Policy and Role Management (BA)
Assignment Policies (BA02)
The diagram shows the assignment policy model in Omada Identity.
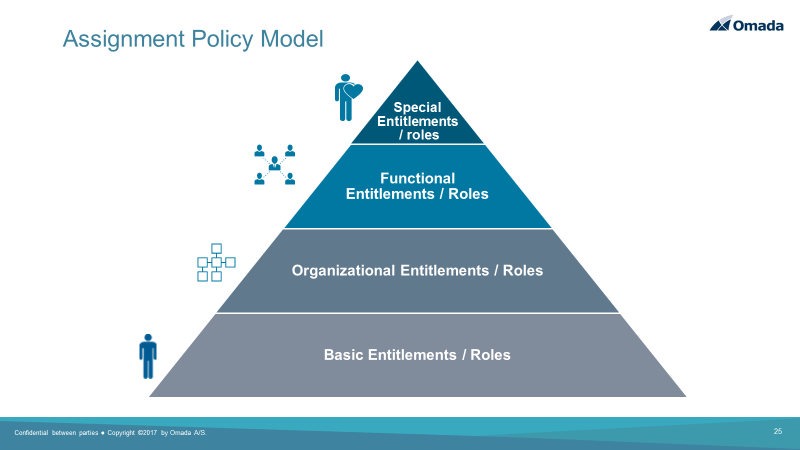
Basic entitlements or roles (birth rights) are assigned when users are on-boarded. These roles will be updated in case of organizational changes, and then removed when employment is terminated as the user leaves the organization.
Organizational and functional roles can be added on top of the basic roles. This prevents role explosion. Organizational and functional roles are known as contexts in Omada Identity. Omada Identity supports any number of contexts, including cost center, geographical location, and projects. 3rd parties and business partners are also supported using contexts.
Special entitlements and roles can also be added using the self-service access request process.
To display the policies defined in this scenario, follow these steps:
-
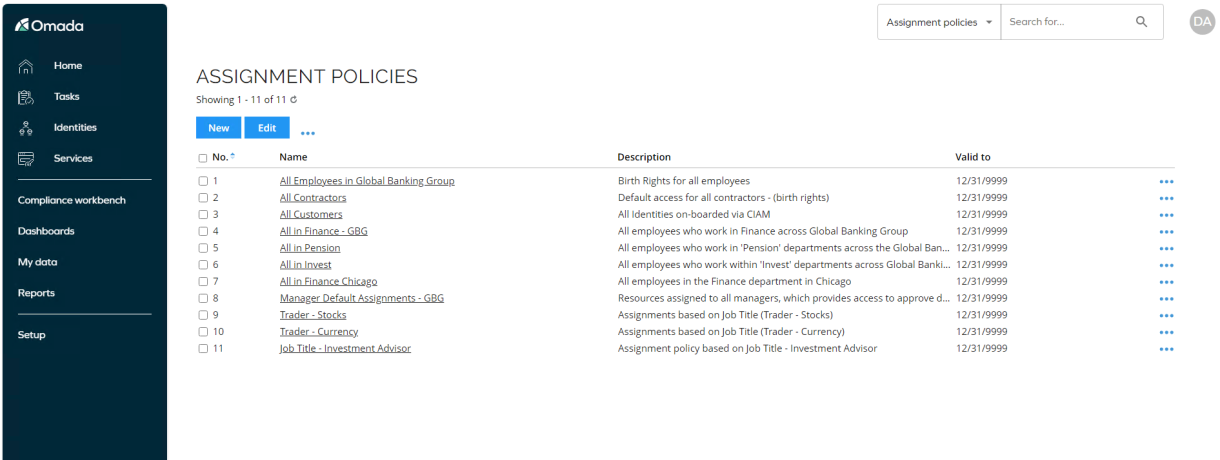
Log in to the Portal as System Administrator and go to Setup > Master Data > Policies > Assignment Policies.
-
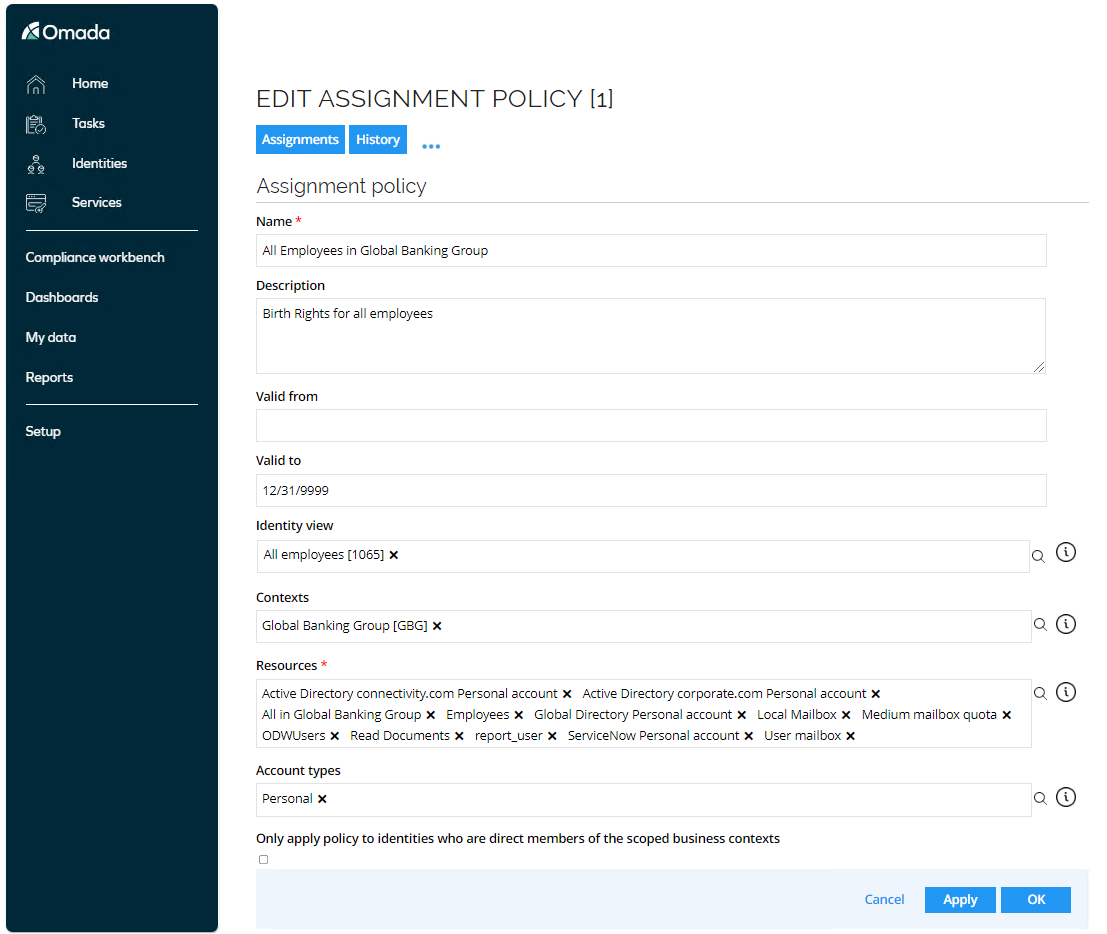
Open the All Employees in Global Banking Group policy.
-
The scope of assignment policies can be a combination of Identity filter and Contexts. Contexts can be hierarchically whereas Identity Filter (views) can be more granular since you can use both positive/negative filter expressions.
- You can also select the policy should only apply to direct members of the contexts and not any members in contexts below in a hierarchy.
- In Resources, you can select which roles, permission, or accounts should be assigned based on the scope. It is also possible to limit the policy for a certain period. The policy can also be limited to specific account types, such as admin accounts, service accounts, and such.
-
You can also open some of the other policies, for example, the one for Contractors. Then, on page two, there are policies based on the job title.
Segregation of Duties (BA02)
The Segregation of Duties (SoD) module is used to define policies for toxic combinations of access rights assigned to the same person, detect any violations, and evaluate these to determine if they should be allowed or blocked.
The SoD Module enables you to:
- Define enforceable policies for granting access.
- Detect policy violations based on defined rules and policies to ensure that critical access combinations (SoD) are not granted without risk evaluations and approvals.
- Ensure that dispensations to violations are re-evaluated periodically.
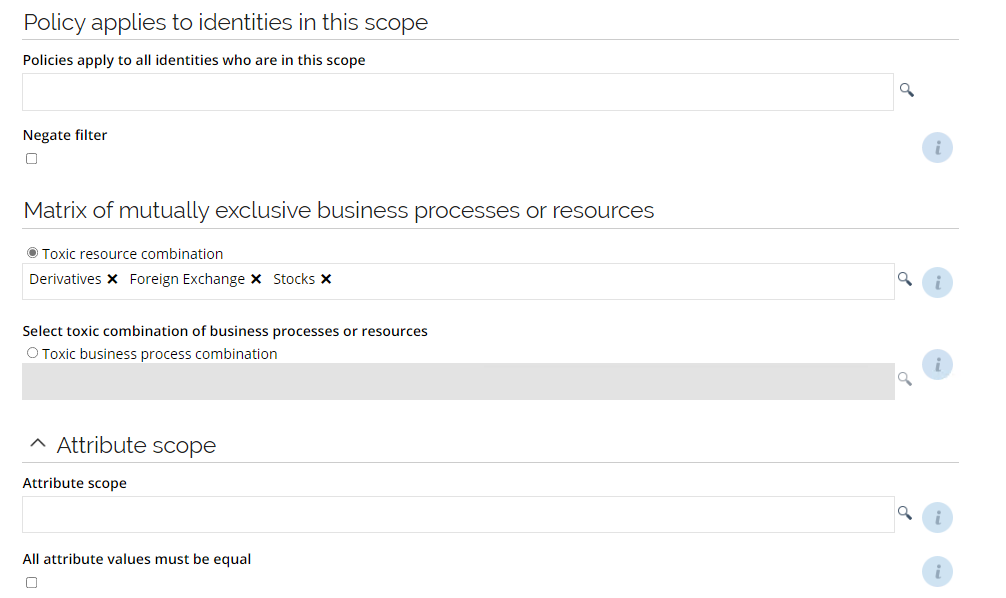
The SoD module allows for fine grained definition of constraints, based on a mutually exclusive Business Process matrix or a mutually exclusive Resource matrix. It is possible to evaluate constraints on resource or identity level. Business processes allows you to associate multiple resources with a business process, allowing you to define SoD constraints for a particular job function. This saves you from adding constraint rules for every possible resource combination.
The module supports a mitigation workflow, powered by the Business Process Engine, where a manager and/or security officer can evaluate all violations for an identity with the possibility of overriding selected violations.
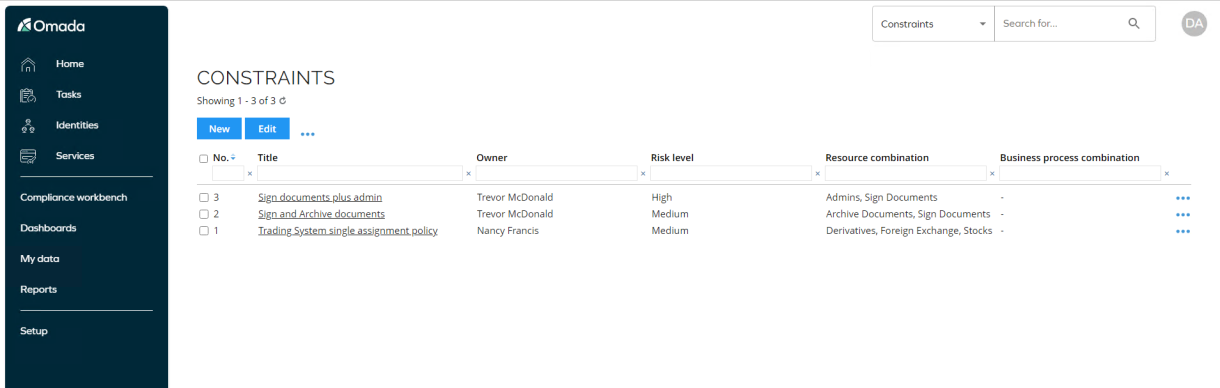
In the demo environment, there is a constraint that the same identity cannot have any combination of roles in the Trading System, meaning you can only be assigned to one role at a time in that application.
Request Access with SoD Violation (AM01.01 – GOV05.01)
In this scenario, we will request access to a resource which is part of a constraint to force a violation as part of the request, which will require the requestor to decide if they would like to change the request or submit anyway knowing there is a conflict.
To display the constraint, follow these steps:
-
Log in to the portal as System Administrator, go to Setup > Master Data > Policies > Constraints.
-
Click the Trading System single assignment policy to open the constraint.
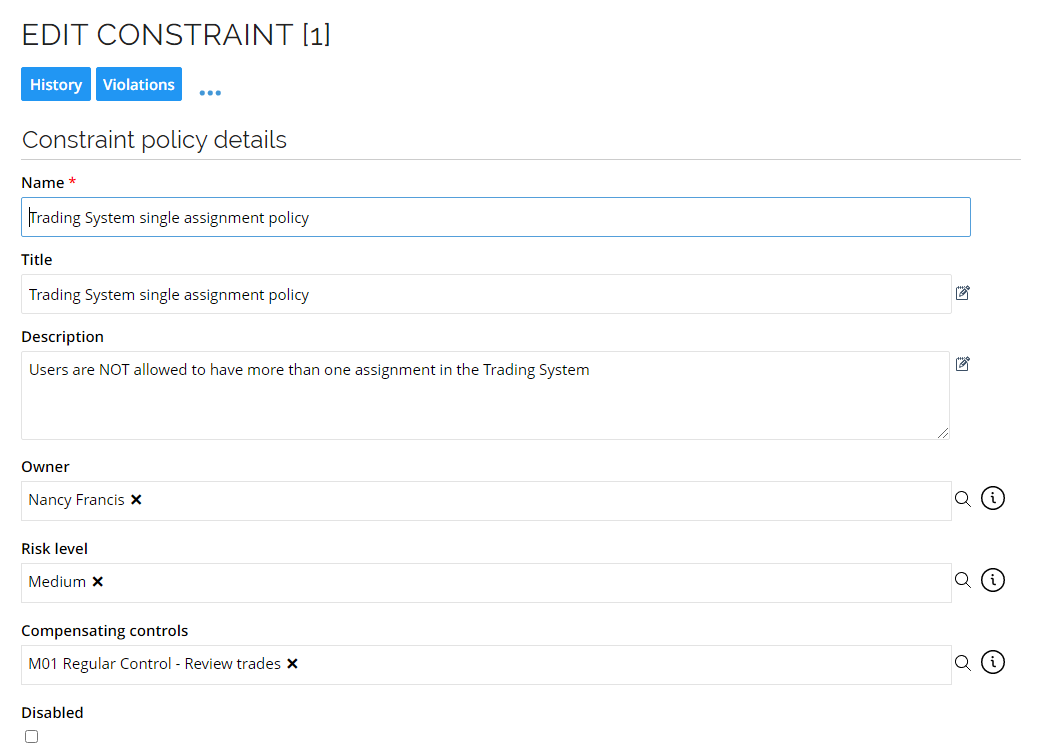
-
Click Violations to display which identities are affected by the constraint.
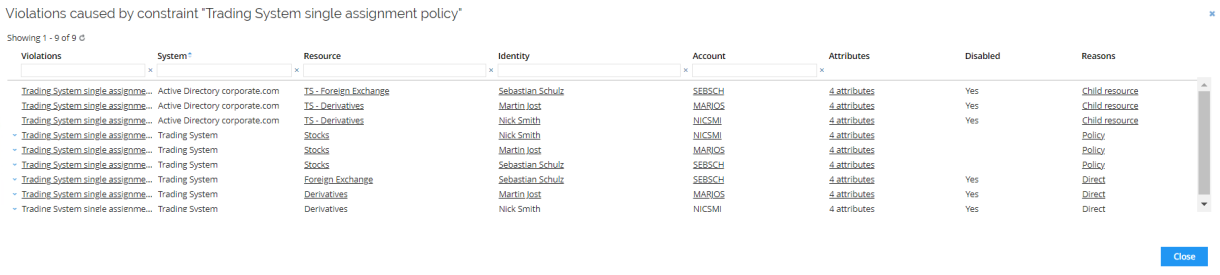
For the demo, the constraint is very simple, but it is possible to define business processes, add resources to business processes and define constraints on process level. This approach will heavily reduce the required number of constraints.
The SoD constraints can take attribute values into consideration. You can apply a scope for the constraint so that it only applies to a subset of identities, and you define a negate filter, meaning that the constraint does not apply to a defined subset of identities.
-
Create a login for Emily Black as described in the Setting up the demo environment section.
-
Log in to the portal as Emily Black. Go to My Profile. Here, you can see that the user already has the Stocks resource assignment in the Trading System due to her job title in the HR System.
-
Go back to the home page. Click Request Access in the process templates widget.
-
Fill in the request as follows:
- Submit request for? Black, Emily
[EMIBLA] - Specify a reason: I need additional access to perform my work duties
- Business context: Invest Chicago
- How to request? Select specific resources
- System to request from: Trading System
- Submit request for? Black, Emily
-
In the search results, select Derivatives by clicking Add.
-
Click Run policy check. The Policy check result is then returned.

-
The employee can now go back to the request and change it, but for this example, we will submit the request and ask for approval even though the assignment will cause a violation. Select Submit this request anyway and click Submit.
-
Log in to the Portal as Nancy Francis and approve the request. The Policy check column displays the detected violation. Click the hyperlink to see more details.
-
A Role and Policy Engine extension controls how RoPE calculates resource assignments that are violating a constraint. By default, existing resource assignment will be allowed while waiting for the Evaluation Violation process is completed.
-
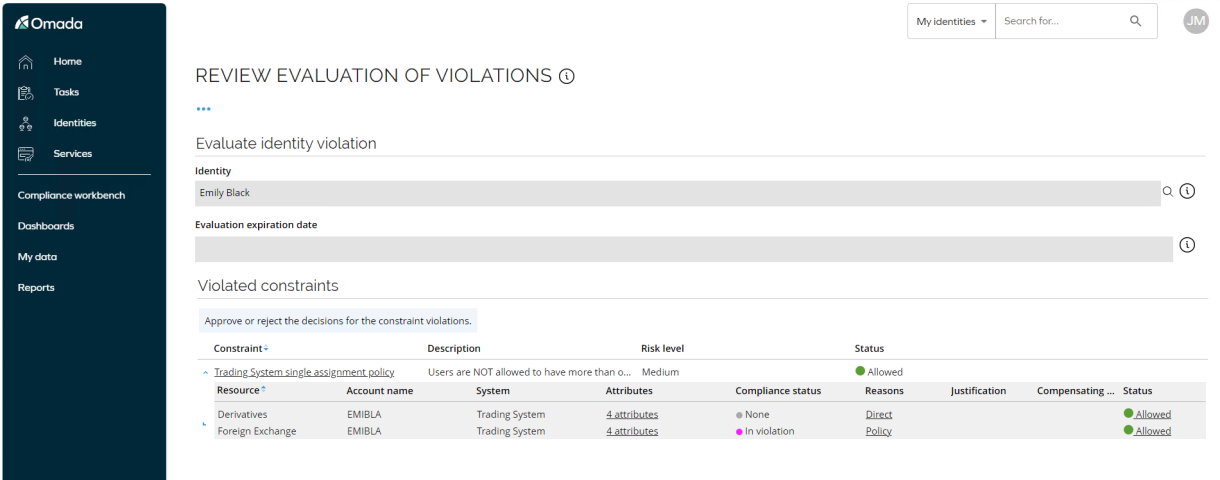
Log in to the Portal as Emily Black’s manager, Robert Wolf. The user has a Evaluate violation task. The manager must decide which, if any, resource assignments the identity should be allowed to keep.More than one can be blocked or allowed.
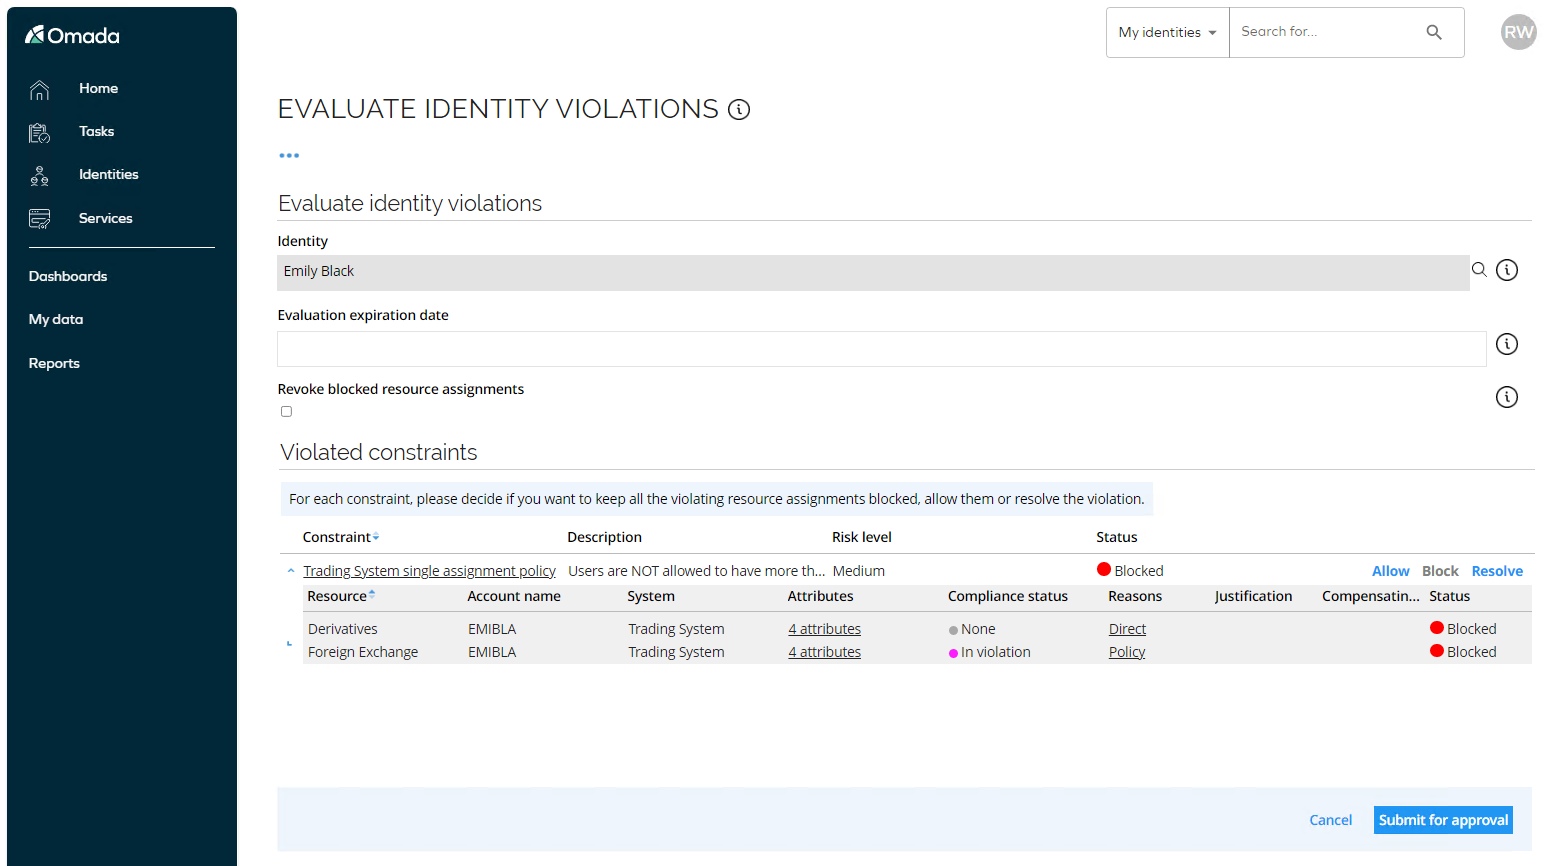 info
infoIt is, however, possible to allow the violation, that is, to allow a blocked resource assignment.
It is also possible to change which resource assignments are blocked.
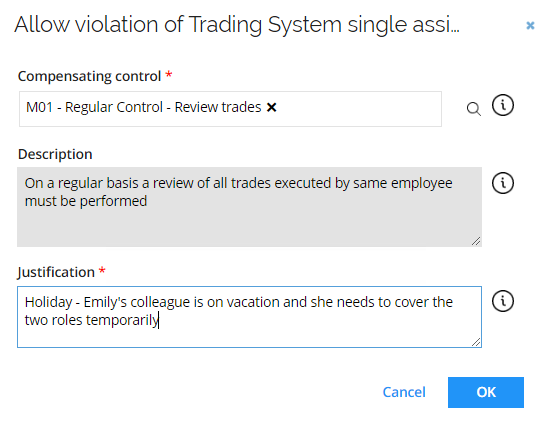
One exempting scenario could be that Emily Black’s colleague is on holiday and she need to take over the responsibilities. Rather than removing the Stocks role, both resource assignments can be allowed by a dispensation. The dispensation can be time-limited, to ensure that the violation is re-evaluated after a set time.
-
Click Allow. Then, the manager must review the selected Compensating control, write a reason and click OK.
-
After clicking OK, you can see the status for the constraint. The Grid is configurable, and customers can choose which columns are relevant to show.

-
Before submitting, review the Expiration date and Revoke assignment options. There is a option where you can Expire Resource assignments which are undecided and blocked. If this option is selected, the blocked resource assignments are expired (the Valid to date set to yesterday and the status set to Obsolete) when the evaluation is approved by the security officer.
-
Submit the process.
-
The evaluation must be approved by a security officer. Log in to the Portal as Judy Miller. This user has an Approve evaluation task. Click the task to open the activity form.
-
You can click the status for each resource to see the reason and compensating control selected.
-
Click Approve.
-
Log in to the Portal as Emily Black’s manager, Robert Wolf, and go to Identities search for and open Emily Black. Scroll down to her resource assignments. Here, you can see the violation. Click the link which will open details about the violation.

Compensating Controls (BA02)
The compensating control objects are maintained in the Setup > Master data > Policies > Compensating controls.
The objects must describe the actions that you must take to compensate for the risk taken when you grant a dispensation to a constraint violation.
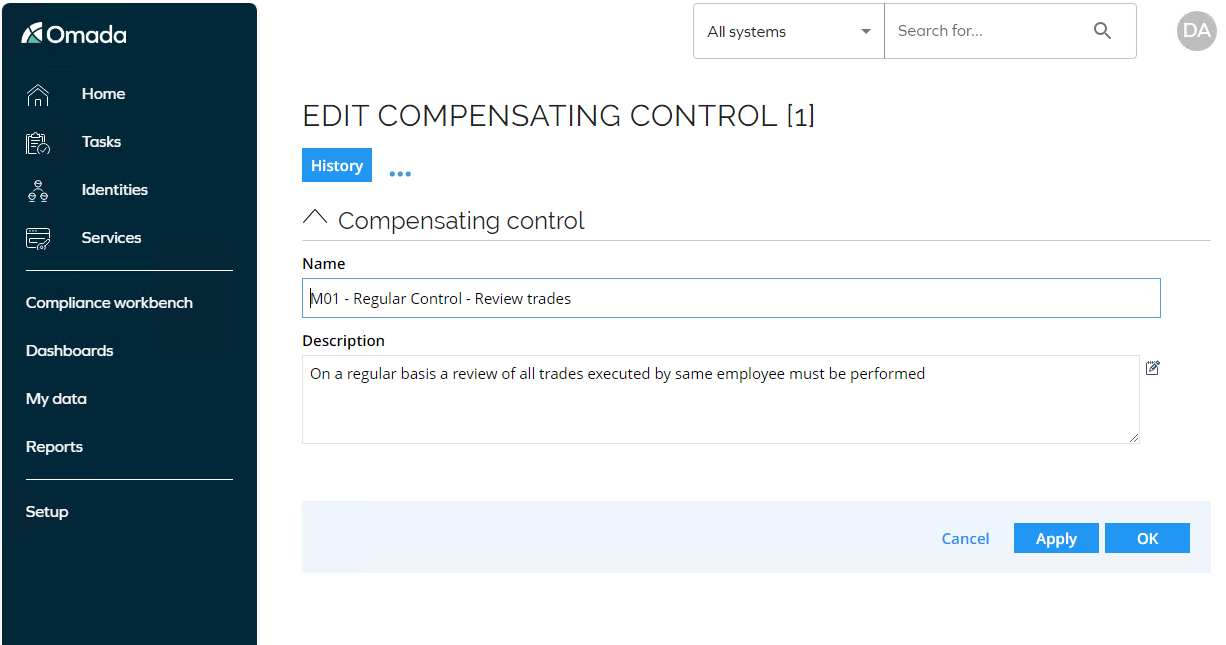
Constraints can be linked to relevant compensating controls. When this is the case, only the linked compensating controls can be selected in the Evaluation process.
Approval by Constraint owner (BA02)
It is possible to configure the Evaluate Identity Violations process to use Constraint owners to assign evaluation tasks. The constraint owners can be set both as the evaluator (first step) and as the approver (second step).
To set Constraint Owners as the evaluator of the process, follow these steps:
-
Log in as System administrator. Go to Setup > Administration > More… > Configuration objects. Select SoD process configuration.
-
Set the assignee expression for the first step as below:
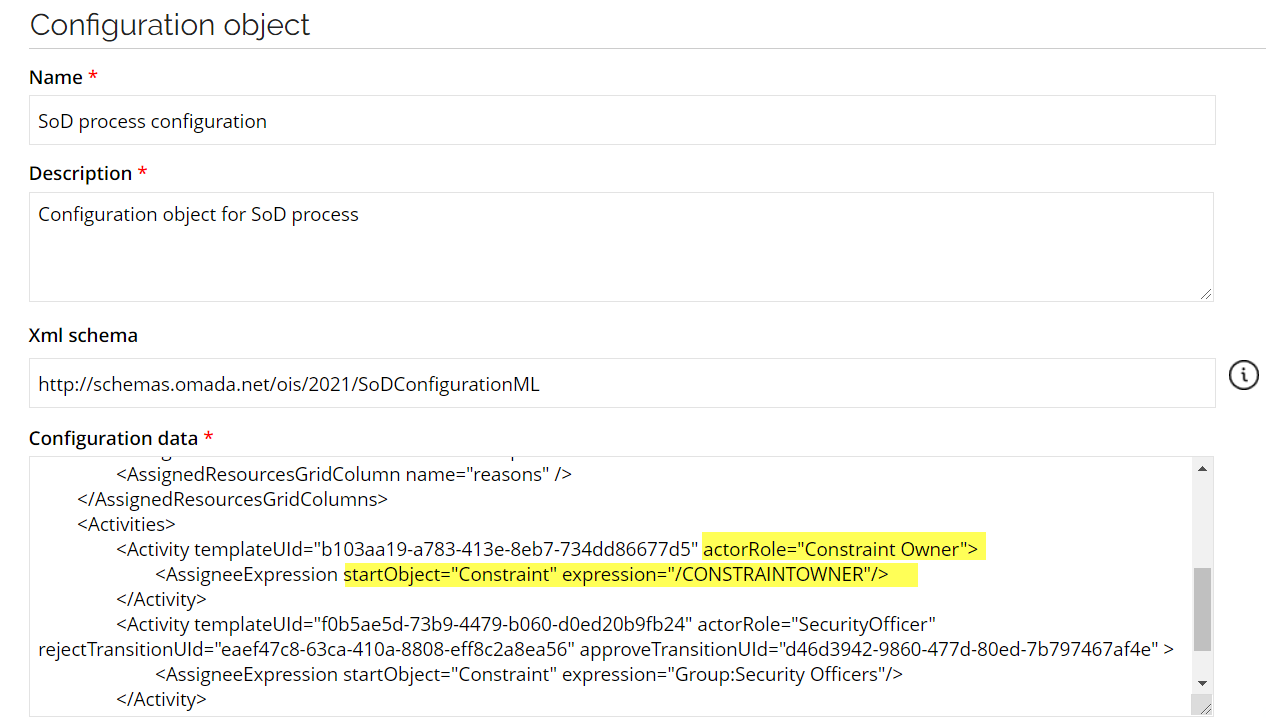
This sets the process to use the constraint owner as the evaluator and the Security Officers group as the approval. If you create a violation for constraints with different owners, both owners will get a task, and the two decisions must be approved by the Security Officers group.
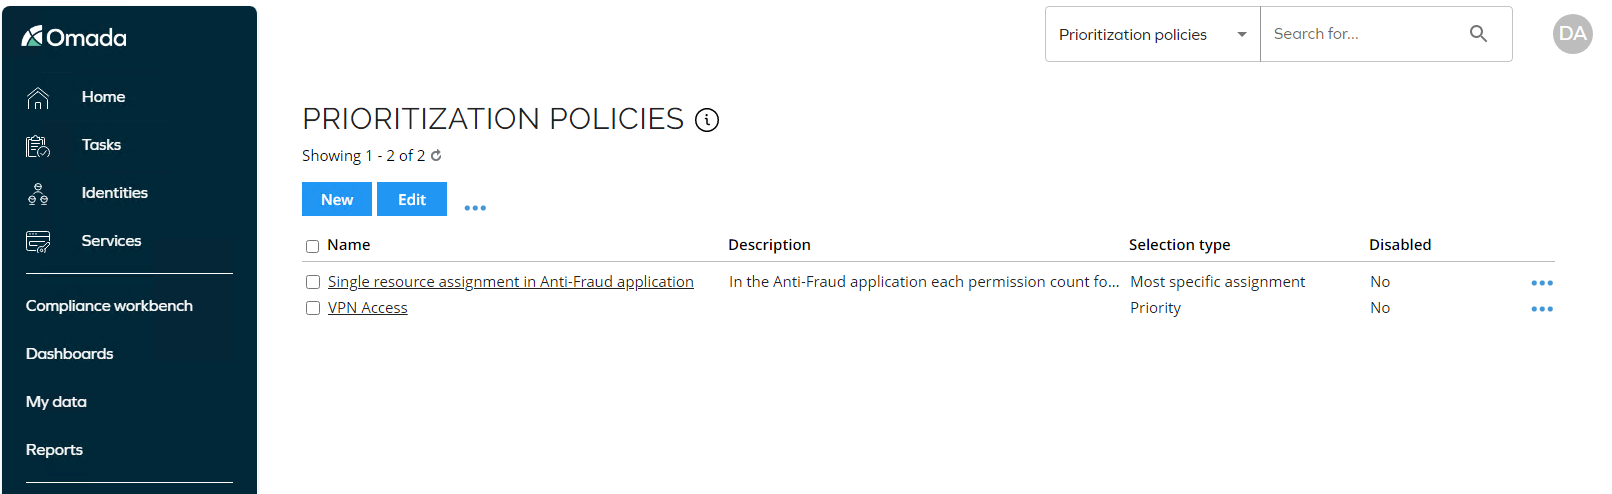
Prioritization Policies (BA02)
The Prioritization policy concept in Omada Identity makes it possible to configure resources to be mutually exclusive.
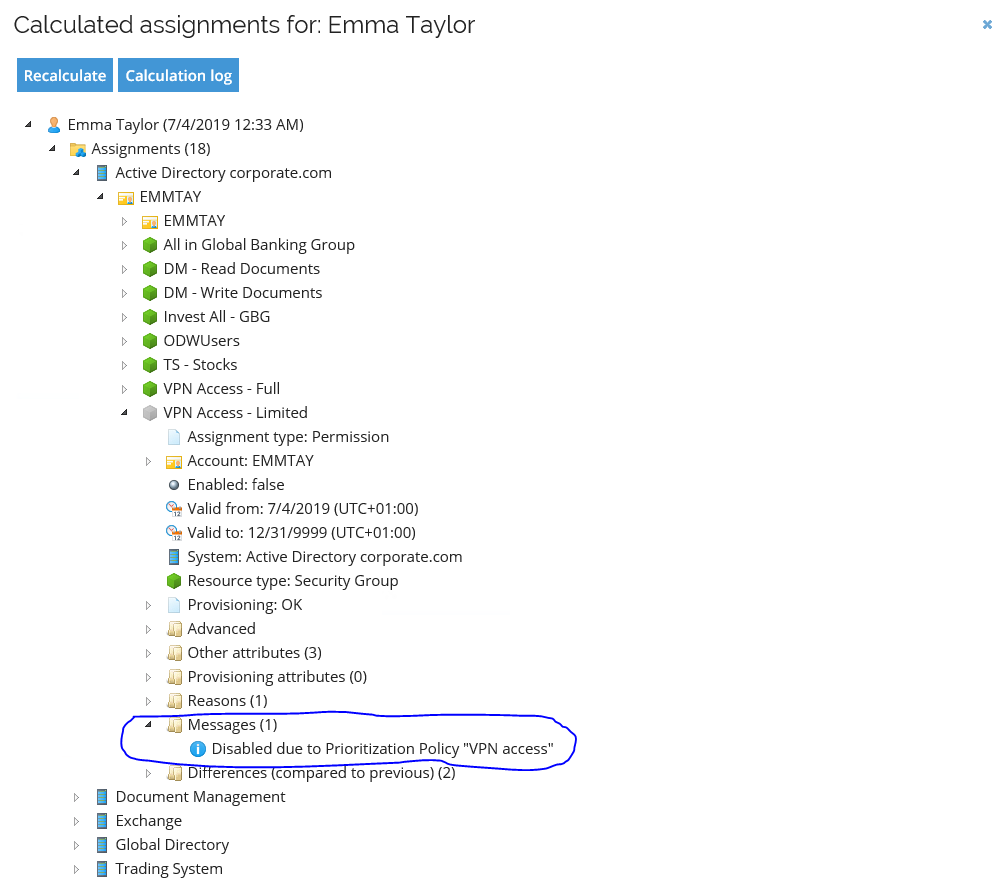
Using the Prioritization policy data object type, you can define several resources that should be mutually exclusive. When more than one resource is assigned to an identity (for each of the accounts of the identity), only one resource is assigned for provisioning based on the selection type of the Prioritization policy. The remaining assignments will be disabled with the effect of being deprovisioned. The RoPE identity calculation will include information on the reason the assignments were disabled.
A view named Prioritization policies is available in Setup > Master data > Policies.
Three selection types are available when creating the policy:
- Priority - this selection type approach assigns the resource with the highest priority/order among the resources selected for the policy.
- Most specific assignment - this assignment selection approach assigns the resource that has been assigned most specifically, defined as the latest assignment in the prioritized list of methods.
- Hybrid - the Hybrid method combines the first two methods. The logic in this case states that assignments assigned via a policy are assigned according to the Priority mode. If one or more direct assignments exist, the Most specific assignment mode is used.
To display the policies defined in the scenario, follow these steps:
-
Log in to the Portal as System Administrator. Go to Setup > Master Data > Policies > Prioritization Policies.
-
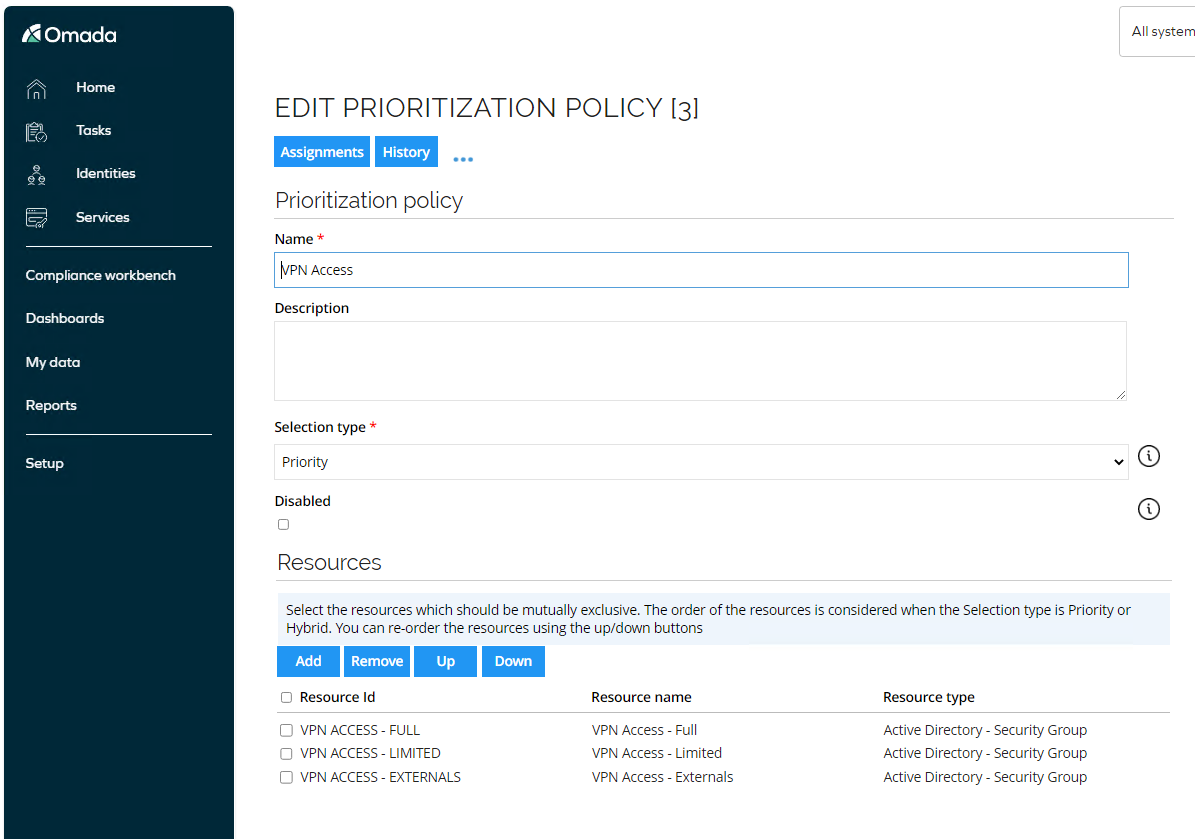
Open the policy VPN Access.
-
This policy is using Priority to determine which assignment to any of the resources specified will survive and which will be disabled. The example used here is three security groups in AD providing different level of access in the VPN solution, and there is a limitation in that solution which only allows membership in one of the groups at the same time.
-
Close the policy and open the Single resource assignment in Anti-Fraud application policy.
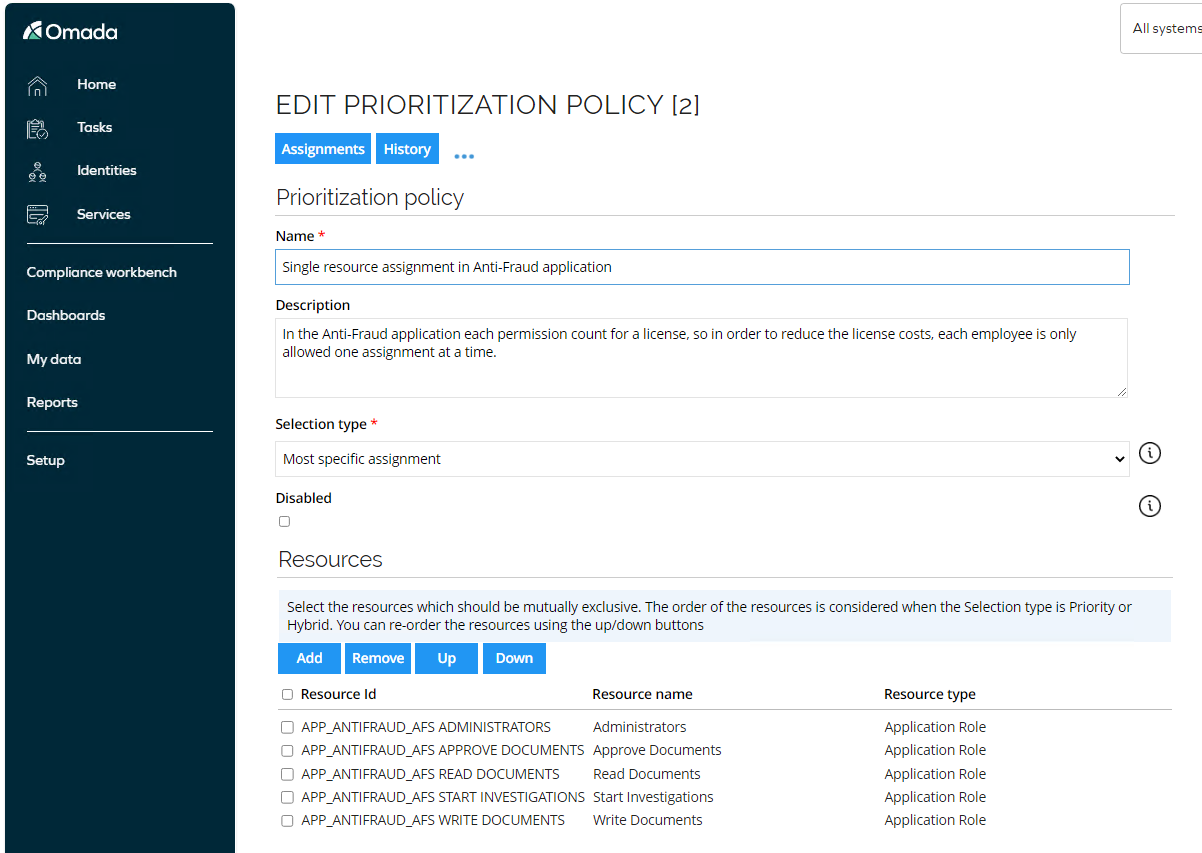
This policy is using Most specific assignment to determine which assignment(s) will be disabled if multiple is assigned to same Identity. This example is for an application, where there is a high license cost for each assignment, so a company policy states that an employee can only have one assignment at a time, and this prioritization policy is enforcing that. There is an assignment policy defined for all managers, which assigns them the resource Approve Documents, but if an access request is performed by/on behalf of any of the managers to one of the other four resources listed in the policy, then that will take priority since it is the most specific assignment.
Request Access with active Prioritization Policy
In this scenario, we will request access to a resource which is part of a prioritization policy to force a disabling of an existing resource assignment. We use the above-mentioned prioritization policy VPN Access. To do so, follow these steps:
-
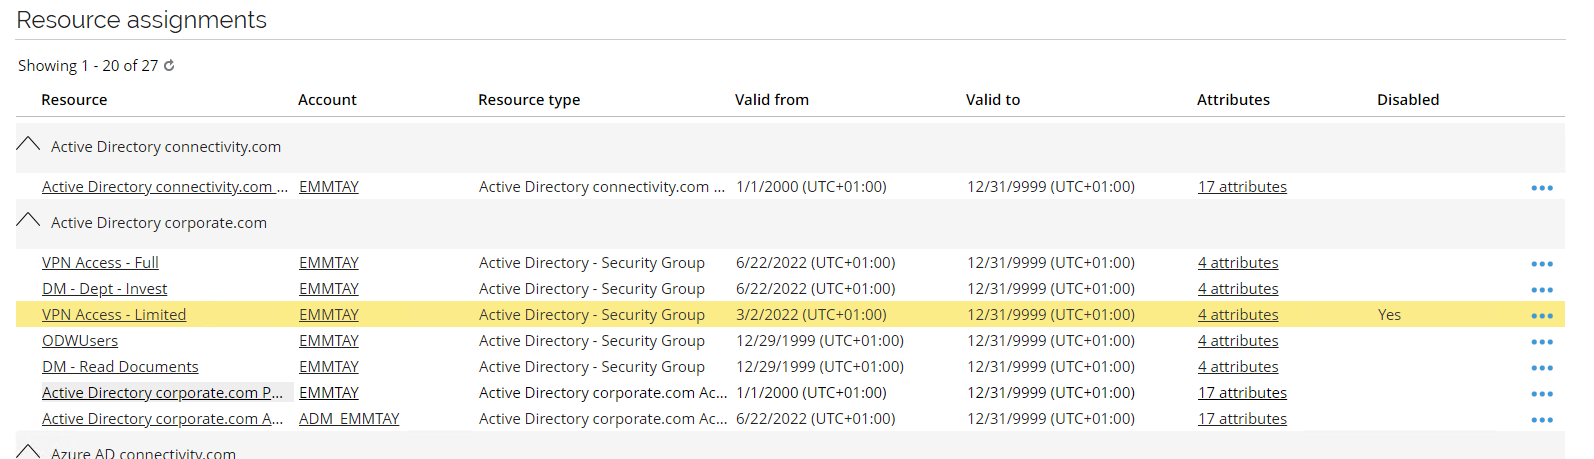
Log into the portal as Emma Taylor. From the top menu, open My Profile to display her existing assignments. Notice she already have an assignment for VPN Access – Limited.
-
Go back to the home page and click Request Access in the process templates widget.
-
Fill in the request as follows:
- Submit request for? Emma Taylor
- Specify a reason: need additional access
- Business context: Business Chicago
- How to request? Select specific resources
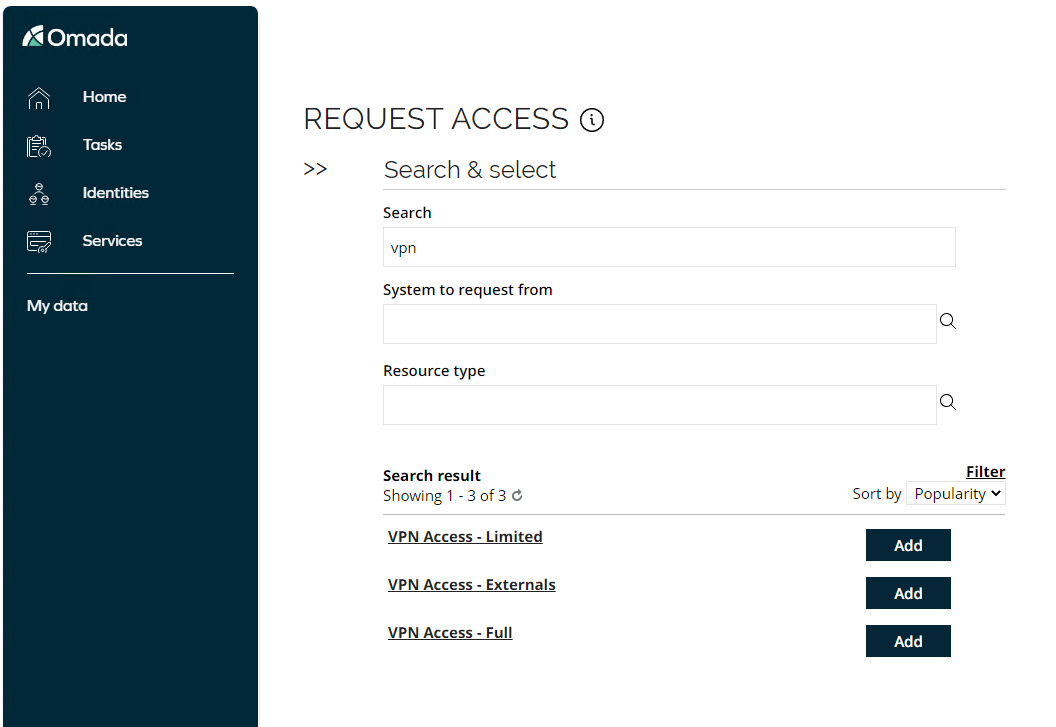
- Search: VPN
In the search result select VPN Access – Full by clicking Add.
-
Click Submit. The approval level for the Active Directory is defined as Resource Owner approval.
-
Log in to the Portal as Hanna Ulrich. The user has a Perform resource owner approval task. Click the link to open the task. The system automatically performs a policy check when you open the task, select Approve and complete the task.
-
Log back into the portal as Emma Taylor. Go to My Profile and minimize the Identity Details section so you are only looking at the assignments. You will see that the previous assignment for VPN Access – Limited is now disabled whereas the new assignment VPN Access – Full is enabled.
-
You can also log in to the portal as Robert Wolf. Go to Identities, search for and select Emma Tayler. Open the Assignments Explorer to see why the assignment is disabled.
-
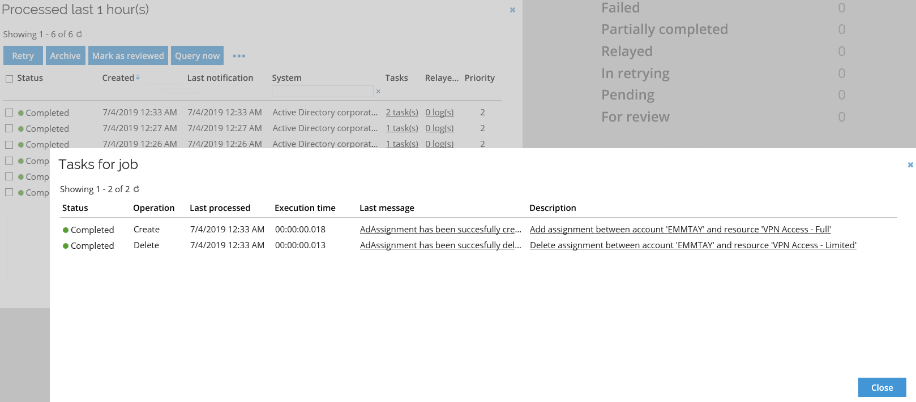
Optionally, you can also log in as the Administrator. Go to Setup > Operations > Operations Dashboard to see the assignments are almost immediately updated in the target system.
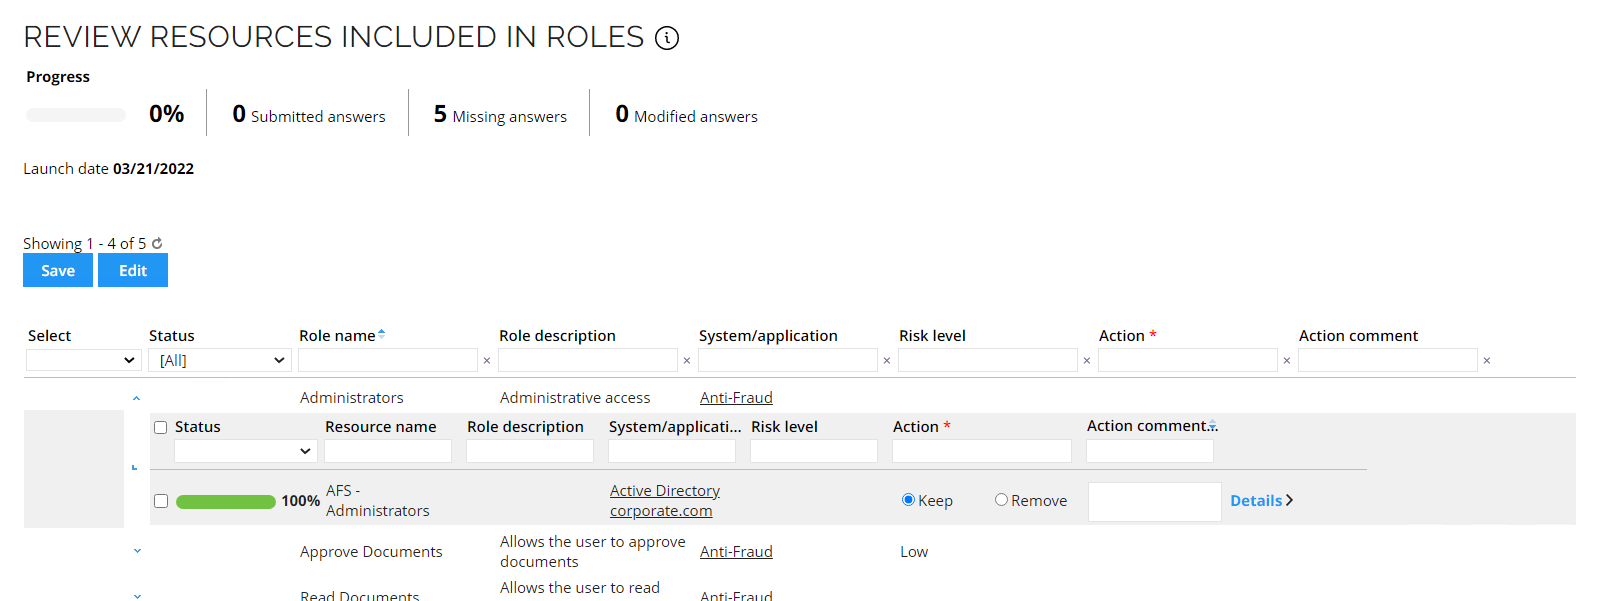
Role Certification survey
This section describes how to use the Role Certification survey.
-
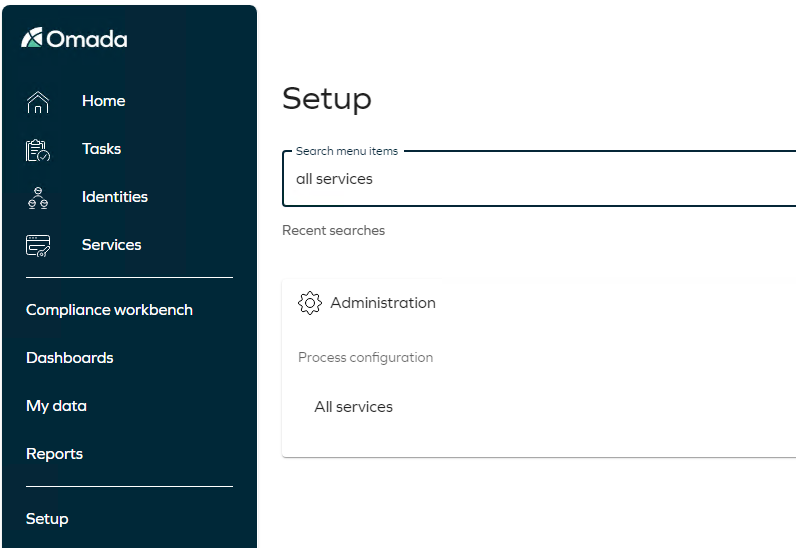
Log in to the portal as System administrator. Go to Setup, and search for All services in the menu search bar.
-
Select the Role certification survey.
-
Scope the survey on the Anti-Fraud application, and click Generate survey data.
-
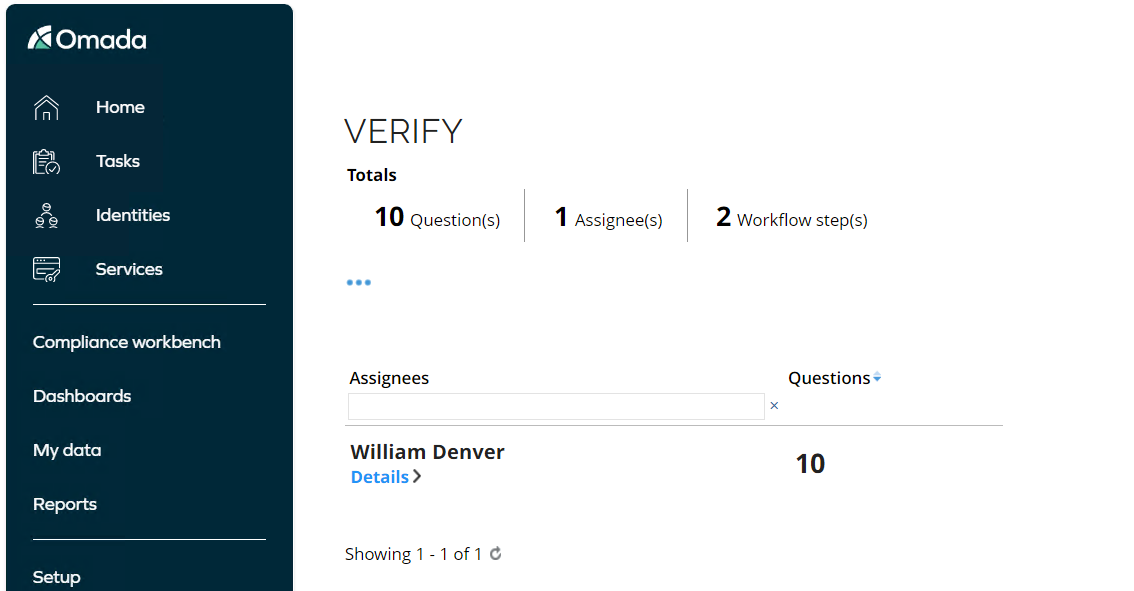
Launch the survey. Log in as William Denver who is the owner of the Anti-Fraud application.
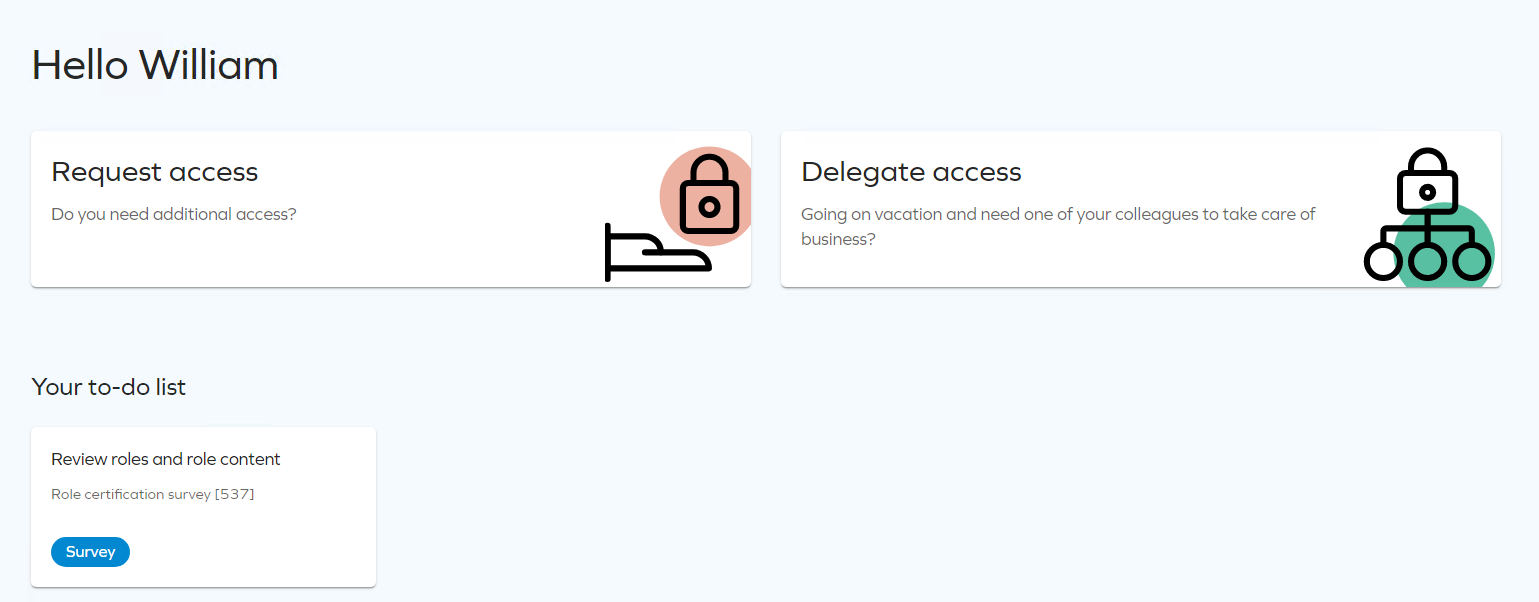
-
Click the Review roles and role content task to open the review.
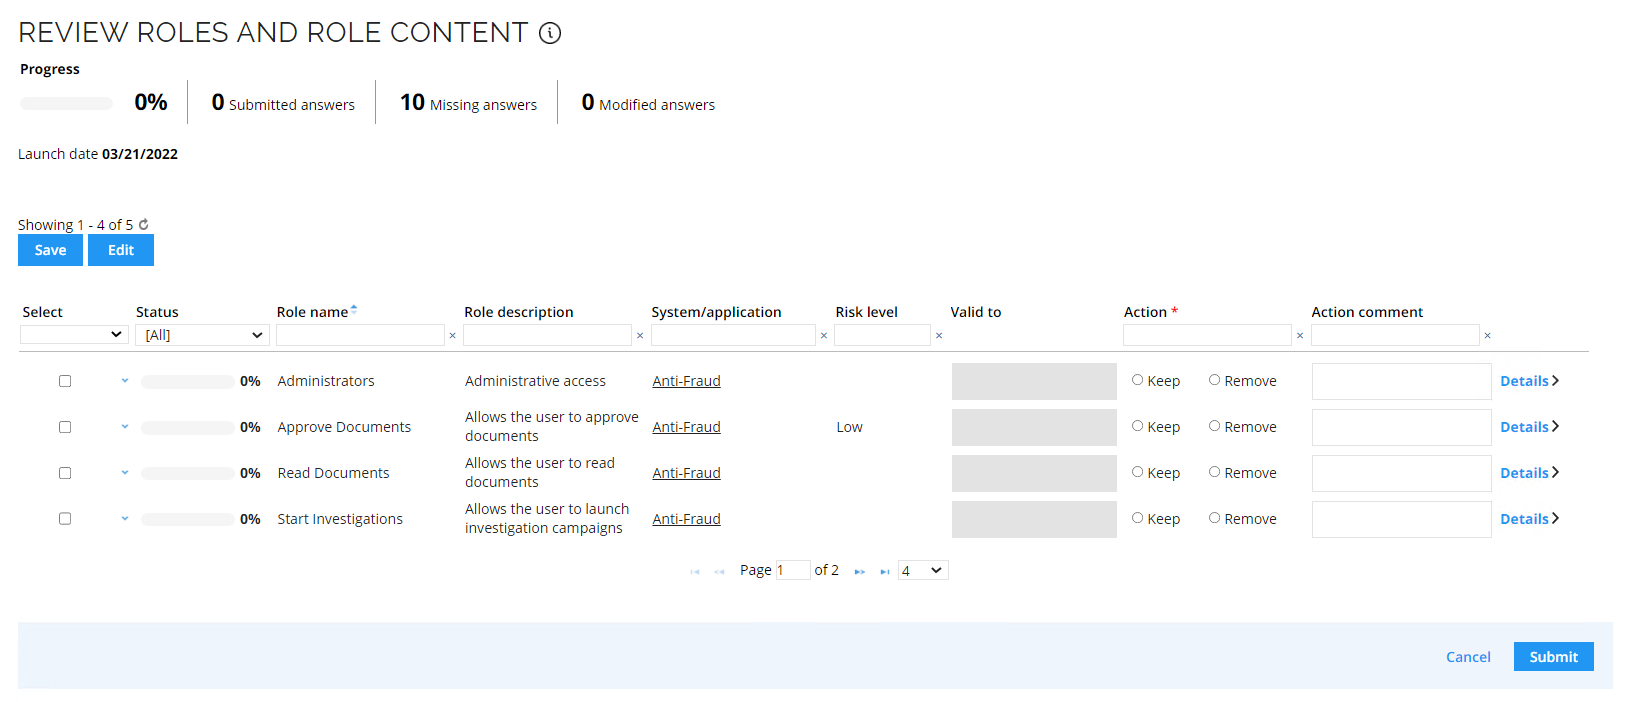
-
If you click the blue drop down arrow in the left column, the child resource grid will expand.

-
Answer all the questions.
-
Log in as Hanna Ulrich who is the Resource owner of the resources included in the Anti-Fraud application.
-
Hannah only has questions for the child resources.
Conditional Inheritance (BA02)
Conditional Inheritance has been enabled for the Peer Community Application Role with child permission resources each tagged for a particular job title. The purpose of this is to assign the role through an assignment policy, but only assign the child permissions that match an attribute for the identity. In this case we are using the context type Job titles. It applies both to job titles that are membership-based and those that are assigned through a direct Context Assignment, for example, requested through the Join a project process.
The Role has been configured as follows:
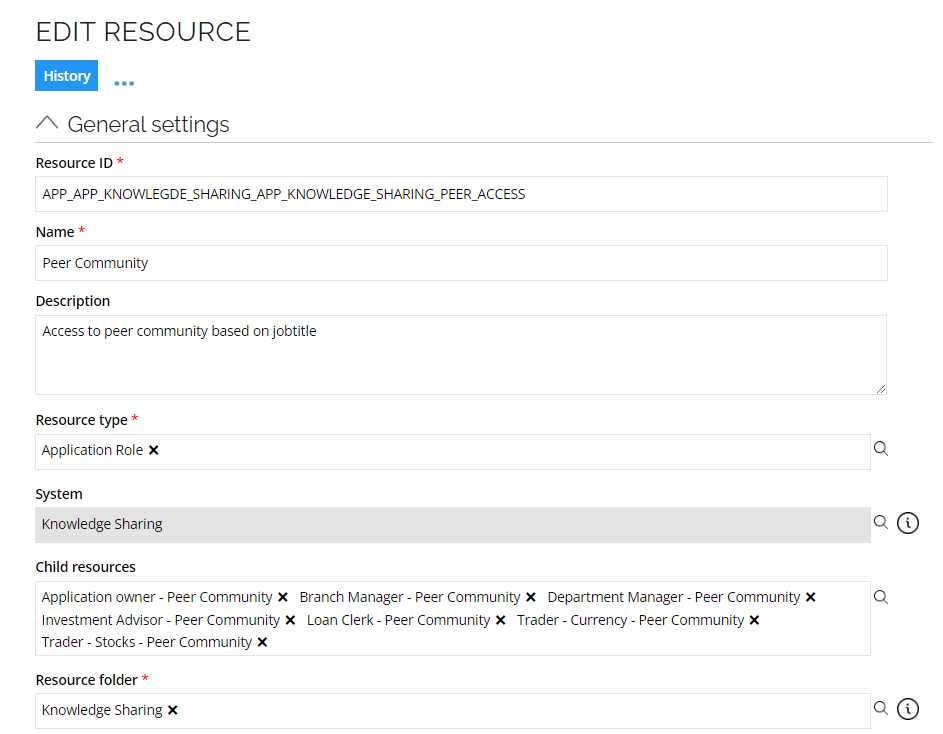
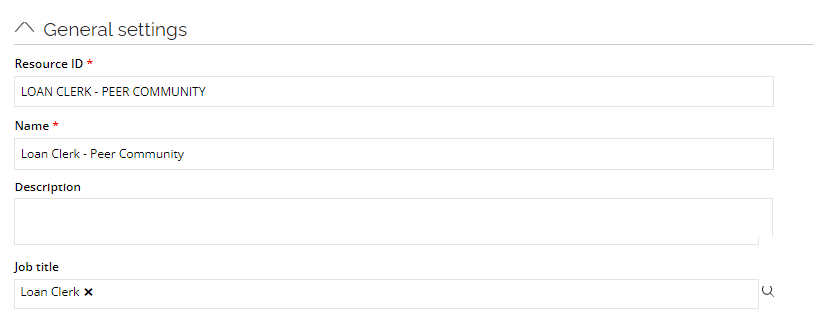
And each child permission has a reference to a job title in the property Job title:
This is how it is configured in the Role and Policy Engine EngineConfiguration file:

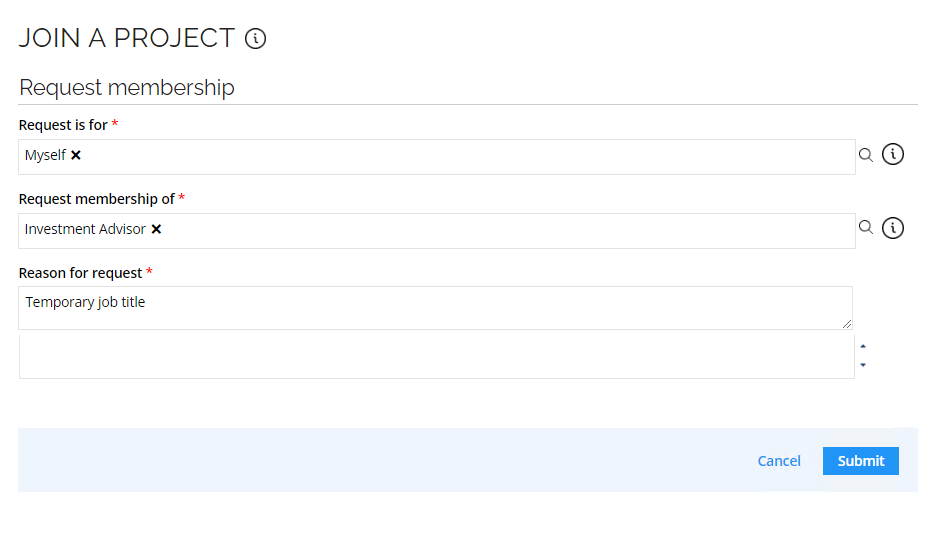
The easiest way to demonstrate it is to request to join a job title context for an identity. To do so, follow these steps:
-
Log in as Emma Taylor.
-
Go to My profile and notice that she is assigned to the Loan Clerk Peer Community.

-
Go to Services and click Join a project. Select the Investment Advisor job title in the Request membership of field.
-
Log in as Robert Scott and approve the request.
-
Log back in as Emma Taylor look again at her profile. In the Knowledge Sharing application, she still has the Peer Community role, and if you expand, you can see she now has two of the child roles:

Not all job titles have a group. It is only the job titles that are from the Invest Chicago org unit.
The EngineConfiguration.config file has been edited to include the following setting:
