Access request
Request Access (AM01.01)
Some access rights are automatically assigned to an identity based on the organization unit or job role. When additional access rights are required, a manual request process must be started. After the request has been made, an approval task is triggered for the identity’s manager and/or resource/system owner, who is notified via email that he/she has a new task.
Approval level
The level of approval for the resources is defined on the Resource Folder which the Resource is placed in.
The following table presents the defined approval below:
| System/Application | Approval | Owner |
|---|---|---|
| Active Directory | Resource Owner | Hanna Ulrich |
| Global LDAP Directory | Resource Owner | Trudy Jones |
| Exchange | Manager (Context owner) | Hanna Ulrich |
| GWG Legacy | - | Trudy Jones |
| Finance System | Manager (Context owner), Resource Owner | Beverley Rich |
| Point of Sale | Manager (Context owner), Resource Owner | Carol Walker |
| GWG Purchasing | Manager (Context owner), System Owner | Lisa Hall |
| Time Management | Manager (Context owner) | Daniel Hammett |
| Trading System | System Owner | Nancy Francis |
| Document Management | Manager (Context owner), Resource Owner | Trevor McDonald |
| Anti-Fraud | Manager (Context owner), Resource Owner | William Denver |
| Omada Identity | System Owner | John Smith |
SoD Policy check
The Policy check simulation is enabled in the demo system. The Policy check simulates the possible outcome of assigning new access rights in terms of constraint violations before anyone requests or approves the assignment.
You can decide if the policy check should be optional or mandatory. This means that your organization can decide whether a policy check is always required or not.
You can also set if it should be visible in the Access Approval or not.
To set up how your organization should work with the policy check, configure the SoD Check object in Policy & risk check.
Peer Access Analysis
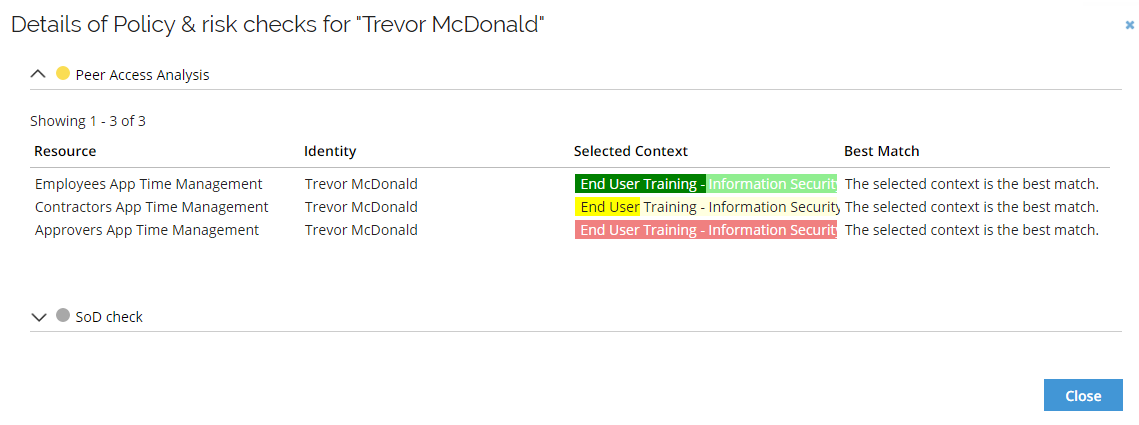
Peer Access Analysis is enabled in the demo system. The Peer Access Analysis shows the percentage of matching peer assignments for a beneficiary in the Access Request process.
Not all identities/contexts are assigned to resources that will give an OK result.
You can use Trevor McDonald and Time Management as an example. If requesting Employees App Time Management and Contractors App Time Management and Approvers App Time management, the Peer Access Analysis should look as follows:
To populate the analytics model with changes, you can submit access requests for colleagues of the beneficiary and import this information to the Data Warehouse.
You can use the company business context for the peer access analysis. Note that this only applies to the identities in the HR system that already exists.
If you want to run this for new employees, you must manually add a context assignment between the new employee and the Global Banking Group company in the HR database. To do so, use a script located in the C:\Program Files\Omada Identity Suite\Demo\HR folder and replace newid with the generated UID in the two relevant places.
Peer Access Analysis for contractors
The Peer Access Analysis relies on context assignments in the Data Warehouse, and not in ES. In the standard Demo system, contractors are registered on org units that originate from the HR-system, and currently these assignments are not imported to the Data Warehouse.
To use peer access analysis for contractors, you should onboard a contractor to an org. unit, then request to join the project called End User Training. This context has access to time management resources.
When requesting access for a user in that project, the peer access result will show something like below:
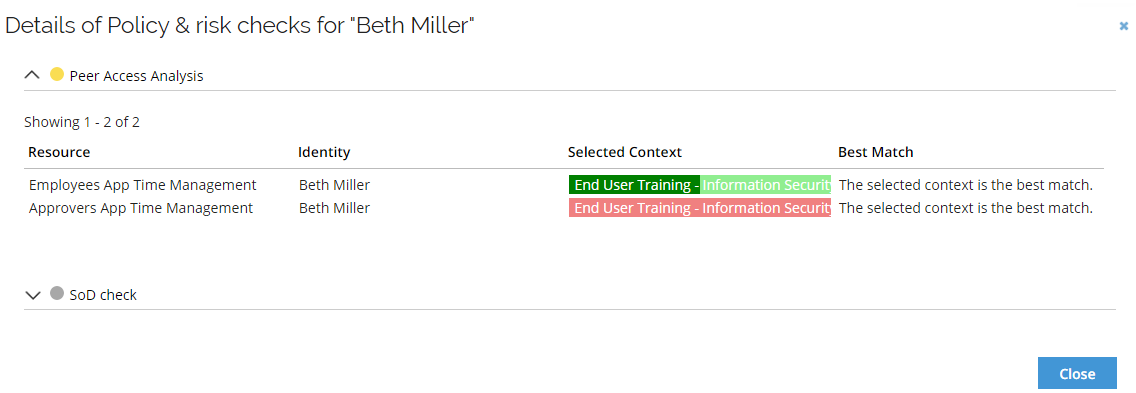
Remember to import the identity and context assignment before running the Peer Access Analysis.
Available applications
The available resources are defined as a reference between the resource and the contexts that the resource is available to. Note that this has been configured for the demo system and is not configured in a default installation of the solution.
The resources in the Access request process are automatically populated when a context has been selected. Other applications may be visible, but no resources will be available unless the resource refers to the selected context. Systems are also filtered based on the company context they have been assigned.
Systems filtering
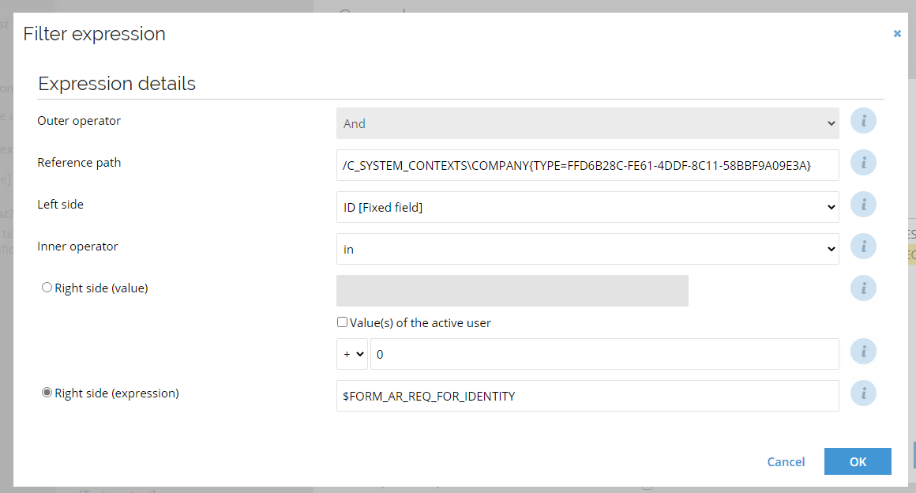
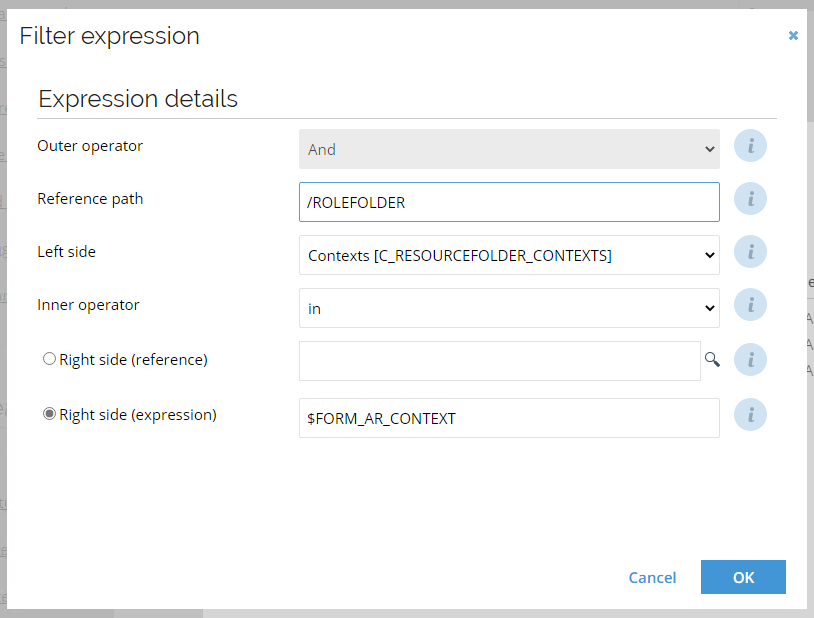
Dynamic Filtering of Systems has been removed as default in the demo environment from v14 update 7. If you want to re-enable the filtering, add the filter again. The filter is configured as follows:
Resources filtering
The systems and applications’ resources have been made available in the Access Request process by using dynamic filtering according to the table below.
The filtering is set by defining relevant contexts for the resource folders. When selecting the context for the beneficiary in the Access Request, only resources belonging to resource folders with the selected context will be shown.
In general, most resources are available in a company context, either Global Banking Group Company and/or Global Warehouse Group Company. Also, the OrgUnit contexts used in the demo script can be used. If you need to be able to access resources in different contexts than the ones listed below, you can add the relevant contexts to the resource folders.
The resources are only available to request based on the specific context, which can be selected in the Access Request screen as part of the process.
| Name | Contexts |
|---|---|
| Active Directory corporate.com | Finance Chicago, Invest Chicago, Global Banking Group, Global Warehouse Group, Technical identities |
| Anti-Fraud | Finance Chicago, Invest Chicago, *All Private Banking, *All Private Customer |
| Document Management | Finance Chicago, Invest Chicago, Global Banking Group |
| Exchange | Finance Chicago, Invest Chicago, Global Banking Group, Global Warehouse Group, Technical identities |
| Finance System | Finance Chicago, Invest Chicago, *All Finance |
| Global Directory | Finance Chicago, Invest Chicago, Global Banking Group, Global Warehouse Group, Technical identities |
| GWG Purchasing | Global Warehouse Group |
| Legacy | Global Warehouse Group |
| OIS Roles | Finance Chicago, Invest Chicago, Global Banking Group, Global Warehouse Group |
| Point Of Sale | Global Warehouse Group |
| Time Management | Global Banking Group, Global Warehouse Grou |
| Trading System | Finance Chicago, Invest Chicago, Internal Accounts Chicago, Global Banking Group |
If you want to disable this filtering on resources, you can do so by removing the Contexts filter on the Requested Resources view.
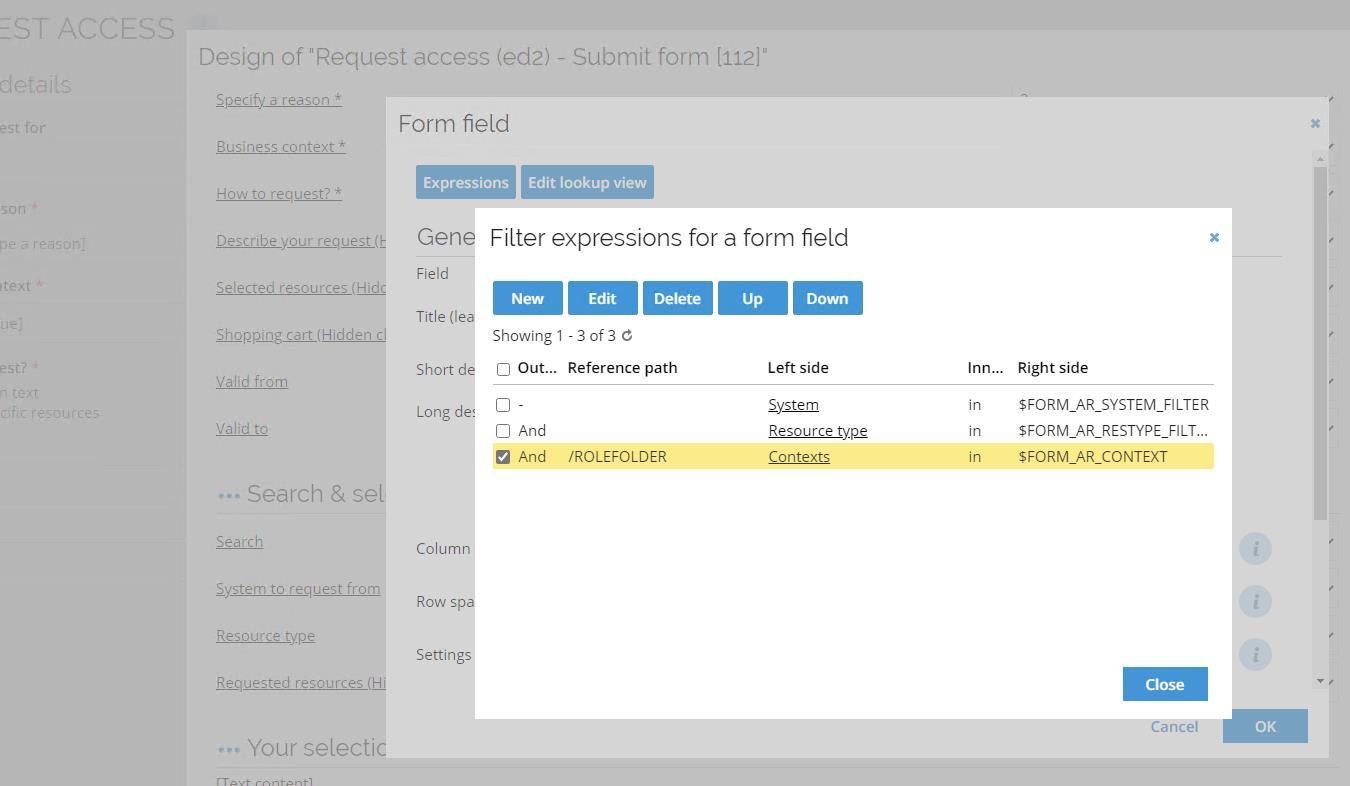
If you want to re-enable the filtering, add the filter again. The filter is configured as follows:
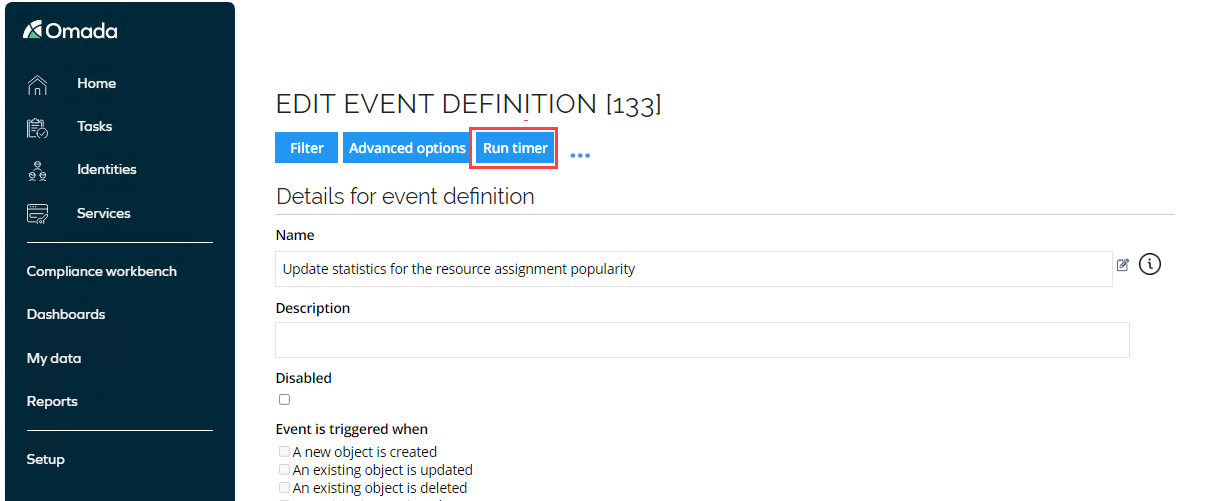
Popularity sorting in Access Request
The list of resources in the Access Request is by default sorted by popularity (within the selected context), as indicated by the drop-down above the result list. The statistic for the popularity is updated using an event definition. If you need the popularity sorting statistics updated during a demo, run the timer for the event definition:
Self-Service Access Request - legacy UI
The Request Access process can be executed on behalf of another identity. A common scenario is a manager setting up a user account for a new employee to be in place in time for the first day of work. Through Omada Identity the employee can also request access for himself, as we will show in this demo.
-
Log in to the Portal as Emma Taylor via the icon on the desktop.

Emma Taylor does not have manager or owner rights, so the services and views she has access to are limited.
-
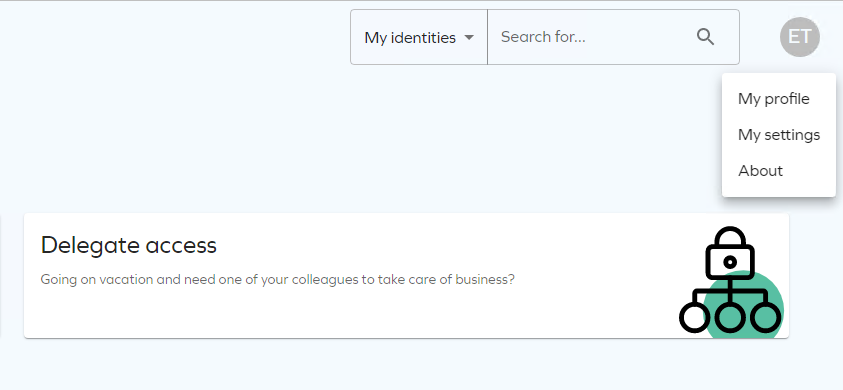
In the top bar, click on click on the avatar ET and select My Profile to display the details about the logged-on user and her assignments.
-
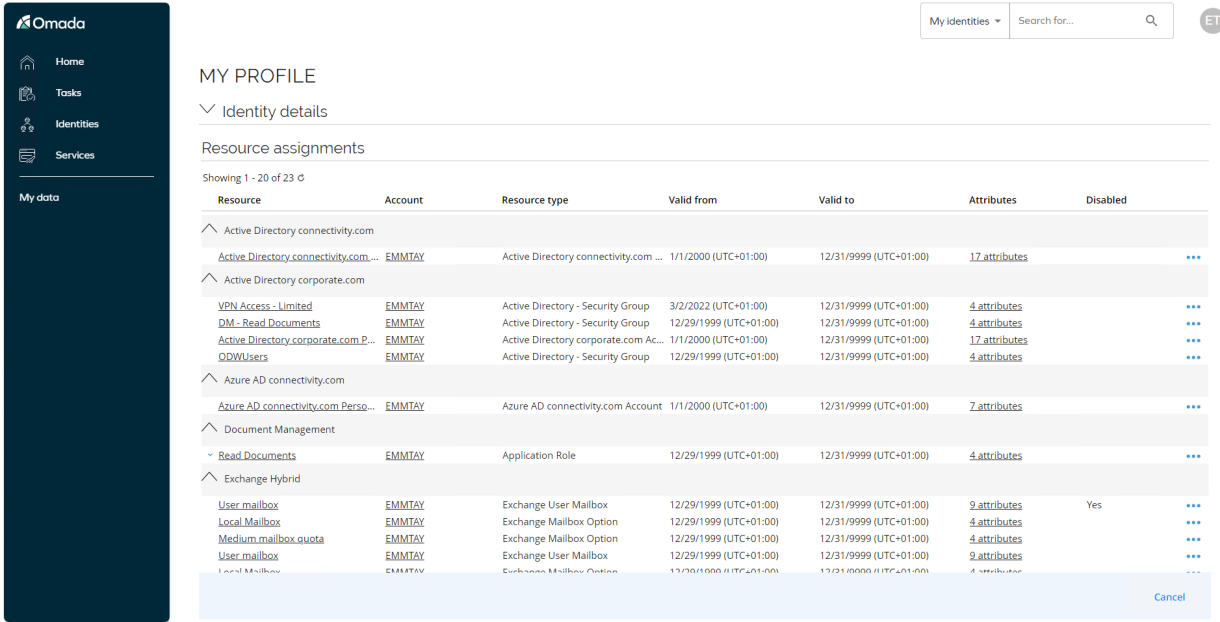
Collapse the Identity Details section to see the Resource Assignments, which presents the currently assigned accounts and resources. Click Close to return to main page.
Emma Taylor only have access to Tasks and in the Services dashboard, she only sees Request access and Delegate access. If you click View all, additional services are available for her as an employee.
-
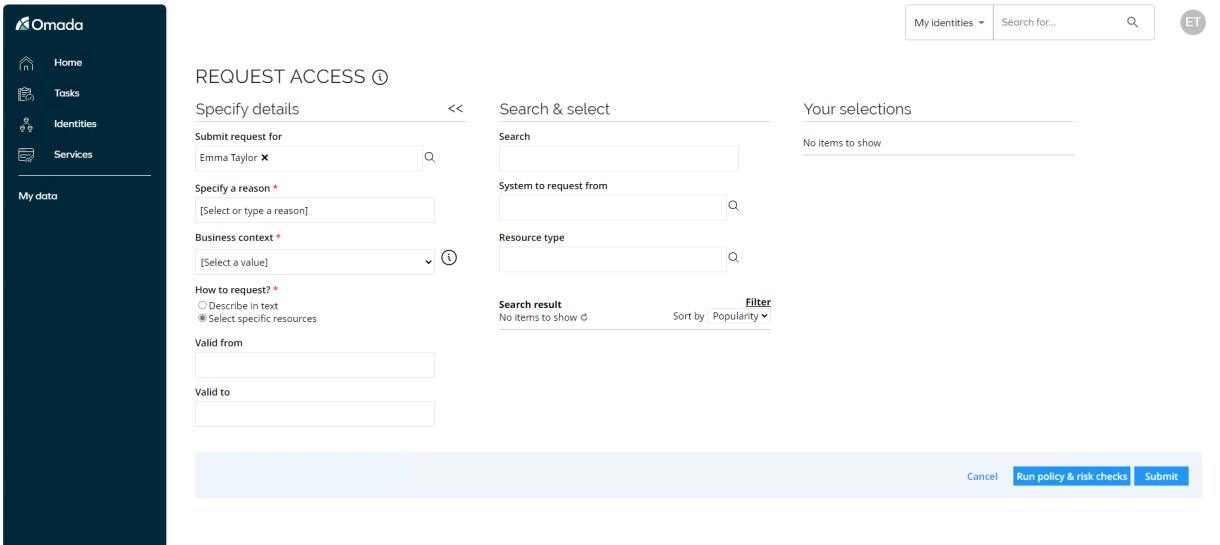
Click Request access on the Start page.
-
You can request access for a managed identity, but as we are requesting access for Emma Taylor, leave myself in the Submit request for field.
-
Select the reason for the request. Open the drop-down list for What is the reason for your request? The available options are:
- Need additional access
- New employee
Select Need additional access.
-
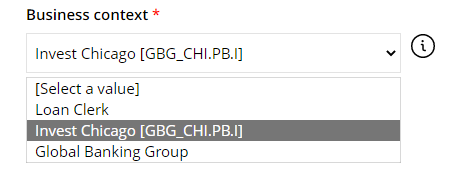
Select which context the request is made in. The context in the request determines who the manager approval task (if required) is assigned to. An identity always has a primary manager, but if the identity belongs to more than one context, there is also a context manager for any non-primary context.
Usually it is the organizational unit that is an identity’s primary context, but a contractor may have a project as their primary context.
Access that is requested in a specific context is not only approved by the context manager, but also follows the “membership” of the context. Any access granted in a context is expired when the context membership is at an end (for example a project that runs for a limited time). Select Invest Chicago.
-
The result list is automatically populated with the resources that have been defined as relevant for the selected context, sorted by popularity in the context.
Resources, which has already been assigned to Emma Taylor are not shown in the list.
-
You can choose to show the different sorting options (by popularity or alphabetically, ascending or descending). It is also possible to demonstrate that already granted resources are not included in the Access Request. Click Filter and select Show already assigned resources to display these or deselect it to hide them again.
-
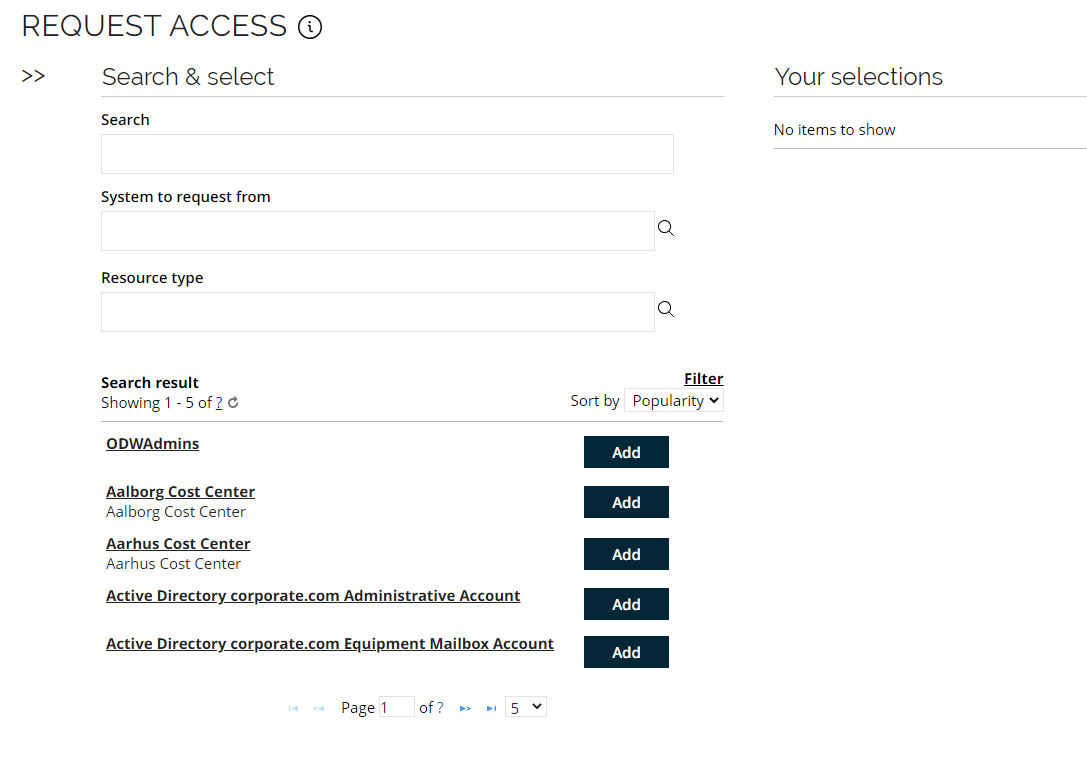
Choose how to select which access to request. A user requesting access can choose between two options:
- Submit a request in plain text, in cases where the user might not know which exact access right they need to request.
- Find an access right by free text search, by a system or by type of resource and submit a request for a specified access right.
The standard solution has a filter that excludes systems and resources with the Prevent self-service property set to True. The demo system additionally filters on the selected context.
-
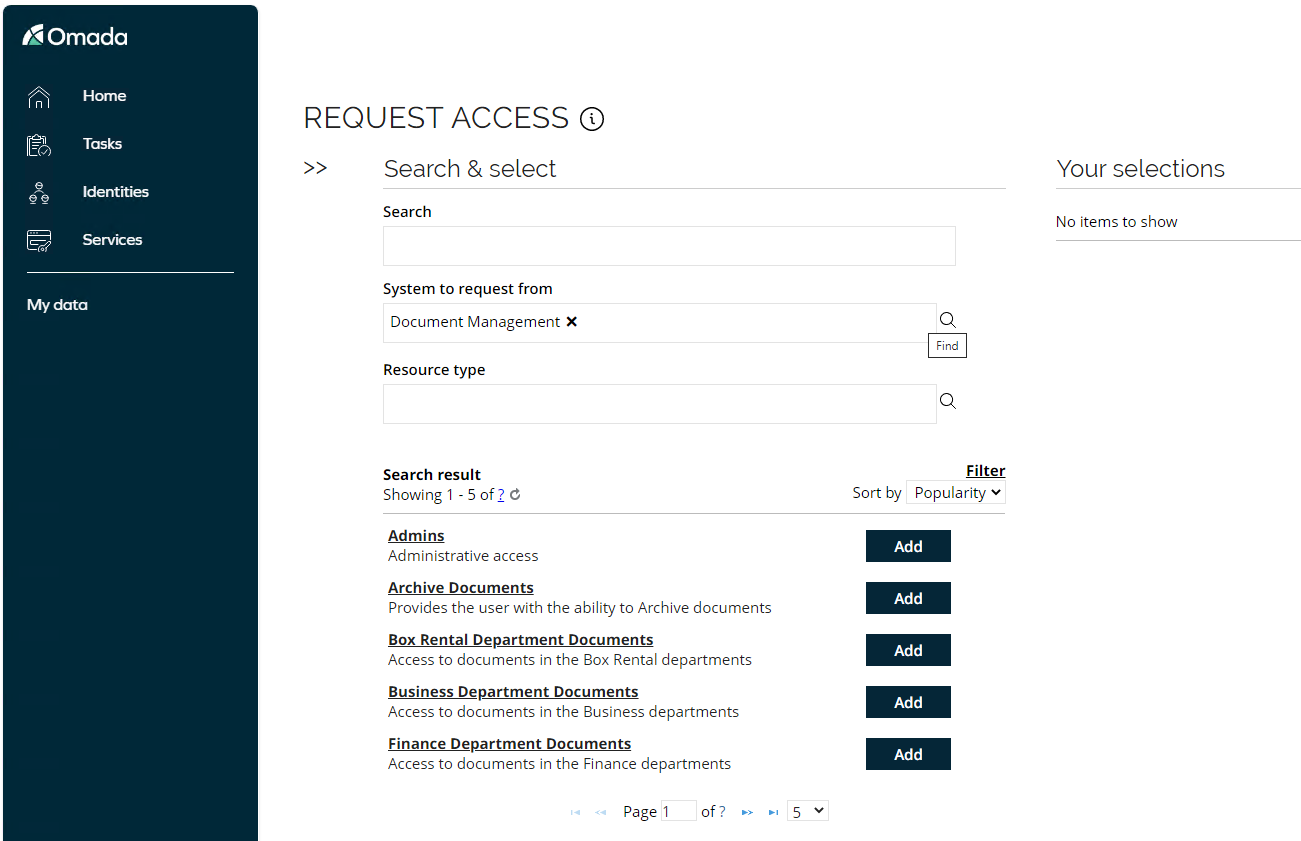
You can look for access rights via Search, System to request from, or via Resource type. Use the System to request from option, select Document management and the resources available to select from that system/application will be presented below.
-
You can click on each resource to see more details. Select the Invest Department Documents resource by clicking Add.
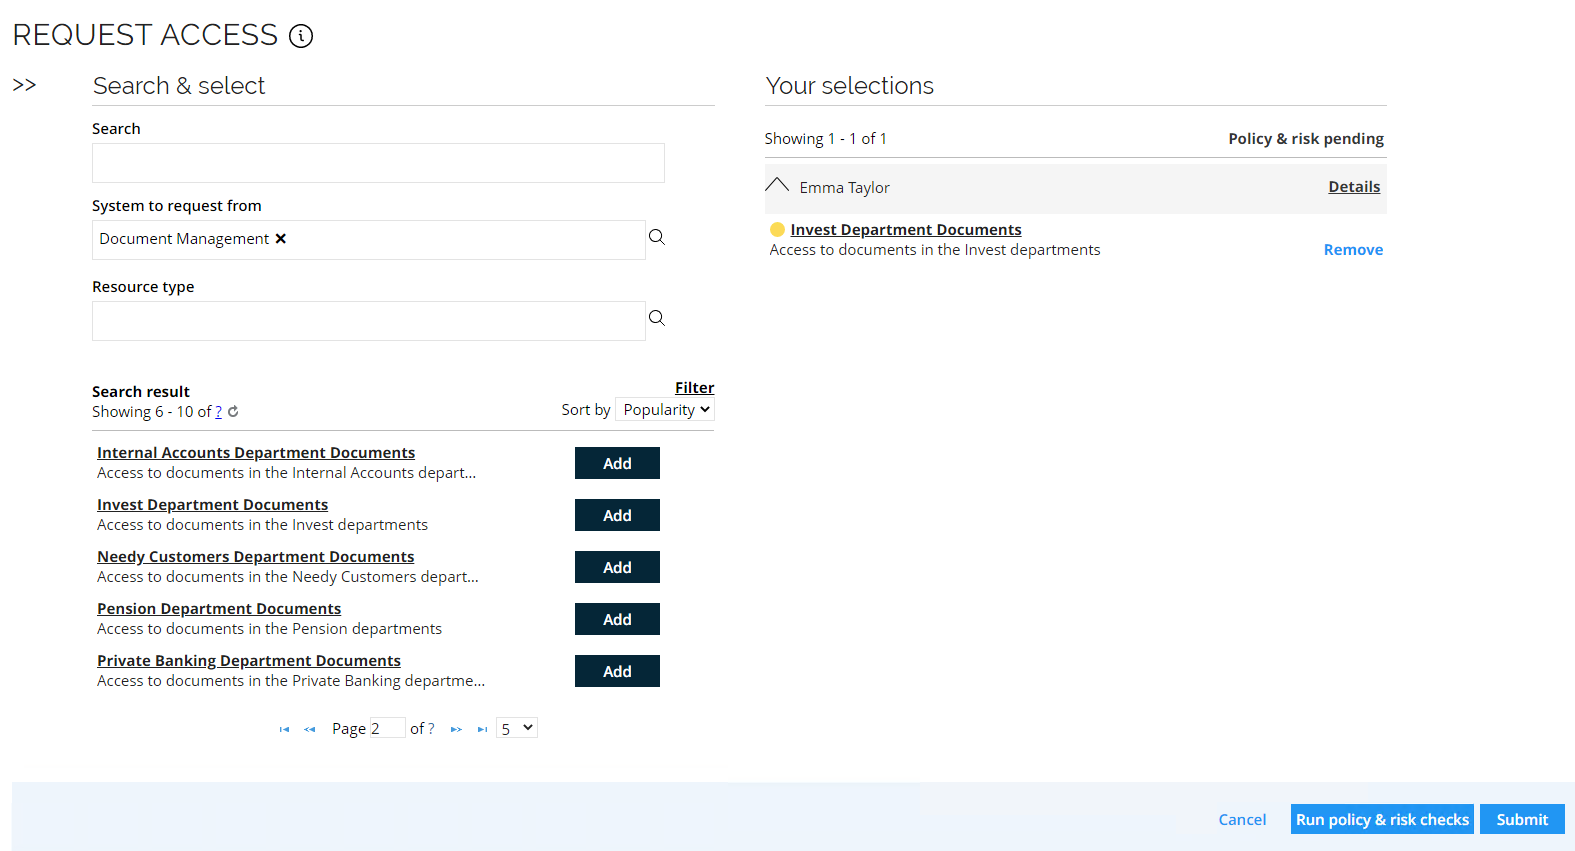
-
The Peer Access Analysis is shown as a color indicator to the left of the resource. Click Details to see the details of the check.
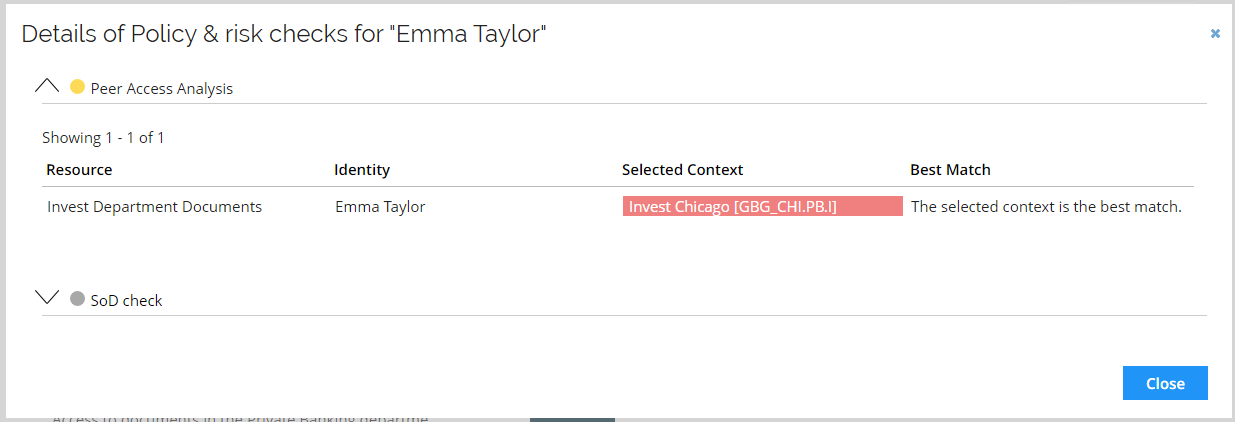
You can select multiple identities in the same request, and you can also request multiple resources.
-
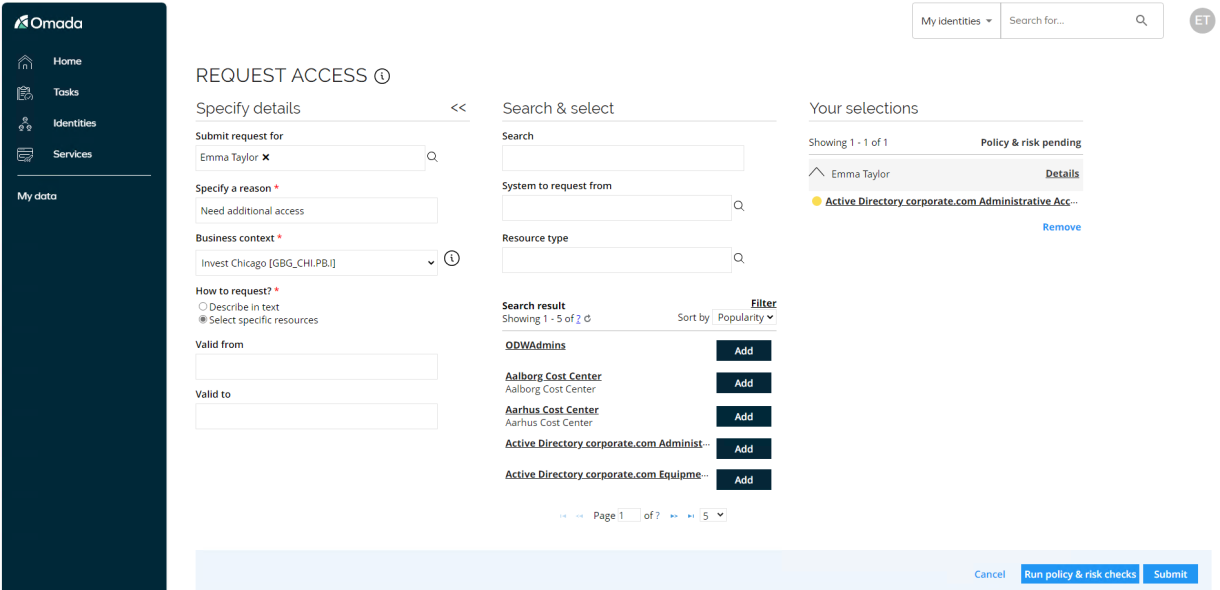
You can select Run policy & risk checks, it is configured as an optional step, but it can also be disabled or set to automatically check for potential violations. If you decide to run it, it will display two pops-up like below:
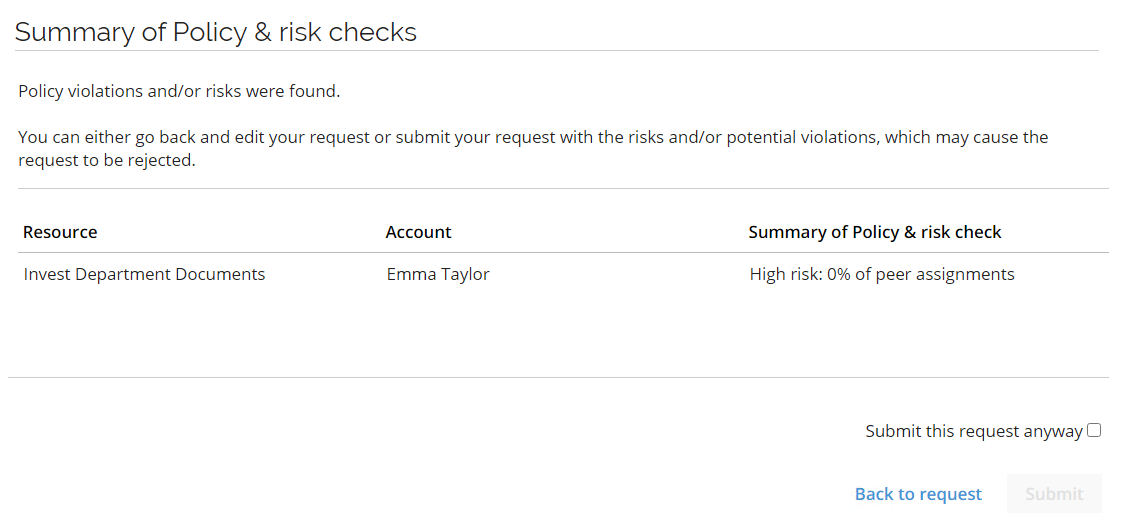
-
Select the Submit this request anyway checkbox and click Submit. You will receive a confirmation.
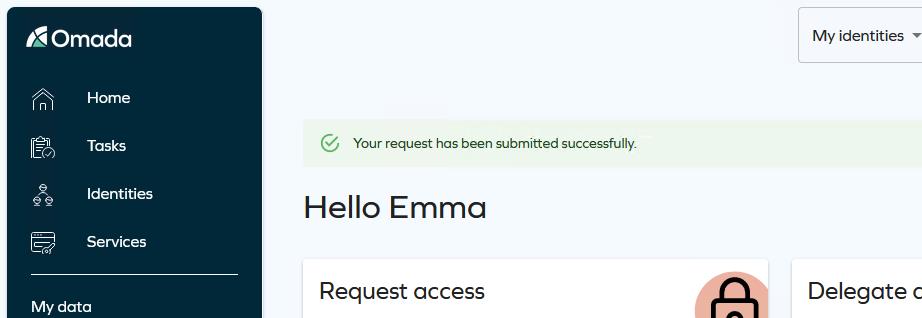
-
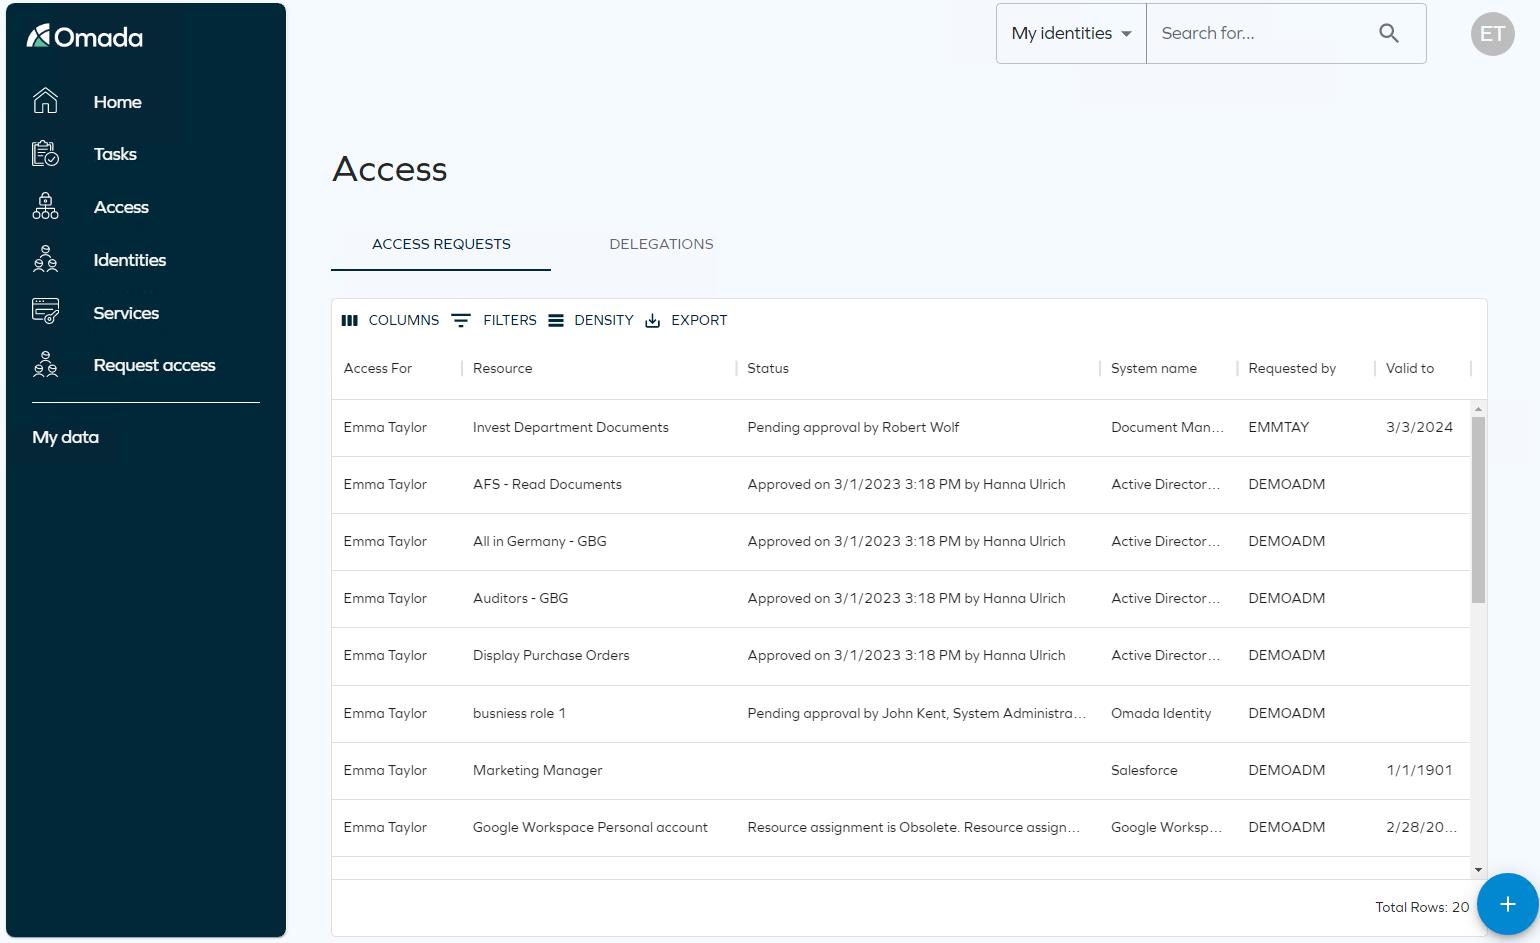
Click Services and go to My access requests. You can see the request for the chosen access right. It is pending approval by Robert Wolf.

-
Next, the request must be approved by Emma Taylor’s manager, Robert Wolf.
Self-Service Access Request – new UI
The Request Access process can be executed on behalf of another identity. A common scenario is a manager setting up a user account for a new employee to be in place in time for the first day of work. Through Omada Identity the employee can also request access for himself, as we will show in this demo.
-
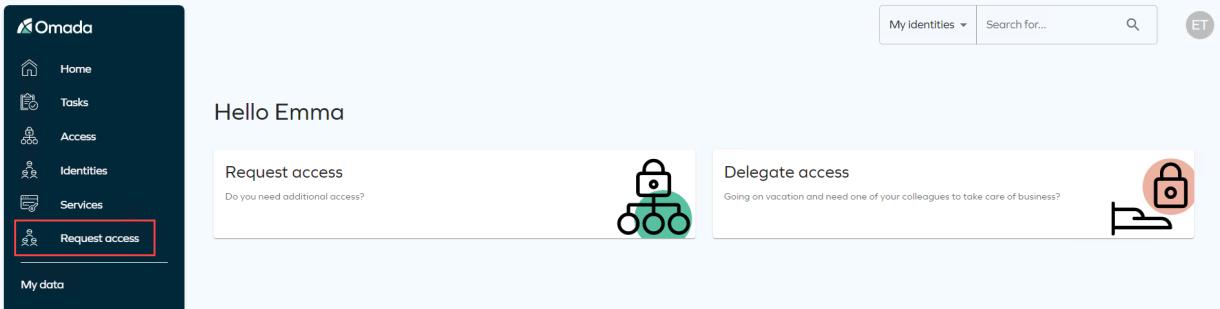
Log in to the Portal as Emma Taylor via the Request access link in the menu.
-
This opens the Request access flow which has four numbered steps that you must go through before submitting the request.
-
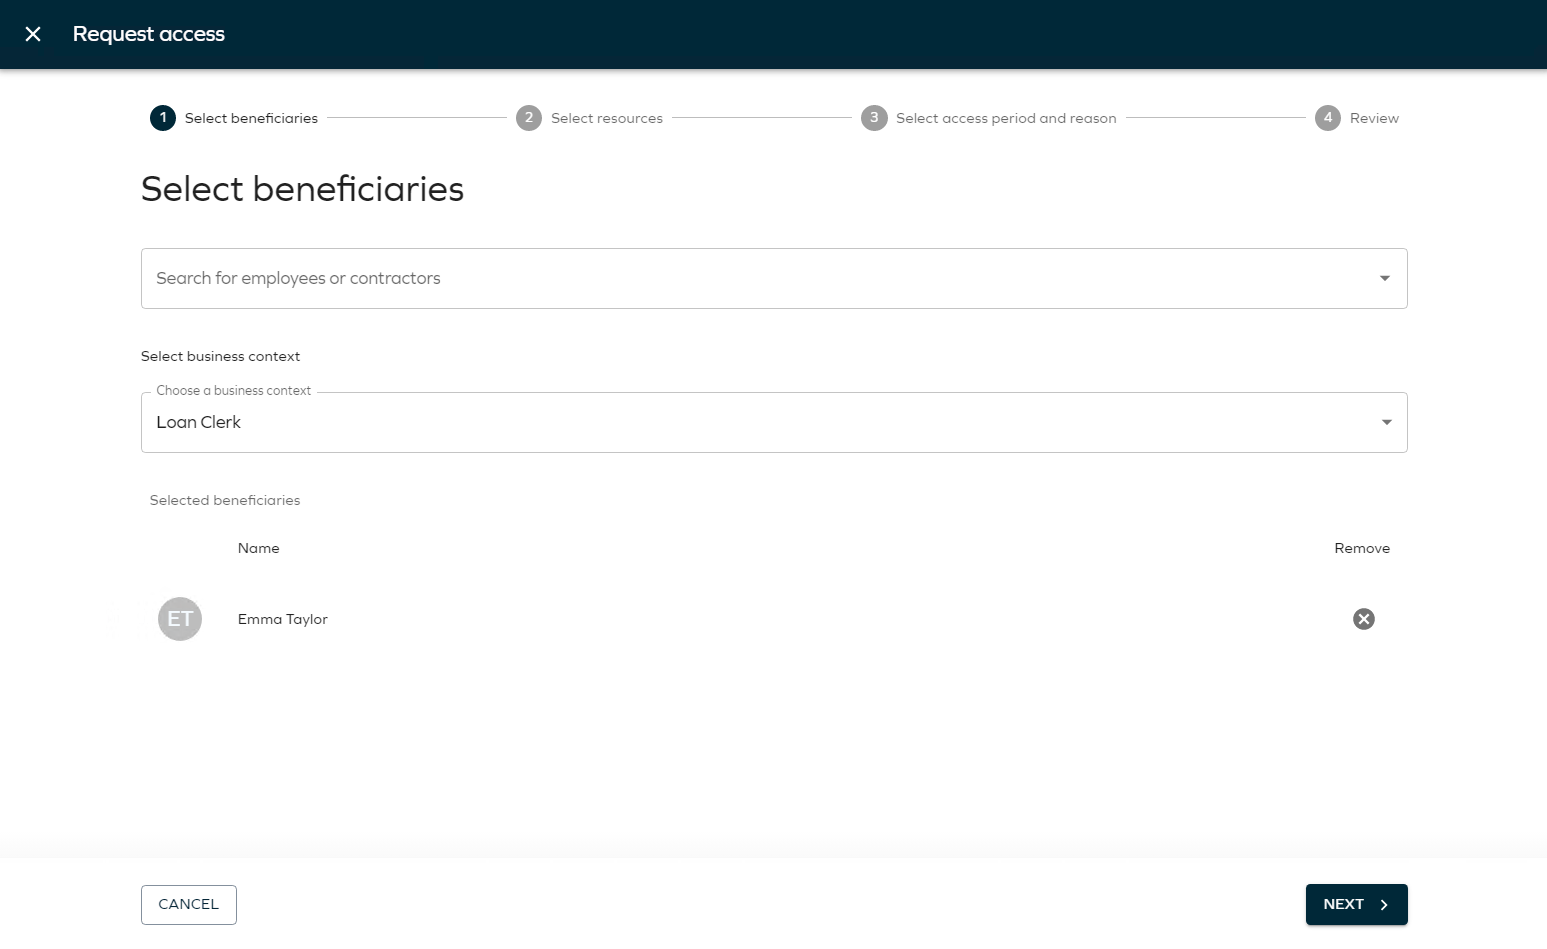
You can request access for a managed identity, but as we are requesting access for Emma Taylor, leave myself in the Selected beneficiaries list.
-
Select which context the request is made in. The context in the request determines who the manager approval task (if required) is assigned to. An identity always has a primary manager, but if the identity belongs to more than one context, there is also a context manager for any non-primary context.
Usually it is the organizational unit that is an identity’s primary context, but a contractor may have a project as their primary context.
Access that is requested in a specific context is not only approved by the context manager, but also follows the “membership” of the context. Any access granted in a context is expired when the context membership is at an end (for example a project that runs for a limited time). Select Invest Chicago.
-
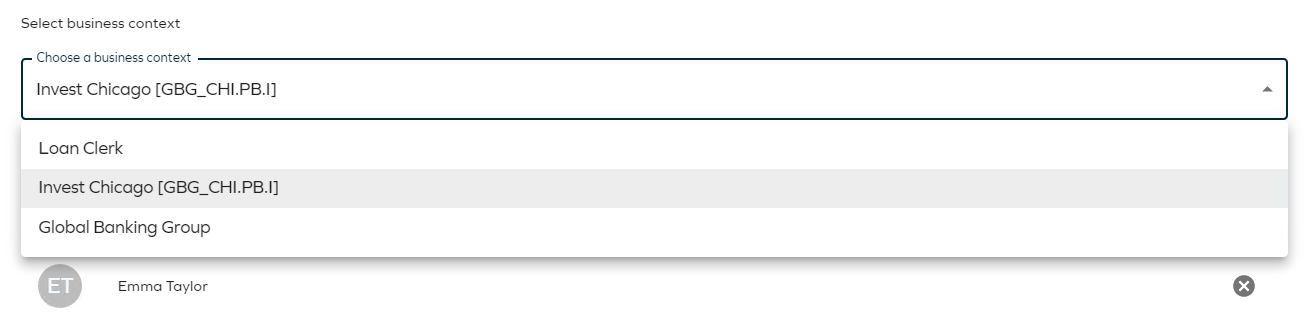
Click Next. This opens the Select resources step.
-
The list is sorted according to popularity and the already granted resources are not included in the Access Request. Click Show assigned resources toggle to include already assign resources or deselect it to hide them again. The standard solution has a filter that excludes systems and resources with the Prevent self-service property set to True.
-
You can look for access rights via Search field. In this field, you can search for keywords for the resource you are looking for. The search can be done on any keyword for the resource or system object, for example name, description, owner, and others. The result list is generated as you type:
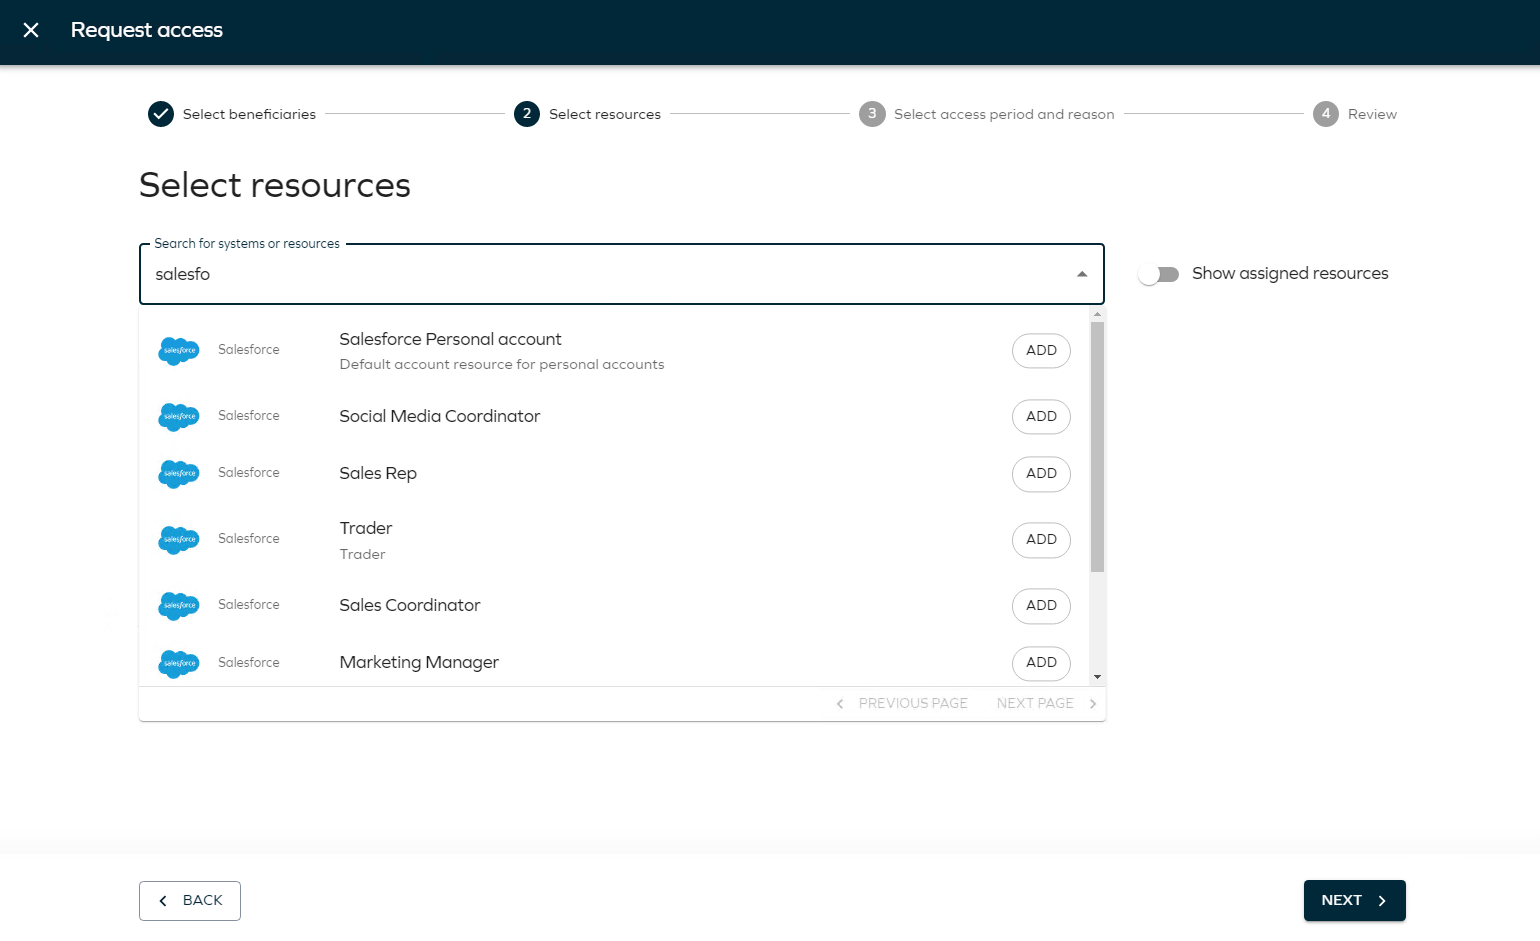
-
Resources have a system icon for visibility.
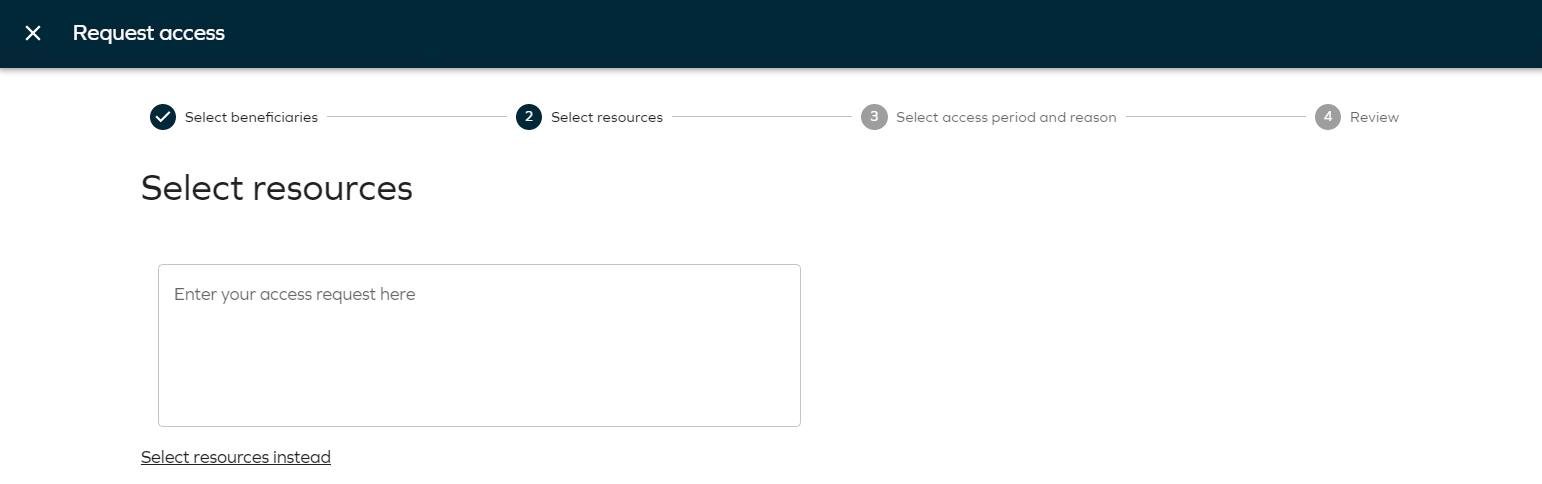
tipIf you want to show how to submit a request using a free text field, which is then interpreted by a member of the Request interpreters’ group, you can do so by clicking the “Cannot find the correct access” link. This opens a page where text can be entered.
-
-
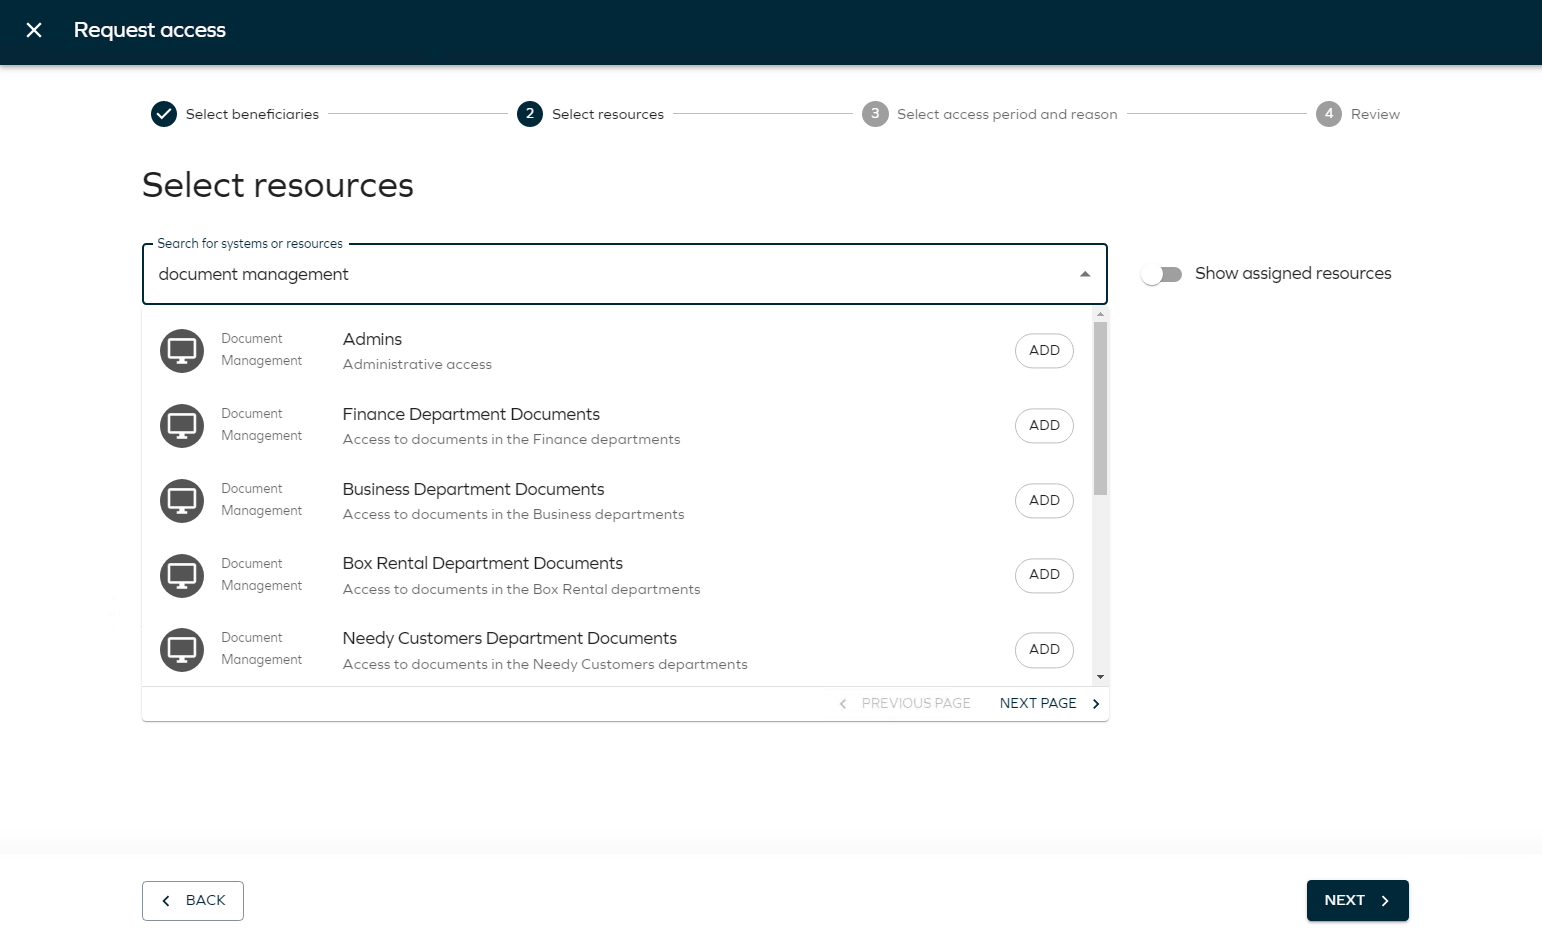
Search for Document Management and the resources available to select from that system/application will be presented below.
-
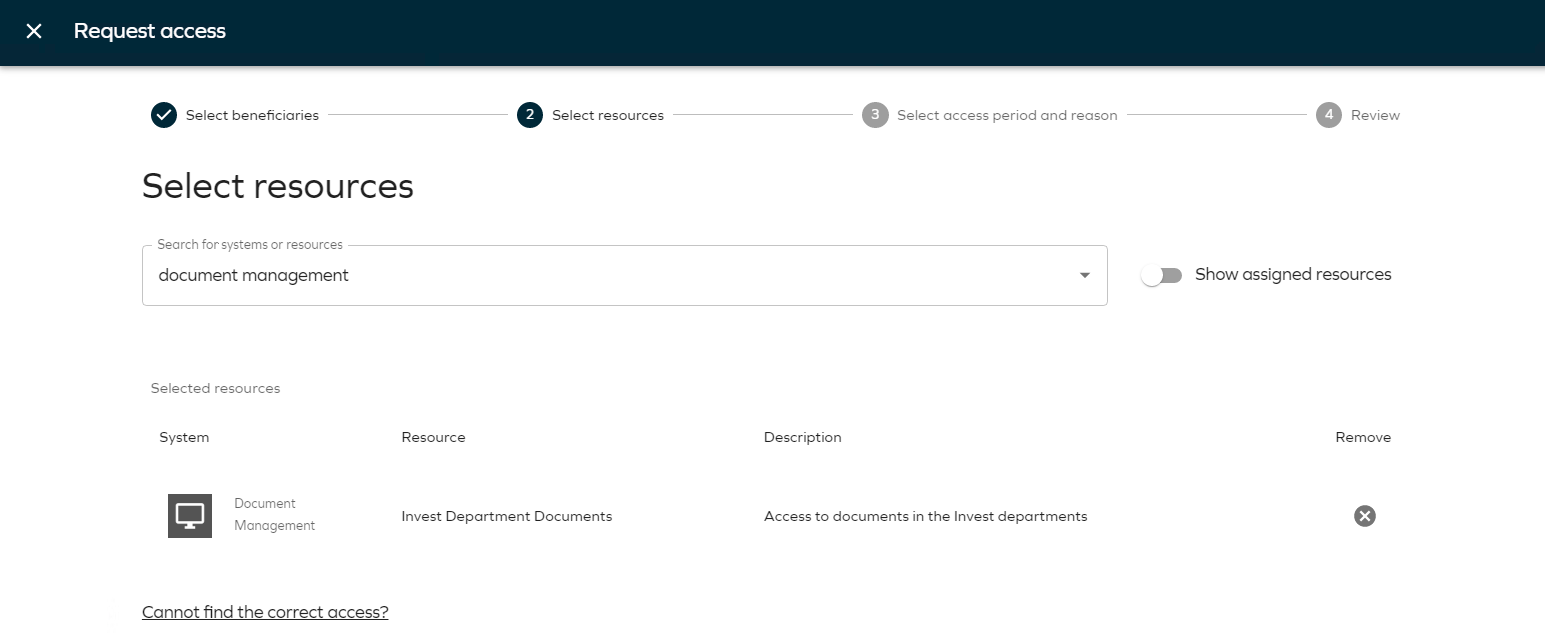
Select the Invest Department Documents resource by clicking it or clicking Add.
-
Click Next. This opens the Select access period and reason page.
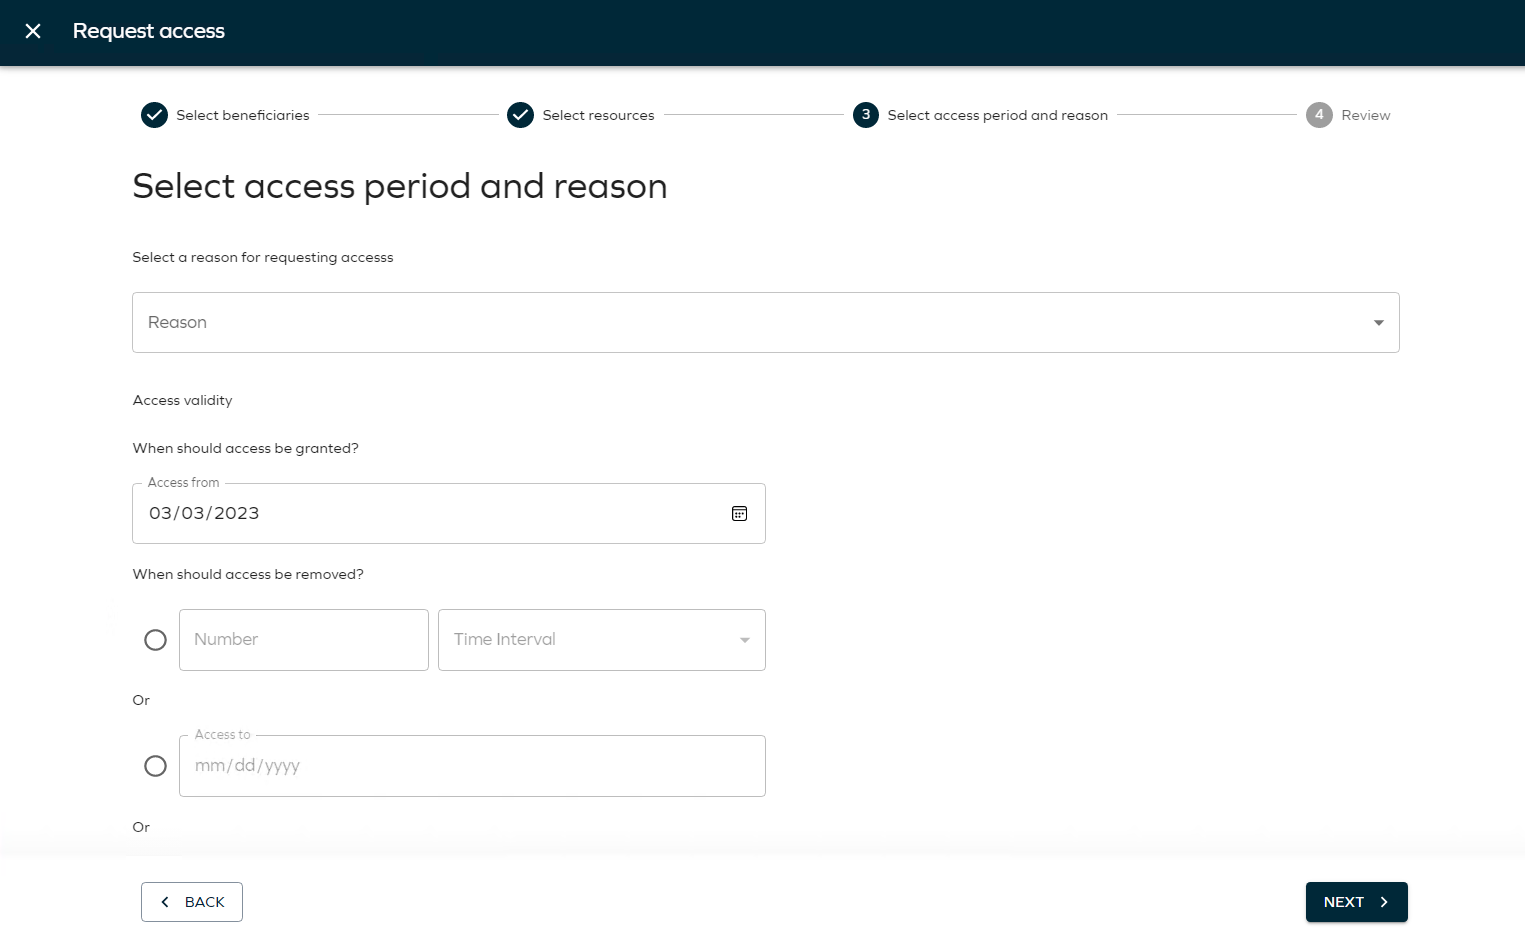
-
In Select a reason for requesting access, the following options are available:
-
[Other] -
Need additional access
-
New employee

Select
[Other]. This opens a new field where you can enter a reason for the request. This reason will be shown to the approver in the approval process.
-
-
In the Access validity section, specify for how long you want the assignment to be valid from, if it is approved. The default is Never expires.
-
You can specify a date in the Access to field or you can select a number of days or months that the access will be valid for.
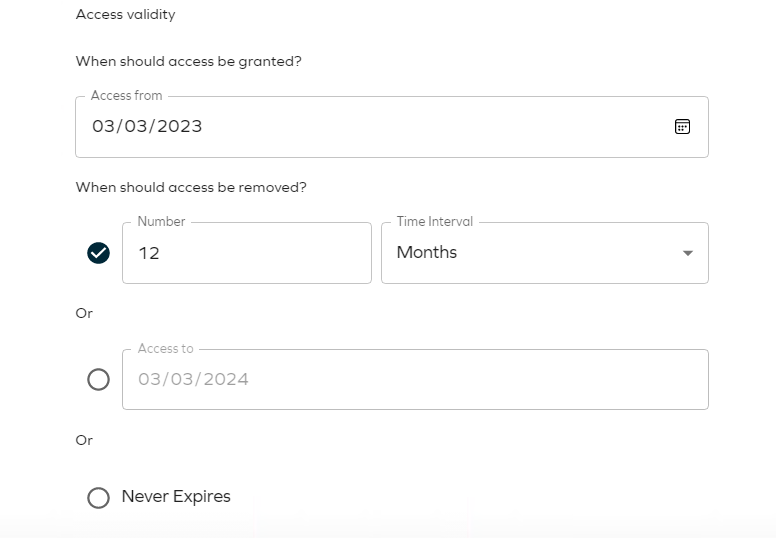
-
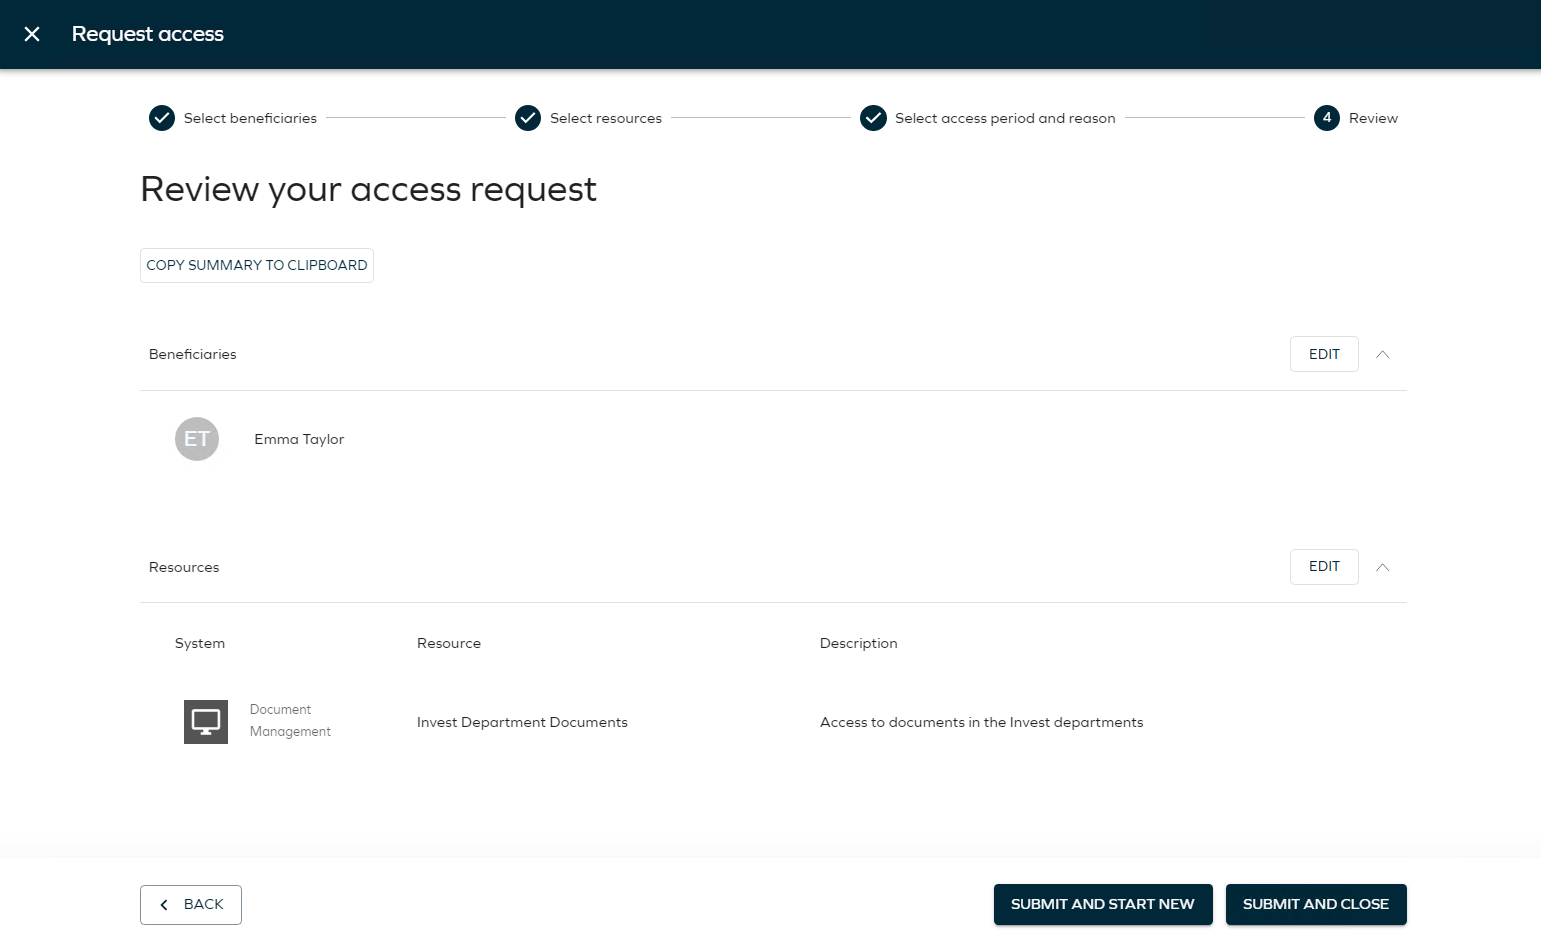
-
Click Next. This opens the Review your access request page. Here the user can get an overview of the request and copy a summary to the clipboard.
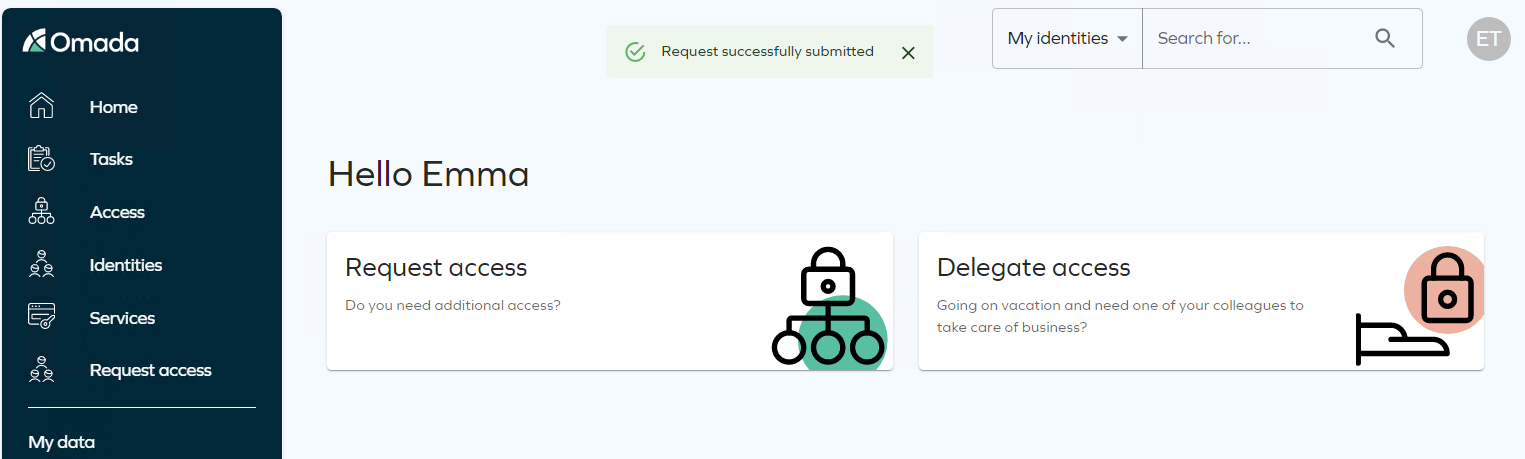
-
Click Submit and start new or Submit and close. Once submitted, you receive a confirmation.
-
Click Access and go to Access requests. You can see the request for the chosen access right. It is pending approval by Robert Wolf.
-
Approve the request as Emma Taylor’s manager, Robert Wolf.
Approval Process (AM02.01)
The requester’s manager receives an email. The email contains all details of the request that an approver would need to know. The approver can see who made the request, what the reason was for the request, which access rights were requested, the discussion log associated with the request, and an overview of the approval process.
-
Log in to the Portal as Robert Wolf by clicking the icon on the desktop.
-
The task is listed in the Tasks widget. As you can see the request submitted has resulted in an Approve requested access item.
-
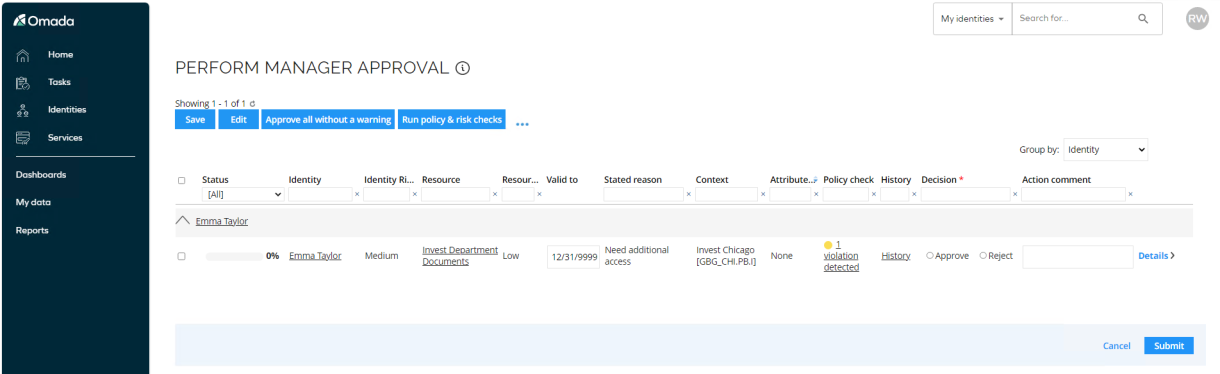
Click the Perform manager approval link to open the approval form. The system automatically performs a policy check when you open the task.
-
Robert Wolf can see the details of the request. As an approver, Robert Wolf can add a comment. Do so and select Approve and Submit to approve the request.
-
Log in to the Portal as Emma Taylor.
-
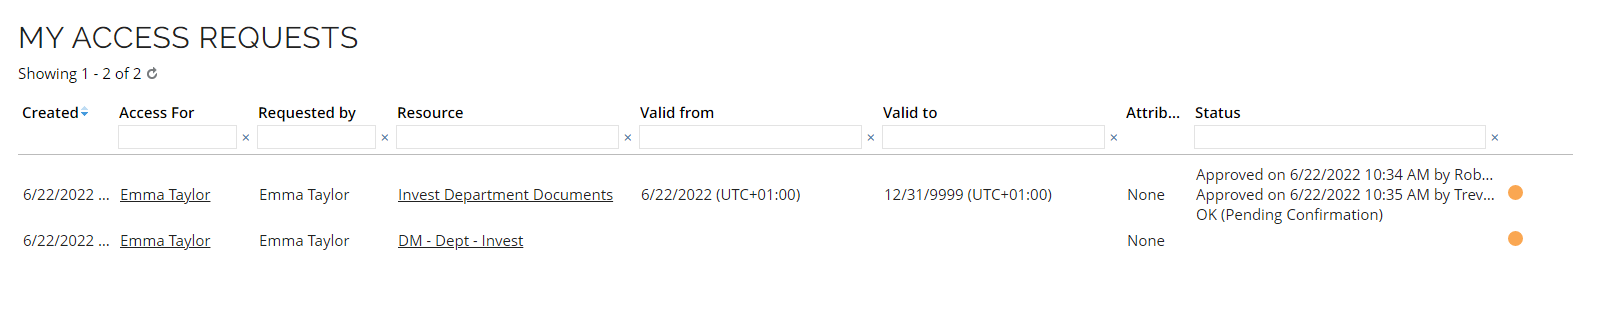
Click My access requests. The status of the request is Pending approval by the resource owner (Trevor McDonald).

-
Log in to the Portal as Trevor McDonald. Click the Perform resource owner approval link to open the task. The system automatically performs a policy check when you open the task.
-
The task looks like the Manager approval. You can click on history to see the audit trail of the request/approval process. Select Approve and Submit.
-
Log in to the Portal as Emma Taylor.
-
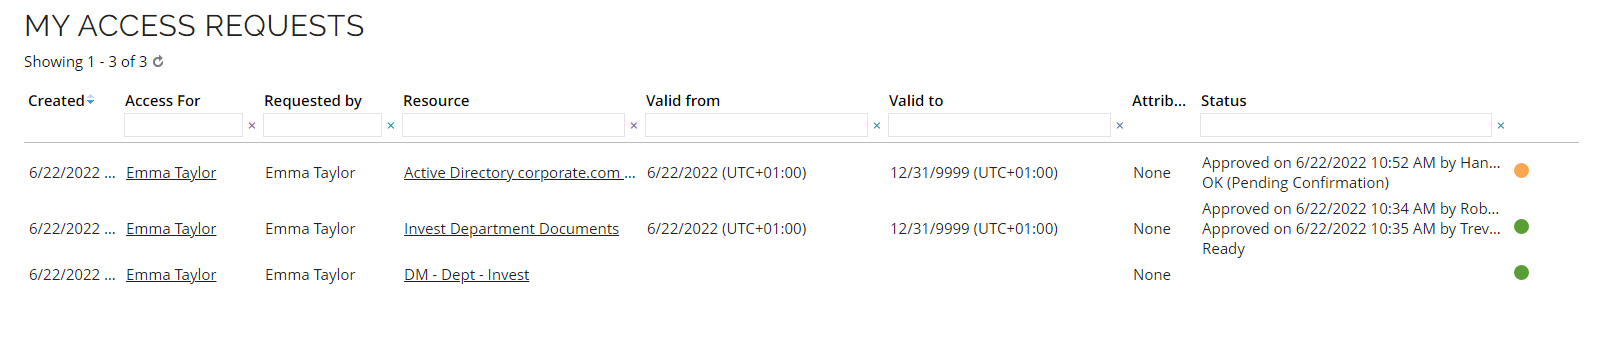
Click My access requests. The status of the request is Approved and Ready. You can see who approved the request and when, plus you can see that the group membership is provisioned in Active Directory. The request was made for a role in a logical application, which is mapped to a physical AD security group, so in the background Omada Identity provisions the Identity’s AD user into the group DM – Dept – Invest, hence why that resource has been added. The Status is OK (pending confirmation) as we need to run a confirming import.
-
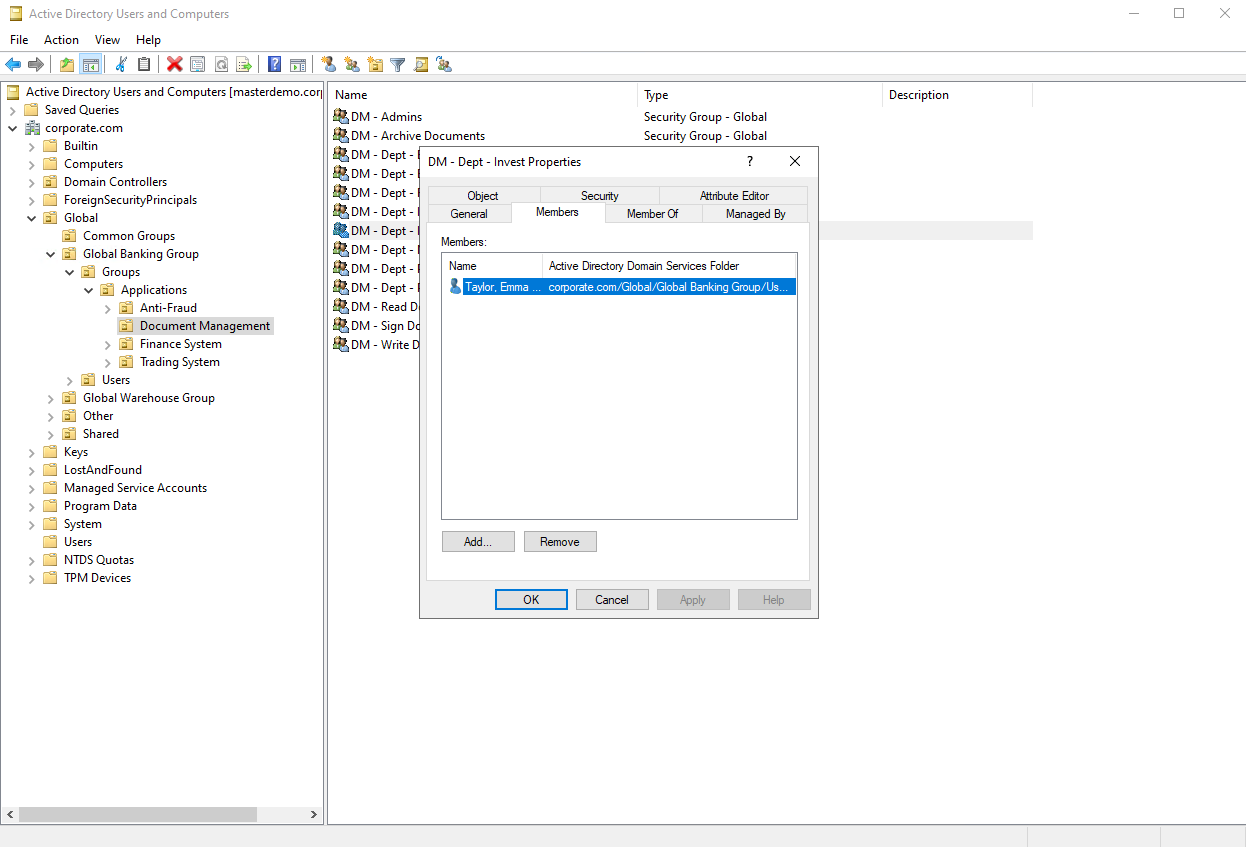
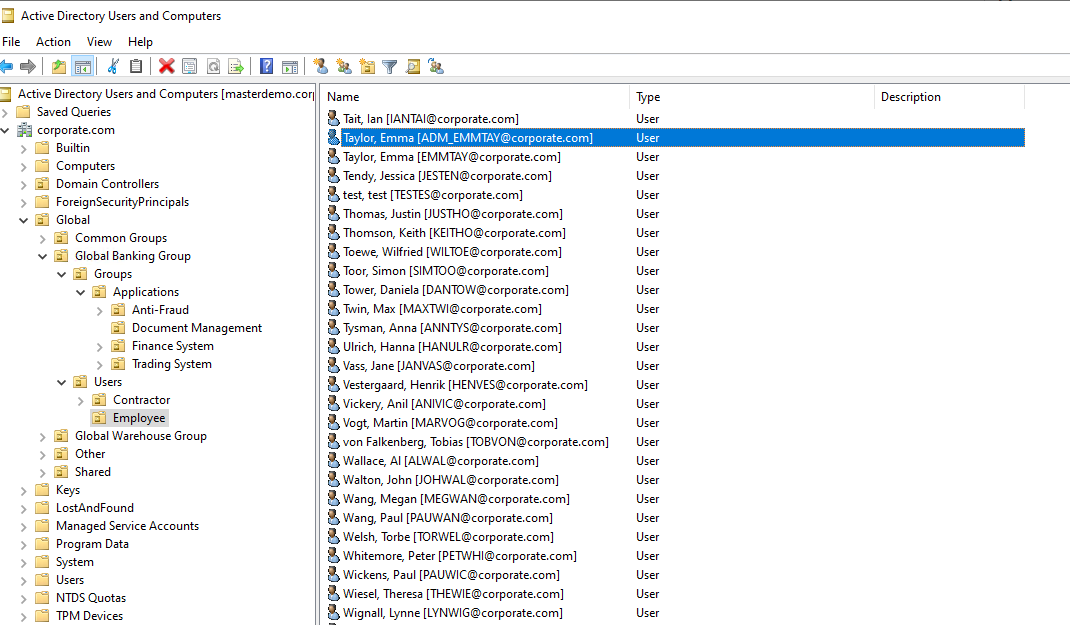
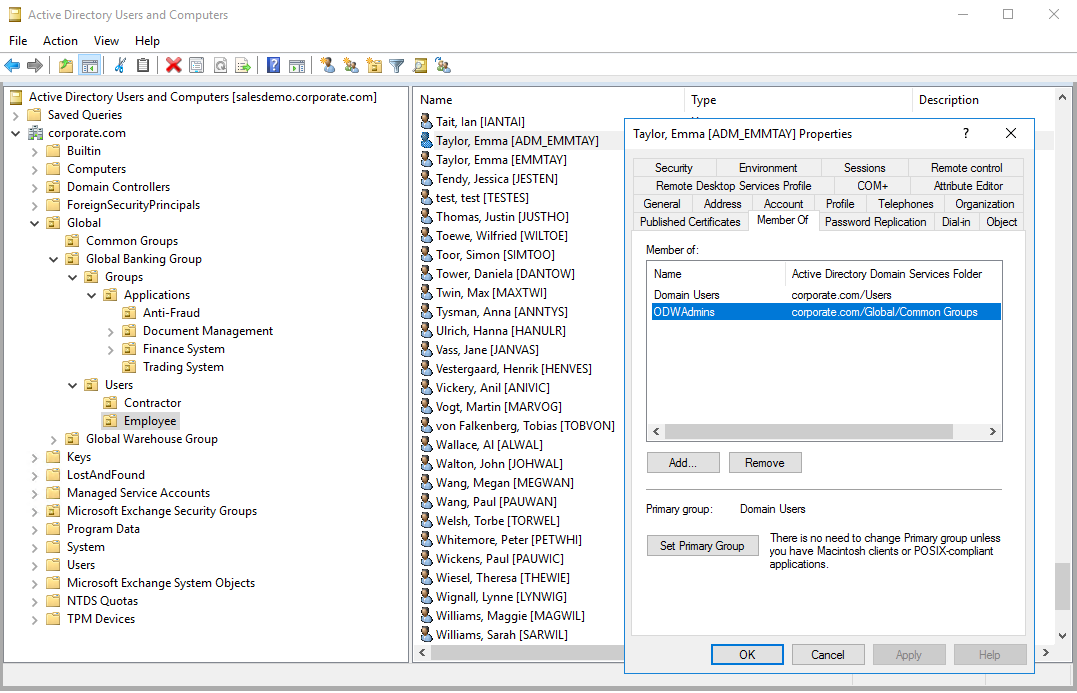
You can log in to Active Directory Users and Computers and verify that Emma Taylor is added to the group.
-
Optionally, you can open Paperclip and see the email notification sent to the requestor once assignments are approved.
-
After confirmation, My access request looks as follows for Emma Taylor:

Extend Access (AM01.01)
Omada Identity has a process for extending access that users have previously been granted. The demo solution contains a predefined flow for extending access for Emma Taylor and the resource Employees App Time Management, but we recommend that you prepare an access request with a shorter expiry date suited to your demo scenario. Keep in mind that some resources are used in other scenarios, so please test before your use case first.
The screenshots below uses the Reviews Time Management resource which were requested before starting the demo in the context of Invest Chicago.
-
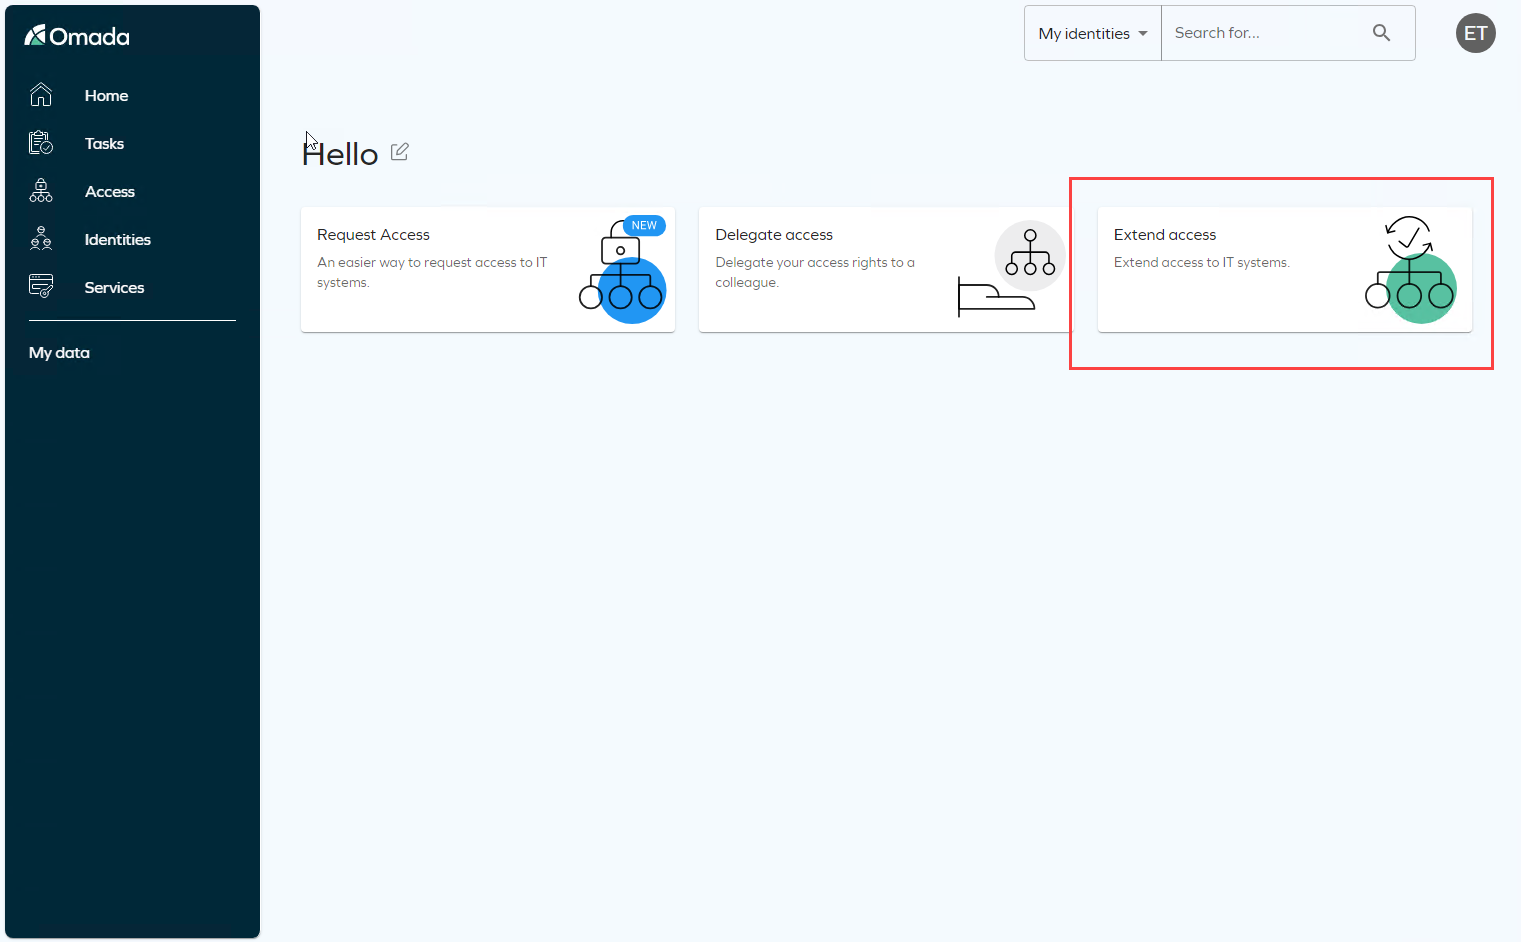
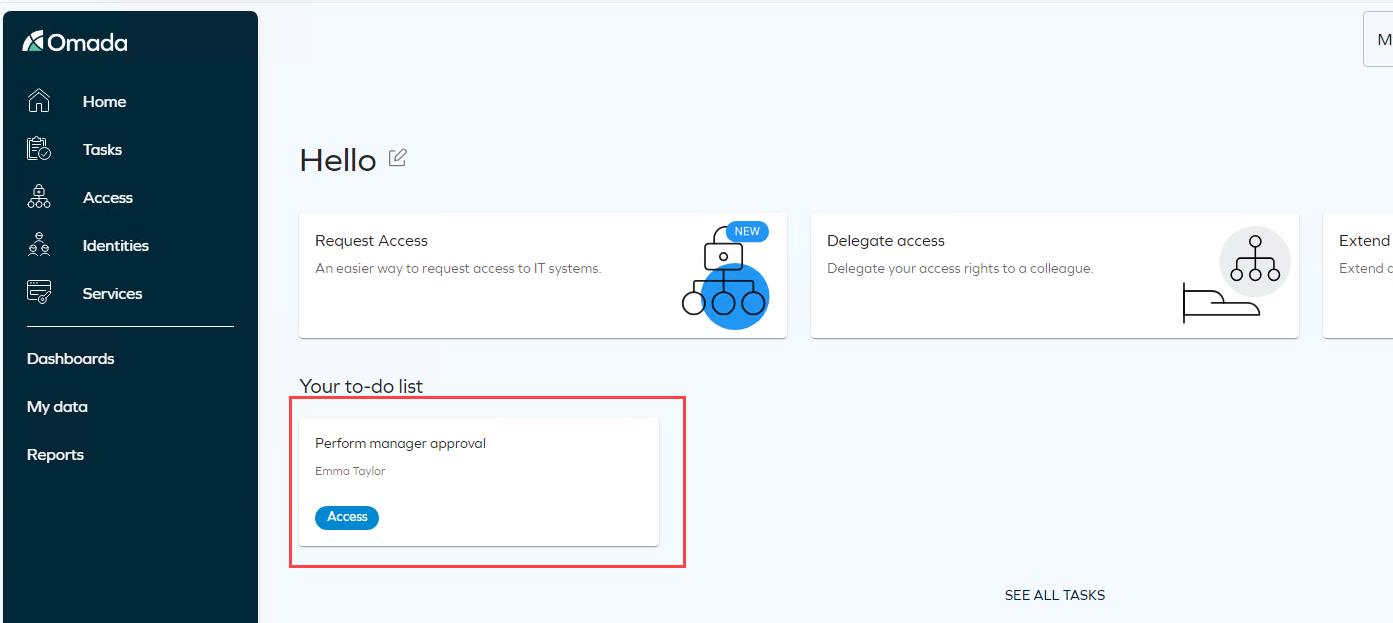
Log in as Emma Taylor and click the Extend access shortcut on the homepage.
-
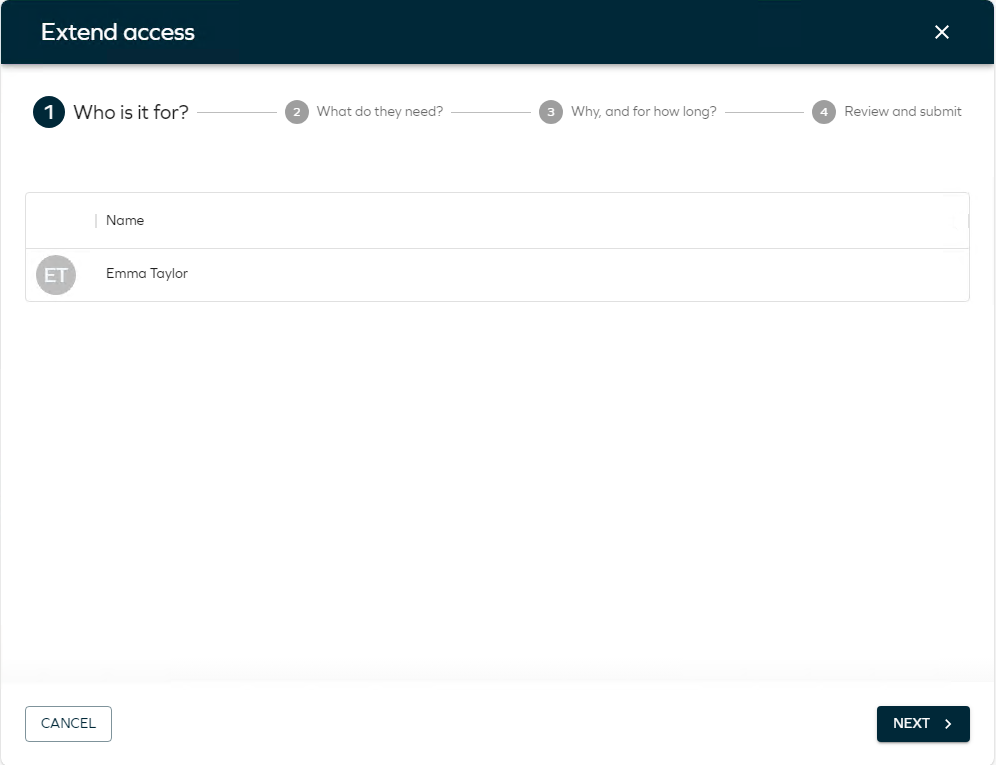
In the first step, there is nothing to select as Emma is preselected. Users can only extend access for themselves. Click Next.
-
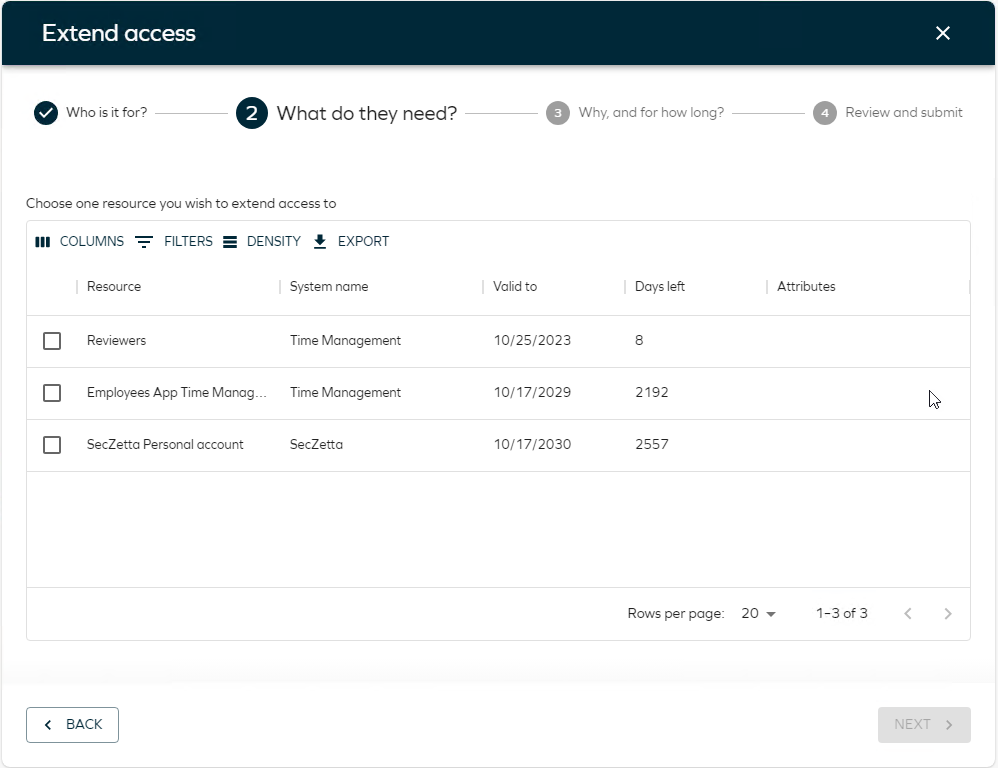
In the next step, all extendable access rights are listed. These are based on the access that has been requested or otherwise directly assigned, and that has a validity set.
You can edit the columns, add search filters, and rearrange the columns. Changes are saved for the next time the users logs in and uses the process.
-
Select one of the access rights to extend, in this case, Reviewers and click Next.
-
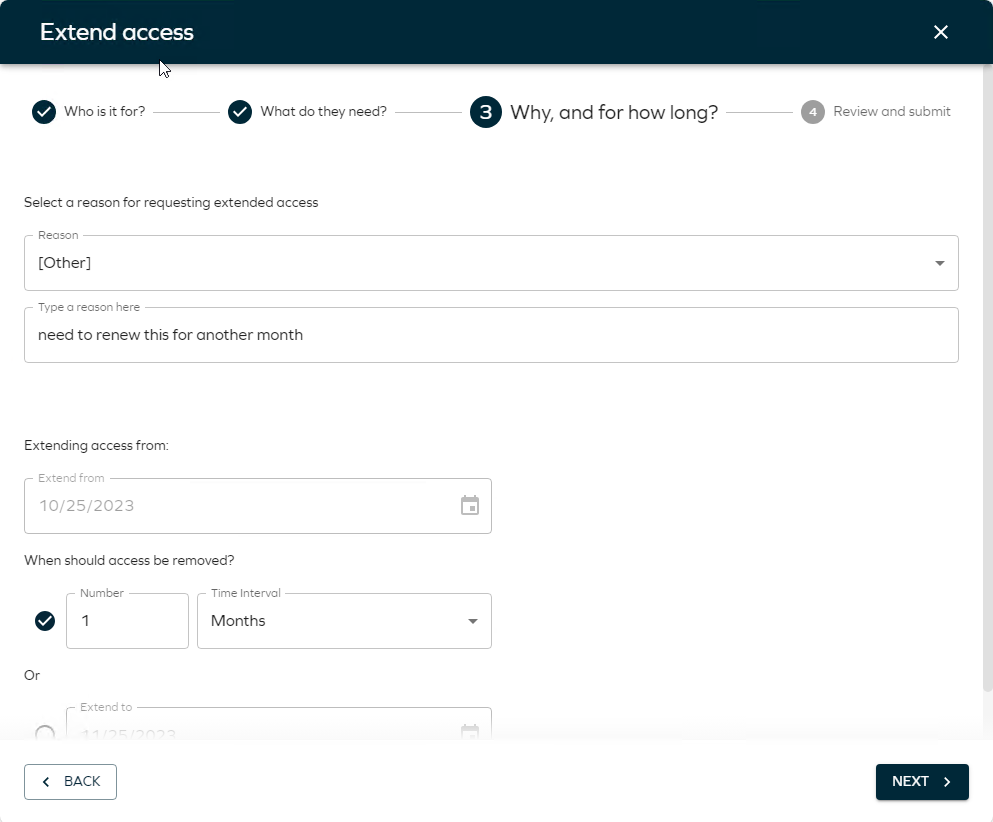
In the next step, specify why you want to extend the access and for how long. If you use the first option then the access is extended for the specified number of days or months from the original expiry date.
-
Select a date and click Next.
-
In the next step, review and get a confirmation on the extension. You can click Submit and start a new (useful if you need to extend more than one access right) or Submit and close.

The extension request needs to be approved if the resource folder for the resource has approval defined, just as for a normal access request.
The Reviewers resource belongs to the Time Management system which is defined for Manager (Context owner) approval.
-
Log in as Robert Wolf (or the manager of the selected context in the request process). He has a task on his to-do list. Click it to open the task.
-
The Approval states whether this is an extension or a new access request.
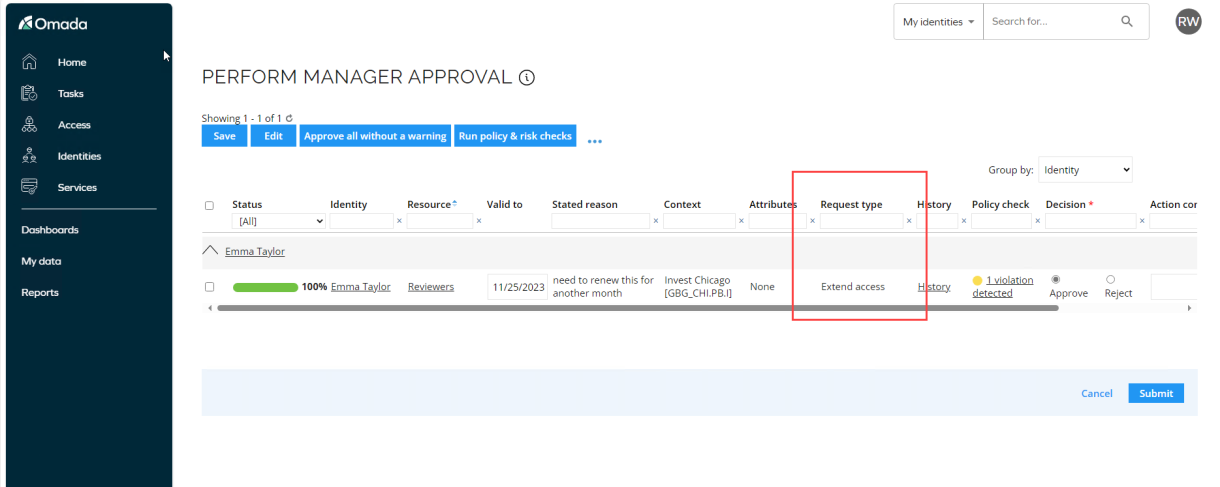
Click Approve and submit the task.
-
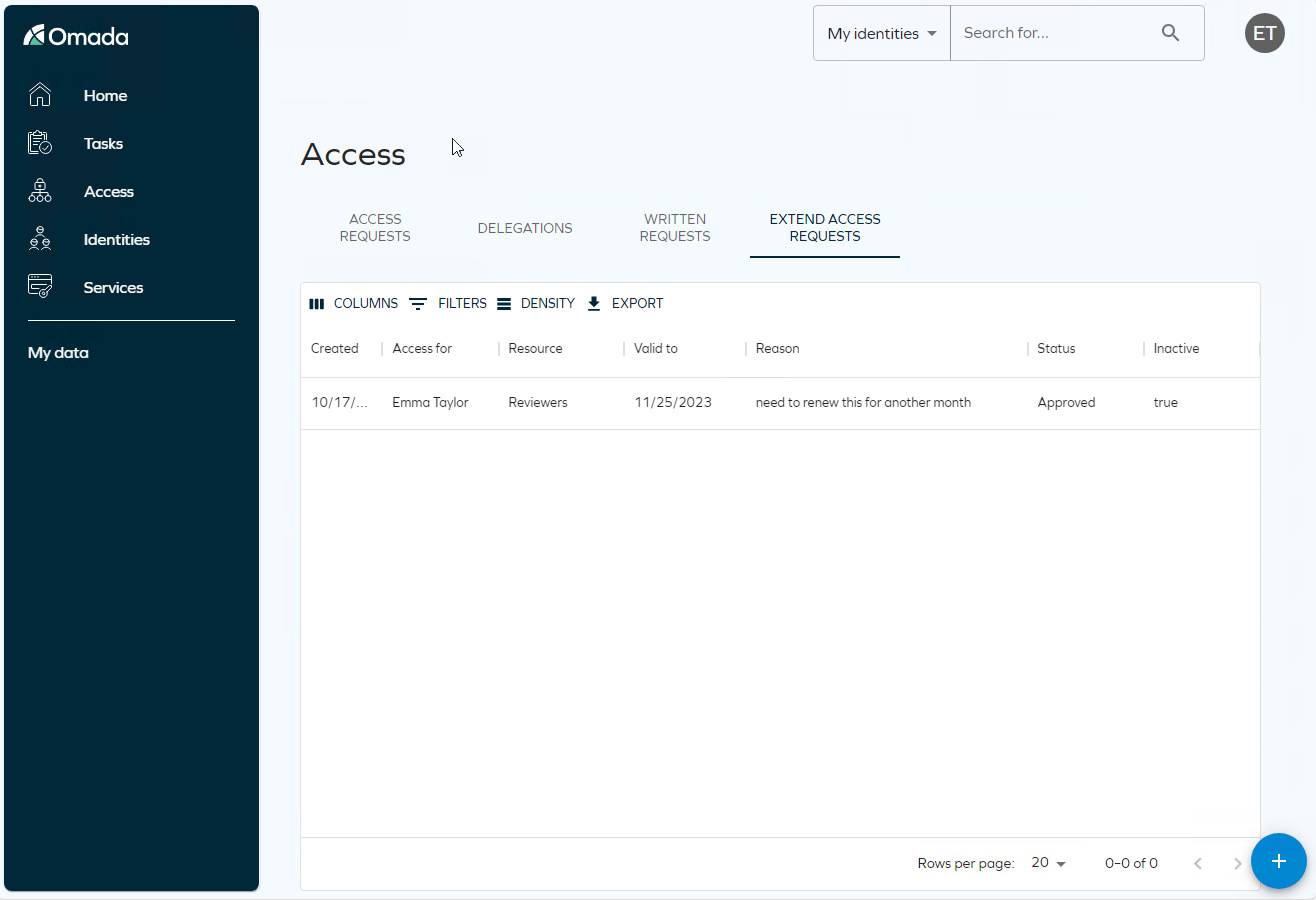
Log in as Emma Taylor and click Access in the menu. Click Extend Access Requests to see that she can view the status of her extensions here. The valid to date reflects the new valid to selected.
-
If you click the Plus icon, you can trigger a new Extend access request.
Remove Access (AM02.02)
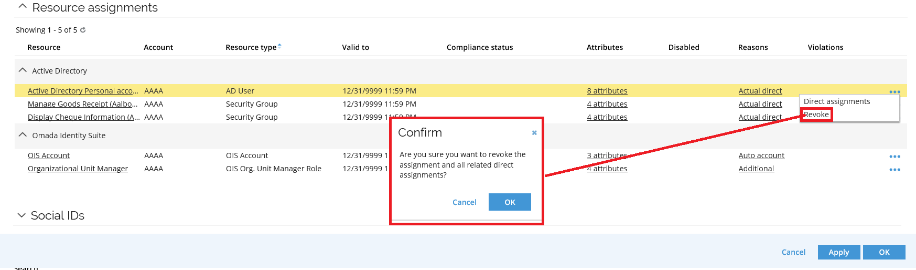
Omada Identity v14 lets you revoke CRAs that do not have a Desired state. The Revoke action is available to members of the Operation administrators, System administrators, and Service desk agents user groups, and it allows them to expire assignments without having to create survey campaigns or manipulate the data in the target system.
In the Resource assignments grid in the identity form, in the context menu, the Revoke action is available if the CRAs are of the following types:
- Direct
- Actual direct
- Unconfirmed actual
- Review OK
When a CRA is revoked, a new Remove verdict is created, and if the CRA has one or more Direct reasons, the resource assignment data objects that are causing them are also expired.
The expiration of direct assignments is done in the same way as the expire functionality for direct assignments, whereby the Valid To date is set to the end of the day, and the status of the assignment is also set to Obsolete.
Request Admin Account (AM01.01)
Omada Identity supports management of both personal accounts, admin accounts, service accounts and other non-personal accounts. The same Request Access process is used.
-
Log in to the Portal as Emma Taylor via the icon on the desktop.
-
Launch Request Access.
-
Fill out the reason and context.
-
In System to request from, select Active Directory corporate.com.
-
In Resource Type, select Active Directory Administrative Account.
-
Click Submit.
-
-
Click Services and go to My access requests. You can see the request for the chosen access right. It is pending approval by Hanna Ulrich, the system/resource owner.
-
Log in to the portal as Hanna Ulrich and perform the approval.
-
Log in to the portal as the requester Emma Taylor. Go to My access requests to see that the admin account is approved and provisioned and ready to use. (refresh screen with F5 if status is not as shown below, it might take a little while for RoPE and OPS to provision the account).
-
Optionally, open Active Directory Users and Computers to verify the new account is available.
Request Access for an Admin Account (AM01.01)
Before proceeding, make sure you have completed the Request Admin Account scenario.
-
Log in to the Portal as Emma Taylor via the icon on the desktop.
-
Launch Request Access.
-
Fill out the reason and context.
-
In System to request from, select Active Directory.
-
In Search, type odw and click Enter.
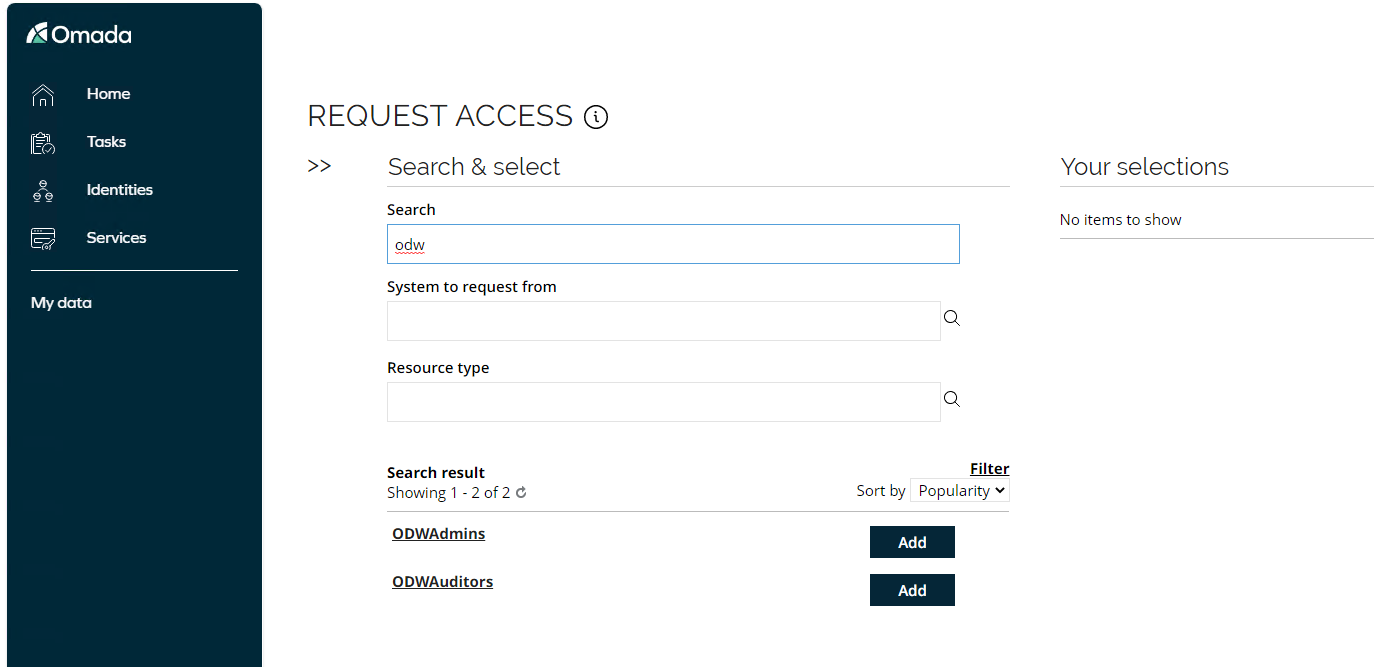
-
-
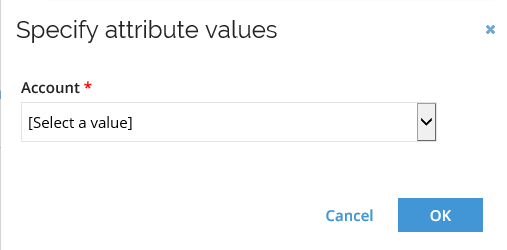
Click Add to select ODWAdmins. A pop-up will appear where you must specify for which account the request is for. The pop-up appears because we have configured the resource to be available for both personal and administrative accounts, this is done under Advanced > Account types on the resource.
-
Select the admin account requested in the previous scenario and click OK. Click Submit to complete the request.
-
Approval is pending by resource owner. Log in to the portal as Hanna Ulrich and approve the request.
-
Log in to portal as the requester Emma Taylor. Go to My access requests to verify the approval and if the provisioning has taken place.
-
Open Active Directory Users and Computers to see the group membership is provisioned for the admin account.
Request Access for a Technical Identity (AM01.01)
Before proceeding, make sure you have completed the Create Technical Identity scenario.
-
Log in to the Portal as Hanna Ulrich via the icon on the desktop.
-
Launch the Request Access process.
-
Hanna Ulrich is owner of a technical identity, so she can request, for example, a new service account(s) for the technical identity. Technical identities can have multiple service accounts assigned.

-
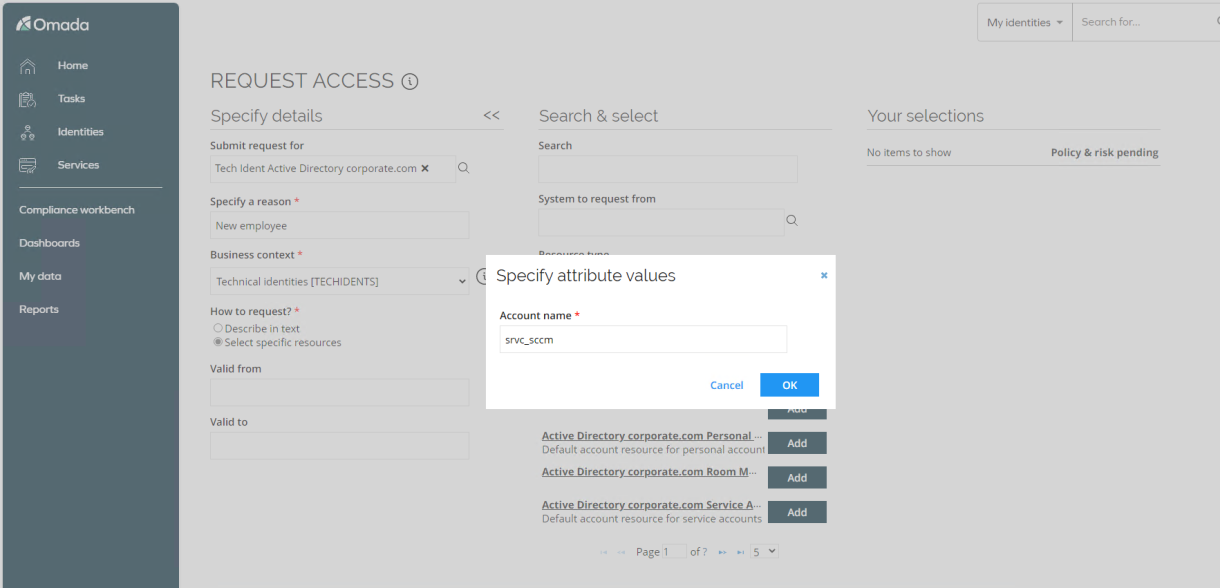
Fill in a request reason and context. Search for and request the resource Active Directory Service Account. When you click Add, a pop-up will appear where you specify the account name of the new service account.
-
Click OK and Submit.
-
Go to Services and open My access requests. Verify the user is provisioned, no approval required.
-
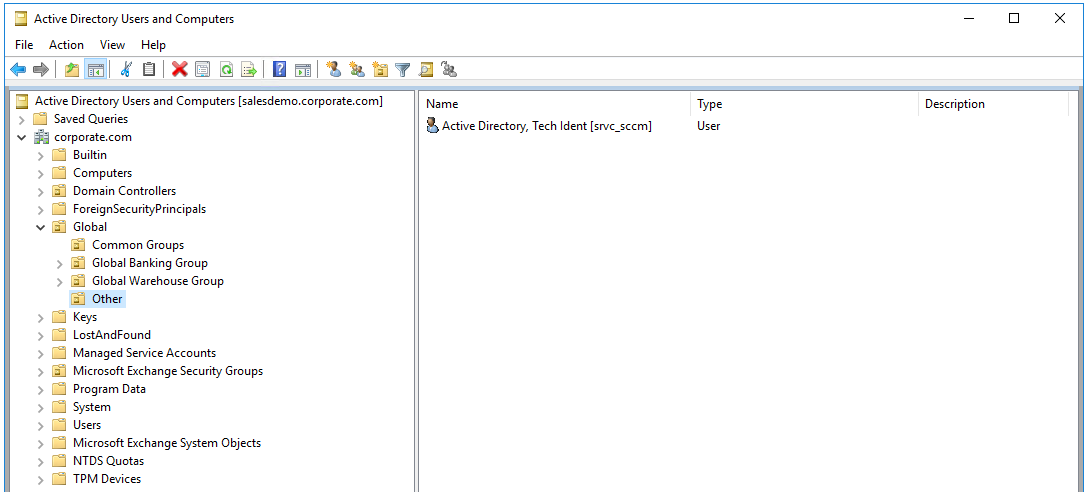
Log in to Active Directory Users and Computers to see if the service account is provisioned in the below ou.
-
You can also request resources for the new service account by following same procedure as above.