Fulfillment and Connectors (AD)
System Onboarding (AD02.03)
The system onboarding process allows you to quickly and easily connect and onboard systems from one central view in the Omada Identity Portal. The updated system detail view serves as a checklist and guides you through all the necessary and recommended configuration steps when adding new systems to Omada Identity. For example, after finishing the configuring tasks, you can start the data import and view the data in the Compliance Workbench for further reconciliation.
The checklist ensures a structured and error-free configuration every time new systems needs to be added and reduces implementation time and complexity significantly.
Progress bar
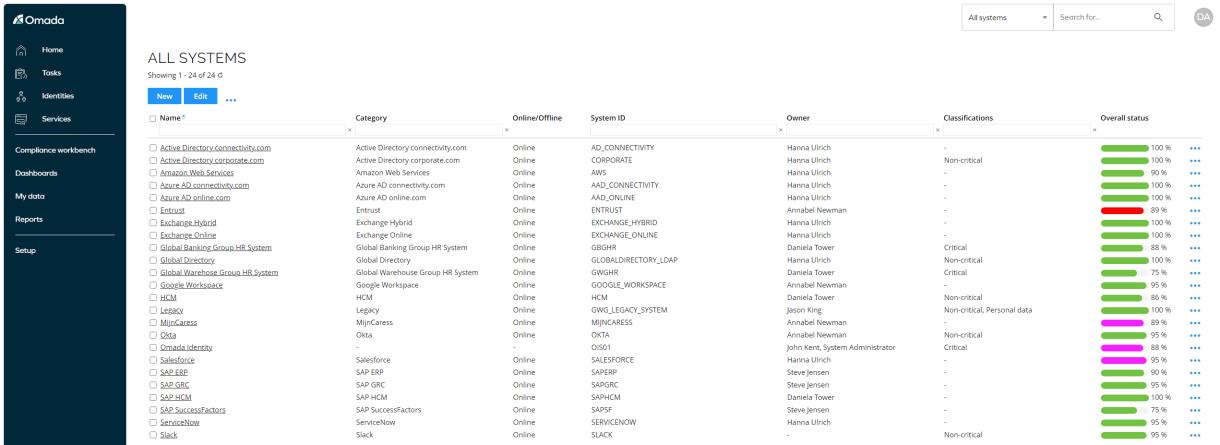
The progress bar that shows the overall status of your onboarding process on the individual onboarded system’s page is also shown in the two systems views, Systems and My systems.
You can see the onboarding progress of the system in the Overall status column. The color of the progress bar allows you to determine the current state of the individual system.
-
- symbolizes that all required tasks are OK and the system is ready to be included as part of a data import.
- If there are required tasks related to Provisioning that are not completed, the progress bar still shows up in green as provisioning takes place after you have imported data.
-
- symbolizes that the system still has pending tasks which you must specify before you are ready to include the system as part of data import.
-
- symbolizes that at least one task related to the particular system is in warning state and requires attention.
-
- symbolizes that at least one task related to the particular system is in error state and requires attention.
System detail view
The system detail view is an individual page for each of the registered systems in Omada Identity. The page contains a checklist of the tasks, which consists of settings that you must set and specify to begin onboarding/importing data from the new system.
When you have done the mandatory tasks, then the page automatically updates the task status and the overall progress bar. You can see a fast overview of your progress in the configuration process.
The checklist includes settings to the general system definition, management of resources, data import, and provisioning tasks.
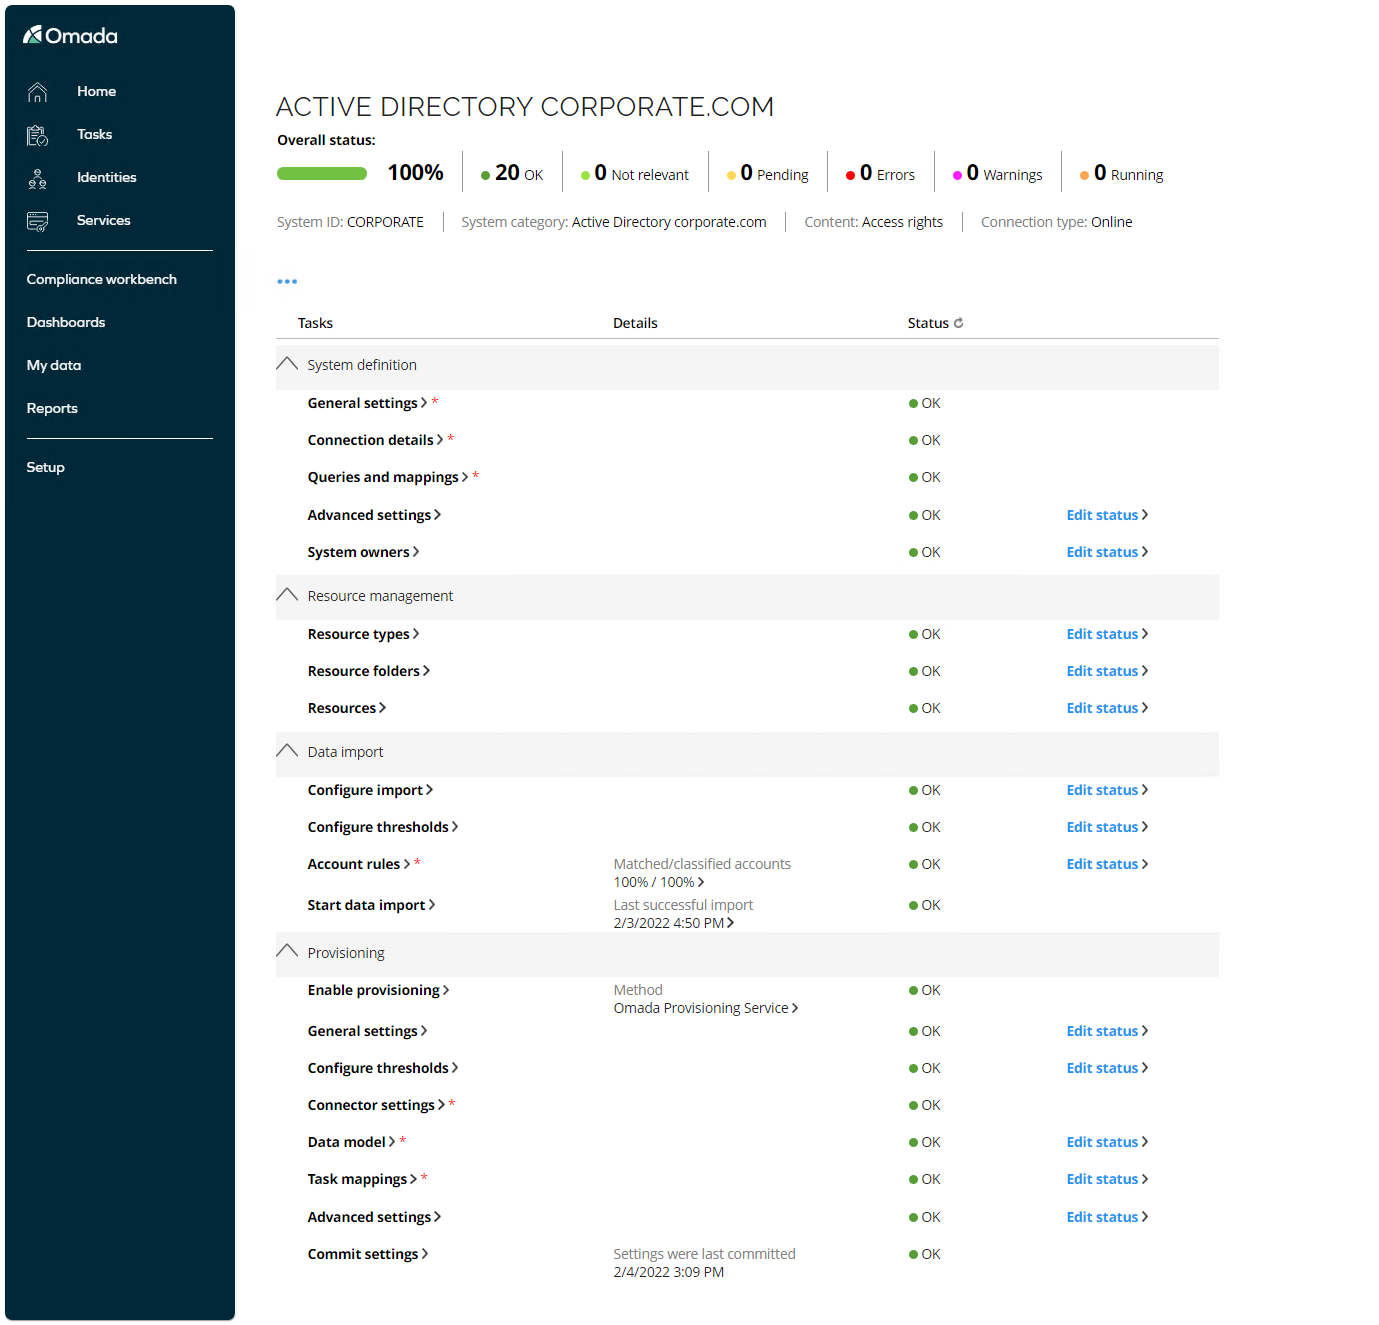
System definition
This section is used to input the system specific connections details, for example, LDAP paths for AD, hostname, and port number for SAP, and such.
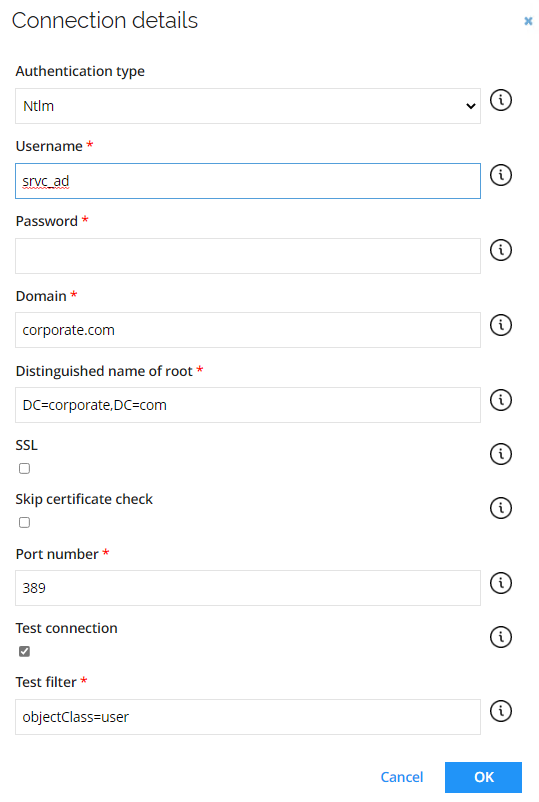
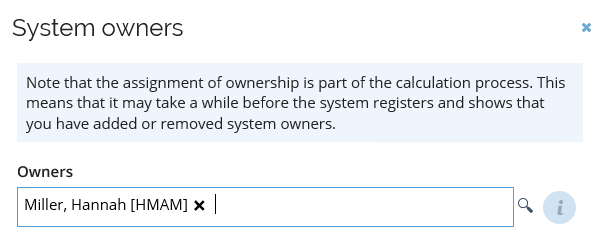
It is also here you assign owner(s) for the system and determine which attributes to import from the specified system.
Resource Management
The System Onboarding wizard will automatically create relevant resource types in Omada Identity based on the target system, for example, Security Group and Distribution Group for AD.
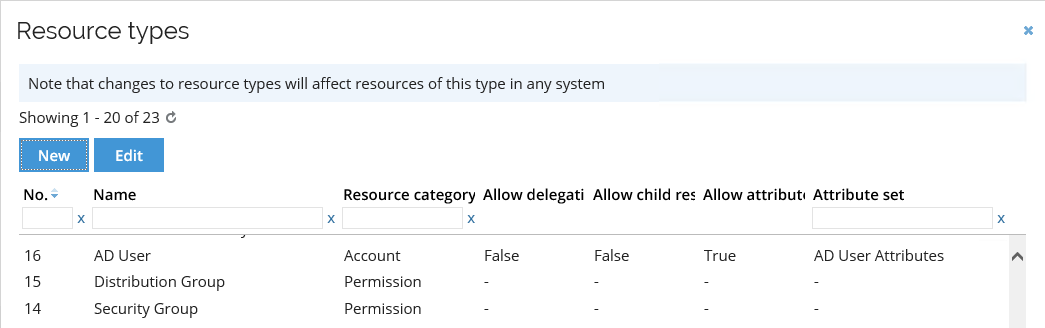
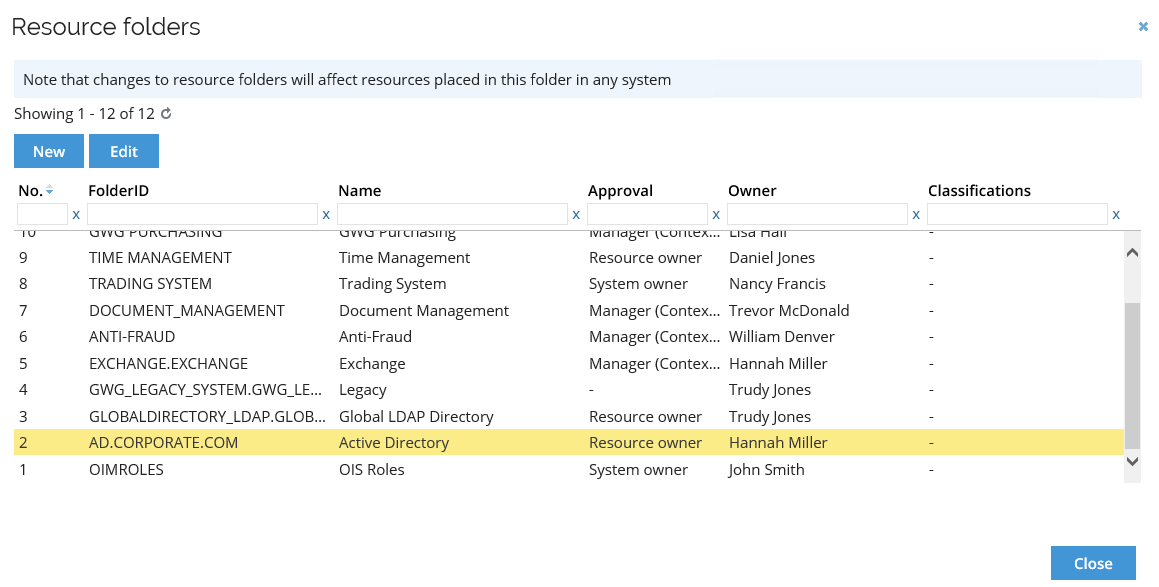
A default Resource Folder will be created for each system, where you can determine the approval level and ownership of resources.
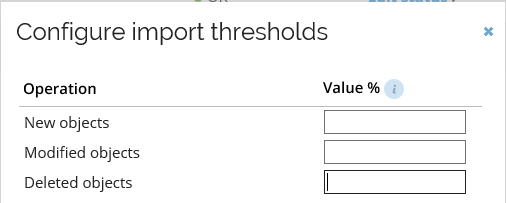
Data import (AD02.06)
In this section you can configure threshold values for the import, which will stop the import in case of large amount of data changes in source system.
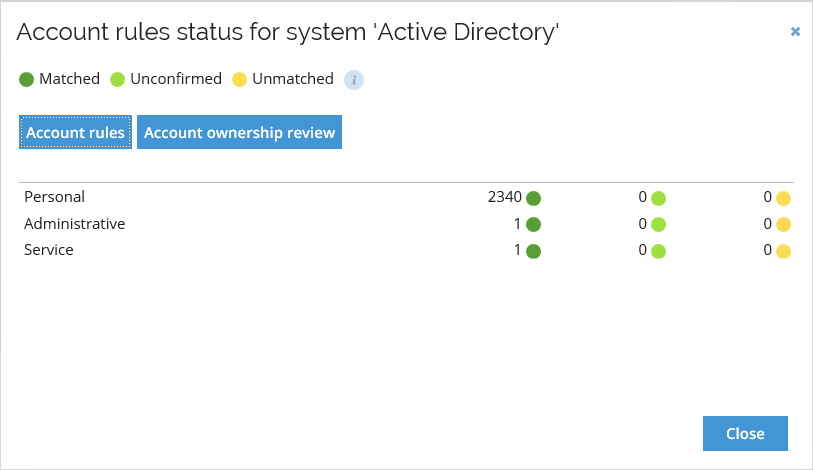
Default Account rules are assisting with matching accounts with identities and determining account types, additional rules can be defined, and custom join rules can be developed and enabled.

Imports can be launched from within this section, afterwards information with number of matched/classified accounts is available and Account Ownership survey can be executed.
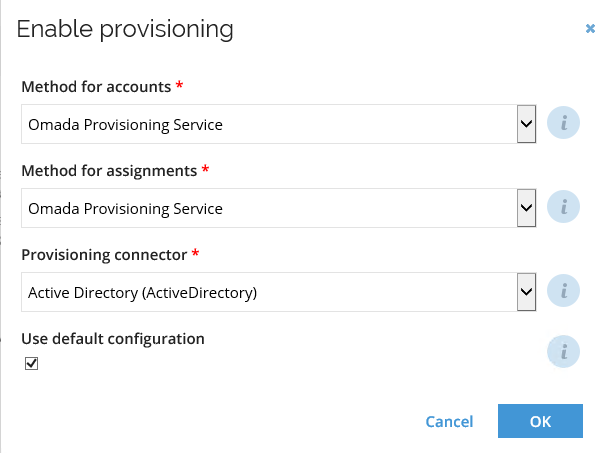
Provisioning (AD02.04)
In this section, you enable provisioning to the target system, which can be done utilizing Omada Provisioning Service, Manual workflow tasks or Microsoft MIM Sync.
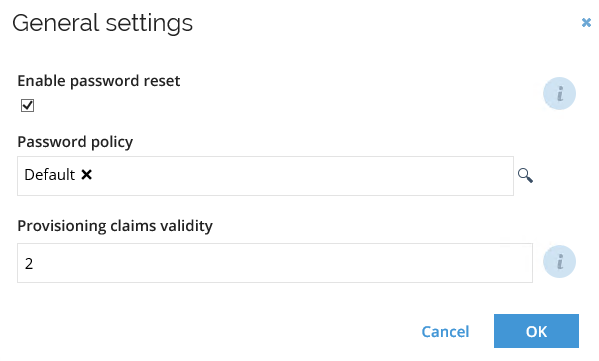
You can enable password reset for the target system
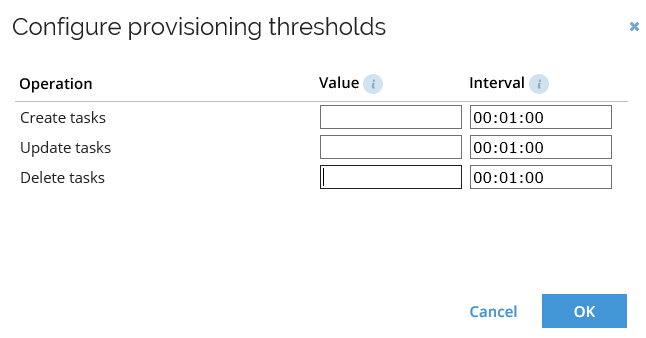
Thresholds can also be configured for provisioning tasks is you utilize OPS.
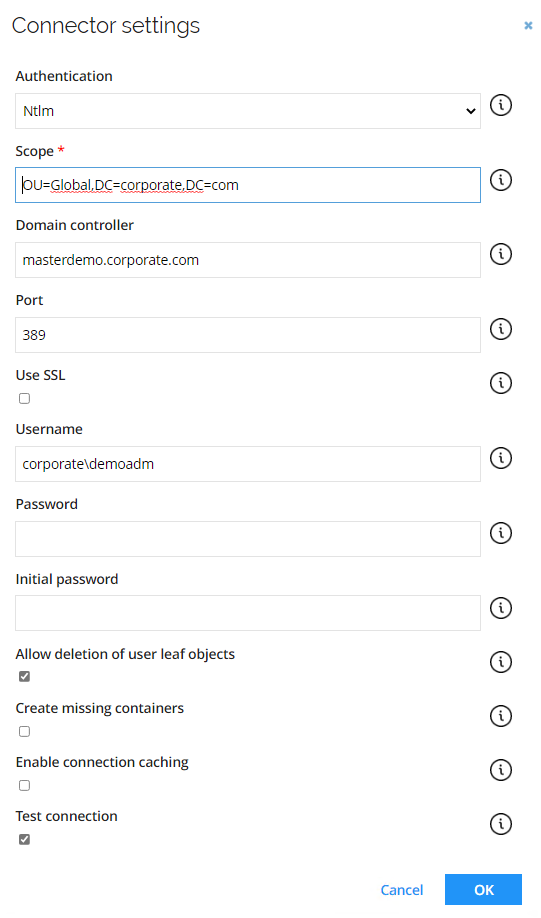
Initial passwords and connections details can be maintained.
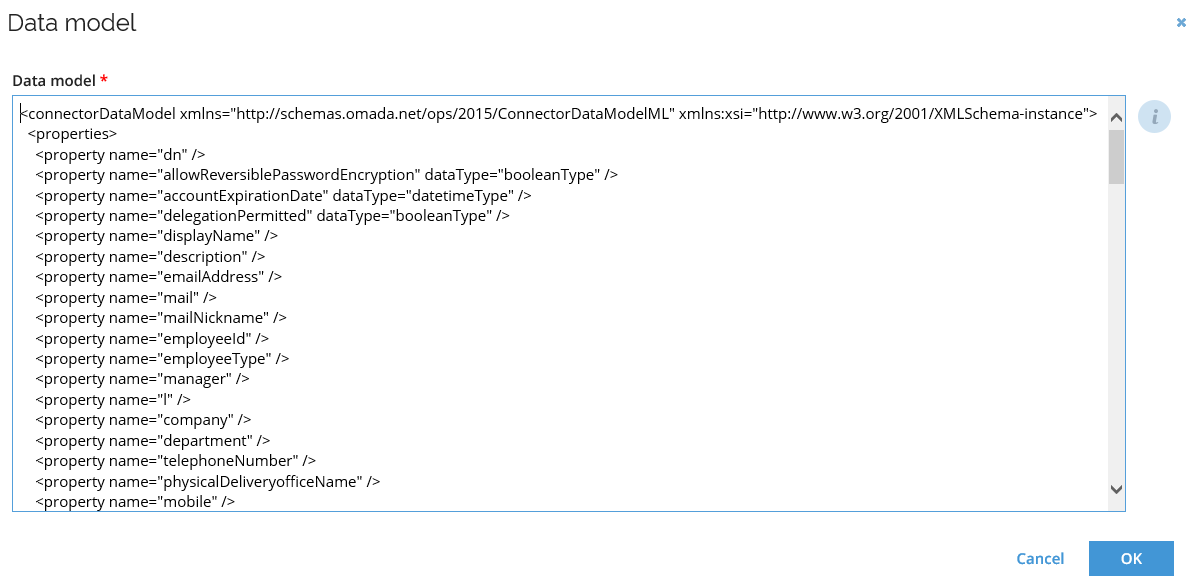
System specific Data model is provided with default properties but can be extended.
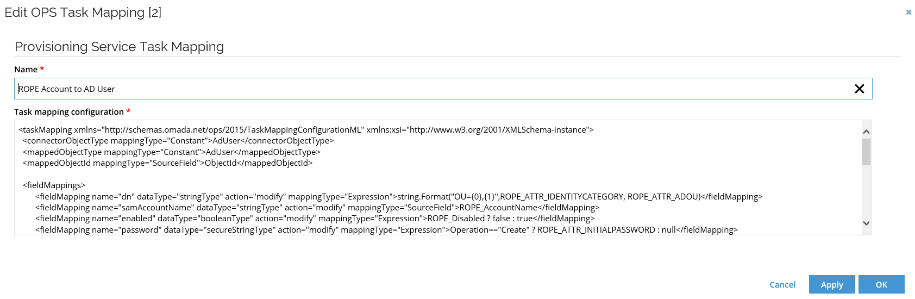
Task mappings are used to map the attributes in the Omada Identity Data Model to the attributes in the target system.
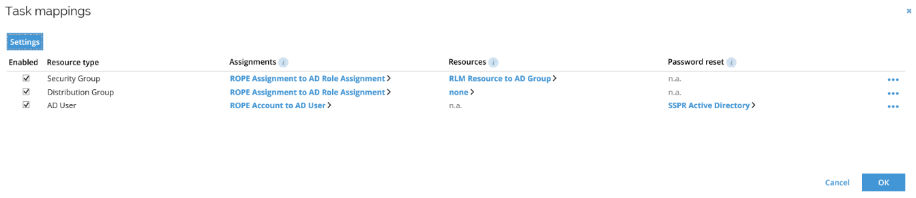
Open Task mapping to see the details.
When all tasks are completed, click Commit settings to save the configuration to the Omada Provisioning Service.
Approve all assignment (AM02.05)
This feature allows for the creation of a verdict for existing assignments, to establish a Desired state without having to run access review surveys, create roles or policies. This is also useful when a customer migrates from an existing Identity Access Governance (IAG) system to Omada Identity.
This means that you can safely switch the resource types to be exclusively managed and given the lack of a Desired state – without running the risk of deprovisioning.
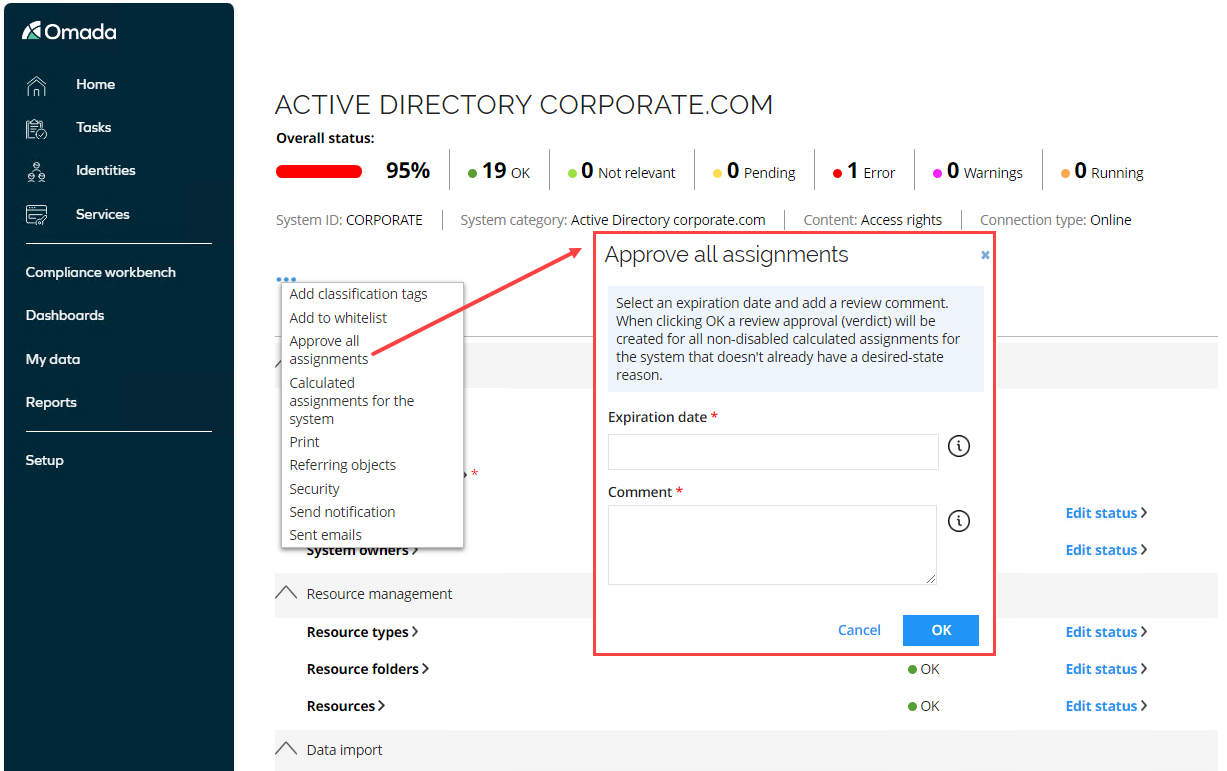
For approving existing assignments, in the System view, in the context menu, you now have the Approve all assignments option.
When you click the** Approve all assignments** option, an Approve all assignments dialog box opens allowing you to specify an expiration date and a comment for verdict.
Application Onboarding (AD01.05)
Before managers and end-users can start to request access to resources via self-service processes in Enterprise Server, it is critical that the resources are well described so that the users are able to find the correct things to request. Typically, this is not the case in the actual systems, and therefore an onboarding process is needed to enhance the data before it is included in the self-service processes.
The Onboard Application process handles this via three overall activities:
- Definition of applications in Enterprise Server (based on actual systems in the system landscape). An application can consist of resources from several actual systems. An example of this is a system that uses AD groups for access control; the application would consist of resources from both AD and the system itself.
- Maintenance of the application roles. In this step the raw data from the systems is imported from ODW and enriched with proper business descriptions and other relevant attributes that enables the end-users to find the data during the access request process.
- Verify data. In this step an onboarding admin verifies the data, and if OK, approves the new application’s data. Once these activities are completed, the data is transferred to the relevant data objects in Enterprise Server and becomes available to the access request process.
Terms used in the application onboarding module:
- Logical system - an application. A logical system can contain more than one physical systems, making it possible to create application resource across systems that can be requested
- Physical system - a uniquely definable IT system such as a (specific) corporate Active Directory.
- Access resource - resource objects. These represents actual permissions in the physical systems, for example, an AD group.
- Application resource (app resource) - an application is a logical business resource (as viewed from the business-oriented user’s perspective). An application resource can contain one or more access resources as children.
- Business owner - a system owner in a business-oriented perspective.
- IT Owner - a system owner in a technical perspective.
IT Owner step
There are three activities in the application onboarding process.
The first is for the IT owner to add the physical resources from the participating systems to the application.
In this demo, we are onboarding the Know Your Customer. The IT owner for this system is demoadm, and the Business owner William Denver.
The process is started by the Administrator:
-
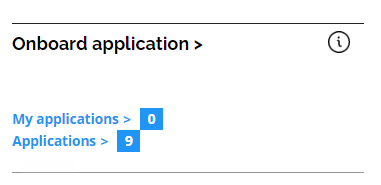
Log in to the Portal as the Administrator. Click Services > Onboard application.
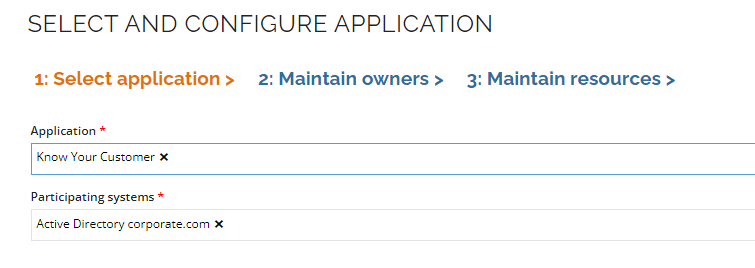
-
Select Know Your Customer as application and notice that Participating systems are automatically populated with Active Directory. This is because the application has been configured as a logical system with one participating system.
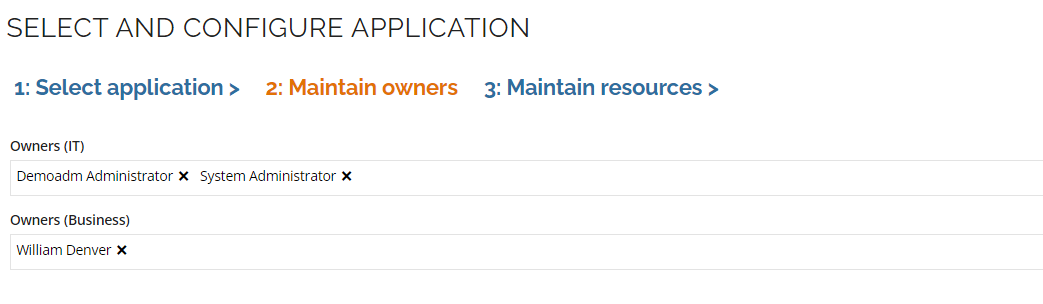
-
Click the Step 2: Maintain owners tab. Confirm that you want to continue the onboarding process by clicking OK in the pop up Confirm dialogue box.
-
Show that there are two owner properties for the application. One is the IT owner, and the other is the business owner. The same user can be selected in both fields if there is no distinction in the organization.
-
Check that William Denver is set as Business owner and select the Step 3: Maintain Resources tab.
-
The grid currently does not contain any resources. We must therefore add some. Click the Add button.
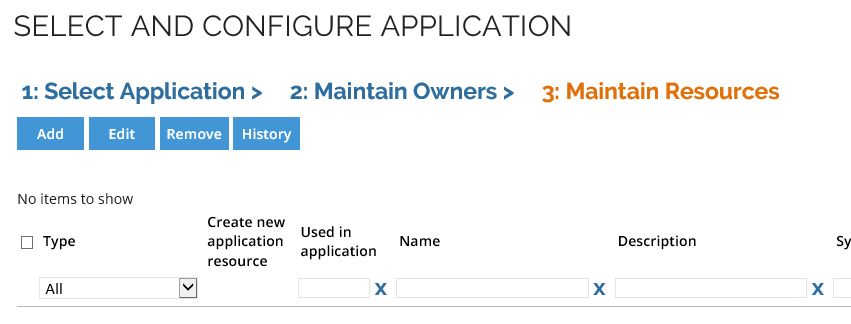
-
Click OK to the default of adding access resources.
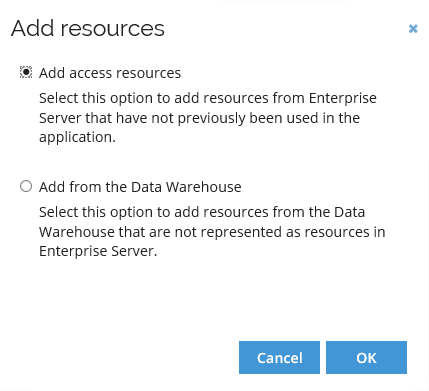 Optional
It is possible to add resources from the Data Warehouse if the resources you want to add to your application do not exist in the Enterprise Server yet.
-
In the search window, type KYC in the filter field under the Name column and click Enter. Select all four results.
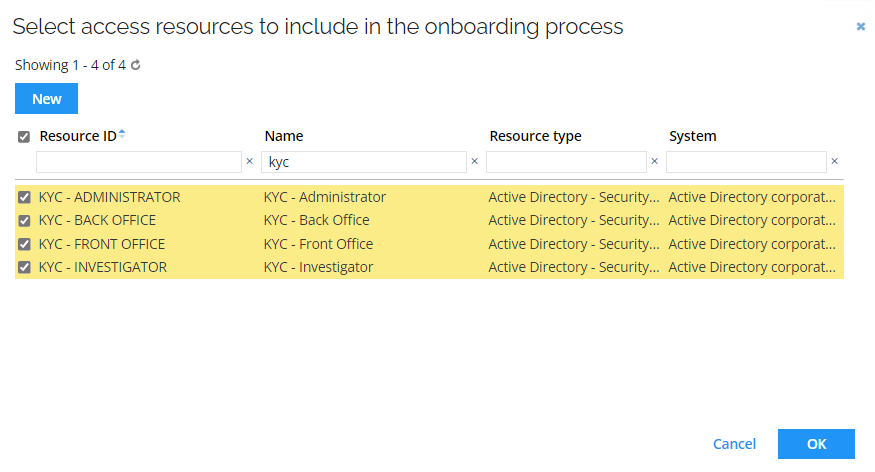
-
Click OK.
-
Double-click one of the resources to show the edit form. Some of the properties can be edited here, and any change will be written to the access resource data object when the process is completed.
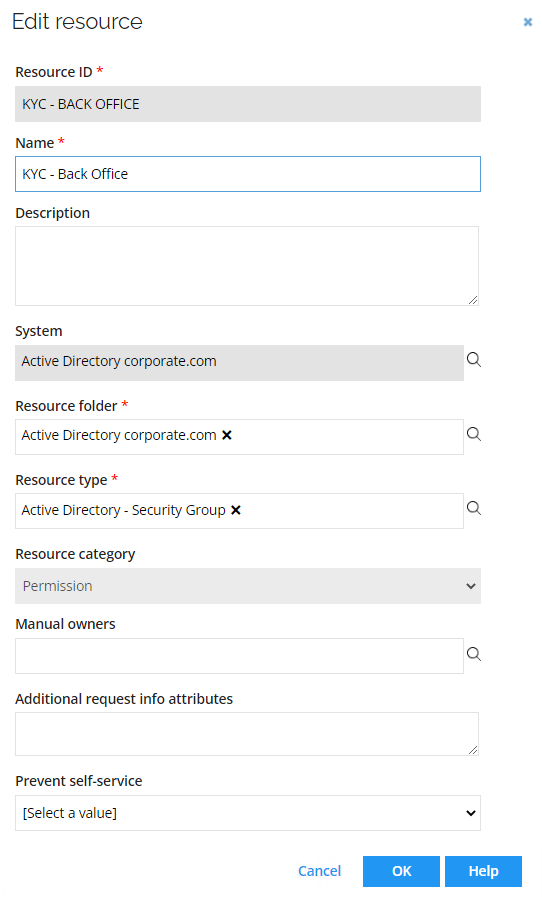
-
Notice that the resource category is Permission. Click OK to close the Edit form.
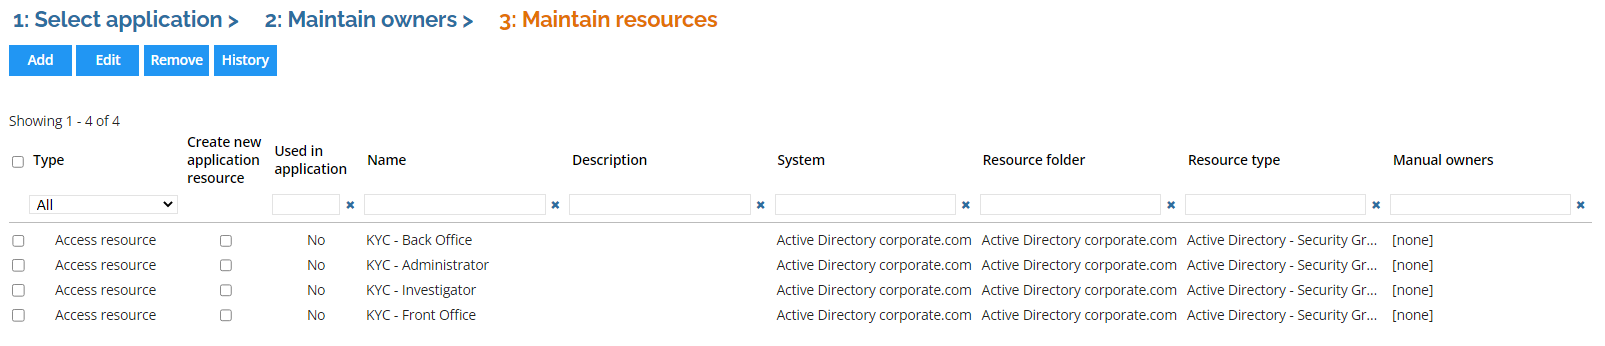
-
Select the Create new application resource checkbox for all four resources. This will create an Application Resource for each of the selected access resources.
-
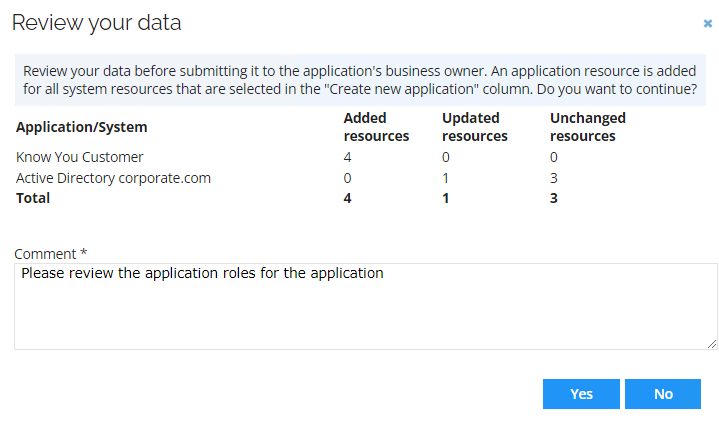
Click Submit to Business owner.
-
Enter a comment in the confirmation dialog.
-
Click Yes.
Business Owner step
In this step of the demo (and process), we review and edit the application resources added in the previous step, to help the end users find and request the access in the finance system.
-
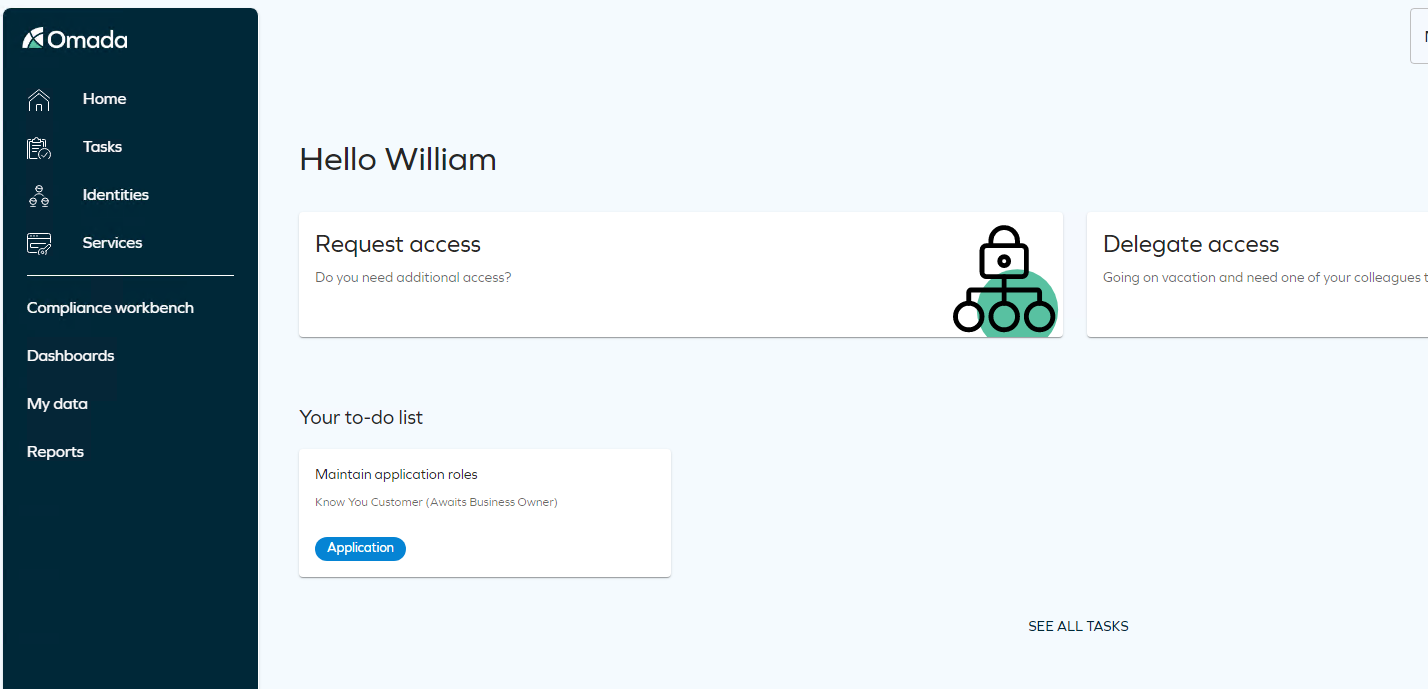
Log in to the Portal as Beverley Rich. You should see the Maintain application roles task.
-
Click the link to open the task.
-
The task looks like the IT owner’s task and contains three tabs. The business owner is taken directly to the third step where they can edit the application resources, but you can click the previous tabs if you want to show the difference between what the different type of owners can edit.
- The business owner cannot change the participating system in the application (as would be possible for the IT owner), but they can maintain the owners in Step 2: maintain owners, with the restriction that they cannot remove themselves. Note that there must always be at least one IT owner and one Business owner.
-
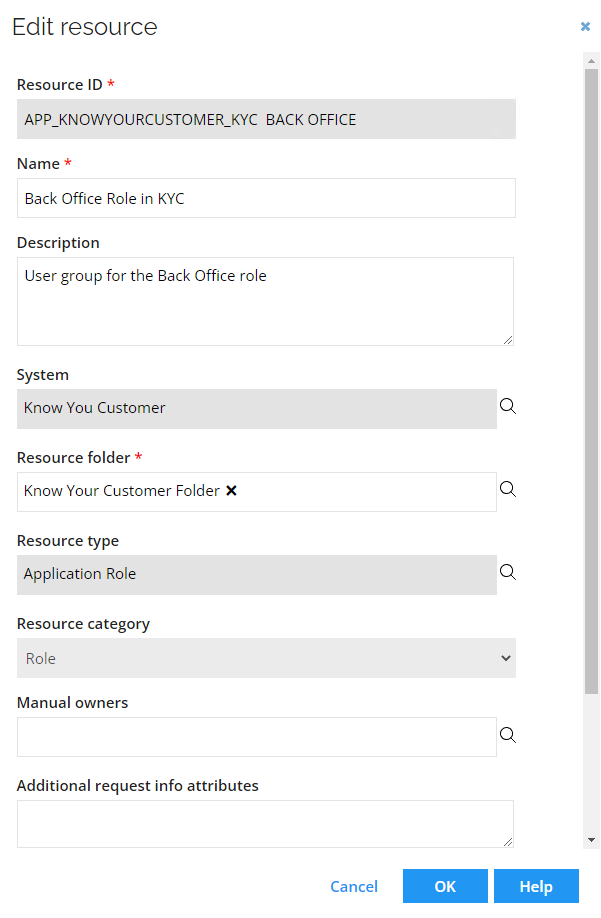
In the Step 3: Maintain Resources tab, double-click the KYC – Back Office resource.
-
You can change, for example, name and description to make it more user friendly.
-
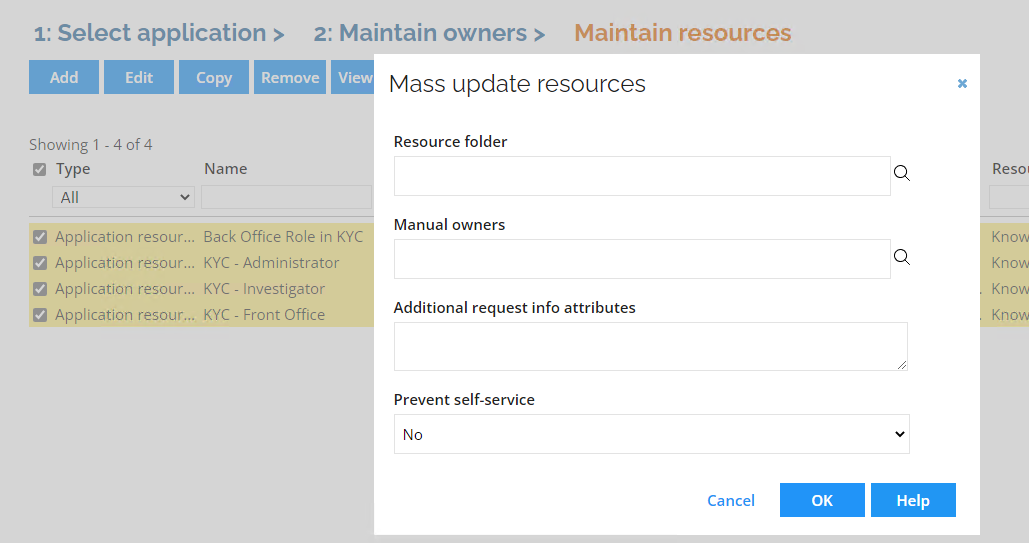
Set the Prevent self-service flag to No for all four resources. If you select all resources and click Edit, you can update both in the mass edit form.
-
Notice that the Resource type is Application Role, and the Resource category is Role.
- Application resources are created as Roles that have the access resource as a child resource. In our example each application resource contains only one resource, but an application resource can have more than one child resource. Application resources contain (child) access resources from any of the participating systems. This allows the end user to request one resource but be assigned access across multiple physical systems.
-
Click Submit for approval. Add a comment and click Yes in the confirmation screen.
Onboarding Admin step
The onboarding requires review and approval by the onboarding admin. In the demo system, this is the same as the IT Owner – demoadm Administrator.
-
Log in to the Portal as System Administrator. Click the Verify data task to open the task.
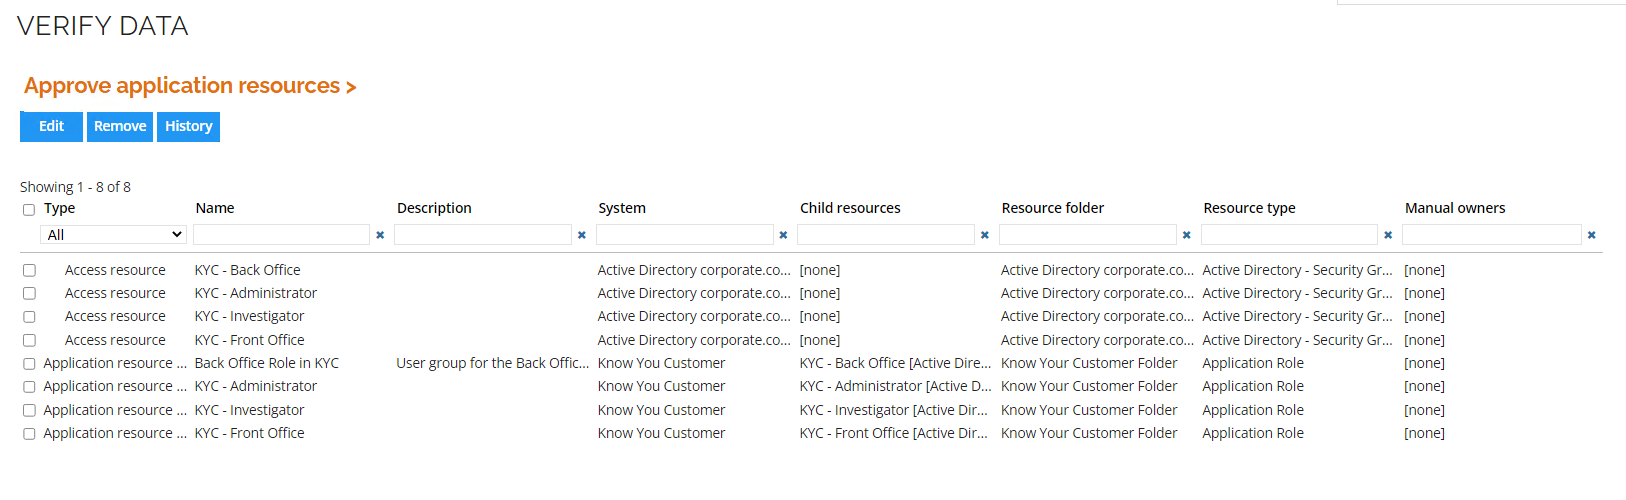
- It is possible for the admin to make changes to the resources, but not add new resources.
-
Click Approve. Add a comment and click Yes. The application onboarding process is now completed.
-
Log in to the Portal as William Denver. Go to My Data > Manage > My Resources.

- Notice the resources we added in the onboarding process. Open the form for one of them and look at the details if you want.
-
Run an import of Active Directory by logging into the portal as System Administrator and going to Setup > Connectivity > Import Profiles.
-
Select the Active Directory system. Click Start import and click OK. This to import the new application and roles to the Data Warehouse.
Manual Provisioning (AD004.01)
The Manual Provisioning package in the standard solution handles the provisioning needs for systems that do not have automatic provisioning configured.
In the Omada Identity demo environment the GWG Legacy System is set up with manual provisioning. Any resource assignments requested for a resource in that system therefore need provisioning confirmation before they become active.
Provisioning can be automatic, and usually is for systems with many requests. In cases where manual provisioning is required or desired the provisioner confirms the provisioning in Omada Identity when the task is completed.
In this section of the demo, Emma Taylor requests access to the Legacy System, and the system owner provisions the access.
-
Log in to the Omada Identity Portal as Emma Taylor.
-
Click Request Access.
-
Fill in the request as follows:
- Who would you like to submit a request for? Emma Taylor
- What is the reason for your request? I need additional access to perform my work duties
- In which context do you need the access? Global Banking Group
- What characterizes your request? Select specific resources
- Choose a system to request from Legacy
-
In the resource list, select both Legacy Personal account and Read. Click Add and Submit.
-
Go to My access requests. You can see the request for the chosen access right. It is pending manual provisioning by Jason King. Note that is it only says, No approval required, wait until the identity calculation is done and refresh the page.

-
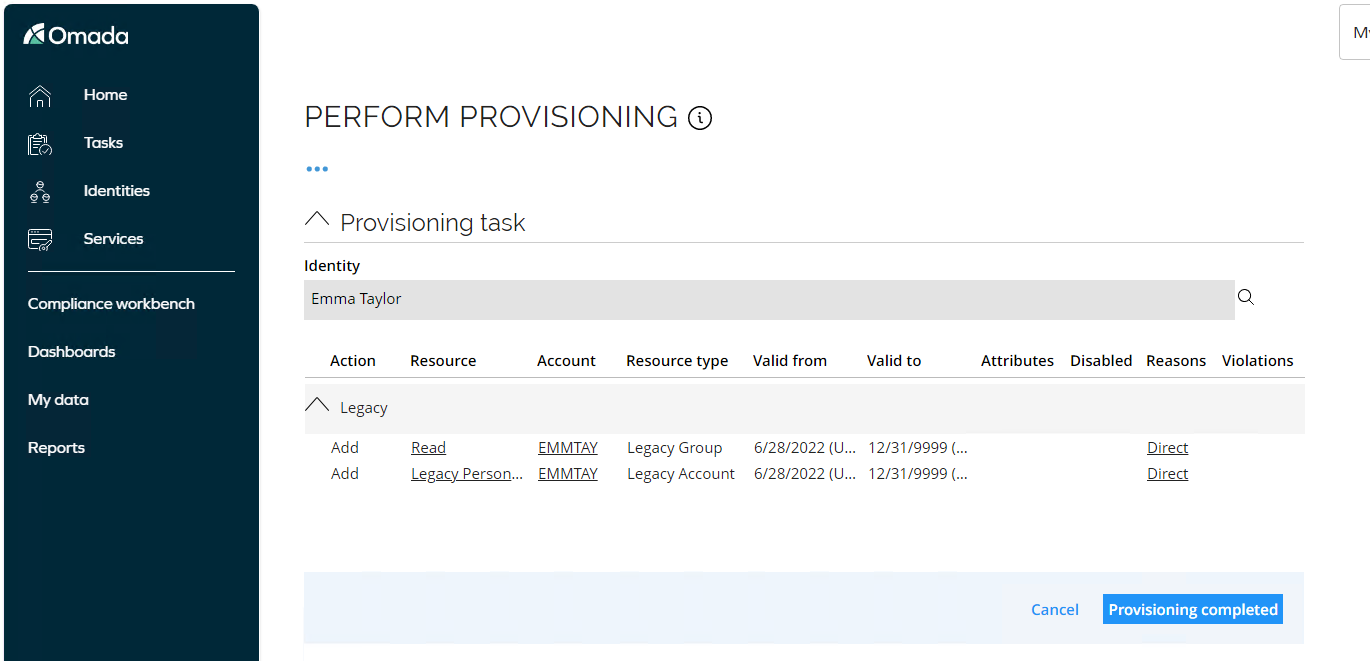
Log in to the Portal as Jason King - the user has a provisioning task in the Tasks items widget. Click the link to open the task.
-
Jason can see the details of the resource assignment that needs to be provisioned.
-
Open a new tab in Edge browser, still logged in as Jason King, and browse to http://legacy/.
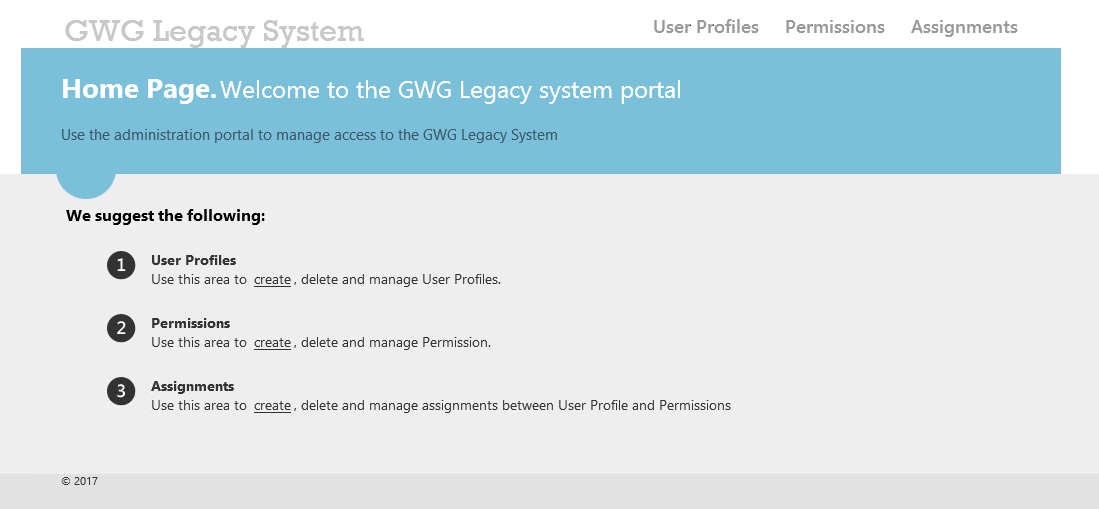
-
Click User Profiles > Create. Type Emma Taylor as Username and EMMTAY as User ID. Click Create.
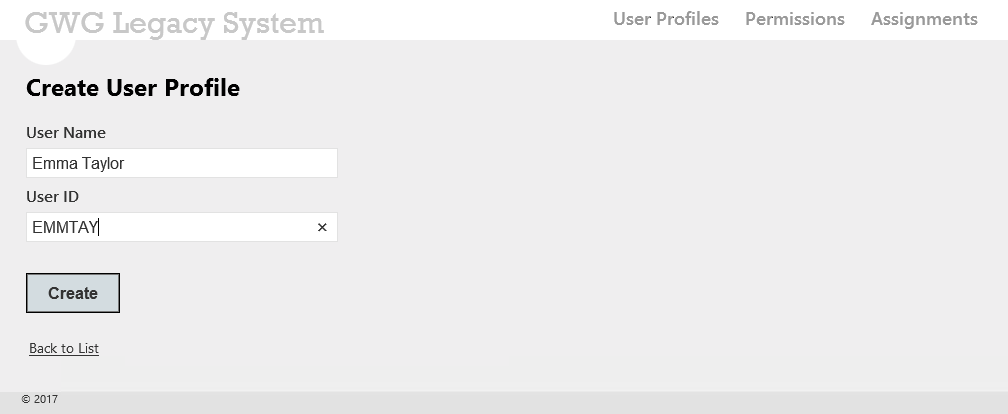
-
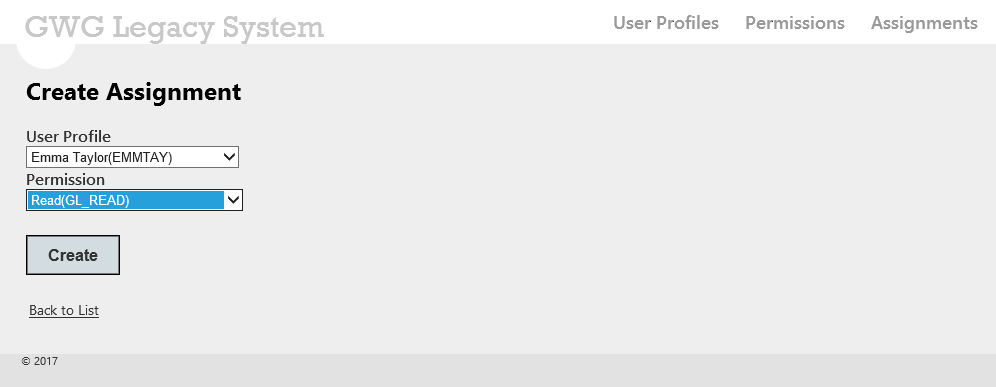
The list of User Profiles is presented, Click Assignments in the top bar and click Create New.
-
Select EMMTAY in the User Profile drop-down and Read in the Permission drop-down. Click Create.
-
Return to the Portal and click Provisioning completed in the activity form.
-
Log in to the Portal as System Administrator and go to Setup > Administration > Connectivity -> Import Profiles.
-
Select the import profile System Legacy and click Start Import and OK. The Import Progress will appear. While waiting for import to finish, continue with next step.
-
Log in to the Portal as Emma Taylor. Go to My access request and verify the provisioning status is updated.

-
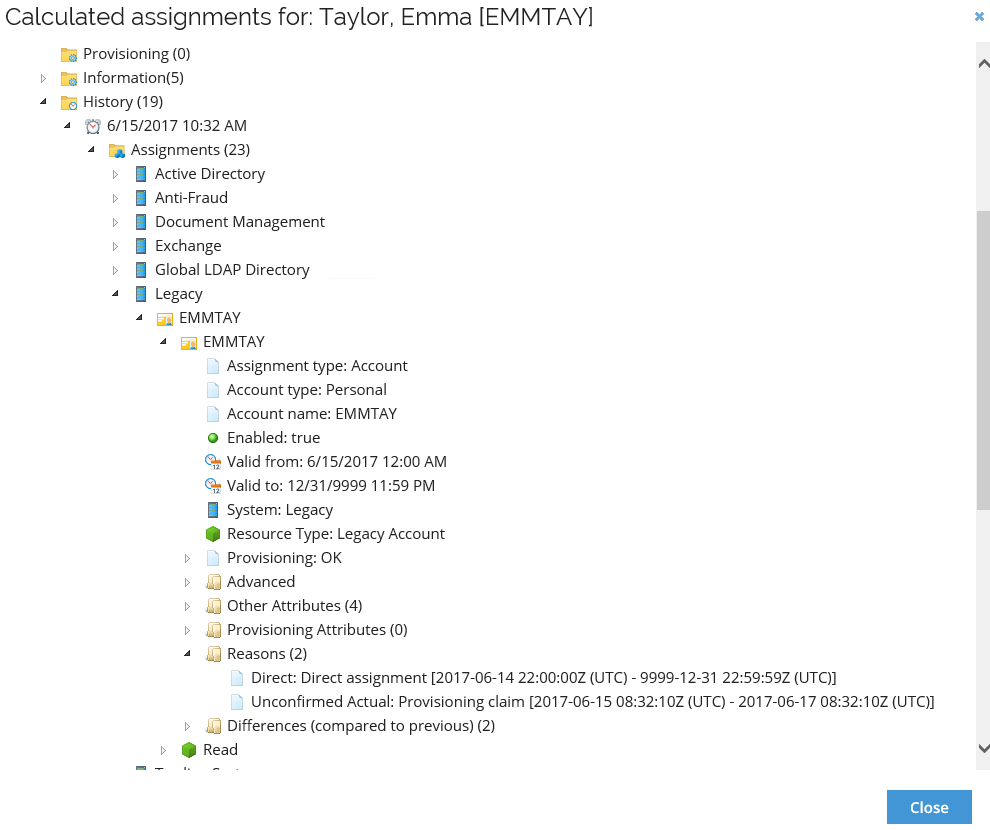
Go back to the System Administrator. Go to Setup > Master Data > Identities and search for and open Emma Taylor. You can choose to open the assignments explorer. Here, you can find the previous calculation and open the Legacy account assignment. Under Reasons, you can find two reasons. The two reasons are Direct and Unconfirmed Actual. The latter is caused by the provisioning confirmation provided by Jason King.
-
Open the latest calculation which was triggered by the reconciliation import from the Legacy system.
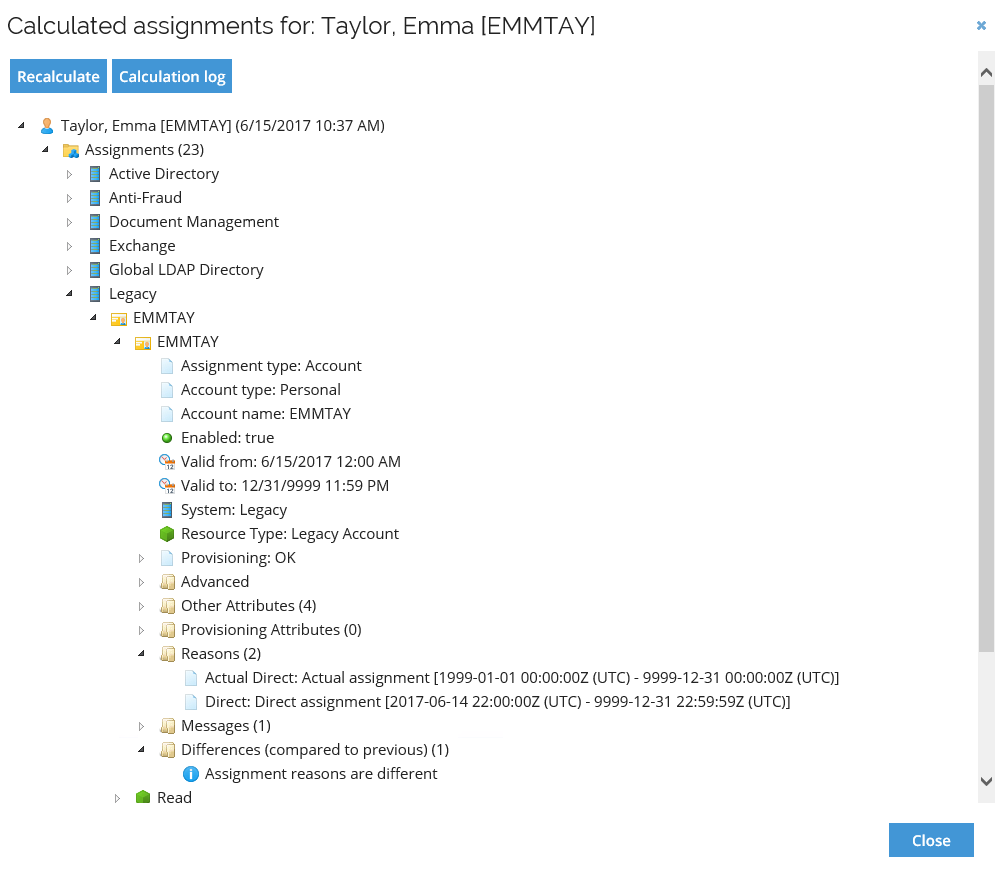
-
After the import, the provisioning claim status/reason is replaced with an actual direct reason – due to the confirming import from the legacy system that provisioning has taken place.
-
Log in to the Portal as Emma Taylor. Go to My access request and verify the provisioning status is updated.

Scheduling of Import Profiles (AD02.06)
It is possible to schedule import profiles via event definitions as an alternative to SQL Agent jobs.
There are three default event definitions:
- Default event definition for the import
- Import master data
- Clean-up import profiles
These event definitions are disabled by default. You can also create a timer and event definition to schedule any other import profile:
-
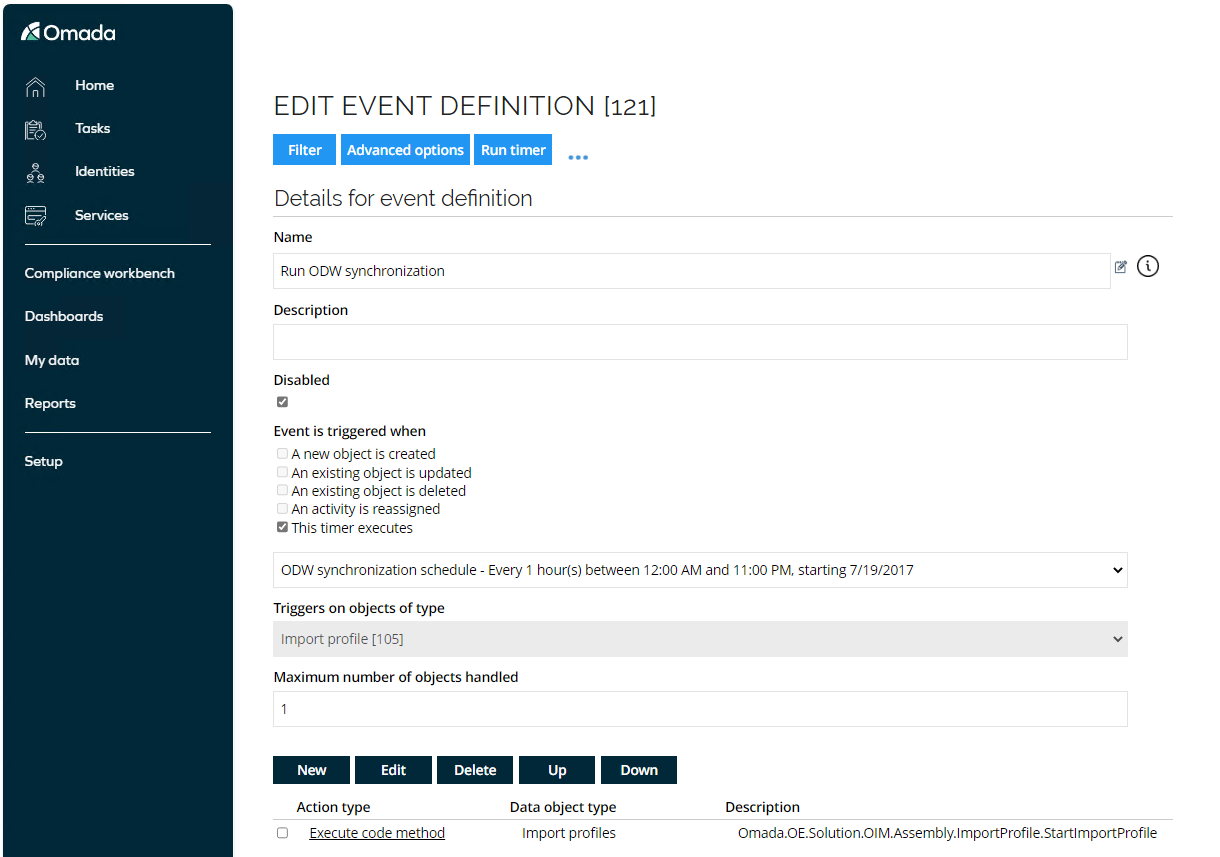
Log in to the portal as System Administrator, go to Setup > Administration > Data Management > Event Definitions.
-
Open Event Definition and Run ODW synchronization.
-
Enable the Event Definition by clicking Apply and Run timer to manually trigger the timer.
-
Go to Setup > Administration > Connectivity > Import Profiles to verify the import profile is running.