Audit (AUD)
Control policies (AUD04)
Omada provides a powerful Audit policy framework that can be used to prevent, detect, and remediate exceptions in master data and entitlement data. The feature is called Control policies and allows you to create, manage, and execute audit cases from Omada Identity.
All resources must have an owner policy
Data setup
Before proceeding, ensure the following:
- Remove the Resource folder owner for one of the applications. In this example, the Anti-Fraud application is used.
- Ensure that all Omada Identity Roles have an assigned owner.
- Optionally, run a Master Data import with Analysis Services enabled to process the data.
Configuration
To configure the All resources must have an owner policy, follow these steps:
-
Log in as the system administrator.
-
Go to Setup > System operation > Control policies > Control policies.
-
Open the All resources must have an owner policy.
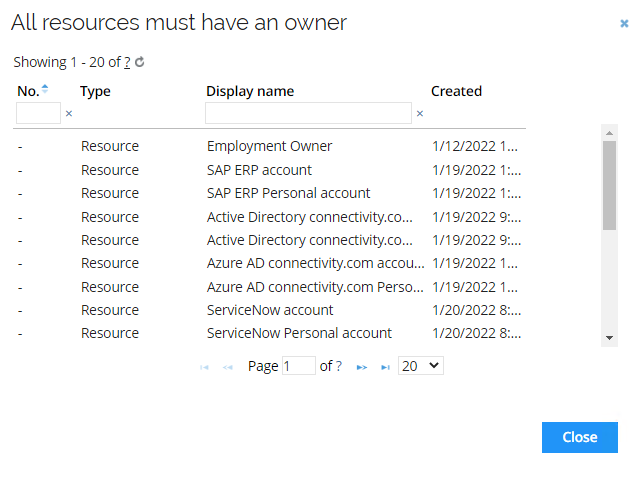
- The policy is based on a view that includes any resource lacking an owner, either directly or through its resource folder. In the Resolver reference path, the assignee expression is configured to send the remediation survey task to the system owner.
-
Click the Show data set. Note that there are many resources shown.
-
Go to the Timers section and run the Control policy schedule timer.
noteThis timer normally runs on a schedule.
-
Go back to the Control policy. The run should result in new exceptions. If you get a warning that the max number of violations exist, there is already a survey running.
-
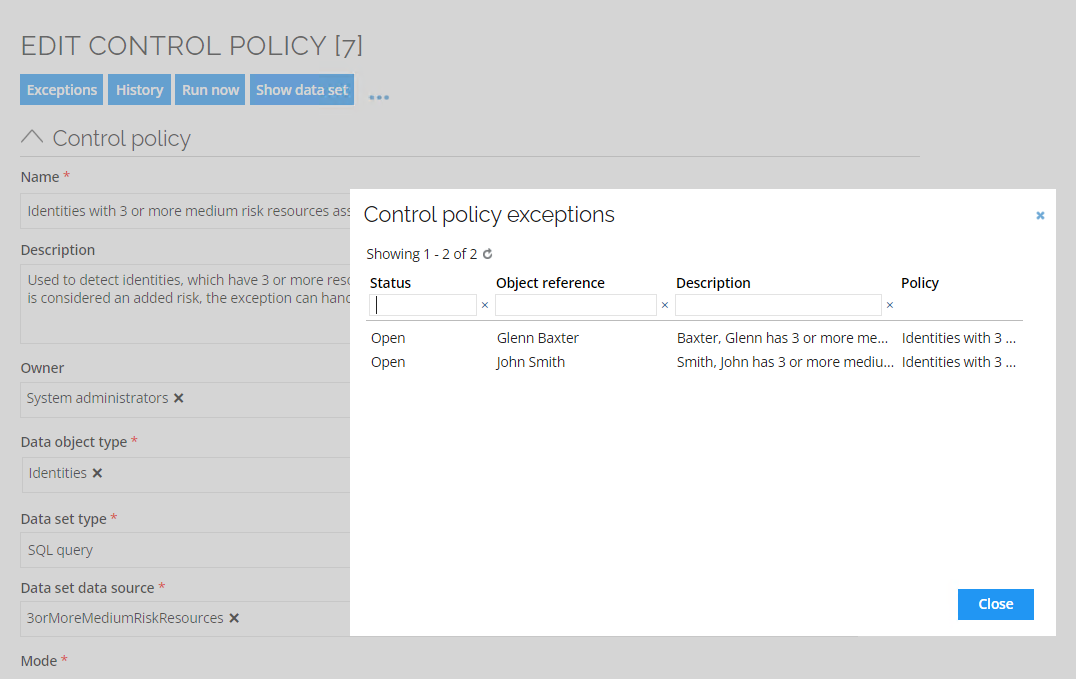
Click the Exceptions button to see the exceptions.
-
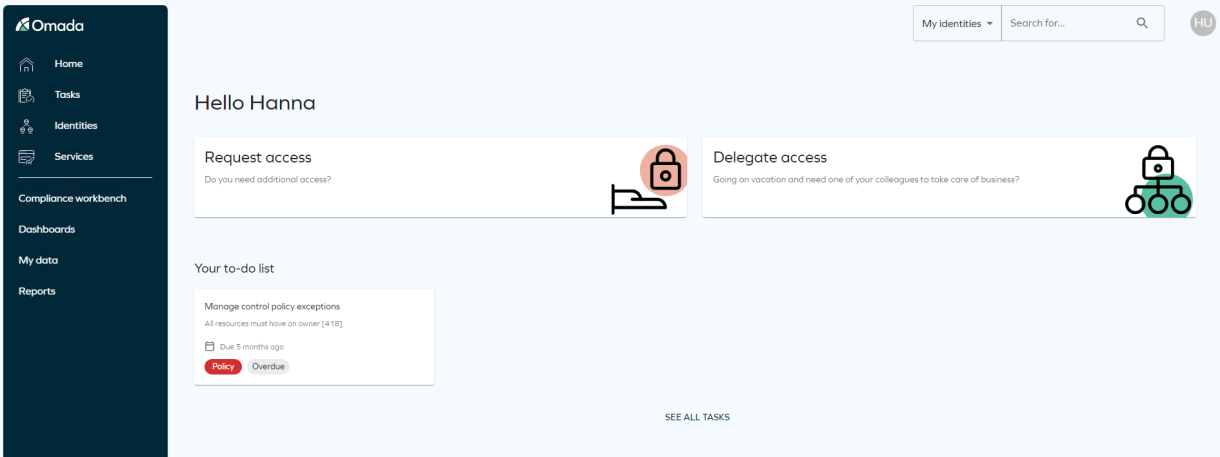
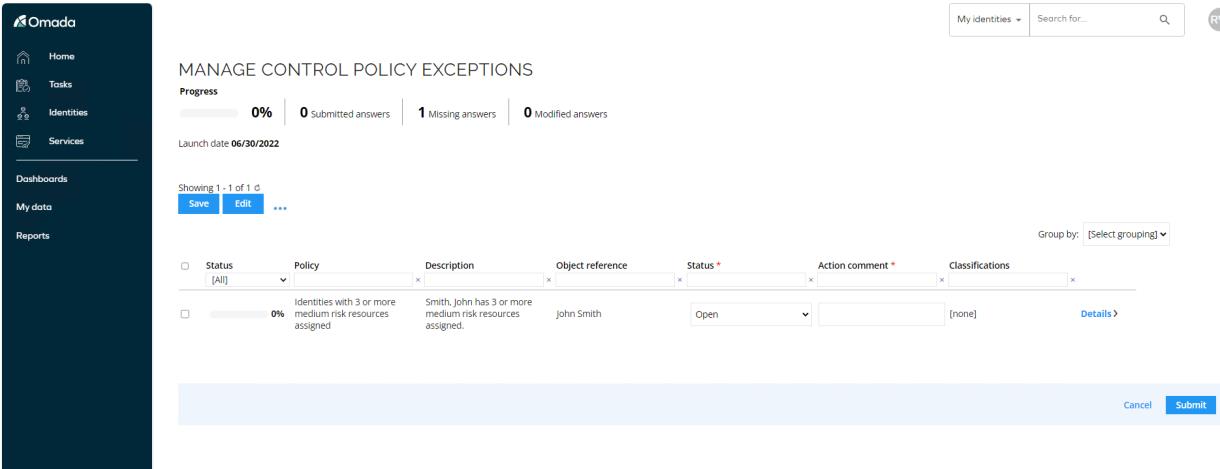
Log in as Hanna Ulrich who is the system owner for the system and click the Manage control policy exceptions task.
-
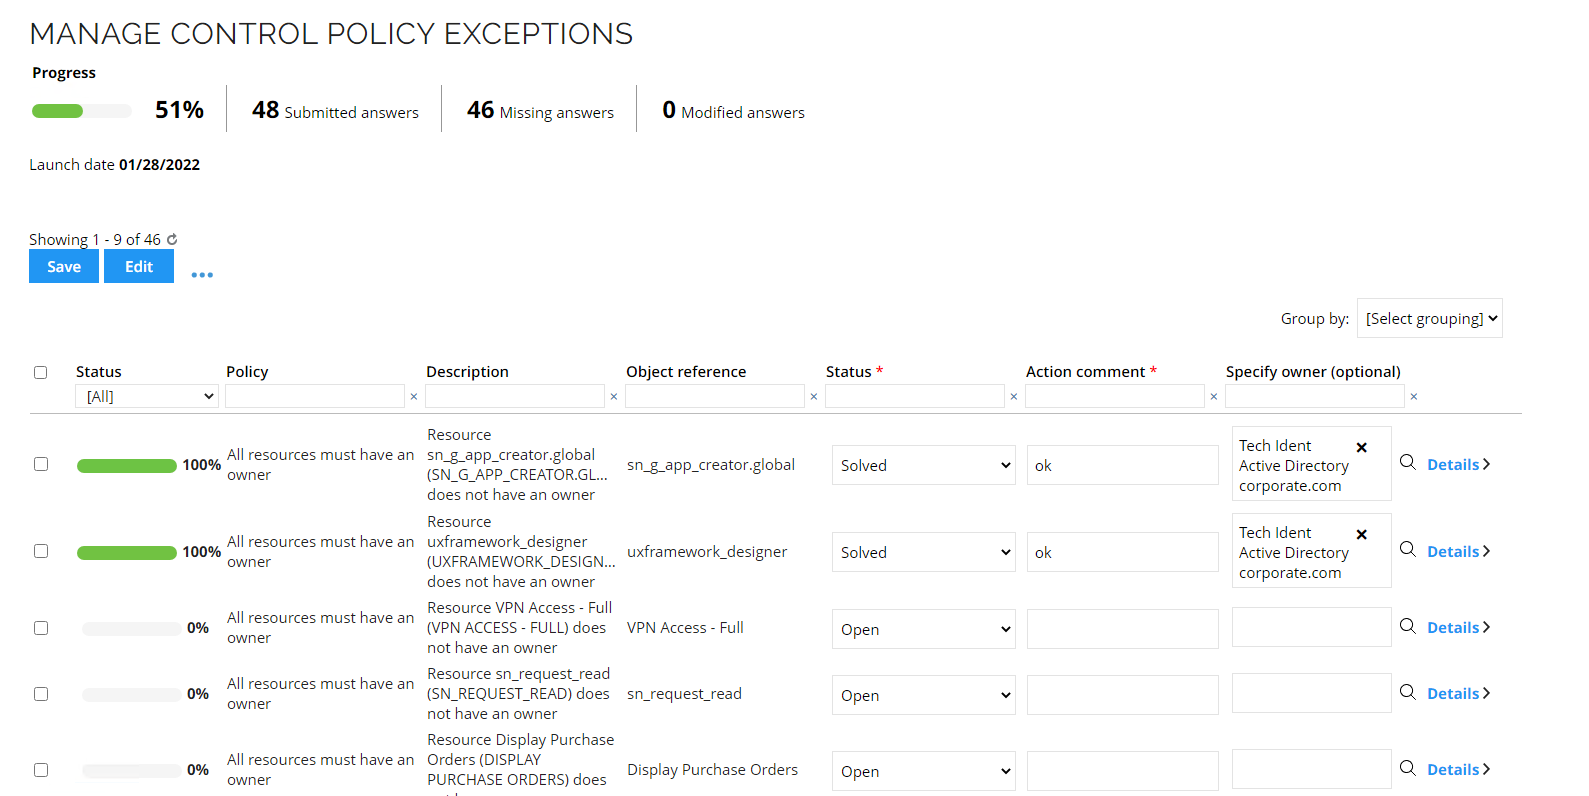
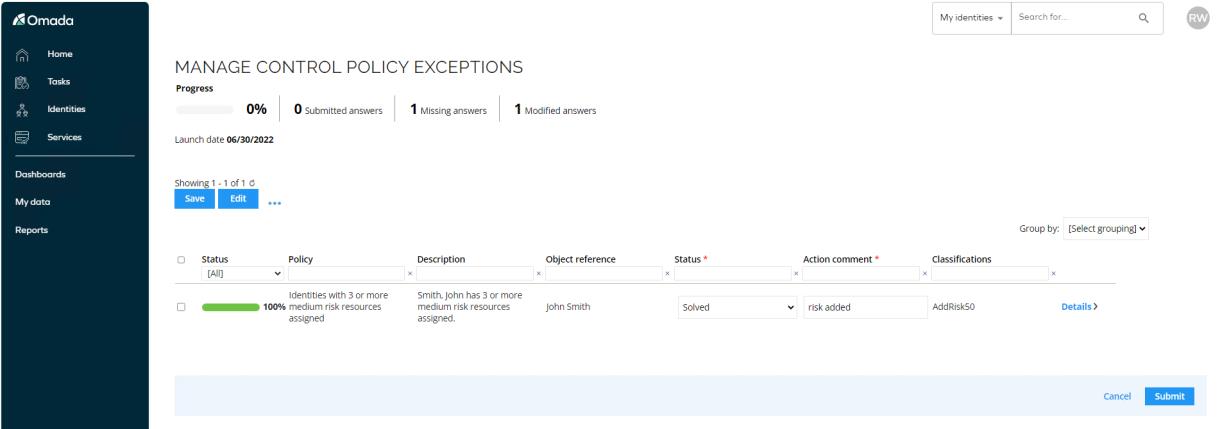
The task opens. To solve an exception, specify an owner, set the Status to Solved, and add an Action comment.
infoYou can edit the exceptions using the Mass edit.
-
Save your changes.
-
Log in as a System administrator and inspect the results of the survey.
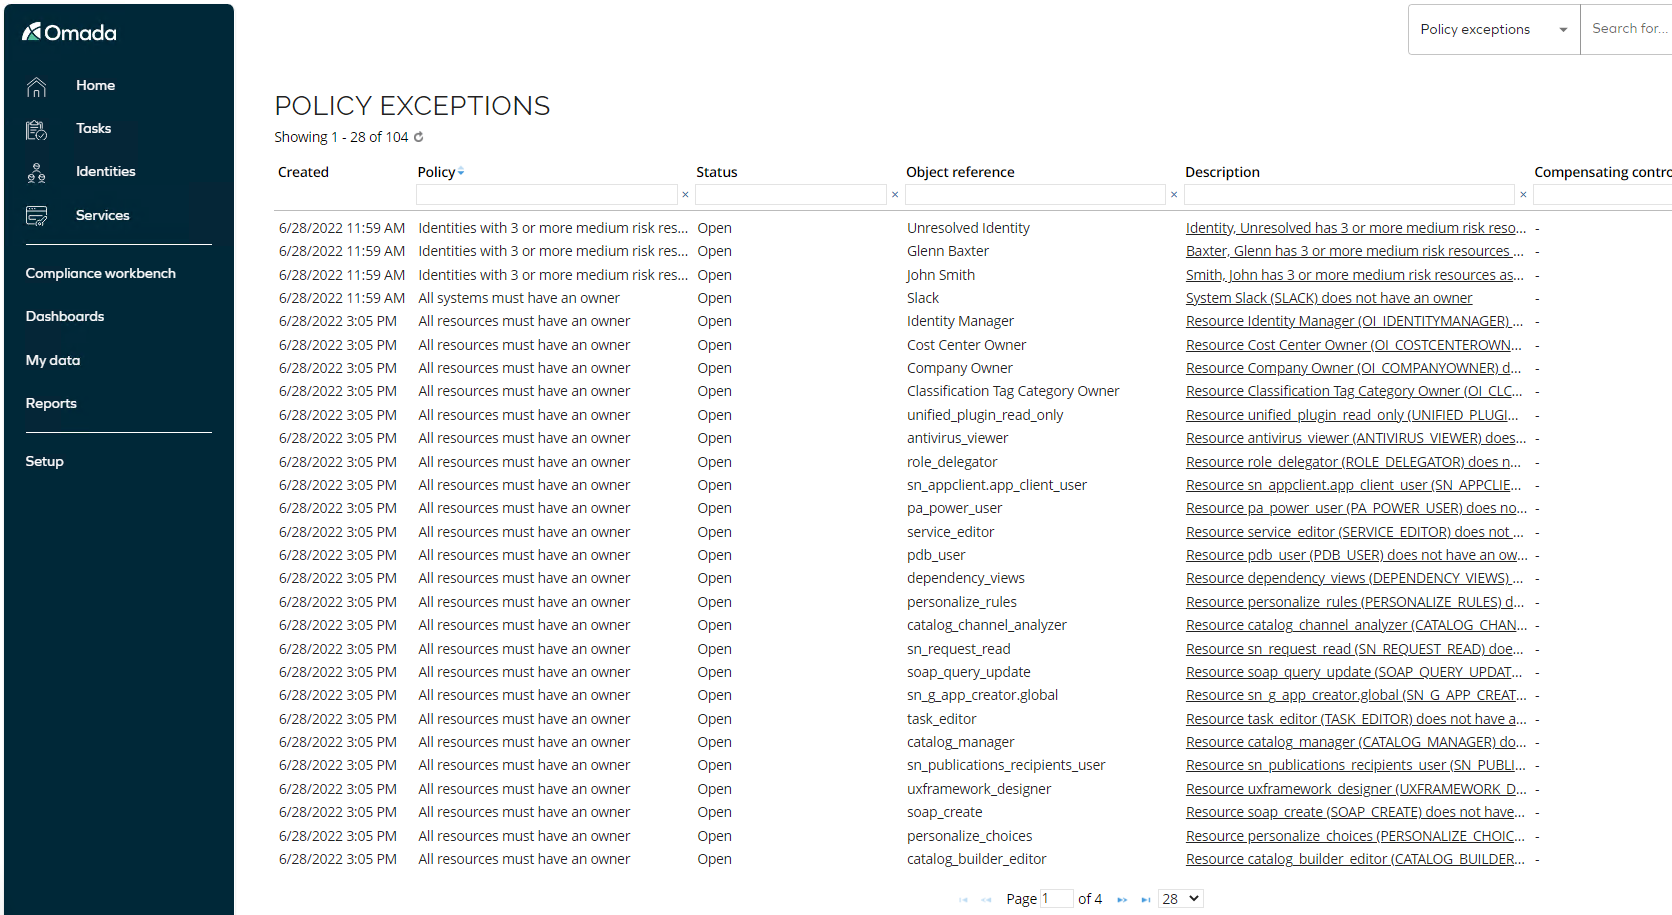
You can also inspect the results in the Policy Dashboard in Setup > System Operations > Control policies > Policy Dashboard.

Identities with 3 or more medium risk resources assigned
By default, Omada delivers the first six control policies as part of the standard solution. However, to demonstrate the flexibility of these policies, a seventh policy has been created to address a more specific requirement using risk levels.
The Identities with 3 or more medium risk resources assigned control policy is used to detect identities that have three or more resources assigned with a medium risk level. If the number of medium risk resources is considered an added risk, an exception can be handled to update the identity's risk profile with an additional risk score.
An identity might have a risk score of 150 and a medium risk level based on the resources assigned. However, if an identity has three or more medium risk resources, the total risk could be greater than what the individual risk score of 150 for each resource represents.
To address this, the manager will receive an exception based on this control policy and can review the identity’s resource assignments. It is recommended to do this in a separate window to see all the details of the different resource assignments.
If the manager determines that the identity’s combination of resource assignments imposes a greater risk than the highest risk score of the individual resources—typically if the resources are all related to the same system, thus providing a higher overall access level to the system than the individual resources do—the manager can assign a risk classification tag directly to the identity. This tag elevates the risk score of the identity based on the combination of access rights.
In such a case, the scenario could result in the identity having a high risk level even though it only has medium risk resources assigned.
Data Object Type Versioning (AUD03)
Omada provides full audit trail on changes to master data. To enable object versioning, follow these steps:
-
Log in to the portal as System Administrator.
-
Go to Setup > Administration > Data Management > Data Object Types.
-
Search and open the Identities Data Object Type.
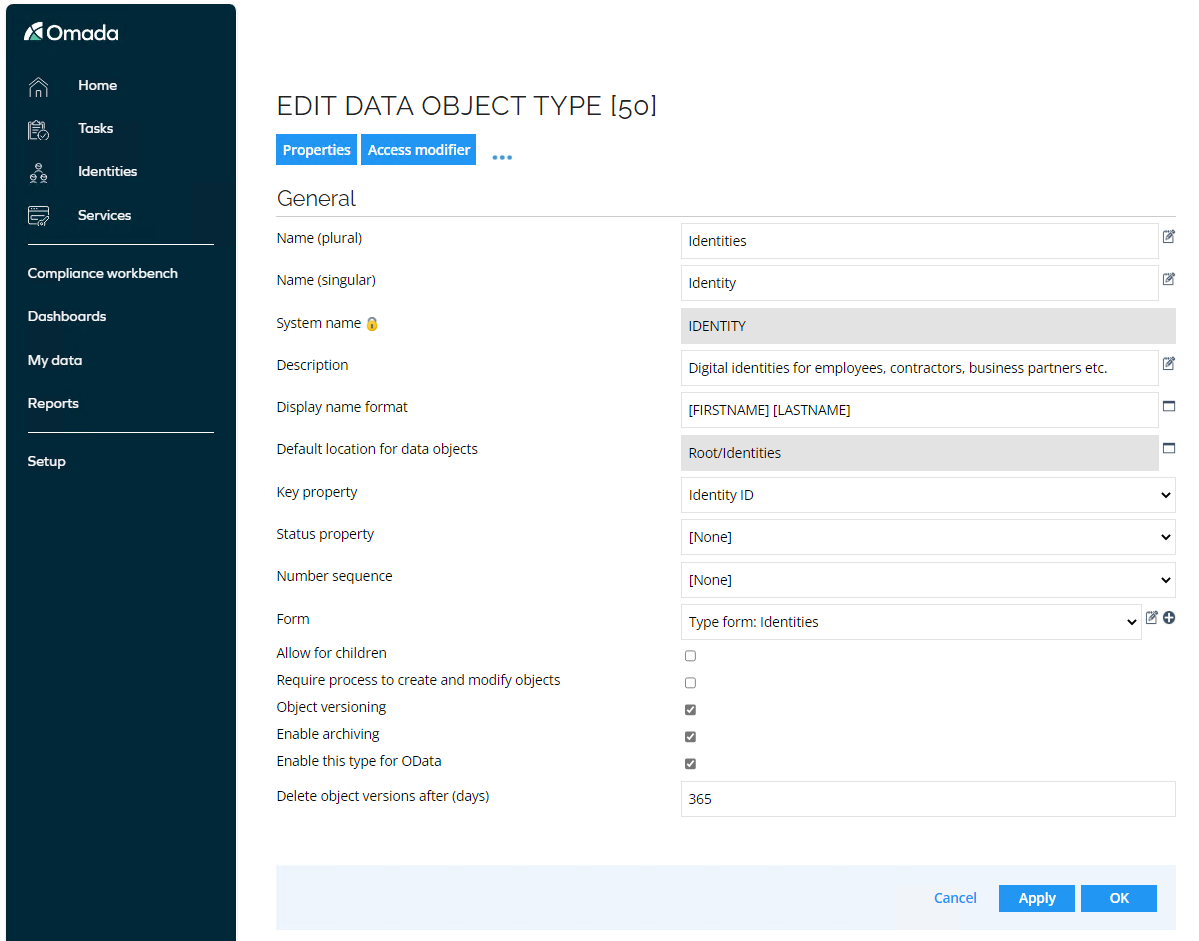
-
Object versioning is enabled, so all changes are recorded for this object type. Archiving is also enabled, meaning that all historical changes are stored in the archiving database and Data Warehouse, making them available for reporting and auditing purposes.
noteObject versions can be deleted in the ES database, but history will be kept in the archiving database.
History (AUD02)
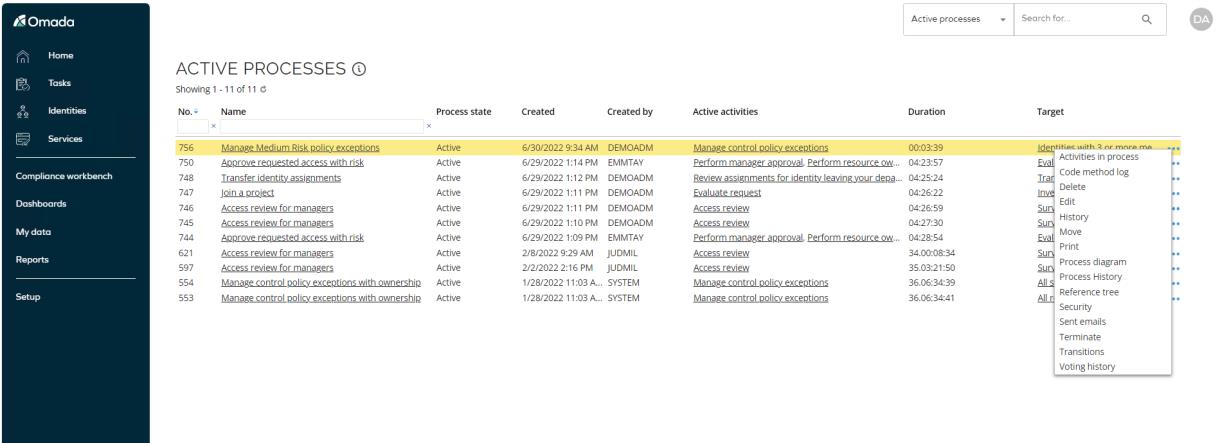
Views Context menu
This section describes all possible options available in the context menu for objects in a view. The options vary depending on the type of object listed in the view. The context menu can be accessed by clicking the Object icon within the view.
-
Sent emails - shows any emails sent related to the object.

-
Reference Tree - shows a tree structure of all related objects. Click the plus icon to expand.
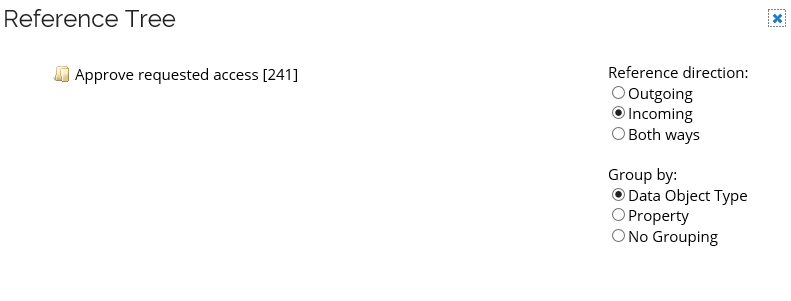
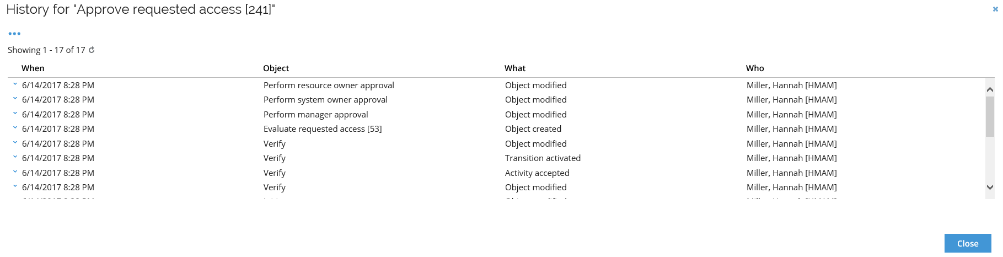
-
History - Shows the history of an object. Click the plus icon to see the changed fields.
-
Data object versioning must be enabled to save history for an object.
-
-
Process History - shows the history of a process. The activities in the process are shown with their state. Click the plus icon to see further details.
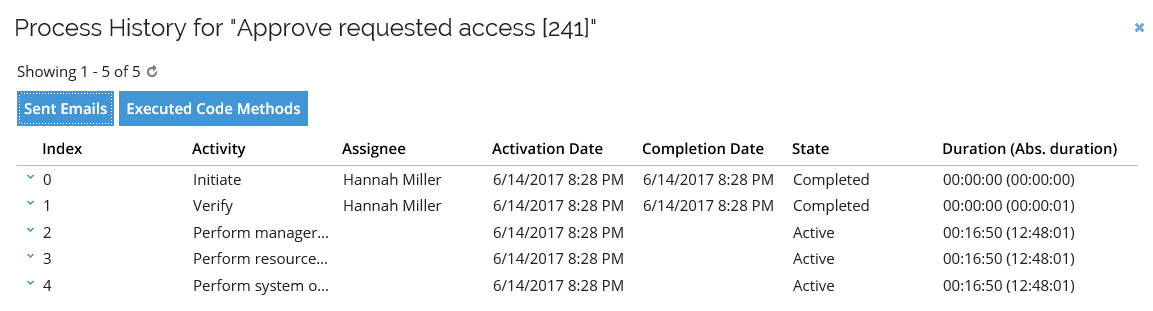
- This screen also links to Sent Emails and Executed Code Methods. This menu item is only available for list views of processes.
-
Executed Code Methods - shows code methods related to the process. Click the Class Path and Method to see further details.

- This menu item is only available for list views of processes.
-
- This screen also links to Sent Emails and Executed Code Methods. This menu item is only available for list views of processes.
-
Process Diagram - shows a visual representation of the process instance. Color coding indicates the status of the activities.
-
This menu item is only available for list views of processes.
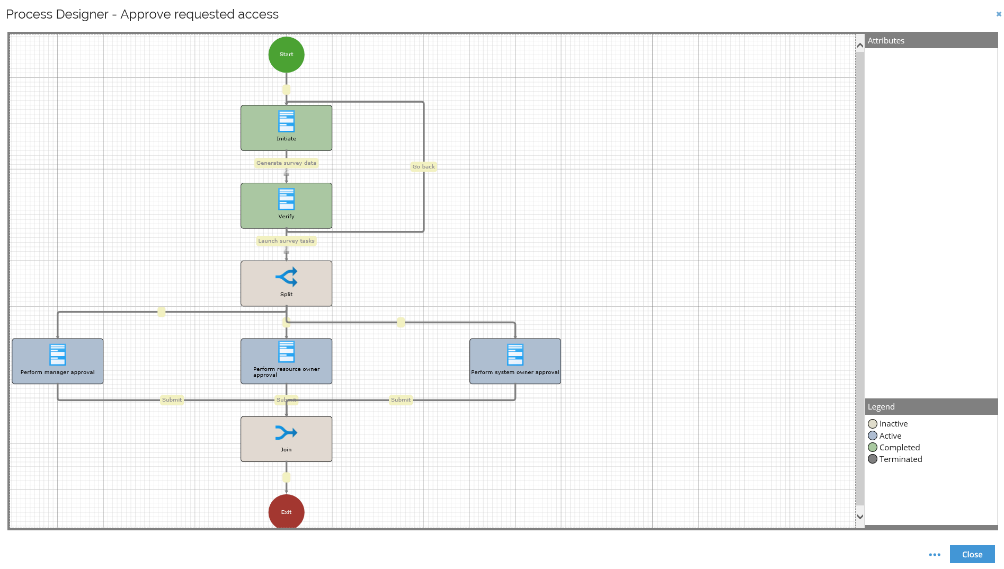
-
Audit Trail (AUD01)
To see the decision log, follow these steps:
- Log in to the Omada Identity Portal as Judy Miller.
- Go to Reports > Audit trail. This will show the audit trail report that shows all decisions made to resource assignments.
- You can see all decisions (approvals, attestations, evaluations). This report tracks all decisions in an audit trail, so that we can see who has approved a resource assignment, and why.
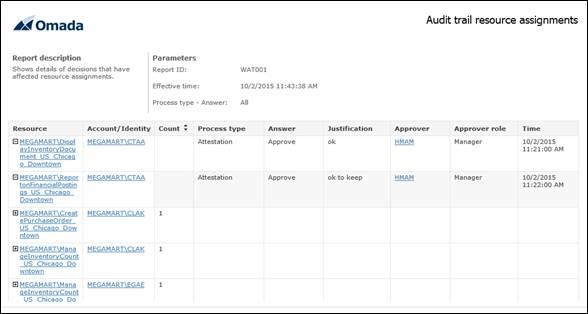
Audit trail resource assignments
Audit Trail reports provide information on decisions made regarding resource assignments. They reveal why certain access exists and who authorized it. Specifically, these reports show resource assignments that have been:
- Approved in an access request process
- Reviewed in a survey
- Exempted in a Separation of Duties evaluation process
Content
The details report contains a details section. The report shows the resource and the account or identity the resource assignment is for.
Click the expand icon (plus sign) to see details on the resource assignment. You will see details on the process type, the answer given, justification, approver, the approver’s role, and time of the answer.
Parameters
The report has the following parameters that you can edit:

Report access
Audit trail is fully supported in the standard Omada Identity reference architecture. It is captured in the Enterprise Server, imported into the Data Warehouse, and exposed in standard reports.
The Audit Trail Resource Assignments report (WAT001) shows an audit trail that fulfills the selected filters. The audit trail is grouped by resource assignment and includes links to the Resource Assignment report (WEN002).