Access Certification (GOV)
Compliance Workbench (GOV)
The Compliance Workbench is a tool for system owners and auditors to bring a system or application into a compliant state.
The workbench shows a graphical overview of the compliance status of all resource assignments for a system or application. These indicate the state of all resource assignments based the actual state (from Data Warehouse data) and on the desired state as defined by Assignment and SoD policies, approvals, and survey results. Actions can be taken based on the status of the resource assignments, the role of the user viewing the dashboard.
RoPE computes a compliance status for all calculated assignments. The compliance status indicates if an assignment is “under control” meaning that it has been either explicitly or implicitly approved. The compliance status is visible in all places where RoPE calculated assignments are shown, including the Data Warehouse reports.
The table below gives an overview of the compliance statuses.
| Status | Description |
|---|---|
| Explicitly Approved | CRA is the outcome of a direct assignment, or it has been approved in a verdict survey. |
| Implicitly Approved | CRA is the outcome of a policy, or it is a child of an assigned enterprise role. |
| Not Approved | CRA only exists in the target system – there is no desired state for it. |
| Orphan Assignment | CRA belongs to the unresolved identity, or the Data Warehouse is uncertain of its ownership. |
| Pending Deprovisioning | CRA awaits to be deprovisioned. |
| In Violation | CRA violates a constraint which, however, has not caused it to be disabled because a pending evaluation procedure exists for the violation. |
| Implicitly Assigned | An implicitly assigned enterprise or application role (which is not in violation). Implicit assignments are created for enterprise and application roles if RoPE detects that an identity is assigned to all the contents of the role – but not the role itself. This is done to allow SoD constraints to be defined on the enterprise or application role level. |
| None | Not possible to express a meaningful compliance status for the assignment. For example, a CRA that is disabled and has no actual state reasons has status None because it is irrelevant from a compliance perspective. |
The Compliance Workbench actions are based on the compliance status of the resource assignments calculated in the Role and Policy Engine (RoPE).
Log in to the Portal as Judy Miller. Open the Compliance workbench dashboard via Compliance Workbench in the left menu.
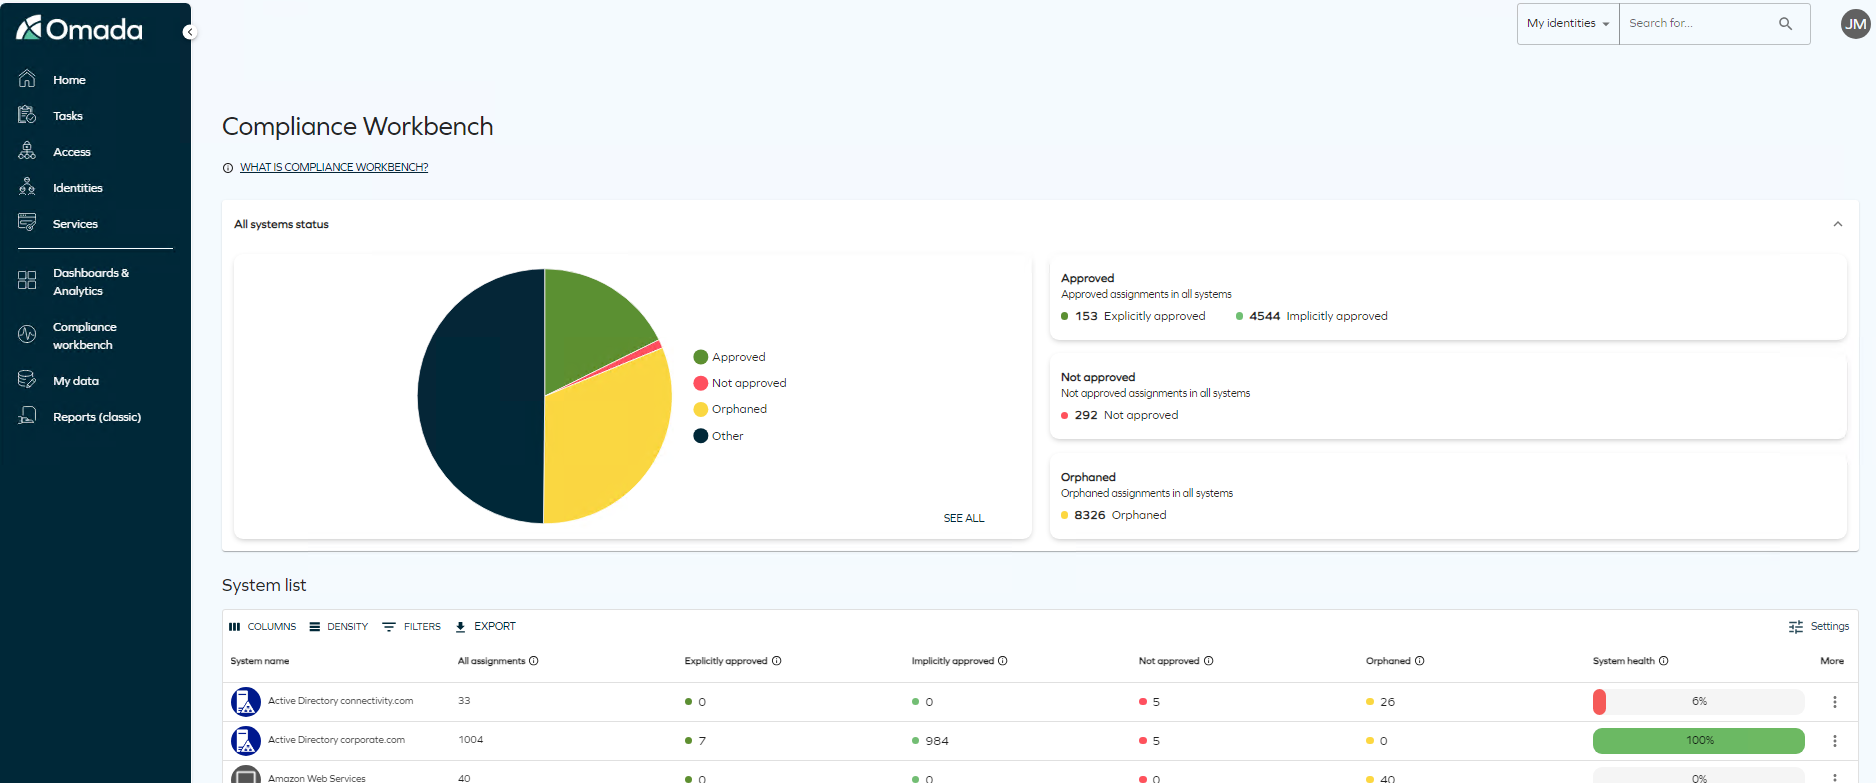
The Compliance workbench has two sections, the All systems status and the System list.
The All system status shows a graphical overview of the Compliance status across all systems. In the right side of the status you can see the number of assignments in the most important Compliance statuses.
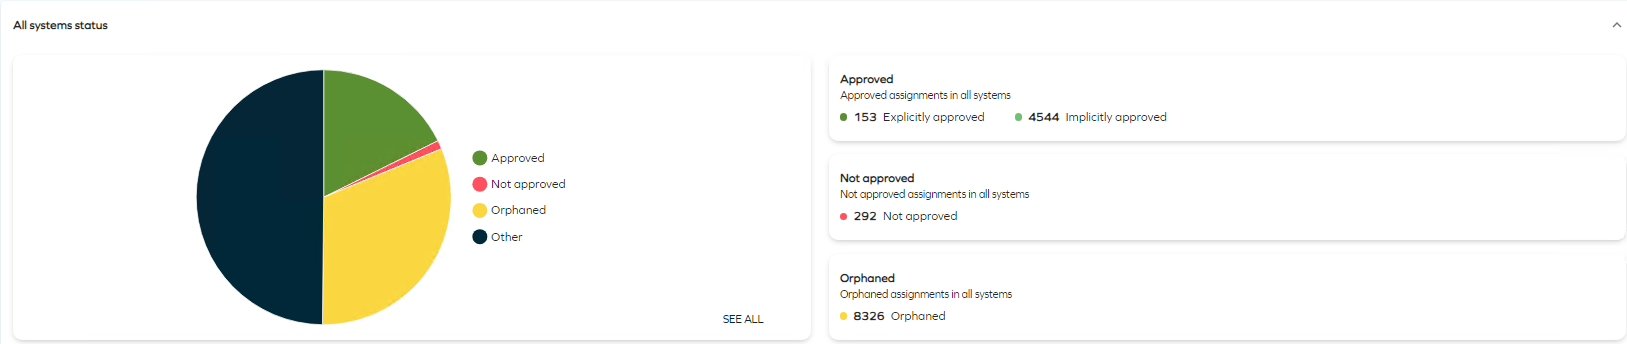
By clicking on the SEE ALL you can see the number of assignments across all statuses.

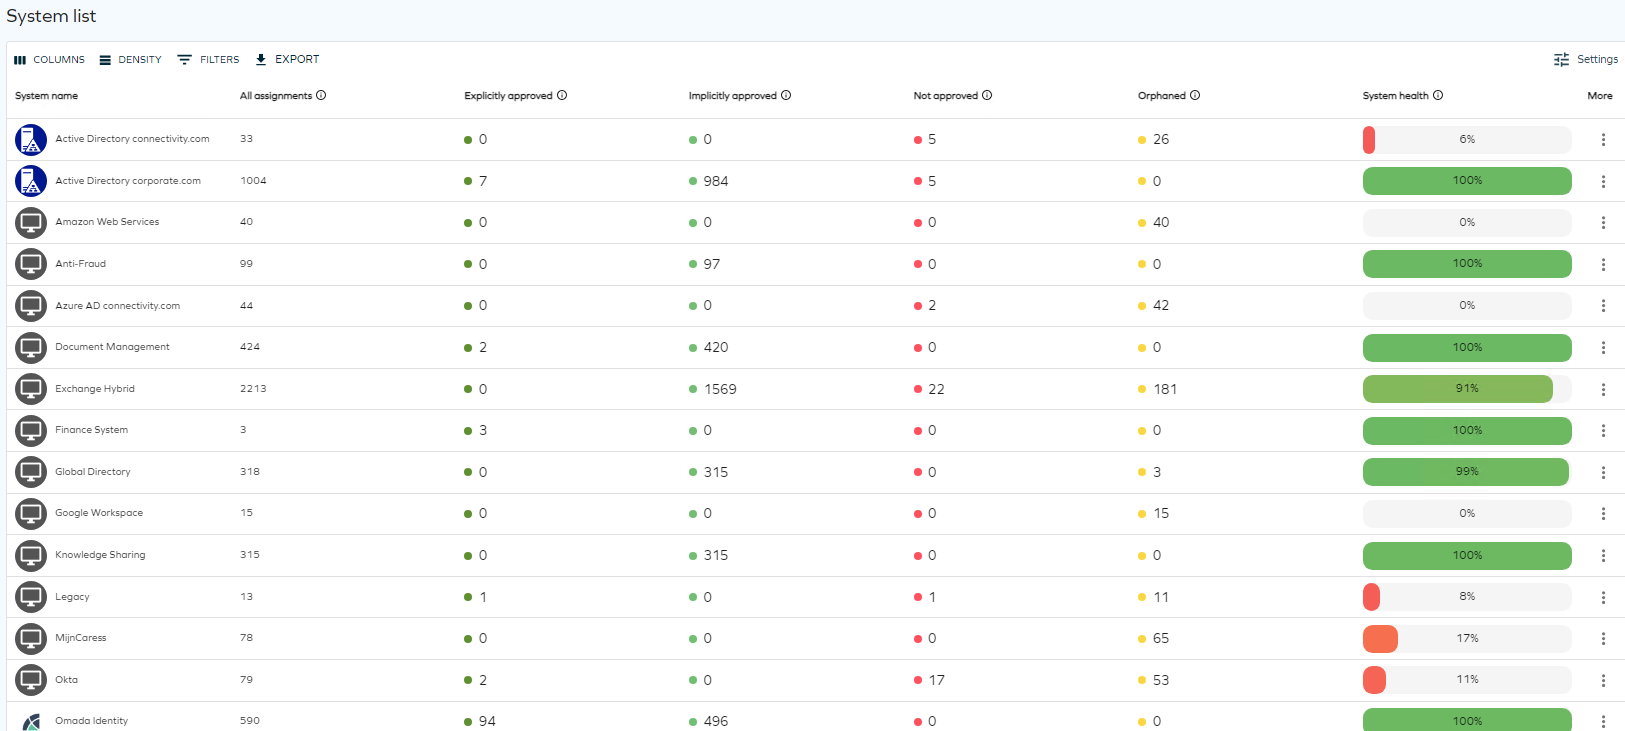
In the System list you can see an overview of all systems and applications in the solution. The Compliance Workbench is also available to the system owners, and they can only see systems owned by them.
There are settings available for the workbench, to access them click Settings.
In the settings you can set if the Compliance Workbench should show account assignments (especially relevant for system with the potential Orphan accounts), and if you want to show or hide systems with no assignments. This is usually Identity data only systems.
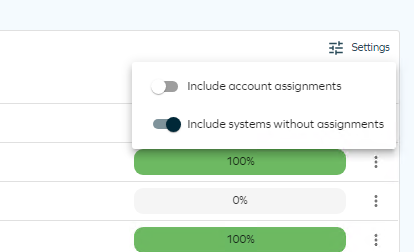
By default, resource assignments to accounts resources are excluded in the workbench. Tick the Include account assignments checkbox. We also recommend for demo purpose to not include systems without assignments.
The workbench is updated. It now shows account assignments and fewer systems.
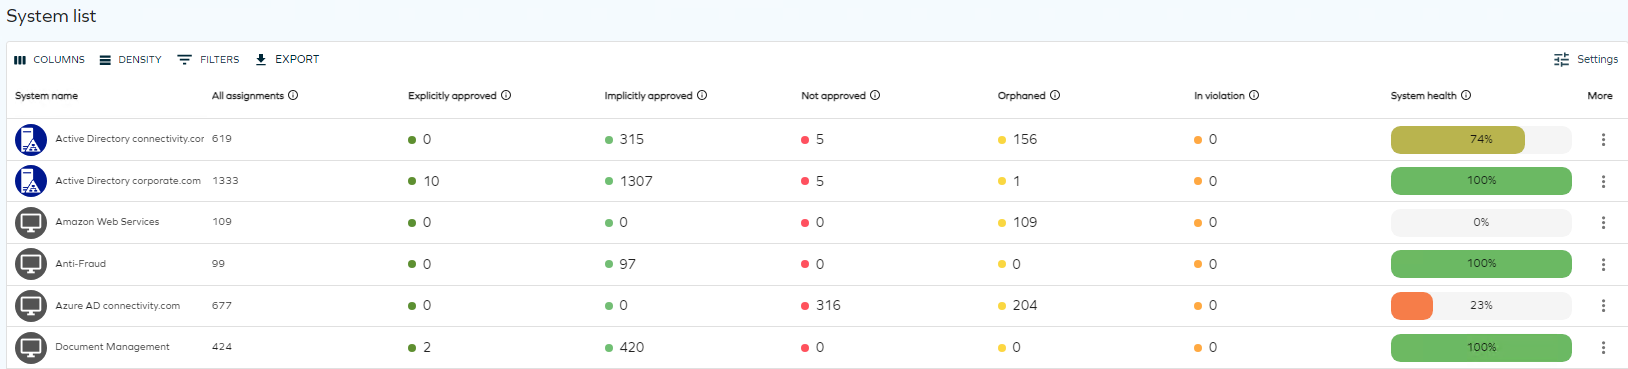
You can also choose with Compliance statuses are shown in the Columns menu option. By default the following are shown:
- System name
- All assignments
- Implicitly approved
- Not approved
- System health
- More
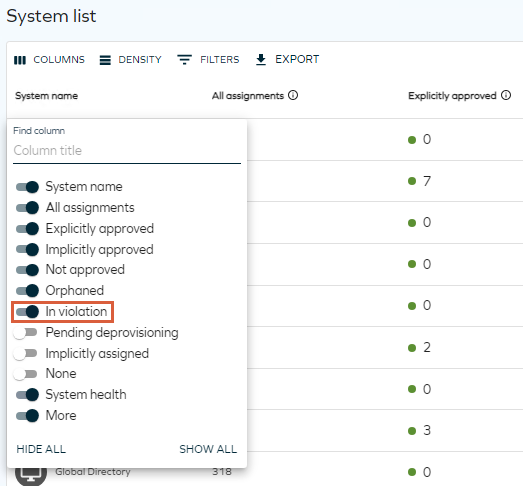
Include In violation as a column option. You can sort columns on the number of assignments in a given compliance status. Re-sort the grid to show the highest number of In violation first.
The Legacy system shows an Orphan account. This is covered in the Account Ownership scenario in this script.
-
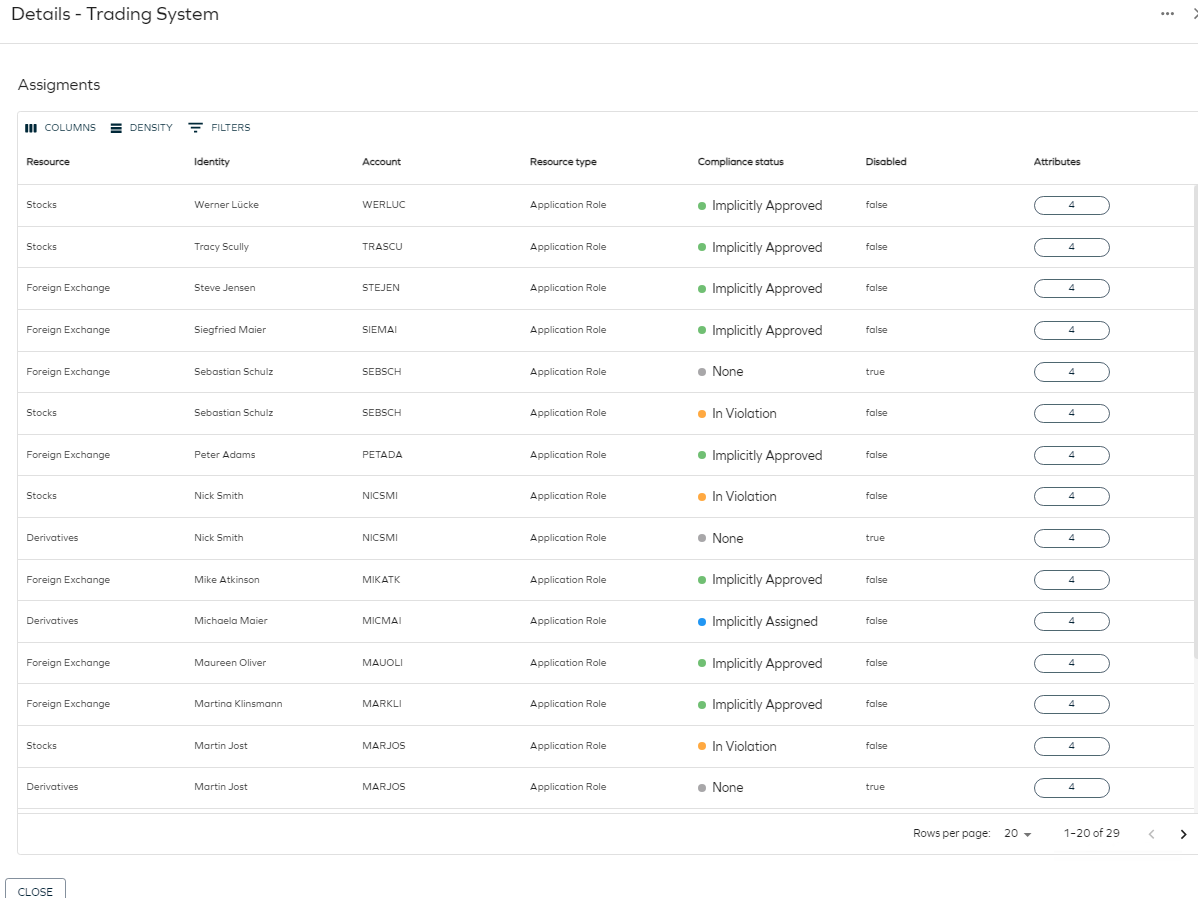
We will now have a closer look at the Trading System, click on the three dots to the right of the application.

-
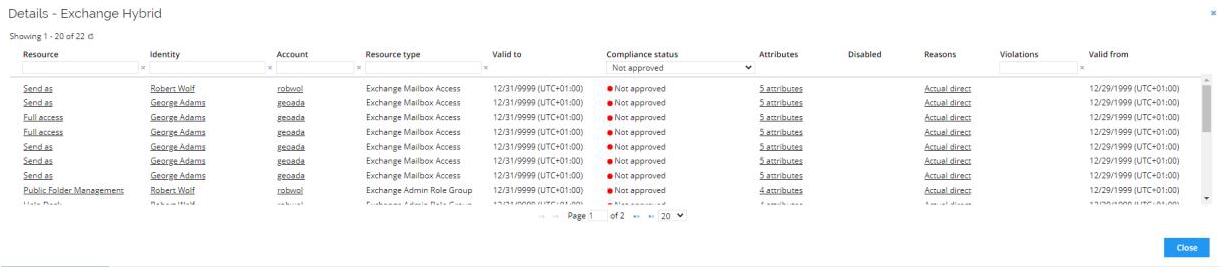
Select Details in the context menu. This brings up a list of the resource assignments in the system. We can see the details of each resource assignments.
Attestation Surveys (GOV02)
Omada Identity provides the below standard survey templates, which can be used out of the box or as a foundation for customer specific surveys.
| Survey | Description |
|---|---|
| Approve requested access | Survey used for evaluating self-service access requests. |
| Access review for managers | Survey for reviewing access. Questions are assigned to the managers of the identities that the assignments are for. |
| Access review for resource owners | Survey for reviewing access. Questions are assigned to the resource owners of the resources that the assignments are for. |
| Account ownership review | Survey for assigning ownership to accounts with non-confirmed owner. |
| User Mailbox access review | Survey for reviewing calculated resource assignments for access to Exchange User Mailboxes. Questions are assigned to the managers of the identities that the assignments are for. |
| Transfer Identity Assignments | Survey used for transferring assignments from one context to another when and identity transfers from one org unit to another. |
| Transfer ownership survey | Used when an identity leaves the organization. |
| Classification survey | Survey used for review and manage classification of systems, resources, folders, contexts or identities. |
| Resource classification survey | Survey used for review and manage classification of resources. |
| System classification survey | Survey used for review and manage classification of systems. |
| Review joined identities | Survey for reviewing joined identities in ODW. |
| Deleted Context Survey | Survey for reviewing contexts no longer in source system. |
The Approved requested access is covered as part of the request access scenario.
The Transfer ownership survey is covered in the Identity Lifecycle Management scenario.
The Transfer identity assignments is covered in the Identity Lifecycle Management scenario.
The three Classification surveys are covered in the Entitlement Management scenario.
Below we will cover the Access review for Managers, Account ownership review and User Mailbox access review.
Access review for Managers (GOV02.06)
Preparation (GOV02.01)
This scenario requires preparation.
We want to create some group memberships directly in Active Directory, which will give them a status of ‘Not approved’ when imported to Omada Identity.
-
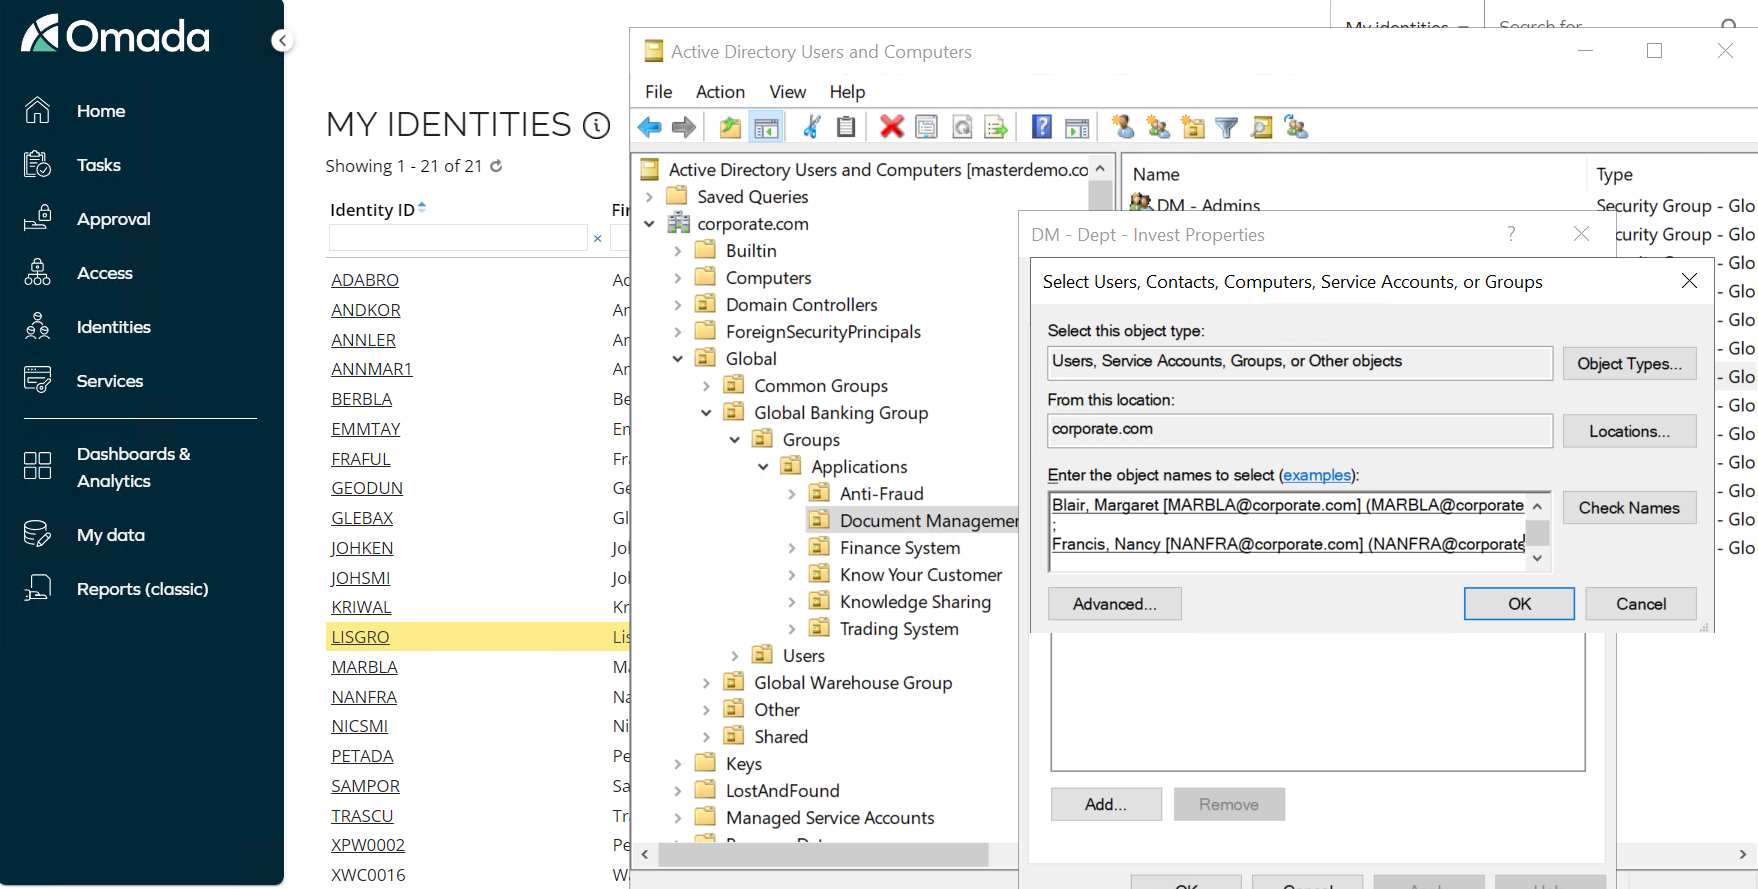
Log in to the portal as Robert Wolf, go to Identities to get an overview of his employees
-
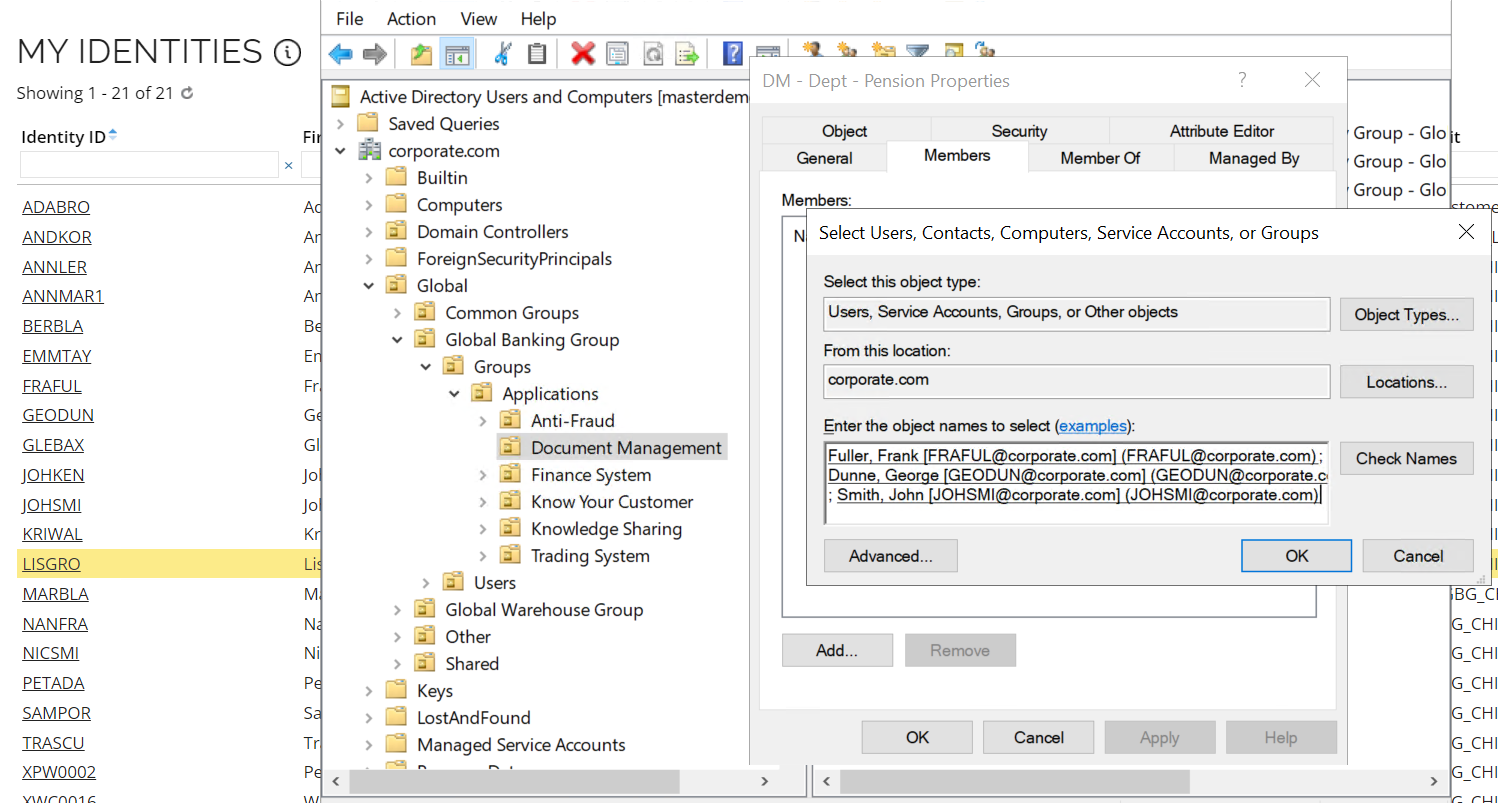
Open Active Directory Users and Computers, open the group DM – Dept – Invest and assign three of Robert Wolfs employees to the group. This membership we will later keep as part of the attestation.
-
Click OK and OK to apply the memberships, then open the group DM - Dept – Pension and add one employee to this group. This membership we will later remove as part of the attestation.
-
Close the group and log in to the portal as System Administrator and run the import profile for Active Directory.
You are now ready to execute this scenario.
Execution (GOV02.01 and GOV02.03)
-
Log in to the portal as the security officer Judy Miller go to Compliance Workbench.

-
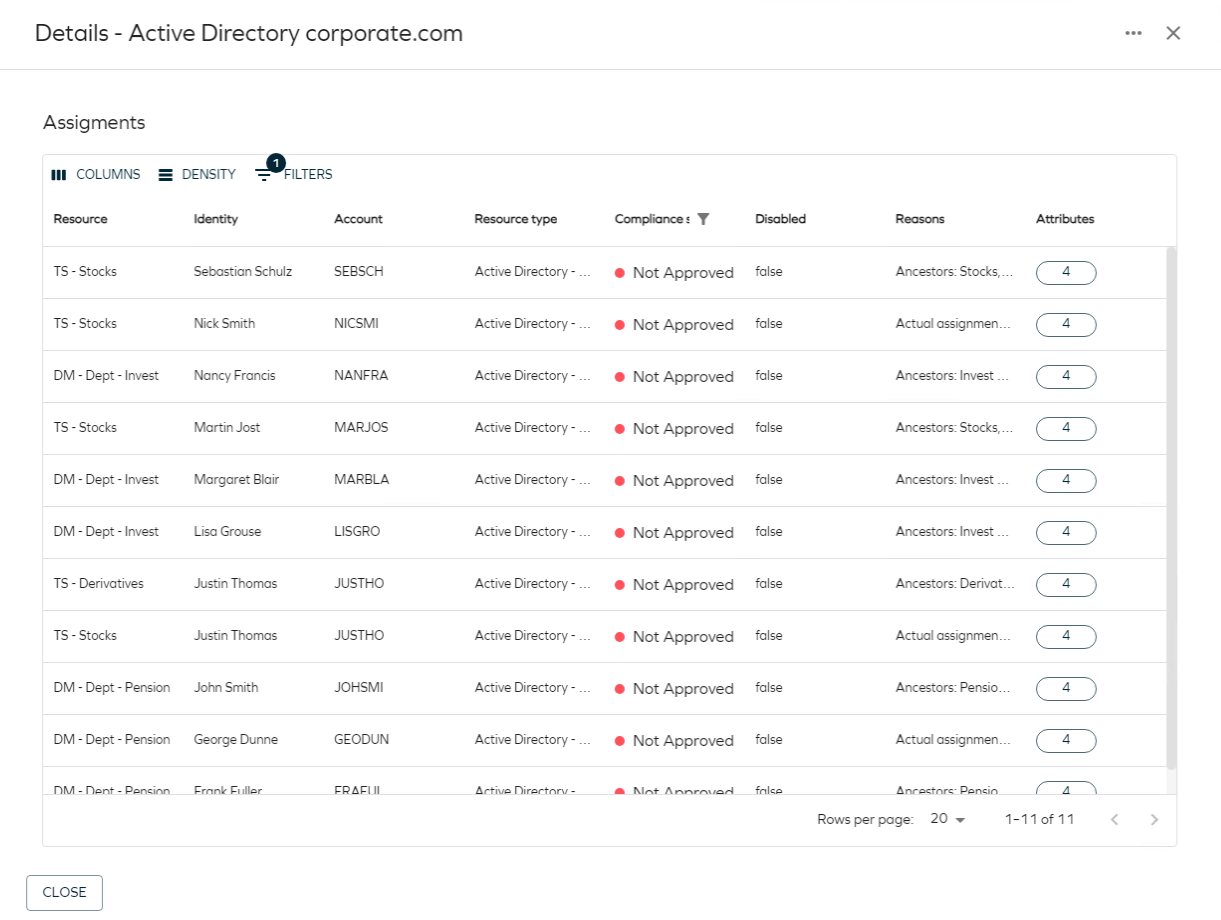
The four group memberships assigned directly in Active Directory are showing up as Not Approved, we now want the manager to review these assignments.
-
Click the number of Not approved assignments to open the details panel. Next to Active Directory to bring up the Details side pane.
-
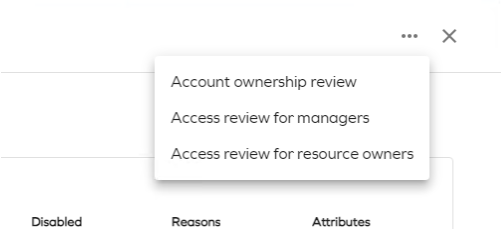
Click the … menu in the top right corner of the side panel.
-
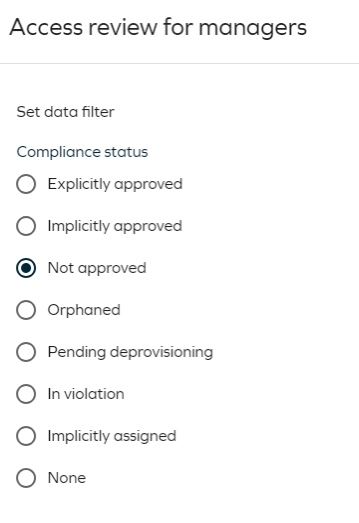
This time select Access review for managers. This opens the set data filter dialog.
-
Select Not approved and click Start Survey.
-
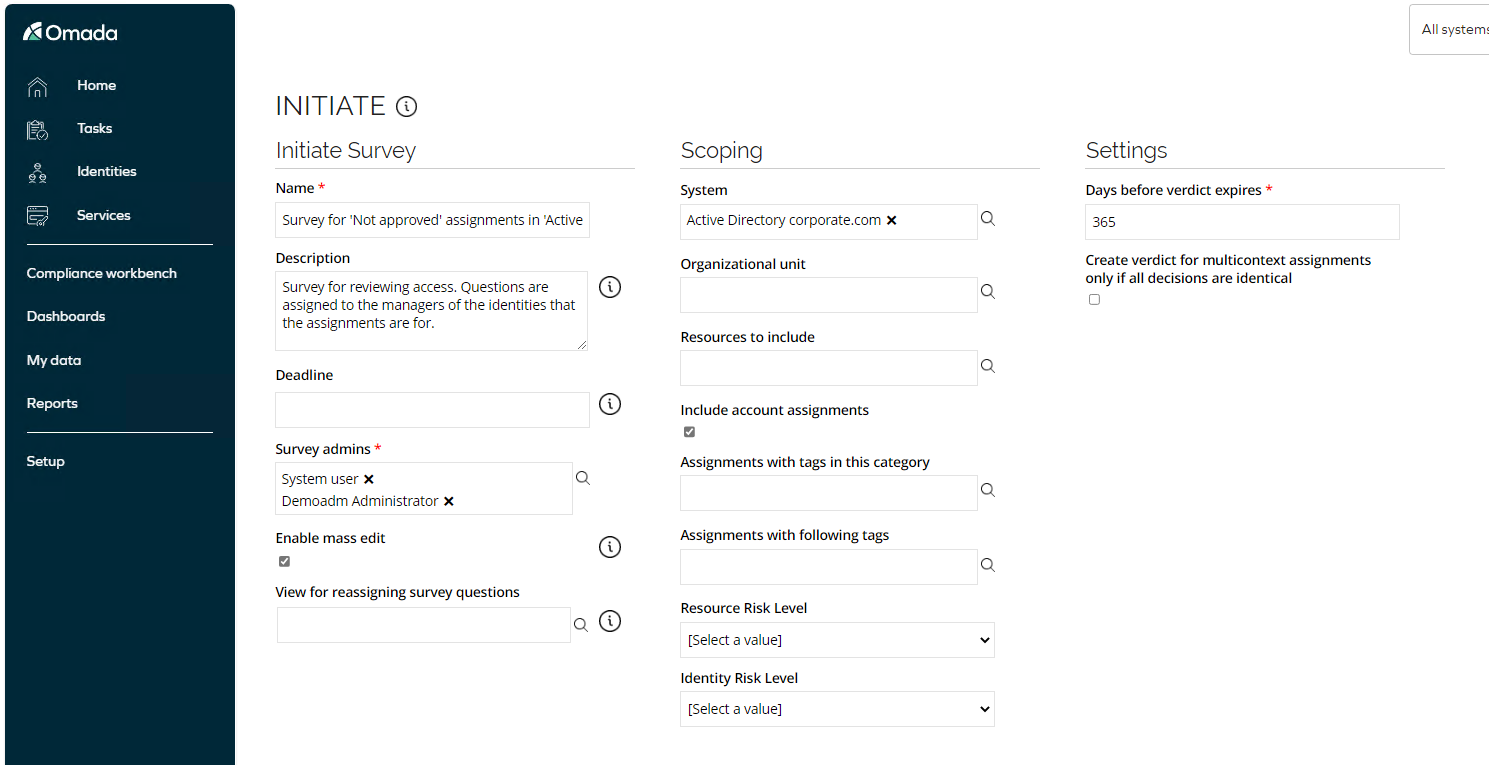
Here you see the scoping options, add 365 in Days before verdict expires click Generate survey data.
-
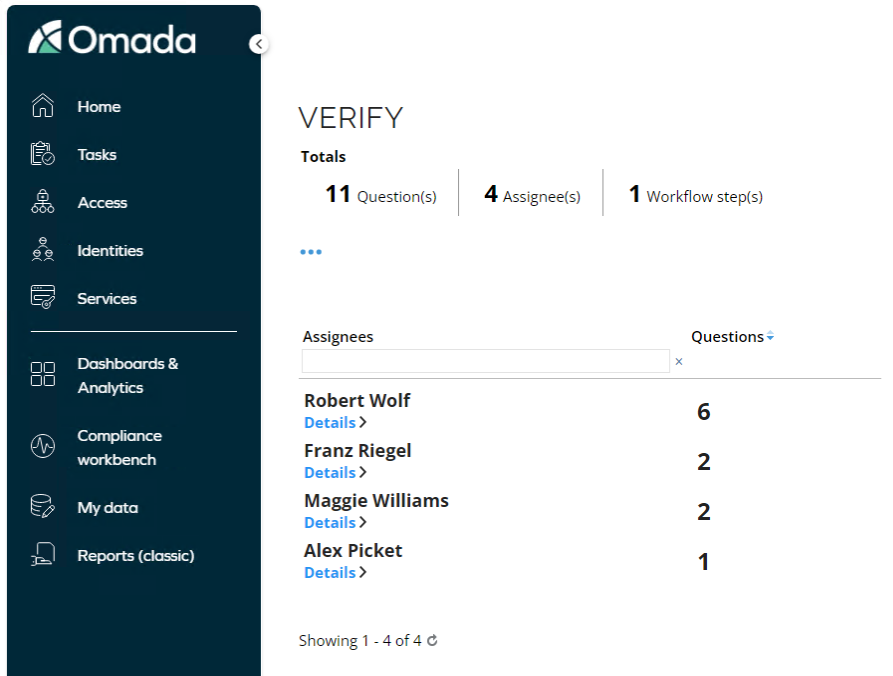
You are now as survey admin asked to verify of the survey tasks looks ok.
-
Click on Details to see how the questions will be presented for the manager – before you launch the survey.
-
Click Close and click Launch survey tasks.
-
Confirmation – remember the number of explicit assignments and not approved assignments, at the end of the scenario, we will verify these numbers are updated based on the access review.
-
Log in to the portal as Robert Wolf.
-
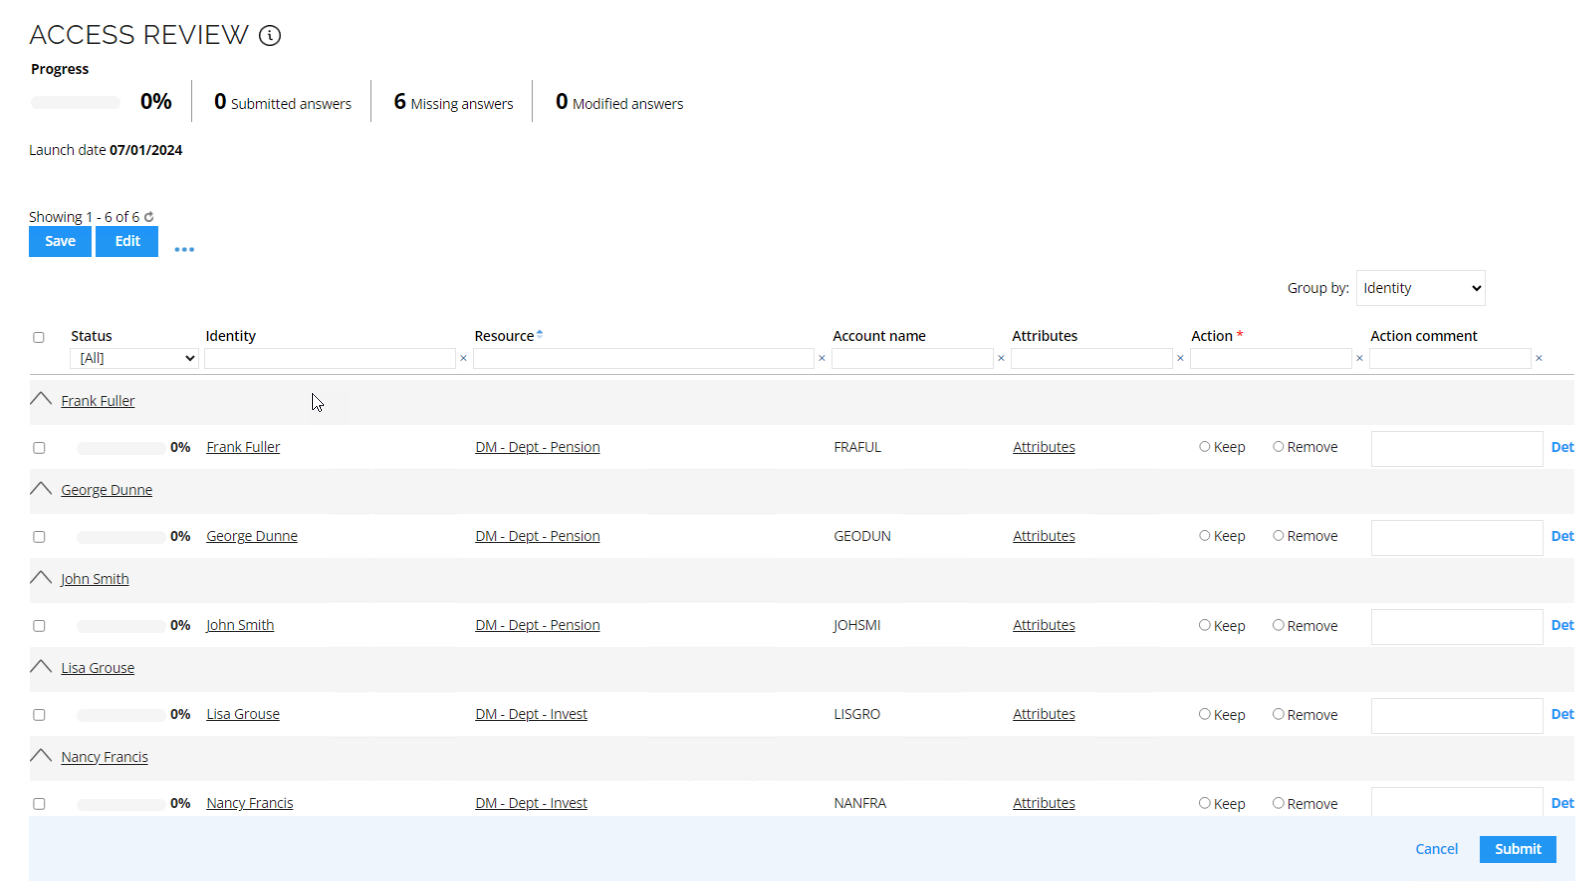
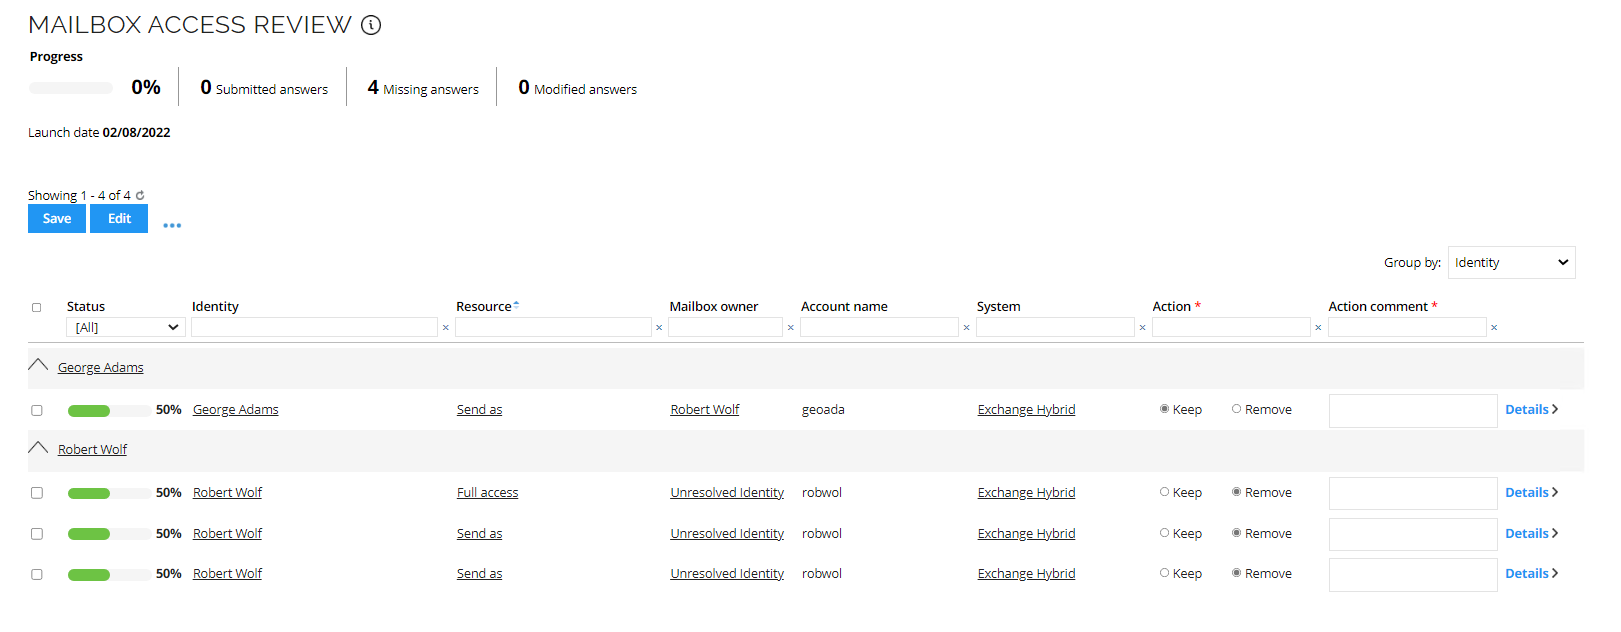
Launch the task Access review for managers.
-
We only want to allow the group membership that gives access to the Invest department, whereas the other assignments, we want to have removed.
-
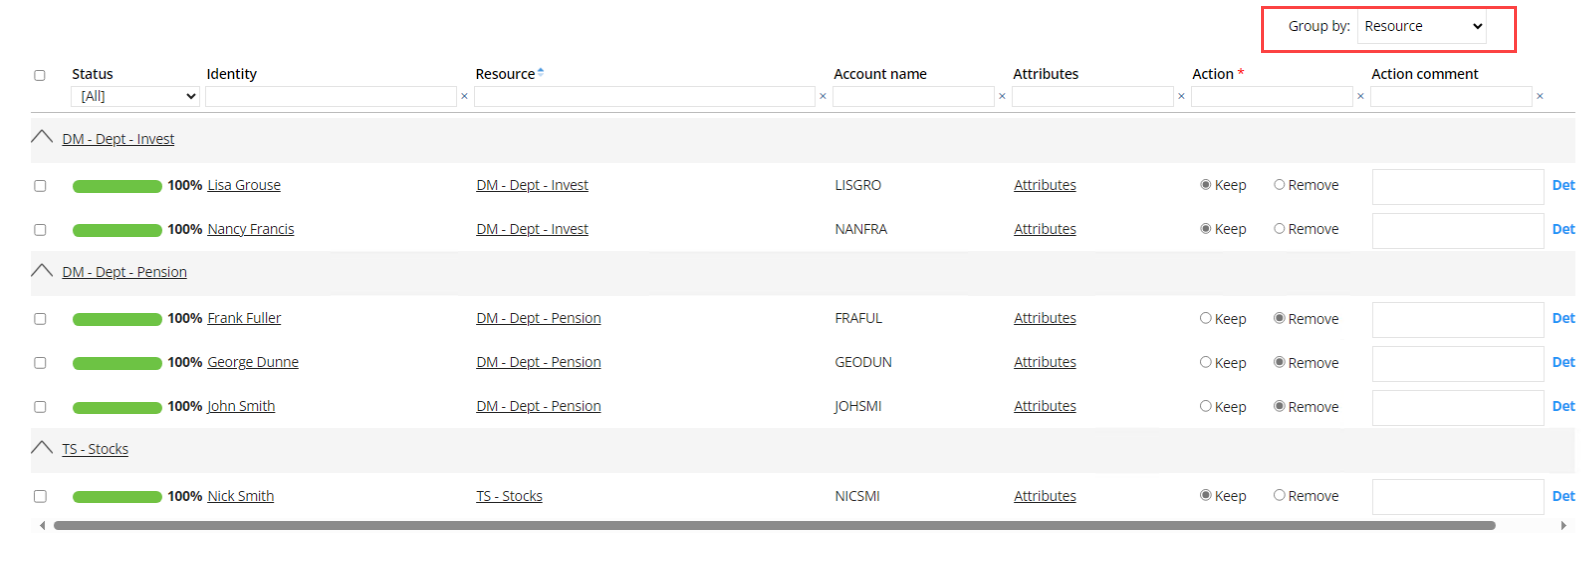
You can Group by Resource to see the assignments group per resource instead of identity.
-
Click Submit.
-
Optionally log in to the portal as System Administrator, go to Setup -> Operations -> Operations Dashboard.

-
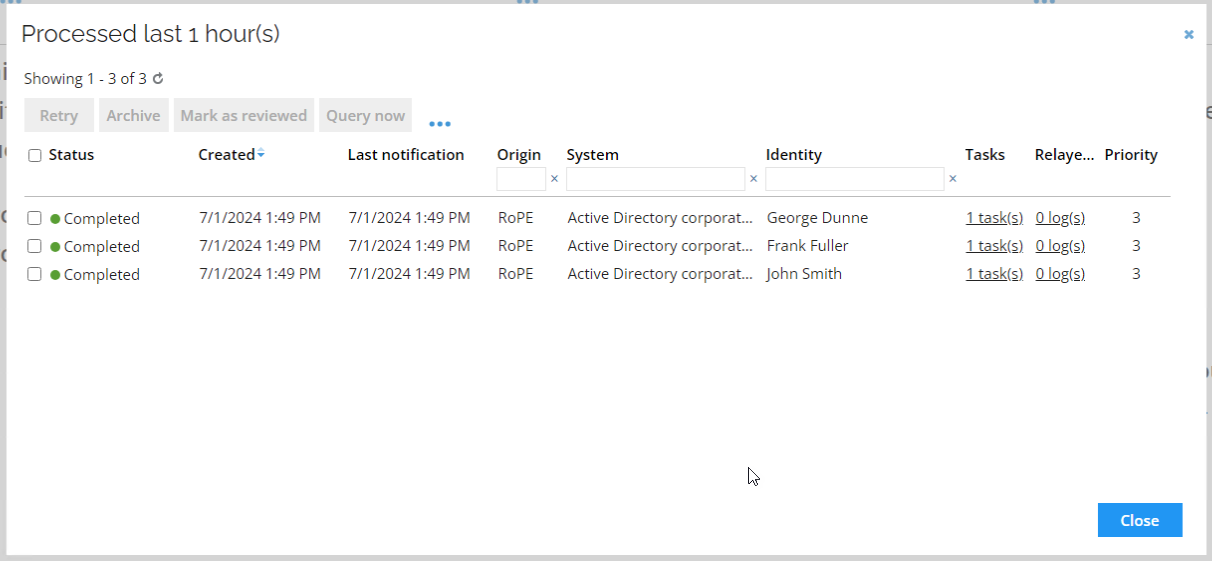
Click on the number next to Processed last hour (numbers of changes may vary dependent on which scenarios has been executed beforehand).
-
Click on the hyperlink 1 task(s) for the first task.

-
Here you can see the group membership was removed as soon as the survey was completed. Click Close and Close to return to the Operations Dashboard.
-
Log in to the portal as Judy Miller again. Go to the Compliance Workbench.

-
The Not Approved assignments are now taken care of and the Active Directory is back to a compliant state, also notice the number of explicit assignments is increased by one – based on the completed manager access review.
-
Optionally verify either via the email log or via Papercut that email notifications are sent to the identities for whom the assignments were removed.
Account Ownership Review (GOV02.05)
This scenario will examine the account ownership survey. We use the survey to determine the ownership of an administrative account in Active Directory.
This scenario requires a little bit of preparation.
The example here uses Emily Black and includes instructions how to prepare for this scenario.
-
We need to add an account in Active Directory that closely but not fully matches the account name format for administrative accounts, for the identity we want to use in our scenario. In this case we will use Emily Black (EMIBLA).
-
Open Active Directory Users and Computers and create a new user in the path corporate.com/Global/Global Banking Group/Users/Employee.

-
The naming convention for admin accounts in Omada Identity is ADM_[IDENTITYID], on purpose we want to create an administrative account that do NOT conform to this, so that we will have to launch a survey to select the owner. Click Next.
Provide a password, and select as above, click Next.
-
Click Finish. Log in to the portal as system Administrator and run the import profile for Active Directory.
In Omada Identity all accounts should be associated with an identity. The Data Warehouse import joins accounts to identities according to certain join rules. If it cannot determine an owner, it attaches the ownership to the unresolved identity.
-
When import is completed, click OK.
-
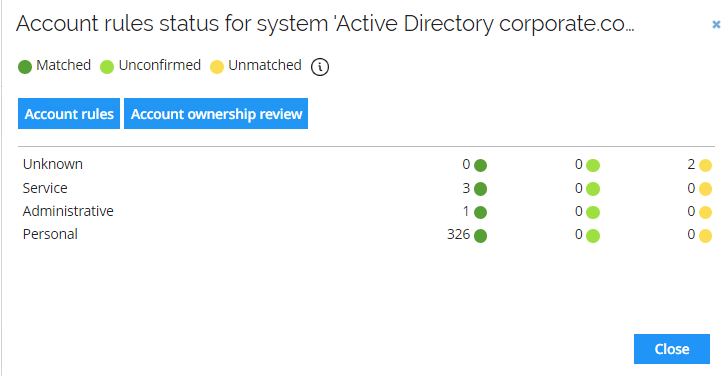
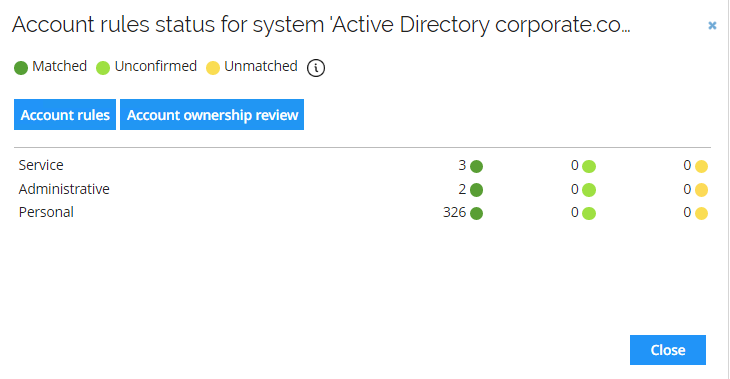
Click on Matched/classified accounts.
-
Notice there are at two accounts which is Unknown, click Account ownership review to initiate a survey to determine ownership.
-
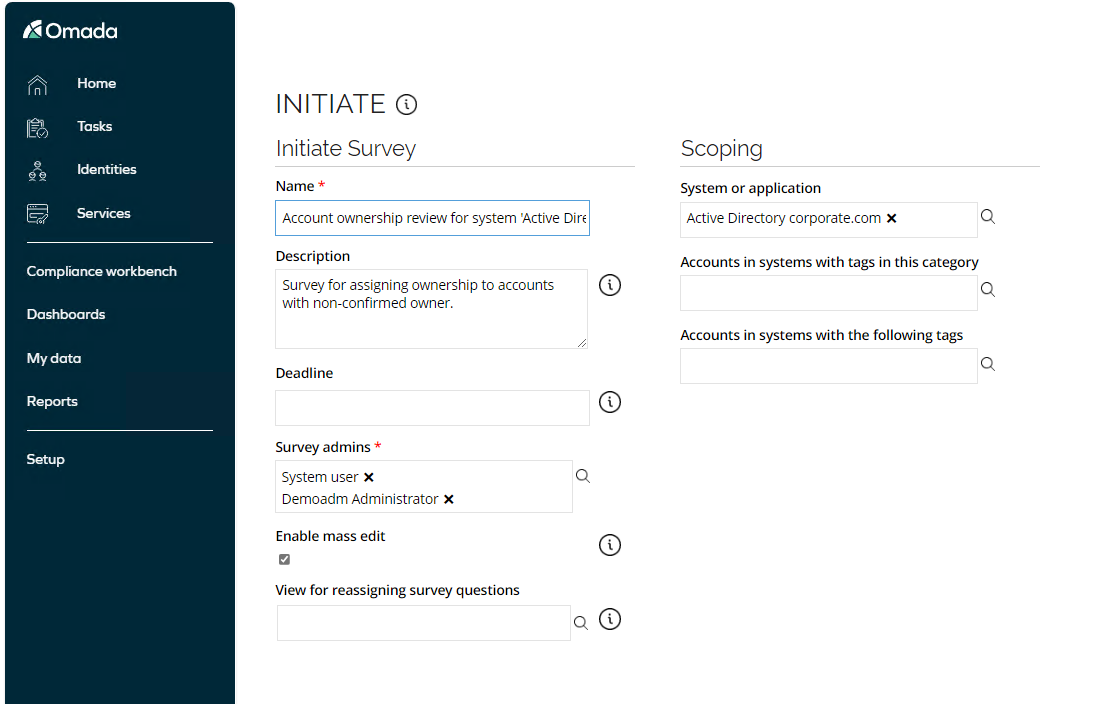
No action is required here, click Generate survey data.
-
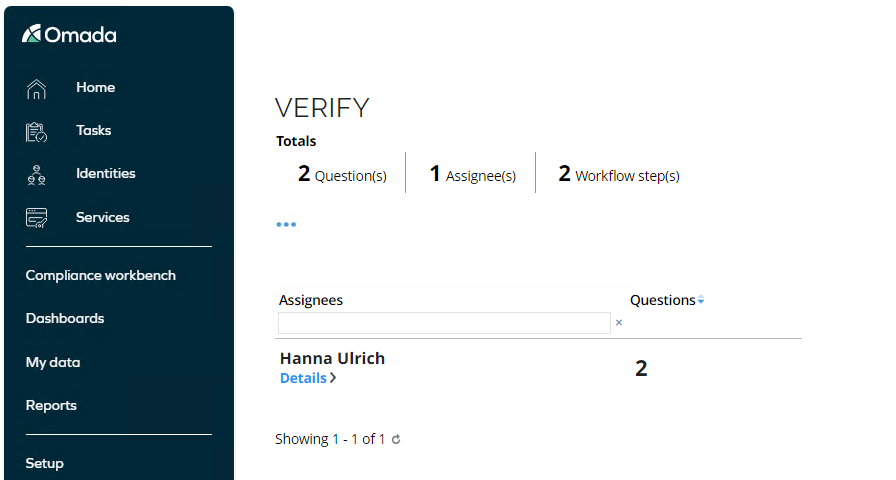
We can see that three questions will be sent to the system owner Hanna Ulrich, click Launch survey tasks.
-
Log in to the Portal as Hanna Ulrich. Click on the task for Account ownership review.
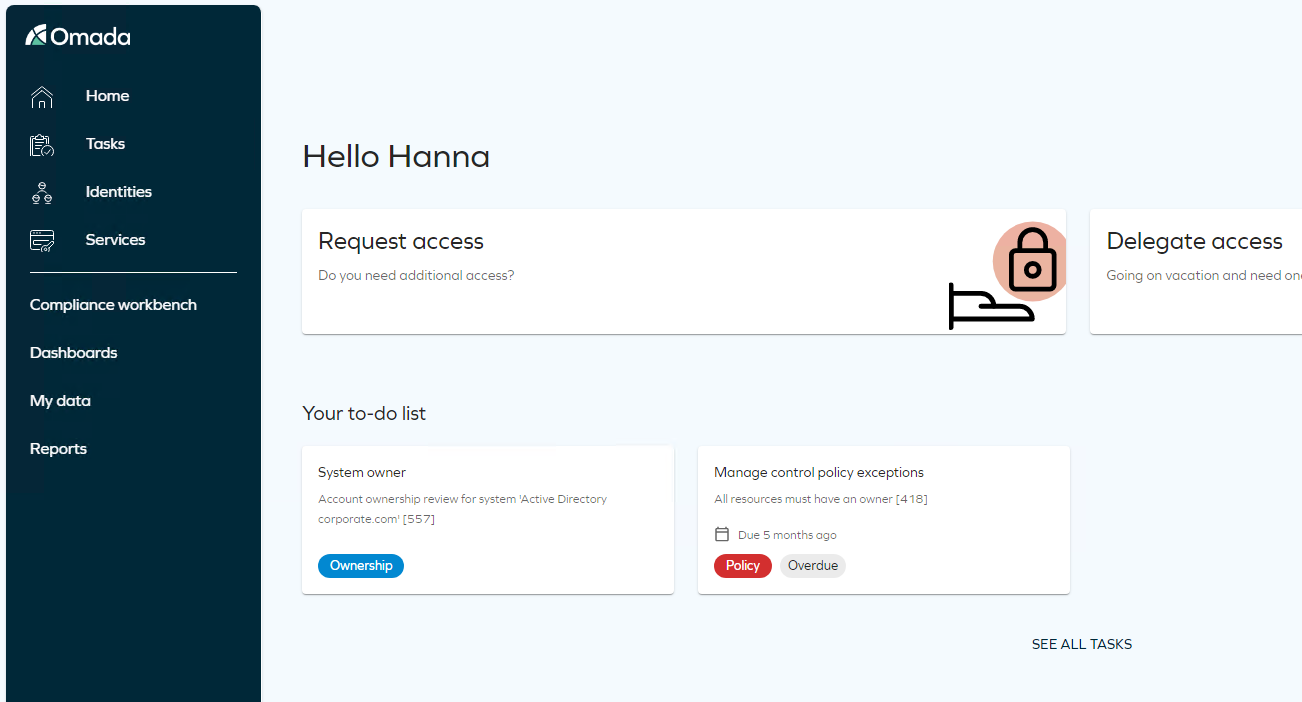
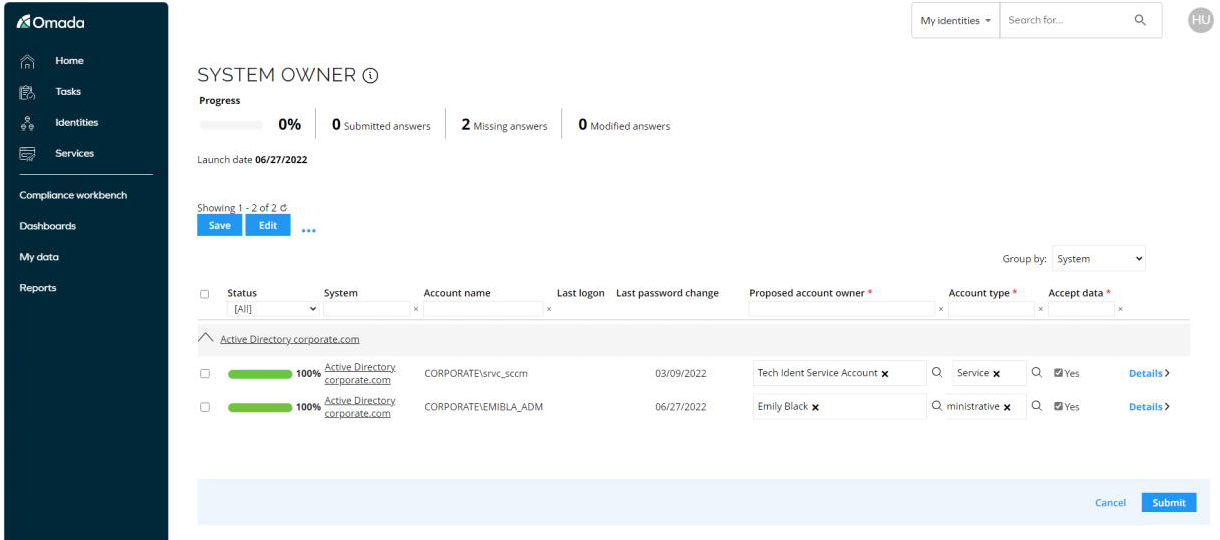
-
The survey opens. There are three required fields that we need to respond to: Proposed owner, Account type and Accept data. For the admin account, select Emily Black as the owner. For the service account, select T0004 as the owner.
-
Click Submit.
-
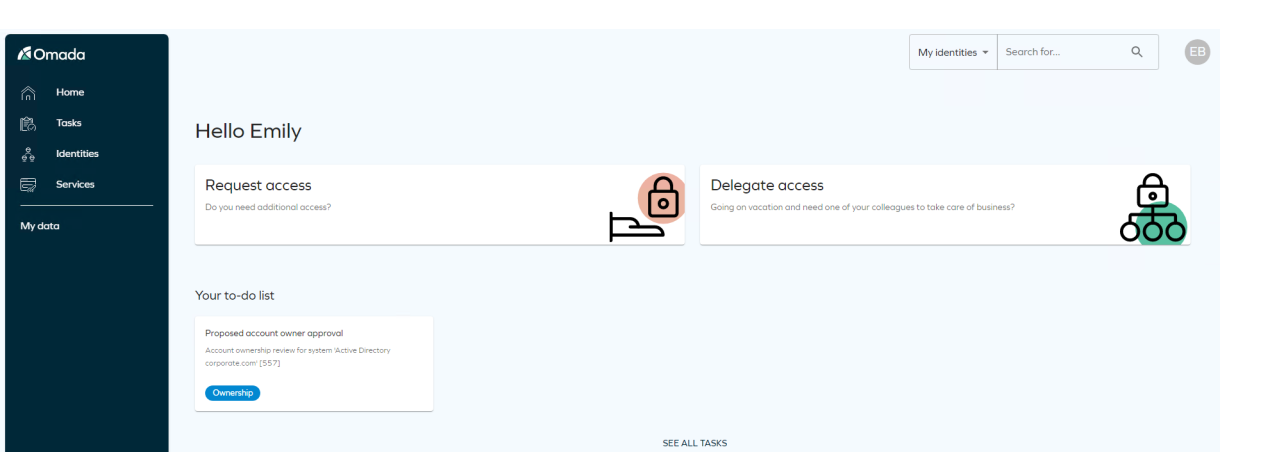
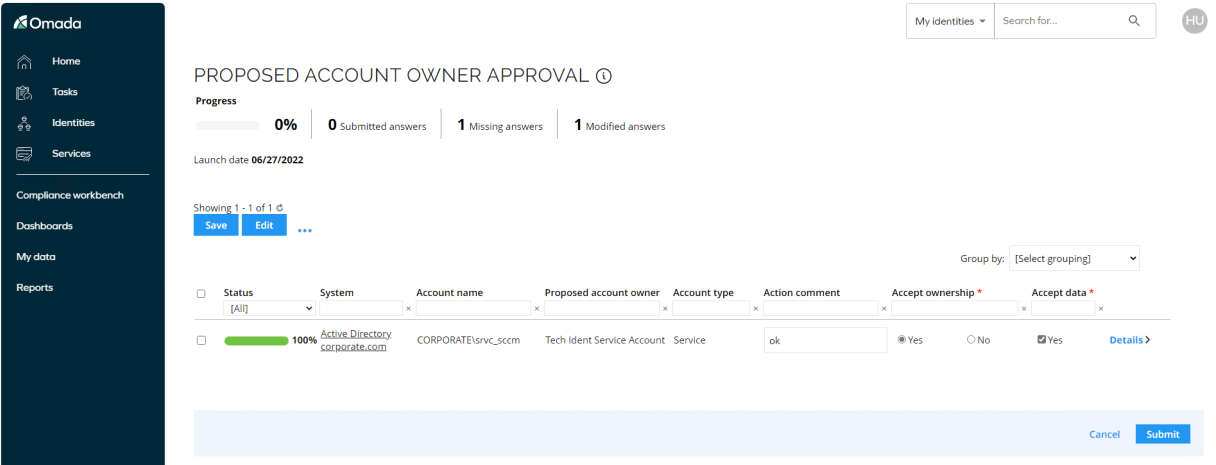
Log in to the Portal as Emily Black, click on the task Proposed account owner approval.
-
Accept the ownership and provide a comment.
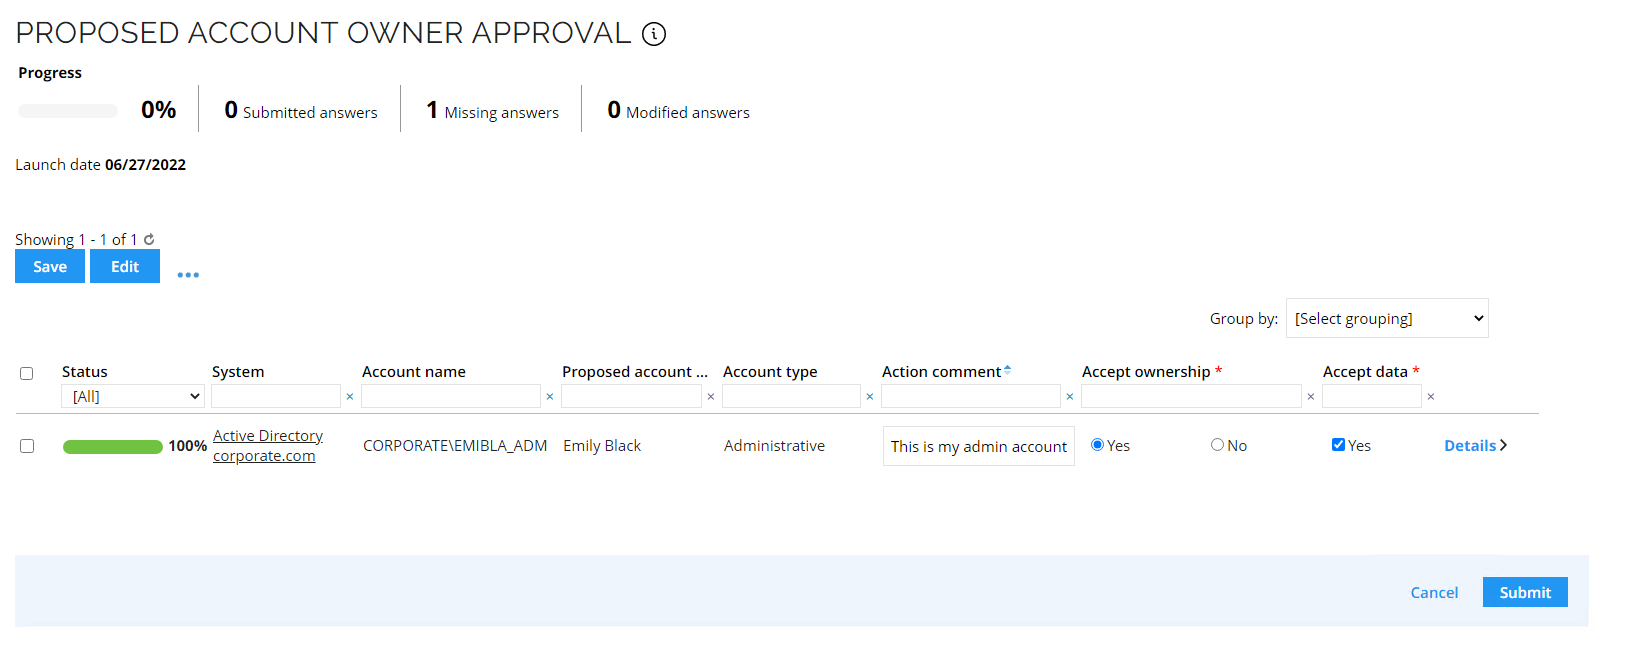
-
Click Submit.
-
Log in to the Portal as Hanna Ulrich, click on the task Proposed account owner approval.
-
Since Hanna Ulrich is the owner of the technical identity T0004 she is required to approve the proposed ownership.
-
Click Submit.
-
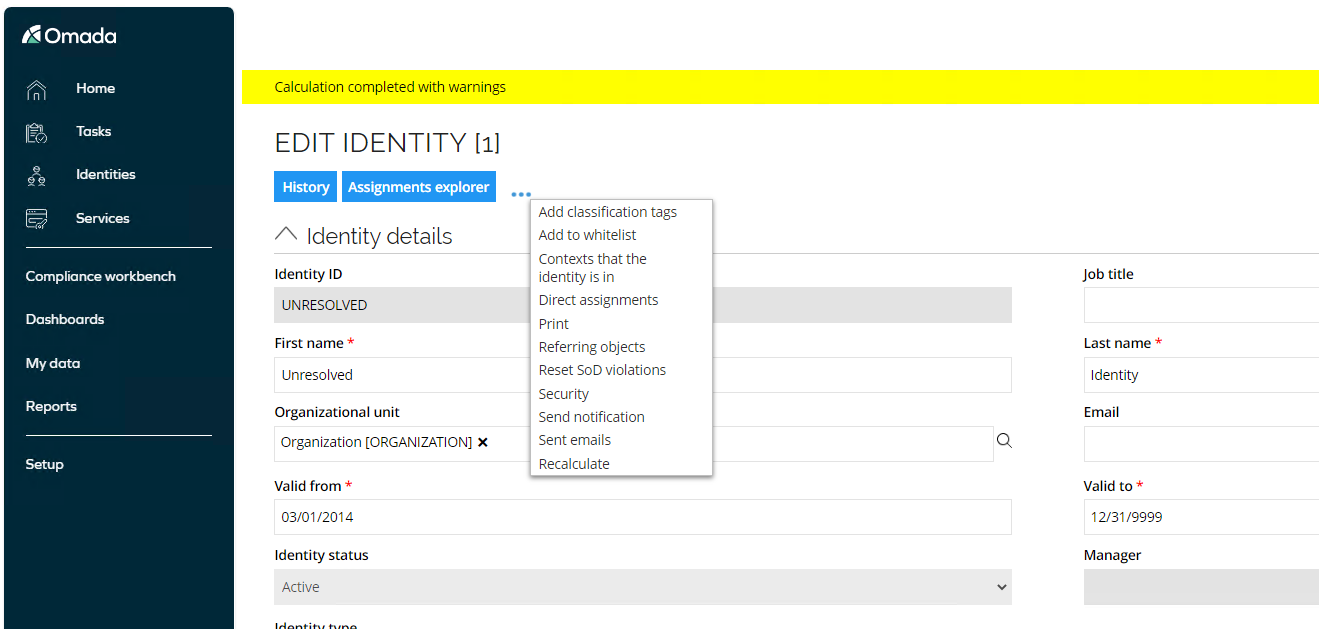
Log in to the Portal as System Administrator, go to Setup -> Master Data -> Identities, search for and select the IdentityID Unresolved. All accounts for which an ownership cannot be found, is assigned to the built-in Identity called Unresolved.
-
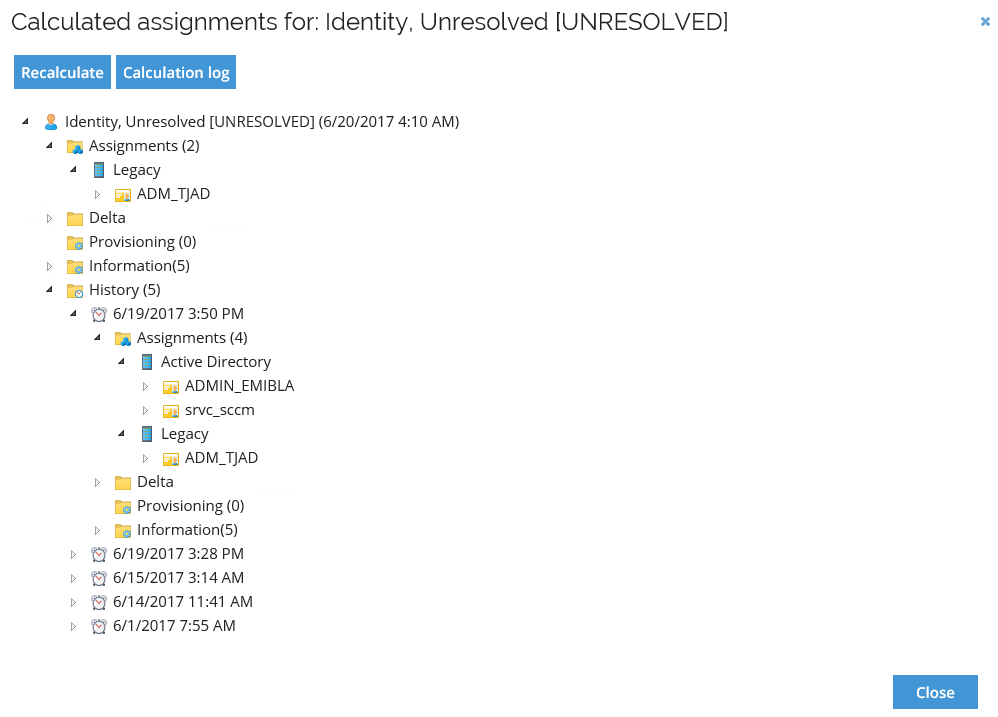
Select the three dots and click Recalculate, when calculation is complete, open the Assignments Explorer. Please note that this may not be feasible due to long loading times for the unresolved identity.
-
Open the current and the previous calculation under History, the two accounts are no longer assigned to Unresolved due to the account ownership survey.
-
Run an import for Active Directory Corporate.com.
-
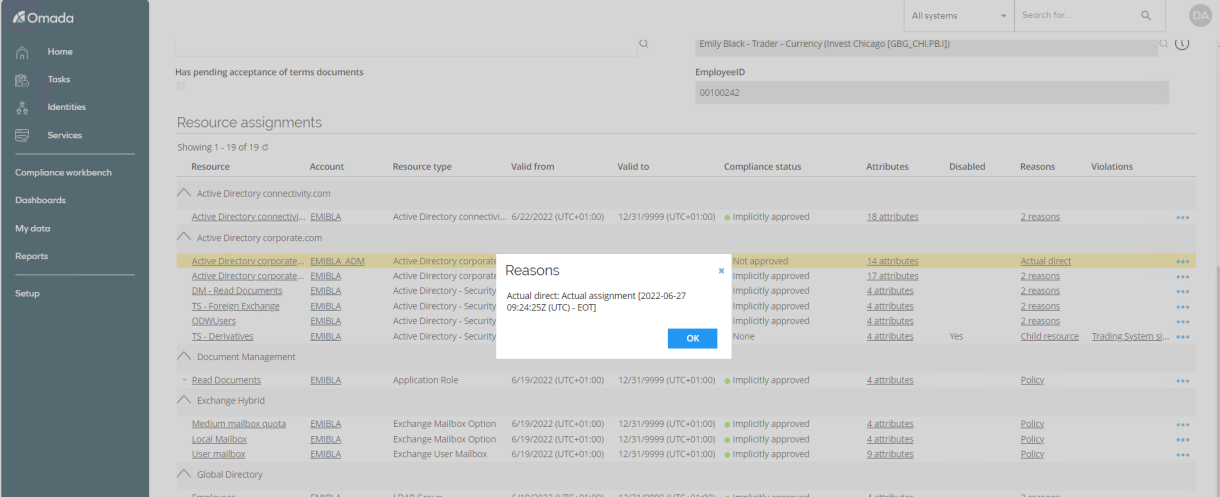
Open the identity details for Emily Black, go to the Resource Assignments, and click Reasons next to the Admin account.
-
You can also go to Setup -> Master Data -> Systems, open Active Directory and click on Matched/classified accounts to verify that all accounts are now classified and assigned an owner.
User Mailbox access review (GOV02.08)
In this scenario we will attest to permissions assigned to users’ mailboxes, out-of-the-box we support the three most used permissions.
• Send as
• Send on behalf
• Full access
Preparation (GOV02.01)
This scenario requires a little bit of preparation, which has been done for some sample data on the demo system. If you want to do the preparation yourself, for other identities, you can follow the steps in this chapter. Ee recommend you perform before the presentation, especially because importing from Exchange can take 25 minutes.
-
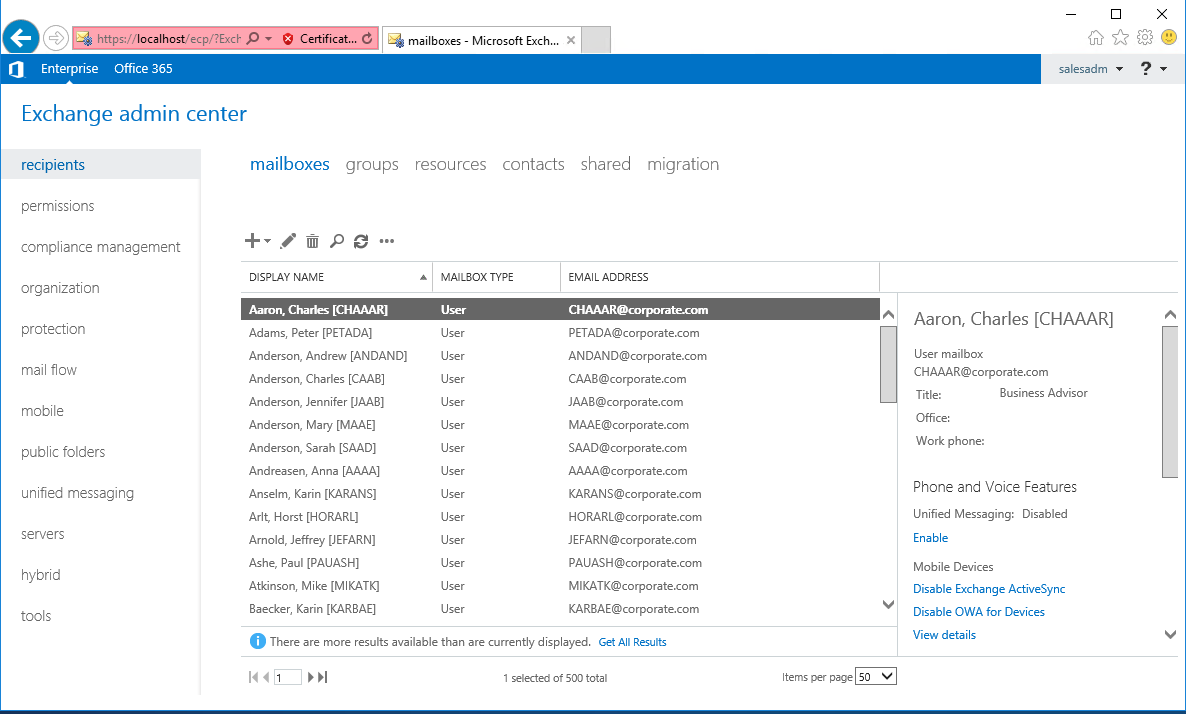
Open the Exchange Admin Center.
-
Log in to the Exchange Admin Center.
-
You are presented with a list of all the mailboxes provisioned in Exchange.
-
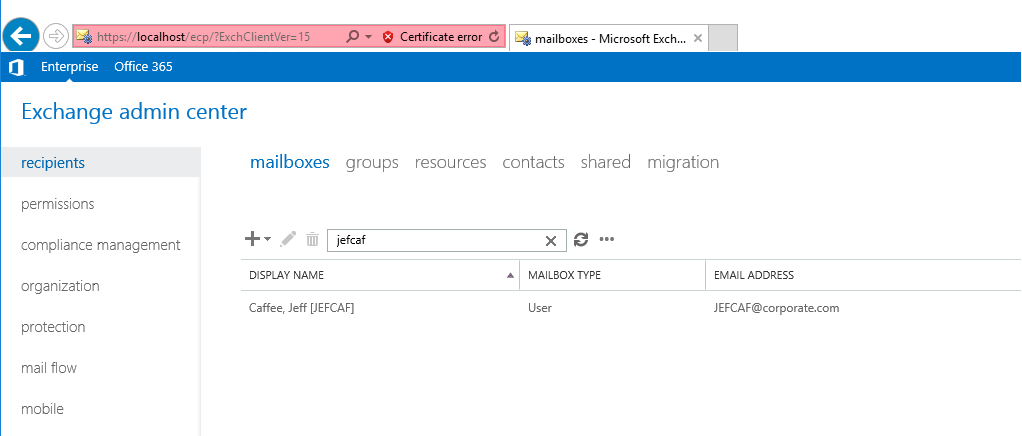
Search for the user you want to use.
-
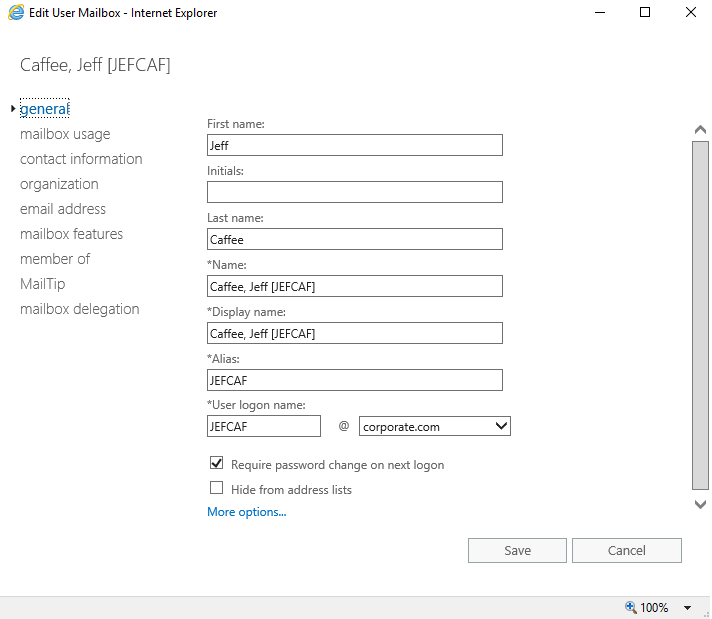
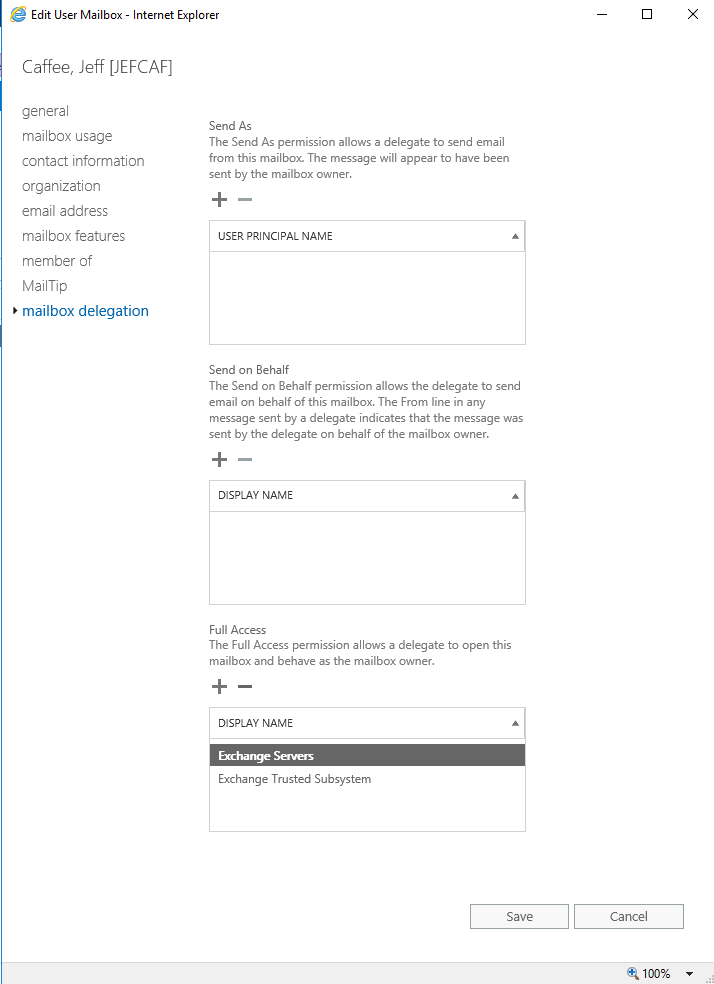
Open JEFCAF via double-click or click Edit.
-
Go to mailbox delegation.
-
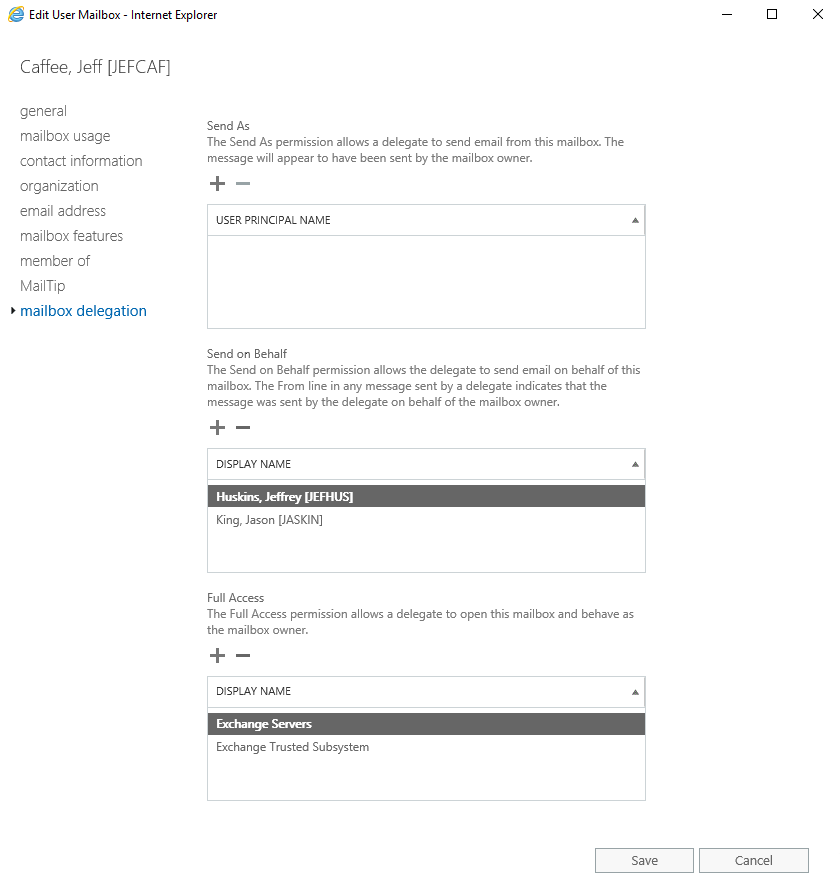
Assign JEFHUS and JASKIN the permission Send on Behalf.
-
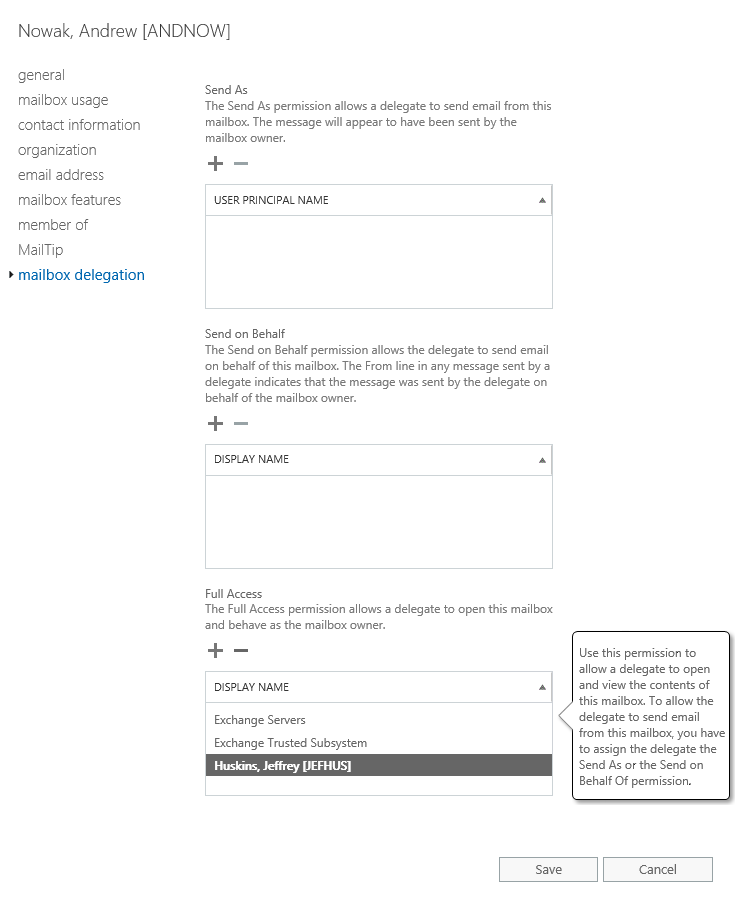
Click Save. Search for and edit ANDNOW, another of Robert Wolfs employees. Assign JEFHUS the permission Full Access.
-
Click Save and exit the Exchange Admin Center.
-
Log in to the portal as System Administrator and run the import profile for Exchange.
When import is completed, you are ready to execute this scenario.
Execution (GOV02.01 and GOV02.03)
-
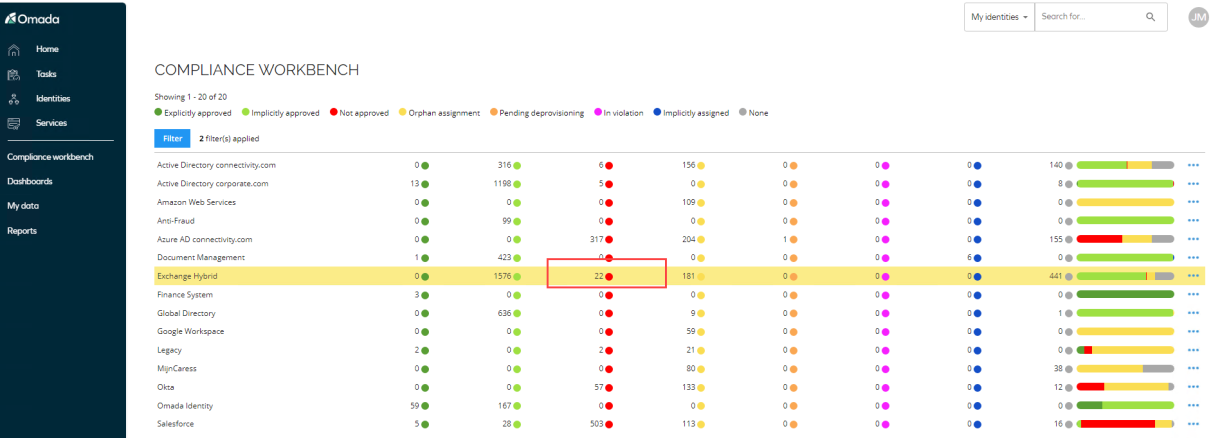
Log in to the portal as the security officer Judy Miller go to Compliance Workbench.
-
Talk about the preparation work, optionally show the permission in Exchange Admin Center. The permissions assigned directly in Exchange are showing up as Not Approved, we now want the manager reviewing these assignments.
-
Click the … next to Exchange Hybrid to bring up the context menu
-
Select Details – in this window you can group by Compliance Status to only show the not approved assignments, which is showing the previously added permissions.
-
Close the window.
-
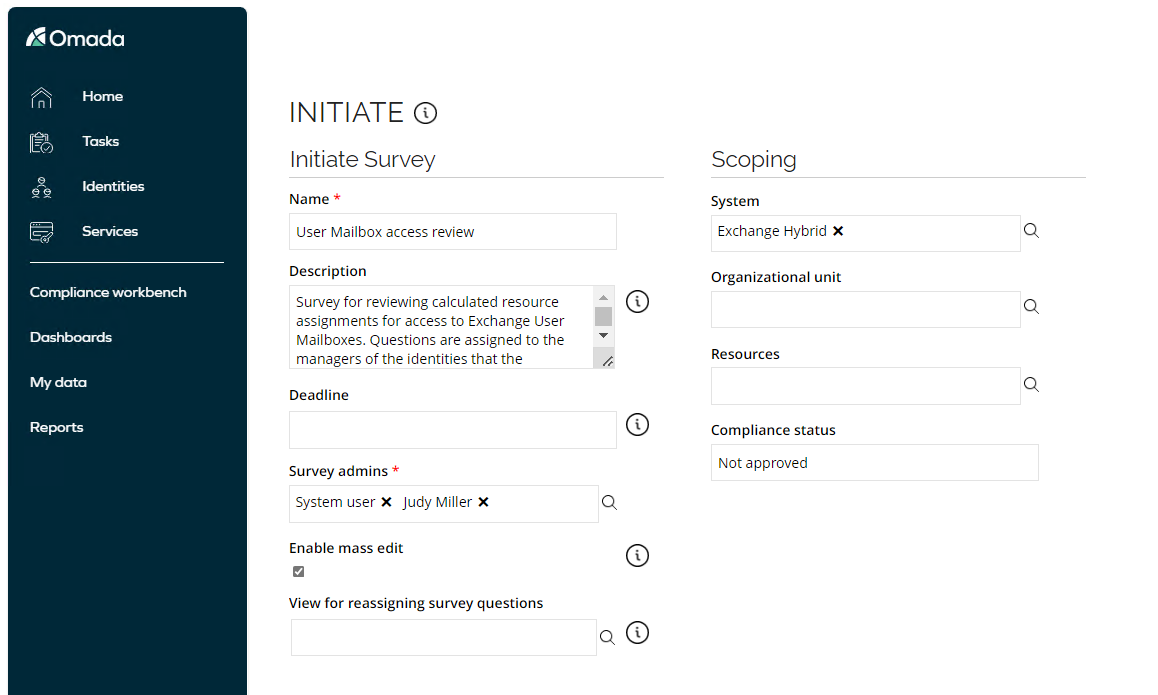
Go to Services – Select User Mailbox access review.
-
Select Exchange Hybrid in Compliance status type Not approved in Compliance status and click Generate survey data.
-
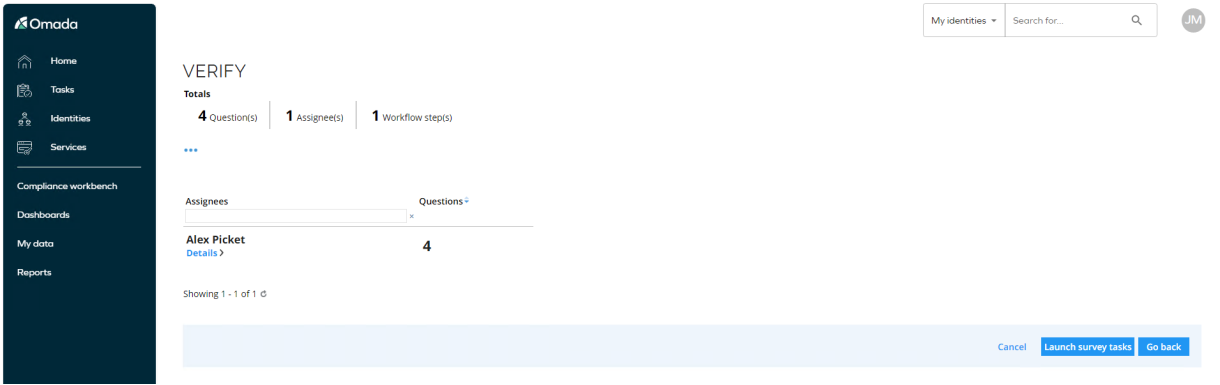
You are now as survey admin asked to verify of the survey tasks looks ok.
-
Click on Details to see how the questions will be presented for the manager – before you launch the survey.
-
Click Close and click Launch survey tasks.
-
Log in to the portal as Alex Picket.
-
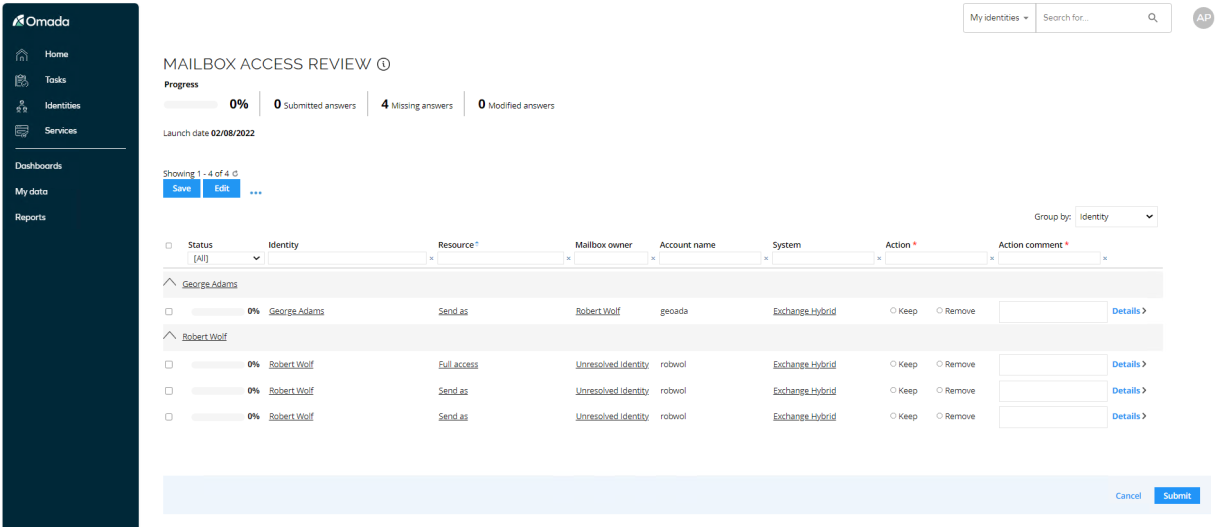
Launch the task Mailbox access review.
-
We only want to allow the permission for George Adams, whereas the other assignments, we want to have removed.
-
Click Submit.
-
Log in to the portal as Judy Miller again. Go to the Compliance Workbench.
-
The Not Approved assignments has now decreased, also notice the number of explicit assignments is increased by one – based on the completed manager access review.
-
Optionally show the Operations Dashboard and the Exchange Admin Center to verify that the permissions are removed.
Survey Administration (GOV02.02)
This section shows some of the actions available in for the survey administrator, the functionality is available for all surveys covered in this chapter.
-
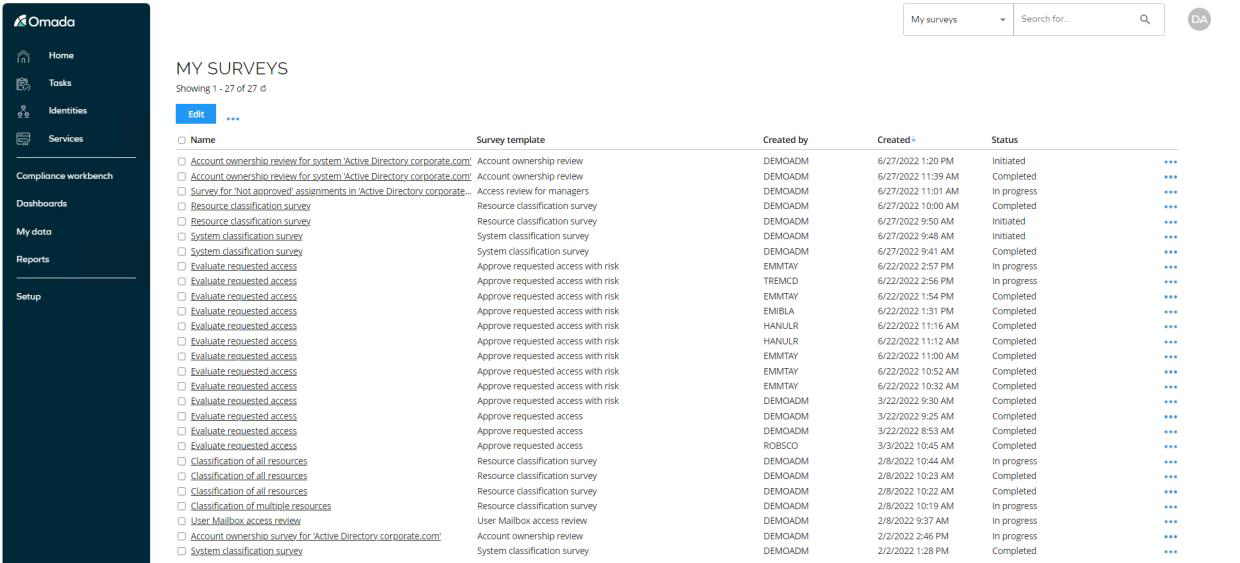
When a survey is launched, you can monitor the progress from My Data -> My Surveys.
-
Click on a survey to display the content.

-
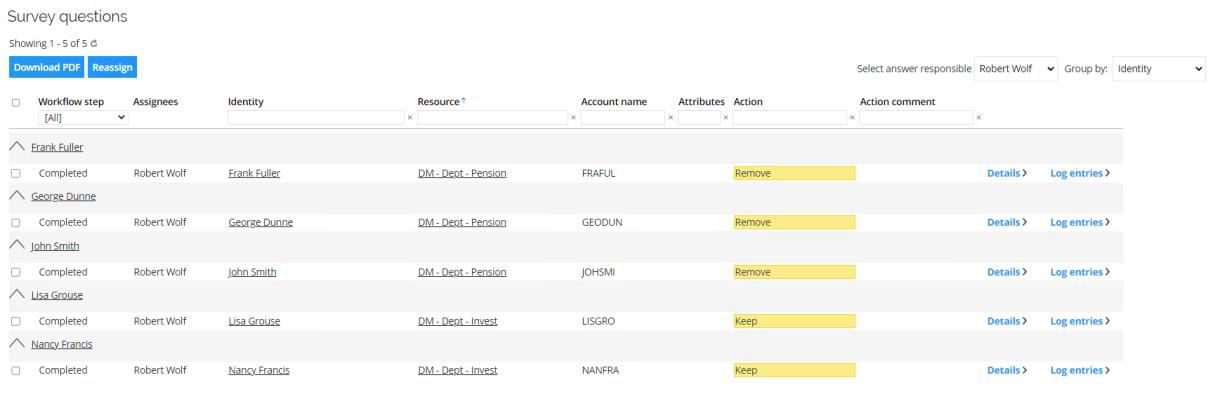
Click on Details to see what has been answered.
-
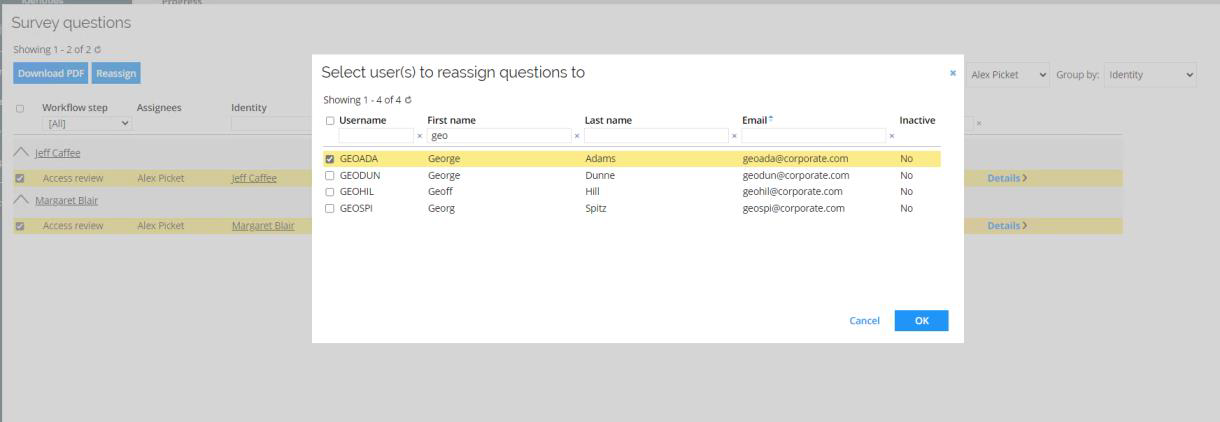
You can optionally select Reassign to assign the outstanding question(s) to another user.
-
Search for and select a new user, who should answer the question(s). Click OK and Close to return to the overview.
-
You can now decide to log on as the new survey assignee.
Schedule Surveys (GOV02.02)
You can schedule surveys to trigger via a Timer. You can create a survey schedule under Setup > Administration > Data Management… > Survey schedules. When a scheduled survey starts, the people that should answer the survey are notified via email and receive a regular survey task in their Tasks view.
While scheduling a survey, you can ask the system to confirm a scheduled survey before sending the tasks by selecting Confirm before launch? When you have selected this option, the system sends a task to survey owners to approve the survey before launching survey tasks to the respondents.
In the demo environment a survey schedule for an Access review for managers has been configured, as shown below.
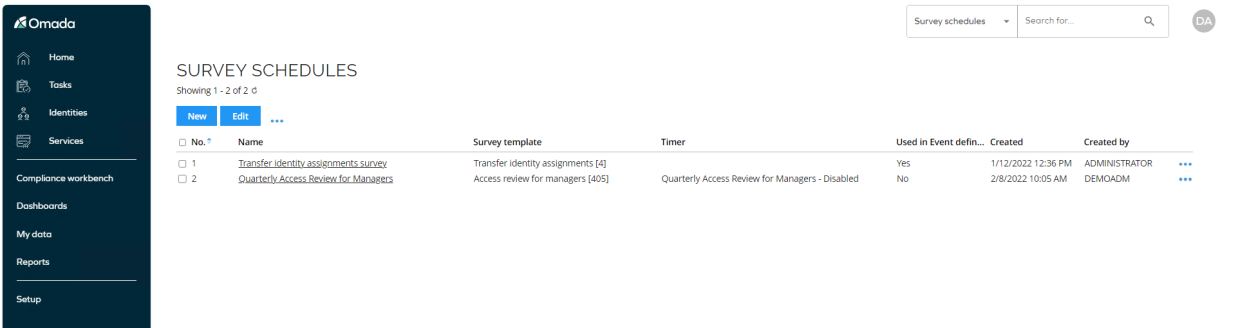
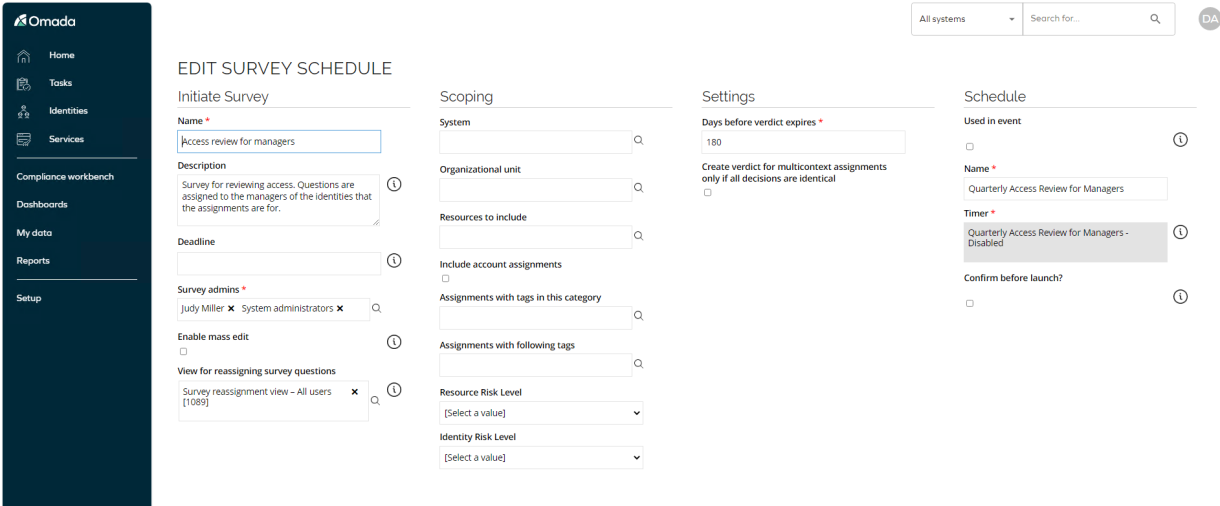
The timer who runs the survey is set to Disabled.

You can run the timer if you wish to trigger the survey, but you may generate many questions if you do not add additional filters in the survey schedule scoping.