Identity Comparison
The purpose of the Identity Comparison dashboard is to compare identities in terms of the resources they have in common.
Overview
To use this dashboard, explore the two tabs it contains, and apply filters to narrow down the selection of identities and resources you want to compare.
Navigating the dashboard
This dashboard is divided into two tabs:
- Selection – used to find and select the identities you want to compare in the second tab.
- Comparison – used to explore how the selected identities match in terms of their resource assignments, job titles, countries, and a number of other parameters.
You can use these tabs in a sequence, starting with the Selection tab to find and select the identities you want to compare, and then moving to the Comparison tab to see how these identities match in terms of their resource assignments, job titles, countries, and a number of other parameters.
While exploring the Comparison tab, you can go back to the Selection tab at any time to change your selection of identities, and then return to the Comparison tab to see the new data related to the new selection.
Selecting identities for comparison on the Selection tab
The purpose of this tab is to find and select the identities to be compared in the second tab.
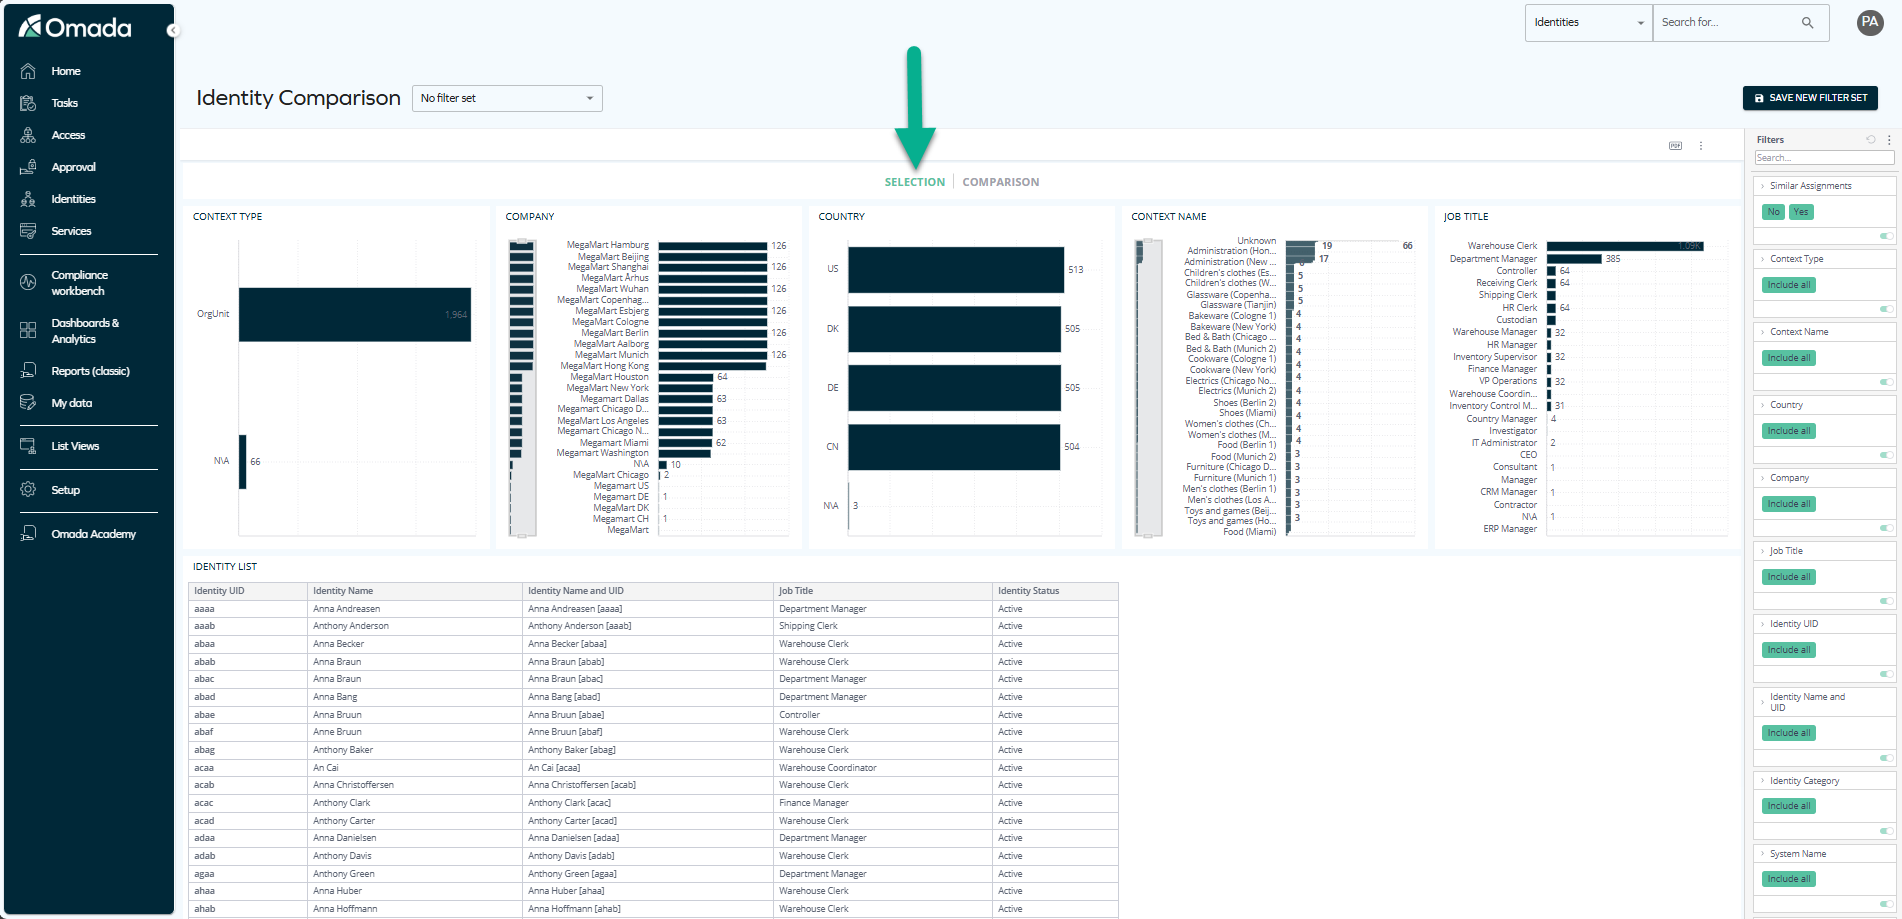
This tab contains six widgets, including:
-
Charts that show statistics related to:
- Context types
- Companies
- Countries
- Context names
- Job titles
The charts are helpful if, at the beginning, you don't know which identities need comparison, and want to gradually narrow down the details before selecting particular identities. For example, you can start with a particular country, then select a particular job title within this country, and only then select the identities that you want to compare.
tipFor details on how to narrow down the data, see Narrowing down the data with additional filtering and sorting options.
-
The Identity list table – this list contains all the identities that you can select for comparison. If you know which identities you want to compare, you can select them directly from this table.
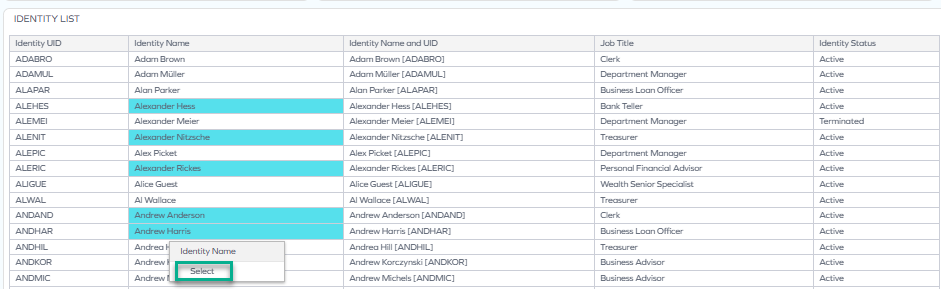
To select at least two identities for comparison, use one of the following methods.
Option 1: Selecting identities in the Identity list table
Right-click an item in the table and click Select. To select more than one item at once, press the Control key, and select as many items as you need.
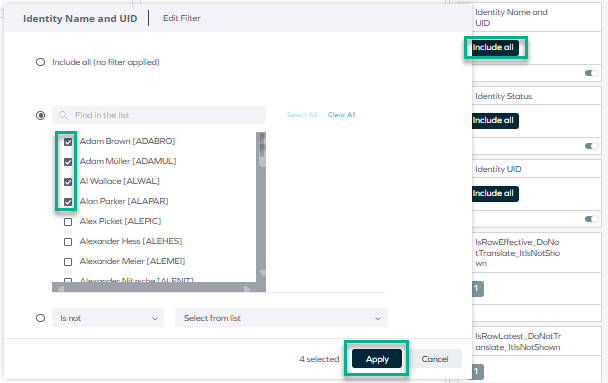
Option 2: Selecting identities in the right pane
In the right pane, find the Identity Name and UID filter, and:
-
Click Include all.
-
Select the identities you want to compare.
tipYou can also use the search line to find the identities of interest to you faster, and apply options such as "Contains" or "Is not" to find the identities that match a particular pattern.
-
Click Apply.
Read on to learn how to narrow down the data by applying additional filters.
Narrowing down the data with additional filtering and sorting options
You can apply filtering and sorting options to narrow down the data and find the identities you want to compare. The information displayed on each widget and tab changes according to the filtering that you apply.
You can apply as many filters as you need without clearing the previous ones: for instance, to compare all identities that hold a particular job title within a given country, select both these parameters, and the data will be filtered accordingly.
Enabling filters
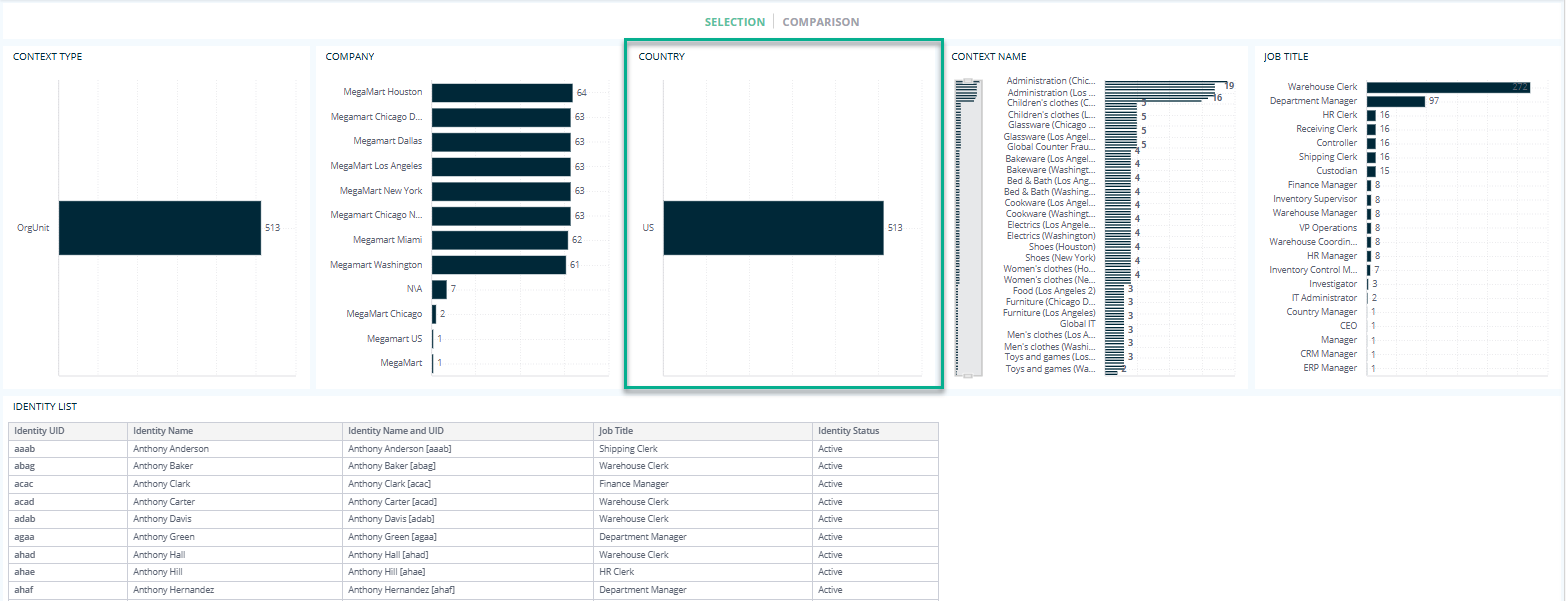
You can enable filtering in a number of ways, for example:
-
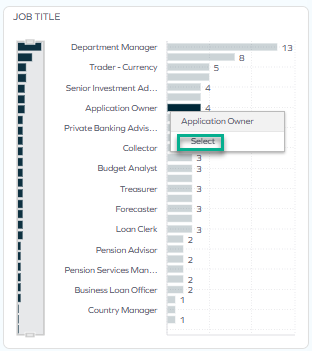
By clicking a chosen item (on any widget or chart), for example, a particular job title.
exampleFor example, when you select one country by clicking it on the chart, all the remaining widgets immediately start to show data from this particular country:
-
By right-clicking an item and clicking Select.
 tip
tipTo select more than one item to filter by, press the Control key, and select as many items as you need:
-
By selecting an item in the right pane.
While using the right pane, you have diverse filtering options. The simplest one is to open the filter by clicking the arrow and selecting items from the list.
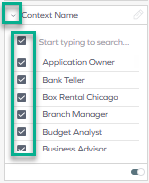
You can also select or exclude particular items:
-
Click either the pencil icon, which appears when you hover over the top right corner of the rectangle, or the Include all field.
-
Select the items of your choice, and tick options such as "Contains" or "Is not".
-
To apply a filter altered this way, click Apply.
When the list is long, it is helpful to type in the search line (at the top of all filters on the right pane, and on each filter itself). For example, to narrow down the filters to only those related to identities, type identity in the search box.
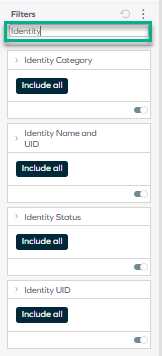
Then, click Include all, and select only the identities of interest to you. In the same way, you can narrow down the data to particular contexts, systems, countries, and more.
-
In the right pane, there is a Similar assignments filter, built for this dashboard only, that helps sort the widgets so that they show only the resources that the identities have in common. It is especially useful while exploring the Comparison tab.
If you want to activate the filter:
- Hover over the Similar assignments filter until the pencil icon appears and click it.
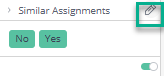
- In the pop-up, deactivate the No option:

This way, Yes remains activated, and the widgets only display the resources that all the selected identities have, for example:

If this filter is applied and an identity has no resources in common with the rest, it is not displayed on the Resource Assignment Matrix. This results in seeing fewer identities in the matrix than you selected before (for example, you see 4 instead of 5, because one does not have any resources in common with the rest).
Disabling filters
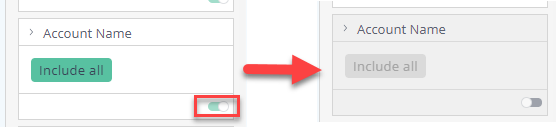
You can also disable filtering in a number of ways, for example:
-
By disabling the toggle:
-
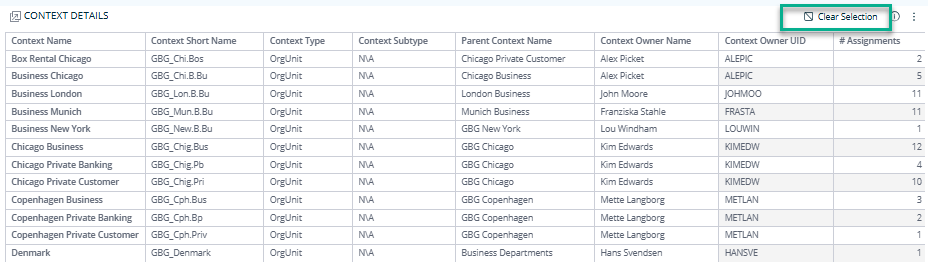
By selecting Clear selection, which appears in the top right corner of a widget when you hover over it:
-
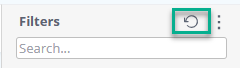
By resetting the filtering in the right pane:
Sorting lists
You can also sort lists by any of the columns, for example, by job title or country.

Comparing identities on the Comparison tab
The purpose of this tab is to help you compare a selection of identities in terms of their resource assignments, job titles, countries, and a number of other parameters.
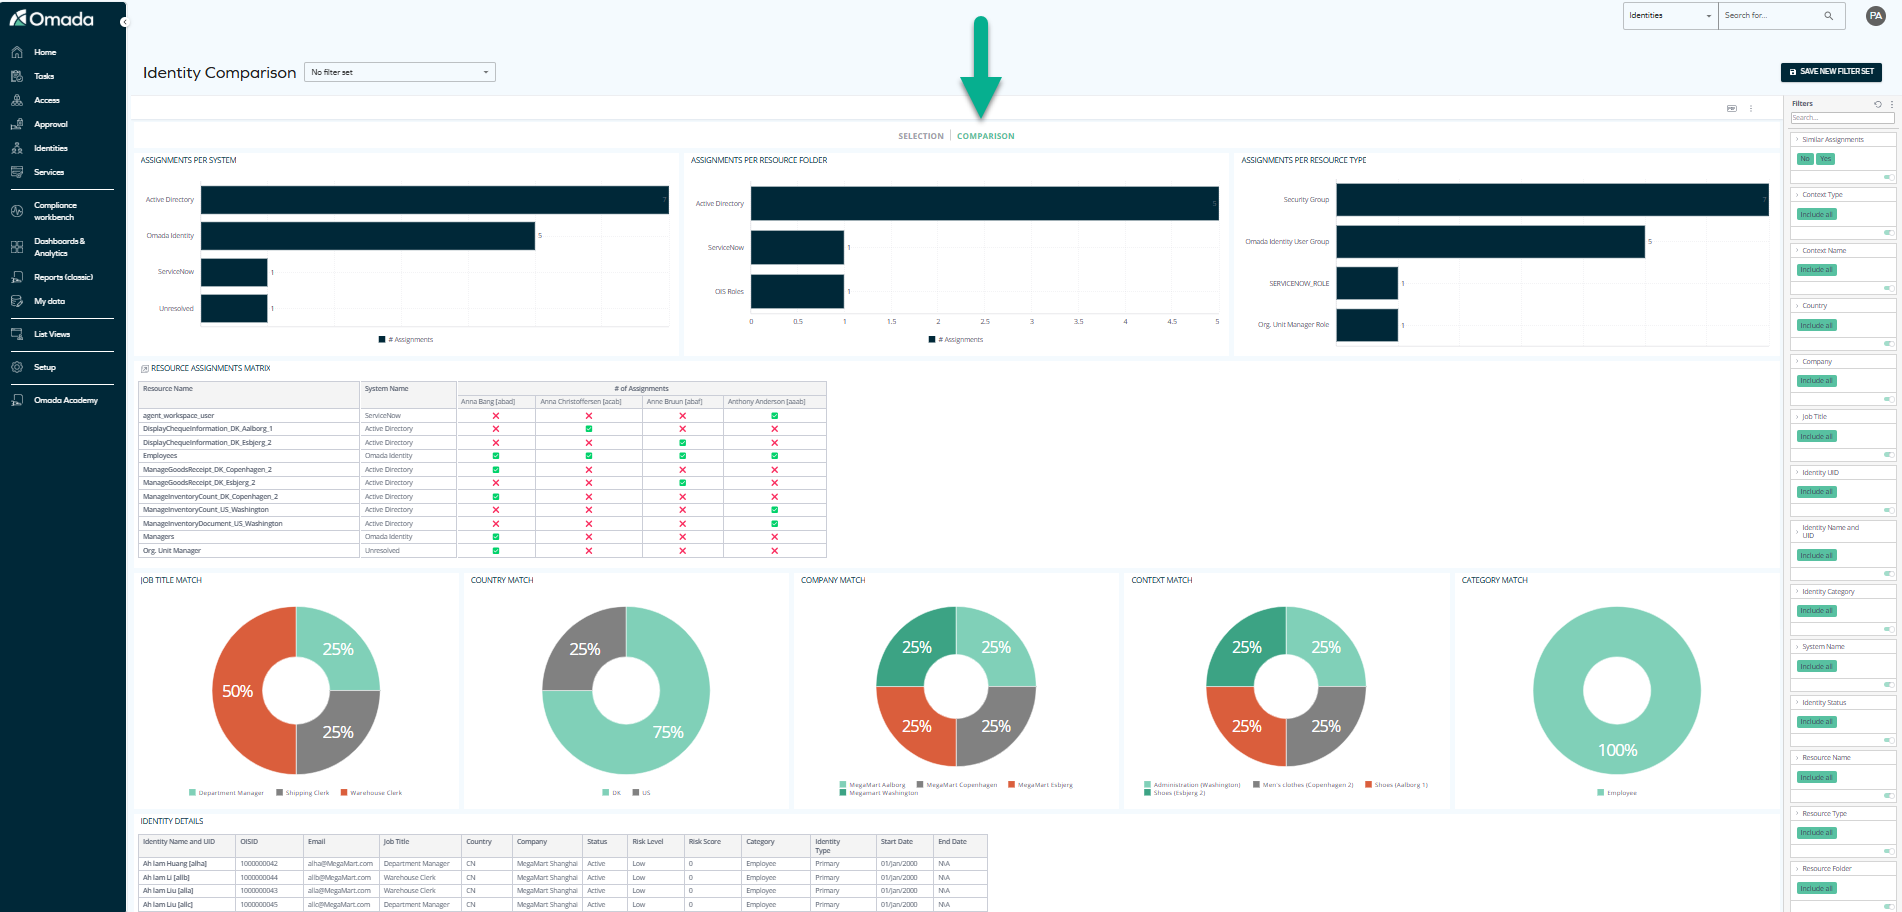
This tab contains numerous widgets in the form of charts and tables.
All these widgets can be used to narrow down the resources displayed on the remaining widgets below. For example, if you chose a number of identities in the Selection tab, and now want to compare their access rights within a particular system, you can select the system by clicking it on one of the charts, and the list of resource assignments below will be filtered immediately, leaving only those belonging to the selected system.
The widgets include:
-
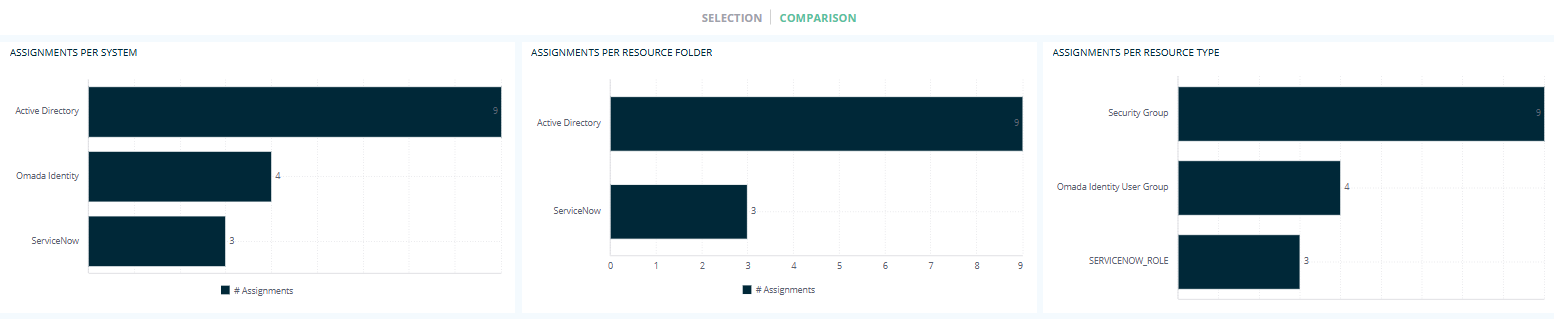
Three charts comparing how many assignments per system, assignments per resource folder, and assignments per resource types the selected identities have:
-
The Resource Assignments Matrix showing all the resources that the selected identities have, while also displaying which resources belong to which of the selected identities.
This is a key comparison tool, as it allows you to see at a glance which resources the selected identities have in common, and which they don't.
 note
note- The green tick (✅) means that the identity has the particular resource.
- The red cross (❌) means the identity doesn't have it.
This widget is jumpable, meaning that you can right-click any cell within it, then select Jump to > Assignments Details, and see more details on a separate widget:

-
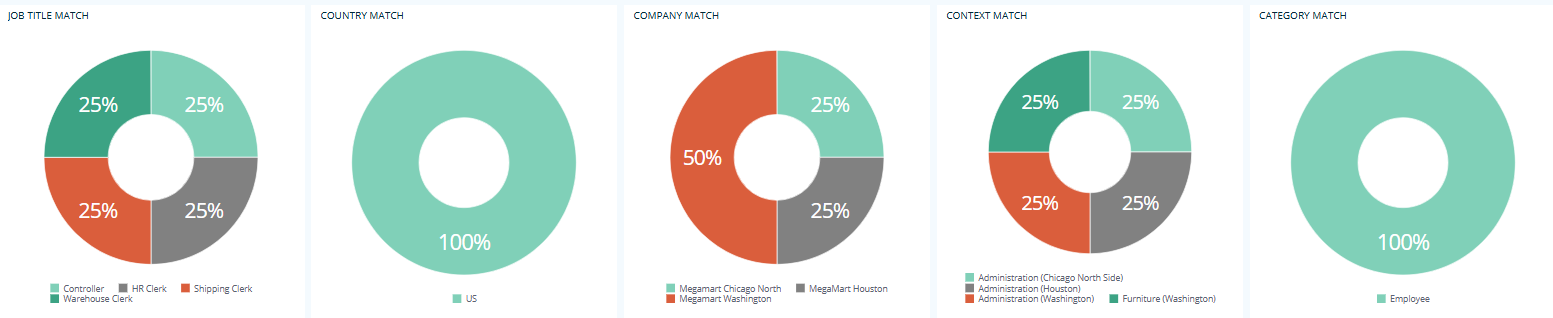
Five charts showing how similar the selected identities are in terms of the job title, country, company, context, and category:
-
The Identity Details table that lists the following details of all the selected identities: the identity name and UID, OISID (Omada Identity System ID), email, job title, country, company, status, risk level, risk score, category, identity type, start date, and end date:

-
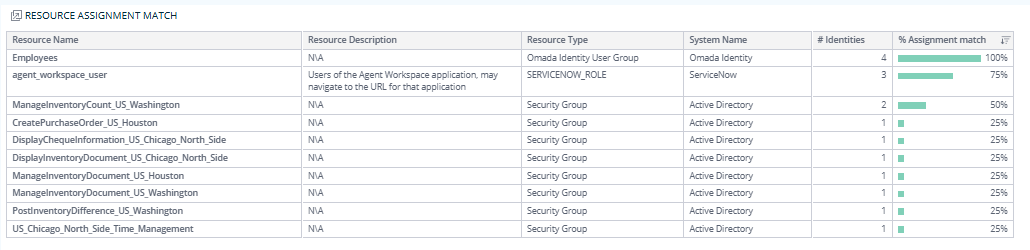
The Resource Assignment Match table that lists the resource name, resource description, resource type, system name, number of identities, and percentage of assignment match in the case of all the selected identities:
All these widgets can contribute to a comprehensive comparison of the selected identities, and help you find the similarities and differences between them in terms of their resource assignments, job titles, countries, and a number of other parameters.
Example use case
This section provides an example of how to use the Identity Comparison dashboard to compare identities in terms of a number of other parameters to spot any discrepancies in the access rights of the selected identities, and take corrective action as needed to ensure that all the selected identities have the appropriate access rights.
The exact values depend on your data, so the example below is for illustrative purposes only.
In this exemplary use case, you need to verify that your two newly onboarded employees in the Global banking group have been provisioned with the same resources as their existing colleagues who hold the same job title.
- On the Selection tab, click Global banking group on the Company chart to filter by that company.
- Click the relevant job title (for example, Treasurer) on the Job title chart to narrow the list further.
- In the Identity list table, hold the Control key and select the four employees you want to compare: the two new hires and two existing colleagues.
- Switch to the Comparison tab.
- In the right pane, activate the Similar assignments filter to display only the resources the selected identities share.
- Review the Resource Assignments Matrix to spot any discrepancies: a red cross (❌) next to a new hire indicates a resource that their colleagues have, but they have not yet been provisioned with.
- Use the Resource Assignment Match table to see the exact percentage of matching assignments across all four identities, and to quickly identify any resources that have been over-provisioned or missed during onboarding.
- Take corrective action as needed to ensure that the new hires have the appropriate access rights and that any discrepancies are resolved before they start working. For example, use access requests and access removals.
Downloading and exporting
To export (download) the content of any widget, open the three-dots menu next to it, select Download, and choose a format.
Before you download the content of a widget, read Omada Identity Analytics – Downloading and exporting for details on the available formats as well as their limitations.
Data update cycle
The data displayed on OIA dashboards reflects the state of the last successful build, which occurs every day after midnight; it is not streamed live. For more information, see the introduction to dashboards: Omada Identity Analytics – Data model.
Access to this dashboard
To learn which user groups have access to this dashboard, see Access to dashboards.