Additional configuration
Set-up certificate authentication
-
Create app/certificate, following the instruction in Microsoft documentation: App-only authentication for unattended scripts in the EXO V2 module.
-
If you chose to create a certificate with password, convert certificate into PEM format.
Converting to PEM can be done with OpenSSL.
exampleopenssl pkcs12 -in filename.pfx -out cert.pem -nodes
Edit attributes to resolve display values for customer setting
You must configure the Omada Identity Portal to display human readable values for access to other users' mailboxes.
- In the Omada Identity Portal, go to Setup > Administration >More... > Customer Settings.
- Edit the customer setting Attributes to resolve display values for in the Role and Policy Engine group.
- Add MAILBOXREF to the comma-separated list of attributes and click OK to save.
Mailbox reconciliation
For proper reconciliation of actual and desired state on exchange mailboxes it is necessary to specify an attribute reconciliation map. This must be done on the Resource type for Exchange mailboxes, the Resource type is named Exchange User Mailbox.
By default, there is no reconciliation map defined, the map depends on which attributes you wish to manage or control from Omada Identity. If you wish to use some of the Exchange Mailbox Option resources, the attributes can be found in the mailbox option resource itself.
This example shows how the system name of the attribute is compared to the name of the imported attribute.
When you wish to manage and control these values on the mailbox, they must be part of the reconciliation map and you must define the following reconciliation map for each of those values:
PRIMARY_EMAIL=PRIMARY_EMAIL; MAILBOXLOCATION=MAILBOXLOCATION;
ISSUEWARNINGQUOTA=ISSUEWARNINGQUOTA;
PROHIBITSENDQUOTA=PROHIBITSENDQUOTA;
PROHIBITSENDRECEIVEQUOTA=PROHIBITSENDRECEIVEQUOTA
Multiple attributes are separated with a comma.
Mailbox migration
Omada Identity supports migrating mailboxes from Exchange on-premises to Exchange online or the other way, without losing the Compliance and Provisioning status.
We do not provide a tool for the actual migration of the mailboxes, it is expected that customers will utilize the Microsoft provided mailbox migration solutions in the Exchange Admin Center or via PowerShell.
Once a mailbox is migrated to Exchange Online, assign a license for Exchange Online to the Microsoft Entra ID user account (to which the user mailbox is assigned). Use the Microsoft Entra ID connectivity for this purpose. If the Microsoft Entra ID account already has a valid license plan which includes Exchange Online, then no action is required.
Mailbox location
In Omada Identity, the physical location for a mailbox is determined via the MAILBOXLOCATION attribute, which is part of the following attribute sets:
- Exchange User Mailbox Attributes
- Exchange Mailbox Access Attributes (no setup required)
Setting up MAILBOXLOCATION attribute in Exchange User Mailbox Attributes
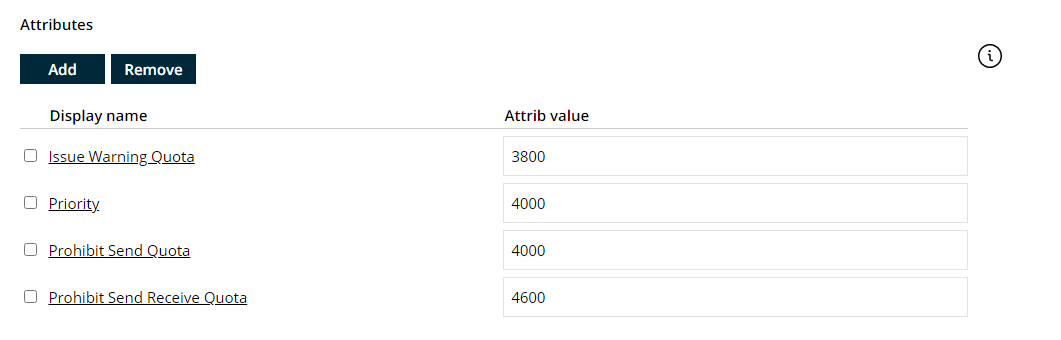
The MAILBOXLOCATION attribute must be set to either Local or Cloud. The attribute value can be populated in many ways (for example: filled out manually in the Request Access process or referenced from an attribute on the Identity or a context). As part of the standard configuration, Omada Identity provides these resources:
EXCHANGE_HYBRID_LOCAL_MAILBOX_OPTIONEXCHANGE_HYBRID_ONLINE_MAILBOX_OPTION
where the values are already populated:

and in combination with the standard, provided configuration of the AttributesValueResolver RoPE extension:
<add type="Omada.RoPE.Controller.OISX.Extensions.AttributeValueResolver,
Omada.RoPE.Controller.OISX">
    <settings>
        ...
        ...
        ...
        <add key="setting7" name="Exchange User Mailbox:MAILBOXLOCATION"
extraInfo="Type:ReferencePath" value="/#ASSIGNMENTS_PER_RESOURCETYPE/Exchange Mailbox
Option:[MAILBOXLOCATION]" />
The resource driven attribute concept is used to copy the value of the Mailbox location from the Mailbox Option resource to the Mailbox resource. You can use both the Request Access process and Assignment Policies to assign mailboxes and location.
When you want to migrate some of your mailboxes, for example, from Exchange on-premises to Exchange online, the Mailbox Location attribute must be updated from within Omada Identity so that the desired state is correct, which means that the value must change from Local to Cloud.
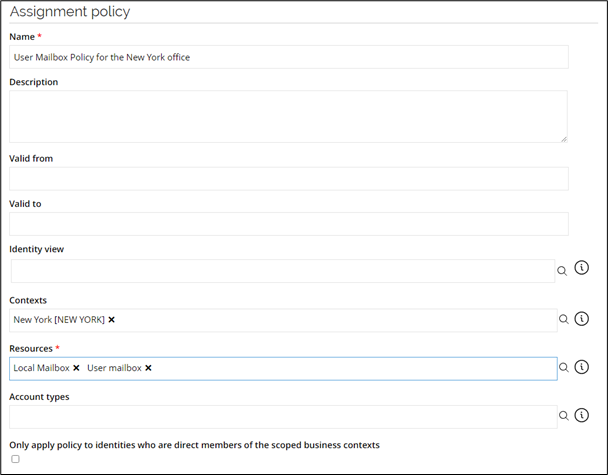
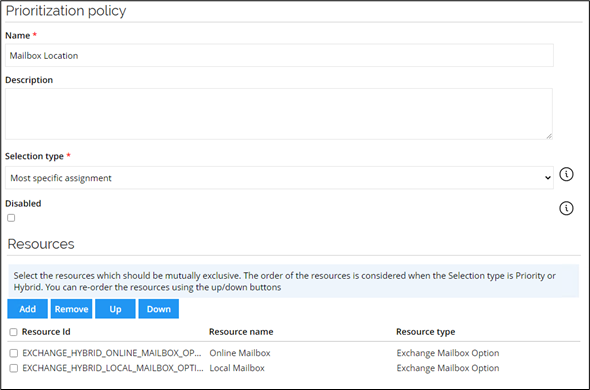
As mentioned earlier, the actual population of the value can be done in many ways, but if you are using the Mailbox Option resources listed above to select the location via Request Access or Assignment Policies, you can use a Prioritization Policy to determine that the last assigned resource assignment for the mailbox option should be the active one, for example:
When you have selected which mailboxes are to be migrated and assigned them a new value in the Mailbox Location attribute, a new provisioning claim (with a migration information) will be generated for each of the Identities for whom their mailboxes will be migrated.
Remember to align the validity of the provisioning claims (General Settings under Provisioning on the Exchange Hybrid system onboarding) so that the actual migration is completed within this validity period.
Once the actual migration is completed outside of Omada Identity, a new import from Active Directory, Microsoft Entra ID, and Exchange Hybrid must be performed (either after each other or in the same import profile). As part of the import, a new user mailbox resource assignment will be created which refers to the Microsoft Entra ID account and the existing user mailbox resource assignment referring to the Active Directory account will be disabled.
Below is an example of how the resource assignments will be presented after the migration. Afterwards you will need to perform a manual cleanup of the new obsolete resource assignments if you want to have those removed (by removing the origin of the Desired State, for example, an Assignment Policy or a Direct Assignment).
