Microsoft Dynamics 365 Business Central
This connectivity package provides support for governing and managing Business Central environments. Business Central provides two methods for managing user permissions:
- User groups: Managed directly within Business Central, user groups allow you to assign roles and permissions to a collection of users.
- Security groups: Managed through Microsoft Entra ID, security groups enable centralized management of user permissions across multiple Microsoft services, including Business Central. This method leverages the capabilities of Microsoft Entra ID for broader access control.
You must choose either user groups or security groups for managing permissions. You cannot use both methods simultaneously. This distinction is crucial for setting up your permissions strategy in Business Central.
Supported objects and operations
User groups
| Resource | Omada data model | Possible operations |
|---|---|---|
| Users | Account | Read, update |
| userGroups | Resource | Read |
| userGroups Assignments | Resource assignment | Create, read, delete |
| permissionSets | Resource | Read |
| userPermissions Assignments | Resource Assignment | Create, read, delete |
Security groups
| Resource | Omada data model | Possible operations |
|---|---|---|
| Users | Account | Read |
| permissionSets | Resource | Read |
| userPermissions Assignments | Resource Assignment | Create, read, delete |
| securityGroups | Resource | Read |
| securityGroups Assignments | Resource Assignment | Create, read, delete |
Minimum required permissions
Only administrators can acquire the authorization credentials required to connect to the Business Central API.
Implementation notes
Depending on your choice whether to use user groups or security groups to manage permissions, the following capabilities are available:
User groups
- Read and deactivate accounts.
- Change user details such as name and last name.
- Read user groups.
- Read permission sets.
- Read, provision, and deprovision user groups assignments.
- Read, provision, and deprovision user permission assignments.
Security Groups
- Read and deactivate accounts.
- Change user details such as name and last name.
- Read security groups.
- Read security groups assignments.
- Read, provision, and deprovision user permission assignments.
Network requirements
None.
Prerequisites
Before importing information from Business Central to Omada Identity, perform the following setps in the Microsoft Azure Portal.
Register a new application in Azure Portal
Create an application registration to authenticate and authorize Omada Identity with Azure Active Directory:
-
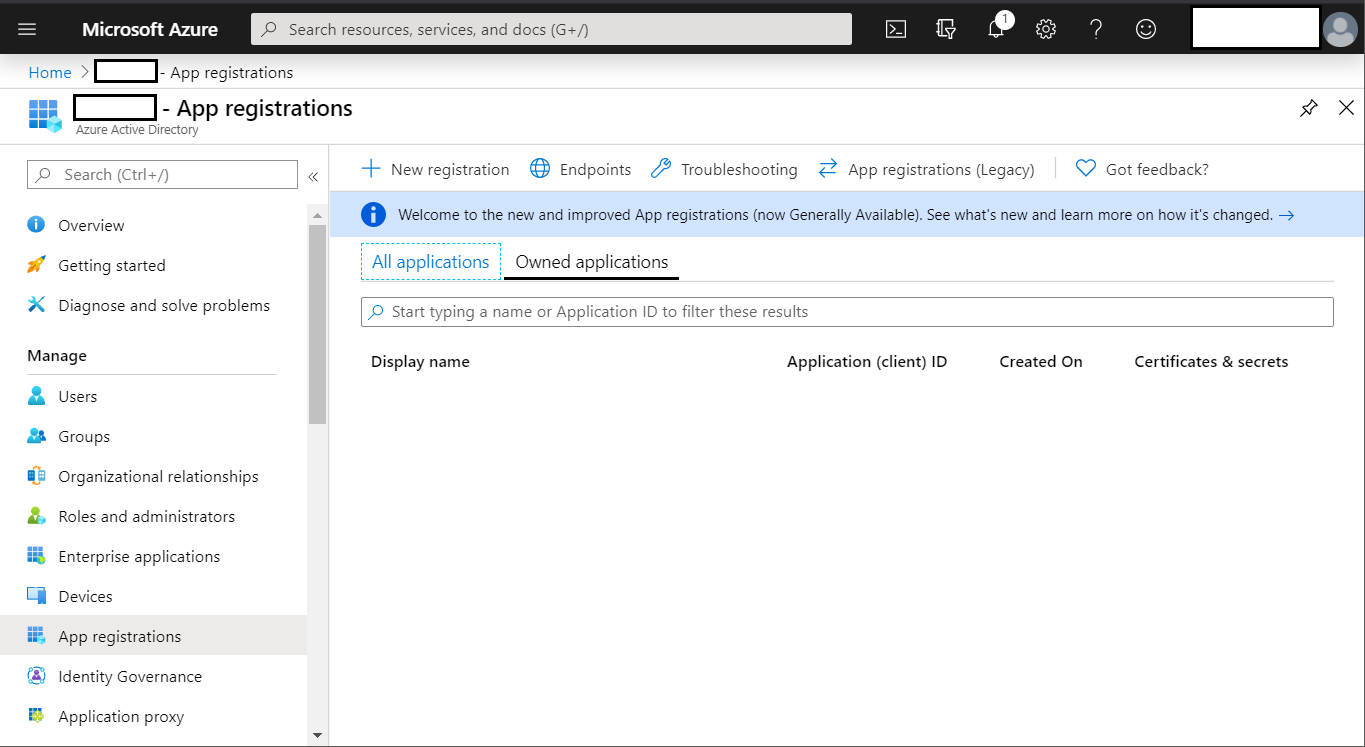
In the Azure portal, go to your directory. In the Manage section, find the App registrations, then click New registration.
-
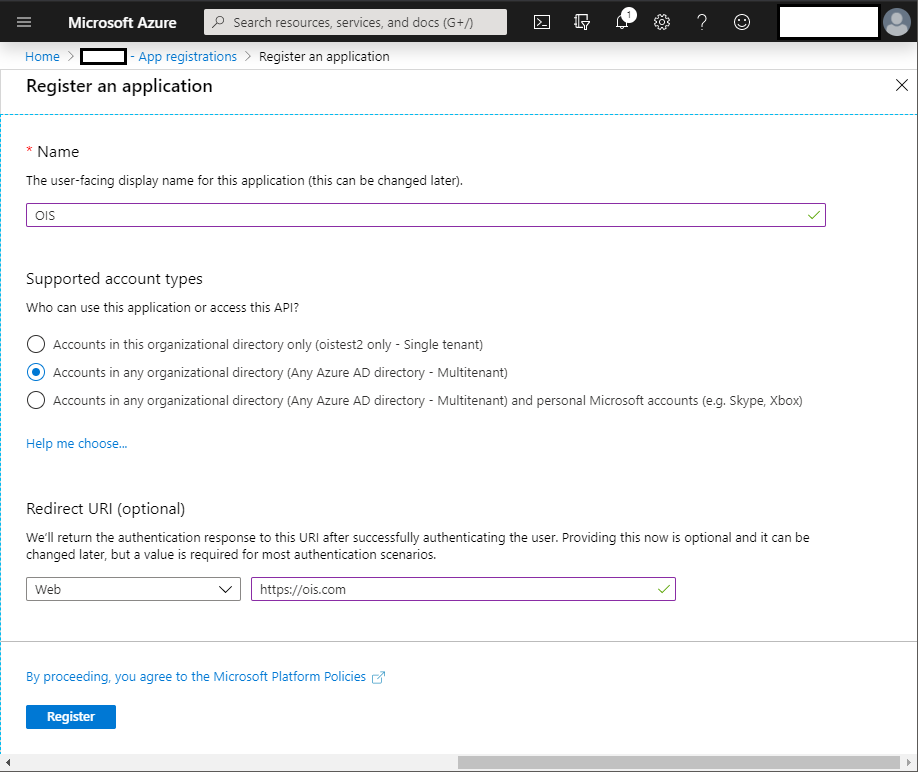
In the Register an application dialog box, enter a Name, select Accounts in any organizational directory as Supported account types, and enter a Redirect URI. You can enter any value that you want to use, as long as it is in a valid URL format.
-
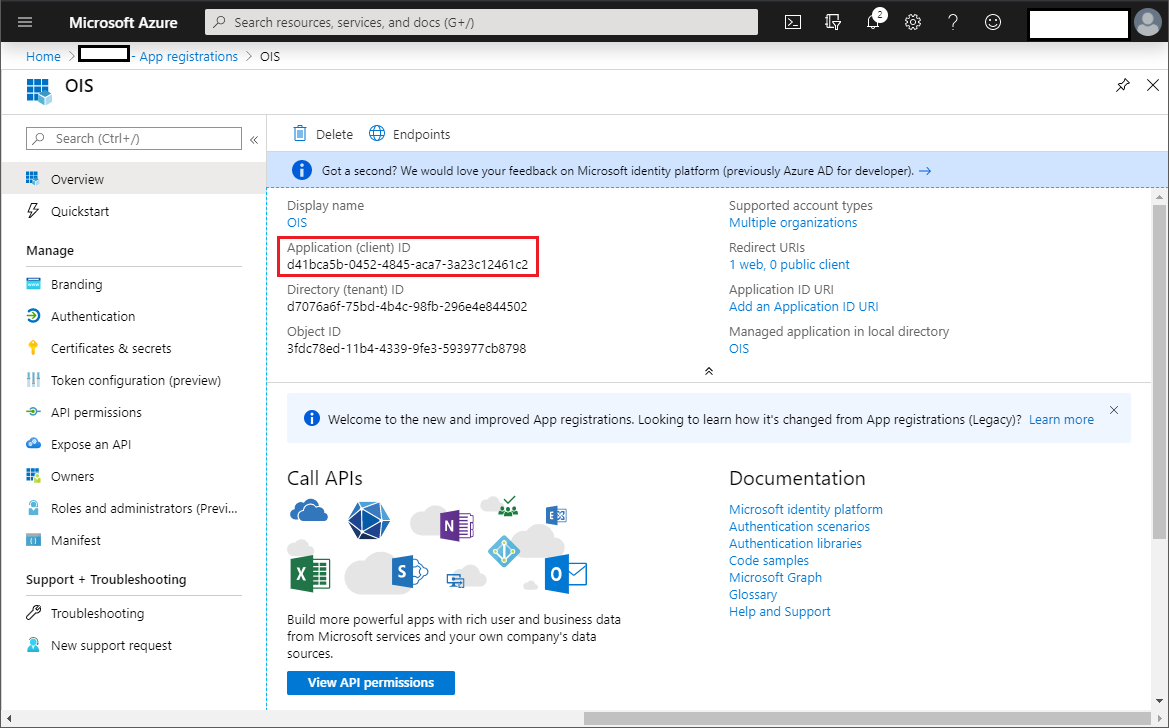
Click Register. Make a note of the Application ID. You must use the Application (client) ID when you onboard the system to Omada Identity.
infoThe Application ID shown in the following image is only an example. Your Application ID contains a different value.
Add Dynamics 365 Business Central
-
In Microsoft Azure, on the left side navigation pane, click API permissions. Select +Add a permission.
-
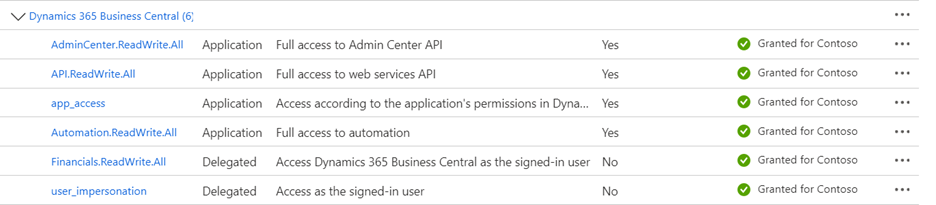
In the Supported legacy APIs, from Commonly used Microsoft APIs, choose Dynamics 365 Business Central. Click Select.
-
Select all needed application permissions.
Create a Client Secret
-
Go to Certificates & secrets select + New client secret.
-
If you want to, type a description for the secret key, for example, to identify one secret key from other keys.
-
If you want to, chose an expiration time for the secret, then click Add.
-
Copy the generated key shown under Value. You cannot see the value again when you have left the screen, so you can only use this key if you copy it now and paste it in Omada Identity after setting up the Omada Identity application on Azure.

Refresh Token
Prerequisites:
- App Registration: Ensure you registered your app in Entra ID and have your client ID, client secret, and tenant ID configured.
- Redirect URI: Set up a redirect URI in your app registration (such as https://www.getpostman.com/oauth2/callback).
Obtaining the authorization code
- Go to Postman and create a new request.
- Set up the Authorization URL:
- Method: GET
- URL:
https://login.microsoftonline.com/{tenant_id}/oauth2/v2.0/authorize - Replace {tenant_id} with your Entra ID Tenant ID.
- Configure the request parameters. In Postman, click the Params tab and add the following parameters:
- client_id: Your client ID from Azure AD.
- response_type: code
- redirect_uri: https://www.getpostman.com/oauth2/callback
- response_mode: query
- scope:
https://api.businesscentral.dynamics.com/.defaultoffline_access
- Click Send. A new tab opens in your browser, asking you to log in and authorize the app. After authorizing, you will be redirected to the specified redirect_uri with the code appended to the URL.
- Save the authorization code. Copy the code from the URL in the address bar (example:
?code=0.AAAABf89....).
Exchanging authorization code for tokens
- In Postman, create a new POST request:
- Method: POST
- URL: https://login.microsoftonline.com/{tenant_id}/oauth2/v2.0/token
- Replace {tenant_id} with your Azure AD Tenant ID.
- Configure the body:
- Click on the Body tab and select x-www-form-urlencoded.
- Add the following key-value pairs:
| Type | Value |
|---|---|
| grant_type | Authorization_code |
| client_id | Client ID from Azure AD |
| scope | https://api.businesscentral.dynamics.com/.default offline_access |
| code | The authorization code you obtained in the step above. |
| redirect_uri | https://www.getpostman.com/oauth2/callback |
| client_secre | Client secret from Azure AD. |
- Click Send. If the request is successful, you will receive a response containing the access_token and refresh_token. Save the refresh token, will need it to connect to the API in Omada.