Migration
If you have systems already onboarded utilizing legacy collectors, Omada recommends migrating those systems to the new .NET-based collectors.
The .NET-based collector offers more capabilities supporting queries and mappings functionality making it the preferred solution. We've introduced the migration feature to ensure the continuity and proper utilization of the existing systems working with the Omada Identity.
The purpose of the migration feature is to switch the legacy system category to one utilizing the .NET- based collector. Depending on the system there are two ways this is achieved:
- The migration feature creates a new category that uses the .NET- based collector. This option is available for all systems.
- The migration feature moves the system to an already existing multisystem category that uses .NET- based collector. This option can be used for Active Directory (AD).
For the Generic Database the migration utilizes already existing system category and replaces the legacy collector with SQL query collector.
For the on-premises deployment of Omada Identity, to fully benefit from the migration feature and avoid unnecessary issues, Omada recommends upgrading to the latest version before using the feature.
The migration feature is available for the following collectors:
| Legacy collector | Replacement collector |
|---|---|
| Active Directory | Microsoft Active Directory |
| Exchange | Microsoft Exchange Hybrid |
| Generic DB | SQL Query Collector for Generic database |
| SAP | SAP Access Data (available for on-premises deployment with the 15.0.3 release) |
Providing the migration functionality for the SAP Identity Data collector has not been scheduled.
Migration priorities
The main emphasis, excluding Generic Database, in the migration process is on the business keys in the Omada Data Warehouse (ODW) controlled data. The business keys are changed in the process because their structure is impacted by the system category and the differences in how they are being generated in the legacy and .NET-based collector. Besides that, all existing and updated historical data are migrated. It ensures that all master data configurations are still valid after the migration.
For systems with trust relation between them, migration task is completed only if all systems have been migrated. This is true for target system trusting other systems or other systems trusting target system.
The feature replicates aspects of legacy system including:
- Old onboarding configuration is translated to the new configuration
- Queries associated with the legacy collector have corresponding Queries and Mappings created for the .NET-based collector.
The query scope for the AD system is established using the LDAP path and you can enable relevant queries using the Import Users, Import Groups, Import Computer settings.
Depending on the system size the migration process time might vary. During migration process you can't perform import of the migrated system.
Migration scope
During system migration the following elements are included:
System onboarding values
- Connection details
- Queries and mappings
- Extension attributes
- Account rules
- Threshold configuration
Business keys
- For current and historical data in the Data Warehouse
- For master data representation in the Enterprise Server
- For master data representation in the archival Enterprise Server Database
- For survey verdicts
- For calculated assignments in the Role and Policy Engine
For Generic Database system Business Keys are not in the scope of the migration process.
To verify which collector you're using:
- In the Omada Identity, go to Setup > Master data > Systems.
- In the Category column set the filtering to the collector you're looking for.
Configuring and performing migration
To successfully and safely perform the migration process, recommends undergoing the following preparations:
-
on-prem Prepare a backup of all databases that are involved in the migration process, including:
- Omada Enterprise
- Omada Enterprise Archive
- Omada Data Warehouse
- Omada Data Warehouse Master
- Omada Role and Policy Engine
-
Ensure that there is a sufficient transaction log disk space required to complete the migration process. The estimated disk space that is required is notified by the feature before initiating the migration.
-
If you have received a notification about high ratio of historical data, perform maintenance to improve the migration process performance.
For more information, go to the ODW data clean-up import profile section.
-
Stop all running Omada Role and Policy Engine instances until the migration process is finished and full import is completed.
-
Enable Preview mode for provisioning to avoid it happening unexpectedly due to the migration process.
-
Finalize running surveys, for example, account ownership or recertification, utilizing Omada Data Warehouse business key. This includes surveys without the PostActionHandler.
noteThe Access Request Approval Surveys are exempted from this prerequisite.
Active Directory migration
Before you start
Make sure that all imports were successful and import thresholds are not exceeded.
-
In the Enterprise Server, go to Setup > Master Data > System.
-
From the list choose the system you want to undergo the migration process.
-
Expand the ellipsis menu with additional options and click the Migrate option.
This will open the migration wizard with the Information tab opened. It provides information on the anticipated disk space that is required to perform the migration process. For the target system that is trusted by other system, or has trusted systems this information is also listed in the Information tab.
-
Click Next button and open System category tab.
noteOptionally you can choose the Run in test mode option. Choosing this option prevents applying changes to databases.
-
Configure the Select system category option. You can choose either existing system category or Create new option.
When creating a new system category it is possible to enable Create multi-system category setting. Enabling this option allows you to choose this system category when performing migration for another Active Directory system.
-
Click Start to start the default migration process.
To customize migration procedure click the Next button and proceed to Advanced tab.
Advanced settings
Configuring the settings in the Advanced tab allows you to customize the migration feature.
-
Configure the Chunk size setting.
This defines the number of business keys that are migrated simultaneously. The default value is set to 50 000. The bigger the value the migration is faster but memory usage increases.
-
Configure the Command timeout setting.
In case of time-outs during the migration procedure increase the setting value.
-
Configure the Use cross-db transaction setting.
This enables a recovery option when errors are encountered. Enabling this setting increases significantly transaction log size.
-
Configure the Create diagnostics setting.
Enabling this setting shows the transaction log usage before and after the migration is complete. Enabling this option requires View Server State permission.
-
Optionally, configure the Interval for call DB (min) setting.
The setting ensures that the connection with databases during migration process is maintained. recommends leaving the Interval for call DB (min) setting on the default value. The maximum configured value should not exceed 30 min.
-
Click Start to start the customized migration process.
Follow-up actions
The system state is left in migration state after the automatic migration is finished. To successfully end the process complete the following manual steps:
-
Check and re-configure the Connection details.
Re-enter the password and verify that the migrated values are correct. recommends to use the Test connection feature for verification.
noteBe sure to check the configuration settings Use SSL and Port.
-
Check Queries and mappings.
Verify if the Queries and mappings are correct and if the extension attributes are added to appropriate queries. If the extension attributes mappings are duplicated remove the duplicates.
-
Check Account Rules.
The default mappings in the legacy collector are different than in the .NET-based collector. Due to this recommends using Data Preview Service to verify values returned by queries and check them against the account rules. Some of the changed mappings are:
-
Account UID
-
Name
-
Domain
-
-
To finish the migration process, tick the Mark complete option in the General settings.
-
Enable the Reset highwatermark setting and perform a full import of the migrated system.
-
Verify, after the Role and Policy Engine (RoPE) has completed provisioning queued identities, that no unexpected provisioning jobs were created during the migration process.
Exchange migration
Migrating custom scripts is not supported for Exchange-based systems.
Before you start
Make sure that all imports were successful and import thresholds are not exceeded.
-
In the Enterprise Server, go to Setup > Master Data > System
-
From the list choose the system you want to undergo the migration process.
-
Expand the ellipsis menu with additional options and click the Migrate option.
This will open the migration wizard with the Information tab opened. It provides information on the anticipated disk space that is required to perform the migration process. For the target system that is trusted by other system or has trusted systems this information is also listed in the Information tab.
-
Click Next button and open System category tab.
noteOptionally you can choose the Run in test mode option. Choosing this option prevents applying changes to databases.
-
Configure the Select system category option. Choose the Create new value.
-
Click Start to start the default migration process.
To customize the migration procedure click Next button and proceed to Advanced tab.
Advanced settings
Configuring the settings in the Advanced tab allows you to customize the migration feature.
-
Configure the Chunk size setting.
This defines the number of business keys that are migrated simultaneously. Default value is set to 50 000. The bigger the value the migration is faster but memory usage increases.
-
Configure the Command timeout setting.
In case of time-outs during the migration procedure increase the setting value.
-
Configure the Use cross-db transaction setting.
This enables a recovery option when errors are encountered. Enabling this setting increases significantly transaction log size.
-
Optionally, configure the Interval for call DB (min) setting.
The setting ensures that the connection with databases during migration process is maintained. recommends leaving the Interval for call DB (min) setting on the default value. The maximum configured value should not exceed 30 min.
-
Configure the Create diagnostics setting.
Enabling this setting shows the transaction log usage before and after the migration is complete. Enabling this option requires View Server State permission.
-
Click Start to start the customized migration process.
Follow-up actions
The system state is left in migration state after the automatic migration is finished. To successfully end the process complete the following manual steps:
-
For the Exchange migration make sure that the trusted Active Directory system is also fully migrated.
-
Check and re-configure the Connection details.
Re-enter the password and verify that the migrated values are correct. recommends to use the Test connection feature for verification. Re-enter the Script file parameter value if it was previously configured.
-
Check Queries and mappings.
Verify if the Queries and mappings are correct and if the extension attributes are added to appropriate queries. If the extension attributes mappings are duplicated remove the duplicates The PowerShell extension scripts are not migrated automatically. Make sure to reconfigure them manually after the migration.
-
To finish the migration process, tick the Mark complete option in the General settings.
-
Enable the Reset highwatermark setting and perform a full import of the migrated system.
-
Verify, after the Role and Policy Engine (RoPE) has completed provisioning queued identities, that no unexpected provisioning jobs were created during the migration process.
Generic database migration
Before you start
Make sure that all imports were successful and import thresholds are not exceeded. The Event handler extension is not supported in the Generic Database migration.
-
In the Enterprise Server, go to Setup > Master Data > System
-
From the list choose the system you want to undergo the migration process.
-
Expand the ellipsis menu with additional options and click the Migrate option.
This will open the migration wizard with the Information tab opened. For the target system that is trusted by other system or has trusted systems this information is listed in the Information tab.
-
Click Start to start the default migration process.
When there are derived systems related to a primary one, it is impossible to migrate just the derived system. When the migration process is performed for the primary system, the derived ones are migrated automatically.
To customize the migration procedure click the Next button and proceed to Advanced tab.
Advanced settings
Configuring the settings in the Advanced tab allows you to customize the migration feature.
-
Configure the Command timeout setting.
In case of time-outs during the migration procedure increase the setting value.
-
Configure the Use cross-db transaction setting.
This enables a recovery option when errors are encountered. Enabling this setting increases significantly transaction log size.S
-
Optionally, configure the Interval for call DB (min) setting.
The setting ensures that the connection with databases during migration process is maintained. recommends leaving the Interval for call DB (min) setting on the default value. The maximum configured value should not exceed 30 min.
-
Click Start to start the customized migration process.
Follow-up actions
The system state is left in migration state after the automatic migration is finished. To successfully end the process complete the following manual steps:
-
Check and re-configure the Connection details.
Re-enter the password and verify that the migrated values are correct. recommends to use the Test connection feature for verification.
-
Check Queries and mappings.
Verify if the Queries and mappings are correct and if the extension attributes are added to appropriate queries. If the extension attributes mappings are duplicated remove the duplicates.
-
To finish the migration process, tick the Mark complete option in the General settings.
-
Enable the Reset highwatermark setting and perform a full import of the migrated system.
-
Verify, after the Role and Policy Engine (RoPE) has completed provisioning queued identities, that no unexpected provisioning jobs were created during the migration process.
SAP migration
Migrating SAP system importing identity data is not supported. If the systems is configured to import both access and identity data, the access data part is being migrated to a new system and identity data remains being processed by the legacy system.
Each SAP Access system is migrated to a separate system category. The system category settings, including account rules and threshold configuration, are also retained and moved, meaning you're required to manage them separately.
Before you start
Make sure that all imports have been successful and import thresholds have not been exceeded.
-
In the Enterprise Server, go to Setup > Master Data > System.
-
From the list choose the system you want to undergo the migration process.
-
Expand the ellipsis menu with additional options and click the Migrate option.
This will open the migration wizard with the Information tab opened. It provides information on the anticipated disk space that is required to perform the migration process. For the target system that is trusted by other system or has trusted systems this information is also listed in the Information tab.
-
Click Next to proceed to System category tab.
noteOptionally, you can enable the Run in test mode option, preventing changes from being applied to databases.
-
Configure the Select systems category option with the Create new value.
-
Click Start to start the default migration process.
Advanced settings
Configuring the settings in the Advanced tab allows you to customize the migration feature.
-
Configure the Chunk size setting.
This defines the number of business keys that are migrated simultaneously. Default value is set to 50,000. The bigger the value, the faster the migration, but memory usage also increases.
-
Configure the Command timeout setting.
In case of time-outs during the migration procedure, increase the setting value.
-
Configure the Use cross-db transaction setting.
This enables a recovery option when errors are encountered. Enabling this setting increases significantly transaction log size.
-
Optionally, configure the Interval for call DB (min) setting.
The setting ensures that the connection with databases during migration process is maintained. We recommend leaving the Interval for call DB (min) setting on the default value. The maximum configured value should not exceed 30 min.
-
Configure the Create diagnostics setting.
Enabling this setting shows the transaction log usage before and after the migration is complete. Enabling this option requires the View Server State permission.
-
Click Start to start the customized migration process.
Follow-up actions
The system state is left in migration state after the automatic migration is finished. To successfully end the process, complete the following manual steps:
-
Check and re-configure the Connection details.
Re-enter the password and verify that the migrated values are correct. We recommend to use the Test connection feature for verification.
-
Check Queries and mappings.
Verify if the Queries and mappings are correct and if the extension attributes are added to appropriate queries. If the extension attributes mappings are duplicated, remove the duplicates.
noteYou can find information on which xpath alias was used and which couldn't be found in the migration log.
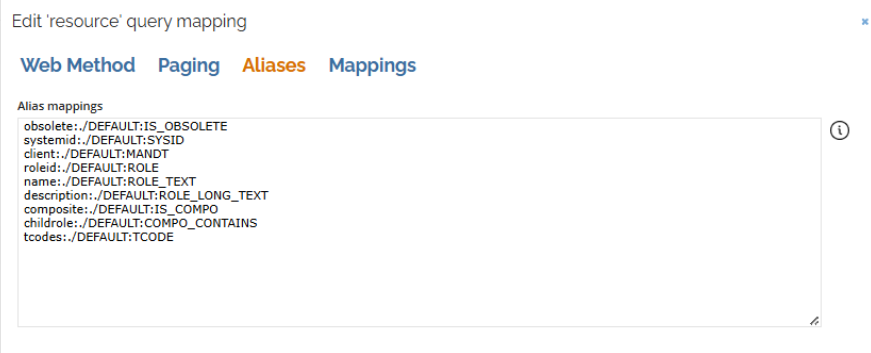
Missing xpath alias, referenced by extension attribute, must be added manually to the Alias mappings in the Aliases tab.
-
To finish the migration process, tick the Mark complete option in the General settings.
-
Enable the Reset highwatermark setting and perform a full import of the migrated system.
-
After the Role and Policy Engine (RoPE) has completed provisioning queued identities, verify that no unexpected provisioning jobs were created during the migration process.
Troubleshooting
Failing import for systems with AD (Active Directory) marked as trust
Description
If you have a system with the relation to AD set as trust, import attempts might fail.
You can encounter this issue if you have established a trust relation between an AD and another system, other than the AD or Microsoft Exchange system. Performing an import from the trusting system fails with the following message:
Resource Assignments are referring to non-existing account or accounts set for deletion
Resolution
To resolve the issue, manually update the resource assignments' ComposedBusinessKeys for the system with the trust value set.
Proceed with the following query on the ODW (Omada Data Warehouse) and replace the @NewSystemID value with the ODWSourceSystemId value of the migrated AD system.
DECLARE @NewSystemId NVARCHAR(4) = '1005'

DECLARE @SystemDomain NVARCHAR(50)
DECLARE @ShortSystemName NVARCHAR(50)

select @ShortSystemName = SystemId, @SystemDomain = Watermarks.value('(/settings/setting[@name="DomainName"]/values/value)[1]', 'nvarchar(max)') from dbo.ODWSourceSystemSetting
WHERE ODWSourceSystemID = @NewSystemId

UPDATE dbo.ResourceAssignmentCBK SET
ComposedBusinessKey = REPLACE(REPLACE(ComposedBusinessKey, '3_<domain>'+@SystemDomain+'</domain>', @NewSystemId+'_<system>'+@ShortSystemName+'</system>'), '</accountcbk>', '<a/></accountcbk>')
WHERE ComposedBusinessKey like '%3_<domain>'+@SystemDomain+'</domain>%'