Microsoft Entra ID
The Omada Microsoft Entra ID connectivity supports governing and managing Microsoft Entra ID instances. It is based on Microsoft Graph API. By using this package you can:
- Register and onboard any number of Microsoft Entra ID instances.
- Load information about Users, Groups, group memberships, and used licenses.
- Automate the provisioning and de-provisioning of Microsoft Entra ID users, groups (Security, Teams, and SharePoint), and memberships.
Each Microsoft Entra ID instance must be onboarded in a separate onboarding process.
Supported objects and operations
The Omada Microsoft Entra ID Connectivity allows you to manage both identity data and access rights. However, the default mappings are provided only for access rights as this connectivity is typically used for that type of data.
| Object | Possible operations |
|---|---|
| Users | Create, read, update, delete ** |
| User passwords | Create, update |
| Security groups | Create, read, update, delete |
| Distribution groups | Read* |
| Mail-enabled groups | Read* |
| Sharepoint sites*** | Create, read, update, delete |
| Teams | Create, read, update, delete |
| Channels | Read |
| Security group memberships | Create, read, delete |
| Distribution group memberships | Read* |
| Mail-enabled group memberships | Read* |
| Team group memberships | Create, read, delete |
| Sharepoint group memberships | Create, read, delete |
| Directory roles | Read |
| Directory roles Assignments | Create, read, update, delete |
(*) The Microsoft Graph API does not provide support for provisioning of distribution groups and mail-enabled security groups. See the Microsoft Exchange Online/Hybrid connectivity section for details how to manage these groups.
(**) When a user is deleted from Microsoft Entra ID, Omada automatically revokes sign-in sessions for the deleted user. If revoking the sign-in session fails for any reason, Omada logs a warning for the task. This functionality is available without any additional configuration.
(***) Due to the lack of support for the POST method in the direct sites creation via the Microsoft Graph API, the creation of Microsoft 365 groups is used as an effective alternative. This process not only creates a group, but it also provisions an associated team site in SharePoint.
In addition, Microsoft Entra ID Connectivity supports the following scenarios:
- Extraction of assignments between:
- Directory roles and users
- Teams groups, members, and owners
- SharePoint groups, members, and owners
- Security groups, members, and owners
- Distribution groups, members, and owners
- Mail-enabled Security groups, members, and owners
- Groups
- Extraction of Teams Channels and parent/child between Teams and Channels
- Extraction of resource owners of each group (Teams, SharePoint, Security, Distribution, Mail-enabled Security)
- Extraction of Stock Keeping Units (SKUs) and included service plans
- Extraction of user’s assigned licenses
- Extraction of user's assigned service plans
- Extraction of user accounts
- Sign-in activity
- User provisioning
- Password reset
- Groups provisioning
- Teams groups
- SharePoint groups
- Security groups
- Assignments
- Add and remove assignments between groups (Security, Teams and SharePoint) and users
- Add and remove assignments between directory roles and users
Minimum required permissions
None.
Implementation notes
The Microsoft Entra ID connectivity package only includes directory roles that are enabled. You must create and enable directory roles - both custom directory roles and from templates – in the Microsoft Azure Portal.
Microsoft Graph API does not currently support the provisioning of SharePoint Sites. As a workaround, provision SharePoint Sites associated with the Microsoft Entra ID groups.
Omada does not facilitate the upgrade of SharePoint groups to Teams groups.
Prerequisites
Before importing information from Microsoft Entra ID to Omada Identity, perform the following setps in the Microsoft Azure Portal.
Register a new application in Azure Portal
Create an application registration to authenticate and authorize Omada Identity with Microsoft Entra ID:
-
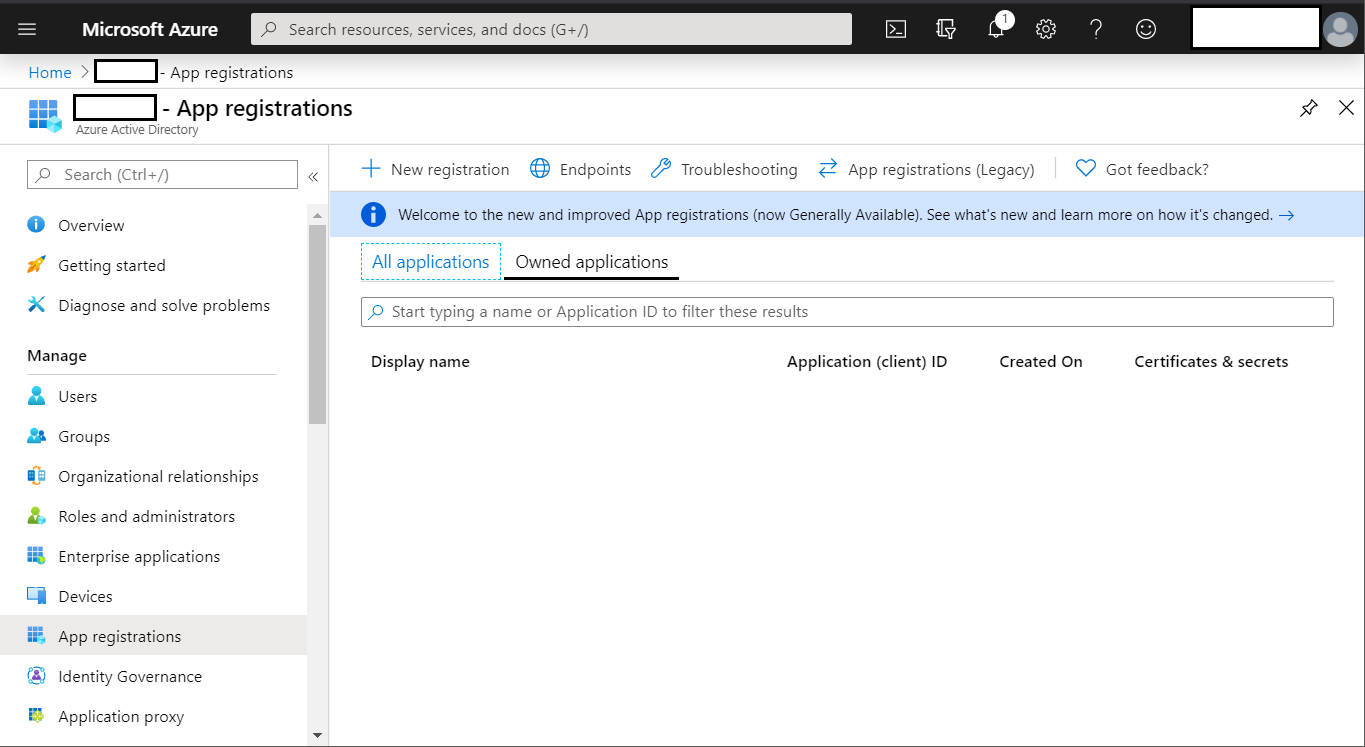
In the Azure portal, go to your directory. In the Manage section, find the App registrations, then click New registration.
-
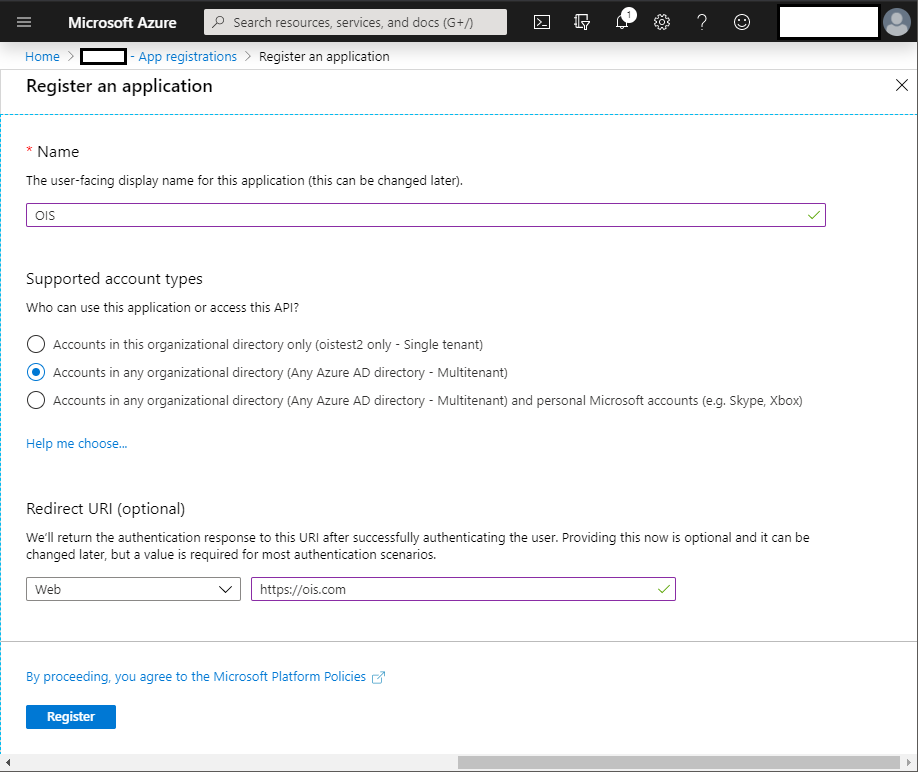
In the Register an application dialog box, enter a Name. In the Supported account types section, choose one of the following options:
- Accounts in this organizational directory only (Single tenant) - if you are managing a single EntraID instance.
- Accounts in any organizational directory (Multitenant) - if you are managing mutltiple instances.
Enter a Redirect URI. You can enter any value that you want to use, as long as it is in a valid URL format.
-
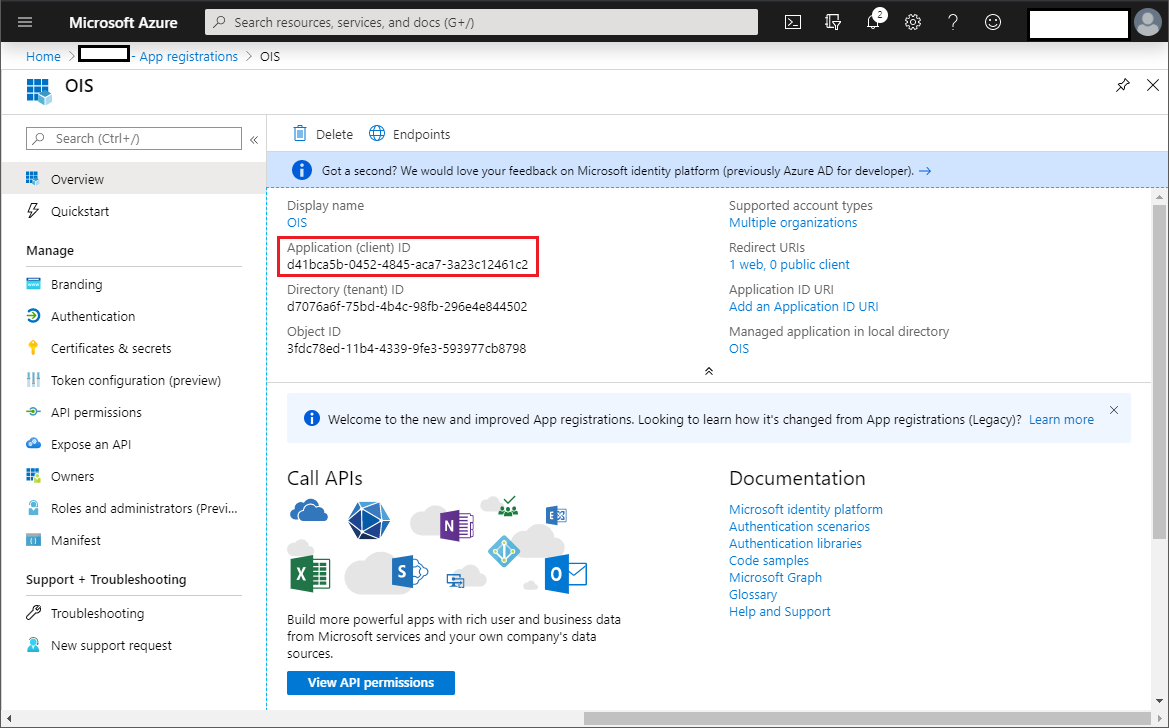
Click Register. Copy and store the Application ID. You must use this Application ID when you onboard the system to Omada Identity.
infoThe Application ID shown in the following image is only an example. Your Application ID contains a different value.
Add Graph API
The connectivity uses the Microsoft Graph API to read and write information to the directory. Add the Graph API for the registered application:
-
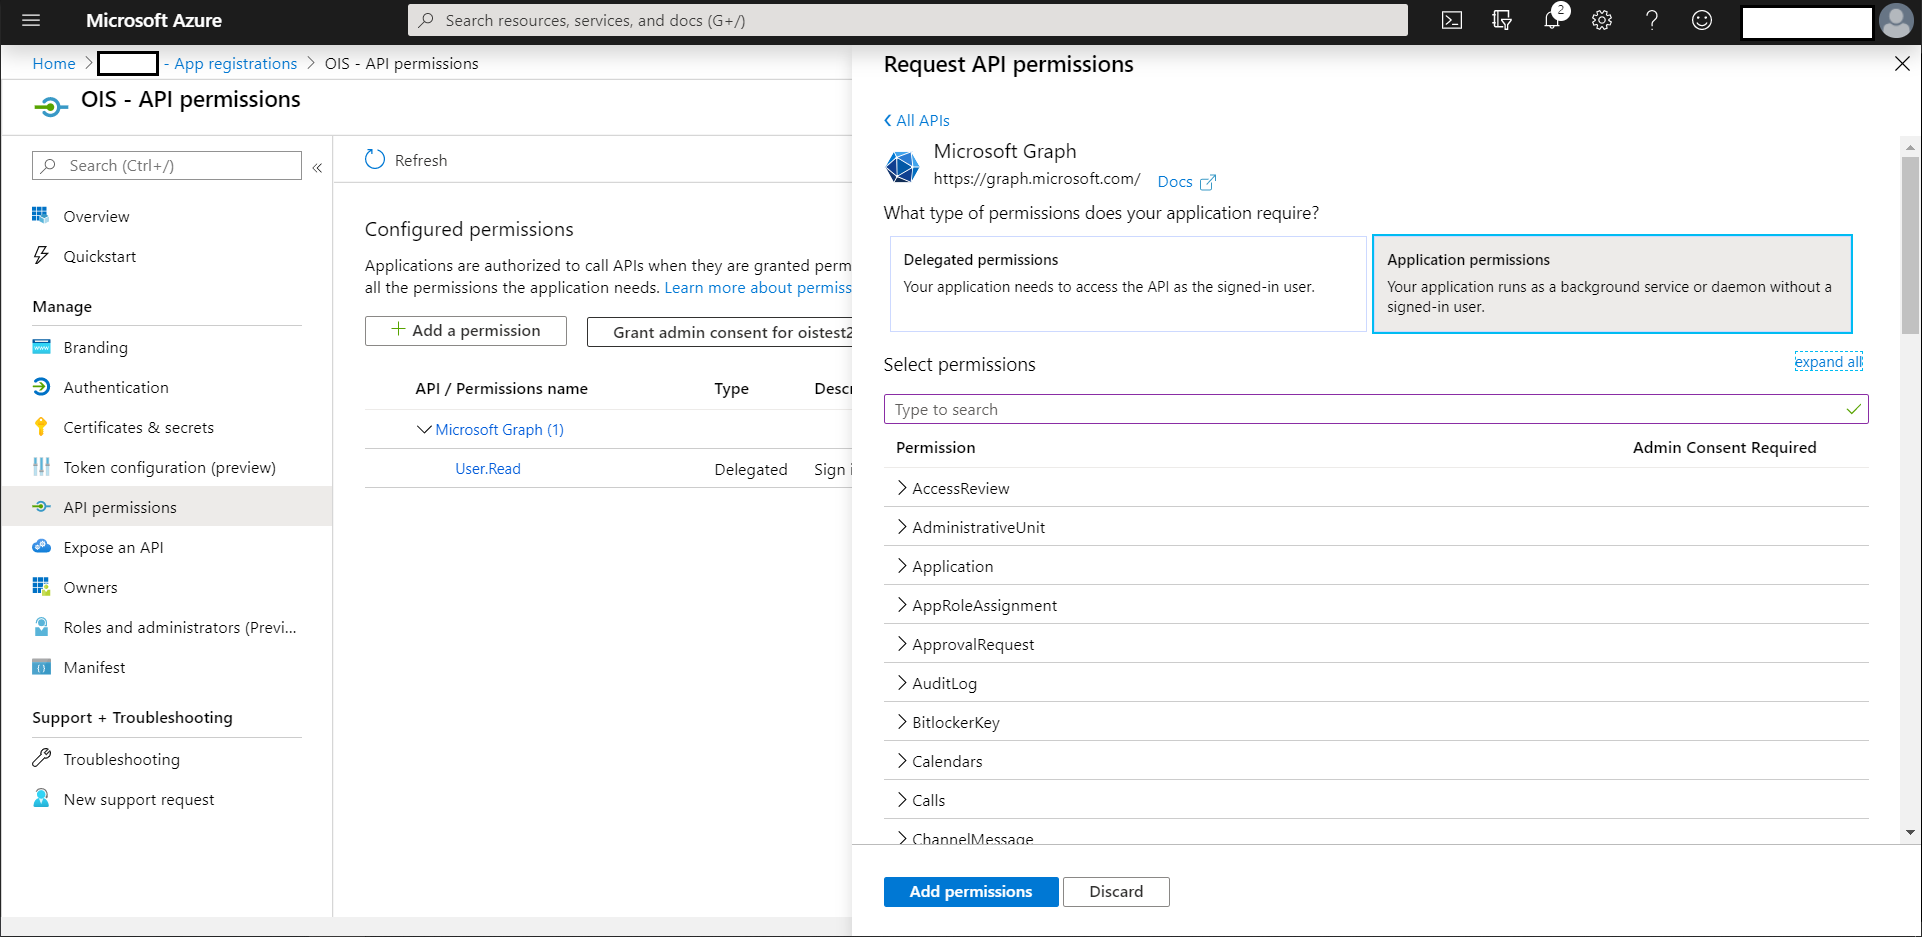
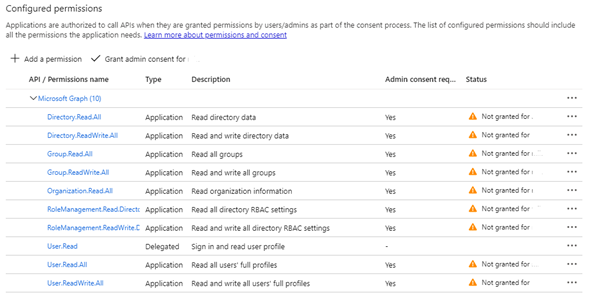
Go to API permissions and select +Add a permission.
-
Choose Microsoft Graph from Commonly used Microsoft APIs (from the Supported legacy APIs) and click Select.
-
Select all needed Application permissions.
-
Click the Add permissions button.
The table below presents the minimum required permissions for the correct connection between Microsoft Entra ID and Omada Identity.
MICROSOFT GRAPH
Permission Type Description AuditLog.Read.All Application Allows access to read audit logs for security and compliance. Used to read the SignInActivity field found in the Q&M section of accounts. Channel.ReadBasic.All Application Provides access to basic channel information. Group.Read.All Application Enables reading group data. Group.ReadWrite.All Application Allows reading and modifying groups. GroupMember.ReadWrite.All Application Allows modifying group memberships. Organization.Read.All Application Required to read organizational structure and data. RoleManagement.Read.Directory Application Required for reading role assignments in the directory. RoleManagement.ReadWrite.Directory Application Allows reading and modifying role assignments in the directory. Sites.Read.All Application Grants access to read site-related data. Team.Create Application Necessary for creating new teams within the organization. Team.ReadBasic.All Application Enables reading basic information about teams. TeamMember.Read.All Application Allows reading team member data. TeamMember.ReadWrite.All Application Enables reading and updating team member data. User.Read.All Application Provides access to user profiles and attributes. User.ReadWrite.All Application Enables reading and updating user profiles and attributes. User.EnableDisableAccount.All Application Allows the application to enable and disable user accounts. -
After adding the permission, grant consent to the permissions. Click the Grant admin consent button.
Create a client secret or a certificate
Credentials are used by confidential client applications that access a web API, and they allow the application to authenticate as itself, requiring no interaction from the user at runtime.
Client secret
-
Go to Certificates & secrets select + New client secret.
-
Enter a description for the secret key. It helps identify one secret key from other keys.
-
Optionally, choose the expiration time for the secret. Click Add.
-
Copy the generated key shown under Value. You cannot see the value again one you exit the screen. Copy the key now and paste it in Omada Identity after setting up the Omada Identity application in Azure.

-
Microsoft Entra ID is now ready to be registered with Omada Identity. You can create as many secret keys as you require.
Certificate
- Go to Certificates & secrets. Select Certificates.
- Select Upload certificate. Choose the certificate file to upload. Click Add. Once the certificate is uploaded, the details are displayed.
- Your Microsoft Entra ID is now ready to be registered with Omada Identity.
Assigning User Account Administrator role (for user/group deletion and password reset)
Allow password reset and deletion of users and group assignments in Microsoft Entra ID
To delete a user or group in Microsoft Entra ID, you must first assign your application’s principal a User Account Administrator role. If you use Microsoft Graph, perform the same operation for the password reset to work. Choose one of the following options:
- Using the portal
- Using the script
-
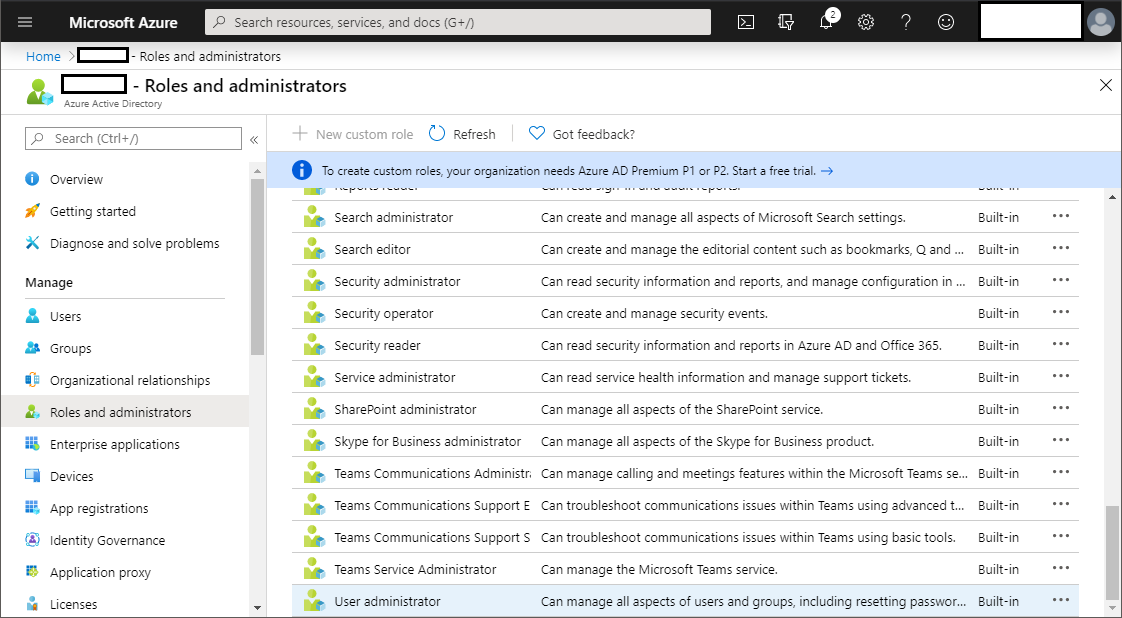
Go to https://portal.azure.com.
-
Click Microsoft Entra ID.
-
Click Roles and administrators.
-
Click User administrator role.
-
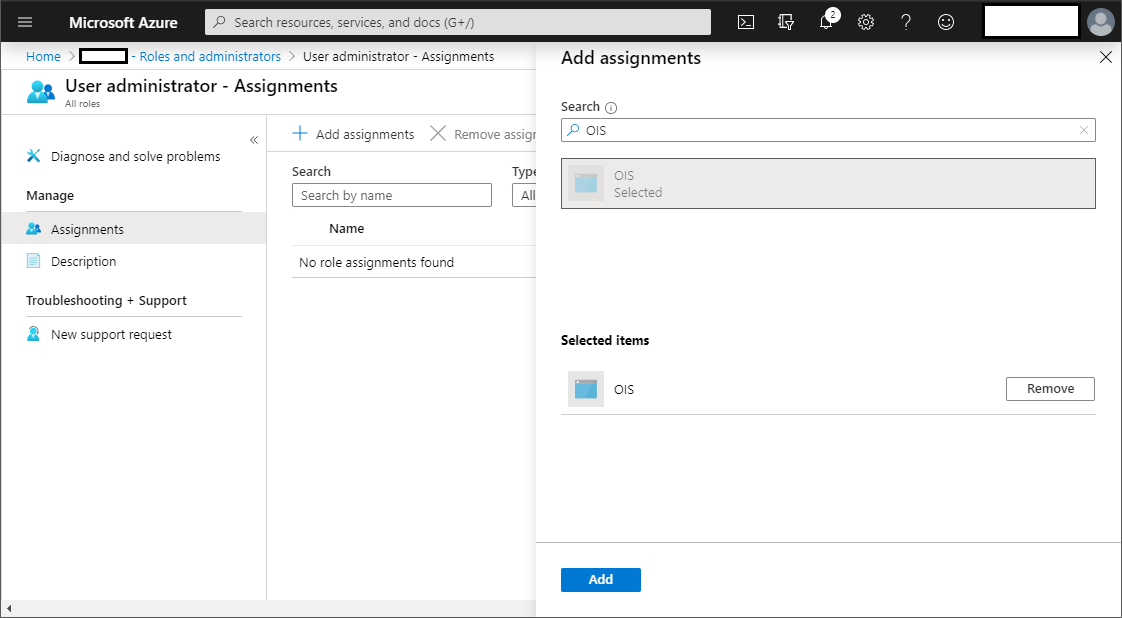
Click + Add assignments.
-
In the search box, enter the name of the application you have created in the Register a new application in Azure Portal step.
-
Click Add.
Ensure you have installed MSOnline PowerShell.
- In Windows, open a PowerShell window.
- Enter the following command, ensuring you first change the highlighted parameters, and then run the command:
# 1. Log me into my MSDN tenant using an account I set up as "global admin".
Connect-MsolService
# 2. Replace the ApplicationID value and use it to get MsolServicePrincipal.
$ApplicationID = 'c3969eb4-c227-4211-9eef-32a8d18b053a'
$webApp = Get-MsolServicePrioncipal -AppPrincipalId $ApplicationID
# 3. Use Add-MsolRoleMember to add it to "User Administrator" role.
Add-MsolRoleMember -RoleName "User Administrator"
-RoleMemberType ServicePrincipal -RoleMemberObjectId $webApp .ObjectId