Migrate from Azure AD to Entra ID
Use the following section to migrate from the Azure Active Directory to the new Microsoft Entra ID connectivity package. We recommend conducting a dedicated onboarding process for Microsoft Entra ID to ensure the comprehensive creation of all properties, attributes, attribute sets, resource types, and other necessary objects. Alternatively, you can also perform these tasks manually - the essential steps are provided in this section.
Omada doesn't support automatic resource type changes. You need to update the resource types manually for all existing resources within the Omada Identity.
If you have Microsoft Exchange Online/Hybrid systems already onboarded in Omada, ensure that you use either the Omada Identity Cloud October 2024 update or Omada Identity 15.0.2 before migrating to Entra ID. Entra ID requires the updated RoPE ExchangeIntegrationExtension for correct functioning. See RoPE Exchange Integration extension not working with latest Entra ID Collector release note for details.
Upgrading the collector
To upgrade the Microsoft Azure Active Directory collector, perform the following operations:
-
Go to Setup --> Administration --> Data management --> Data object types.
-
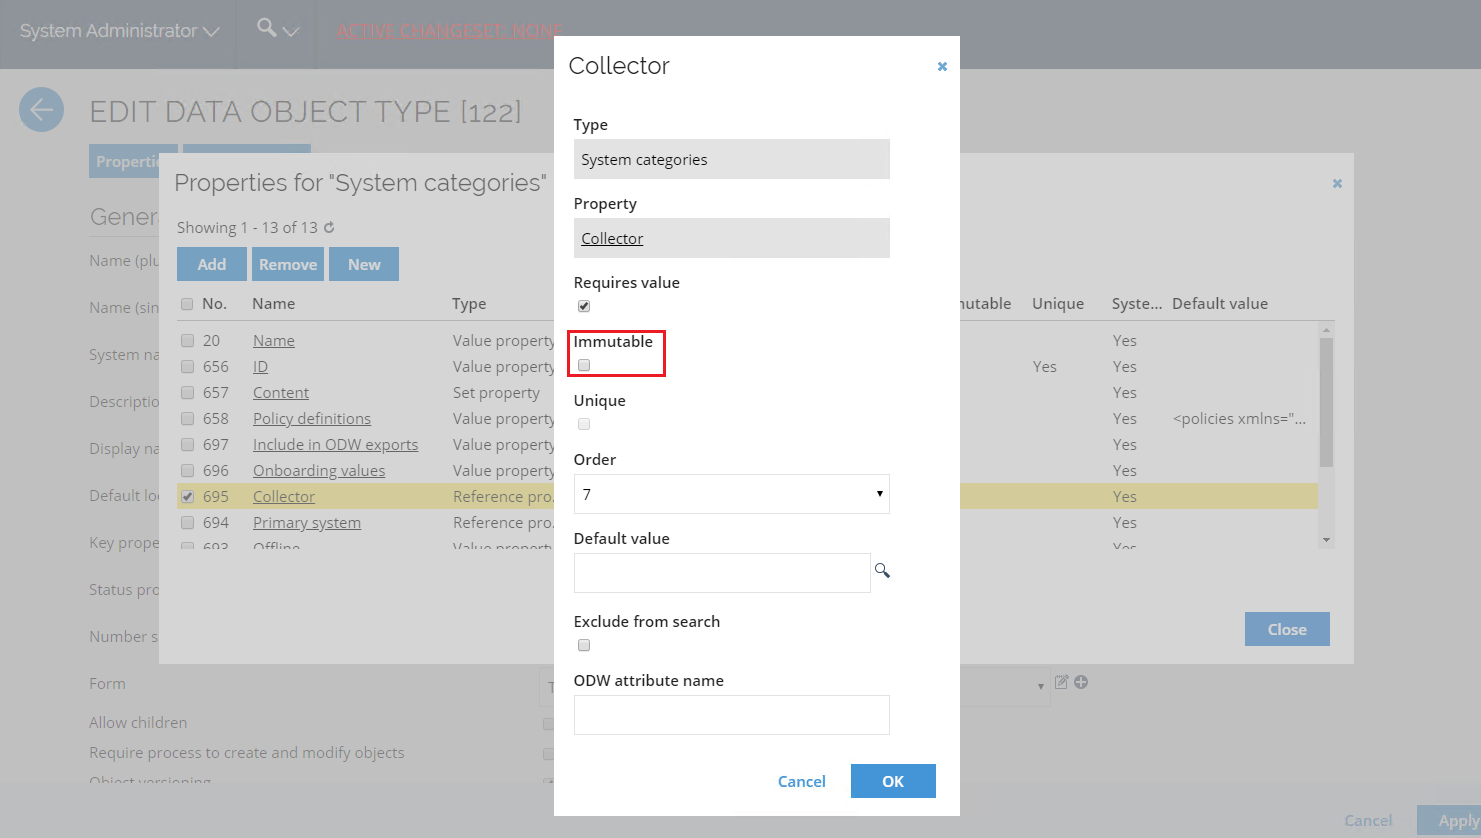
Select the System categories object type. Open Properties.
-
Edit the Collector property. Deselect the Immutable option.
-
Go to Setup --> Master Data --> More --> System Categories.
-
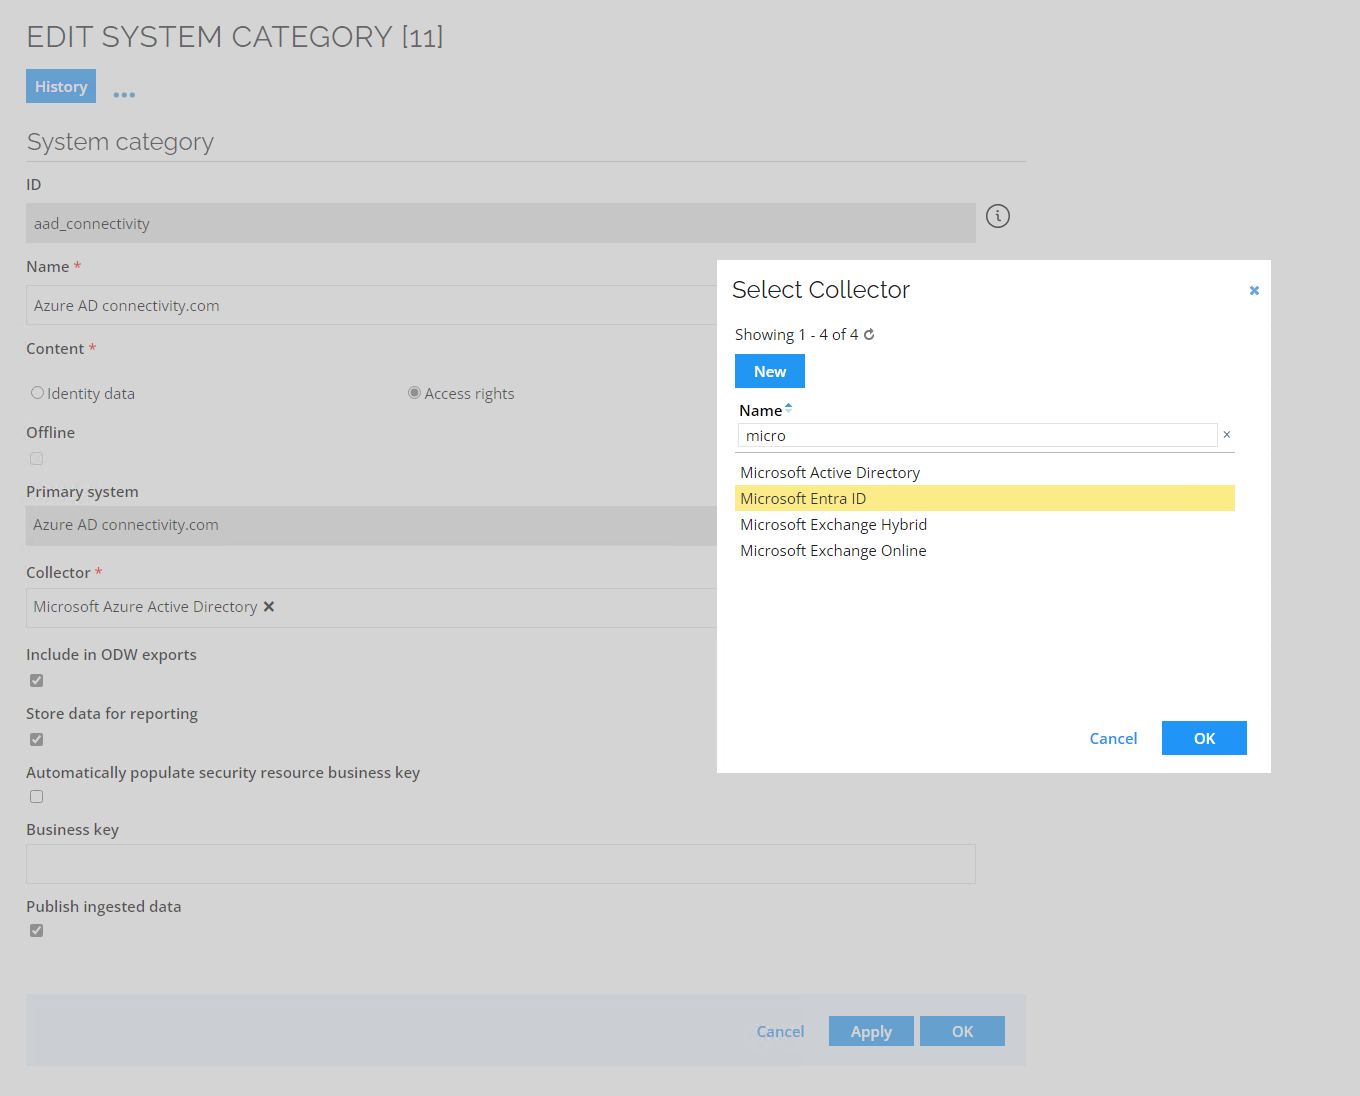
Select the Microsoft Azure Active Directory-based system category and click the Edit button.
-
Replace the collector with the new Microsoft Entra ID version and save the changes.
-
Go to Setup --> Master Data --> Systems and select your Azure AD system.
-
In the Queries and mappings section, remove the queries specified below:
Object type Microsoft Azure Active Directory object Default selected fields Resource groups id, displayName, description Resource assignment groups id, memberdelta_ids Resource owner groups id, owners_mailNickname -
Delete the query for the old accounts and move the new account query to the very top.
Creating new queries, properties, and values
Create a new value to store the user's role within a group
-
Go to Setup --> Administration --> Properties. Click New.
-
Click Set Property. Enter the following details:
Name: MSEntraIDGroupRole
System name: C_MSENTRAIDGROUPROLE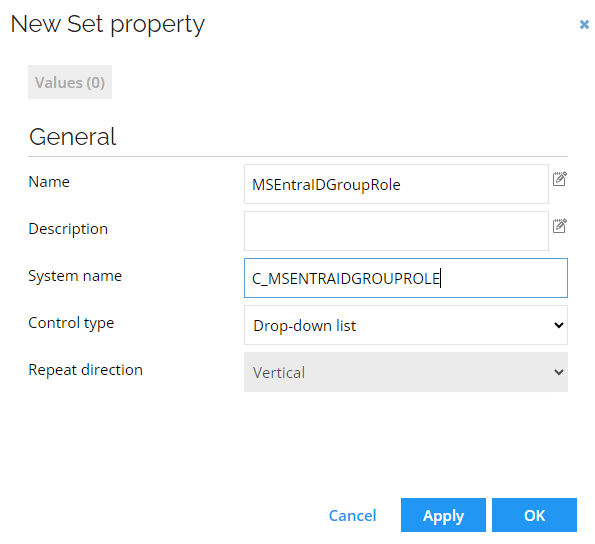
-
Click Apply. In the top left side of the screen, click Value.
-
Click New and create two values:
memberandowner. Click OK.
Create a new property to store the user's membership ID within a group
- Go to Setup --> Administration --> Properties. Click New.
- Click Value property. Enter the following details and click OK:
Name: MS Teams Membership ID
System name: C_MSTEAMSMEMBERSHIPID
Create a new attribute and add it to an attribute set (Role)
- Go to Setup --> Master Data --> Attributes. Click New.
- Enter the following details and click OK:
Name: Microsoft Entra ID – Role
Definition: C_MSENTRAIDGROUPROLE
Display name: Selectownerfor an owner, ormemberfor a regular user
Requires value: (select the checkbox)
Create a new attribute and add it to an attribute set (Teams membership ID)
- Go to Setup --> Master Data --> Attributes. Click New.
- Enter the following details and click OK:
Name: MS Teams Membership ID
Definition: C_MSTEAMSMEMBERSHIPID
Hidden attribute: (select the checkbox)
Create an attribute set
- Go to Setup --> Master Data --> Attribute sets. Click New.
- Enter the following details and click OK:
Name: MS Entra ID – Groups
Attributes: : Include both attributes created earlier:Microsoft Entra ID – RoleandMS Teams Membership ID
Create a new resource type for Security Groups Resources
- Go to Setup --> Master Data --> Resource types. Click New.
- Enter the following details and click OK:
Name: Microsoft Entra ID Security Group
Resource category: Permission
Allow attributes: (select the checkbox)
Attribute set: MS Entra ID - Groups

Creating new resource types for distribution groups
- Go to Setup --> Master Data --> Resource types. Click New.
- Enter the following details and click OK:
Name: Microsoft Entra ID Distribution Group
Resource category: Permission - Click OK.

Creating new resource types for mail-enabled security group resources
- Go to Setup --> Master Data --> Resource types. Click New.
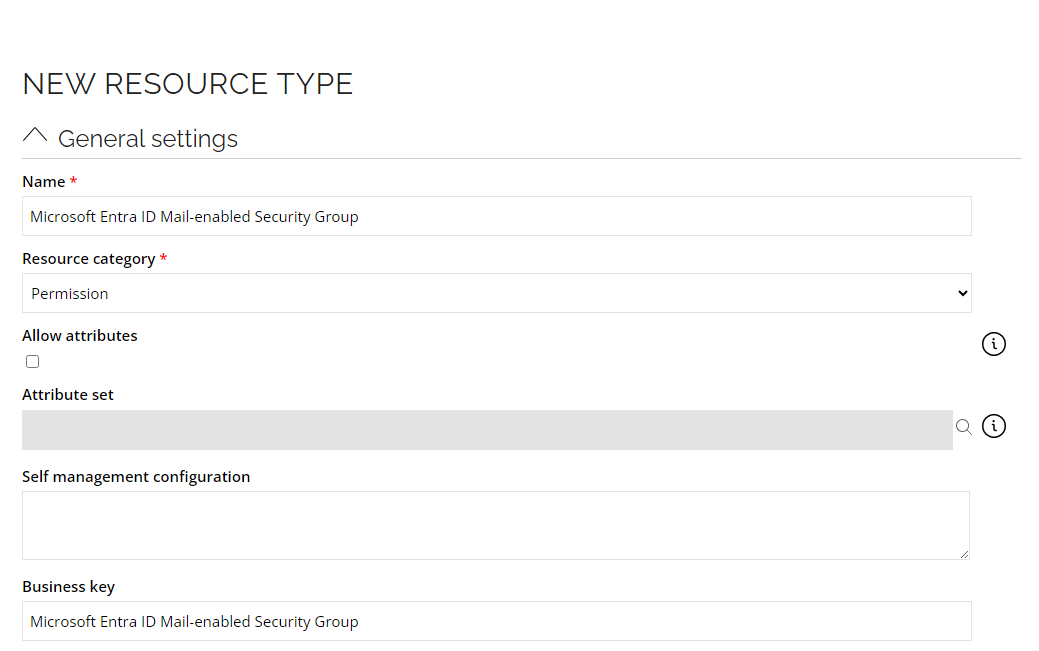
- Enter the following details and click OK:
Name: Microsoft Entra ID Mail-enabled Security Group
Resource category: Permission
Security Group, Distribution Group and Mail-enabled Security Group as Resource
Add a new query that imports groups as Resource. Edit the values following the table below:
- General
- Advanced
- Mappings
| Field | Value |
|---|---|
| URL | groups?$filter=onPremisesSyncEnabled eq null and NOT(groupTypes/any(s:s eq 'Unified'))&$select=id,displayName,description,mailNickname,onPremisesSyncEnabled,mailEnabled,securityEnabled |
| Description | Security Group, Distribution Group and Mail-enabled Security Group (requires Group.Read.All application permission) |
| Field | Value |
|---|---|
| Headers | {"Request":{"ConsistencyLevel":"eventual"}} |
| Field | Type | Value |
|---|---|---|
| Business key | Map | id |
| Security resource business key | Map | id |
| Name | Map | displayName |
| Category | Constant | Permission |
| Type | Expression | securityEnabled == true && mailEnabled == false ? "Microsoft Entra ID Security Group" : mailEnabled == true && securityEnabled == false ? "Microsoft Entra ID Distribution Group" : mailEnabled == true && securityEnabled == true ? "Microsoft Entra ID Mail-enabled Security Group" : null |
| Short name | Map | id |
| Logical key | Map | description |
| Description | Map | description |
Group members (Security, Distribution, Mail-enabled groups) as Resource Assignment (delta)
Add a new query that imports group members as Resource Assignment. Edit the values following the table below:
- General
- Paging
- Mappings
| Field | Value |
|---|---|
| URL | groups/delta?$select=displayName,description,members |
| Use delta | Yes |
| Delta URL field | @odata.deltaLink |
| Filter | membersdelta_odatatype=="#microsoft.graph.user" && removed_reason != "deleted" |
| Description | Resources Assignments - Members (requires GroupMember.Read.All application permission) |
| Field | Value |
|---|---|
| Change paging | Yes |
| Paging mechanism | Paging URL |
| Paging URL field | @odata.nextLink |
| Field | Type | Value |
|---|---|---|
| Resource business key | Map | id |
| Account business key | Map | membersdelta_id |
| C_MSENTRAIDGROUPROLE | Constant | member |
Group owners (Security, Distribution, Mail-enabled groups) as Resource Assignment
Add a new query that imports group owners as Resource Assignment. Edit the values following the table below:
- General
- Mappings
| Field | Value |
|---|---|
| URL | groups?$expand=owners($select=id)&$select=id |
| Description | Resources Assignments - Owners (requires GroupMember.Read.All application permission) |
| Field | Type | Value |
|---|---|---|
| Resource business key | Map | id |
| Account business key | Map | owners_id |
| C_MSENTRAIDGROUPROLE | Constant | owner |
Resource Owners (Security, Distribution, Mail-enabled groups)
Add a new query that imports Resource Owners. Edit the values following the table below:
- General
- Mappings
| Field | Value |
|---|---|
| URL | groups?$expand=owners($select=id,userPrincipalName)&$select=id |
| Filter | owners_userPrincipalName != null |
| Description | Resources Owners (requires GroupMember.Read.All application permission) |
| Field | Type | Value |
|---|---|---|
| Resource business key | Map | id |
| Owner UID | Map | owners_userPrincipalName.Substring(0,owners_userPrincipalName.IndexOf("@")) |
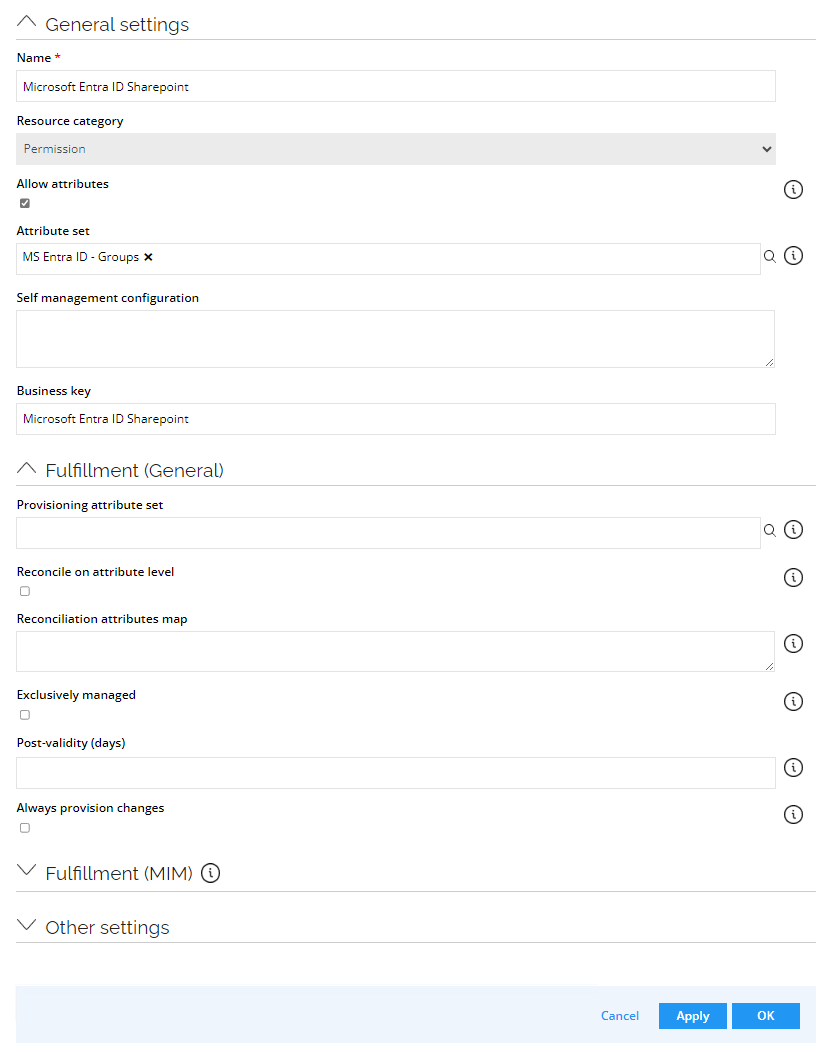
Creating new resource types for Sharepoint group resources
- Go to Setup --> Master Data --> Resource types. Click New.
- Enter the following details and click OK:
Name: Microsoft Entra ID Sharepoint
Resource category: Permission
Allow attributes: (select the checkbox)
Attribute set: MS Entra ID – Groups
Create the queries specified below.
Sharepoint Groups as Resource
Add a new query that imports Sharepoint Groups as Resource. Edit the values following the table below:
- General
- Advanced
- Nested Requests
- Mappings
| Field | Value |
|---|---|
| URL | groups?$filter=onPremisesSyncEnabled eq null and mailEnabled eq true and (groupTypes/any(s:s eq 'Unified')) and NOT(resourceProvisioningOptions/any(s:s eq 'Team'))&$count=true |
| Description | Sharepoint Sites (requires Sites.Read.All and Group.Read.All application permission) |
| Use delta | No |
| Field | Value |
|---|---|
| Headers | {"Request":{"ConsistencyLevel":"eventual"}} |
| Field | Value |
|---|---|
| Nested URL | groups/{PARENT_id}/sites/root |
| Nested URL is root | Yes |
| Field | Type | Value |
|---|---|---|
| Business key | Map | PARENT_id |
| Security resource business key | Map | PARENT_id |
| Name | Map | DisplayName |
| Category | Constant | Permission |
| Type | Constant | Microsoft Entra ID Sharepoint |
| Short name | Map | PARENT_id |
| Logical key | Map | description |
| Description | Map | description |
| SiteID | Map | id |
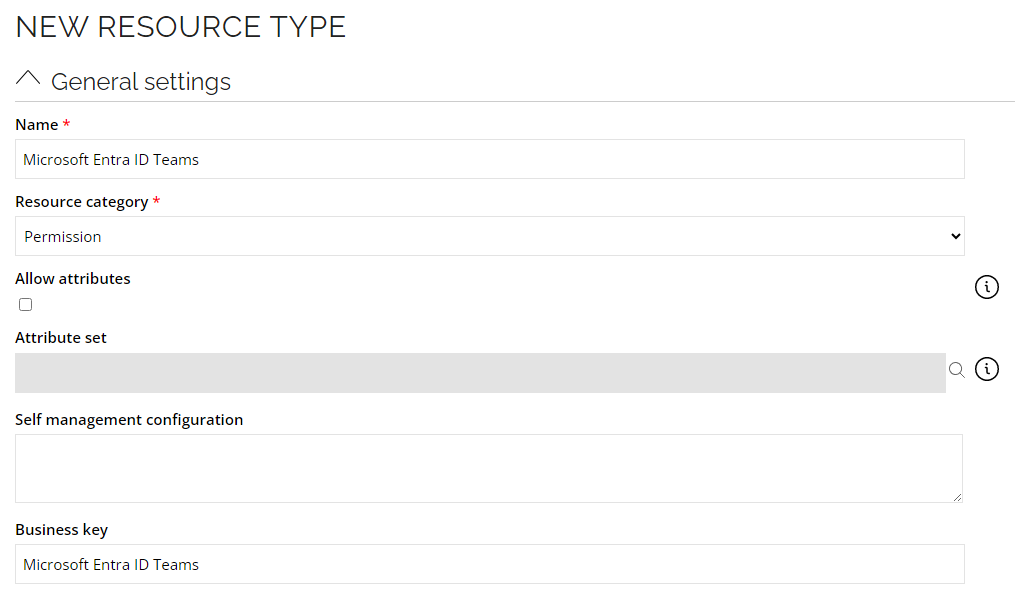
Creating a new resource type for Teams group resources
- Create a new Resource Type for Teams Groups Resources. Go to Setup --> Master Data --> Resource types and click New.
- Enter the following details and click OK:
Name: Microsoft Entra ID Teams
Resource category: Permission
Allow attributes: (select the checkbox)
Attribute set: MS Entra ID – Group
Create the queries specified below.
Teams Groups as Resource
Add a new query that imports Teams Groups as Resource. Edit the values following the table below:
- General
- Mappings
| Field | Value |
|---|---|
| URL | teams |
| Description | Teams Groups (requires Team.ReadBasic.All application permission) |
| Use delta | No |
| Field | Type | Value |
|---|---|---|
| Business key | Map | id |
| Security resource business key | Map | id |
| Name | Map | displayName |
| Category | Constant | Permission |
| Type | Constant | Microsoft Entra ID Teams |
| Short name | Map | id |
| Logical key | Map | description |
| Description | Map | description |
Teams Groups as Resource Assignment
Add a new query that imports Teams Groups as Resource Assignment. Edit the values following the table below:
- General
- Nested Requests
- Mappings
| Field | Value |
|---|---|
| URL | teams |
| Description | Resources Assignmets - Teams Groups (requires TeamMember.Read.All application permission) |
| Use delta | No |
| Field | Value |
|---|---|
| Nested URL | teams/{PARENT_id}/members |
| Field | Type | Value |
|---|---|---|
| Resource business key | Map | PARENT_id |
| Account – business key | Map | userId |
| C_MSENTRAIDGROUPROLE | Map | roles |
| C_MSTEAMSMEMBERSHIPID | Map | id |
Creating a new resource type for Teams channel resources
- Create a new Resource Type for Teams Groups Resources. Go to Setup --> Master Data --> Resource types and click New.
- Enter the following details and click OK:
Name: Microsoft Entra ID Teams Channel
Resource category: Permission
Create the queries specified below.
Teams Channel as Resource
Add a new query that imports Teams channels as Resource. Edit the values following the table below:
- General
- Nested Requests
- Mappings
| Field | Value |
|---|---|
| URL | teams |
| Description | Teams Channels (requires Channel.ReadBasic.All application permission) |
| Use delta | No |
| Filter | displayName != "General" |
| Field | Value |
|---|---|
| Nested URL | teams/{PARENT_id}/channels |
| Field | Type | Value |
|---|---|---|
| Business key | Map | id |
| Security resource business key | Map | id |
| Name | Map | displayName |
| Category | Constant | Permission |
| Type | Constant | Microsoft Entra ID Teams Channel |
| Short name | Map | id |
| Microsoft Teams ID | Map | PARENT_id |
Teams and Channels as Resource parent/child
Add a new query that imports teams and channels as Resource parent/child. Edit the values following the table below:
- General
- Nested Requests
- Mappings
| Field | Value |
|---|---|
| URL | teams |
| Description | Parent/child between Teams and Channels (requires Channel.ReadBasic.All application permission) |
| Use delta | No |
| Filter | displayName != "General" |
| Field | Value |
|---|---|
| Nested URL | teams/{PARENT_id}/channels |
| Field | Type | Value |
|---|---|---|
| Indirect | Constant | False |
| Parent resource business key | Map | PARENT_id |
| Child resource – business key | Map | id |
Account
Add a new query that imports Account. Edit the values following the table below:
- General
- Mappings
| Field | Value |
|---|---|
| URL | users?$expand=manager($levels=max;$select=id,displayName,mailNickname)&$select=id,userPrincipalName,displayName,accountEnabled,lastPasswordChangeDateTime,mail,givenName,surname,businessPhones,signInActivity |
| Description | Accounts for Microsoft Entra ID Users (requires User.Read.All application permission) |
| Field | Type | Value |
|---|---|---|
| Last password change | Expression | lastPasswordChangeDateTime == null ? (DateTime?)null : (DateTime.Parse((string)lastPasswordChangeDateTime) < DateTime.Parse("1753-01-01T00:00:00Z") ? DateTime.Parse("1753-01-01T00:00:00Z") : DateTime.Parse((string)lastPasswordChangeDateTime)) |
| Phone (check multivalued) | Map | businessPhones |
| Entramanager (check History) | Map | manager_mailNickname |
| signInActivity | Map | signInActivity_lastSignInDateTime |
Ensuring the the correct functioning of manager provisioning
- Go to Setup --> Master data –-> Attributes. Click New.
- Enter the following details and click OK:
Name: Microsoft Entra ID – Manager
Definition : MANAGER
Hide attribute: (select the checkbox)
Ensuring the the correct functioning of business phone provisioning
- Go to Setup --> Master data –-> Attributes. Click New.
- Enter the following details and click OK:
Name: Microsoft Entra ID - Phone
Definition : CELLPHONE
Hide attribute: (select the checkbox)
Business phone attribute set
- Go to Setup --> Master data –-> Attribute sets. Click New.
- Enter the following details and click OK:
Name: MS Entra ID User Attribute
Attributes : Email, First name, Last name, Initial password, Microsoft Entra ID – Manager, Microsoft Entra ID – Phone
Performing manager reconciliation between Microsoft and Omada
- Go to Setup --> Master data --> Resource types.
- Search for
<your system name>Account. - Add a new attribute map in the Reconciliation attribute map field:
MANAGER=entramanager;.

- Change the Attribute set field:
MS Entra ID User attributes - Change the Provisioning attribute set field:
MS Entra ID User attributes - Click OK.
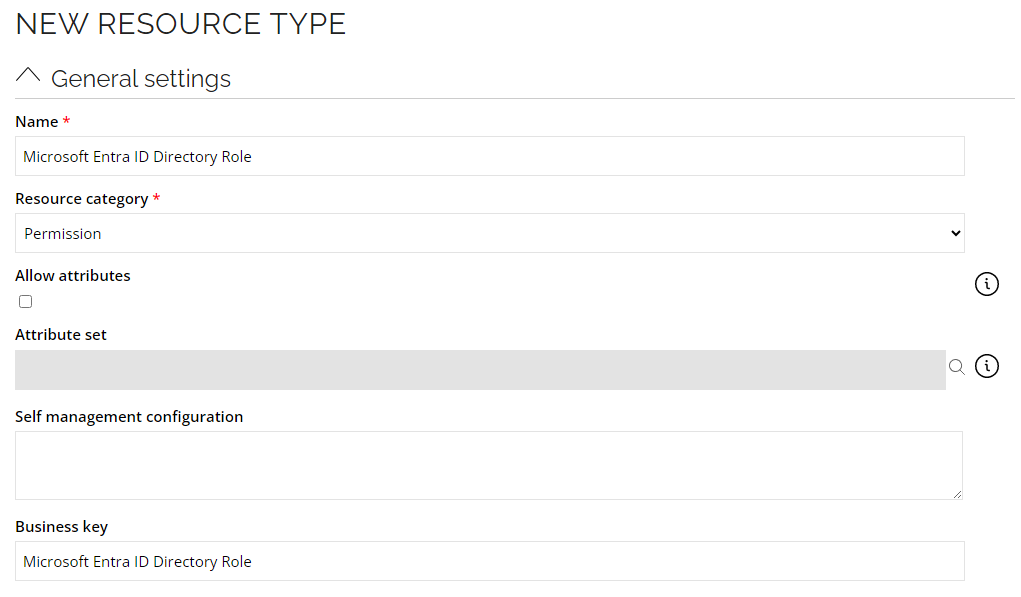
Creating new resource types for Directory Role Resources
- Go to Setup --> Master data --> Resource types. Click New.
- Enter the following details and click OK:
Name: Microsoft Entra ID Directory Role
Resource category: Permission
Resource (directoryRoles)
Edit the query that imports Resource (directoryRoles). Edit the values following the table below:

- General
- Mappings
| Field | Value |
|---|---|
| Description | Resources for Microsoft Entra ID Directory Roles (requires RoleManagement.Read.Directory application permission) |
| Field | Type | Value |
|---|---|---|
| Type | Constant | Microsoft Entra ID Directory Role |
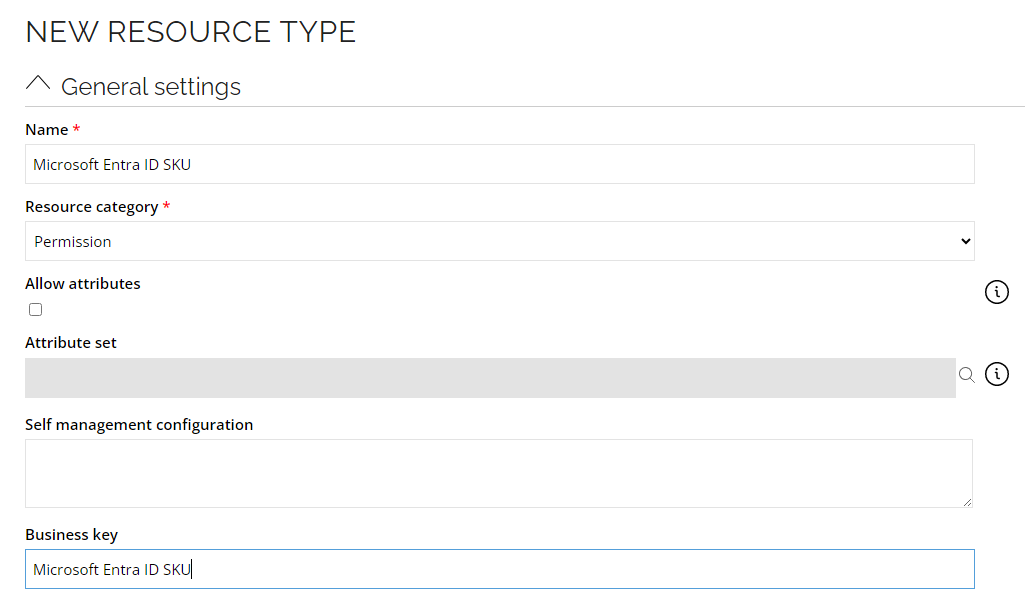
Creating new resource types for SKU Resources
- Go to Setup --> Master data --> Resource types. Click New.
- Enter the following details and click OK:
Name: Microsoft Entra ID SKU
Resource category : Permission
Resource (subscribedSkus?$select=skuId,skuPartNumber)
Edit the query that imports Resource (subscribedSkus?$select=skuId,skuPartNumber). Edit the values following the table below:

- Mappings
| Field | Type | Value |
|---|---|---|
| Type | Constant | Microsoft Entra ID SKU |
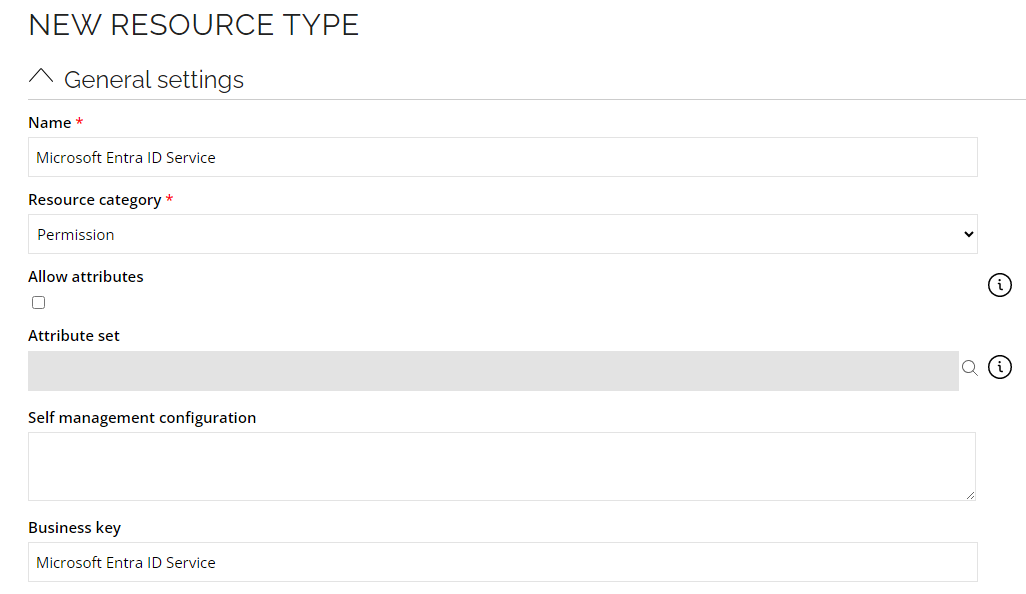
Creating new resource types for Service Plans Resources
- Go to Setup --> Master data --> Resource types. Click New.
- Enter the following details and click OK:
Name: Microsoft Entra ID Service
Resource category: Permission
Resource (subscribedSkus?$select=servicePlans)
Edit the query that imports Resource (subscribedSkus?$select=servicePlans). Edit the values following the table below:

- Mappings
| Field | Type | Value |
|---|---|---|
| Type | Constant | Microsoft Entra ID Service |
Running the import
Perform the following steps before running the import:
- Change the Resource Type on Resources. Go to Setup -> Master data -> Resources.
- Find for the Resource that needs to be changed.
- Change the Resource Type as specified below and click OK.

- Go to Setup -> All systems. Click the system and in the system view, click Start data import.
- In the Start import window, select the Reset source system high-water marks and Reset internal high-water marks options.
- Click OK.
Upgrading the connector
To upgrade the Microsoft Azure Active Directory connector, perform the following operations:
-
Create a backup of the existing Microsoft Azure Active Directory Connector data model - copy it to a file.
-
Go to Setup --> Master Data --> Systems and select your Microsoft Azure Active Directory system.
-
Select Enable provisioning and choose the new Microsoft Entra ID connector. Select the Use default configuration option.
-
Click OK.
-
Add the
usageLocationproperty to the task mappings forMSEntraIDUser - Assignment. Enter the correct country code.Parameter Operator Value usageLocation Constant Country code (examples: US, ES, GB)
RoPE Configuration
Perform the following steps to ensure the correct functioning of manager provisioning and deleting assignments between Teams groups and users:
-
Open the RoPE configuration file:
On-prem:\Omada Identity Suite\Role and Policy Engine\Service\ConfigFiles
Cloud: Management Portal --> RoPE configuration -
Under the Attribute Value Resolver extension, add the following lines (change the key value in case you already have that specific key defined):
<add key="MSEntraID_Manager" name="MANAGER" extraInfo="Type:ReferencePath" value="/#IDENTITY/OUREF/MANAGER/IDENTITYREF:[IDENTITYID]"></add>
- Under the Map Attributes From Actual Data extension, add the following lines (change the key value in case you already have that specific key defined):
<add key="3" extraInfo="Microsoft Entra ID Teams" name="C_MSTEAMSMEMBERSHIPID" value="C_MSTEAMSMEMBERSHIPID" />
Events definition
Establish event definitions that trigger create, update, and delete operations for resource provisioning (Teams groups, SharePoint groups, and Security groups). To create event definitions, implement a code method to GenerateGUID in the logical key field:
- Go to Setup --> Administration --> Process configuration --> Event definitions. Click New.
- Enter the following details:
Name: Trigger Microsoft Entra ID Groups – Create
Description: Microsoft Teams, Microsoft SharePoint, Microsoft Security
Event is triggered when: A new object is created
Triggers on objects of type: Resources - Click Apply.
- Click New and create two Execute code method entries.
- Code method 1
Assembly:Omada.OE.UtilityCodeAssembly.dll
Class Name:Omada.OE.UtilityCodeAssembly.Main
Name of method:GenerateGUID
Name:result
Map to property:Logical key - Code method 2
Assembly:Omada.OE.Solution.OIM.Assembly.dll
Class Name:Omada.OE.Solution.OIM.Assembly.OPS.ResourceLifeCycleManager
Name of method:SubmitPrioritizedProvisioningJob
Name:operationEnum
Map to value:create
- Code method 1
- Click OK.
- In the event definition setup view, click Filter.
- Create a new filter. Enter the following details and click OK:
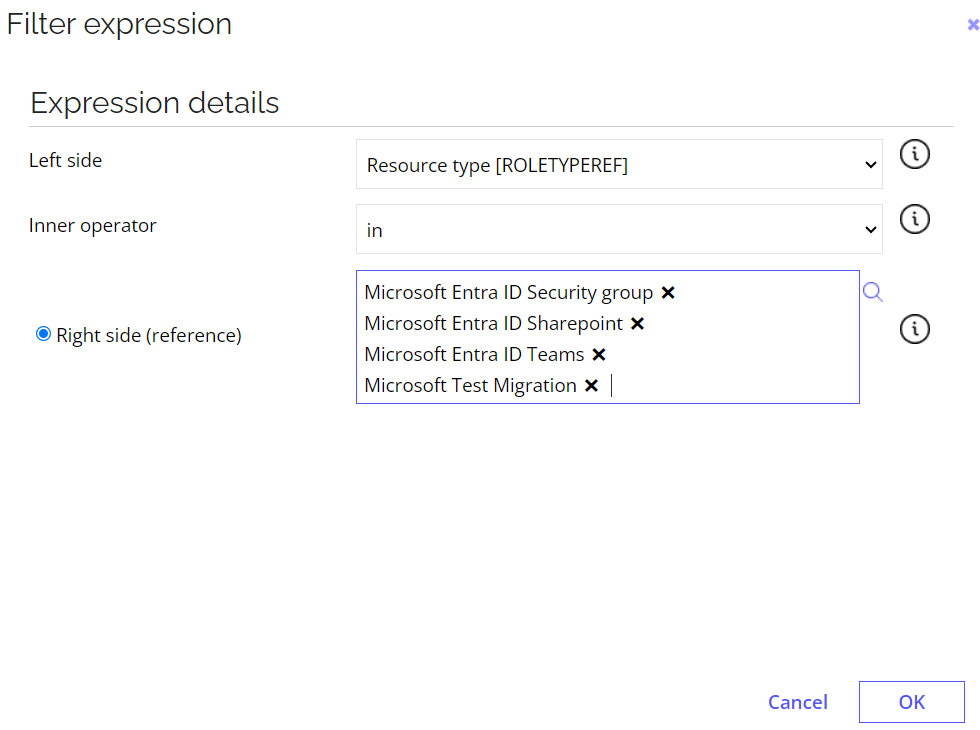
- To save the new event definition, click OK.
Create event definitions to trigger update and delete actions in the Resources object. For the update and delete operations, you don't need to create a code method to GenerateGUID.
You can only update the group's name.