Managing environment
Use the Manage environment page to perform operational actions on an existing environment, such as updating configuration, controlling runtime state, scheduling operations, and handling recovery scenarios.
Environment management actions
From the Environment overview page, you can access a set of actions that allow you to manage the lifecycle and behavior of an environment.
These actions are typically used after an environment has been created and configured.
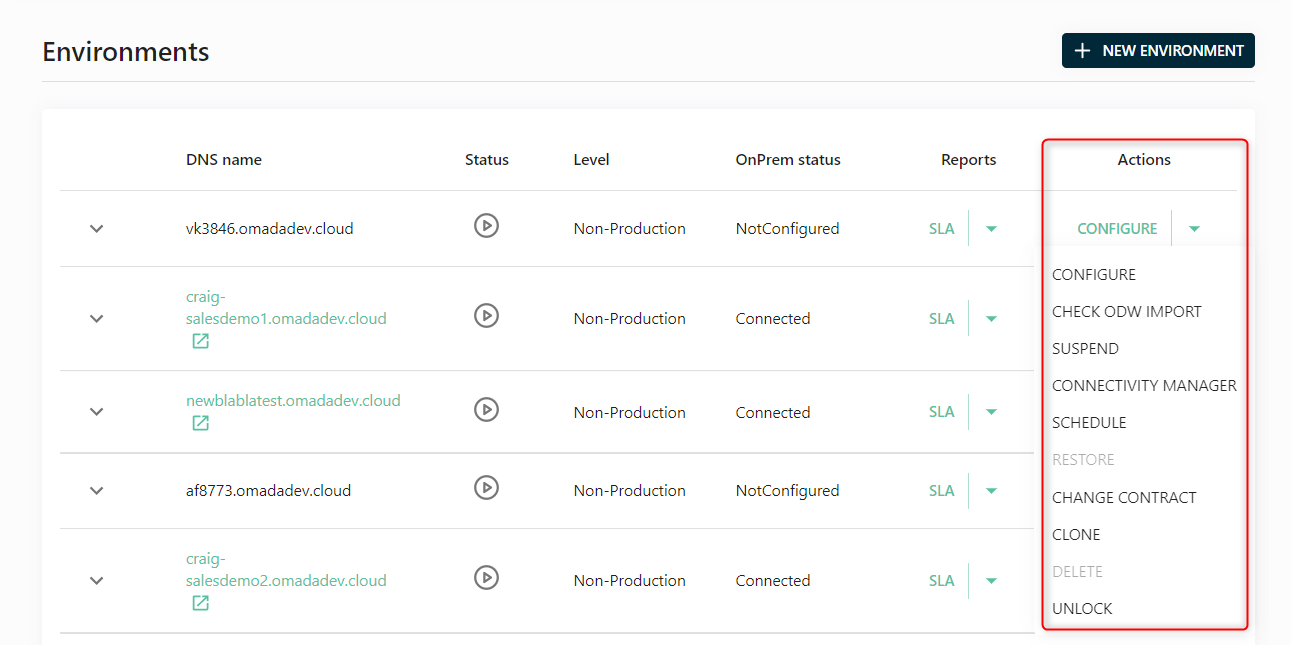
Only one operation can be executed at a time on an environment (for example, configuration or upgrade).
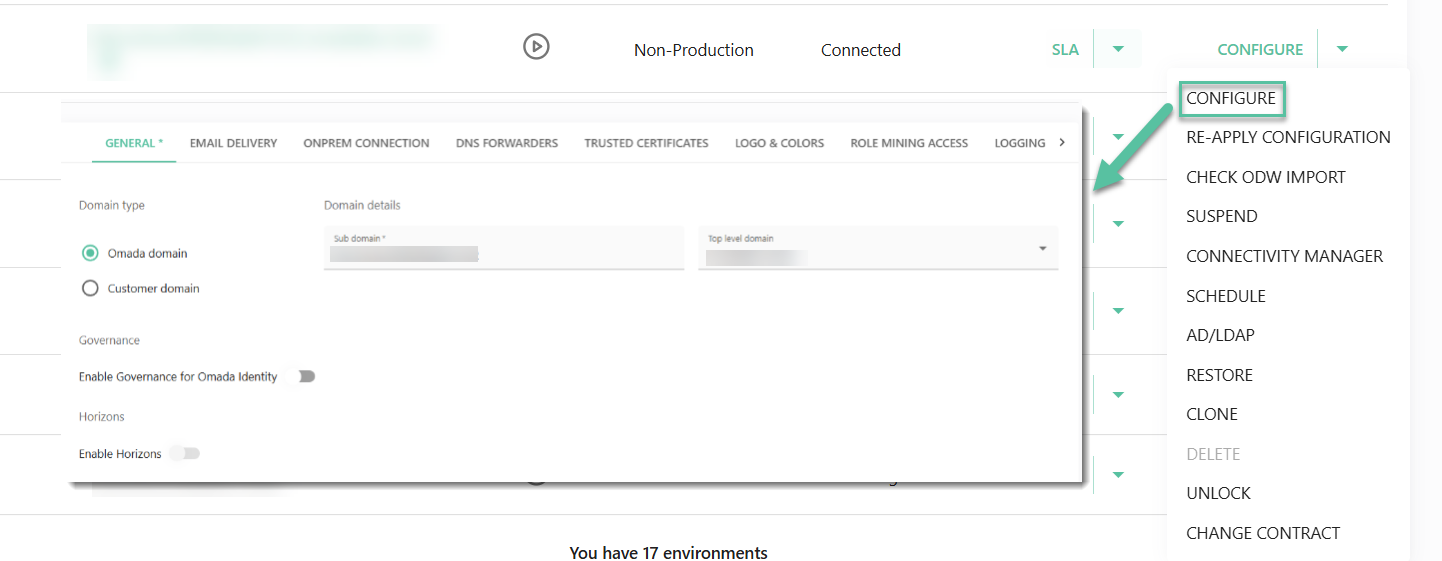
Configure
Update environment settings and configuration.
-
Opens the same configuration interface used during environment setup.
-
Allows changes to environment-specific settings (where supported).
For field-level details, refer to the Configuring environment section in the Cloud Management Portal documentation.
Re-apply configuration
Re-apply configuration triggers a full reconfiguration of the environment using the existing settings. It performs the same underlying process as the Configure action, but without requiring any changes or user input.
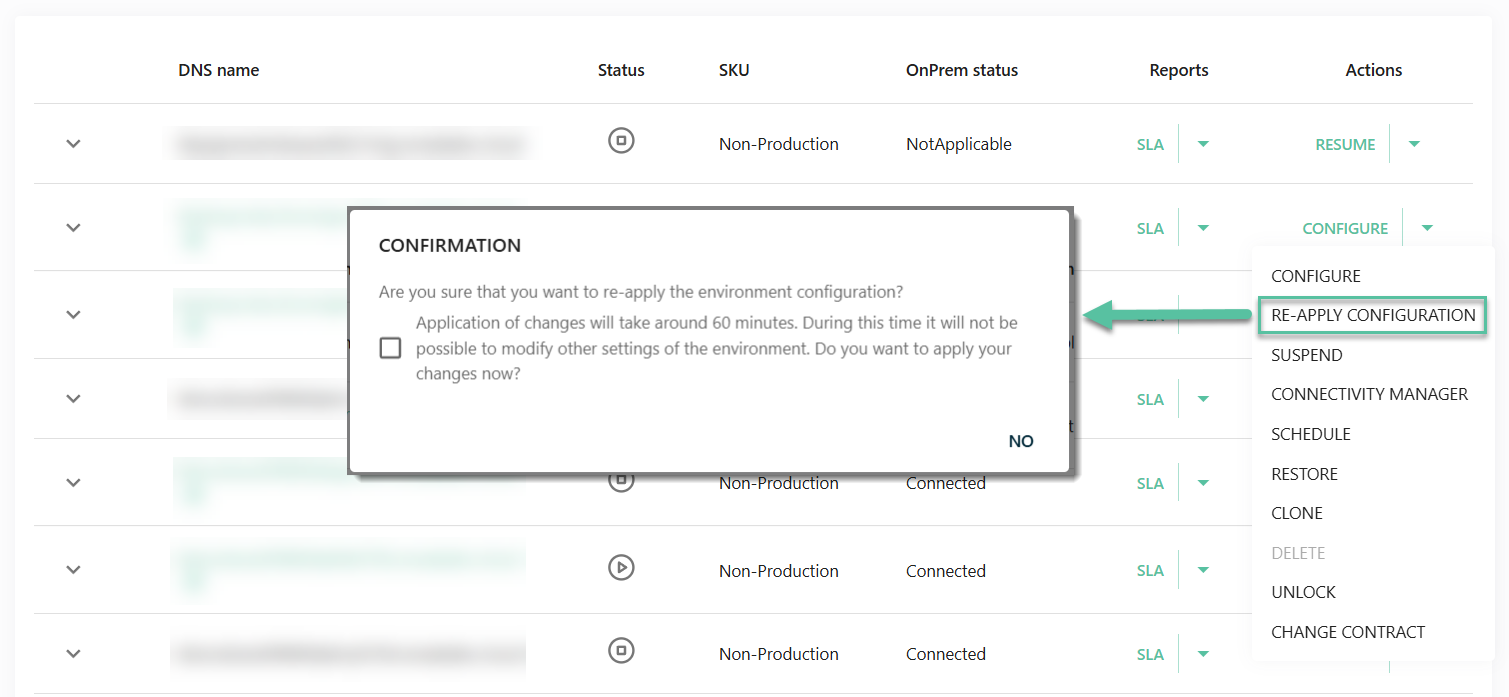
This option is typically used to re-run the configuration pipeline in cases where a previous configuration attempt may have failed or not completed successfully. It ensures that the environment is brought to the intended state based on the last applied configuration.
The application of the configuration can take up to 60 minutes. During this time, it is not possible to modify other settings of the environment.
Check ODW import
View the status of the Omada Data Warehouse (ODW) import job.
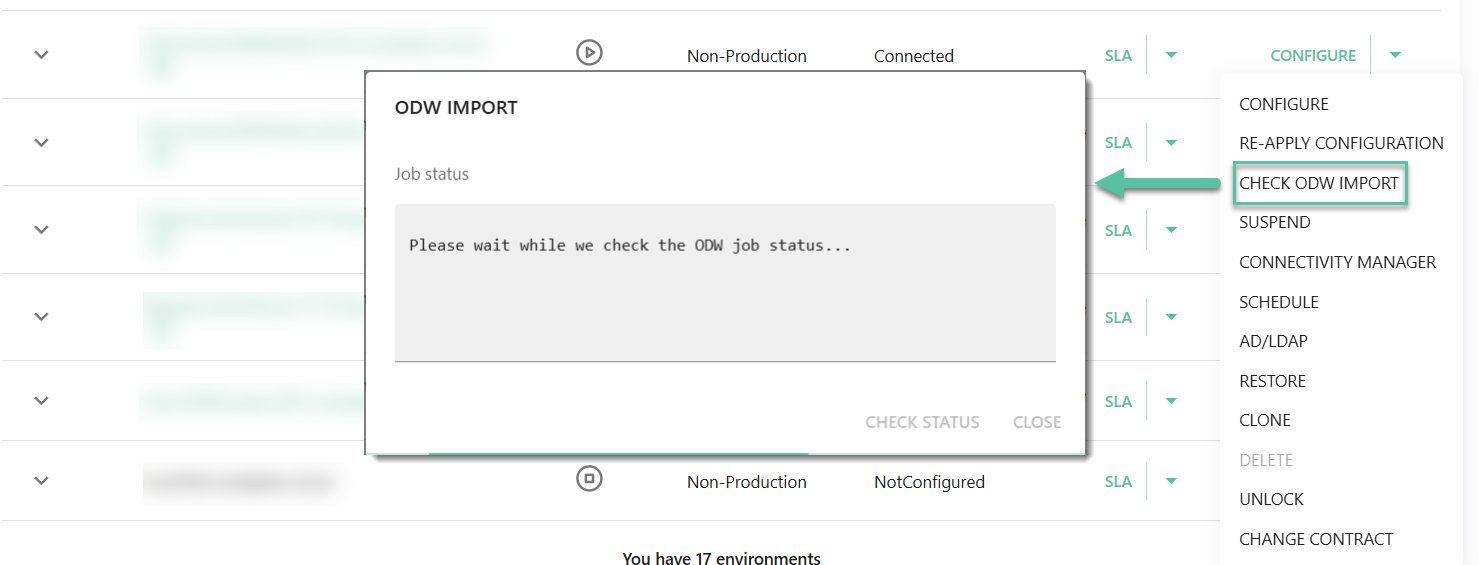
ODW Import:
- Shows whether an import is running.
- Useful for troubleshooting data synchronization issues.
Suspend/Resume
Control the runtime state of the environment.
-
Suspend - pauses the environment. You can pause an environment by clicking Suspend in the dropdown menu.
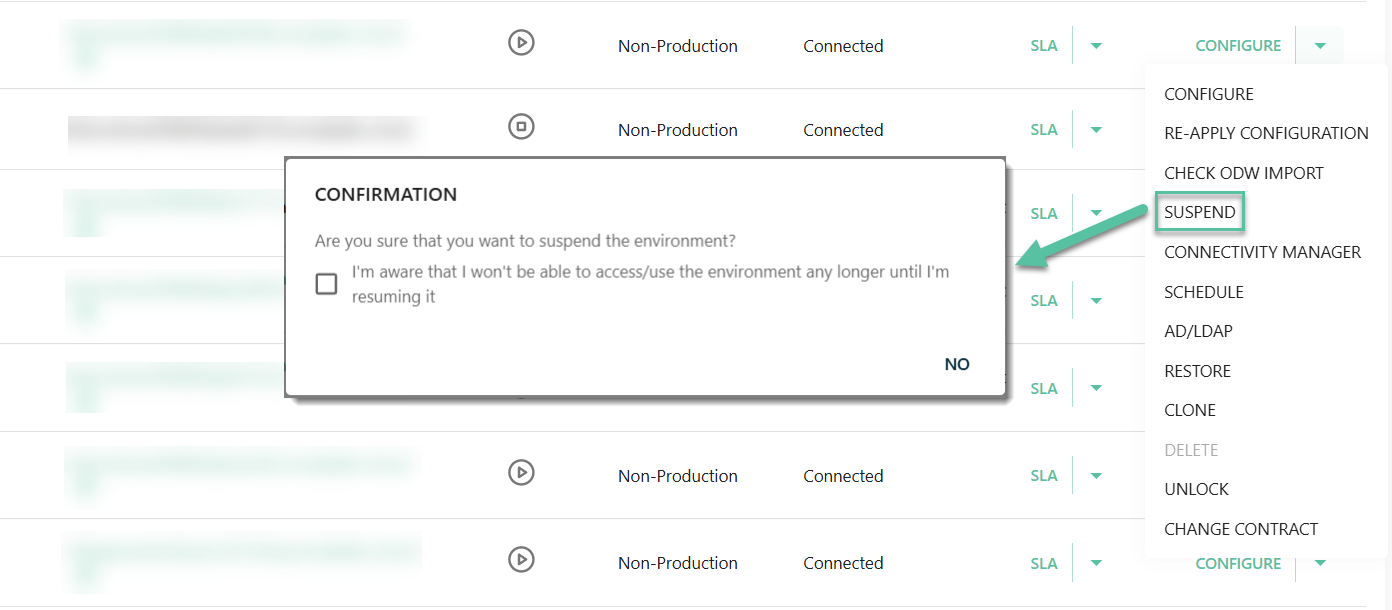
-
Resume - reactivates a suspended environment. To reactivate it, click Resume (1). You'll then get the confirmation message that the operation has started (2).
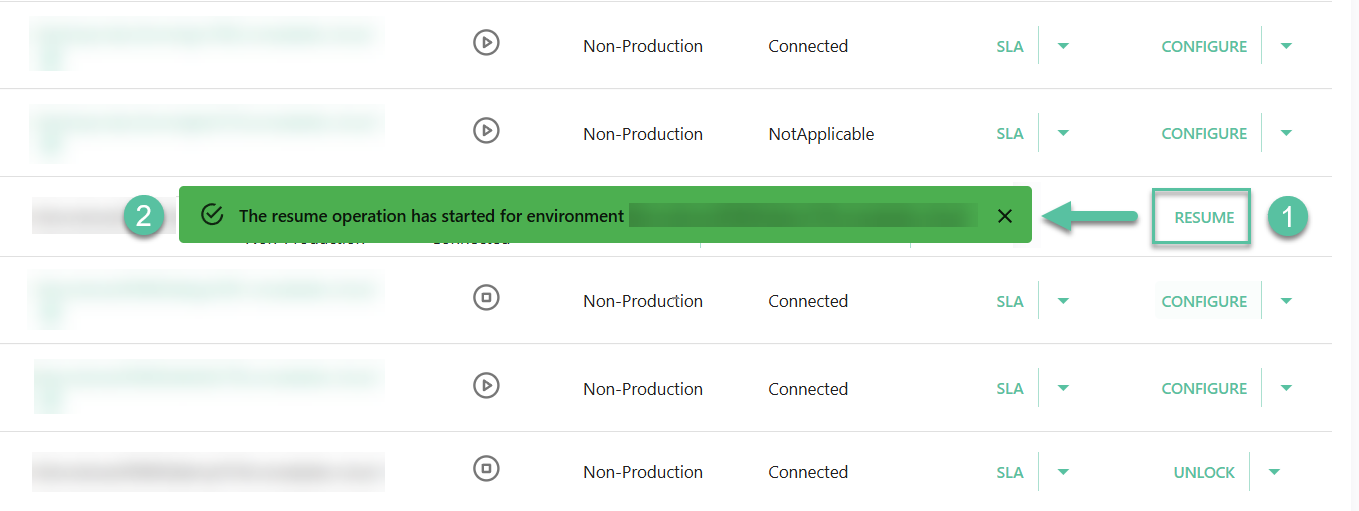
- Suspended environments can still be deleted.
- Use suspension to temporarily stop usage without removing the environment.
Connectivity manager
Use the Connectivity manager to manage integration packages and upload custom PowerShell scripts.
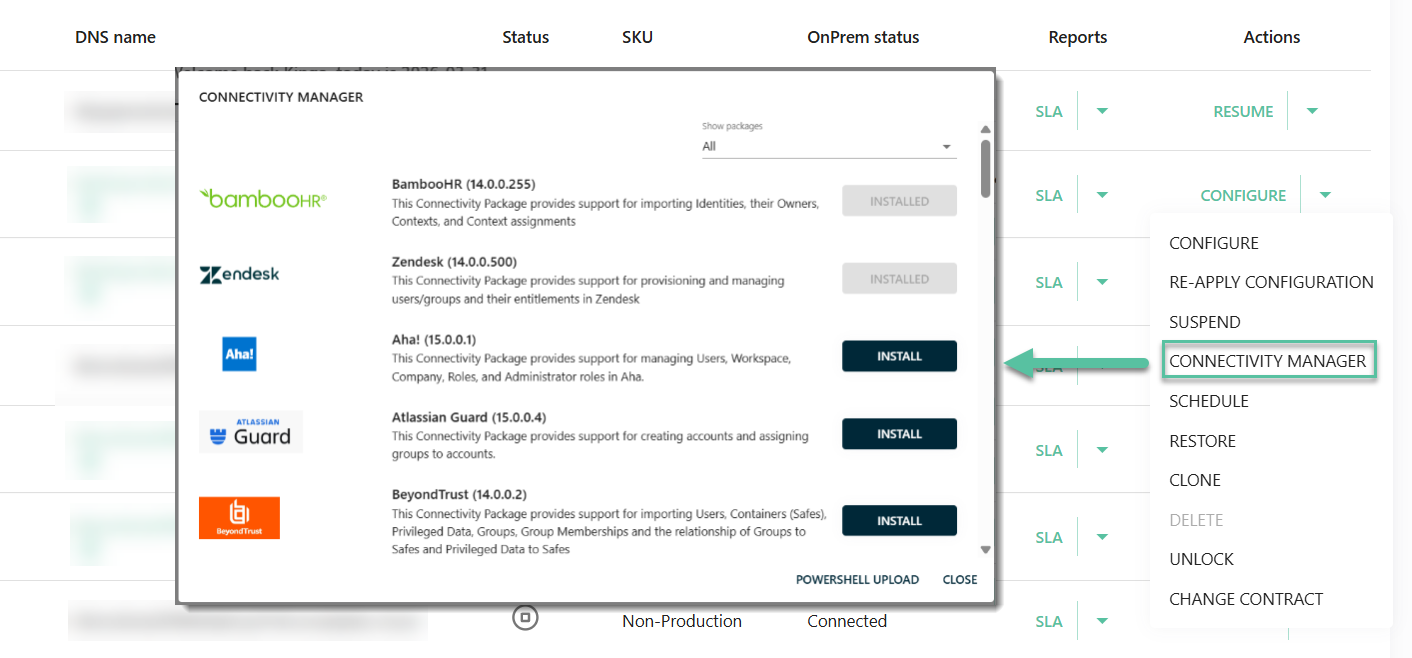
Use this dialog to manage connectivity packages:
- Install new packages.
- Upgrade existing packages (when available).
- View package descriptions and supported functionality.
Select PowerShell Upload to upload custom scripts used for connectivity scenarios.
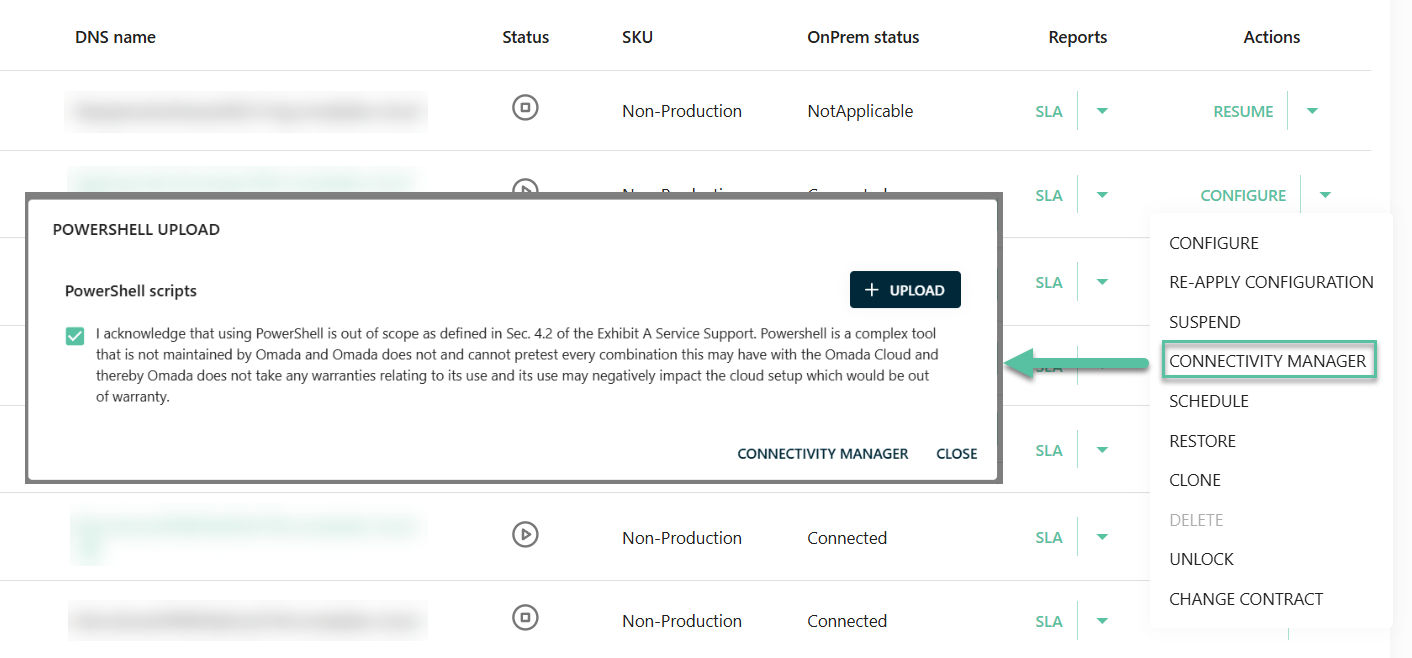
Uploaded scripts are listed in the dialog and can be reused across the environment.
From the Actions column, you can:
- Download scripts to review their content.
- Delete scripts that are no longer needed.
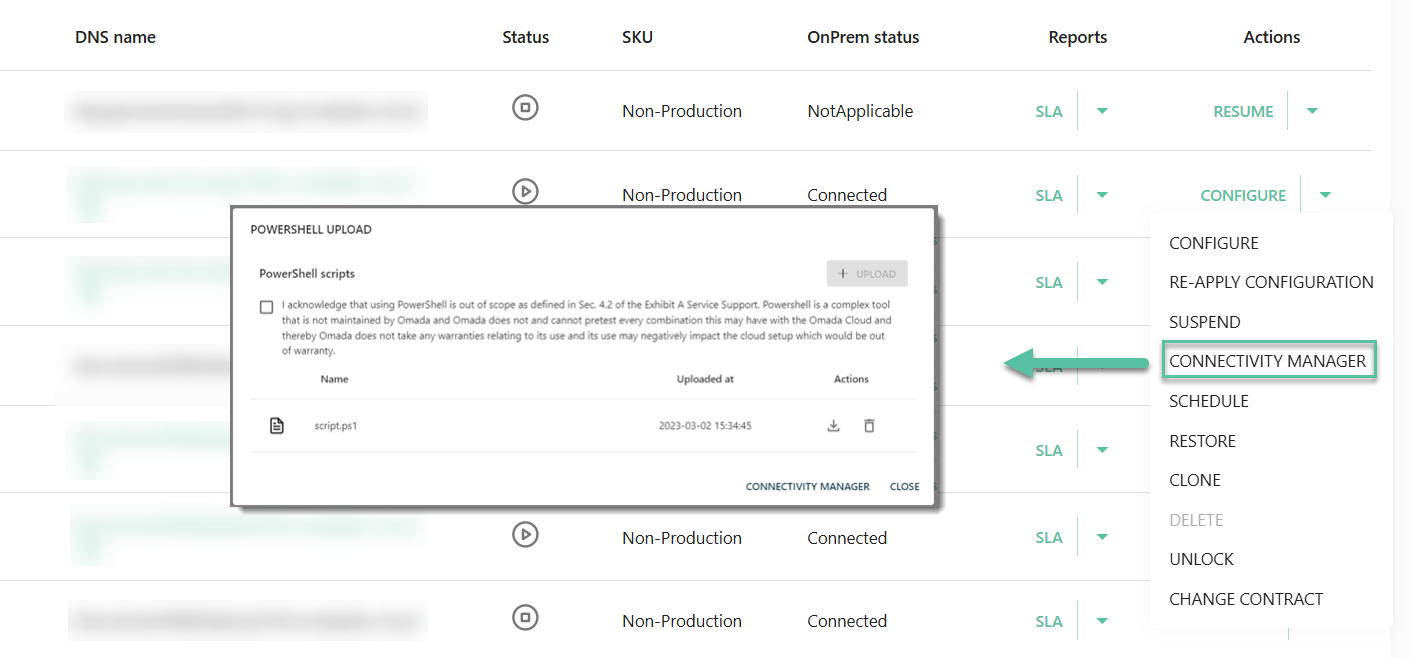
To successfully upload a script:
- Accept the disclaimer for each upload.
- Use the
.ps1file format. - Ensure each file has a unique name.
- Keep file size below 1 MB.
Schedule
Use Schedule to automate environment operations such as suspension, resumption, or upgrades.
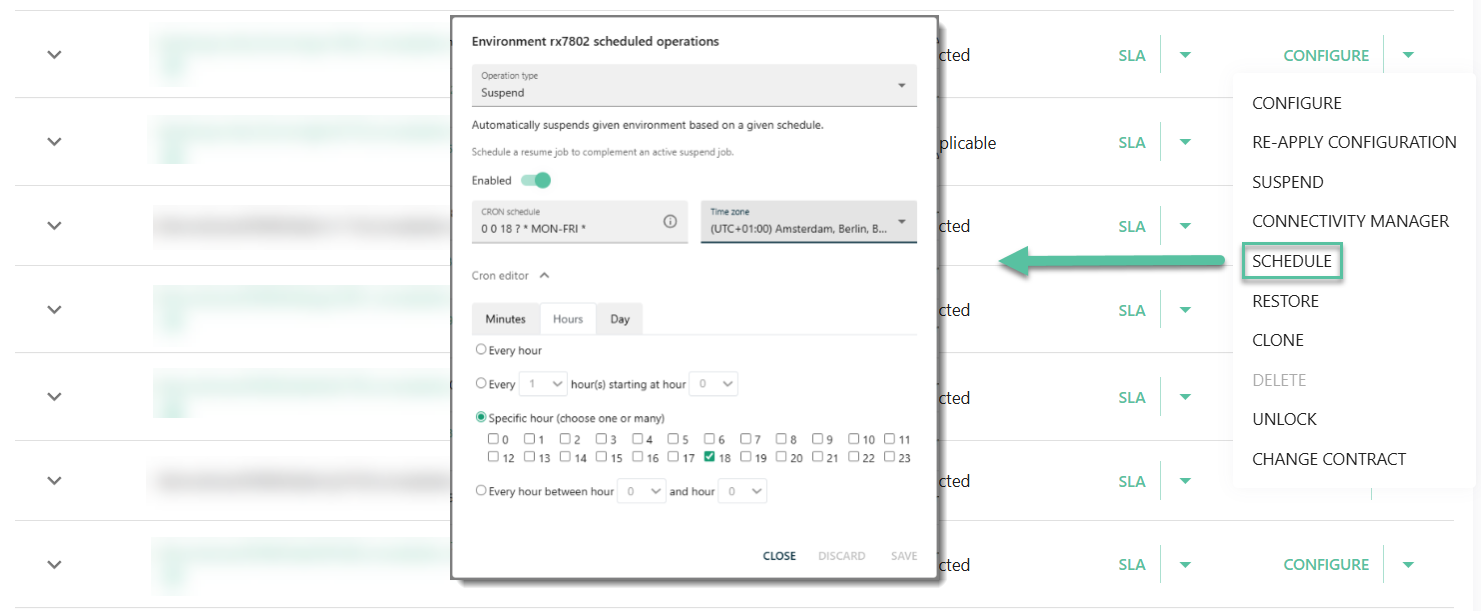
To schedule suspension, resumption, or upgrade, define when an operation should run:
- Select the operation type:
- Suspend - automatically pauses the environment.
- Resume - reactivates a suspended environment.
- Upgrade - applies a new version when scheduled.
- Enable the schedule using the Enabled toggle.
- Choose the time zone.
- Set the day and time using the scheduler or CRON editor.
- Schedule operations during maintenance windows or off-peak hours.
- Pair Suspend and Resume schedules to control availability.
- Verify time zone settings to avoid unintended execution times.
CRON expressions
You can use a CRON expression to define precise schedules. This is useful when you need more flexibility than the standard scheduler provides (for example, for complex or recurring patterns).
For example, the following CRON expression:
**0 0 18 ? * MON-FRI ***
Defines a schedule that:
- Runs at 18:00 (6 PM).
- On Monday to Friday.
- In the selected time zone.
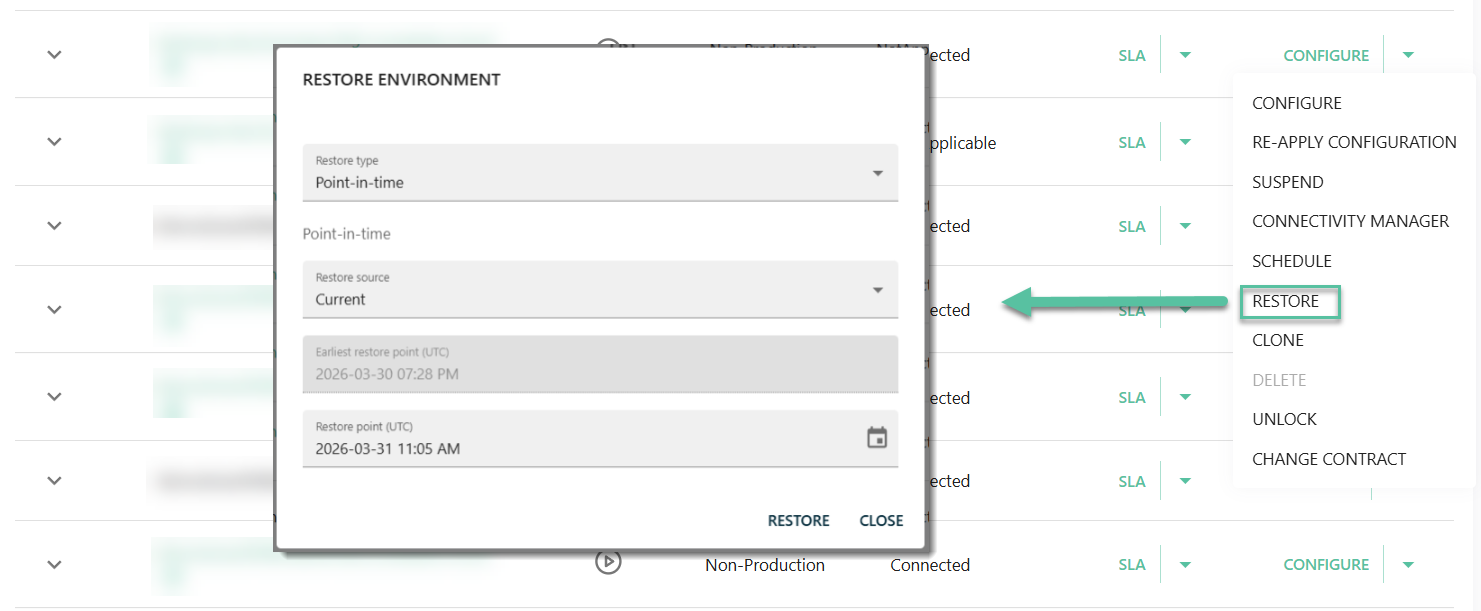
Restore
This action allows you to restore an environment to its previous state by a specified past date.
It is designed to be used as a containment resort or a recovery action when facing a systemic failure, compromising normal operations, or configuration corruption.
The Restore action impacts both configuration and data. Performing the restore action reverts the configuration, identities, resources, and assignments to a captured state specified in the Restore point setting. For production environments, you can configure the restore point for up to 31 days in the past and for non-production environments, the maximum is 7 days.
Restore point availability depends not only on the environment level, but also on environment lifecycle actions.
Performing an upgrade or executing a restore operation resets the restore point baseline. When this happens, the oldest available restore point is discarded and replaced with a new baseline. As a result, restore points created prior to an upgrade or a previous restore operation are no longer available, even if they fall within the expected retention period.
Performing the Restore action may result in the loss of changes and data created after the point in time specified in the Restore point setting. Recovering data requires manual effort through subsequent imports and reconciliation actions.
Consider performing the Restore action in the following scenarios:
- System instability
- Critical event recovery
- Configuration corruption
Errors spreading through multiple domains, due to uncontrolled and untraceable configuration changes, causing system instability.
The environment is non-functional due to corrupted database, deleted configuration, or failure to deploy.
A widespread calculation or provisioning failures caused by a corrupted update or misconfiguration.
The Restore option is not an efficient solution when:
- There is an access right or role permissions issue that can be addressed by configuration changes.
- The environment is stable and any data discrepancies can be resolved through import or recalculation.
- There are provisioning issues limited to specific users or connectors.
- An isolated configuration change occurred, with limited impact, that can be reverted manually.
Before you start
Before you decide to initiate the restoration process, perform the following actions:
- Validate if there are alternative actions that you can take. Treat the Restore option as a last resort measure.
- Identify the extent of data modified and created from the selected restore point.
- Plan for downtime, since during the restoration process the environment is unavailable. The whole process usually takes between two to four hours, but depending on the volume of data the downtime might be extended beyond that timeframe.
- Inform affected stakeholders about the downtime and the extent of data impacted by the restoration process.
- Consider creating backup of external systems impacted by the restoration process. Exported data can support reconciliation process afterwards.
Performing the Restore process
-
In the Management Portal environment overview page, find the environment you want to restore and click the Restore button in the Actions menu.
-
Configure the Restore point (UTC) setting.
ImportantThis setting determines both the configuration and data rollback scope.
-
Click Restore to initiate the restoration process.
-
Proceed with the post-process actions.
Post-process actions
- Validate connectors to ensure all configured systems are accessible.
- Perform imports of affected systems with the Reset High-Watermark setting enabled.
- Recalculate identities, prioritizing those with known loss of assignments. To make the process more efficient, consider grouping identities (for example, by organizational units) and performing recalculation group by group, rather than for all identities at once.
- Validate provisioning to ensure all group memberships, access rights, and mailbox assignments are restored correctly.
- Validate pending approvals and resubmit access requests that were created after the restoration point.
- Audit data to identify any discrepancies.
- When utilizing the Cloud Application Gateway, ensure that both the Import and Provisioning worker services are operational.
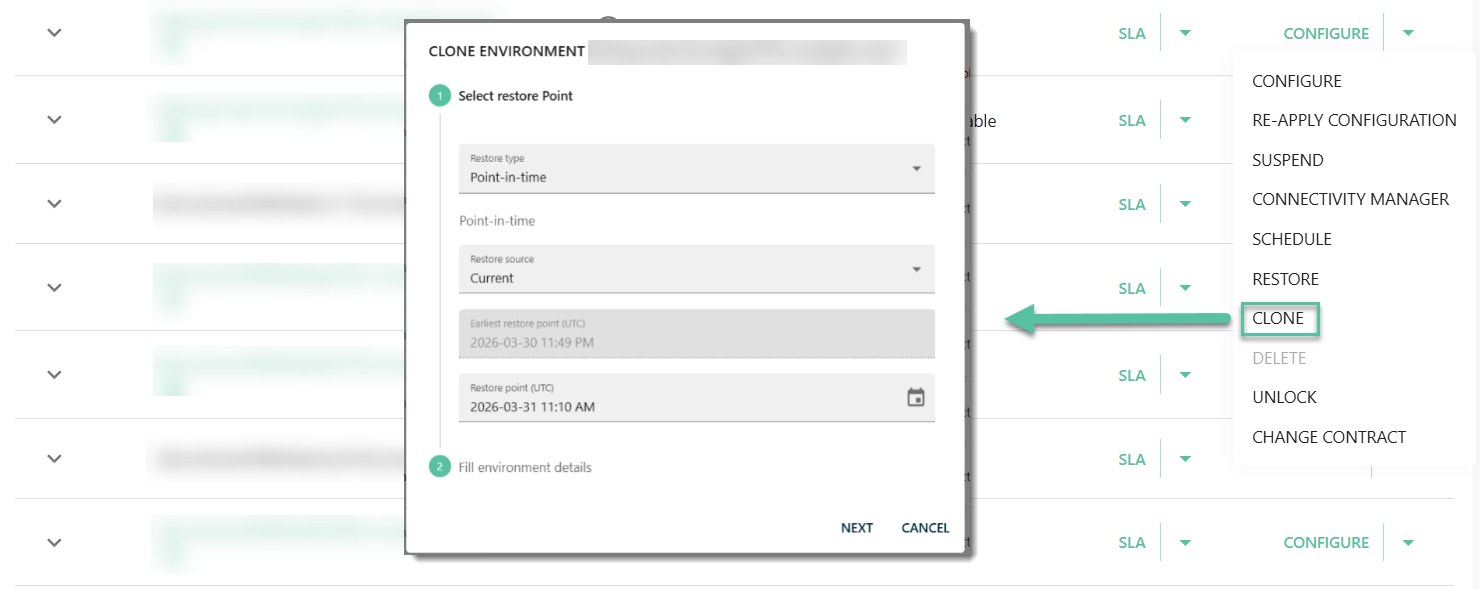
Clone
You can clone an existing environment to create a new environment with the same configuration and data, depending on the selected environment SKU.
Environments can be cloned between Production and Non-Production environments, in both directions:
- Production to Non-Production
- Non-Production to Production
Clone workflow
When cloning an environment, follow these steps:
- Select a restore point.
- Provide environment details, including:
-
Contract number
-
Delivery region
-
Environment SKU - only SKUs that are eligible for cloning are available for selection.
limitationCloning to or from an environment with the Non-Production-Configuration SKU is not supported, regardless of whether the source environment is Production or Non-Production.
To transfer changes involving a Configuration SKU environment, use the Log configuration option instead. Then:
- Download the generated changeset from the Configuration SKU environment
- Upload that changeset into the target Non-Production environment
An environment with the Non-Production-Configuration SKU can only be created as a new environment (that is, it cannot be created via cloning).
-
Delete
Once an environment is no longer needed, you can delete it.
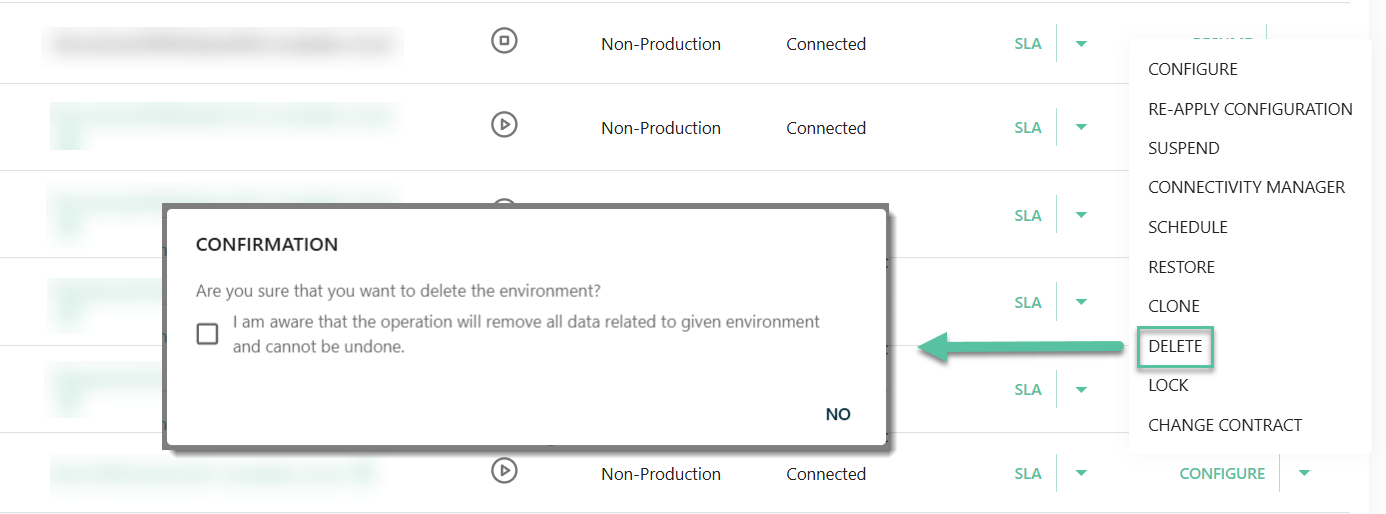
Locked environments cannot be deleted. Unlock the environment to proceed.
Deleting an environment permanently removes all data and cannot be undone.
Lock/Unlock
The Lock option prevents accidental or automated deletion of the environment.
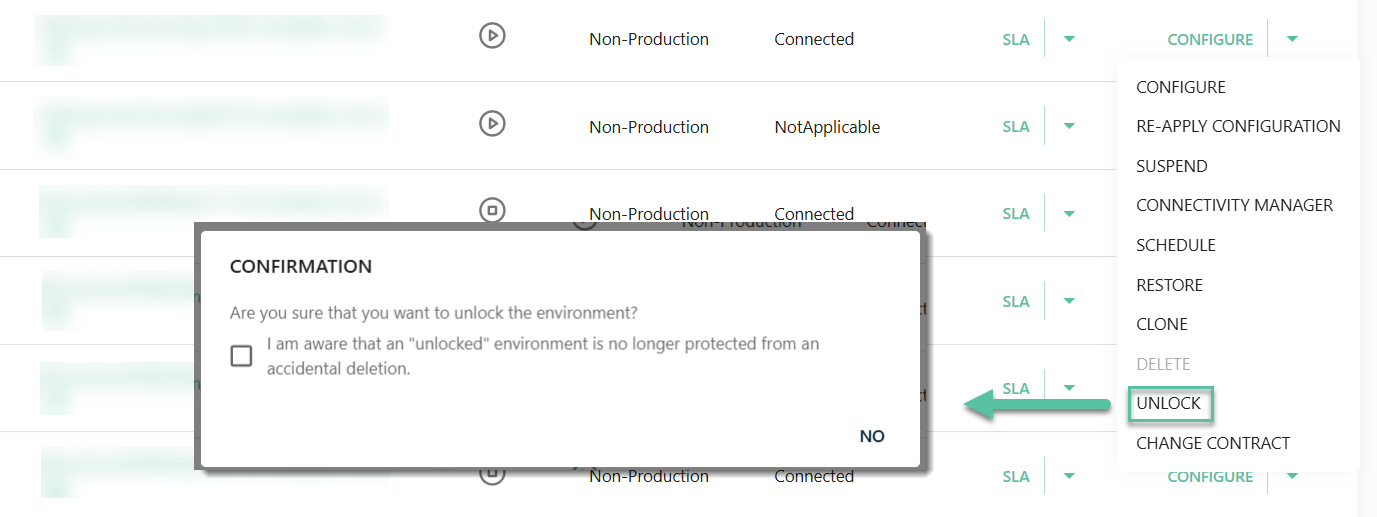
When an environment is locked, the Delete action is disabled.
Change contract
Move the environment to another contract with available capacity.
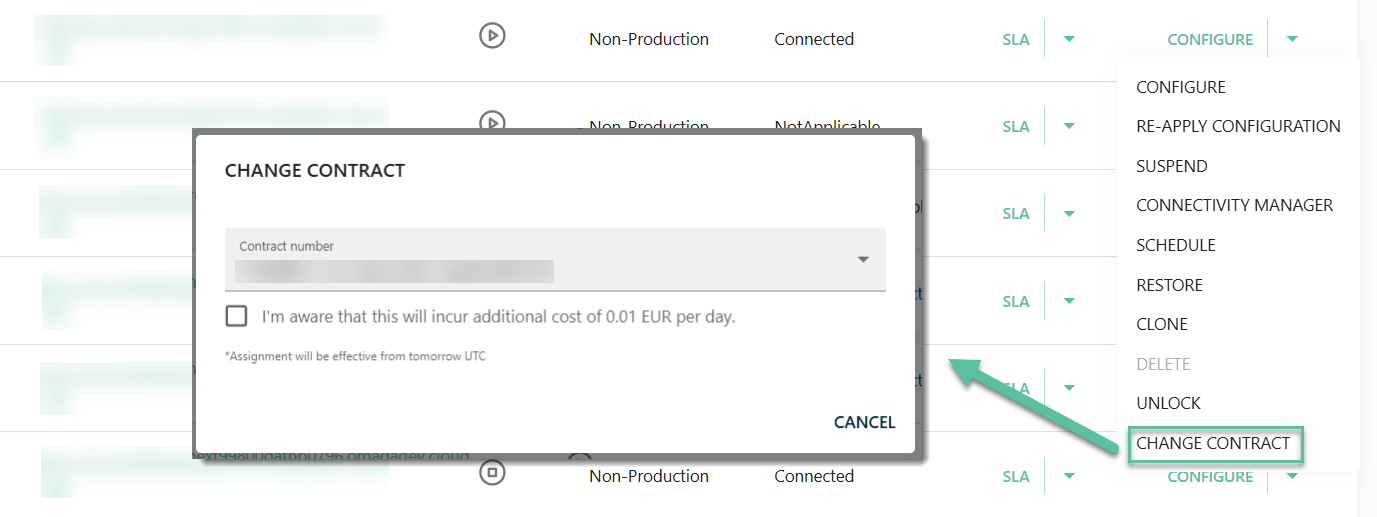
Key considerations:
- The target contract must have available capacity.
- The change takes effect from the next day (UTC).
Changing contracts may incur additional costs depending on the target contract.
Upgrade
This action is available when a new Cloud release is available.
Select Upgrade to review the release notes before proceeding.