Step 2. Test connectivity
The next step is to test the connectivity and see where each of the components come into play.
Registering a system
To manage the installed Lightweight Directory Access Protocol (LDAP) system, you must first register a new system.
To perform this procedure, you must be a System Administrator in Omada Identity.
To register a system:
-
In Enterprise Server, go to Services > Register New System.
-
Enter a Name and a System ID and select New as Category.
-
In the Register new system dialog box, in the Collector technology section, select the Acme Foo Collector (LDAP).
The collector is there due to the following lines in our registration.xml file:

-
In the Content section, select Access rights, and then click OK. Your system is now registered.
Onboard, import and review data
When the system is registered, you must continue the onboarding by importing data. To do this:
-
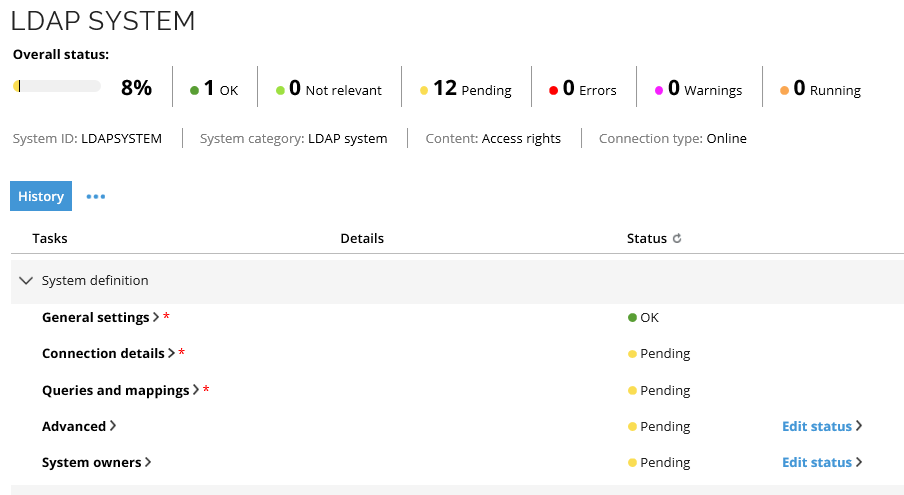
In Enterprise Server, go to Setup > Master data > Systems and select the system that you registered.
This brings up the System Onboarding page for the system you registered.
-
In the Tasks section, expand System definition.
The configuration of both the Connection details and Queries and mappings tasks is defined in the Onboarding configuration.xml file located in the C:\Program Files\Omada SDK\V14.0\tutorials\template connectivity\configuration folder.
Test Connection details
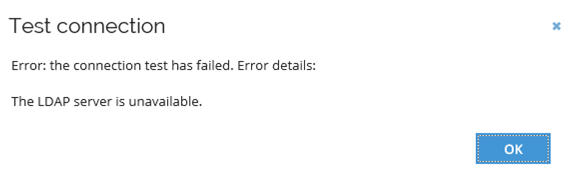
In the following test, you deliberately enter incorrect information to verify that the check of the connection details works as intended. The validation of the host name and the verification that the host exists are done by the deployed and registered POST action.
To test connection details:
-
Click the Connection details task, and in the Connection details dialog box, enter random values in the Host, Port, Base DN, Authentication type, User, and Password fields.
-
Check the Test connection checkbox, then click OK. The following error message appears about the enter host:
-
Click OK to go back to the Connection details dialog box.
-
This time enter the correct details in the Host, Port, Base DN, Authentication type, User, and Password fields.
-
Click OK. In the System Onboarding page, the status of the Connection details tasks turns green to OK.
Test queries and mappings
To test queries and mappings:
-
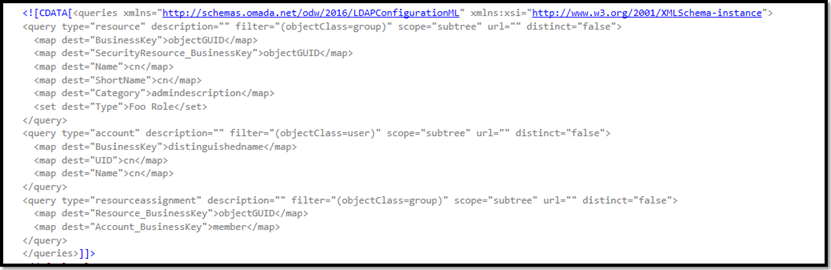
In the System Onboarding page, click the Queries and mappings task. The list of queries and mappings is prefilled with 3 queries:
- Resource
- Account
- Resource assignment

The predefined queries are also specified in the Onboarding configuration.xml file located in the folder C:\Program Files\Omada SDK\V14.0\tutorials\template connectivity\configuration. See the following sample code:
-
Click OK. The Queries and Mappings task status turns green. This means queries and mappings are working properly.
Import data
Before you can import data, in the System Onboarding page, you must set the status of the Account rules task to OK.
To import data:
-
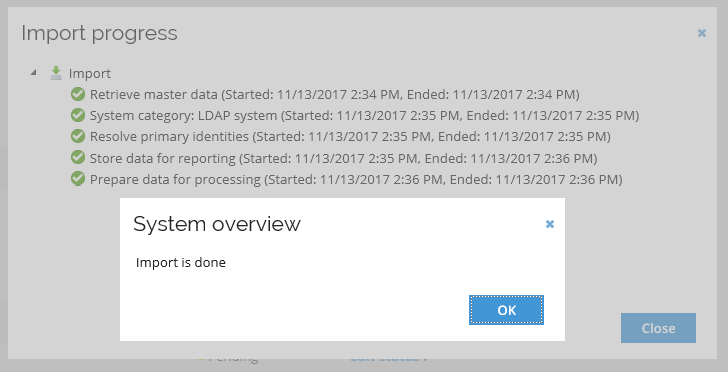
Click the Import data task. Enterprise Server automatically creates a new import profile that imports data from your new system. Click OK and wait for the import to finish.
Review imported data
When the data import is finished, click the Resources tasks to inspect the resources found in the system.
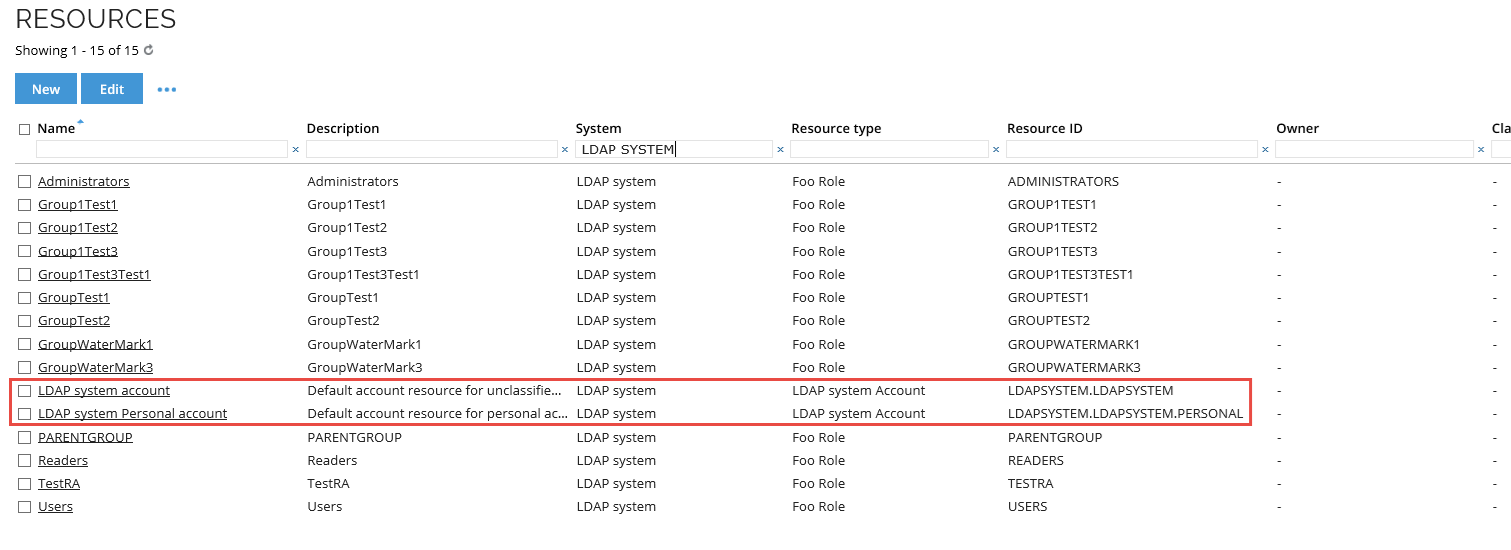
In the Resources dialog box, the resources must match the Roles in the LDAP system.
This means you have now imported roles, which are called resources in Omada Identity.
All resources have Foo Role as their Resource type. This resource type was created automatically when you registered the system in Step 1 -- Register the connectivity and connector.
Information about the resource types to be created during registration are stored in the Onboarding configuration.xml file located in C:\Program Files\Omada SDK\V14.0\tutorials\template connectivity.
The LDAP system account and the LDAP system Personal account are account resources. These are automatically created when you register a new system.
Set up provisioning
To set up provisioning so that requested accesses are written to your LDAP system:
-
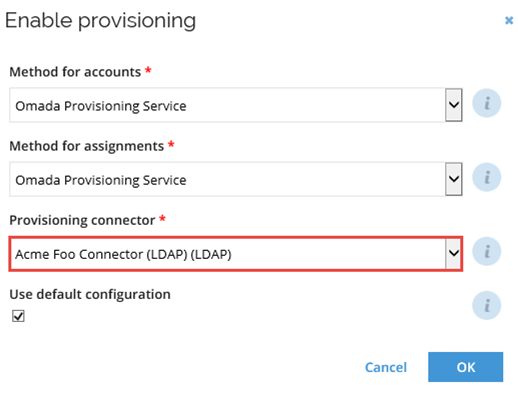
Go to Setup > Master data > Systems and select your LDAP system. Then, select the Enable Provisioning task. This opens the Enable provisioning dialog box.
-
Under Method for accounts and Method for assignments, click the drop-down arrows and select Omada Provisioning Service (OPS).
-
In the Provisioning Connector field, click the drop-down arrow and select the Acme Foo Connector (LDAP) (LDAP).
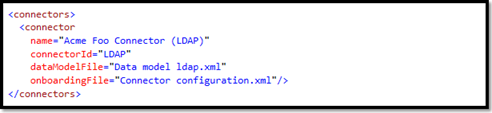
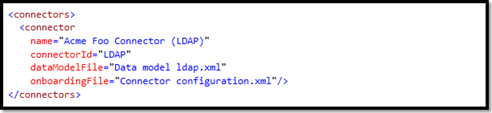
The Acme Foo Connector (LDAP) (LDAP) is there due to the following lines in the registration.xml file:
-
Click OK. The Enable provisioning task status is now automatically updated to OK.
Inspect the data model
On the System onboarding page for your LDAP system, select the Data model task to inspect the data model for the connector. This data model is created as part of the system registration performed in Step 1 -- Register the connectivity and connector.
This data model is defined in the Data model ldap.xml file located in the folder C:\Program Files\Omada SDK\V14.0\tutorials\template connectivity\configuration.
For example, in the registration.xml file, in the connector registration, you can see how the Data model ldap.xml file is referenced:
In the System Onboarding page, you must manually set the status of the Data model task to OK.
Field mappings and task mappings
Next, you must specify task mappings and update field mappings to point to your specific OrgUnit. Task mappings dictate how properties in RoPE are mapped to properties in the connector data model. To perform these procedures:
Field mappings
-
Using a text editor, in the RoPE Account of the User LDAP.xml file, you must update the value of the "dn" field mapping element to point to your specific OrgUnit. See the following code sample:
  <fieldMappings>
    <fieldMapping name="dn" dataType="stringType" action="modify" mappingType="Expression">string.Format("CN={0},CN=User,CN=demo.megamart.com,DC=demo,DC=com",ROPE_AccountName)</fieldMapping>
    <fieldMapping name="cn" dataType="stringType" action="modify" mappingType="SourceField">ROPE_AccountName</fieldMapping>
    <fieldMapping name="name" dataType="stringType" action="modify" mappingType="Expression">Operation == "Create" ? ROPE_AccountName : null</fieldMapping>
    <fieldMapping name="displayName" dataType="stringType" action="modify" mappingType="SourceField">ROPE_Identity</fieldMapping>
</fieldMappings> -
In the RoPE Assignment to Group member LDAP.xml file, you must update the "member" field mapping to point to your specific OrgUnit. See the following code sample:
<fieldMappings>
    <fieldMapping name="cn" dataType="stringType" action="modify" mappingType="SourceField">ROPE_ResourceIdentifier</fieldMapping>
    <fieldMapping name="member" multiValued="true" dataType="stringType" action="modify" mappingType="MultiValueExpression">ROPE_Accounts:string.Format("CN={0},CN=User,CN=demo.megamart.com,DC=demo,DC=com",Value)</fieldMapping>
  </fieldMappings>
Task mappings
As part of the system registration, you also created two taskMapping objects. You can see them
in the registration.xml file located in the C:\Program Files\Omada SDK\V14.0\tutorials\template connectivity\Configuration.
See the following code sample:

The entries reference the mapping.xml in 2 files that are located in the folder C:\Program Files\Omada SDK\V14.0\tutorials\template connectivity\Configuration.
To specify task mappings:
-
In Enterprise Server, on the System onboarding page, select the relevant system. Then, select the Task mappings task. In the Task mappings dialog box, map the Foo Role resource type to Foo Assignment, and then map the LDAP system Account resource type to Foo User.
infoThe LDAP system Account resource type will have a different name if you called your system something else during the registration process.
-
When you are finished specifying task mappings, click OK.
-
In the System onboarding page, set the status for the Task mappings task to OK.
-
To send the provisioning configuration to the provisioning service, click Commit settings.
Test provisioning functionality
To test if provisioning works, you must first log in as a user and request access to your new system.
The service account used for running the Omada Provisioning Service Windows service must have write access to the file.
To test the provisioning functionality:
-
Log in as a user, and request access to the system that you registered. If the access request is not automatically approved, log in as an approver and approve it.
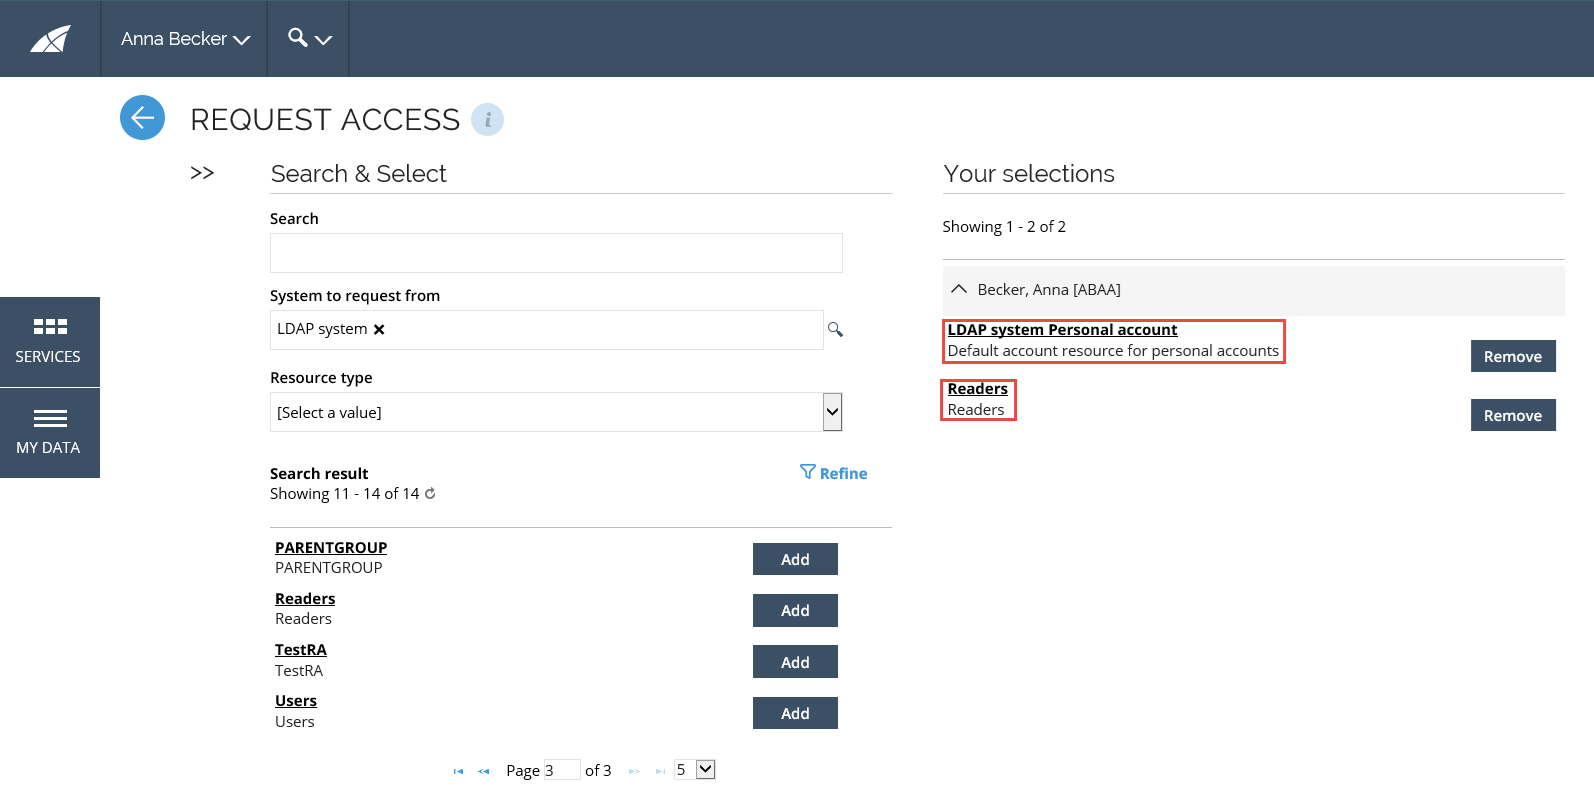 note
noteIn the example above, the user Anna Becker has requested access to the LDAP system account and Readers.
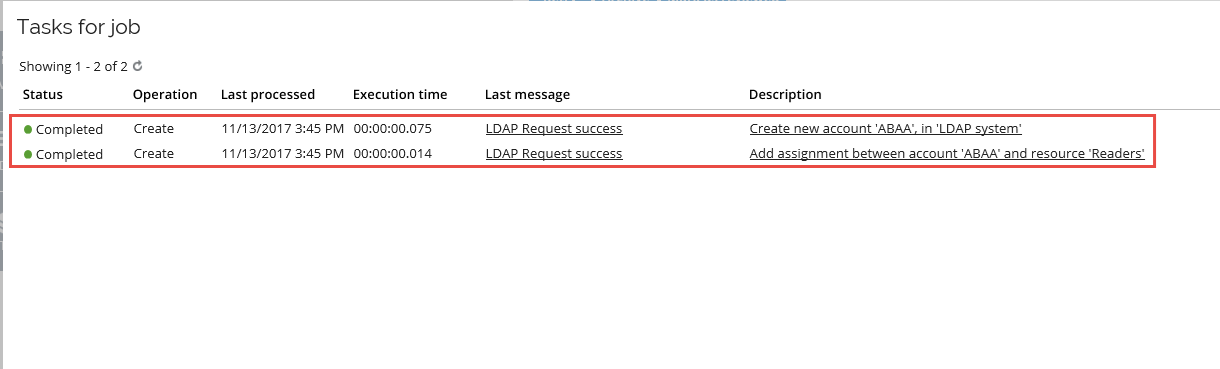
-
After you approve the access request, in the provisioning monitor, you can see that a new job with two tasks were created, and their status says Completed.
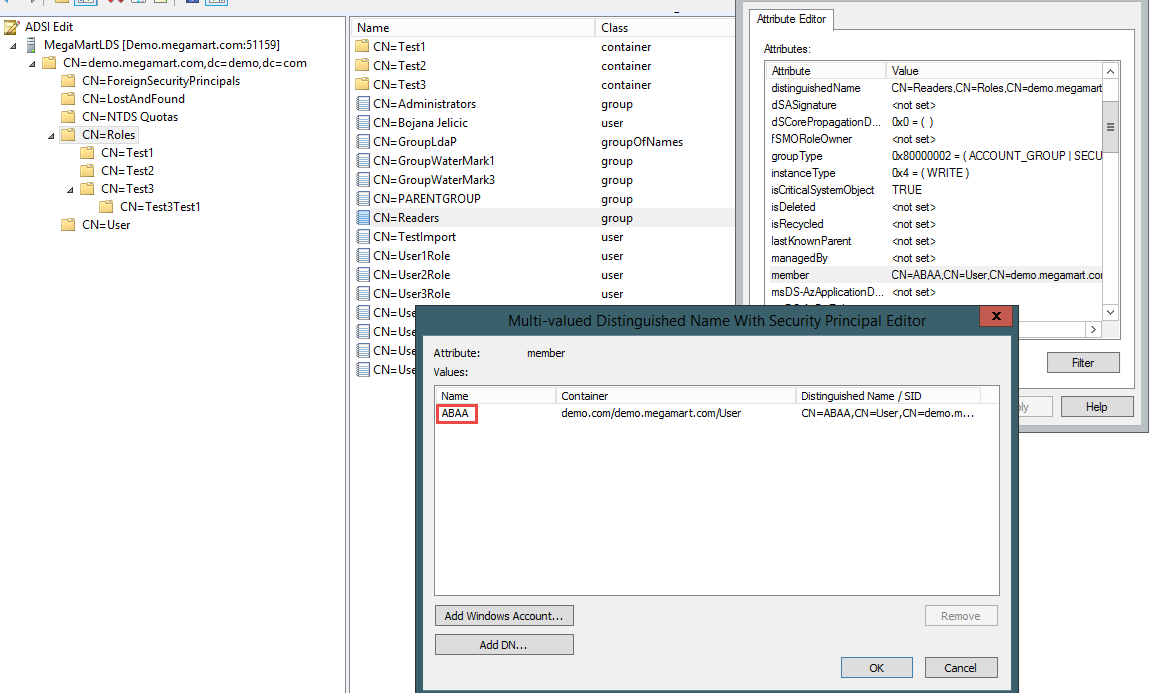
If you open your LDAP system, you can see that the system is updated, for example:

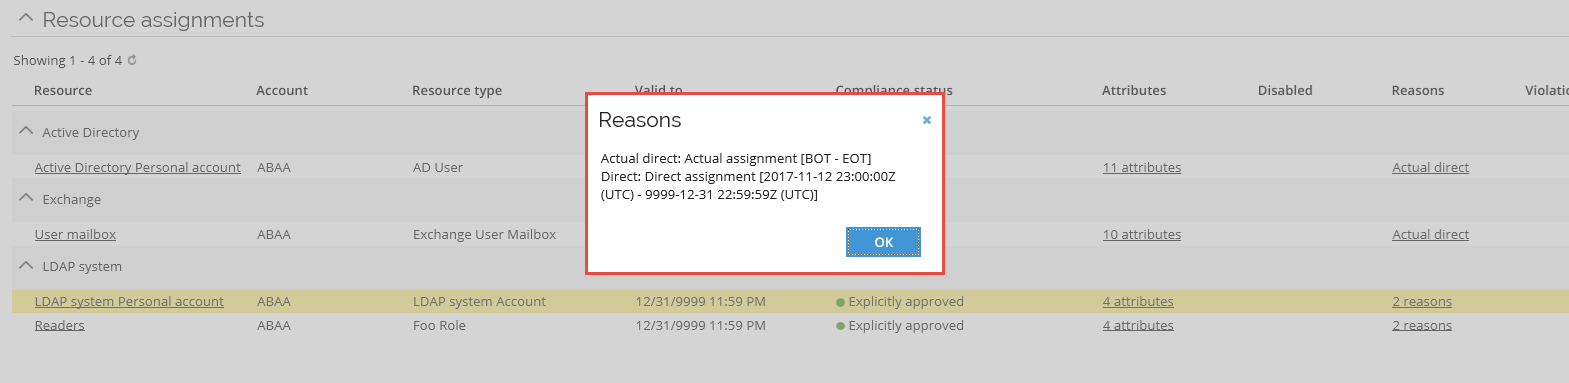
Verify reconciliation
After configuring connectivity, you must check that the reconciliation between Actual state and Desired state is working properly. While testing the provisioning functionality, you requested new access and afterwards, it was provisioned to the system.
The request is a new desired state, which can be seen as a Direct reason.
Because OPS successfully provisioned the new assignments, you now also have an Unconfirmed actual reason, also referred to as a provisioning claim.
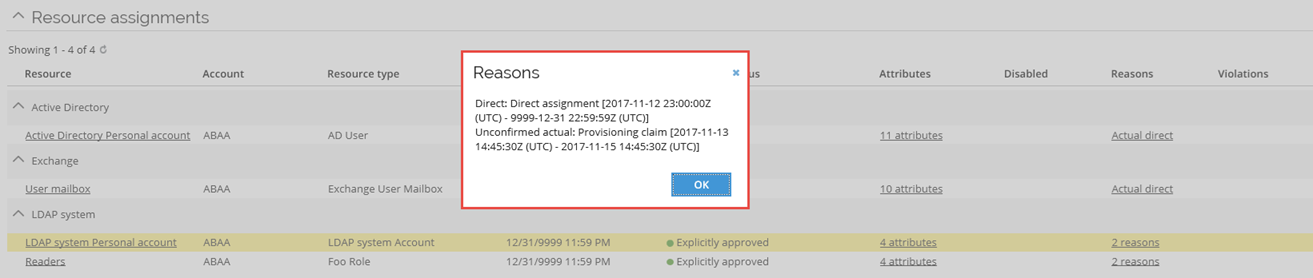
By default, a provisioning claim is valid for 48 hours or 2 days. This means that you must import data to the Omada Identity Data Warehouse within that time.
If you do not import data within that time, a new provisioning job is automatically created in OPS.
To verify reconciliation:
- To ensure that you get a real Actual state, import data, and run the warehouse import or Import data again.
- After running the warehouse import and waiting for RoPE to automatically reconcile, the Reasons dialog box appears, showing two reasons, the Actual direct (or your Actual state) and Direct (or your Desired state).
This means reconciliation has been verified.