Step 1 – Manual deployment
In this first set of procedures, you must deploy and register a new connectivity, so it can be used in the system onboarding process.
Ensure that you perform the procedures in this tutorial in chronological order.
Deploy the artifacts
The following table gives an overview of the artifacts that allow you to test your connectivity. To deploy the artifacts, refer to the Deployment column and copy the respective artifact to the relevant folder.
The folders listed on the following table are the default folders in the default location. However, depending on your system’s configuration, it is possible that these folders are located in different folders or drives.
| Artifact | Description | Deployment |
|---|---|---|
| Acme.Foo.Collector.dll | .NET Assembly used by ODW to import data | |
| Acme.Foo.Connector.dll | .NET Assembly used by OPS to update target system. | Copy this to the Omada Provisioning Service installation folder. The default folder is C:\Program Files\Omada Identity Suite\Provisioning Service |
| Acme.Foo.Postaction.dll | .NET assembly used by Enterprise Server to validate system onboarding data. | Copy this to the \bin folder. The default folder is C:\Program Files\Omada Identity Suite\Enterprise Server\website\bin |
| Acme.Foo.Collector.js | JavaScript file used by queries and mappings dialog in system onboarding. | Copy this to the C:\Program Files\Omada Identity Suite\Enterprise Server\website\Jsinc folder. |
Deploy the collector
Next, deploy the collector.
Deploy the connector
The connector is used by Omada Identity to provision, update or deprovision users and assignments to the target system. In this tutorial, the connector is a single .NET assembly compiled as part of the Connector project. The name of the assembly is Acme.Foo.Connector.dll. After you compile the project, you can find it in the default output folder on C:\Program Files\Omada SDK\V14 0\tutorials\end-to-end\connector\bin\Debug folder.
To deploy the connector:
-
Stop the Omada Provisioning Service Windows service.
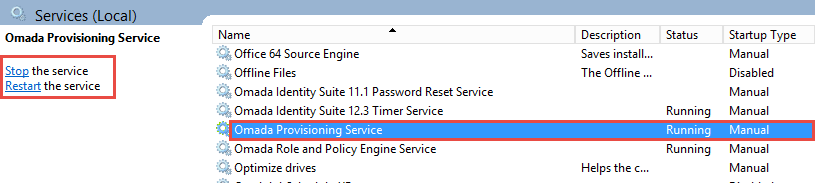
-
Copy the
Acme.Foo.Connector.dllfile to the Omada Identity Provisioning Service installation folder on C:\Program Files\Omada Identity Suite\Provisioning Service. -
Restart the Omada Provisioning Service Windows service. You have now deployed the connector.
Copy the POST action
During system onboarding, the POST action is used to validate user input. This action is a single .NET assembly, which is compiled as part of the POST project.
The name of the assembly is Acme.Foo.Postaction.dll. After you have compiled your project, you can find the assembly in the SDK output folder on C:\Program Files\Omada SDK\V14.0\tutorials\end-to-end\postaction\bin\Debug.
To copy the POST action:
-
Copy the
Acme.Foo.Postaction.dllfile to the Enterprise Server \bin folder on C:\Program Files\Omada Identity Suite\Enterprise Server 12\website\bin. -
Also copy the
Acme.Foo.Postaction.dllfile to the Role and Policy Engine \service folder on C:\Program Files\Omada Identity Suite\Role and Policy Engine\Service.
Copy queries and mappings API
The queries and mappings API is a JavaScript API. In this tutorial, we have used the API to tailor queries and mappings to fit the connectivity. These customizations were done in the Acme.Foo.Collector.js file located on C:\Program Files\Omada SDK\V14.0\tutorials\endto-end\configuration.
To copy the queries and mappings API:
- Copy the Acme.Foo.Collector.js file to the Enterprise Server \Jsinc folder. C:\Program Files\Omada Identity Suite\Enterprise Server\website\Jsinc.