Data import
Connection details
If the addresses for query and for entities are the same, you must leave the Entity root and Query address fields blank or empty. Instead, enter the full address in the Base URL field.
Queries and mappings
The collector performs a GET request on a specific URL. The final URL is created by adding the Query URL to the base URL. The Query URL must contain at least the name of the entity that you would like to collect data from. The schema for an entity confirms that properties are present in a specific entity and describes how to access them.
You must investigate the schema for the response as well as the schema for each of the entities that comes out of the CyberArk API. You can do this by reading the documentation for the CyberArk API or by running a manual GET request.
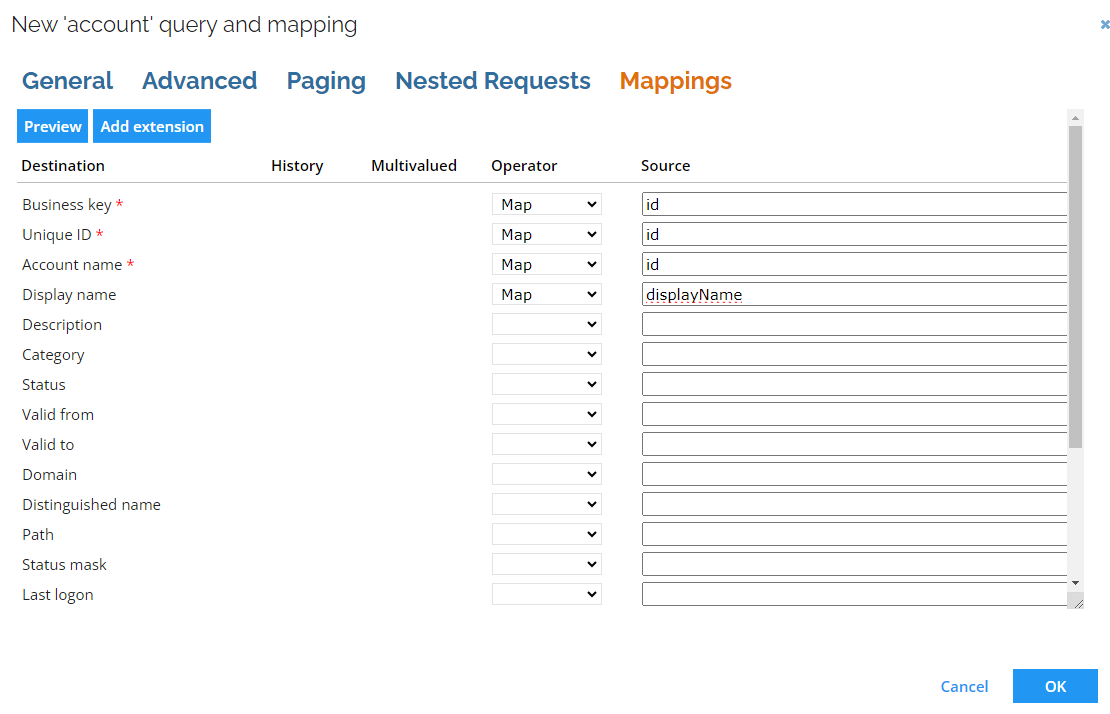
When you onboard a system based on SCIM 2.0, a number of default queries and mappings will be set up when you register the first system. They are:
- Accounts – users are imported into Omada Identity as accounts.
- Resource – groups are imported into Omada Identity as resources with the resource type "CyberArk Group".
- Resource Assignment – user memberships in groups are imported into Omada Identity as resource assignments.
- Resource Parent/Child – group memberships in other groups are imported into Omada Identity as resource parent/child relationships.
Group filtering
A filtering functionality in the query mapping form is managed using the Filter field. The Filter field is used for Dynamic Expresso expressions. By default, Filter in the Group mapping is filled in with the following expression:
urnietfparamsscimschemascyberark10Group_ldapFullDN == null
It filters out all AD-originating Groups from the data imported to Omada Identity.
Mapping of resource owners
If you create a query to import resource owners, it is possible to specify the resource's owner in two ways. You can do it either by directly importing the UID of the identity or by specifying the account from which the resolved owner is imported as a resource owner.
When mapping directly to the UID of identity, ensure that identities are already imported to Omada Identity.
When mapping to an owned account, it is possible to either specify the business key of the account or the composed business key. The former should be used if the account is in the same system as the resource; the latter should be used if the account is imported into any of the trusted systems.
When the account stems from another system, you should use a Lookup mapping.
RoPE Configuration
Before moving to the CyberArk connector configuration, changes in a Role and Policy Engine (RoPE) configuration file are needed.
-
Go to the Omada Identity Management Portal and open the RoPE configuration tab.
-
Find the following two sections that are commented out. Uncomment the section marked in bold by deleting the lines with comment markers:
<!--and-->.Generic extension for mapping ODW attributes to OPS provisioning attributes
The extension is typically used when a target system requires an internal identifier to modify or deprovision an account and this identifier is not represented in the ES. In that situation the extension can be used to fetch the identifier directly from the ODW and assign it to a RoPE attribute which can then be used by the OPS. Any attribute to be mapped to RoPE needs to be specified using the following format:
<add key="**UNIQUE KEY (e.g. number)**" extraInfo="**RESOURCE TYPE DISPLAY NAME**" name="**ODW ATTRIBUTE NAME**" value="**ROPE PROVISIONING ATTRIBUTE NAME**" />Alternatively, if you want to refer to the resource directly (e.g. due to ambiguous resource type names), use the following format:
<add key="**UNIQUE KEY (e.g. number)**" extraInfo="UID:**RESOURCE TYPE UID**" name="**ODW ATTRIBUTE NAME**" value="**ROPE PROVISIONING ATTRIBUTE NAME**" /><add type="Omada.RoPE.Controller.OISX.Extensions.MapAttributesFromActualDataExtension, Omada.RoPE.Controller.OISX">
<settings>
<add key="1" extraInfo="ServiceNow Group" name="snowAssignmentID" value="SERVICENOW_ASSIGNMENT_ID" />
<add key="2" extraInfo="ServiceNow Role" name="snowAssignmentID" value="SERVICENOW_ASSIGNMENT_ID" />
<add key="3" extraInfo="CyberArk Identity Container" name="assignmentID" value="CYBERARK_ASSIGNMENT_ID" />
</settings>
</add> -
Save the file.
Setting up CyberArk Rights filter expression (optional)
Optionally, after the initial import is completed, but before connector configuration, the user can add the Resource type in CyberArk Rights filter to the CyberArk Rights property.
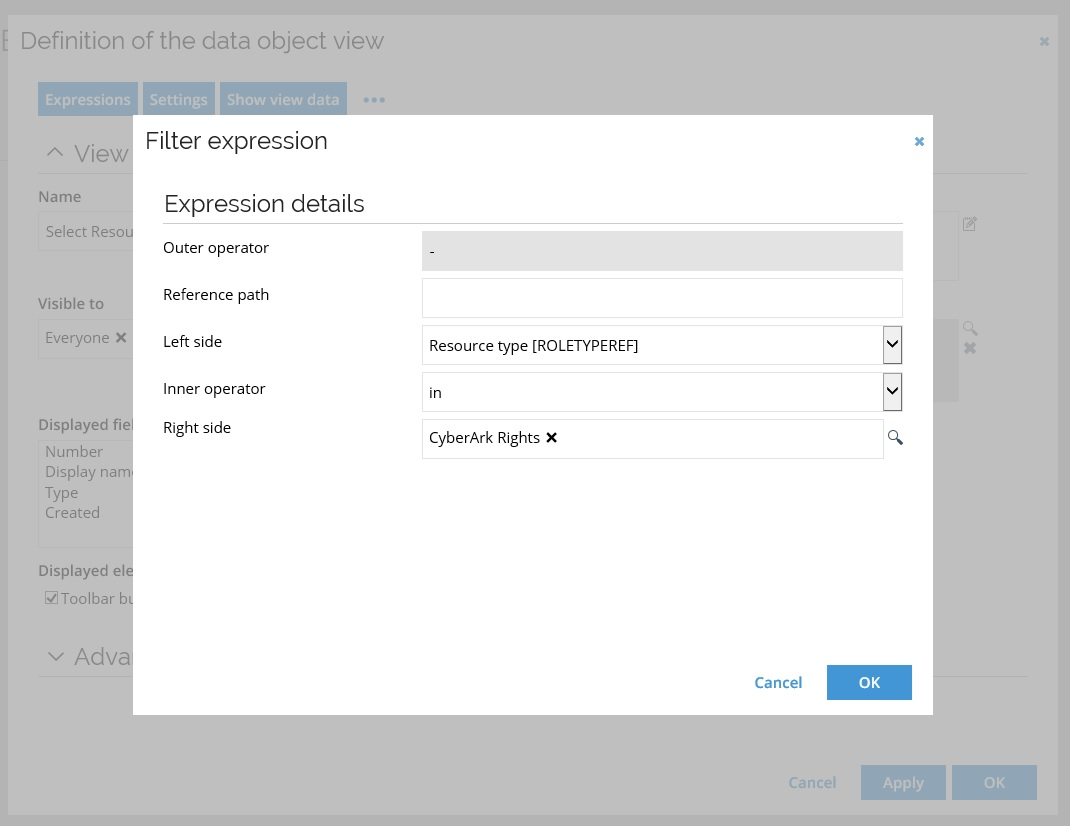
This is done to enable the filtering only for the relevant attributes when performing a Request Access for CyberArk Safes.
Configure thresholds
The Configure thresholds function allows you to set the amount of changes that cannot be exceeded, relevant to the last import.
In the Configure import thresholds view, type a number (integer) in percentage for New objects, Modified objects, and Deleted objects to enable thresholds for the import of objects from this system.
The value for each operation is by default set to 0, which means that no threshold calculations take place for the operations until you change the integer.
For all .NET-based collectors, thresholds are calculated in the following relation:
If the system category is set to Identity data, the thresholds are calculated.
If the system category is set to Access data, the thresholds are calculated.
If the system category set to Both, the thresholds only apply to Access data, that is, Accounts, Resources, and ResourceAssignments.
For more information see Thresholds.
Collector migration
Since Omada Identity 14.0.6 (Update 6) all collectors based on the generic REST collector have their Collector ID migrated from REST to Omada ODW NET Query.
For the existing REST-based template collectors the migration process is performed during the update process, and it is transparent to the users.
In case of the existing custom REST-based collectors, i.e., the customer created collectors with REST as a Collector ID, some additional actions need to be taken by the customer to migrate the REST-based collector to a .NET Query collector.
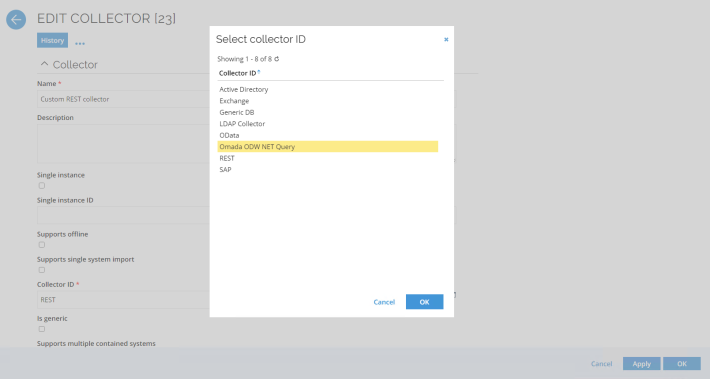
In order to switch your custom REST-based collector to .NET:
-
Go to Setup > Administration > Connectivity > Collectors
-
Select your custom REST-based collector and Edit.
-
Change the Collector ID to Omada ODW NET Query and Apply.
In addition to the Collector ID, configuration changes must be added to the collector configuration file for the following configuration parameters:
- assemblyLocation
- assemblyName
- assemblyNameGAC
- assemblyFolder
These configuration details can be found in the generic REST collector configuration details.
Bear in mind the following relations of the configuration parameters:
If assemblyLocation==FILE then assemblyFolder + assemblyName needs to be filled; else, it can be left unset.
If assemblyLocation==GAC then assemblyNameGAC needs to be filled; else, it can be left unset.