Identities
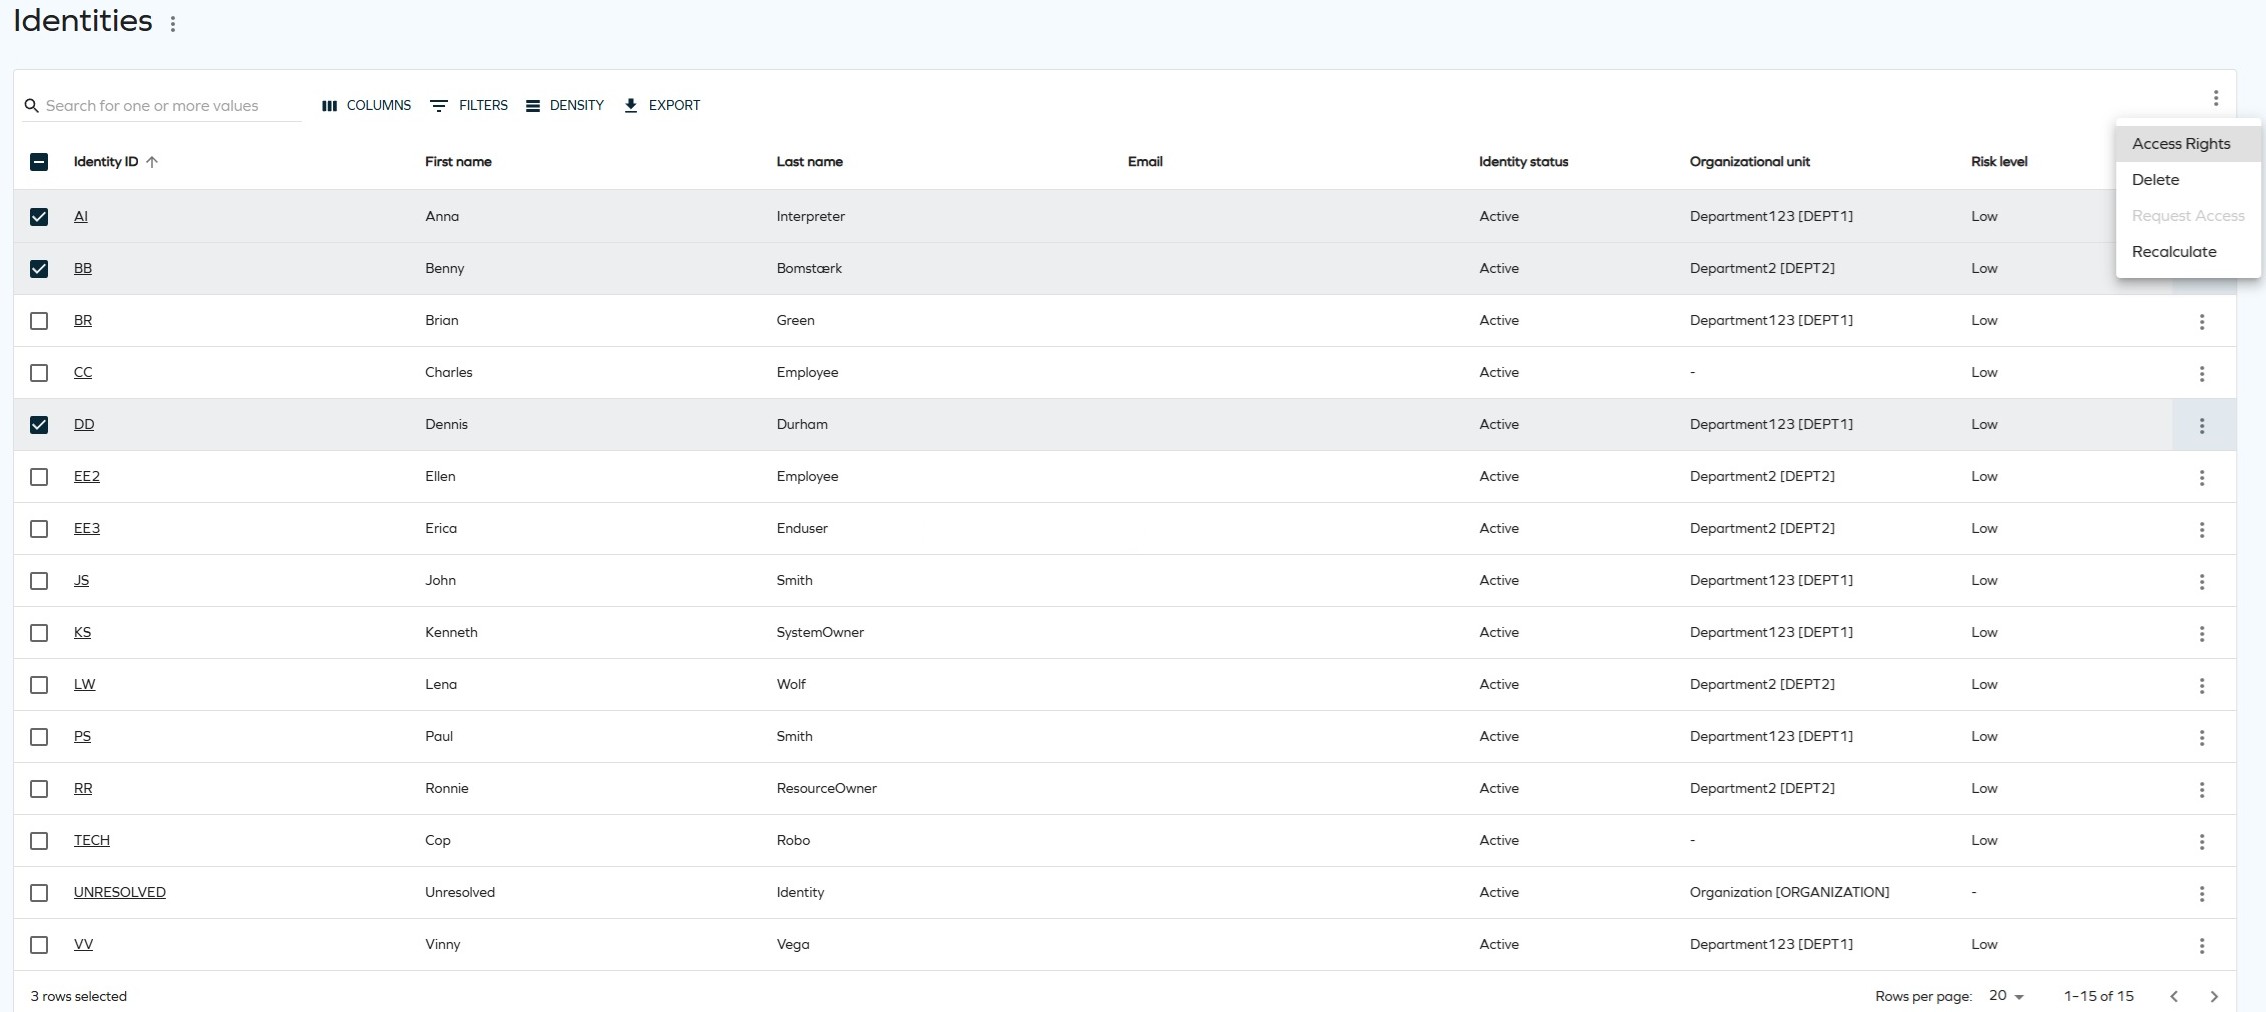
The Identities link in the navigation pane provides access to a comprehensive panel displaying all identities.
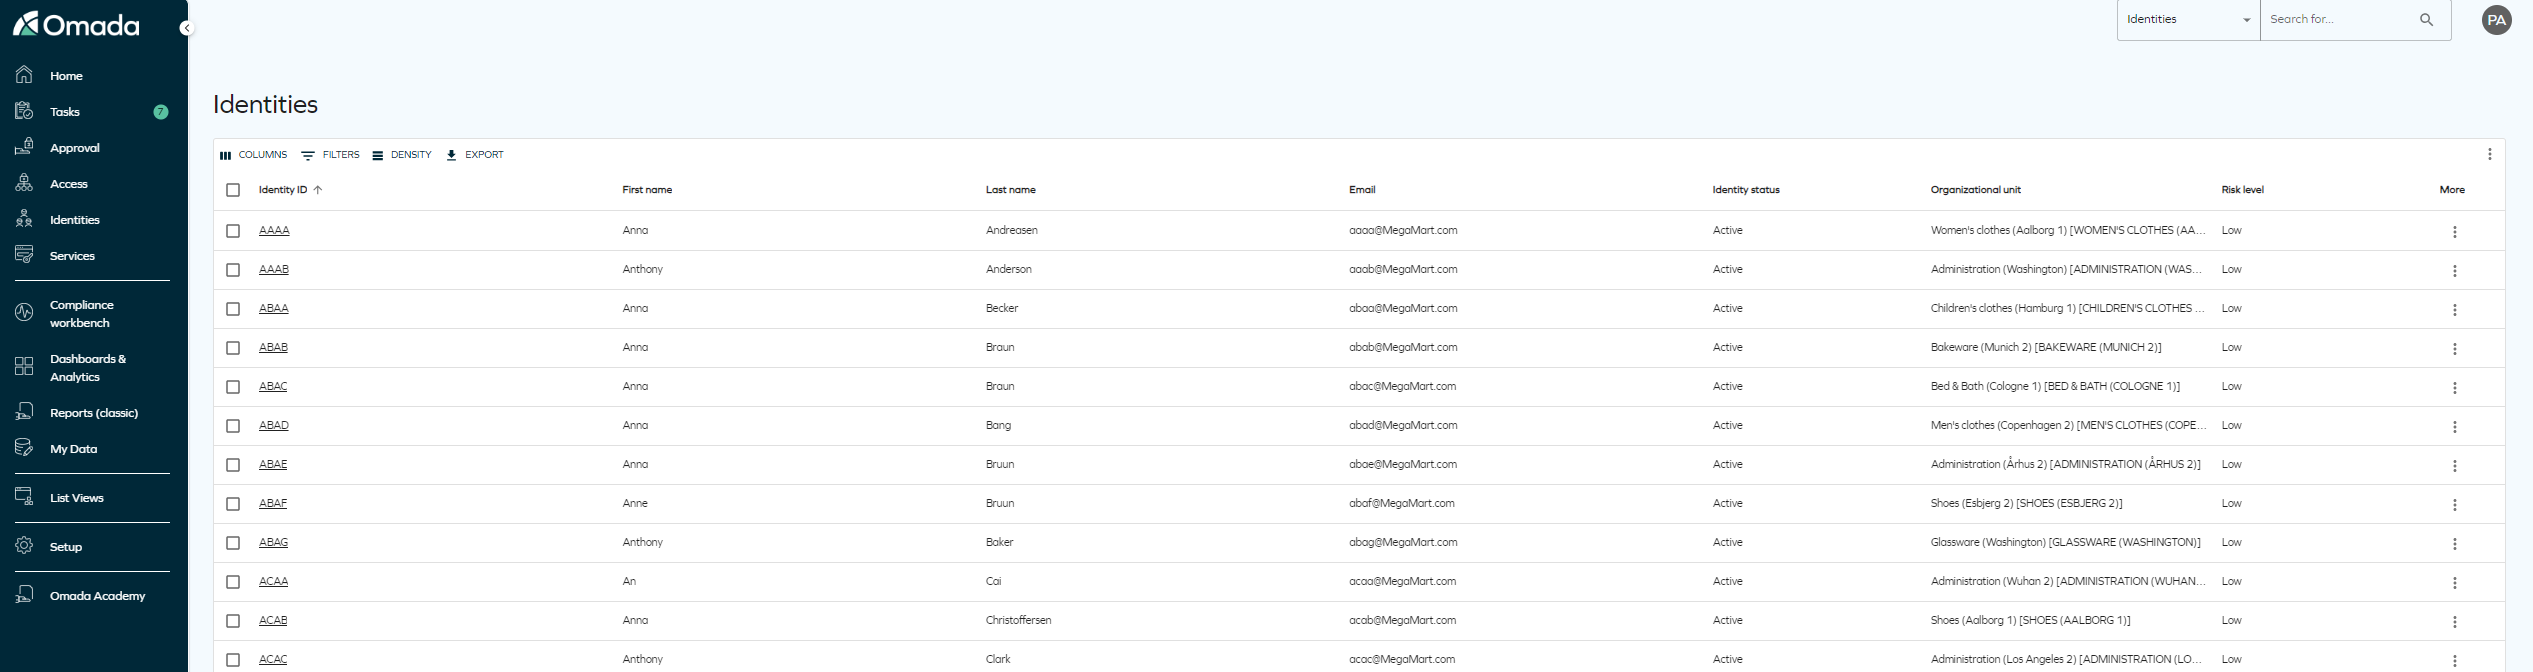
This panel includes various options to manage identities effectively. These options enable configuration of:
-
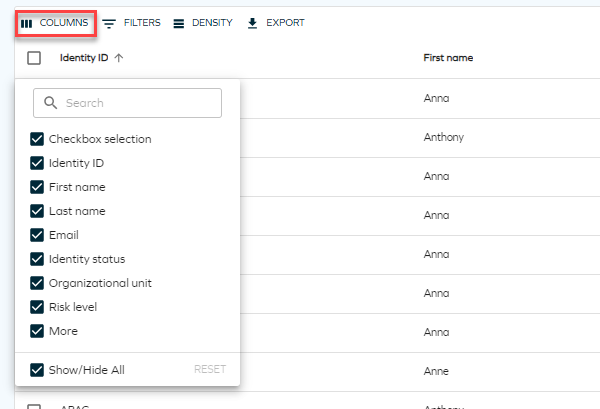
Columns: Select the columns to display in the identities list.
-
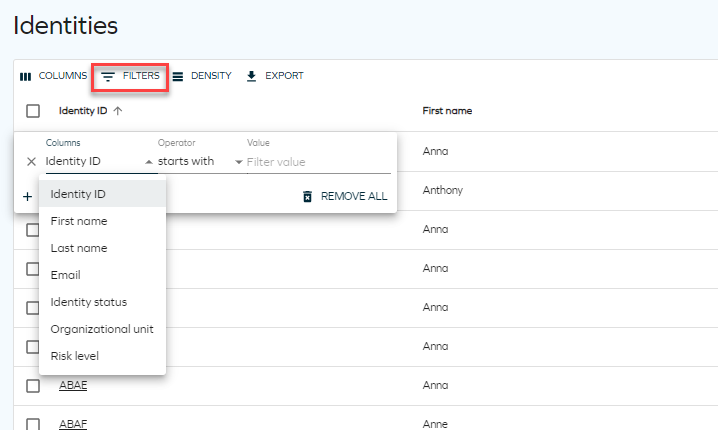
Filters: Filter by any column and specify the desired value.
-
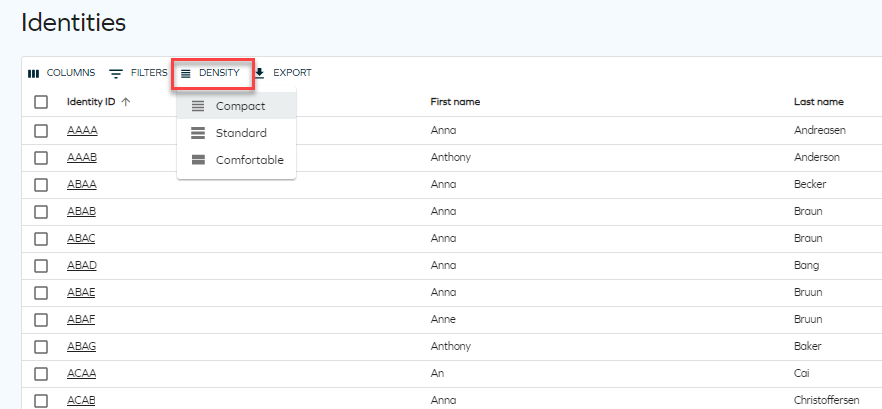
Density: Choose between compact, standard, or comfortable views for displaying identities.
-
Export: Export the list as a CSV file or print it.
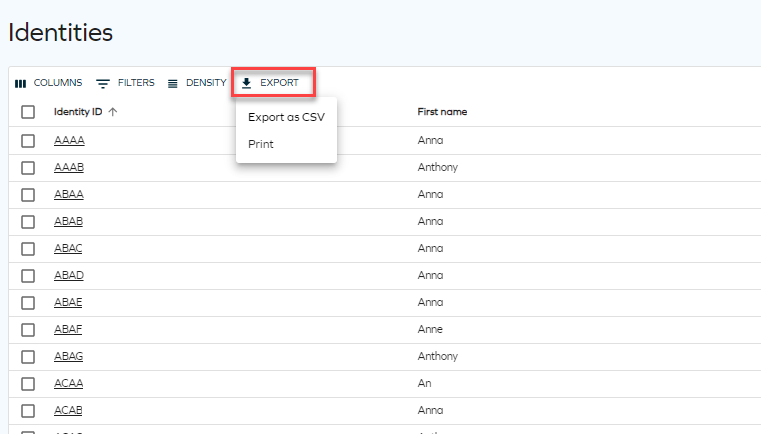
Identity grid view
Clicking the three dots button for each identity reveals actions that can be performed on that identity.

Multiple identities can be selected for batch deletion or recalculation.

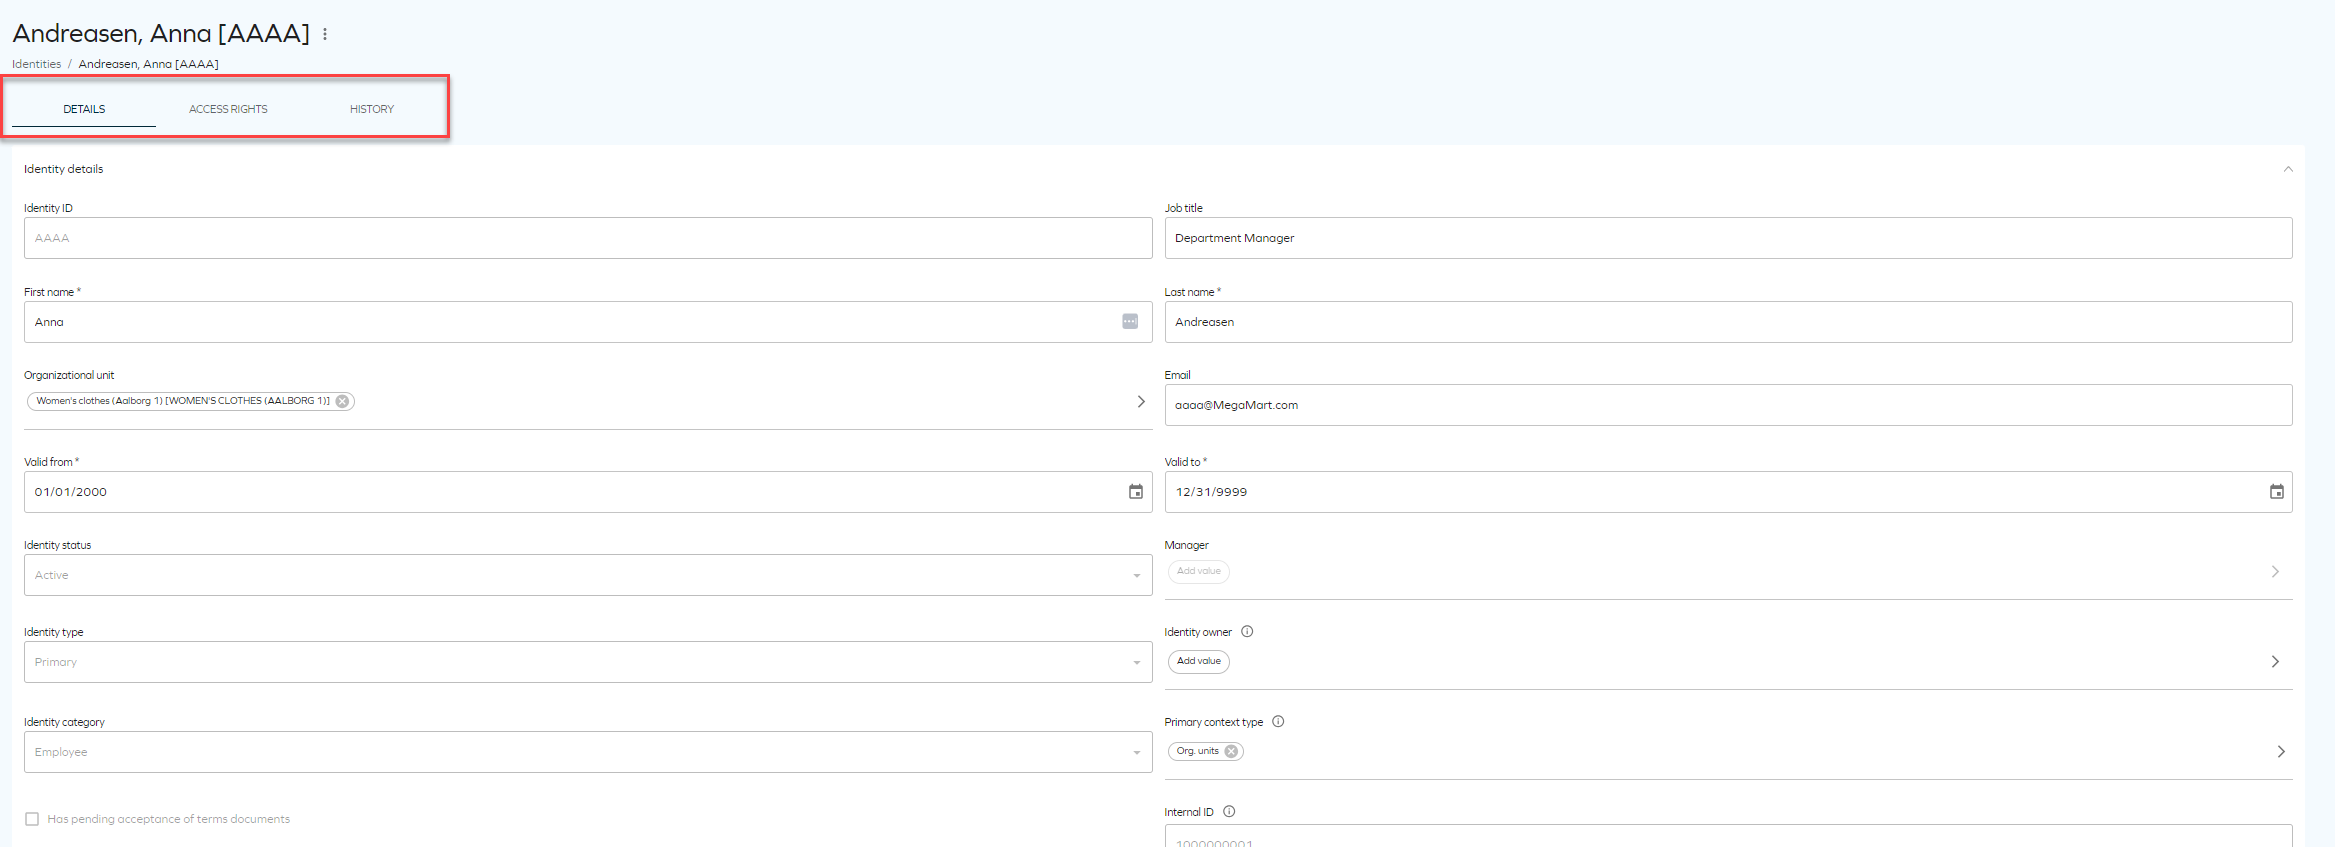
Clicking an identity opens a detailed view, including access rights and history.
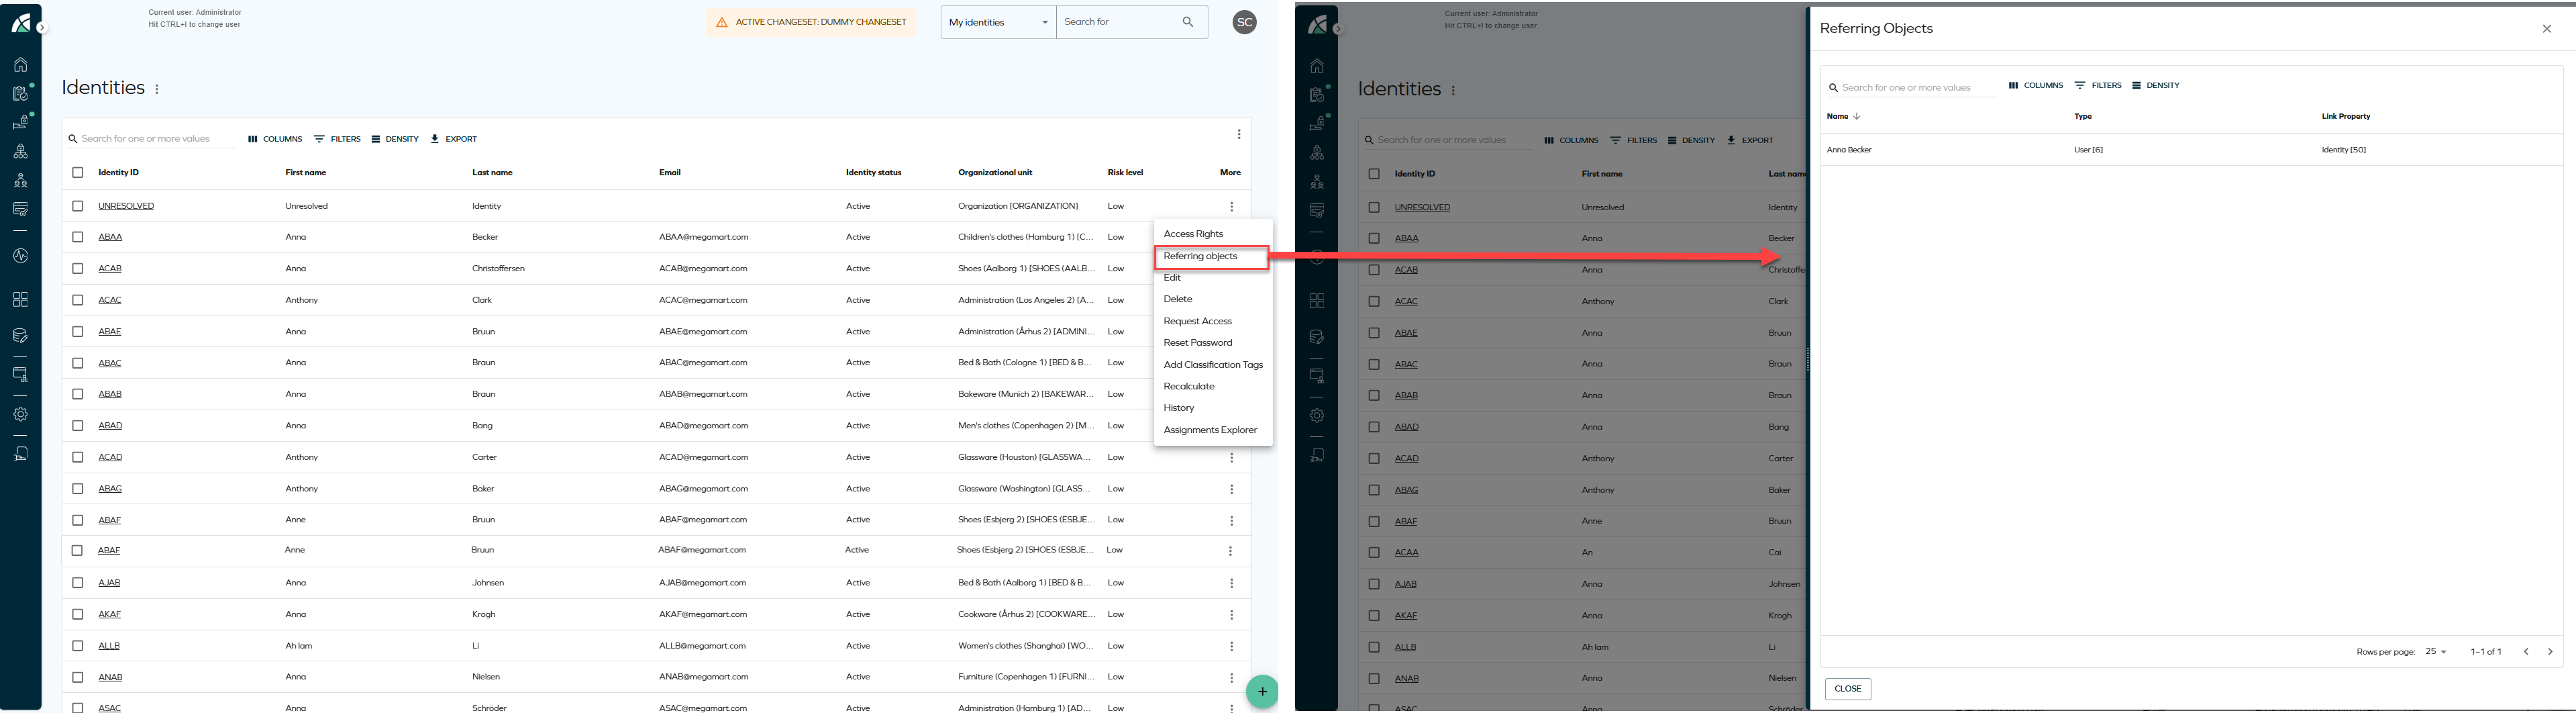
Viewing referring objects
The Referring objects option allows you to view all data objects that reference a specific identity. When selected, the action opens a side panel containing a grid with all related objects, including the identity itself.
The Referring objects action is available from the following locations:
-
From the Identities list, click the ellipsis button and select Referring objects.
-
From the Identity details page, click the ellipsis button next to the identity name and select Referring objects.
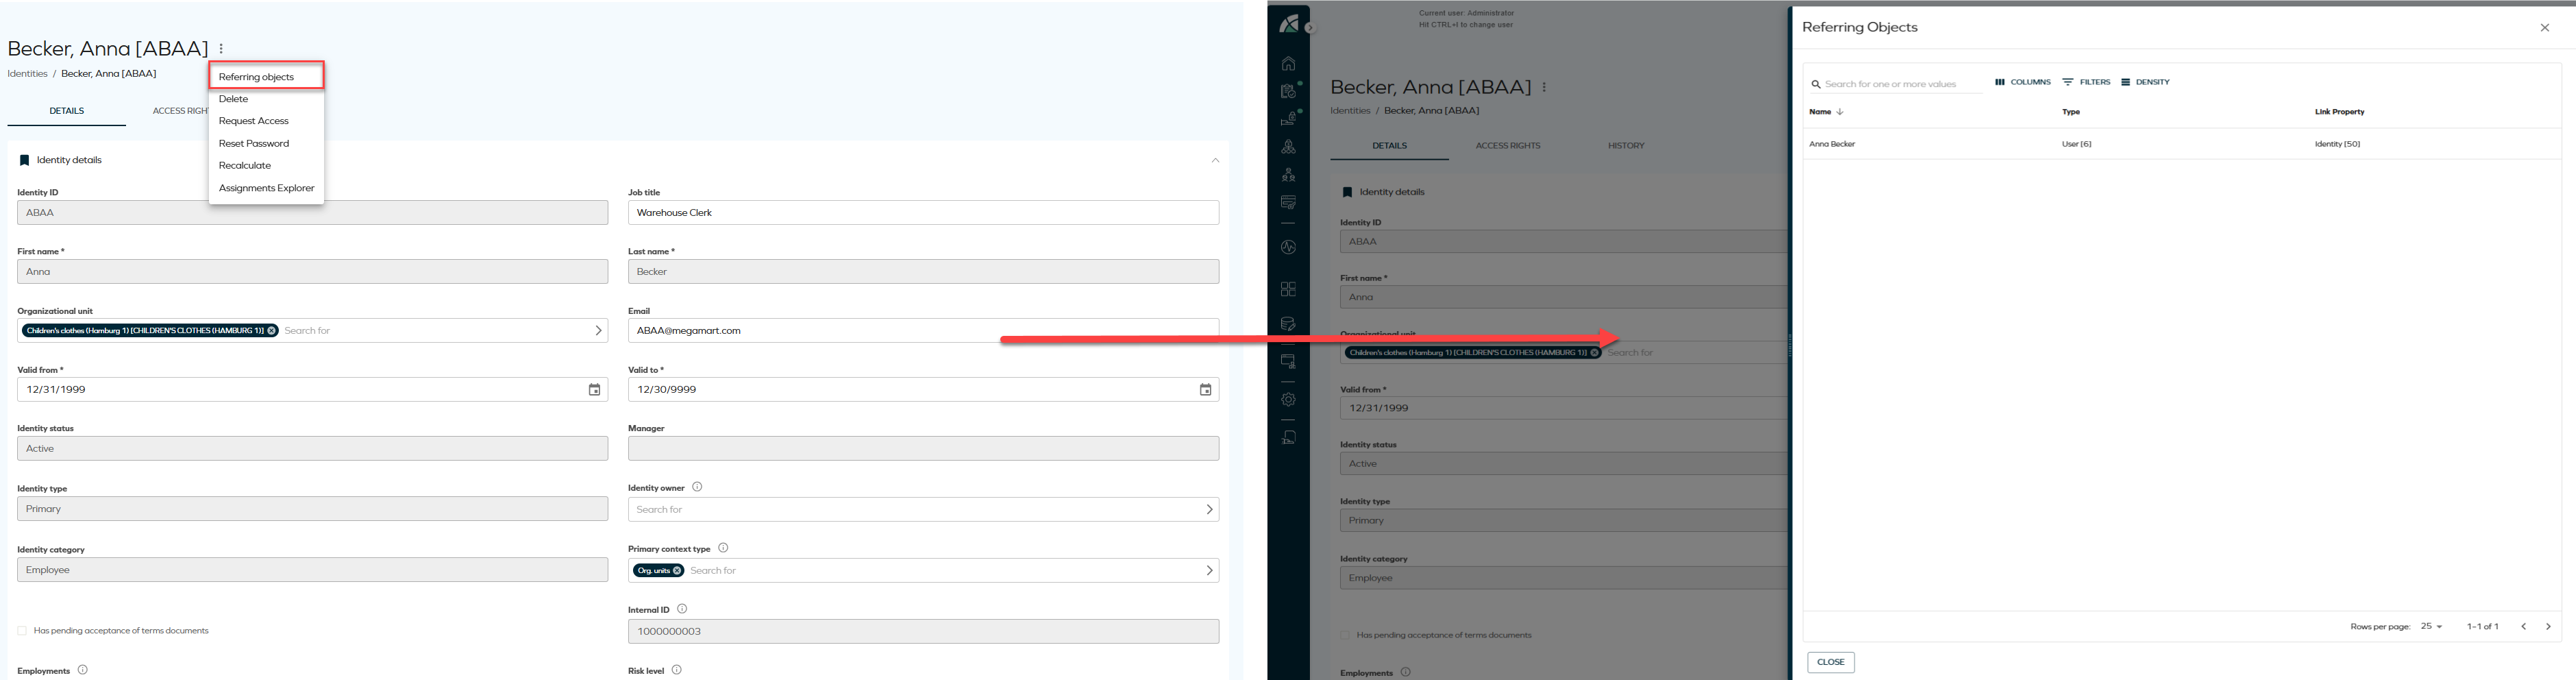
The side panel enables you to review identity relationships without navigating away from the current view. Other available actions may include access rights, recalculation, deletion, and assignment exploration, depending on configuration.
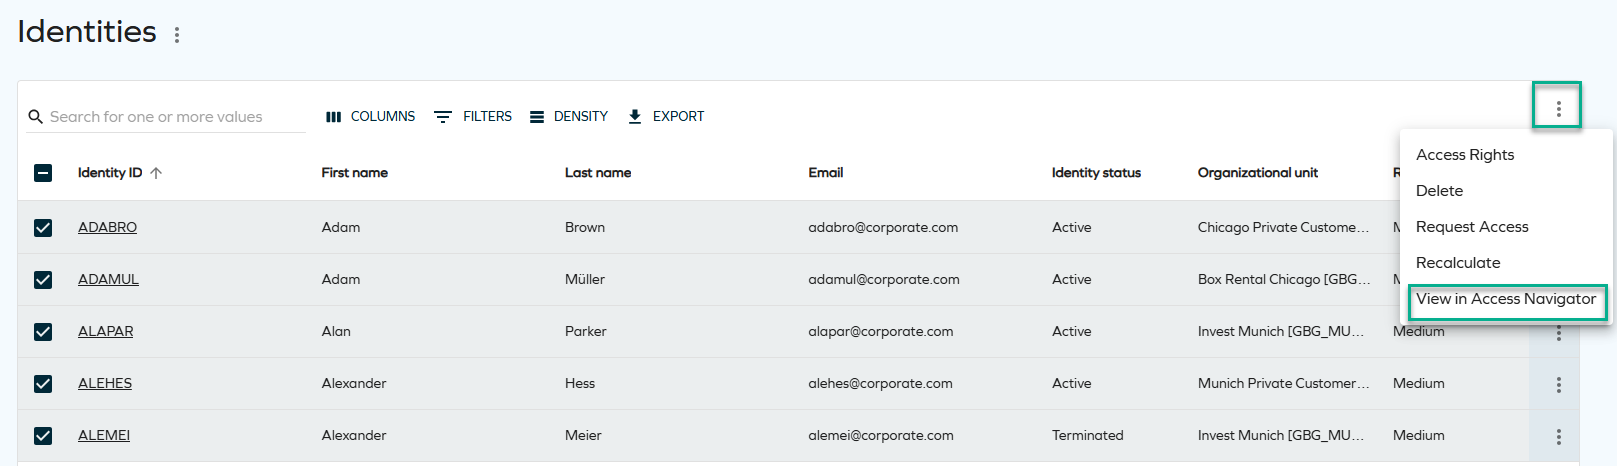
Navigation between the Identities list and Omada Identity Analytics dashboards
Identities can be viewed both in the Omada Identity Portal (Enterprise Server) and through Omada Identity Analytics (OIA) dashboards.
- Enterprise Server (ES) shows current, operational production data.
- OIA provides analytical views and historical insights based on the daily-built data model.
This bidirectional navigation reduces manual context switching and helps you move seamlessly between operational details and analytical insights. You can navigate directly:
-
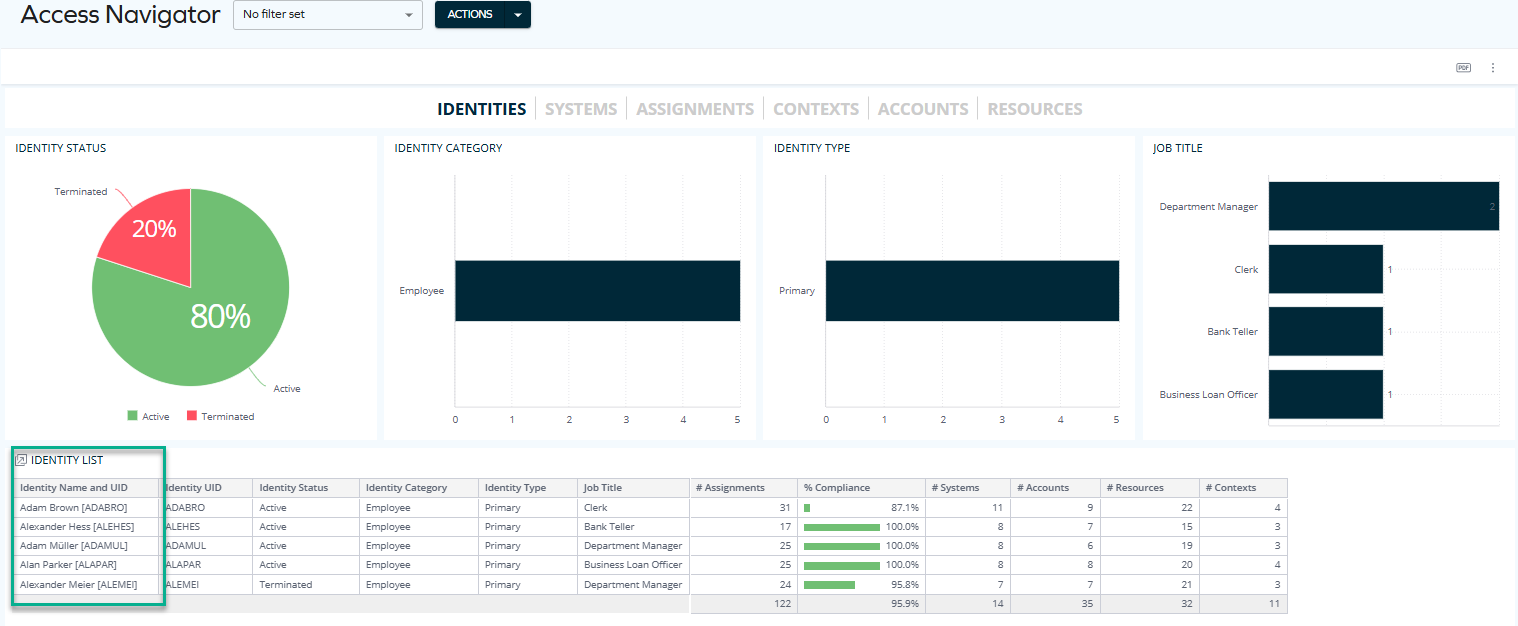
From ES to OIA, opening relevant OIA dashboards for the selected identities.
Select a number of identities and click View in Access Navigator to display the selected identities through the Access Navigator dashboard.
You can now see the identities populated on the dashboard.
 technical details & limitations
When navigating from the Identities list, the number of identities that can be pre-selected and passed to OIA is limited. It depends on the length of the Identity IDs, as they are included in the navigation request, for example:
-
With Identity IDs of approximately 6 characters, you can typically select more than 250 but fewer than 500 identities.
-
Shorter Identity IDs (for example, 4 characters) allow a higher number of identities to be selected.
This limitation exists to ensure reliable request handling and stable system performance. If you exceed the limit, you will see an error message on the screen.
-
-
From OIA to ES, opening the Identities list.
Click the Identities action item to view the pre-selected identities through the Identities list (Enterprise Server).

You can now see the identities populated on the list.
 technical details & limitations
When navigating from OIA to the Identities list, you can pre-select a maximum of 40 identities. This limit is enforced to ensure reliable request handling and stable system performance. If you exceed the limit, you will see an error message on the screen.
Removing assignments
To remove assignments, you need to have the Operation Administrator role or other role that has permissions to remove. To assign such permissions to a role, go to Setup > Authorization Roles and select the target role (for example, Manager). Click Authorizations and navigate to the Service desk expandable list. Select the Remove assignments checkbox.
Perform the following steps:
-
From the identities list, click the identity to enter the detailed view. Navigate to the Access rights tab.
-
Select one or more assignments by clicking the corresponding checkboxes.

-
In the top right corner of the table, click the ellipsis (three dots), and then the Remove access option.

-
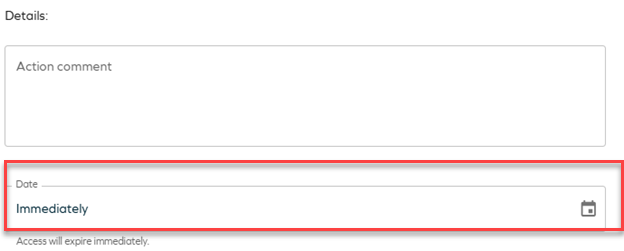
In the side panel, enter a reason (as a comment) for removing the access. Comments are optional by default. You can change a customer setting to make it mandatory.

-
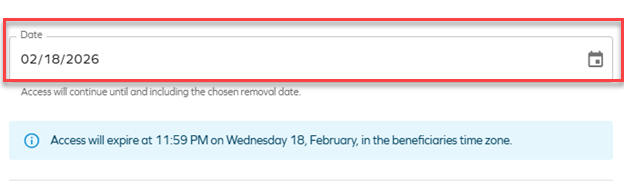
Enter the date. If you enter the current date, remove is instant and triggers a recalculation of the identity. If you select a future date, the change will come into effect at the selected time.
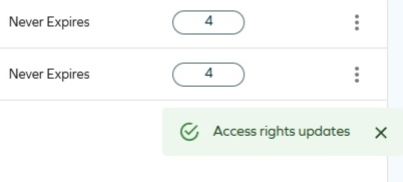
Once you save your changes, a snackbar message (a bubble message below the identities table) is displayed with the remove status:
- green - success
- red - an error has occurred (you don't have sufficient permissions to remove or you tried to only remove assignments that can't be removed)
- yellow - one or more assignments can be removed and one or more assignments cannot be removed
- blue - removers with a future date
Removing access (multiple identities)
Prerequisites: To allow users to remove multiple access at once, change the
AllowMassRevokecustomer setting value toTrue. See Customer settings - User Interface for details. Otherwise, users will be able to remove one assignment per action only.
-
In the Identities view, select one or more identities from the list. In the top right corner, click the ellipsis (three dots), and then Access rights.
-
Select the access rights you want to remove by clicking the corresponding checkboxes. In the top right corner, click the ellipsis (three dots), and then Remove selected access.
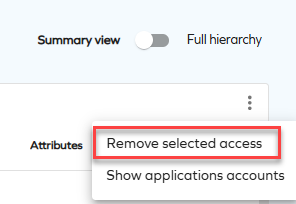
-
In the side panel, review the assignments that will be removed (click the identity's name to open the collapsible list). Enter the date and an action comment. Click Save changes.
To remove the identity/related resource assignments from the remove action, click Remove identity. If you remove all resource assignments of an identity manually, the identity is automatically removed from the list.
Access rights tab
After selecting a particular identity, you can view their access rights.
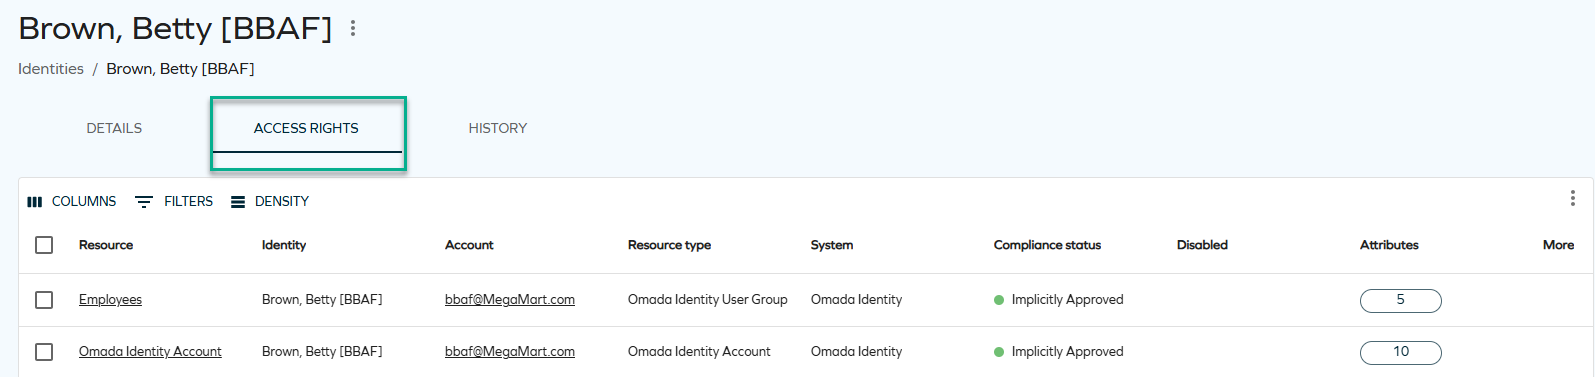
When the list of access rights is long and diverse, it is easier to view it with the use of filtering, which includes custom drop-down lists and various lookup components.
To apply filters, click on FILTERS and select the item or items that you wish to filter by. You can choose a variety of lookup parameters such as resources, the compliance status, or the validity timeframes.
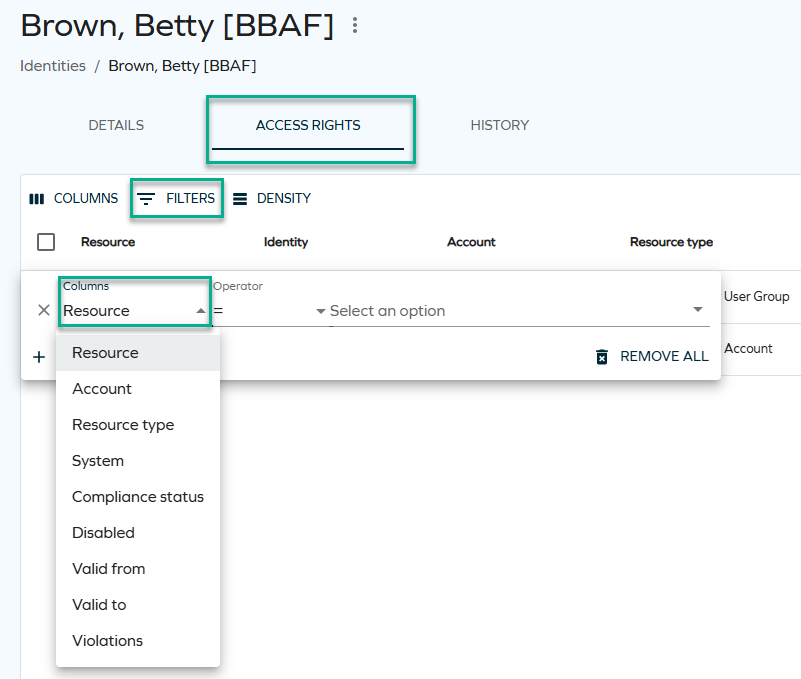
Some of the parameters require typing a particular name to filter by (accounts and violations), some offer a drop-down list to choose from (for example, resources and compliance statuses), and some are dates (valid to and valid from values).
You can also choose more than one filter at once: for example, you can look up access rights within a particular system and with a particular validity timeframe.

How access rights are populated in the Access right tab
The Access rights tab displays access rights based on the CalculatedAssignments model. This model represents access requests and assignments that have been calculated by the Role and Policy Engine (RoPE) for the identity.
Access rights are displayed according to the following principles:
- Access rights appear in the list only after the calculation process has completed.
- The list reflects the current effective access state of the identity.
- If an access right is removed or expires, it is removed from the view after the next recalculation.
- The Access rights tab is not a historical or audit view. Access rights that are no longer effective are not retained for visibility.
The Identity details page is the same regardless of whether it is accessed from Menu > Identities, Setup > Identities, or My Data > My Identities. As a result, access calculations and visibility rules are consistent across all views.
Showing child resources (hierarchical view)
While viewing the access rights of an identity, you can see a hierarchical view of child resources (without depth limitations). You can switch between the full-hierarchy mode (showing child resources) and non-hierarchy mode (not showing child resources) by switching the Use hierarchical view toggle in the top-right corner. Filtering supports expanding children in both modess.
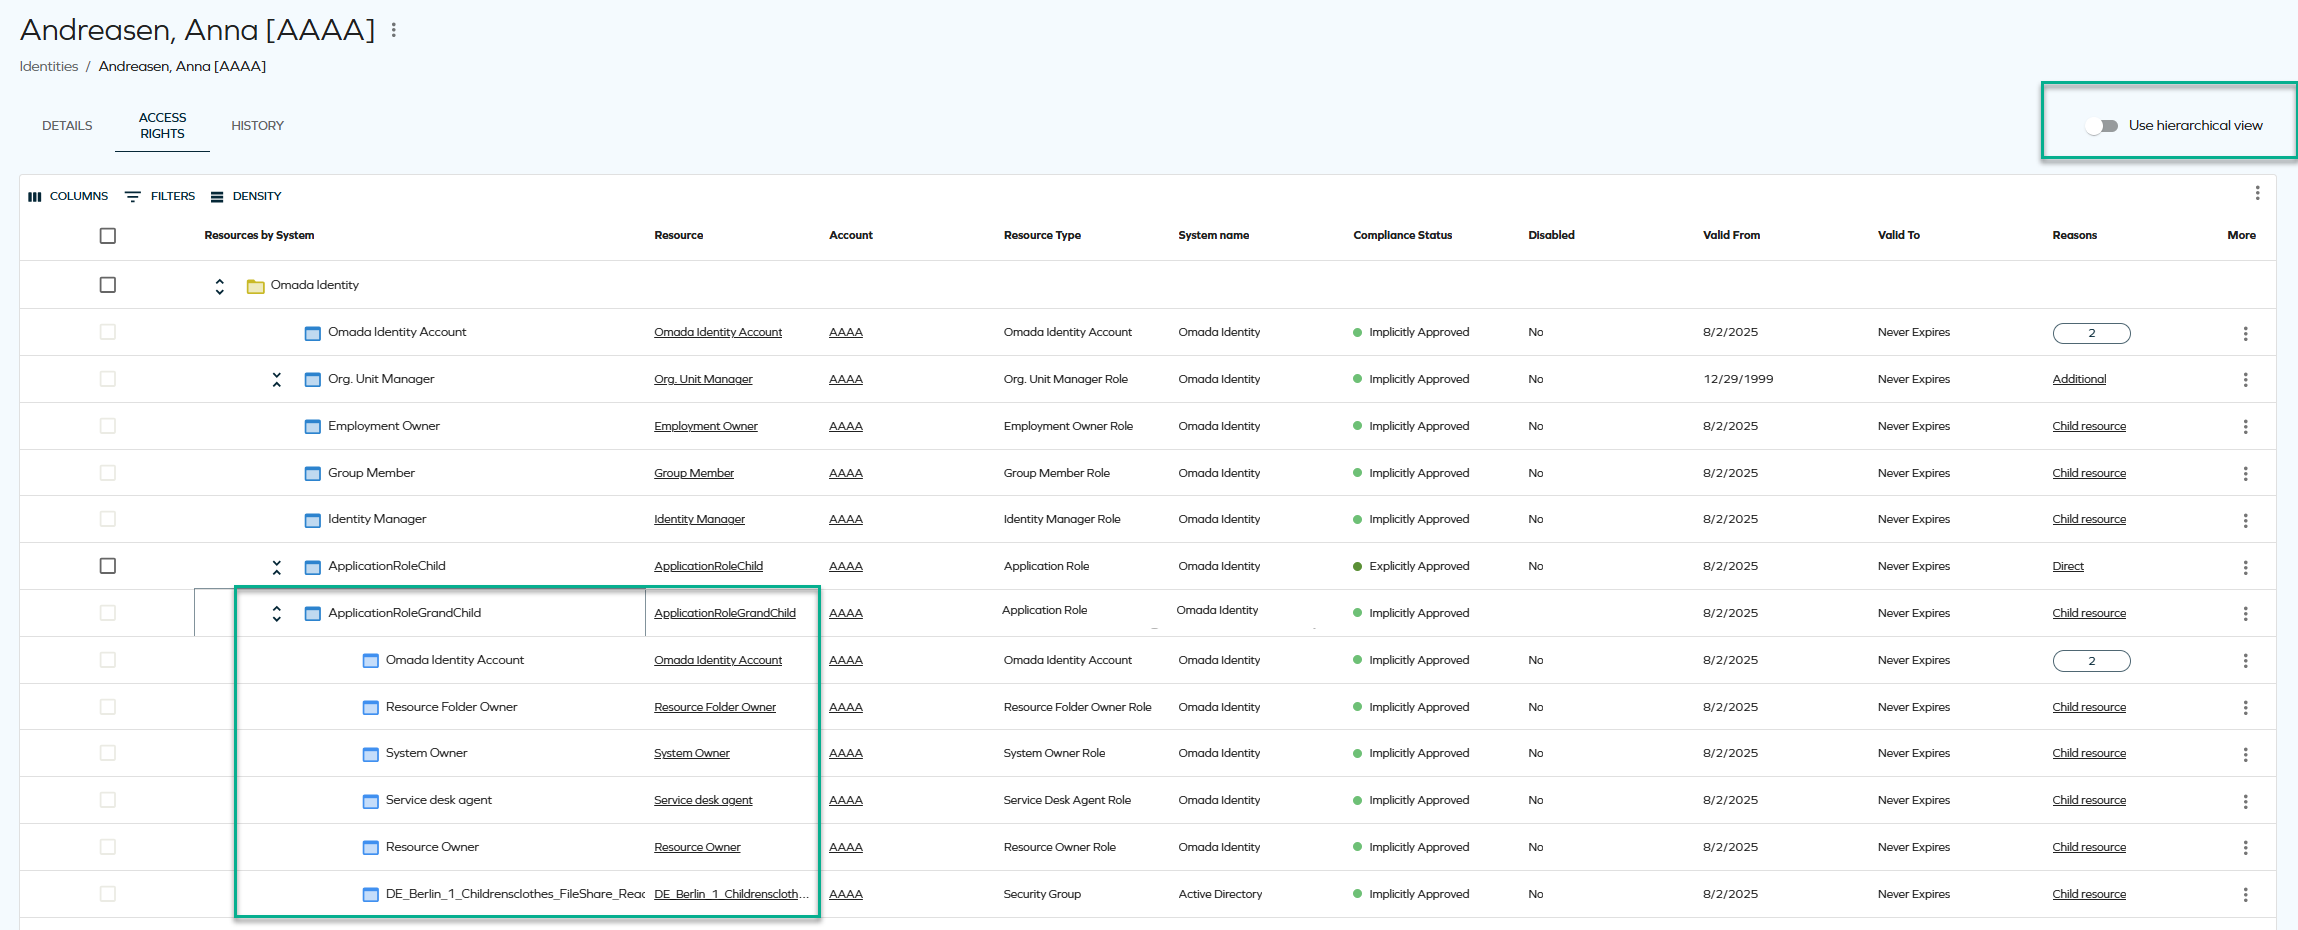
- Sorting is disabled both in full hierarchy mode and in non-hierarchy mode when a resource is expanded.
- Paging does not preserve the state of expanded rows.
- Filtering, sorting, paging, and using the Items per page setting only apply to top-level resources.
- The Actions menu currently only supports the Remove functionality. To avoid confusion, checkboxes for resources that cannot be removed are shown as disabled.
Assignment explorer
The assignment explorer feature will allow you to explore identity assignments. You can launch the assignments explorer from the Identity list view or via the Identity grid view dropdown action menu. The assignments explorer opens in a side panel, providing a hierarchical view of resource assignments associated with the selected identity.
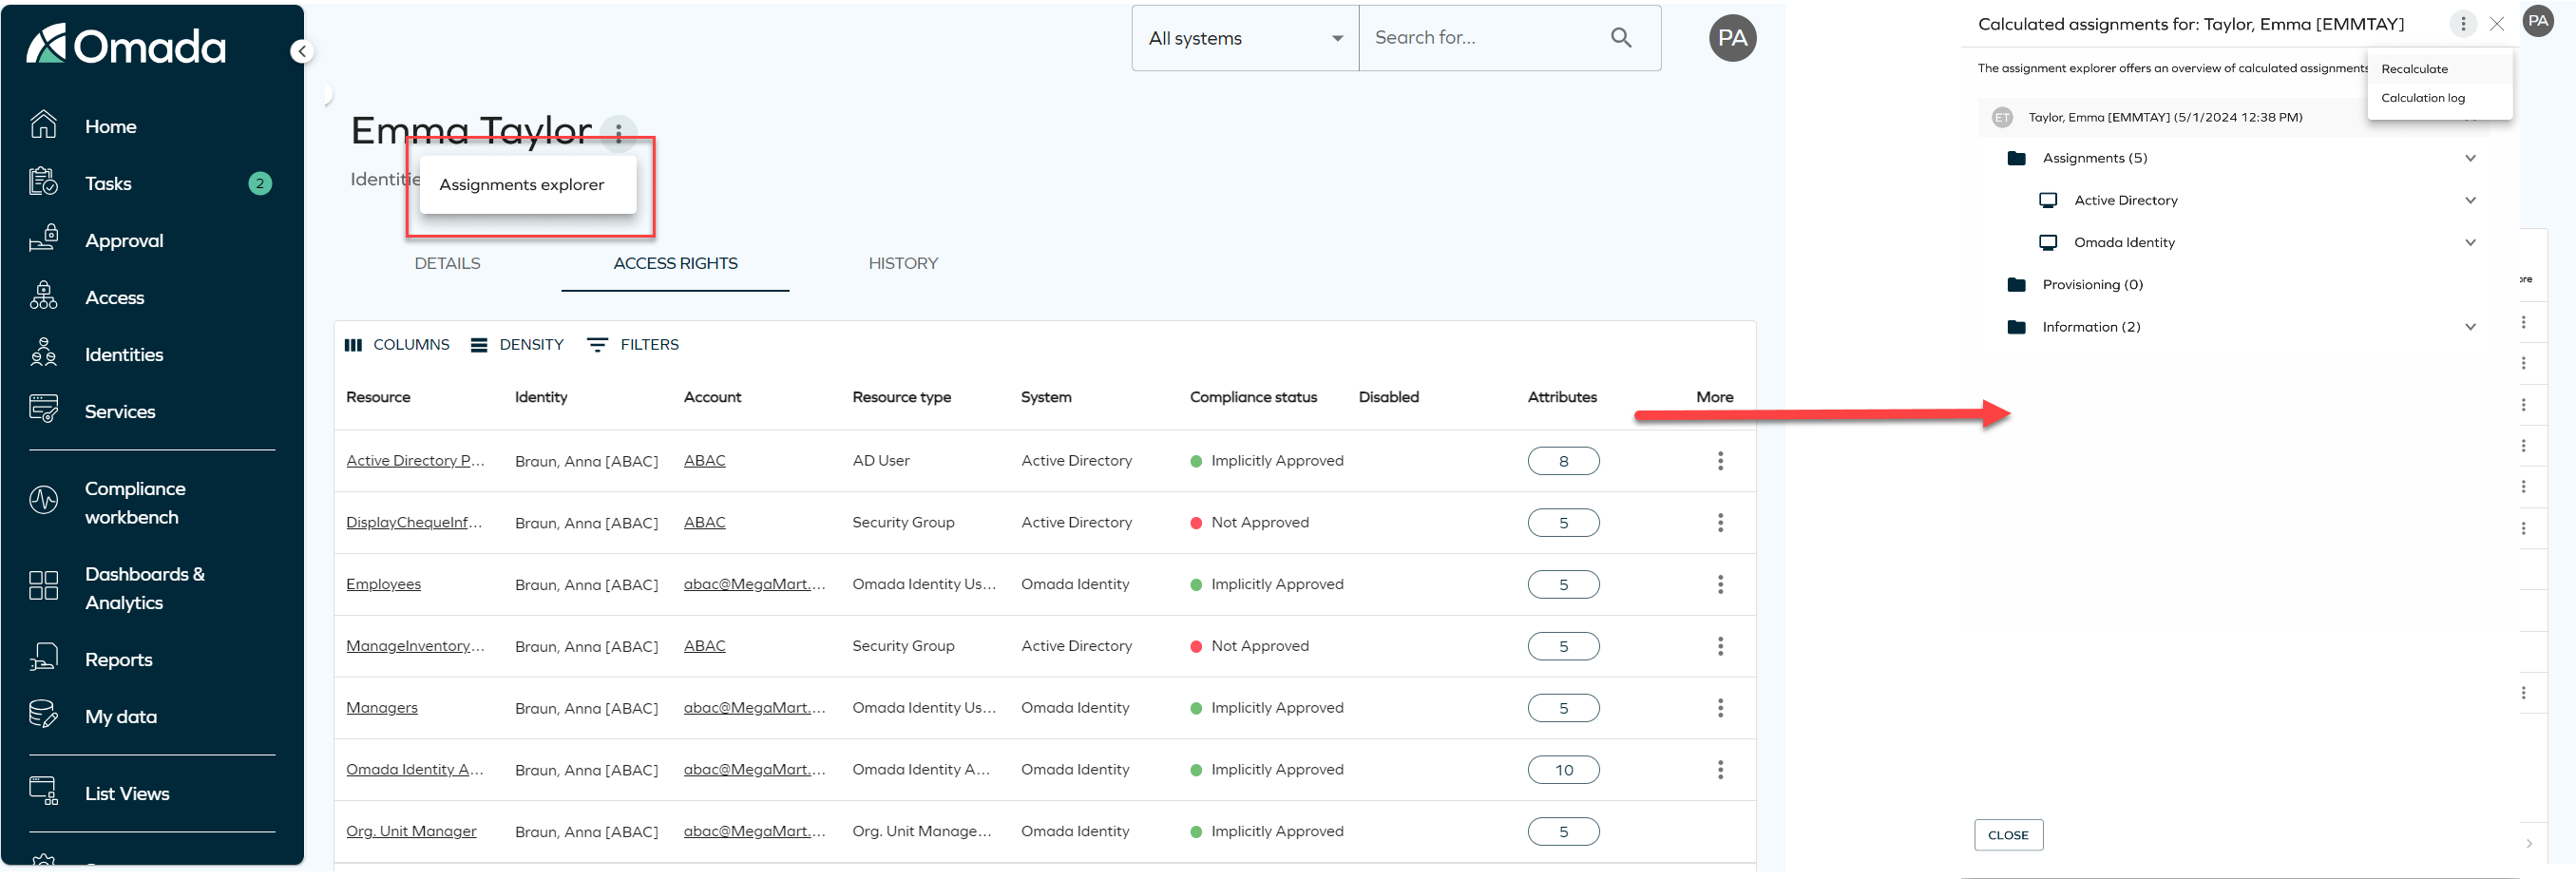
Additionally, you can re-calculate the identity assignments and explore logs related to the identity calculations. To do that, click on the three dots button on the right upper corner of the assignment explorer to expand the dropdown menu, then you can select betweetn:
- Recalculate: it triggers the re-calculation process in the background.
- Calculation log: it displays the logs for the identity calculations.

Remove access panel
When removing access for an identity, the following options are available:
- Inmediate remove access:
- The resource assignment is expired inmediatly.
- RoPE recalculation and deprovisioning are triggered inmediately.
- Scheduled remove access:
- Access removal can be scheduled for a specific date.
- By default, access is removed at the end of the selected day based on the identity's time zone.
- When the scheduled time is reached:
- RoPE recalculation and deprovisioning are triggered inmediately.
- The resource assignment is expired within a few minutes.