Access
The Access page provides a centralized overview of all access-related activities within Omada Identity.
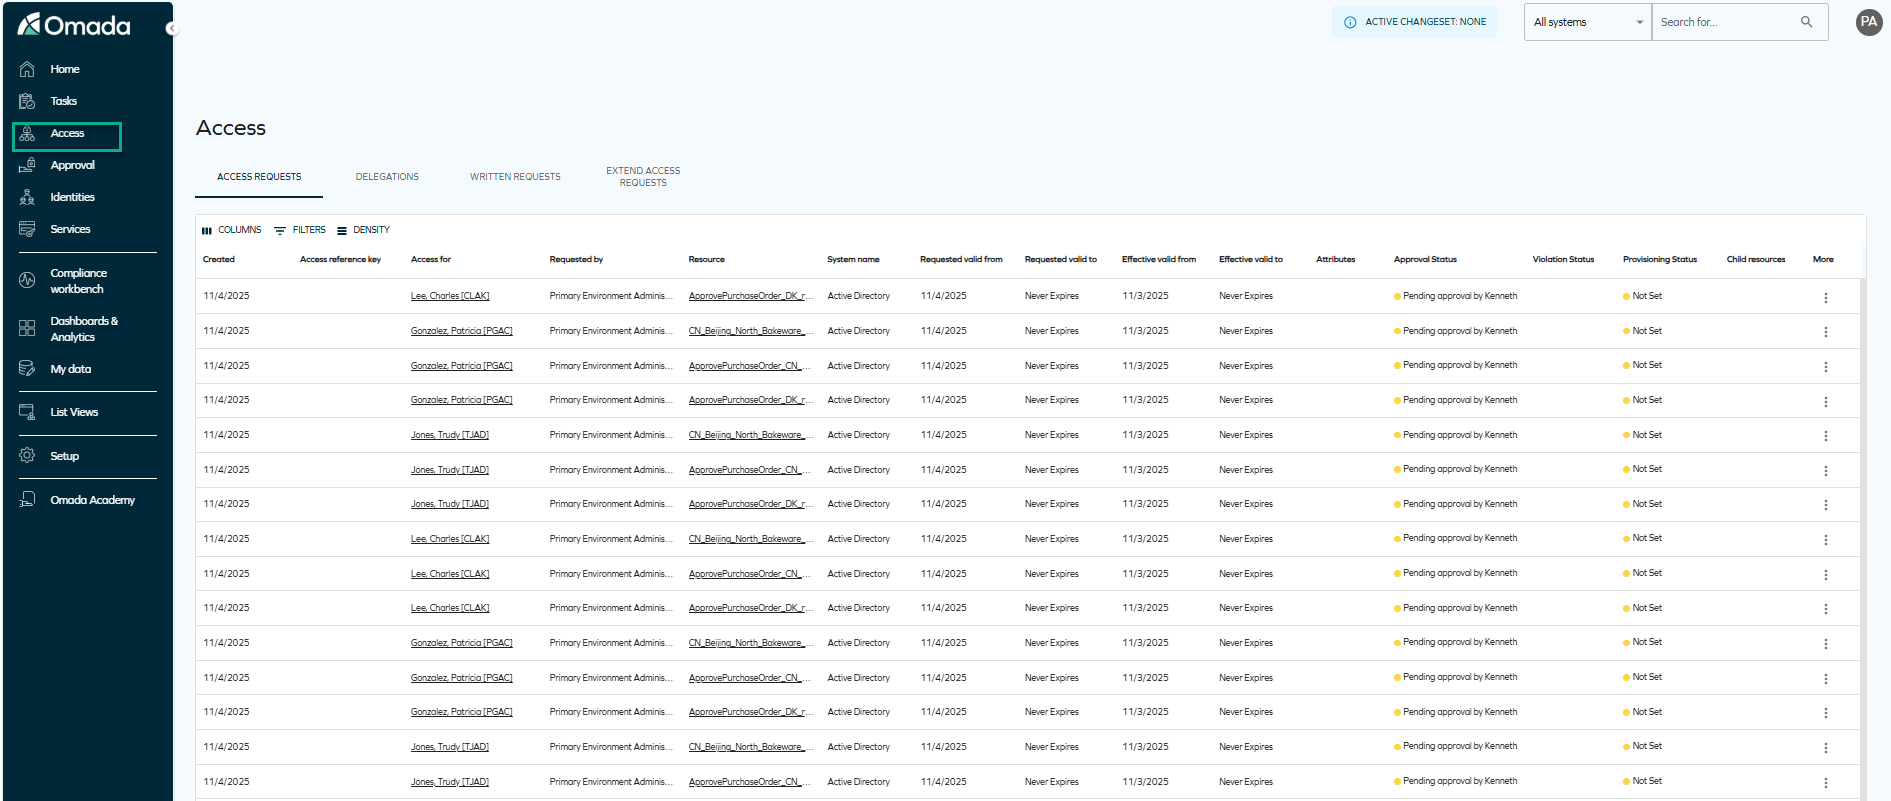
It allows users and administrators to view, manage, and track different types of access requests and delegations through four tabs:
-
Access Requests – Displays all requests for new access, showing details such as requester, resource, system, approval status, and provisioning status. For more details on the access request process, see Access request.
This tab also displays two different kinds of valid from and valid to dates:
-
Requested valid from and Requested valid to – These columns (previously named Valid from and Valid to) display the requested validity period originally specified by the requester when submitting the access request. They represent the requester’s intended validity dates before any adjustments made during approval.
-
Effective valid from and Effective valid to – These columns show the actual validity period applied to the resource assignment after approval. The values reflect any changes made by the approver to the valid from and valid to dates of the resource assignment, including revoking or expiring access. These columns always display the current state of those fields.
-
-
Delegations – Lists active delegations that allow one user to act on behalf of another for specific resources or actions, along with their activation and expiration details. For more details on access delegation, see Delegate access.
-
Written Requests – Shows manually submitted access requests, including request reasons and validity periods.
-
Extend Access Requests – Contains requests to extend the duration of existing access assignments, with information about the requested validity period and request status. For more details on extending access requests, see Extend access.
Display and filtering
The tabs display access- and approval-related information stored in tables. The columns organize data per creation date, access reference key, the name of the beneficiary, the name of the requester, approval status, and more relevant parameters.
The Access reference key is a six-character alphanumeric identifier that uniquely identifies each resource assignment created through an access request. It allows users, approvers, HR staff, and support teams to reference a specific request easily during follow-up conversations or troubleshooting.
The Access reference key column depends on the Create unique assignment code for resource assignments feature toggle (customer setting) being enabled. For technical details, look up CreateUniqueIdsForResourceAssignments in Customer settings.
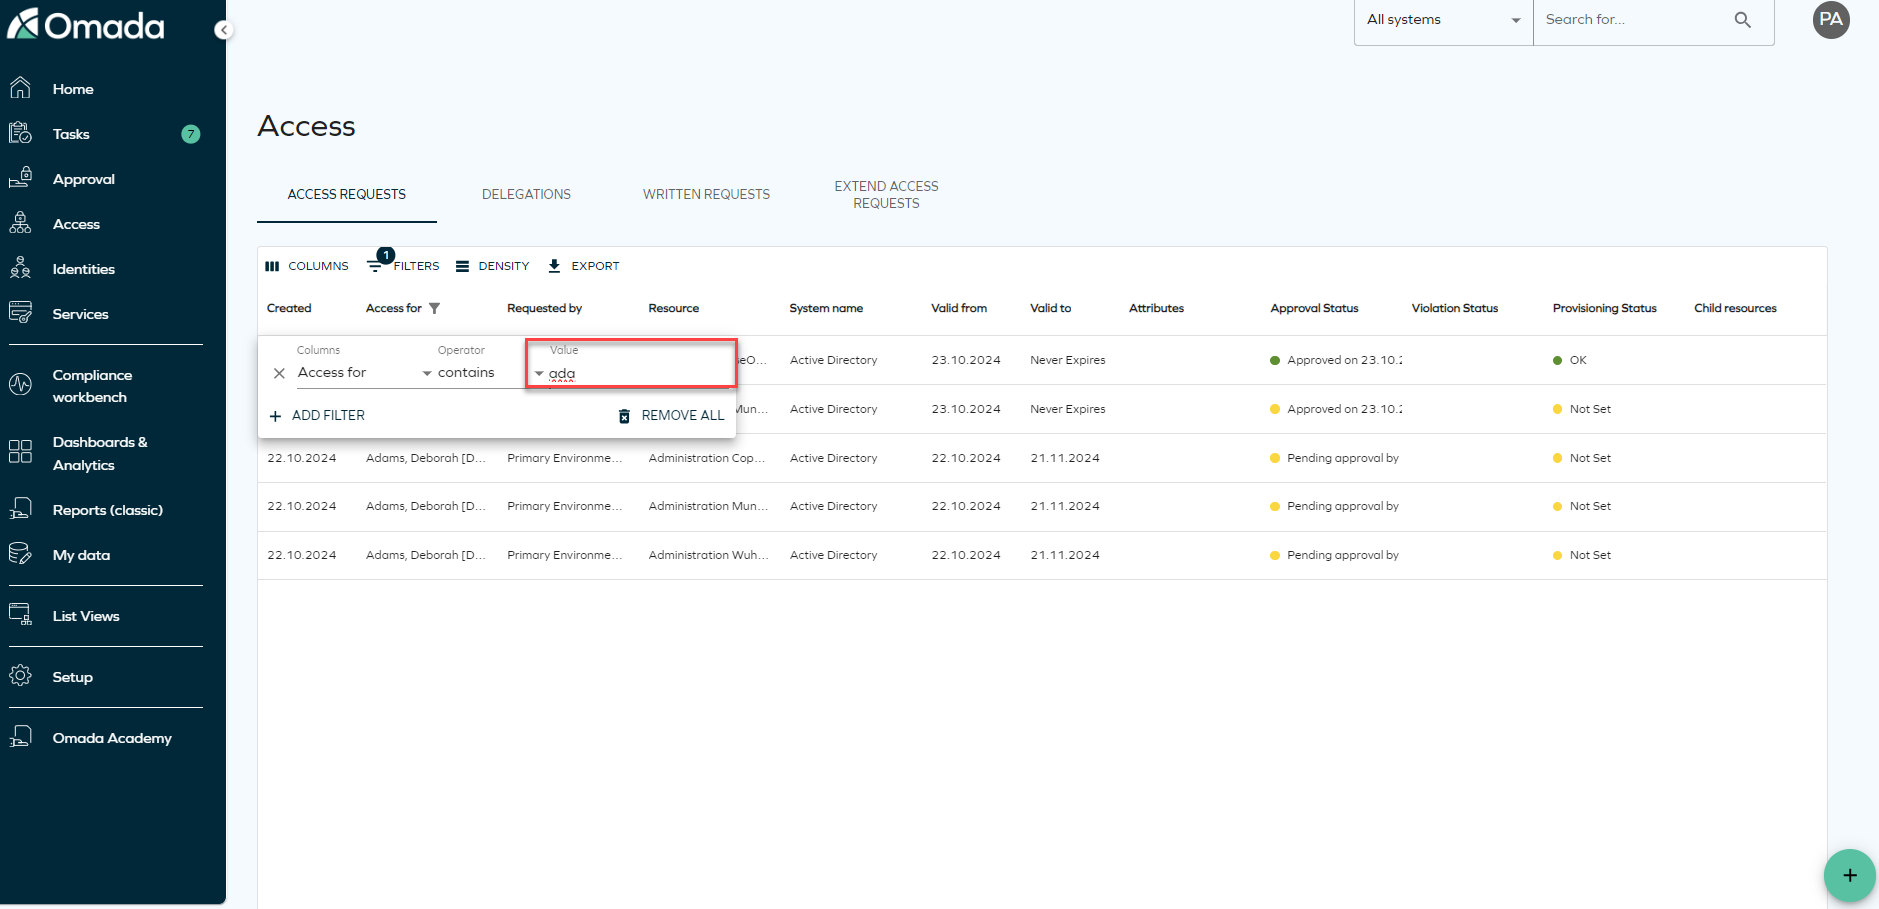
Each tab includes customization options such as Columns, Filters, and Density to tailor the displayed data, as well as pagination controls for navigating through records.
When using search filters, take into account that the search filter operates by matching the first letters of the word you are searching.
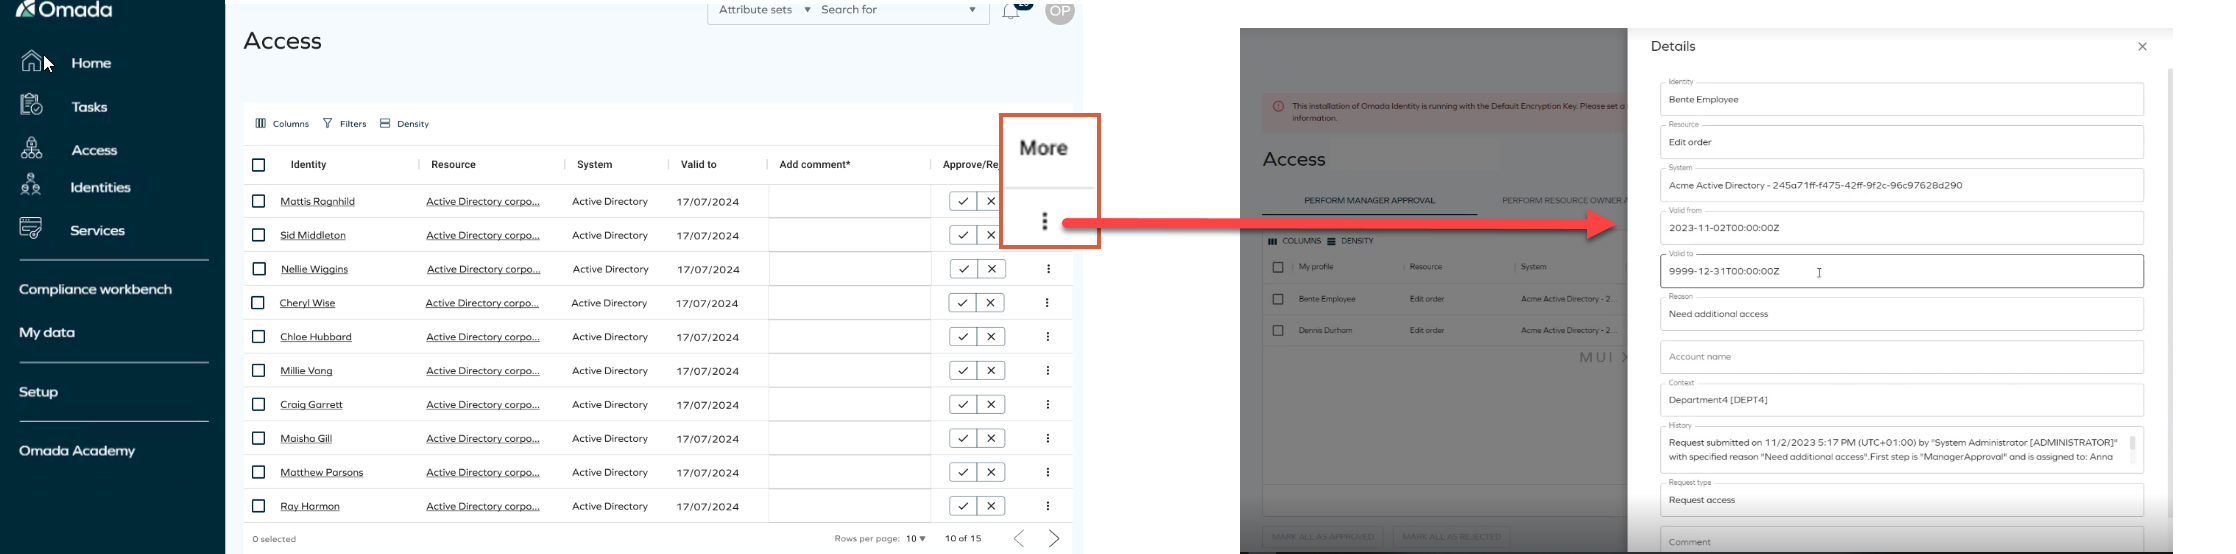
Access request overview through the Assignment Timeline
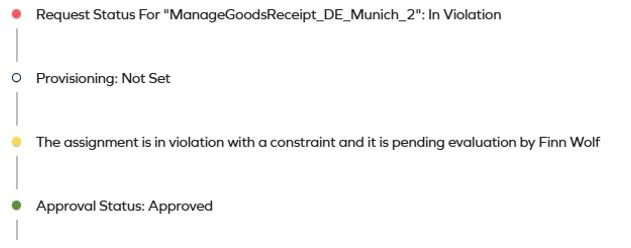
You can use the Assignment Timeline to verify the progress of the access request in detail. It allows you to review the steps that have already been completed, steps remaining, users/groups involved, and also the status of the background processes for this request.
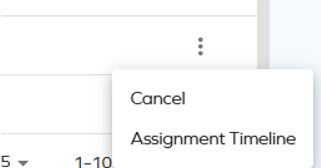
To open the Assignment Timeline, locate the access request you want to review, click the ellipsis (three dots), and then Assignment Timeline.
Color-coded indicators are used to present the status each step:
-
green - approval

-
yellow - action pending

-
white - the step is not started
-
red - rejection

The Access link in the navigation pane allows you to view all the questions assigned to you. At the top, you will find different tabs based on your permissions and workflow steps. To view questions in each step, simply click on the corresponding tabs.
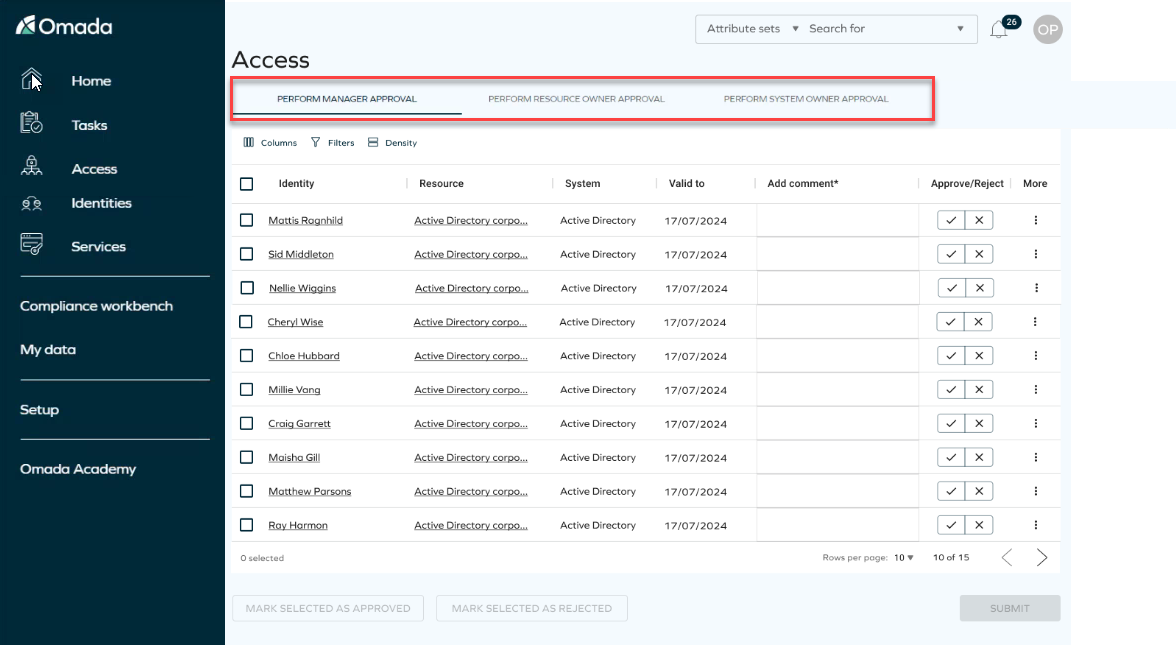
You can answer questions in bulk by selecting them all, choosing your answers, and then clicking Submit. It's crucial to submit your answers before closing the tab, as there is no option to save your changes for later retrieval.
Please note that the Decision field is no longer optional, as it was in the legacy Access flow. It is now mandatory for processing.
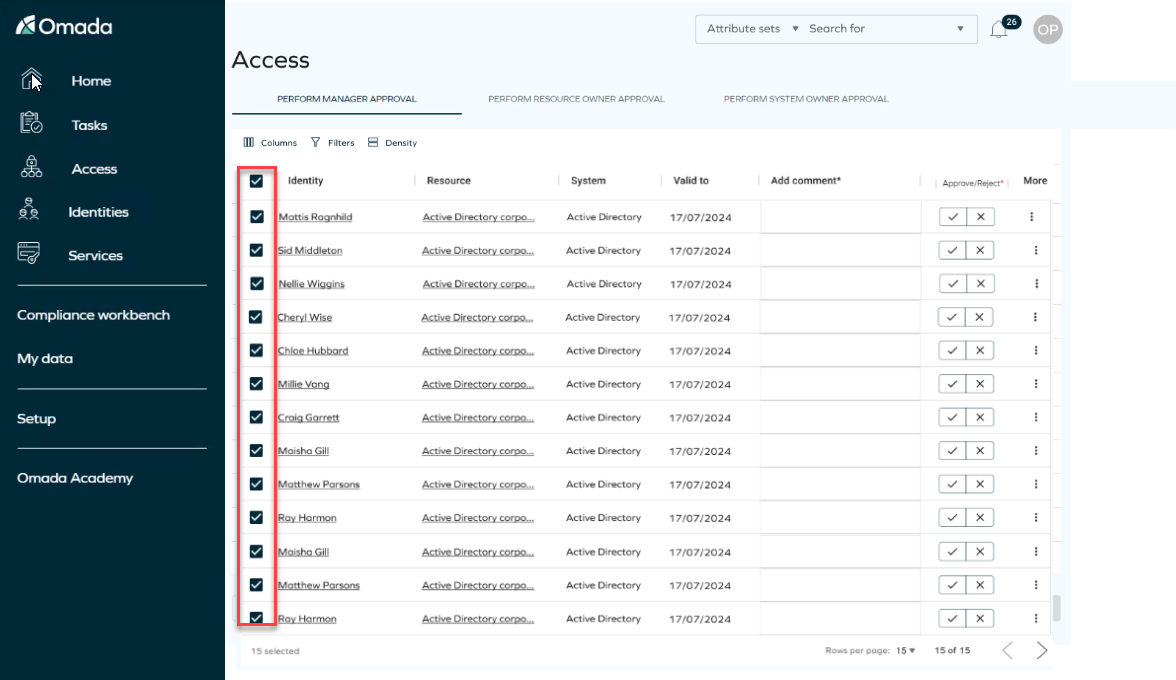
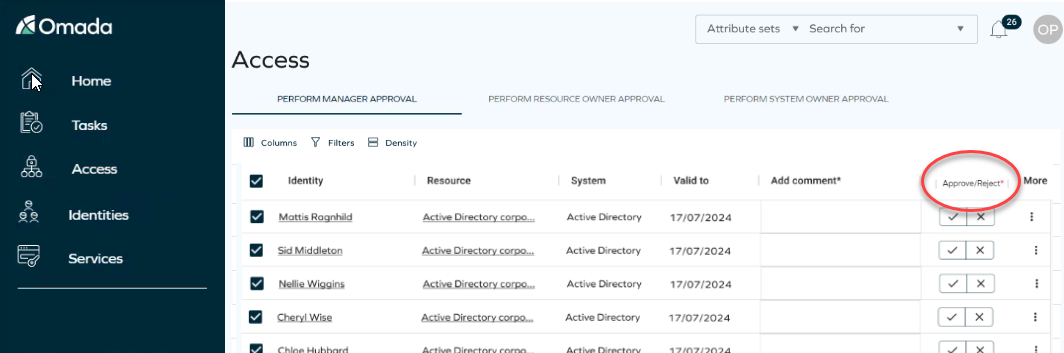
If there is a mandatory column, a red indicator will appear, indicating that you need to complete it. You must fill out these fields in order to enable the submit button.
Clicking on the ellipsis menu under More allows you to access additional information about the form. However, editing is not possible.
The steps and assignees may change based on the decisions made.
Cancelling a request
If you are the requester or beneficiary, you can cancel an access request in the pending state:
-
In the More column, click the ellipsis (three dots) button.
-
Confirm the operation.
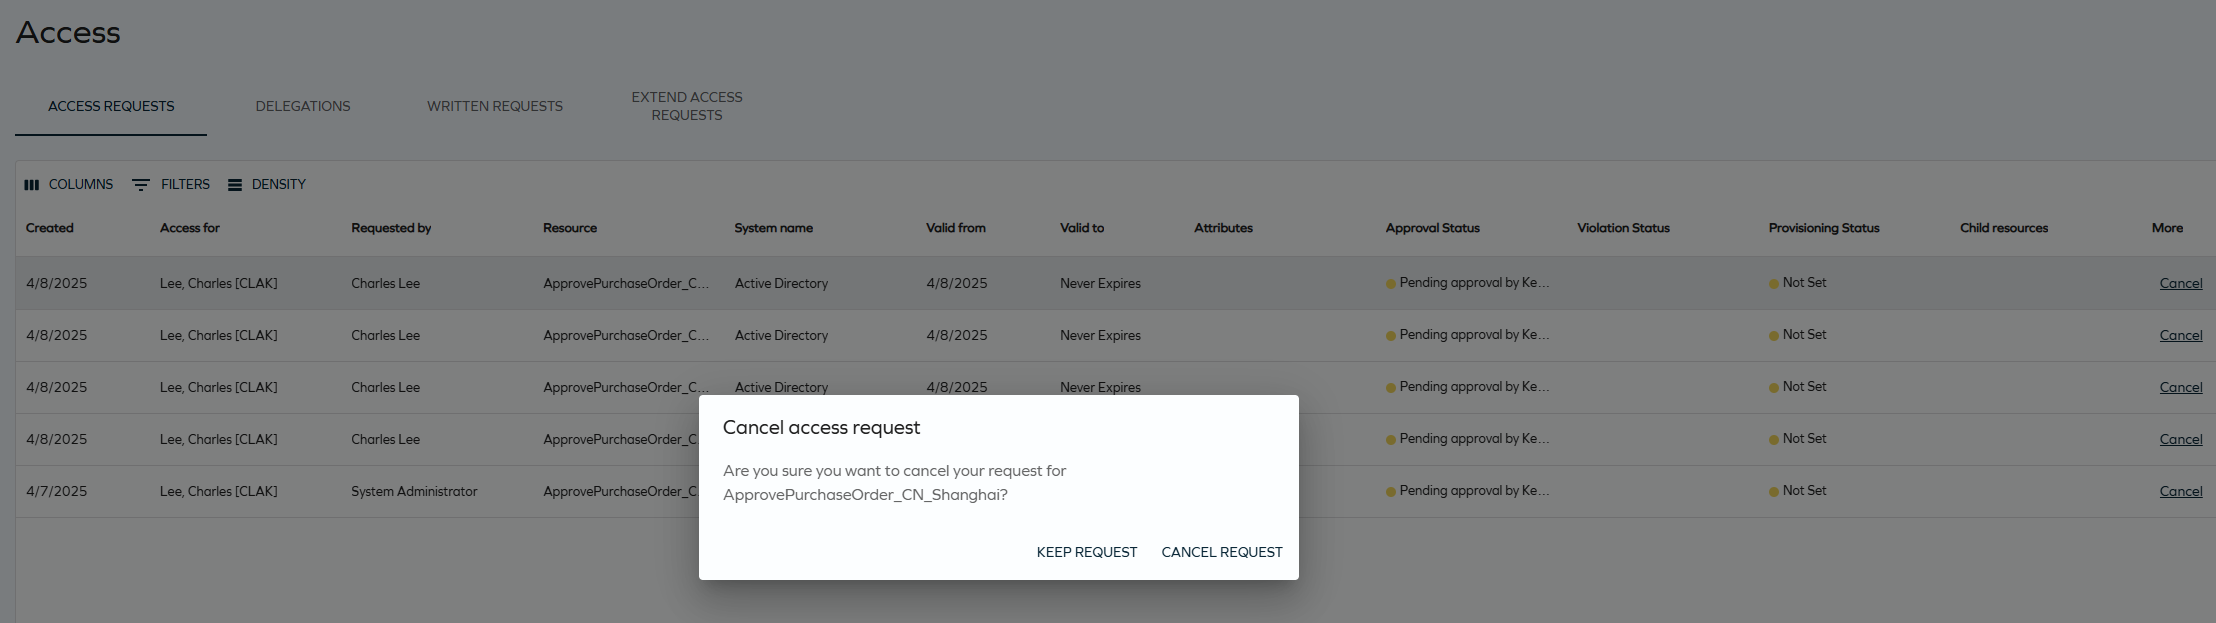
The request is now cancelled.
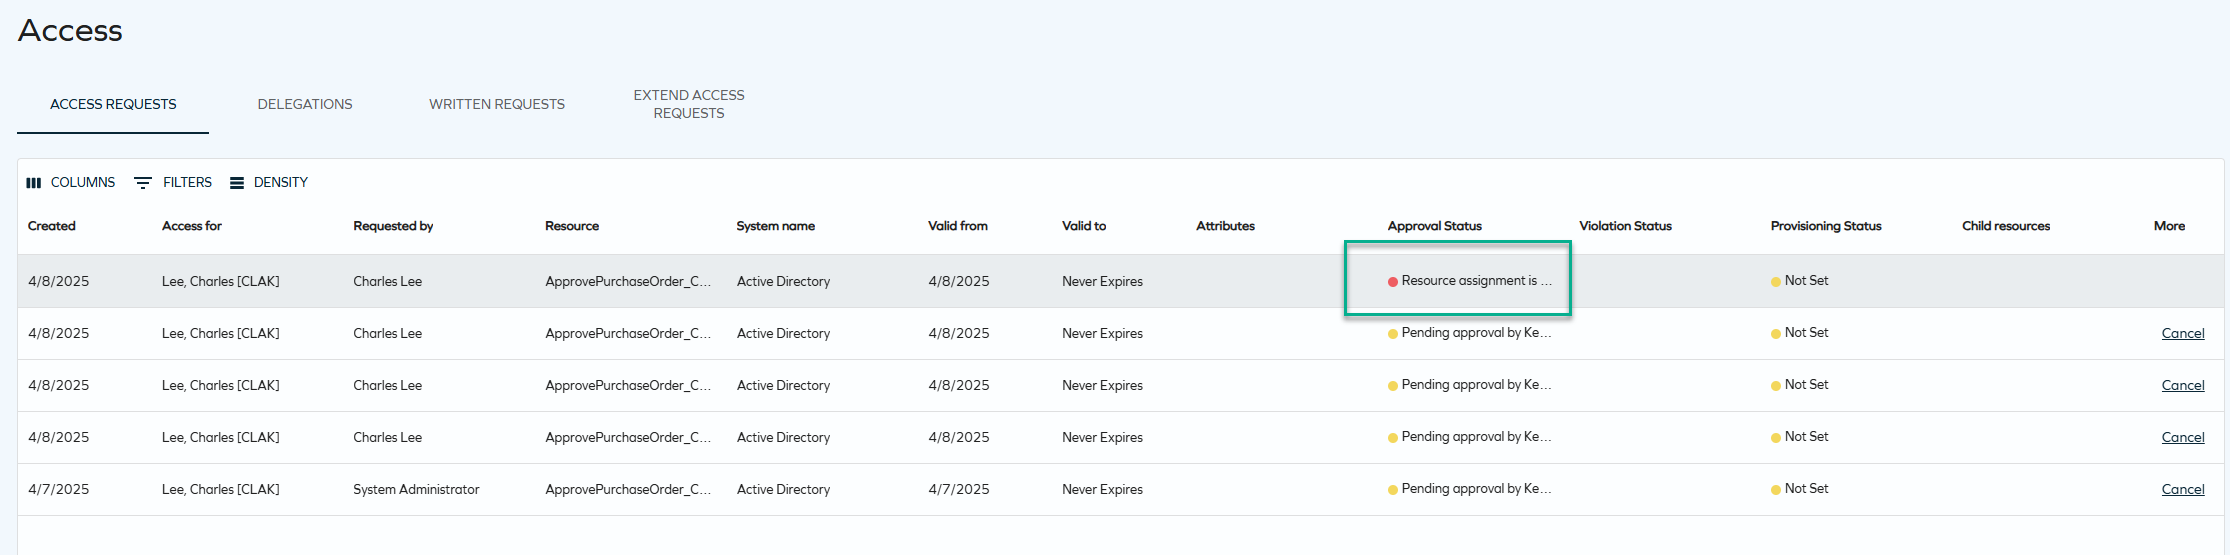
You can cancel one request at a time using the UI, and more than one request using the API. Assignees can be notified through an e-mail about the cancellation. The survey created after the access request is closed if all related resource assignments are cancelled (or has already been answered).