AD Federation Services and SAML
This page contains third-party references. We strive for our content to always be up-to-date, however, the content referring to external vendors may change independently of Omada. If you spot any inconsistency, please report it to our Helpdesk.
Here you can find details on how to configure AD Federation Services with SAML.
Configure Omada Identity
On-prem-
Follow the steps in the Configuring Omada Identity for Single Sign-on using SAML section.
-
Update the IdPEndPoint in tblCustomerAuth to point to the installed ADFS server.
-
Update the IdpIssuer and IdpAudience in tblCustomerAuth with the URL of the Omada Identity.
-
You can update all three columns by running the query, for example:
UPDATE tblCustomerAuth SET IdpEndPoint = 'https://adfs1.contoso.com/FederationMetadata/2007-06/FederationMetadata.xml',

IdpIssuer = 'https://enterpriseserver/logon.aspx' , IdpAudience = 'https://enterpriseserver/logon.aspx'
Configure AD Federation Services and SAML
-
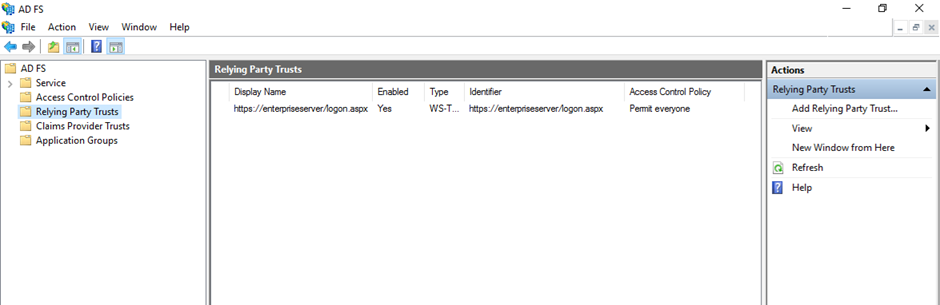
Open AD Federation Services, select Relying Party Trusts folder, and Add Relying Party Trusts.
 info
infoFor information about how to install ADFS Role Service refer to the Microsoft documentation.
For information on how to enable ADFS login page, please refer to Microsoft documentation.
-
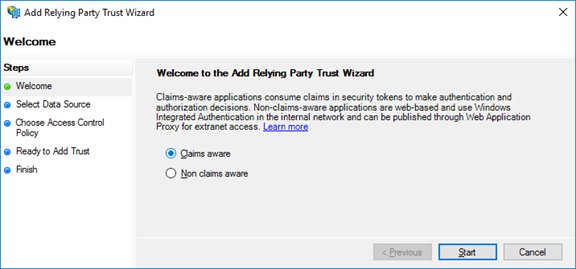
In the opened dialog box select Claims aware application and Start configuration.
-
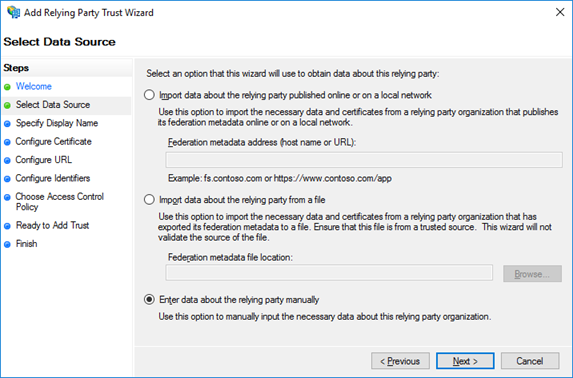
Select the Enter data about the relying party manually option and click Next.
-
On the next screen provide the Display name and click Next.

-
As a Relying party SAML 2.0 SSO service URL provide the address of the Omada Identity.

-
On the next screen add the Relying party trust identifier.

-
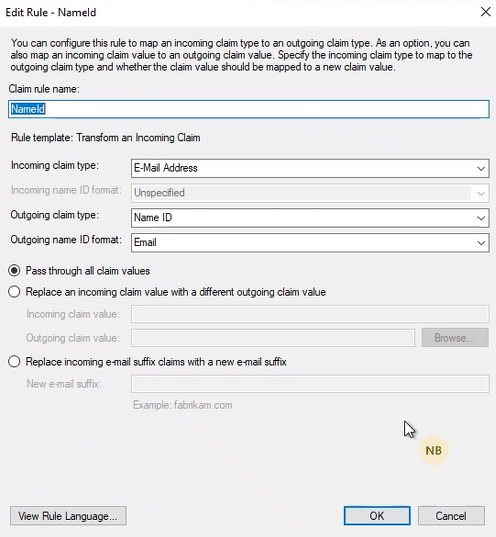
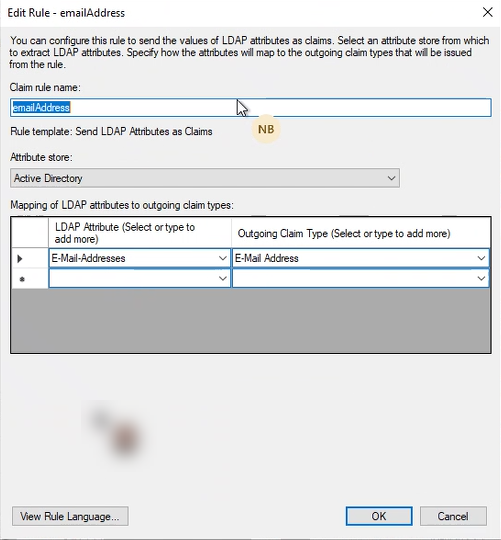
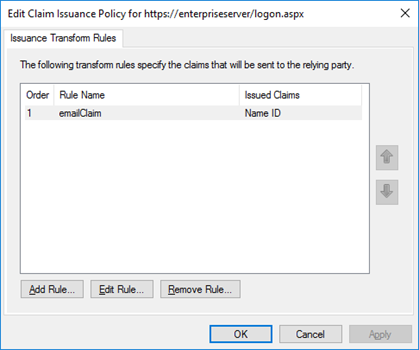
For the added Relying party trust, edit the Claim Issuance Policy and add emailClaim rule.
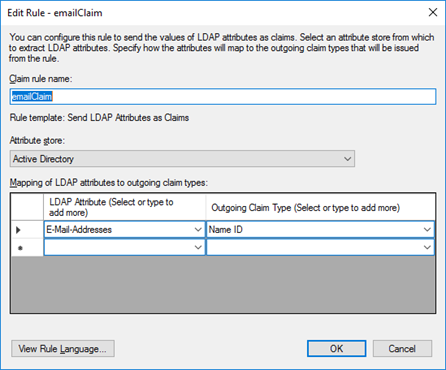
Make sure your config for the NameId looks as follows: