Configure OKTA with SAML
This page contains third-party references. We strive for our content to always be up-to-date, however, the content referring to external vendors may change independently of Omada. If you spot any inconsistency, please report it to our Helpdesk.
To configure OKTA with SAML:
-
Log in to the OKTA portal, and select Admin.
-
Go to the list of applications and click Add Application.
-
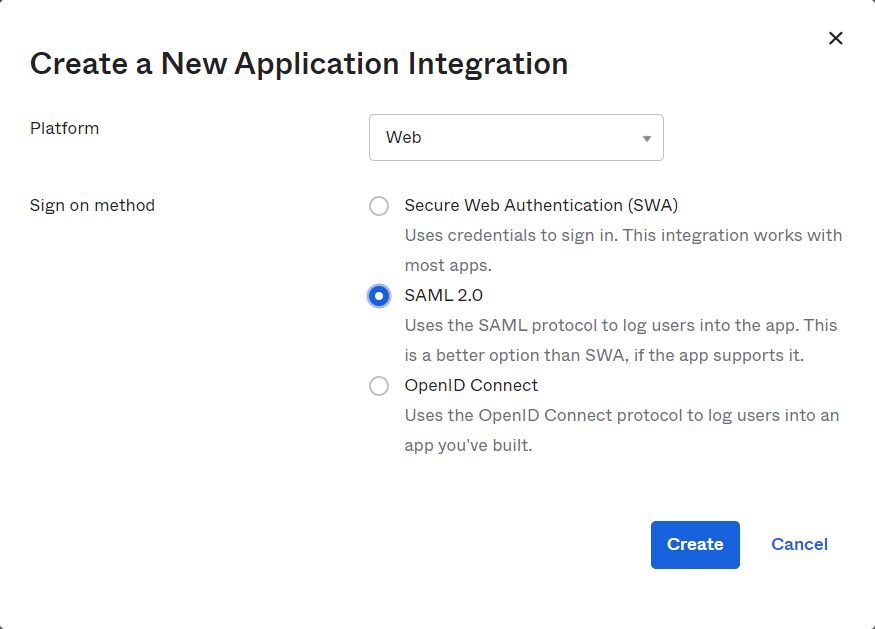
Select Create New App, then SAML 2.0
-
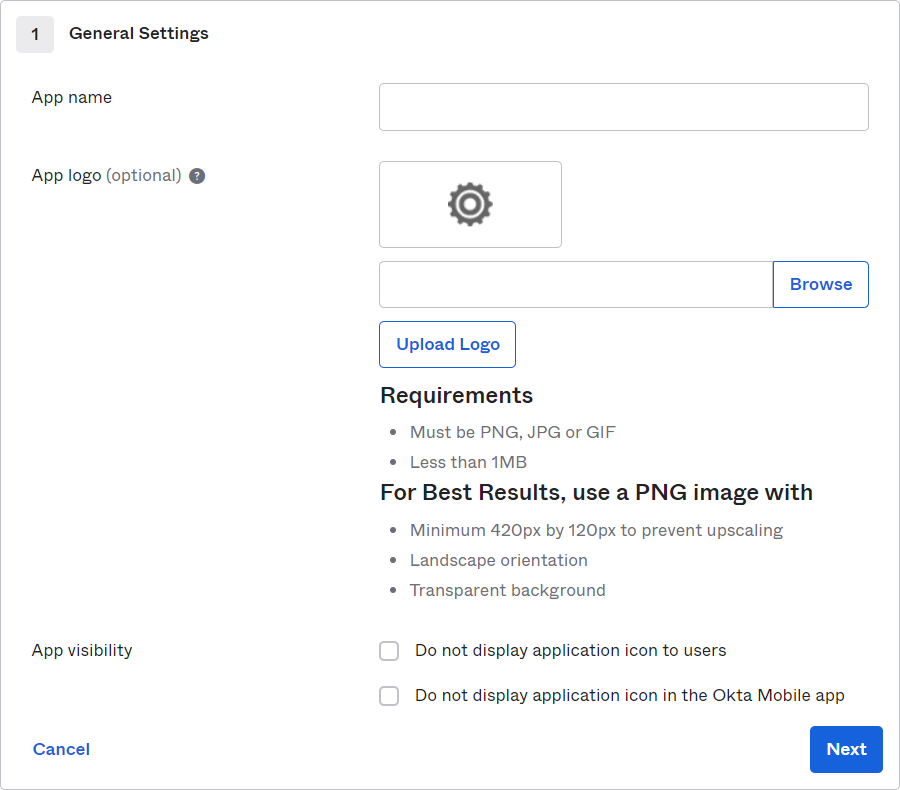
Provide the General Settings.
-
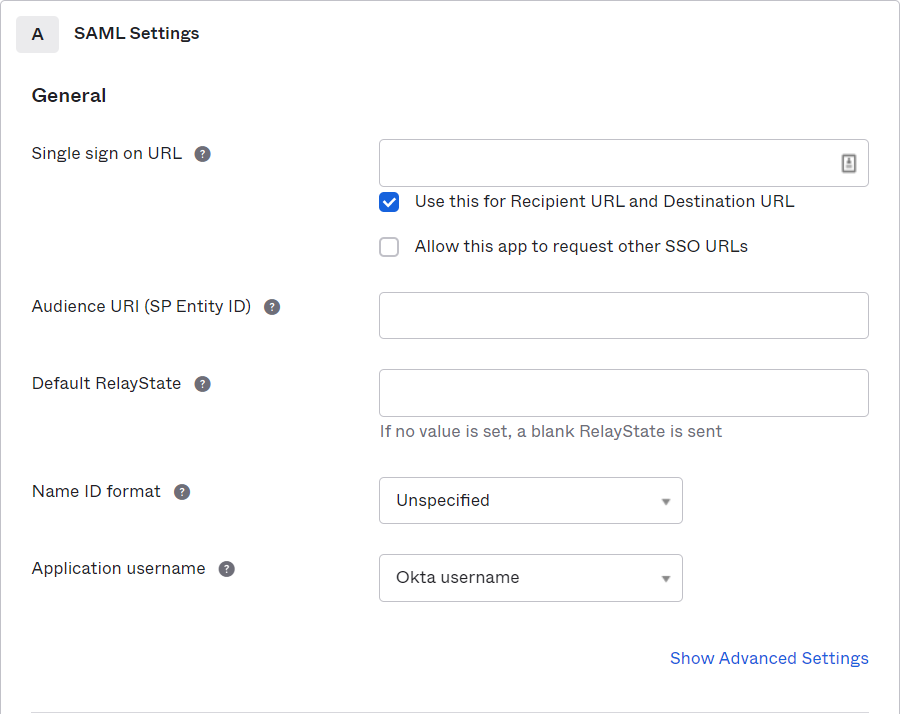
Fill in the properties of the app registration:
-
Compose the Single Sign On URL with Enterprise Server URL at the base and /logon.aspx at the end of the URL, e.g.,
https://enterpriseserver/logon.aspx. -
Enter Audience URI, e.g.,
http://example.com/saml/sso/example-okta-com. -
Select Unspecified as the Name ID format.
-
Select an applicable Application username which matches the username in tblUser in Omada Identity.
-
Click Show Advanced Settings
-
In the Advanced Settings, set the Response or Assertion Signature as Signed.
infoCurrently, Omada Identity supports only one of Response or Assertion Signature to be signed. The other setting must be left as unsigned.
-
Choose the appropriate Signature Algorithm, for example,
RSA-SHA256. -
Select appropriate Digest Algorithm, for example,
SHA256. -
Set the Assertion Encryption as
Unecrypted.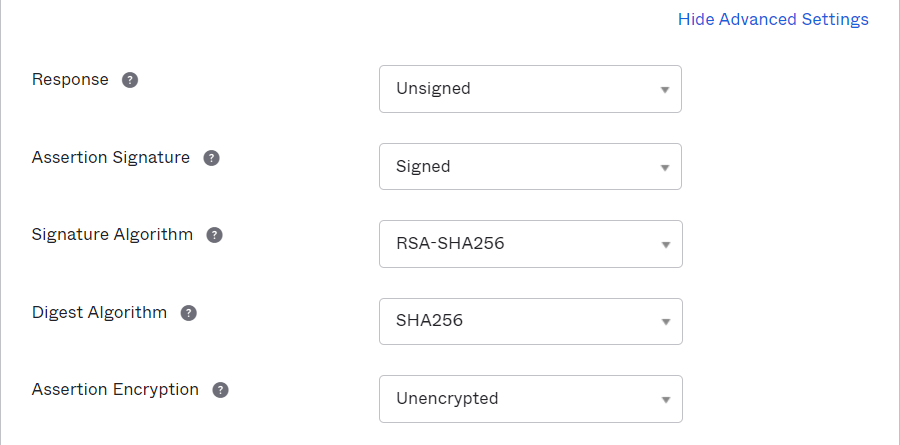
-
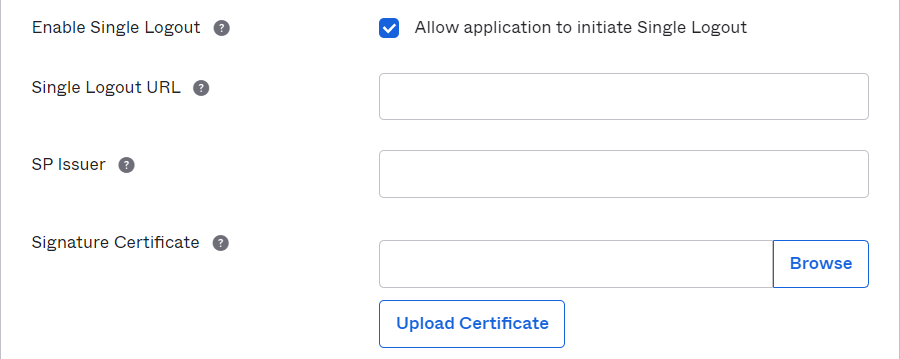
Select Enable Single Logout.
-
Enter Single Logout URL with Enterprise Server URL at the base and /logoff.aspx at the end of the URL, e.g.,
https://enterpriseserver/logoff.aspx. -
Enter the same value in SP Issuer and SAML Issuer ID, e.g.,
http://enterpriseserver -
Upload a valid certificate in Signature Certificate.
-
-
In the Attribute Statements section add three attribute statements:
-
FirstName set to
user.firstName. -
LastName set to
user.lastName -
Email set to
user.email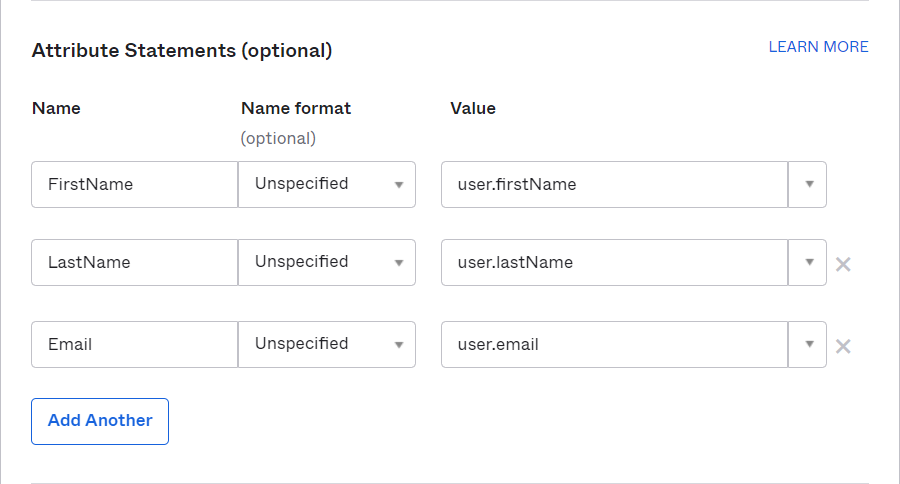
-
-
Fill in the information in the Feedback section and click Finish.
-
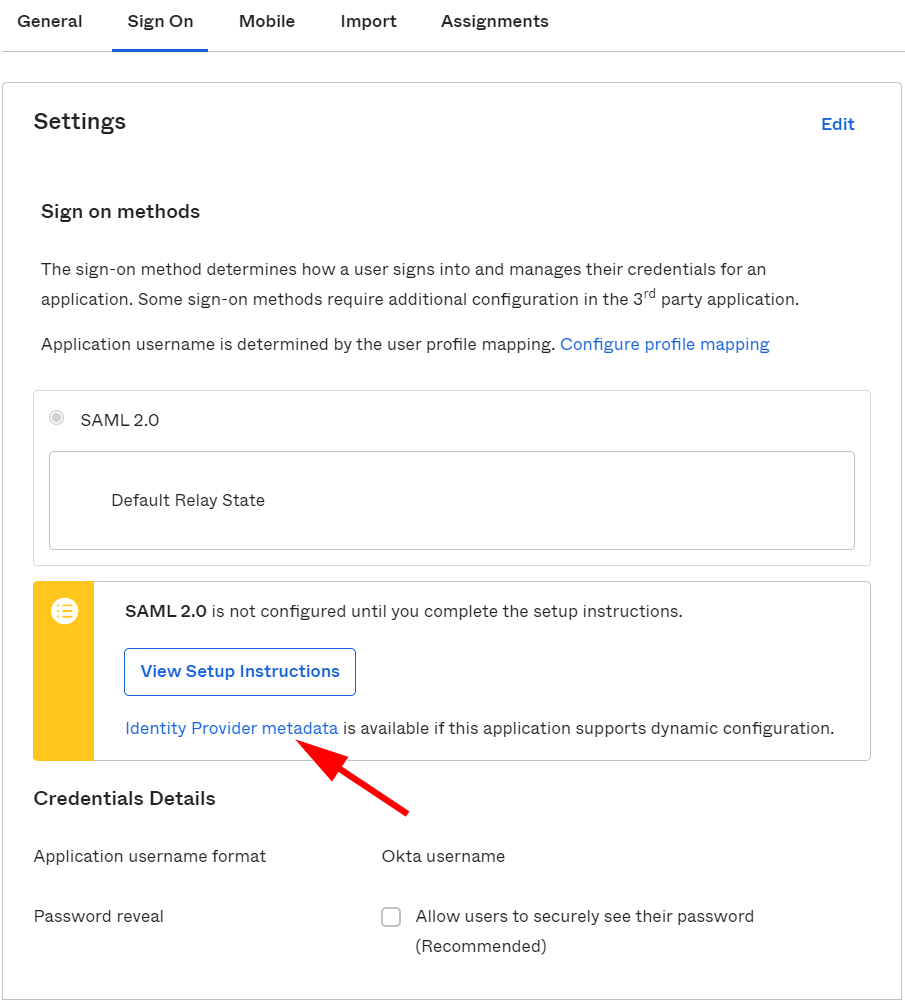
From the Sign On section of the newly created SAML application click the link to Identity Provider metadata.
-
Configure Omada Identity accordingly:
- Copy the URL address of the Identity Provider metadata and paste it to the IdpEndPoint in tblCustomerAuth.
- Use SP Issuer in the IdpIssuer in tblCustomerAuth.
- Use Audience URI in the IdpAudience in tblCustomerAuth.
- Use the serial number of the certificate uploaded in Signature Certificate in IdpCertSerialNo in tblCustomerAuth.
-
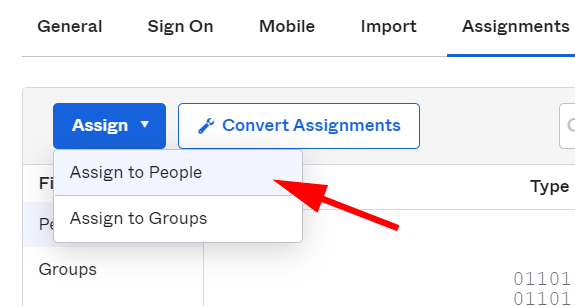
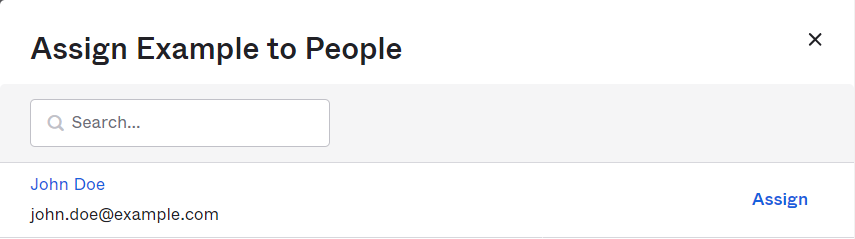
Open the Assignments section, click the Assign button and select Assign to People.
-
In the Assign SAML Application to People dialog box, search for your username and click Assign.
-
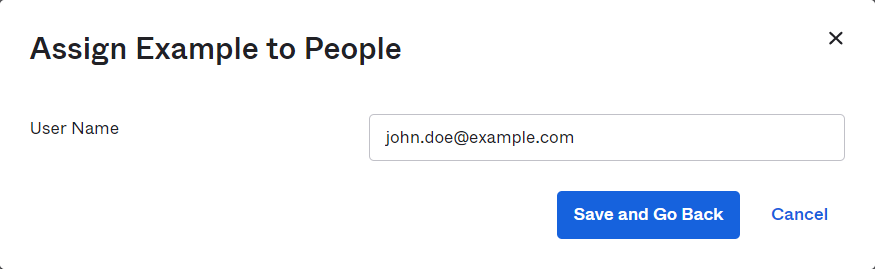
Verify the user-specific attributes and select Save and Go Back.
-
Click Done to finish configuration and exit the wizard.