Workflow
The Workflow step is where you define the activities that the survey objects will be processed in. Each workflow step corresponds to an activity that the assignees will be assigned to perform.
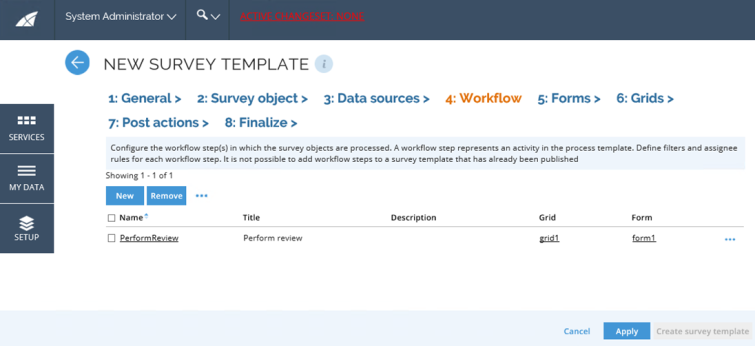
You can create a New workflow step, as well as, Edit and Remove steps. There are links to the grid and the form. Through the ellipsis menu, you can edit assignees and object type filters for a workflow step.
To create a new workflow step:
-
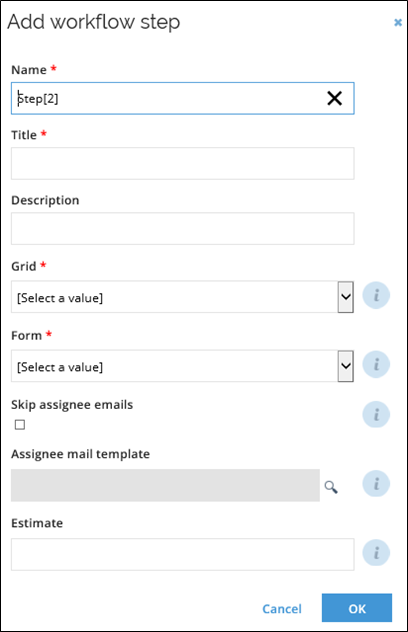
Click the New icon and define values for all the required fields to add a workflow step:
-
Give the workflow step a name.
-
Give the workflow step a title. This is what will be displayed as the activity name.
-
Enter a description of the activity. The description is displayed above the grid in the activity form.
-
Select the grid to use for this activity in the dropdown menu.
-
Select the form to use for this activity in the dropdown menu.
-
Tick the Skip assignee mails checkbox if no notifications should sent for this activity.
-
Select the Assignee mail template to use for the notification for this workflow step. If undefined, the default mail template will be used.
-
Enter an estimate if you want to send reminders for the activity.
infoThe estimate must be entered in XML duration data type. XML duration data type is written as PnYnMnDTnHnMnS where P stands for period and n is the number of years, months and days; T stands for time and n is the number of hours, minutes and seconds. P15D sets the estimate to 15 days. PT40H30M sets the estimate to 40 hours and 30 minutes.
warningDuration is not calculated in calendar days, but in work hours and work weeks. A work week runs from 9-17, Monday to Friday, by default. This means that a week counts as 40 hours. If you wish to send reminders after a certain number of calendar days, you should calculate 8 × nDays and set the XML duration to that number of hours.
-
Click OK to save the workflow step and process to edit the assignee filters.
-
To remove a workflow step, select the workflow step you want to remove and click the Remove icon.
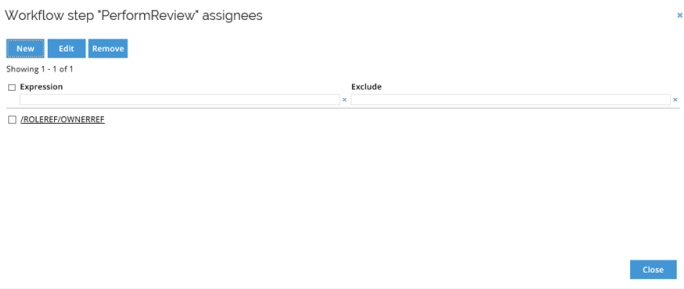
Assignee rules
Add assignee rules to the workflow step to define the user (or users) who will be assigned to the survey task.
-
Click the Assignees icon in the grid to add or edit assignee expressions.
-
For each assignee rule you specify an expression, and optionally, an exclude statement.
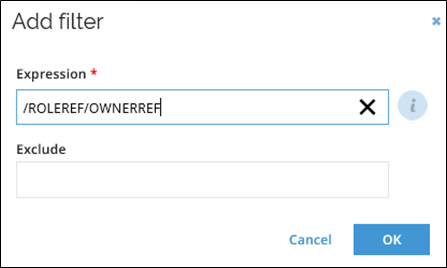
Both fields must be reference paths to a user object, or the name of user group prefixed by Group.
It is possible to state the name of a user group by using the syntax "Group:[user group name]". This can be used, for example, to catch any questions that would otherwise be unassigned. You can define more than one assignee rule.
Exclusion rule
For each rule, it is possible to specify an exclusion rule. This is often used to exclude assignees from answering questions where they themselves are referenced in the survey object.
For example, the Exclude expression "/IDENTITYREF\IDENTITYREF{Type=85D42C0E-0C9D-4D36-9C23-7C768ED06825}" serves to prevent the identity referenced on the survey object from being assigned to the activity.
The paths in the Assignee step can include a scope variable in filter expressions. However, multiselects are not currently supported, for example: /OWNERREF/IDENTITYREF{ID=@identity_var}/$EffectiveManage.
Workflow step filters
Workflow step filter expressions are used to route survey objects to a workflow step. This is used to skip a workflow step when certain conditions are met.
Follow these steps to add a workflow step filter:
- In the workflow step screen, click the ellipsis icon and select Fields.
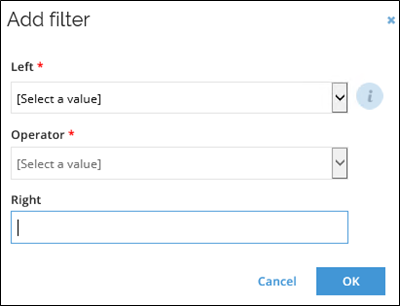
- If no filters are configured, the add filter window will popup automatically. Otherwise, click the New icon to open the popup.
- In the Left dropdown, select one of the survey object properties to compare in the filter expression.
- In the next dropdown, select the Operator. The options depend on the data type of the property selected.
- Enter or select the value in the Right field.
The example below excludes any questions where the action field has the value Remove.
