Survey engine configuration
The Survey engine is a module that runs on top of the Omada Identity Standard Application. To use it, you need to install the survey feature package.
Mail notifications
Survey task notification
You can configure the Survey Template to send task notification emails to assignees at survey launch. This is controlled by a setting in the survey template.
Assignees are not (re-)notified when they are assigned new questions if they already have an uncompleted work item for the same survey.
By default, emails are sent using the survey task notification email template. Custom email templates can be used by defining an assigneeMailTemplateId attribute for the workflow steps. The value of this attribute should be the Form Data UID of the mail template that you wish to use.
You can use different mail templates for individual workflow steps. The default maximum number of emails that can be sent at a time is 50. The number can be configured by inserting the following customer setting into the database by executing a script:
\INSERT INTO tblCustomerSetting([Key],Name,Description,ValueInt,Type,Category)

VALUES ('EventMailMax', 'Maximum emails sent', '', 10000, 0, Mail)
Survey task reminder
You can configure Omada Identity to send reminders to assignees that have open work items in a survey after specified time has elapsed. To enable the reminder, set a time estimate on the workflow step in the survey template.
For published survey templates, you can edit the estimate property directly on the corresponding activity.
Survey reminders are configured to be sent the next time the associated timer is run when less than 8 hours of the estimate remain. Survey reminders are sent using the Survey task reminder template.
Survey reminders are not controlled by the survey task notification setting and will be sent if an estimate has been defined for the workflow step even if survey task notifications have not been enabled.
You should never use the standard escalation concept used in Omada Identity Standard Application for survey activities.
Survey reports
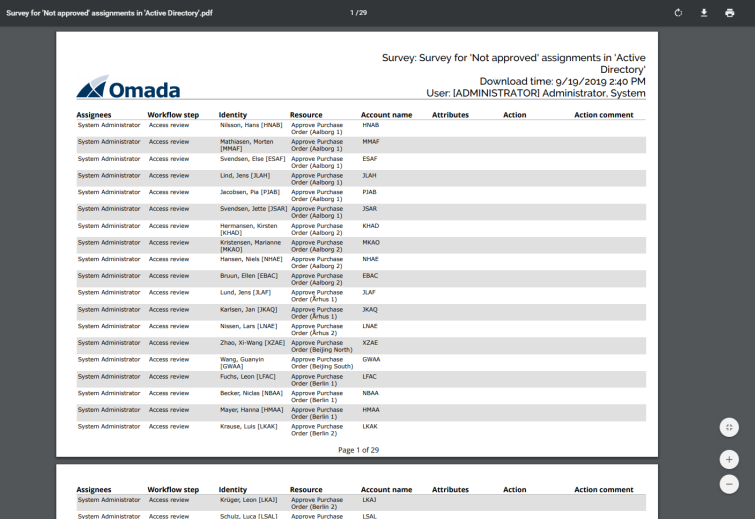
Assignees, administrators, and auditors can download PDF reports of the questions for all assignees or use the Select answer responsible filter to create a report for a given assignee.
In the report for a given assignee, only the questions assigned to them are included. Survey administrators and auditors can view all questions.
Download a PDF or CSV report
Follow these steps:
- Open the Surveys view by going to My data > My surveys or Setup > Operations > Surveys.
- Click any survey to open it.
- Click the Details button for any assignee to open their assignments.
- Select the format in which you want to download it.
- Select if you want to Download inmediately or Schedule download.
- Click OK. If you have selected Schedule download, you will receive an email when it is ready.
The Policy check column will not show any information in the PDF report as that is dynamically generated and not saved on the survey object.
You can generate a PDF/CSV report for any survey except for the Role Certification Survey.
Additional survey reports
These sample reports are installed with the module:
- Omada Identity Survey Assignee Status
- Omada Identity Resource Assignment Survey
- Omada Identity Resource Assignment Survey Deprovision
If the Survey Reports have been configured for surveys, the Reports button will be available in the Administration tab in the Survey Administration view.
Survey Assignee Status
You can see the following columns:
- Assignee
- Total (number of questions)
- Completed (number of questions)
- Progress in percentage

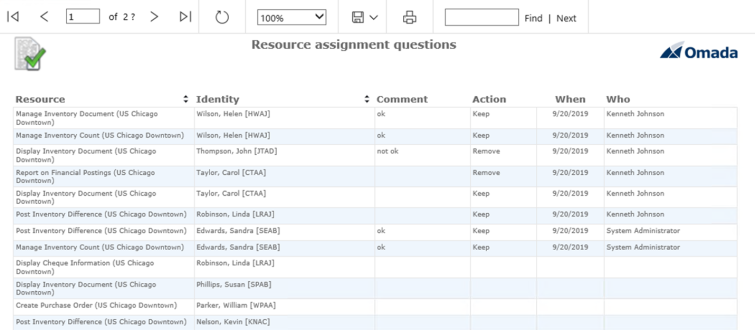
Resource Assignment Survey
This report shows all questions generated for the survey. The columns displayed are:
- Resource
- Identity
- Action
- Comment
- When (the date any action was taken)
- Who (the user who answered the question)
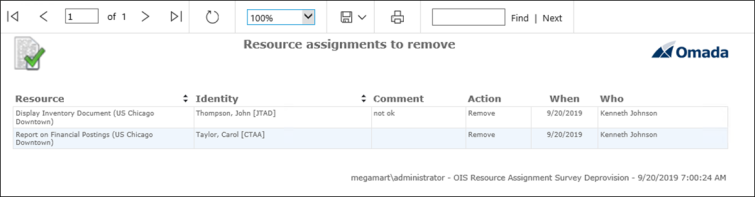
Resource Assignment Survey Deprovision
The Resource Assignment Survey Deprovision report only shows the questions where the chosen Action is Remove.
The columns displayed are:
- Resource
- Identity
- Comment
- Action
- When (the date any action was taken)
- Who (the user who answered the question)
Enable survey reports
To enable the reports:
-
Upload the sample reports to your SSRS ReportServer.
-
Create a shared data source that connects to the Omada Identity database and update the reports to use this data source.
-
Copy the JavaScript file
OIM.Attestation.UI.SurveyAdministration.Reports.jsand rename the copy, for example,OIM.Attestation.UI.SurveyAdministration.Reports.Custom.js. -
Open the custom file in your preferred JavaScript editor, for example, Notepad.
-
Change the reportServer, reportFolder, and reportViewerUserIntegrated variables to your local settings. By default, the Integrated mode is set to True.
var reportServer = 'localhost';

var reportFolder = '/OIS';

var reportViewerUseIntegrated = false; -
You may need to edit the URL and other settings in the sample script file to suit your environment.
var reportViewerNative = 'http://' + reportServer + '/ReportServer/Pages/ReportViewer.aspx?'; -
The Survey Assignee report is available for any report. To make the other reports available you must specify the name of the survey in the dedicated reports section.
//dedicated reports

switch (templateName) {

case "Access review for managers": -
Edit the form that is used for the Survey admin view, usually the Type form: Survey.
-
Click Script Files and add the custom JavaScript file to the list.
Custom reports
You can use the sample reports as a basis for developing your own reports for other survey templates.
To do this:
- Create a new report (.rdl file).
- Upload the .rdl file to your report viewer.
- Develop a custom JavaScript that calls the new report.
- Register the custom JavaScript on the Form for the Survey Administration view for the survey template.
Recalculation of survey assignees
It is possible to recalculate the assignees of the unanswered questions in an active survey. This can be relevant if a survey is long-running and some of the information that was used for the initial assignment of the questions is no longer accurate. For example, the line manager of some of the surveyed users has changed.
In order to set up the nightly recalculation of survey assignees, use the out of the box event definition Update survey assignees.
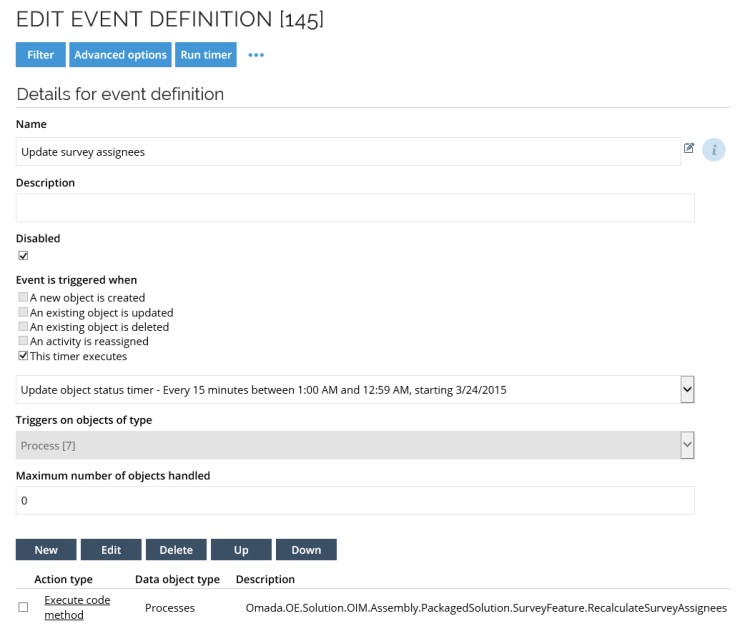
Configure the RecalculateSurveyAssignees code method to use SurveyReassignmentConfiguration XML
The RecalculateSurveyAssignees code method recalculates assignees for all non-completed objects in a survey and reassigns the survey activities as needed. This method is typically executed in a nightly timer event and supports escalation features that add users from specified reference paths to the list of assignees after a specified time interval.
The configuration requires an XML document with a root SurveyReassignmentConfiguration element containing default settings and specific survey template configurations. There is a default configuration object that you can use as a template. The configuration object is named SurveyReassignmentConfiguration.
Default configuration elements
The following elements define default values that are used for all survey templates unless overridden at the specific workflow step level:
-
DefaultEscalationMailTemplateUid (optional) - GUID of the mail template to use when sending escalation notifications. If not specified at the workflow step level, this default is used.
-
DefaultRefPathsNewAssignees (optional) - semicolon-separated string of reference paths that is used as assignee expressions when calculating new assignees for escalation. Examples of paths include:
/IDENTITYREF/$EffectiveManager- effective manager of an identity.User:UserSystemName- specific user identified by user name.Group:GroupName- specific user group identified by user group name.
-
DefaultExludePathsNewAssignees (optional) - semicolon-separated string of reference paths that should be excluded from the assignee calculations. Used to filter out users that should not receive escalations.
-
DefaultAction (optional) - specifies how new assignees are added during escalation. Valid values:
ADD- new assignees are added to the existing list of assignees (default if not specified).REPLACE- new assignees replace existing assignees entirely.
Survey template configurations
- SurveyTemplateConfigurations - a container for survey template-specific configurations.
- SurveyTemplateConfiguration - configuration for a specific survey template.
Uid- GUID of the survey template this configuration applies to.
Workflow steps configuration
- WorkflowSteps - a container for workflow step configurations.
- WorkflowStep - configuration for a specific workflow step within the survey template.
Name- name of the workflow step as defined in the survey template.NumberOfDaysBeforeEscalation- if set to a positive number, it indicates the number of days after the survey launch before the escalation is triggered. If set to0, the escalation will occur immediately.- EscalationMailTemplateUid (optional) - GUID of the mail template to use for this specific step's escalation. Overrides the default if specified.
- RefPathsNewAssignees (optional) - reference paths for calculating new assignees for this specific step. Overrides the default if specified.
- ExcludePathsNewAssignees (optional) - reference paths to exclude from assignee calculations for this specific step. Overrides the default if specified.
- Action (optional) - specifies how new assignees are added for this step (
ADDorREPLACE). Overrides the default if specified.
Property value reactions
In this section, you can configure automatic survey questions to be answered based on the property values of referenced objects. The property value reactions are processed before recalculating assignees:
- PropertyValueReactions - a container for property value reaction configurations.
- PropertyValueReaction - configuration for a specific property value reaction.
- SurveyRefProperty - the reference property in the survey that points to the object to check (example:
IDENTITYREF). - PropertySysName - the system name of the Set or Reference property on the referenced object to check (example:
IDENTITYSTATUS). - PropertyValue - the guid value to check for in the set or reference property.
- SurveyAnswers - a container for the survey answers to set if the condition is met.
- SurveyAnswer - a specific answer to set.
- PropertySysName - the system name of the survey property to set.
- PropertyValue - the value to set for the property (string, Boolean, GUID for set properties, and other).
- SurveyRefProperty - the reference property in the survey that points to the object to check (example:
Special behaviours
- Manual assignment override.
If assignees were changed manually at any point, the reassignment process will not modify those questions. This prevents the code method from overriding deliberate manual reassignments. - Escalation timing.
SettingNumberOfDaysBeforeEscalationto0triggers the escalation immediately rather than disabling it. - Property value reactions processing.
- Property value reactions are applied before performing the recalculation of assignees.
- If survey questions are closed (answered) as a result of property value reactions, no assignees are recalculated for those questions.
- If - after applying property value reactions - no more unanswered questions remain, the code method automatically closes the survey that is in progress.
- Reference path syntax.
- User reference syntax:
User:UserName- references a specific user by their user name. - Group reference syntax:
Group:GroupName- references a specific user group by its name.
- User reference syntax:
- Property value types.
For set properties (such asIDENTITYSTATUS), thePropertyValueshould be the GUID of the property value. For value properties, the value type depends on the property data type:- Boolean properties - the value should be a valid Boolean string (true or false).
- DateTime properties - the value should be a valid datetime string.
- Integer properties - the value should be a valid integer string.
- Decimal properties - the value should be a valid decimal string.
- Text/String properties - any text value.
- Survey closure behaviour.
- After processing property value reactions, if all survey questions were answered, the survey is automatically closed by the method.
- Property value reactions can potentially lead to an early completion of the survey if all questions have been answered.
- Assignment recalculation logic:
- The recalculation only occurs for non-completed survey objects.
- If all objects in the survey were completed, the survey is closed.
- Escalation adds new assignees according to the configured reference paths – when the specified number of days has elapsed since the survey was launched.
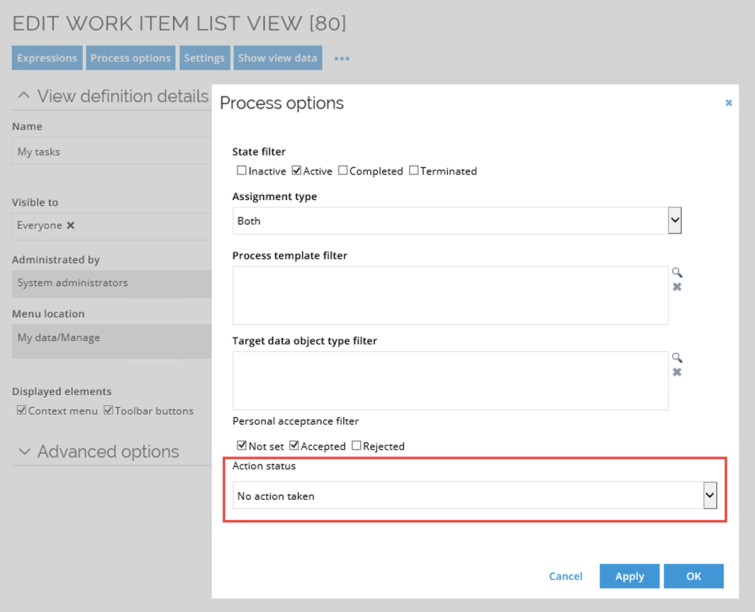
My Tasks view configuration
Omada recommends that you change the configuration of the My work items view, so that it does not display those work items where the user has already taken an action (set it to No action taken). This ensures that only the active tasks are shown in the list.
Survey security
A newly published survey process template will be available in the list of process templates for the creator of the survey template and users in the System Administrators group. If other users need to have access to launch a survey of this type, the security settings must be changed for the survey template.
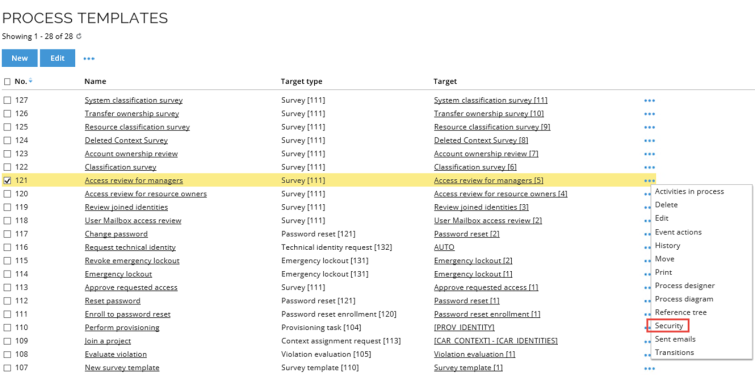
Access to process template
User groups that should be able to start a survey process must be given access to the Process Template.
-
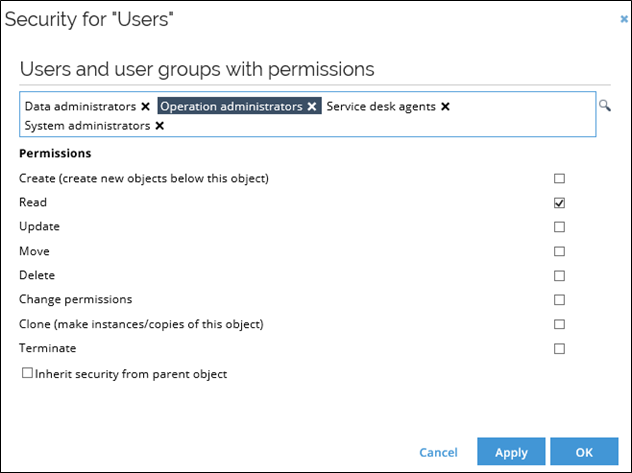
Click the ellipsis menu for the relevant process template in Setup > Administration > Data Management > Process Templates. Select Security from the context menu.
-
Add the user or user group and set the security as below.
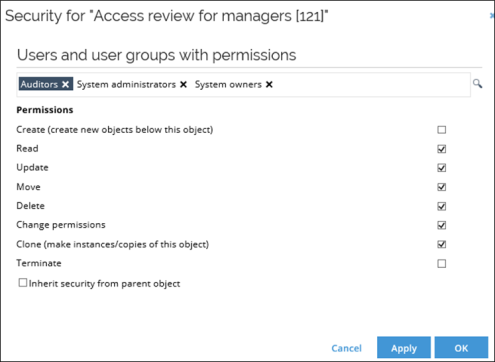
Read permissions to user
Survey administrators must be given read access to the User object in order to be able to re-assign survey questions.
User object in surveys
In some of the standard application surveys, there is an option to select a proposed owner. Normally, users without administrative permissions do not have access to read user objects. Thus, they will not be able to select a user object in this property.
You can change the access modifier in the lookup view for the proposed owner property if you do not want to give access to all the users globally.
Custom logo in survey question report
You can add a custom logo the Survey Question report by adding a customer setting that points to the new logo file.
To do this, use the customer setting SurveyPDFReportsLogo. The value of the setting should be a Base64 encoded logo image that will be used as a logo when exporting Surveys to PDF.
Mass edit
You can use mass edit to select more than one question and answer them at the same time. However, when using mass edit functionality, you can select parent or child questions but never both of them at the same time. In case both types are selected, a warning message will show up.
Enable mass edit
To enable mass edit functionality in the Access request approval survey, follow these steps:
-
Navigate to Process templates and locate the process template for the Access request approval survey.
-
Select the Target object.
-
Press Ctrl + Right-click anywhere on the page and select Form designer from the context menu.
-
Click on the Survey form section and select Edit.
-
Remove the text
[class=PanelHidden]from the Description field and unselect the Hidden (clientside) checkbox.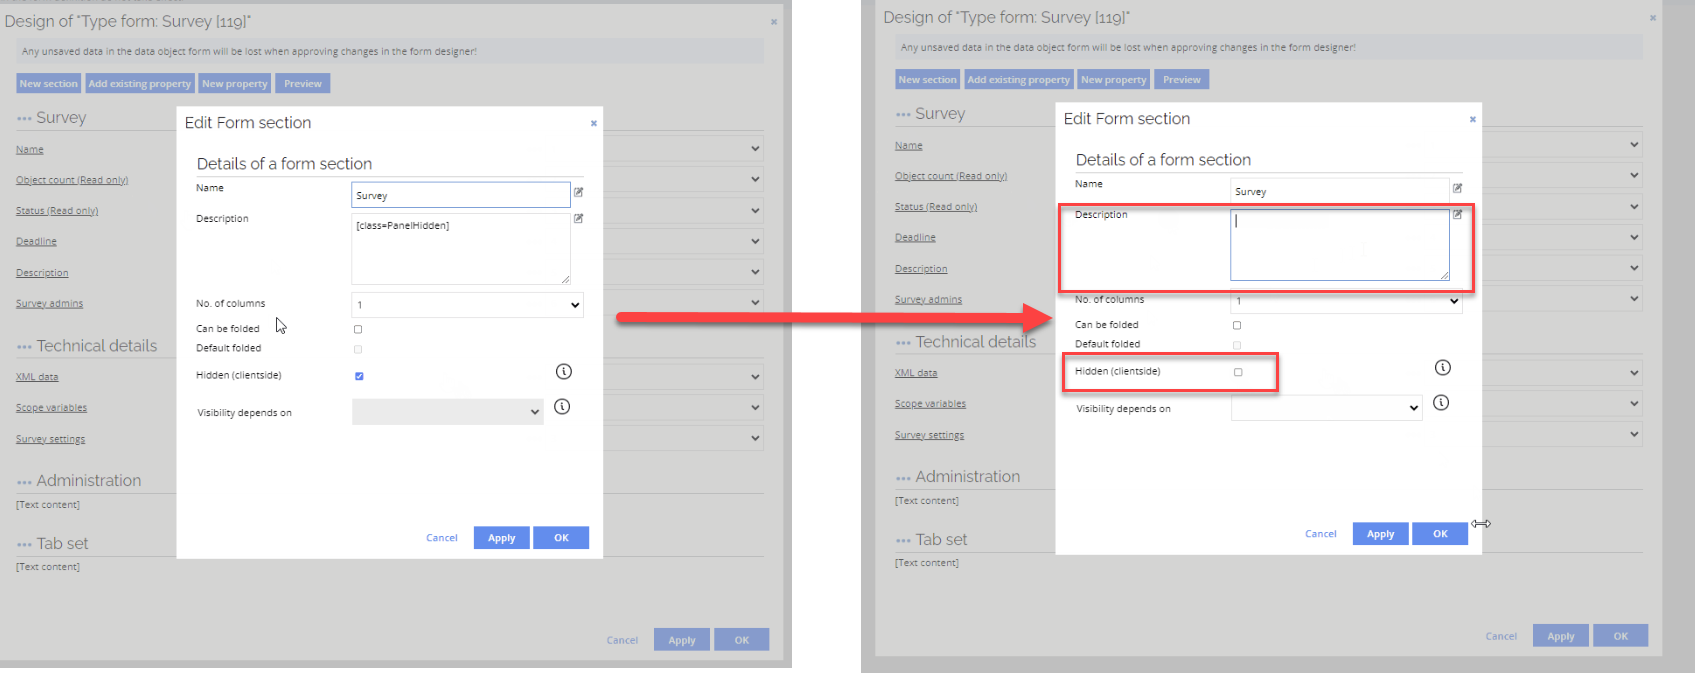
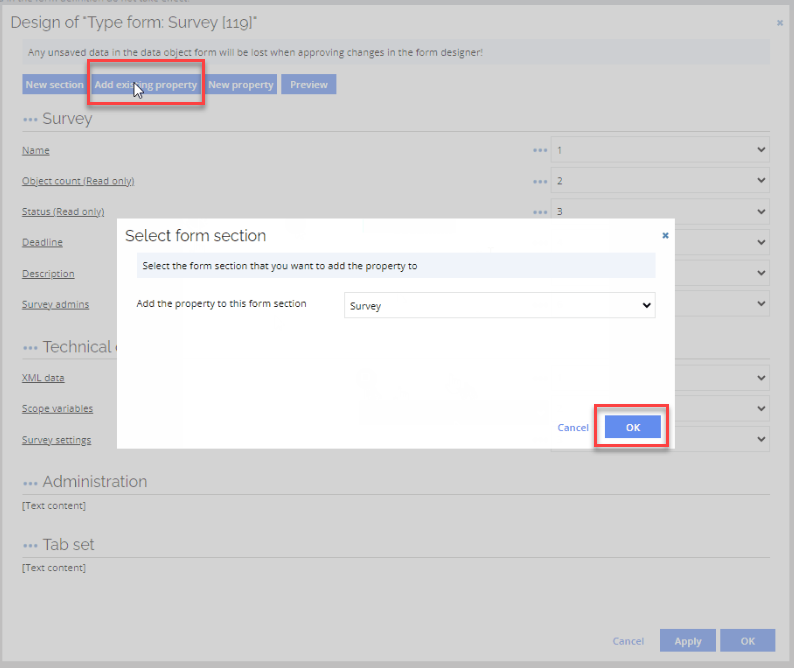
-
Select Add existing property and click Ok.
-
Select the Enable mass edit property.
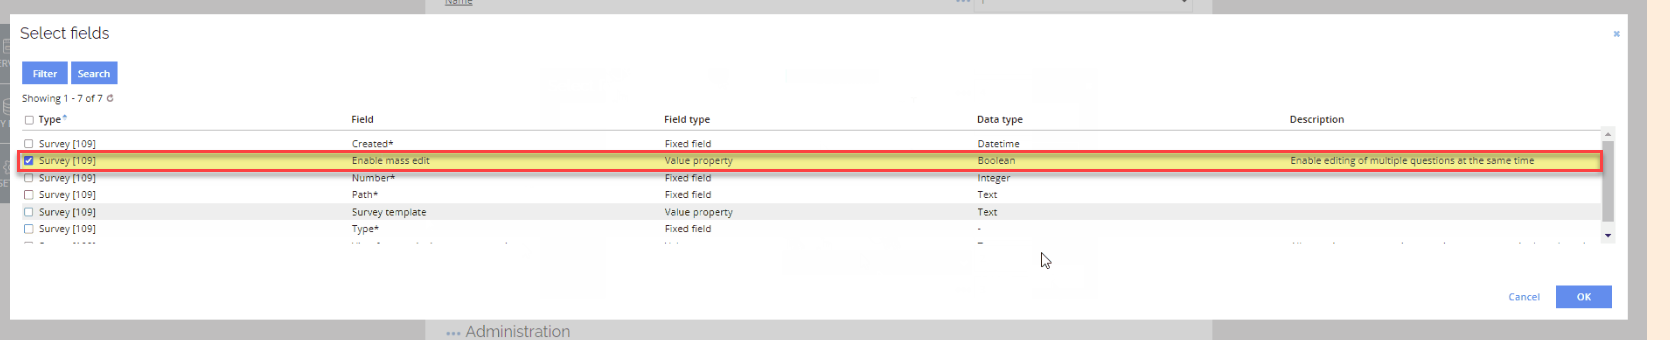 note
noteEnable mass edit must be enabled on the specific property that was added to the Survey data object type (DOT) in the previous steps. The number of multistate or editable attributes configured in the survey template form does not affect mass edit availability unless the Enable mass edit option is explicitly selected for the added property. If it is not enabled, the mass edit functionality will not be available, even if multiple editable fields are present in the survey template.
-
(Optional but recommended)
After completing the configuration, re-add the text
[class=PanelHidden]to the Description field and re-enable the Hidden (clientside) option, as described in step 5, to restore the original visibility of the survey panel.
The visibility and editability of these fields during mass edit can be configured in the Survey template under the Forms tab by selecting Fields from the menu. If none of these fields are set as visible/editable, mass edit will effectively be disabled for the survey.
Background data generation for Surveys
It is possible to queue the generation of survey data for background processing via the timer service. To do that, when initiating a survey, click on the checkbox Generate data in background.
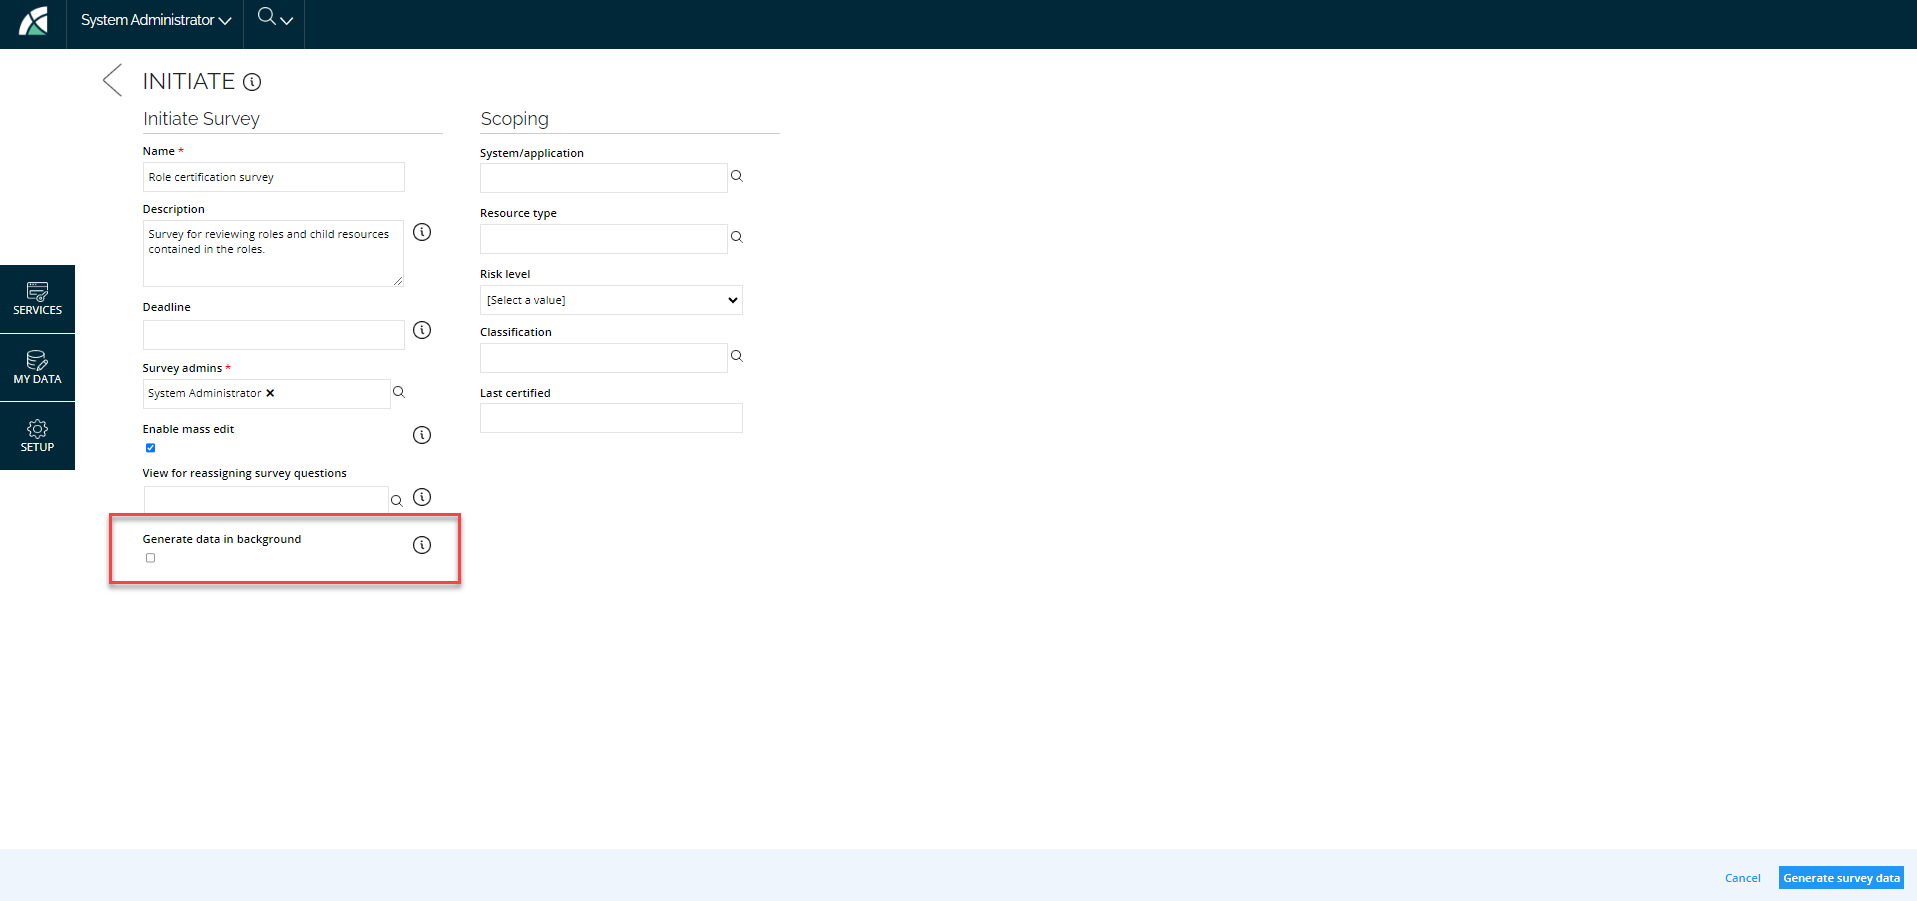
If the checkbox is selected, and you click on the Generate data button, the survey data generation will be queued and processed in the background by the timer service.
After initiating the data generation, you will be directed to the verification step of the survey. A message at the top pops up indicating that data generation has been queued for processing.
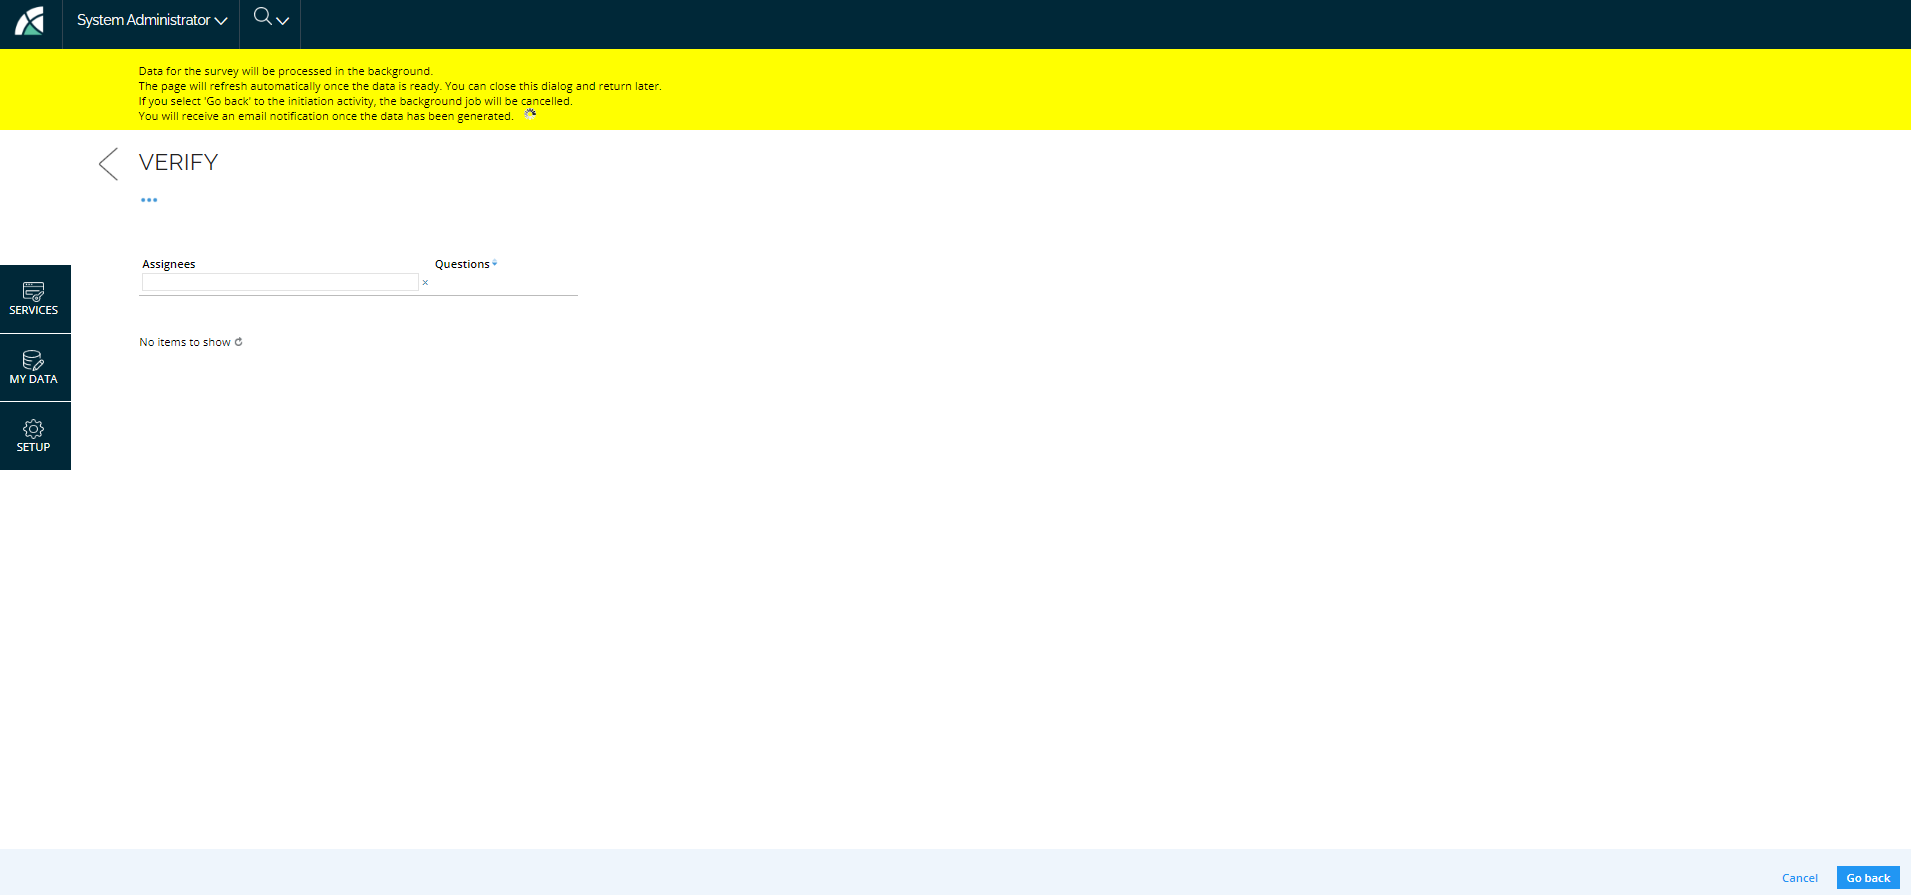
- You can close the dialog box and return to your task on the homepage. The survey task will remain accessible for further actions. Once the data generation is complete, the users who initiated the survey will receive an email notification.
- If you click the Go back button, the survey will be removed from the queue and will not be processed by the timer service.