Access approval
- The new Access approval UI will be activated only when the new UI is enabled in the upgrade.
- New UI processes cannot be added to the All services dashboard.
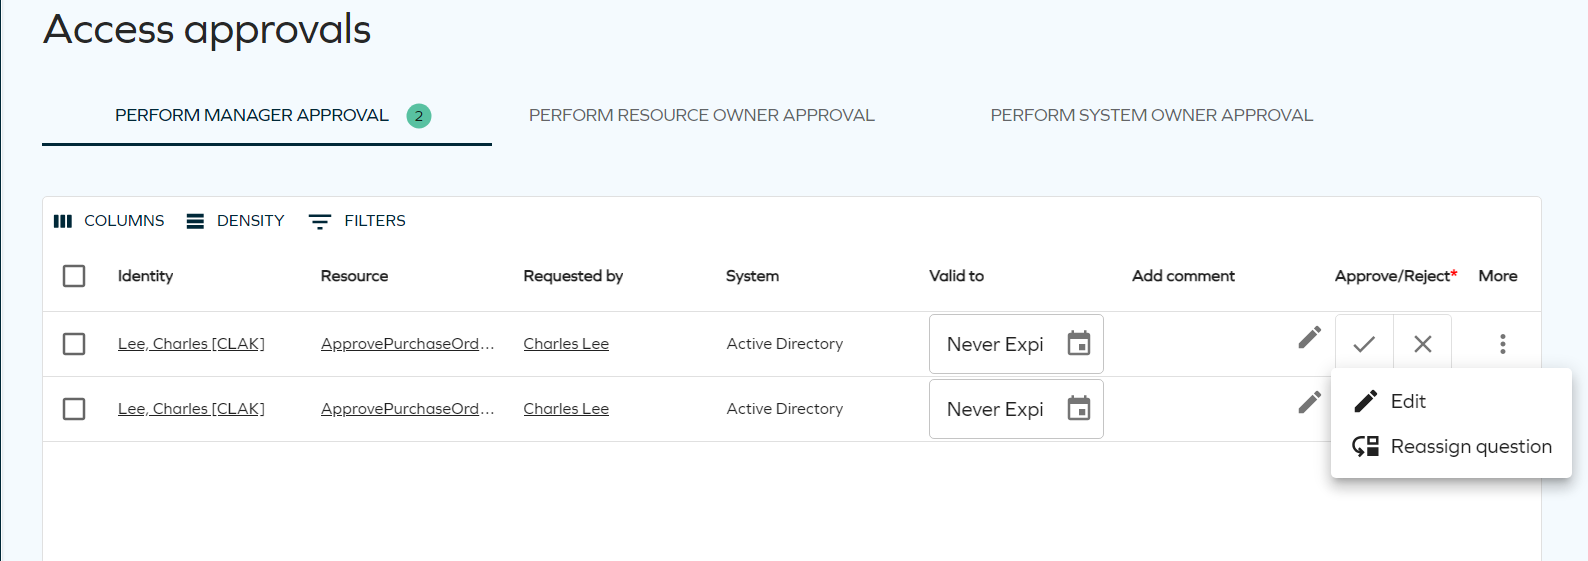
The Approval tab in the navigation pane allows you to view all the questions assigned to you. Clicking on this tab will display all the questions assigned to you. At the top, you will find different tabs based on your permissions and workflow steps. To view questions in each step, simply click on the corresponding tabs.
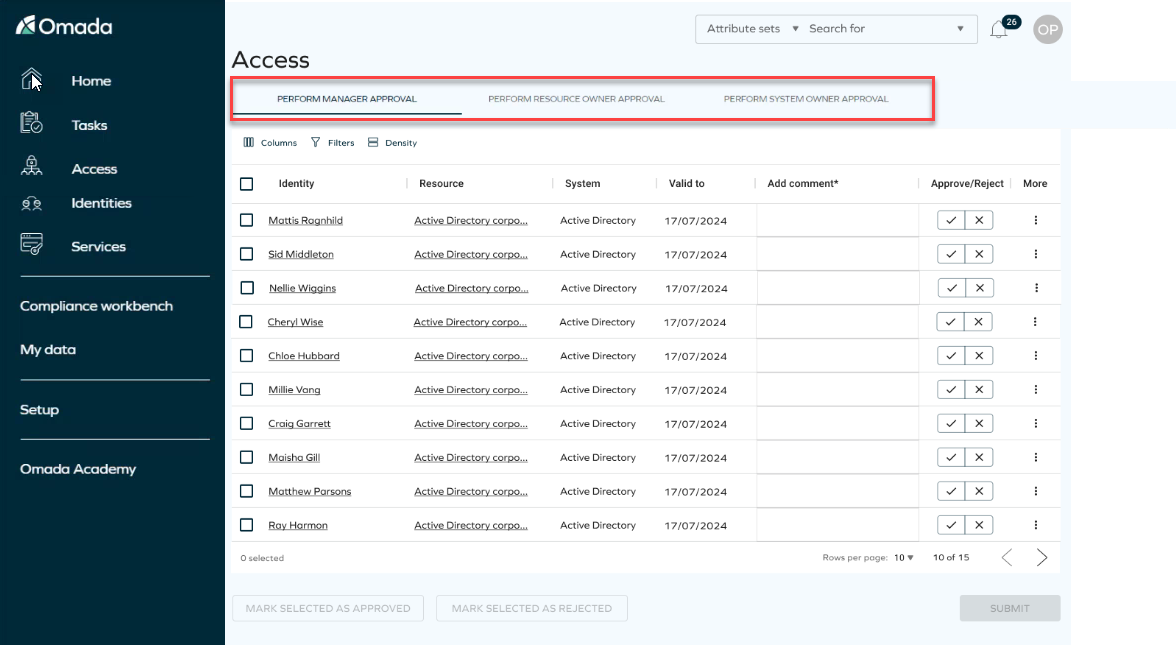
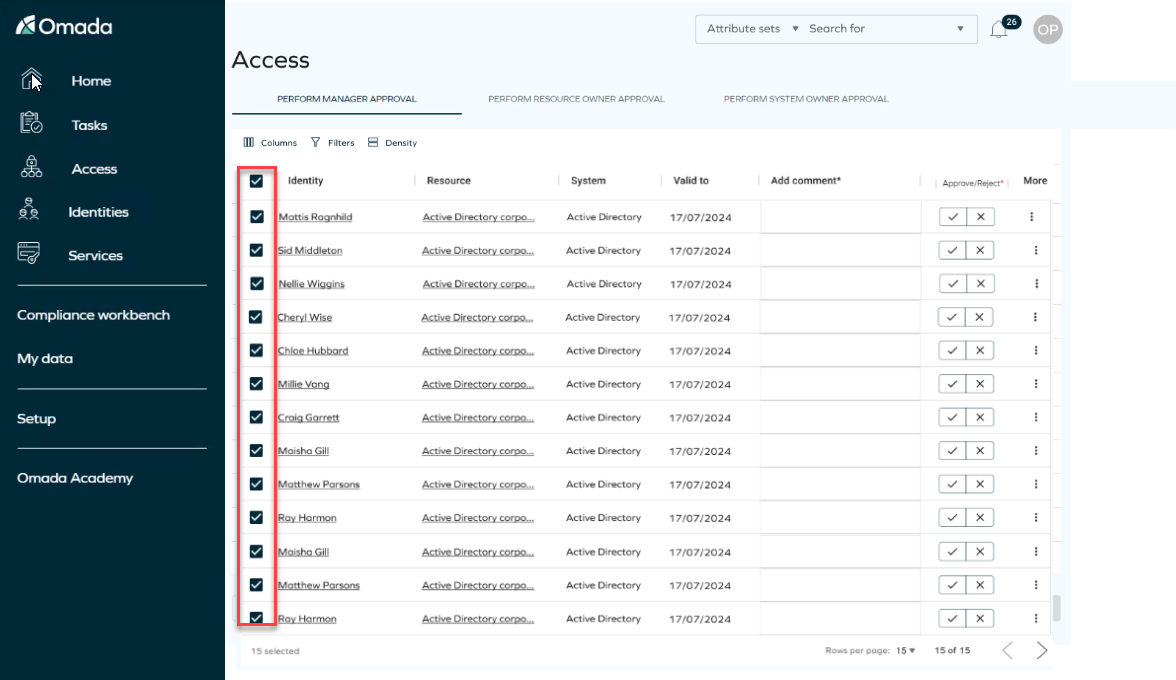
You can answer questions in bulk by selecting them all, choosing your answers, and then clicking Submit. It's crucial to submit your answers before closing the tab, as there is no option to save your changes for later retrieval.
If there is a mandatory column, a red indicator will appear, indicating that you need to complete it. You must fill out these fields in order to enable the submit button.
Clicking on the three dots More allows you to access additional information about the form. However, please note that editing is not possible.
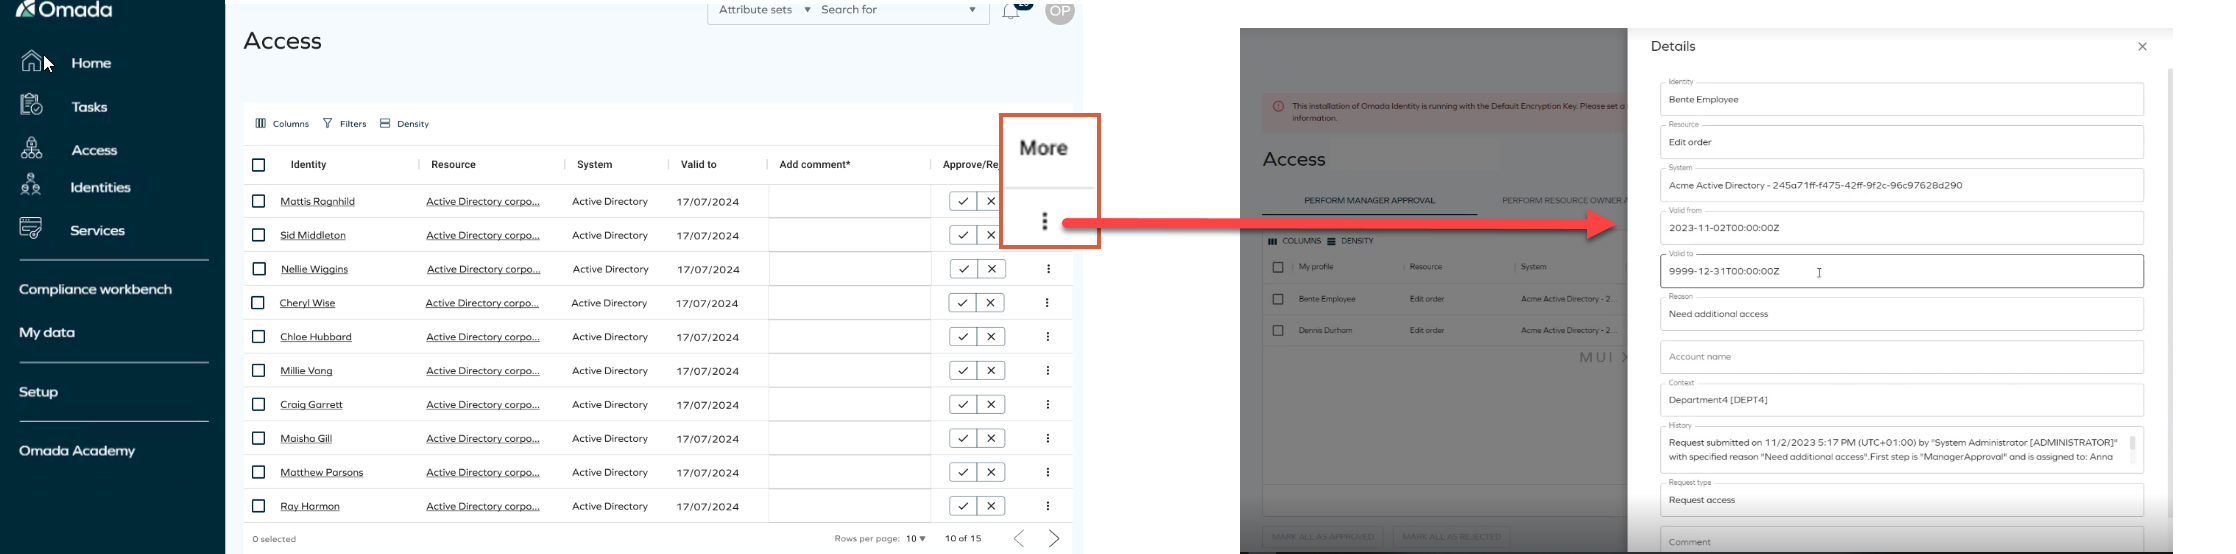
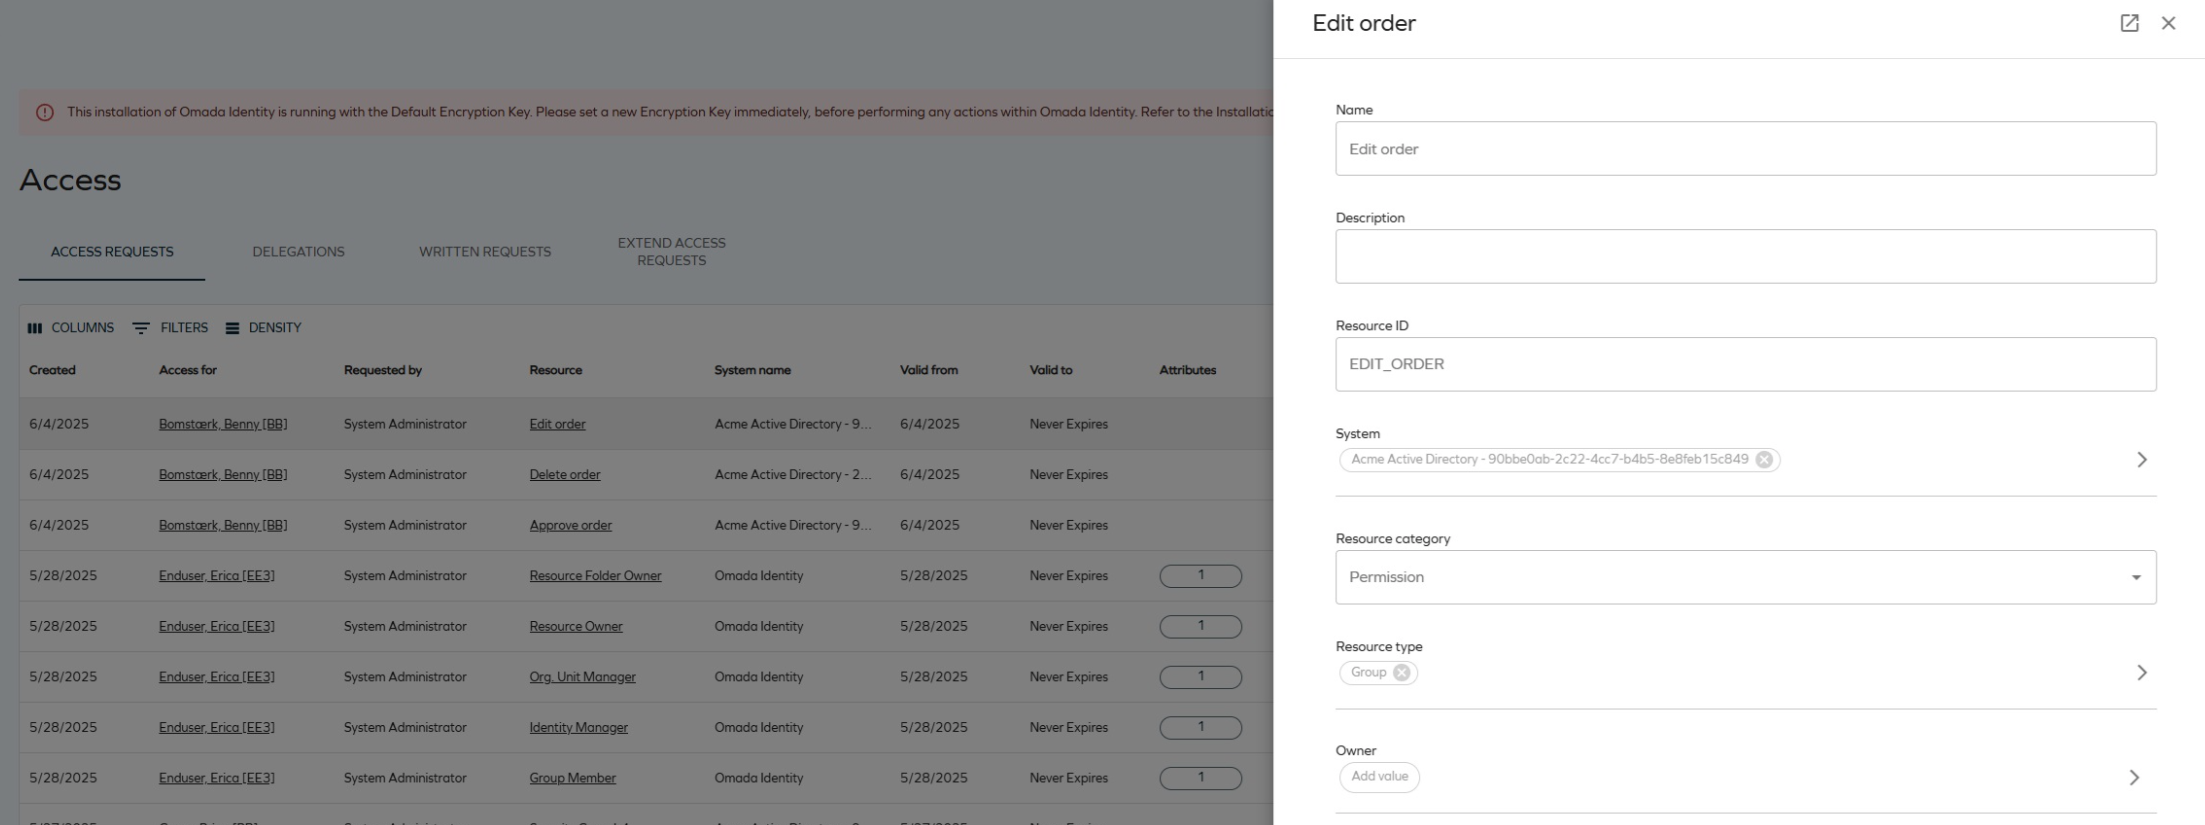
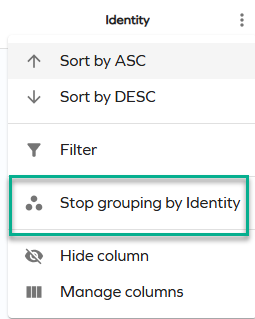
The Access for and Resource columns are clickable. An additional side panel is displayed, presenting more information about the data object in the read-only mode.
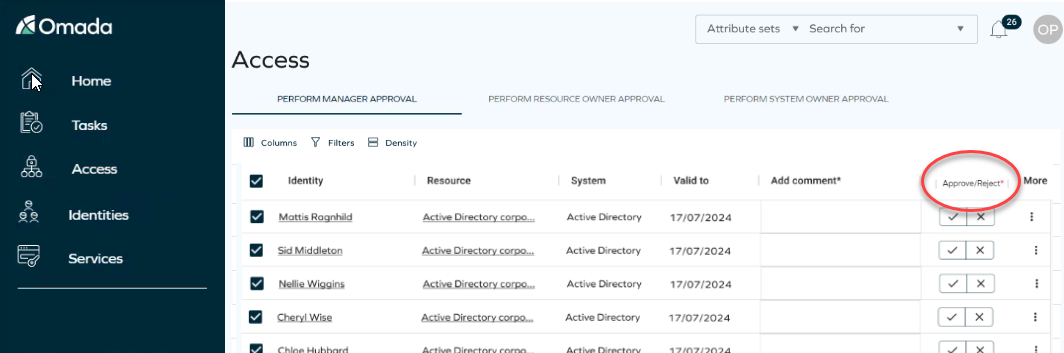
Approving or rejecting a request with a comment
While approving or rejecting a request, you can leave a comment for the requester.

To make the comment mandatory (and visible to the requester), enable the new customer setting ApprovalRejectionReasonRequired in the Standard Application category. When set to true, users need to enter comments for each rejected item, otherwise they won't be able to submit them.
Reassign questions
Survey questions can be reassigned to different identities by selecting one or more questions and assigning them to one or more users. To enable this, navigate to Customer Settings and search for Access approval survey reassignment view. Insert the UID of the view used for selecting users during the survey question reassignment process.
Once the question reassignment feature is enabled, you can initiate the reassignment process by clicking More next to the question you wish to reassign. This will open a menu where you can select Reassign questions.
To reassign multiple questions, utilize the checkmark column to select the desired questions. Then, click the action button to access the reassignment panel. The side panel that opens will display all users configured for the reassignment view.
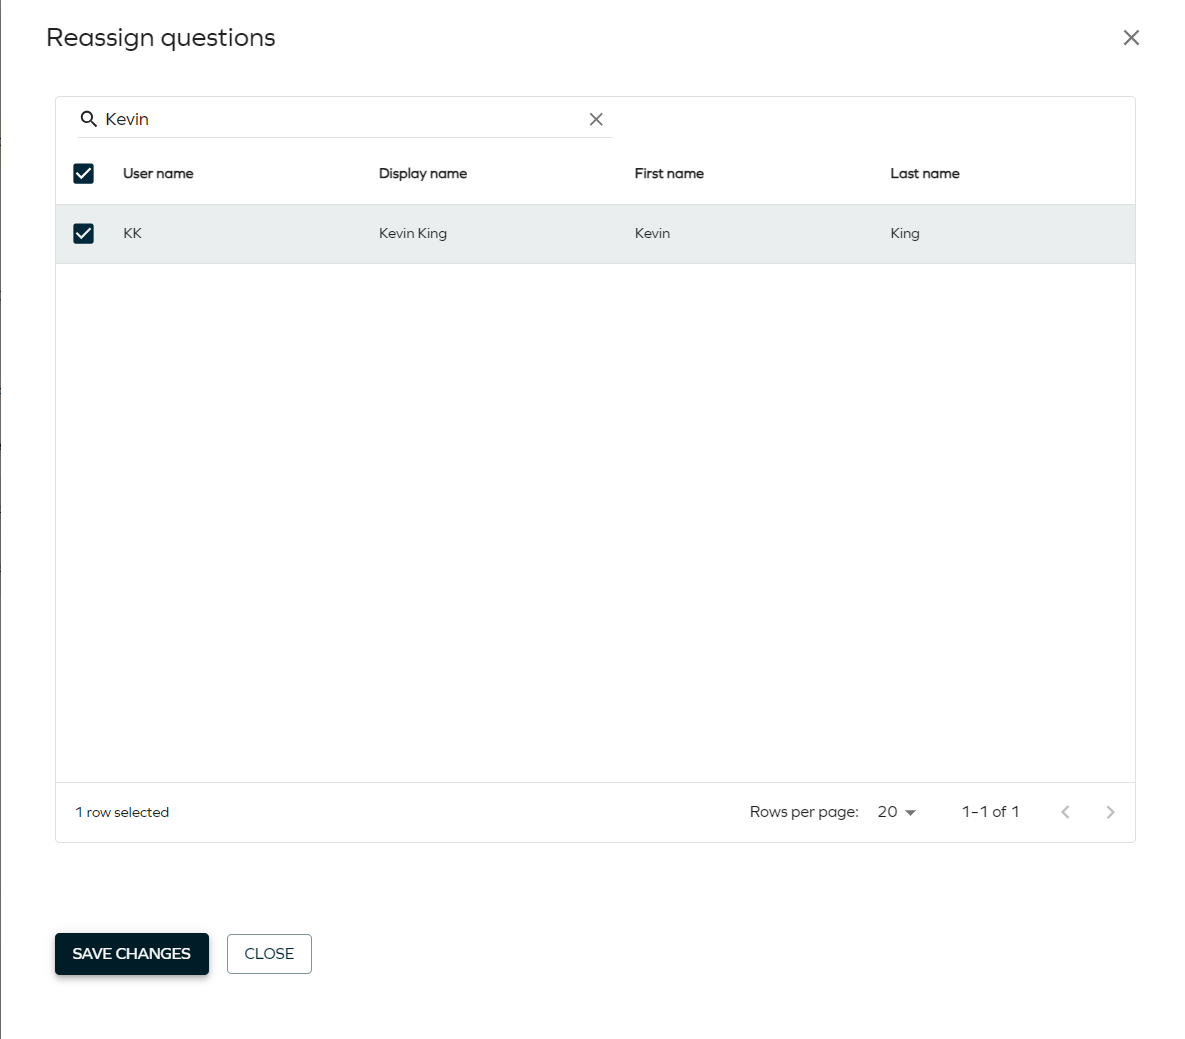
To filter identities in the reassignment view, use the input field at the top of the data grid. This allows you to narrow down the results based on the identity's display name.
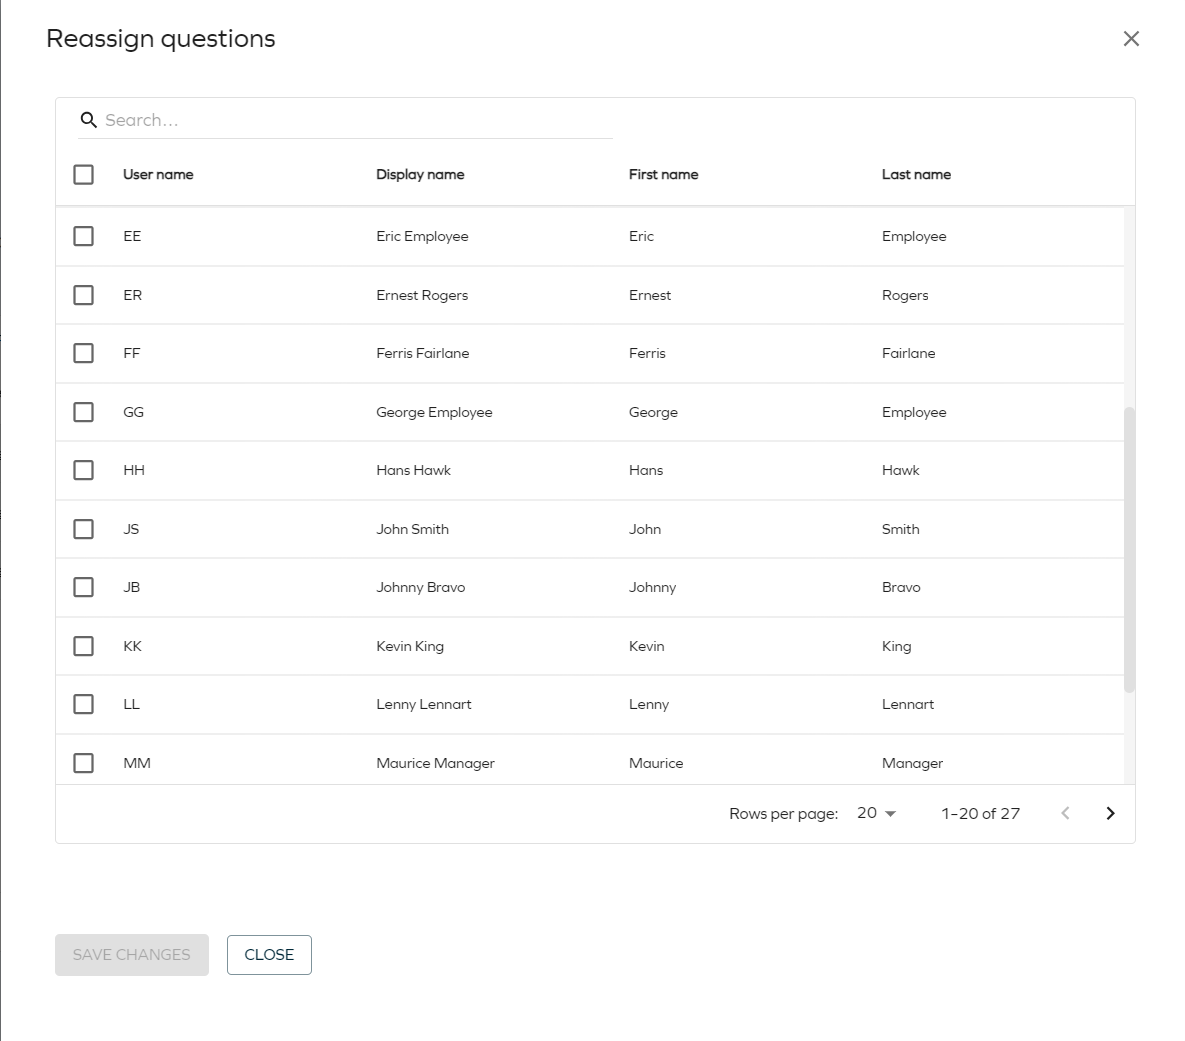
After selecting the users for reassignment, the Save Changes button becomes active. Clicking this button submits the reassignment, closes the panel, and triggers a success notification to confirm the reassignment.
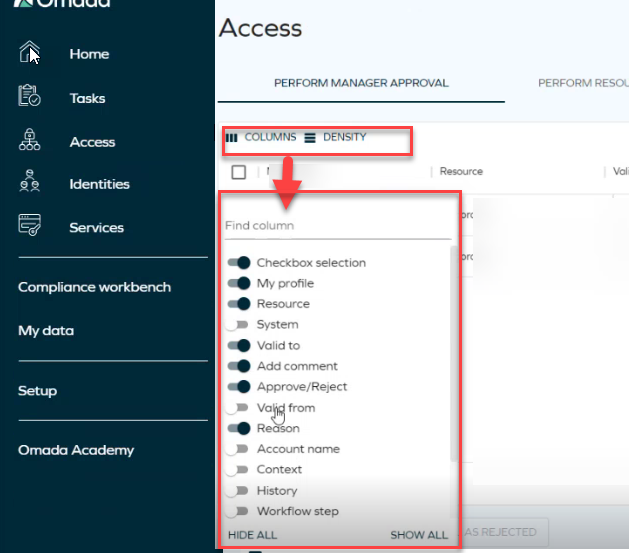
Filtering and grouping
You can use the columns and filters to customize how the page appears. Keep in mind that these changes will only be visible to you.
The search filter operates by matching the first letters of the word you are searching.
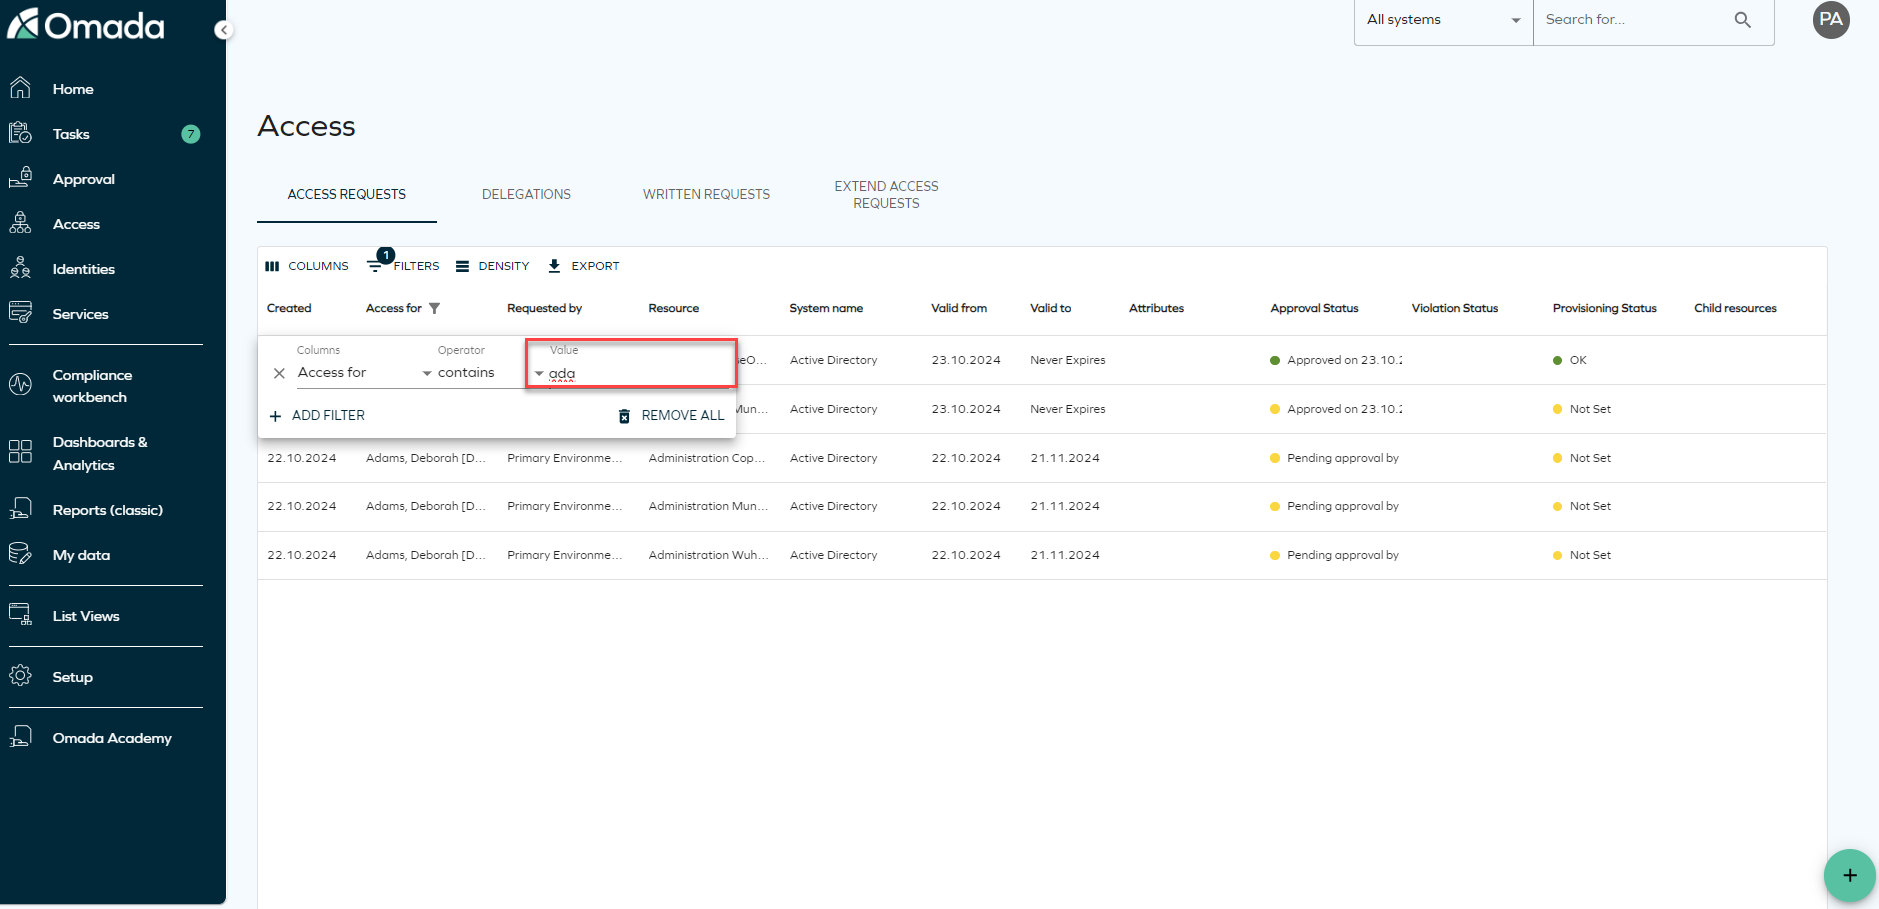
While reviewing requests sent for approval, you can also filter them by request types (access extension or access request). To do that, select Filters and choose Request type from the drop-down. Then, select Request access or Extend access.
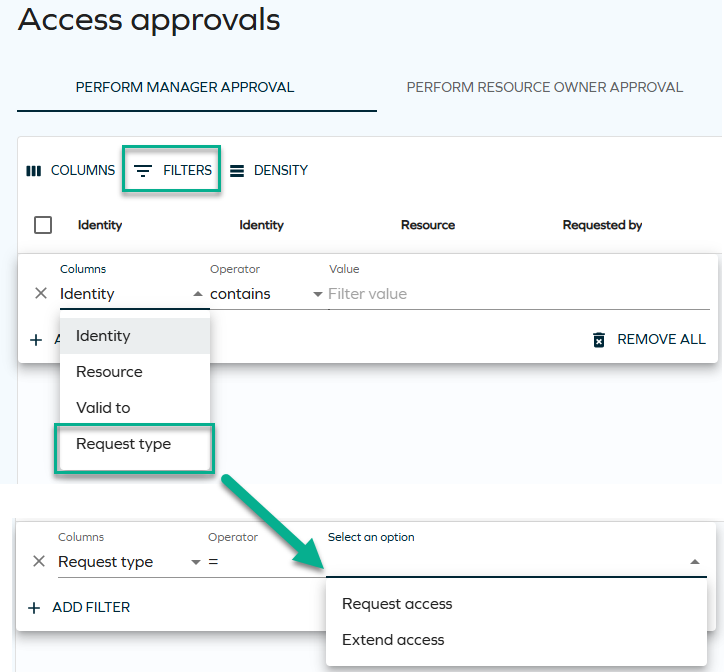
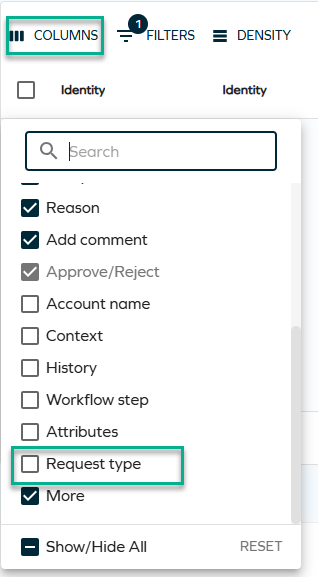
If you cannot see the Request type column in the table, click on Columns and tick the Request type in the drop-down.
Row grouping
You can group the rows either by identities (the default option) or by resources. To switch between these two groupings, select the ellipsis (three dots) next to Identity or Resource, and select Group by Identity or Group by Resource.
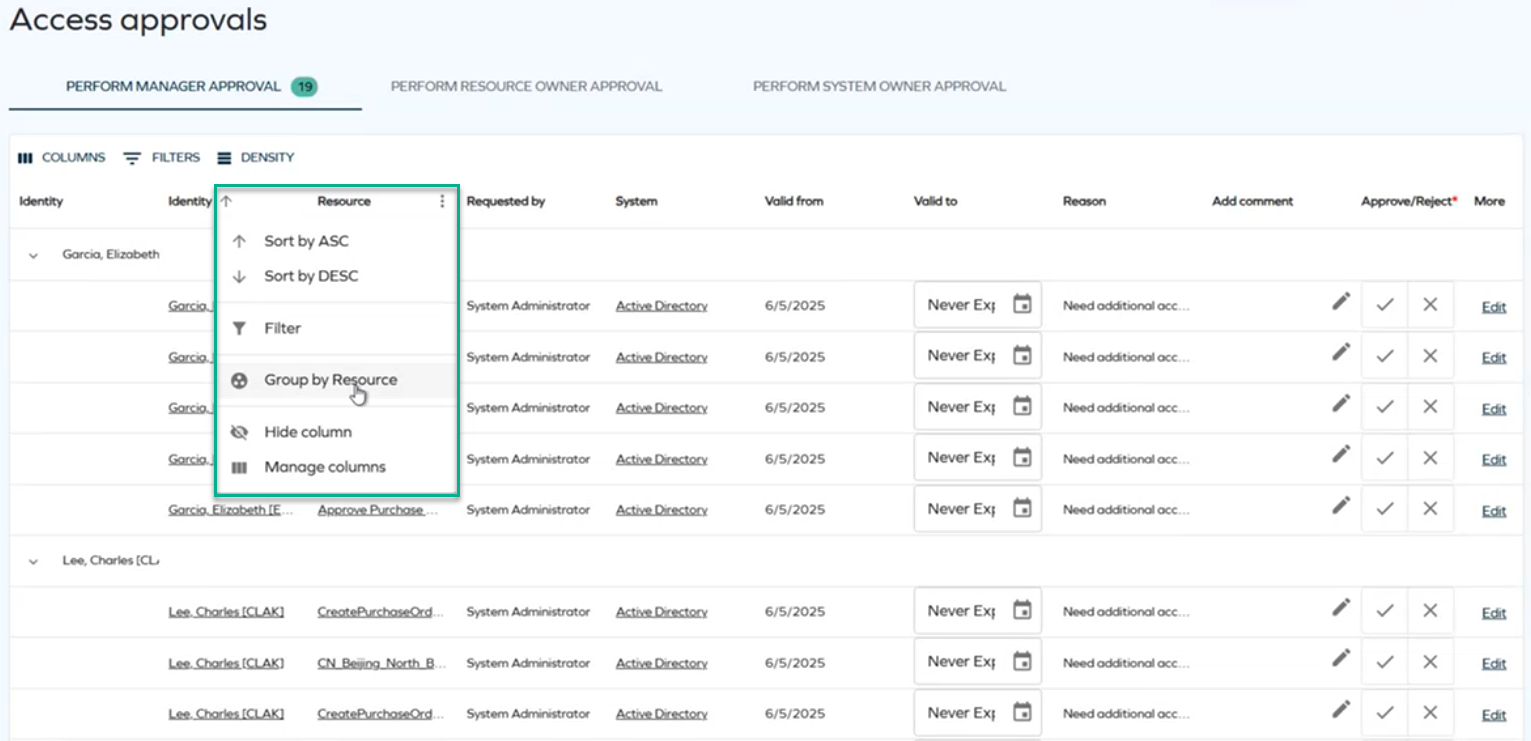
You can also choose no grouping at all by clicking Stop grouping by Identity or Stop grouping by Resource.
When you leave the page, the grouping of your choice (or the default one, if you did not modify it) is preserved for you.
Once grouping has been enabled on a column, you cannot change sorting: it is locked as it was before until you ungroup. Then, it can be toggled again. Once grouping is enabled again, it uses the latest sorting order.
The Group by setting that exists on the survey template level is not used when determining the initial state of grouping.
Additional information
-
Clicking on the underlined text will display additional information about that identity or resource.
-
If a user submits an access extension request, the approver sees both the original and new valid to date.

Policy & Risk Check
Policy and risk checks are automatically initiated when you access the Approval page. Additionally, you have the option to manually trigger the policy and risk checks by clicking on the Run risk check button.
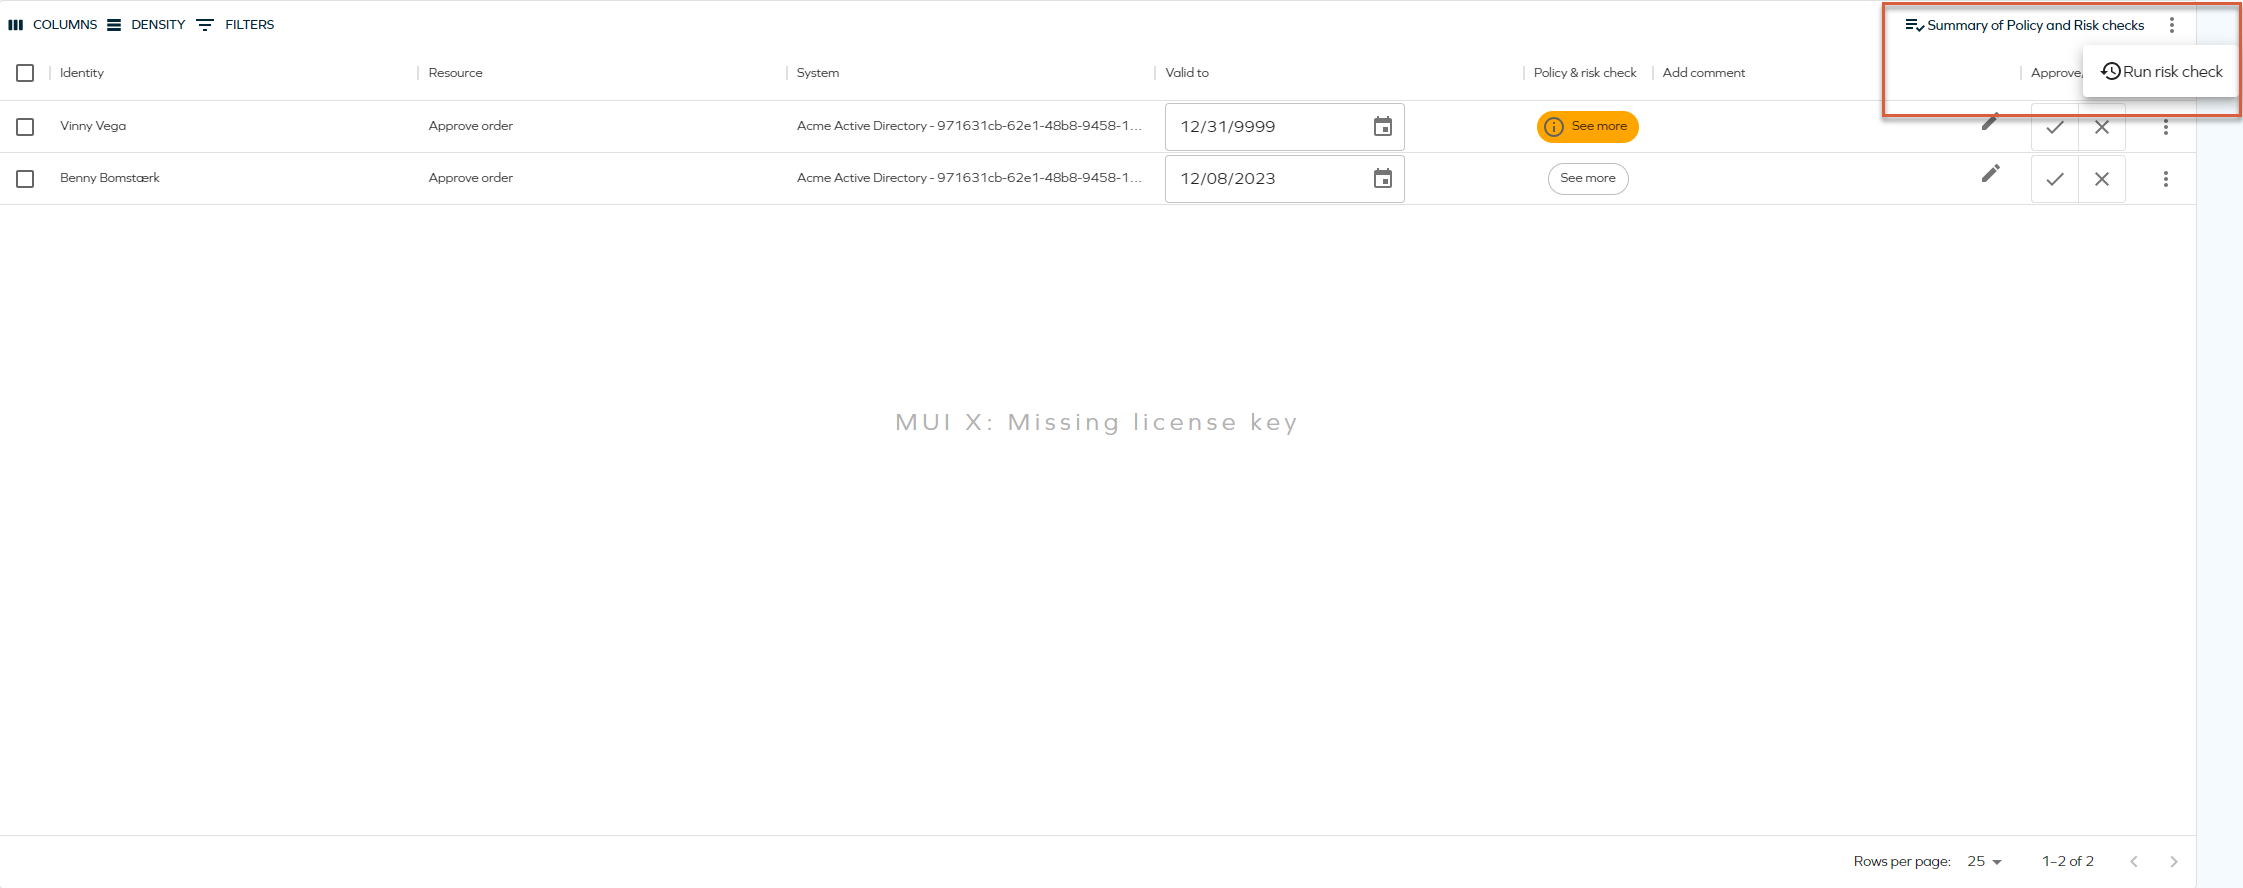
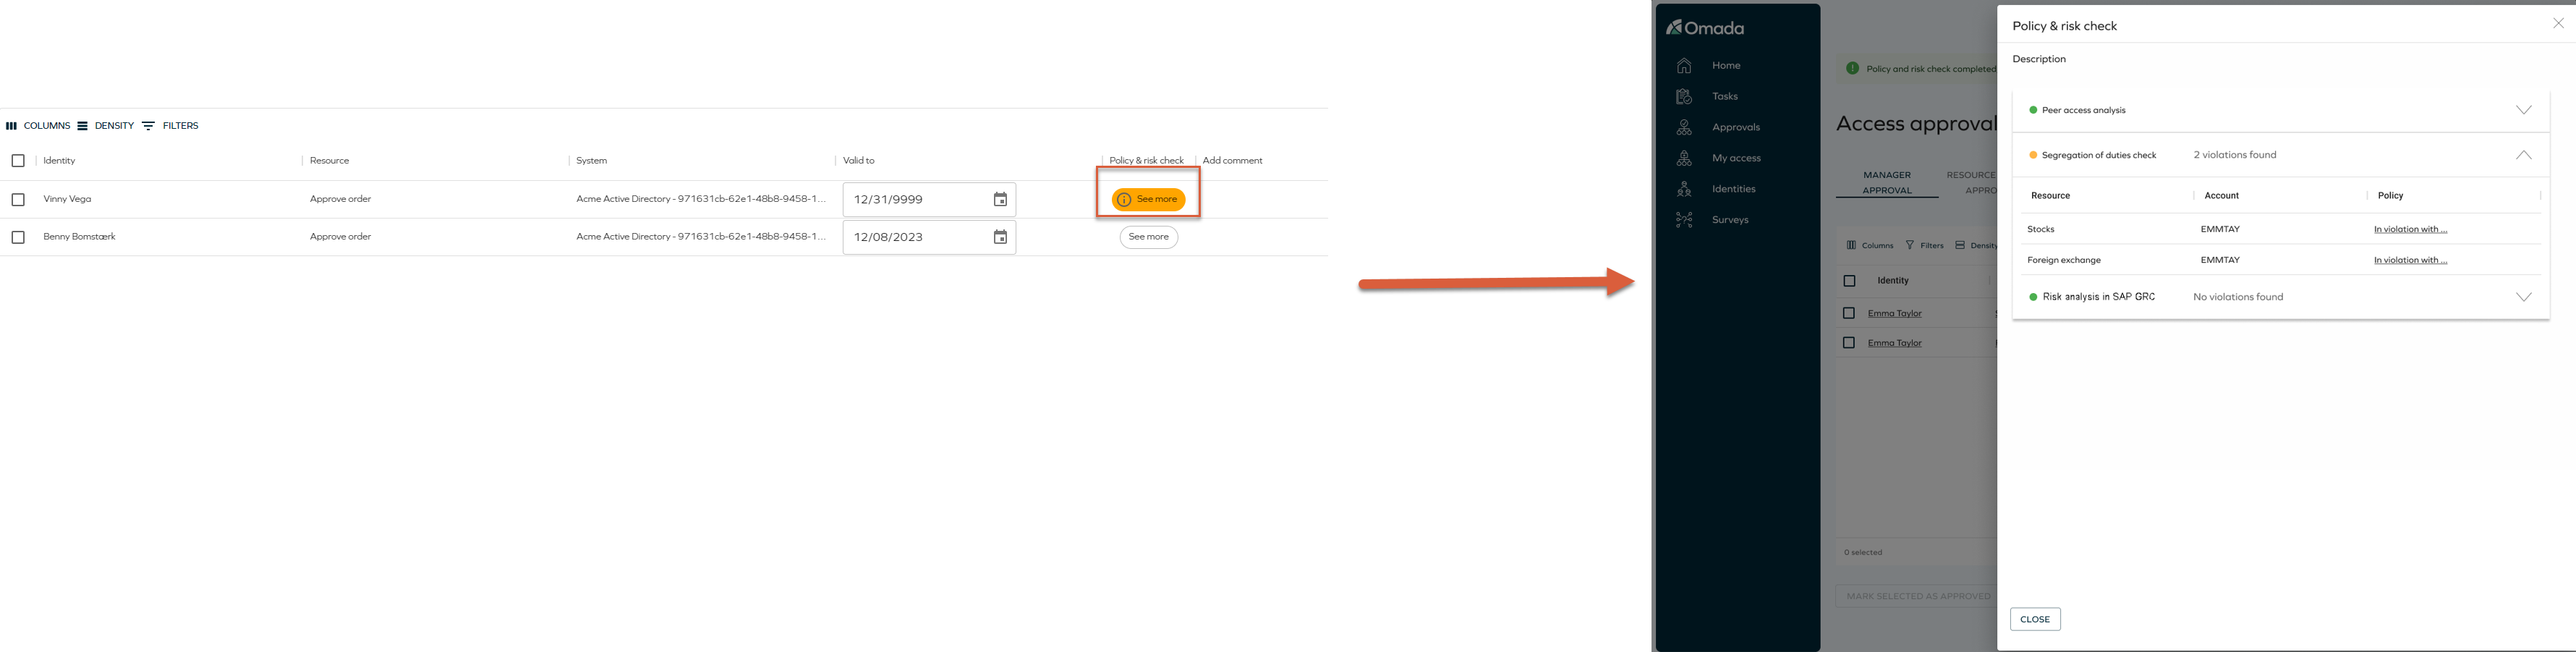
Once the check is completed and no violations are found then a confirmation message will display. You can view a detailed summary by clicking on the See More button within the Policy & Risk Check column. This will provide access to the summary, allowing you to review the results of the Peer Access Analysis check, Segregation of Duties check, and Risk analysis SAP GRC.
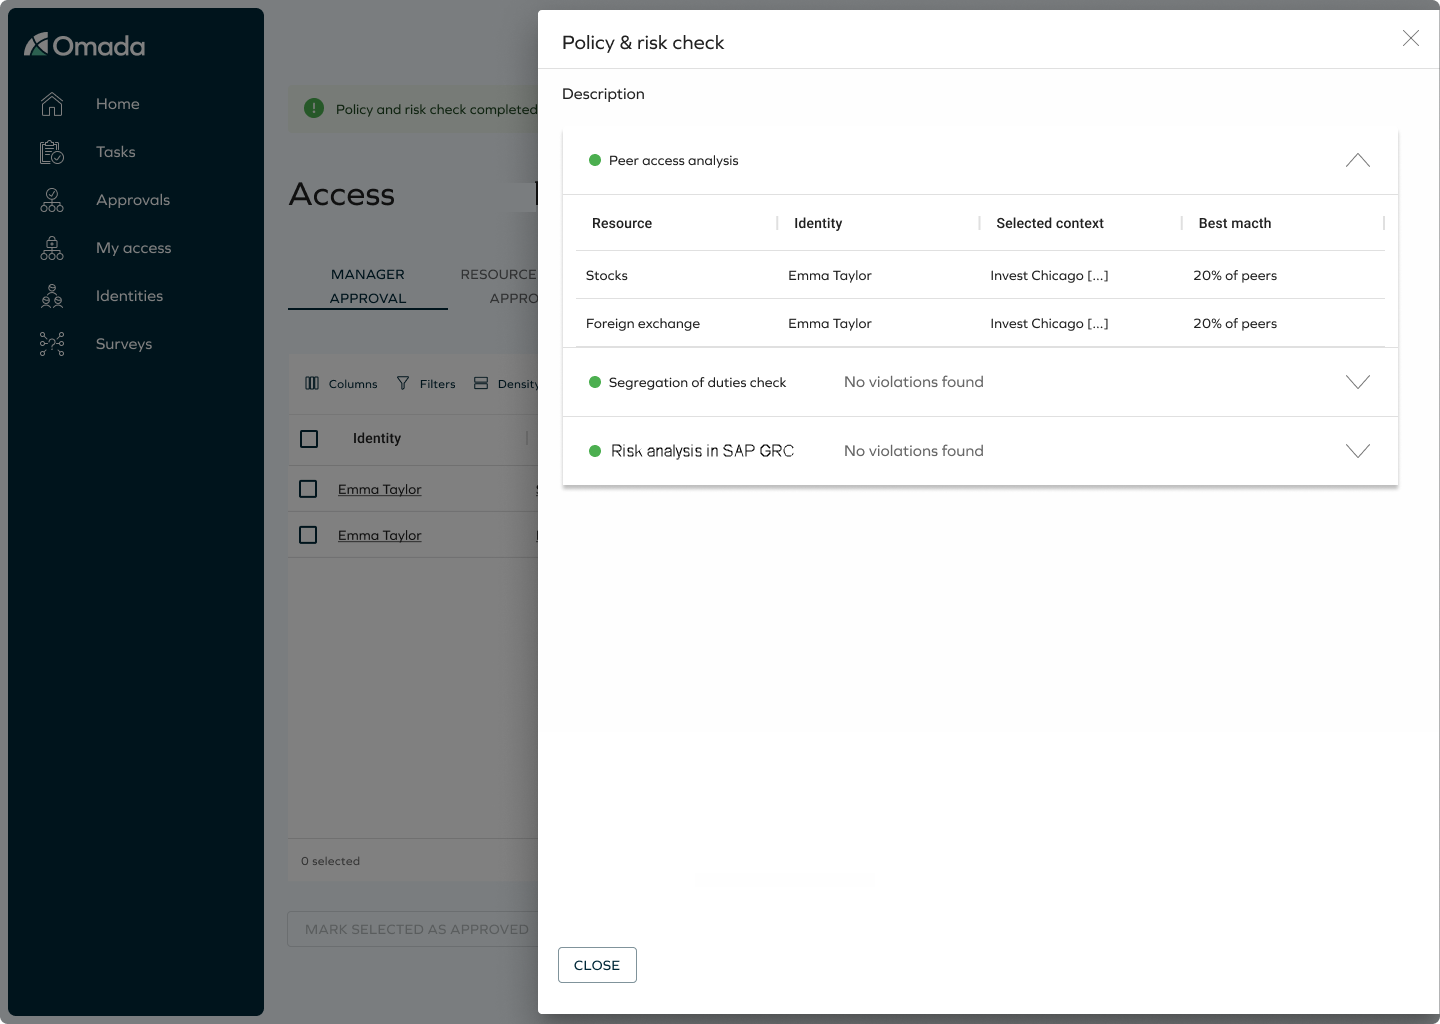
In the case that violations are detected, a warning message will pop up, indicating the presence of issues that require your attention. To inspect the violations, click on the See More button, which will open the Risk checks violations summary.
Custom templates
Custom email templates
Follow these steps to modify custom email templates to link to the Access flow:
-
Enable Use new UI for approvals customer setting: Go to Setup > Customer settings. Search for Use new UI for approvals and enable it by setting its value to TRUE.
-
Locate the email template: Find the templates under Setup > Email templates.
-
Identify the link to the activity: in each template, find the part of the template that generates the link to the activity.
-
Replace the activity link with the Approval UI link: replace the link for the activity, with the link to
/approveaccess/(Perform Manager approval tab is active by default), or to/approveaccess/(ActivityName) to active the corresponding tab for the activity. In this case (ActivityName) is the placeholder for the activity.- /approveaccess/ManagerApproval: Perform Manager Approval tab is active.
- /approveaccess/ResourceOwnerApproval: Perform Resource Owner Approval tab is active.
- /approveaccess/SystemOwnerApproval: Perform System Owner Approval tab is active.
Custom templates for Access approval
A custom template in Access approval allows you to create tailored approval workflows for Access requests. It enables the definition of specific criteria, roles, and processes that align with the organization's policies and compliance requirements. This customization enhances efficiency and ensures that Access approvals are managed according to the unique needs of the organization.
When using a custom template in Access approval, ensure the following fields are included and properly configured:
- ValidTo
- Comment
- Decision
If these fields are not required for your specific use case, you must still include them in the form as hidden and read-only fields to maintain functionality.
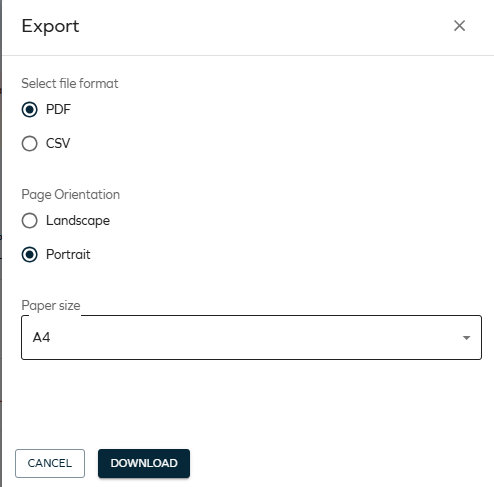
Exporting questions as a CSV/PDF report
You can export all questions as a CSV/PDF report by using the Export button. In the top grid, click Export:

In the panel, click Download:
The export process may take a while. On average, it requires 10 seconds per 1000 records.
Customizing the report
You can customize the report data by creating a custom view of the data grid (using the columns, filters, and sorting):
- Columns: exports the selected columns only.
- Data: exports one portion of your data by using the data grid filters.
- Sorting: exports data in the selected sorting (by sorting the data grid).
You can also choose between CSV and PDF formats. The PDF format can be additionally customized further – you can configure the orientation (landscape/portrait) and the page size (A3, A4, A5, a letter format).