Access Navigator
The purpose of the Access Navigator dashboard is to analyze the overall access that identities have.
Overview
This dashboard is divided into six tabs that let you gain insight into the access information from the perspective of:
Read below to understand what each tab displays, how the widgets relate to one another, and how you can use filtering and jump-to functionality to investigate access patterns in more detail.
Navigation
You can navigate directly between the Access Navigator dashboard and the Identities list in the Omada Identity Portal (Enterprise Server) to switch between analytical views and operational identity data, for example, to investigate findings from dashboards and then take action on the corresponding identities.

For details on how navigation between this dashboard and the Identities list works, including limitations, see the Navigation sections in Omada Identity Analytics and Identities.
Understanding and using widgets
Each tab contains different kinds of widgets that display valuable access information in the form of charts and tables.
Widgets differ on every tab. The only widget that appears on every tab is Identity list, a jumpable table that lets you access, for example, the Identity Details dashboard.
A jumpable widget lets you jump from a specific item to another tab to access more details. Widgets of this type are marked with an opening icon:
Navigating between jump-to dashboards
Jump-to dashboards (JTD) are ones that you can jump to from a given widget. Within such dashboards, you can access even more details about identities as well as their accounts and assignments.
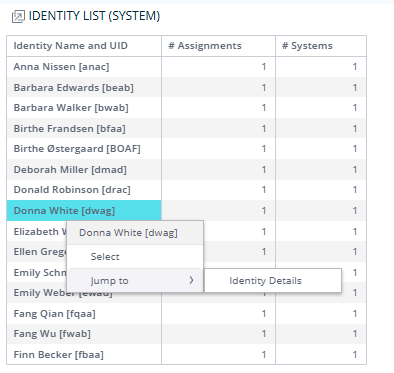
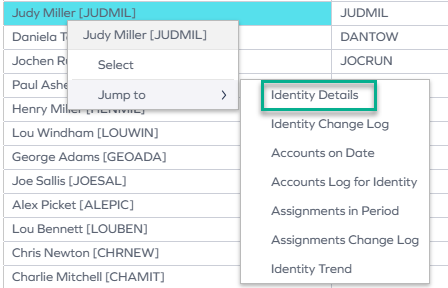
To jump from a widget to a dashboard, right-click an item, select Jump to >, and select the dashboard you want to view.
For instance, if you select the Systems tab, go to the Identity list table, and select an item (by right-clicking it), you can jump to a number of dashboards to narrow down your analysis and look for access patterns:

For a detailed description of a jump-to dashboard (Identity Details), see #
Data update cycle and date-based analysis
The data displayed on OIA dashboards reflects the state of the last successful build, which occurs every day after midnight; it is not streamed live. For more information, see the introduction to dashboards: Omada Identity Analytics – Data model.
Selecting time frames with the date picker
Each of the widgets displays information from a given period or point in time. By default, it is the last day or the last month, depending on the dashboard.
However, some widgets let you change the time frame:
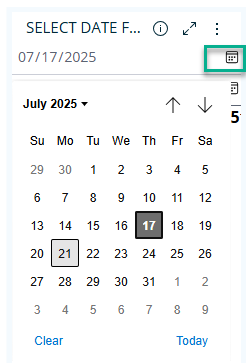
If you want to switch from the latest to historical data, you can change the dates by using the date picker. Click the calendar icon and select any dates of interest to you.
Navigating through access data on all tabs
Each tab provides a different perspective on the same access data, allowing you to analyze identities, systems, assignments, contexts, accounts, and resources while using consistent filtering and jump-to functionality across all tabs.
Because filtering persists across tabs, you can perform cross-tab analysis by selecting an item in one view and immediately exploring its impact in the others.
Read below to understand the types of data available on each tab. Then, follow the example use case to learn how to perform a cross-tab analysis of access data step by step.
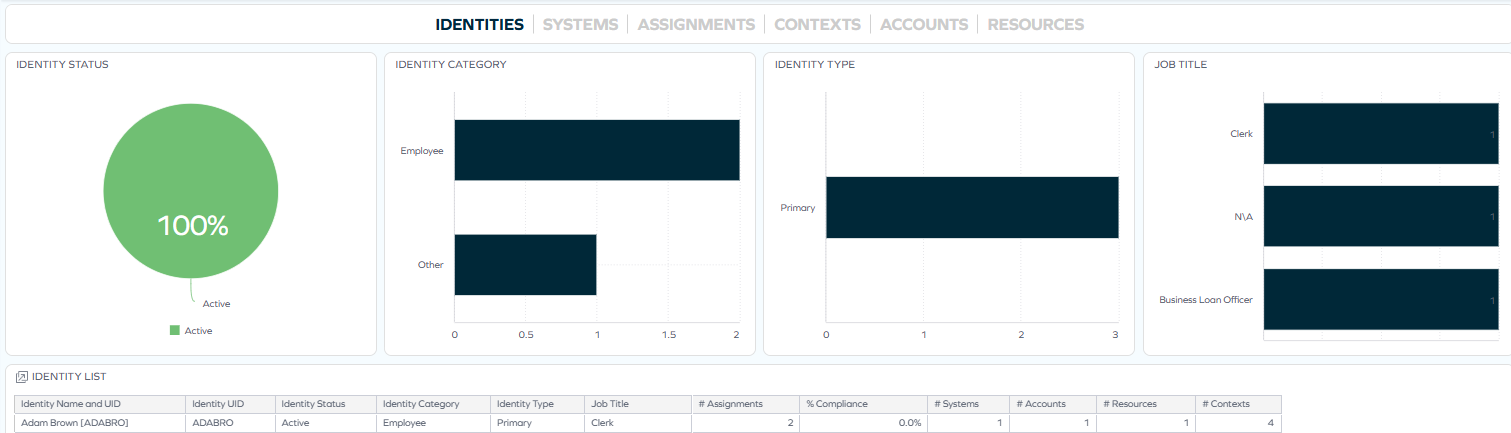
Identities tab
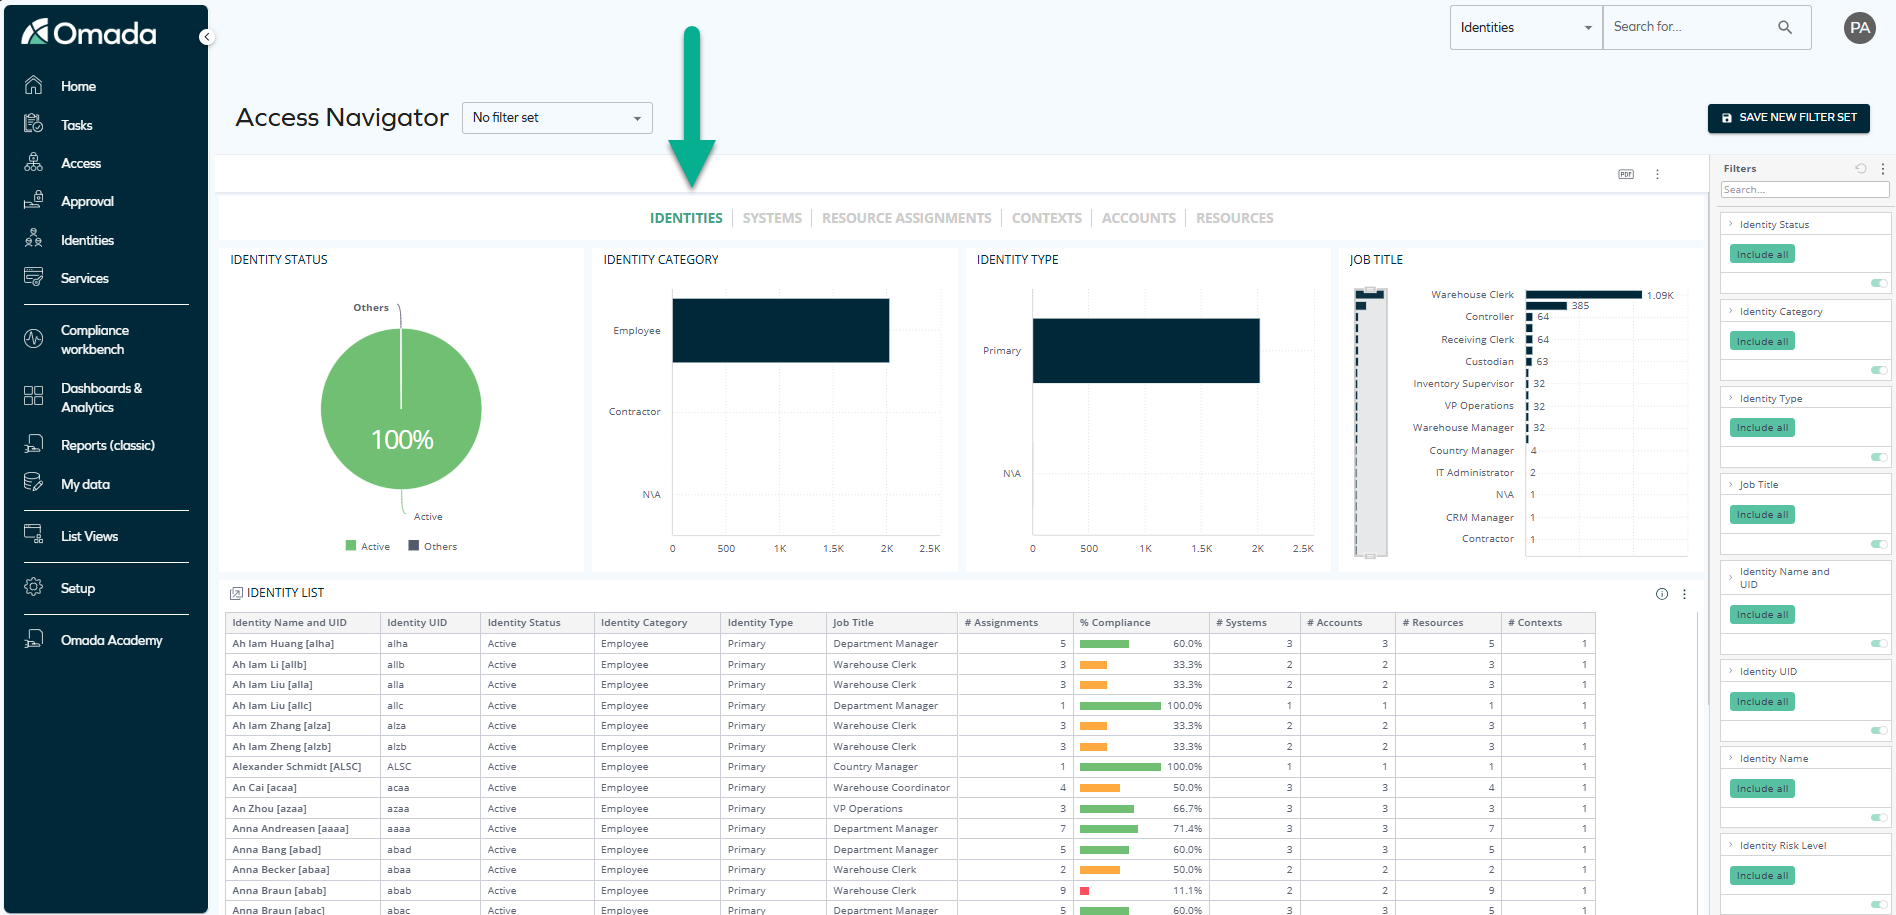
This tab shows information related to identities that have particular access.
It contains a number of widgets:
-
Identity status – shows the percentage of active and other identities.
-
Identity category – shows the number of identities belonging to particular categories (for example, employee, contractor, N/A).
-
Identity type – shows the number of identities belonging to particular types.
-
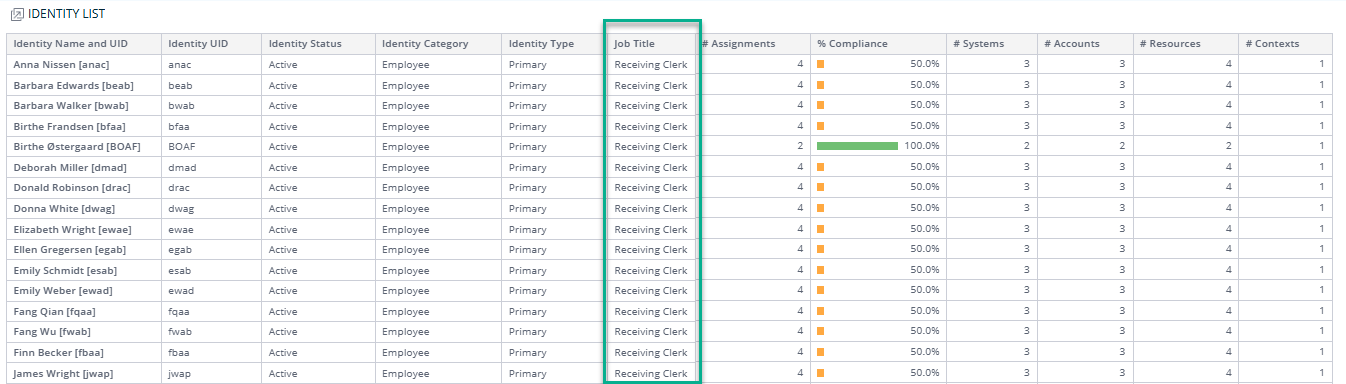
Job title – shows statistics related to job titles.
-
Identity list – a widget that shows the same data as above and more, including the Identity UID, number of assignments, accounts, resources, and contexts.
Identity list is a jumpable widget. Within it, you can select an item (by right-clicking it) and jump to the following dashboards:
- Identity Details
- Identity Change Log
- Accounts on Date
- Accounts Log for Identity
- Assignments in Period
- Assignments Change Log
- Identity Trend
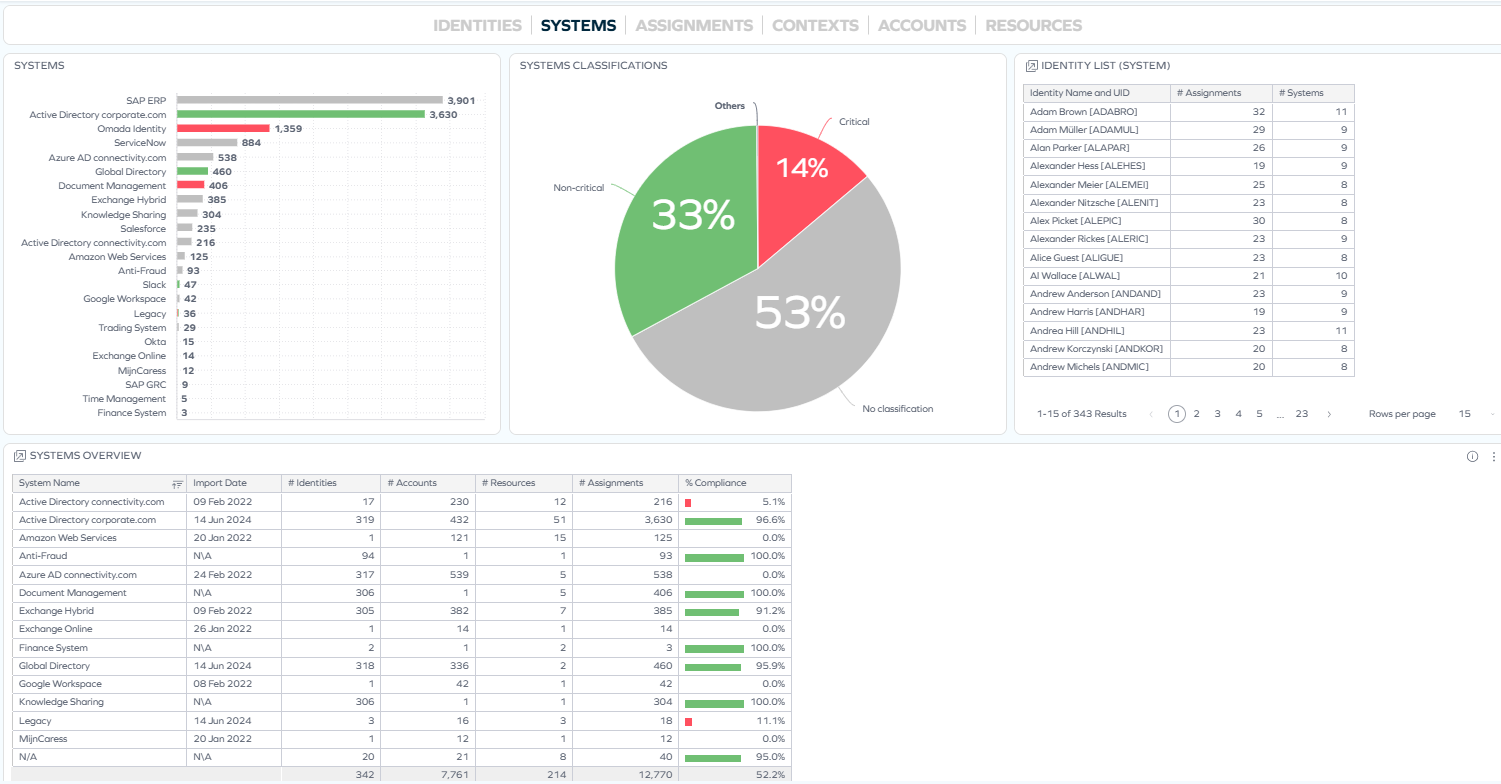
Systems tab
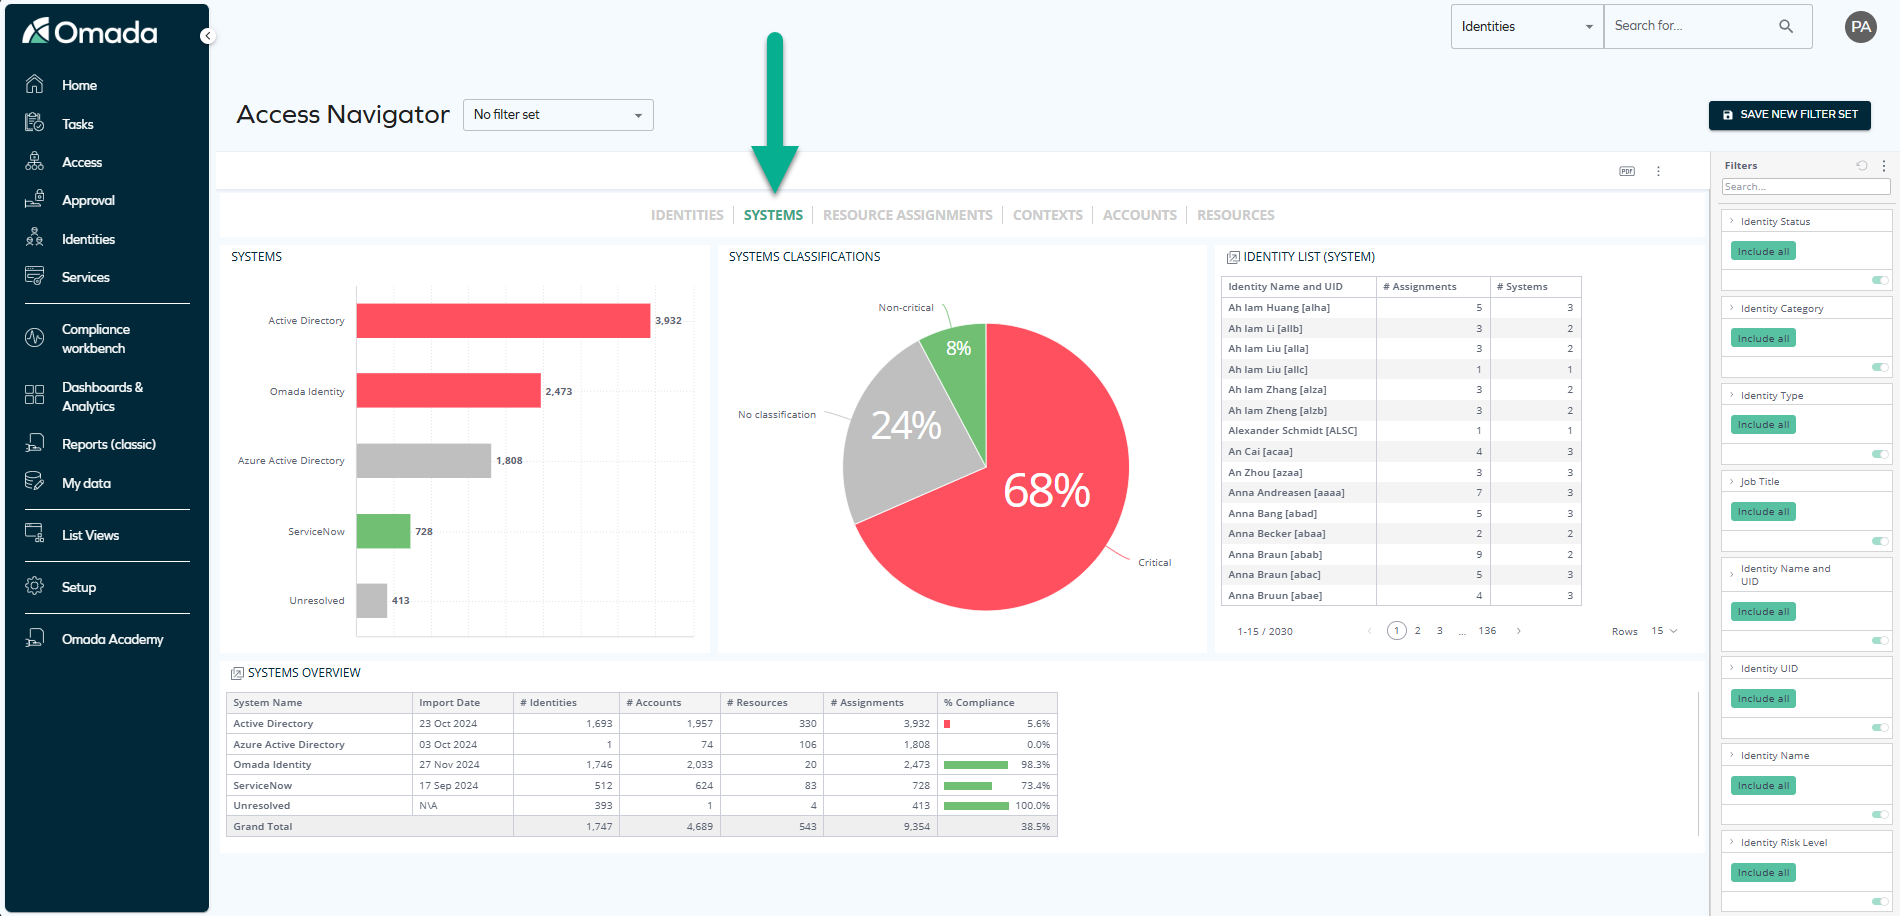
This tab shows information related to the systems that the identities have access to.
It contains 4 widgets:
-
Systems – shows how many identities have access to particular systems.
-
System classifications – divides systems into critical and non-critical in terms of compliance.
-
Identity list (system) – a jumpable widget that shows a list of identities having a particular number of assignments within a particular number of systems.
noteYou can jump from this widget to the Identity Details dashboard and to two more dashboards: Identity Change Log and Accounts on Date.
-
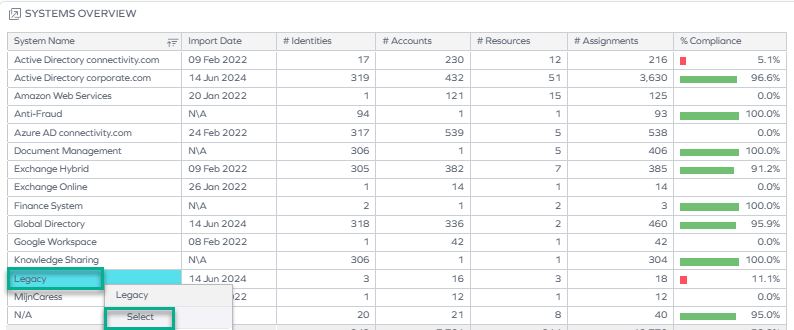
Systems overview – This table displays the last import date of a particular system, the number of identities, accounts, resources, and assignments in that system, and the percentage of compliance.
noteYou can jump from this widget to two dashboards: System Details and System Trend.
Assignments tab
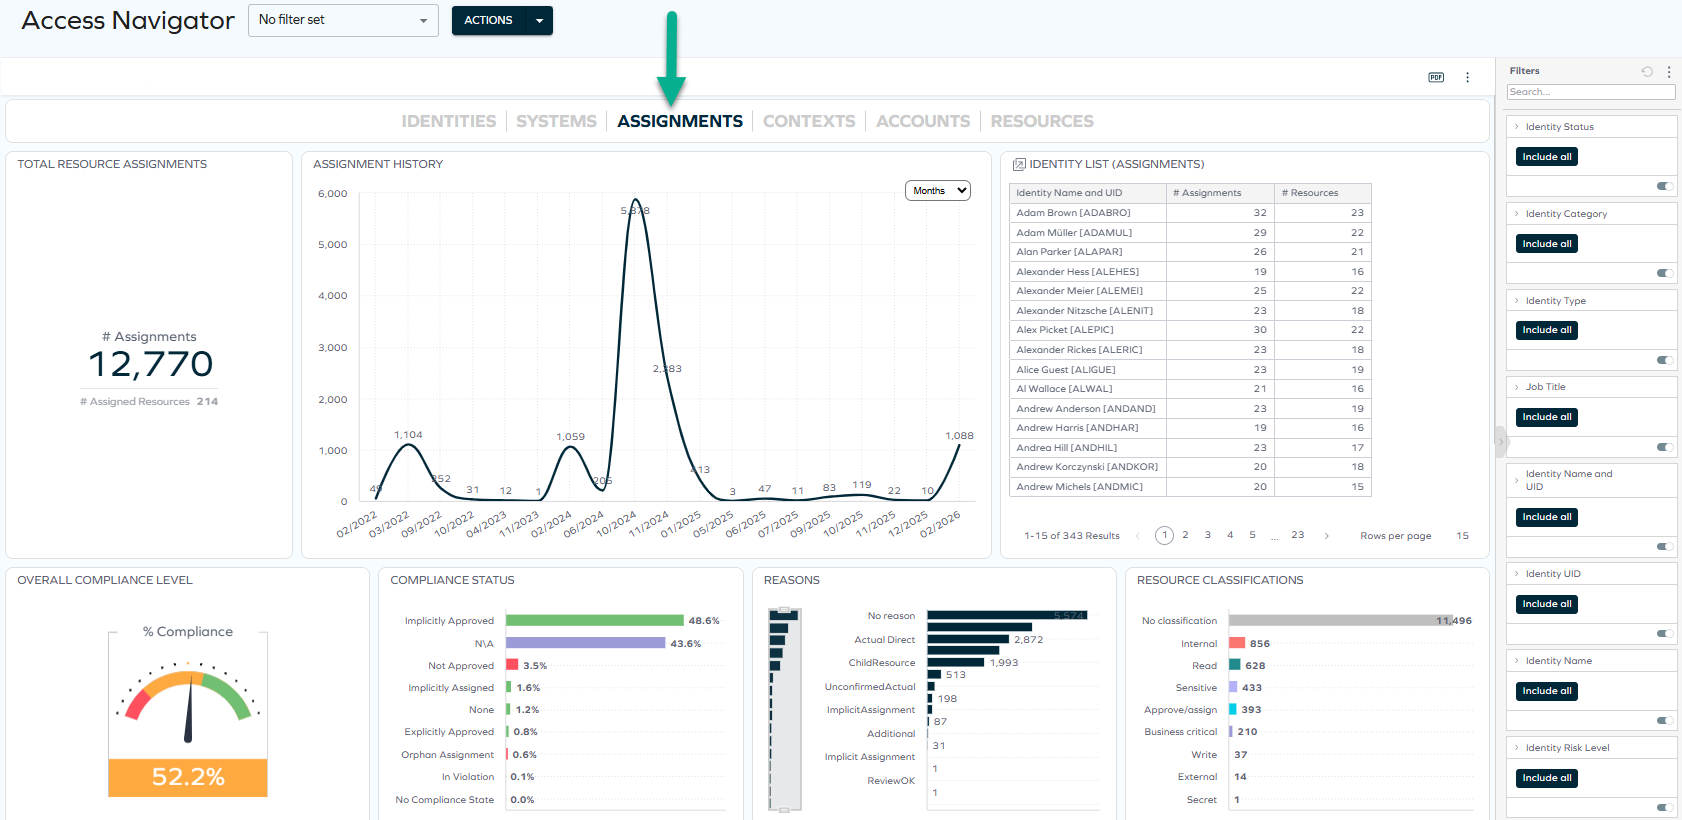
This tab shows information related to the resource assignments that the identities have.
This tab was previously a separate dashboard named Resource Assignments.
It contains 8 widgets:
-
Total resource assignments – shows the total number of assignments and assigned resources.
-
Assignment history – displays the dates on which assignments were made. In the drop-down menu, you can switch from days to weeks, months, quarters, and years.
-
Identity list (assignments) – a jumpable widget that shows a list of identities having a particular number of assignments and resources.
noteYou can jump from this widget to the Identity Details and to two more dashboards: Identity Change Log and Accounts on Date.
-
Overall compliance level – shows the percentage of compliance.
-
Compliance status – shows how compliant the implicitly approved and explicitly approved resource assignments are.
-
Reasons – shows the statistics related to reasons of assignments (including actual direct, policy, direct).
-
Resource clasifications – shows the statistics related to the classifications of resources.
-
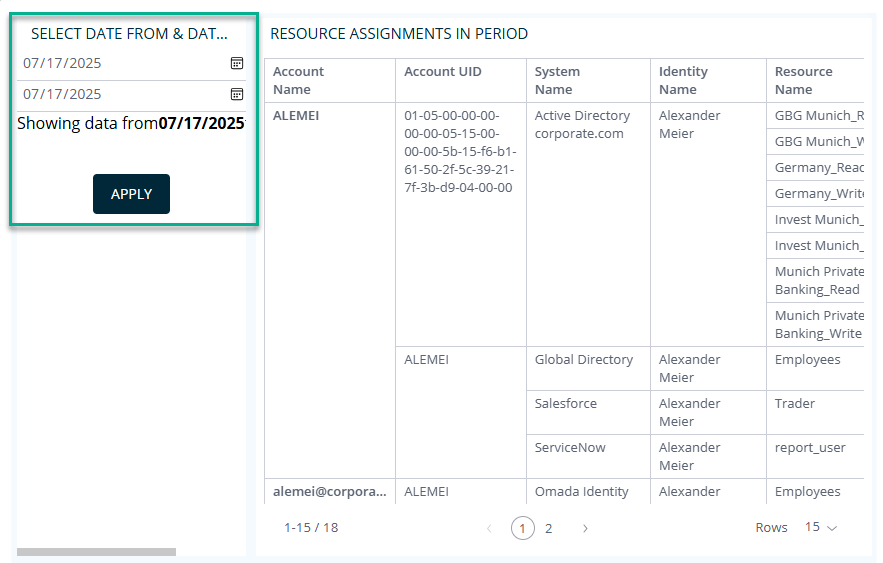
Assignment details – a jumpable widget that displays all the details related to assignments: the Identity UID, Identity Name, System Name, Resource Name, Compliance Status, and more.
noteYou can jump from this widget to a number of dashboards: Reason Details, Assignments in Period, and Assignments Change Log, where you can access even more details about assignments.
Contexts tab
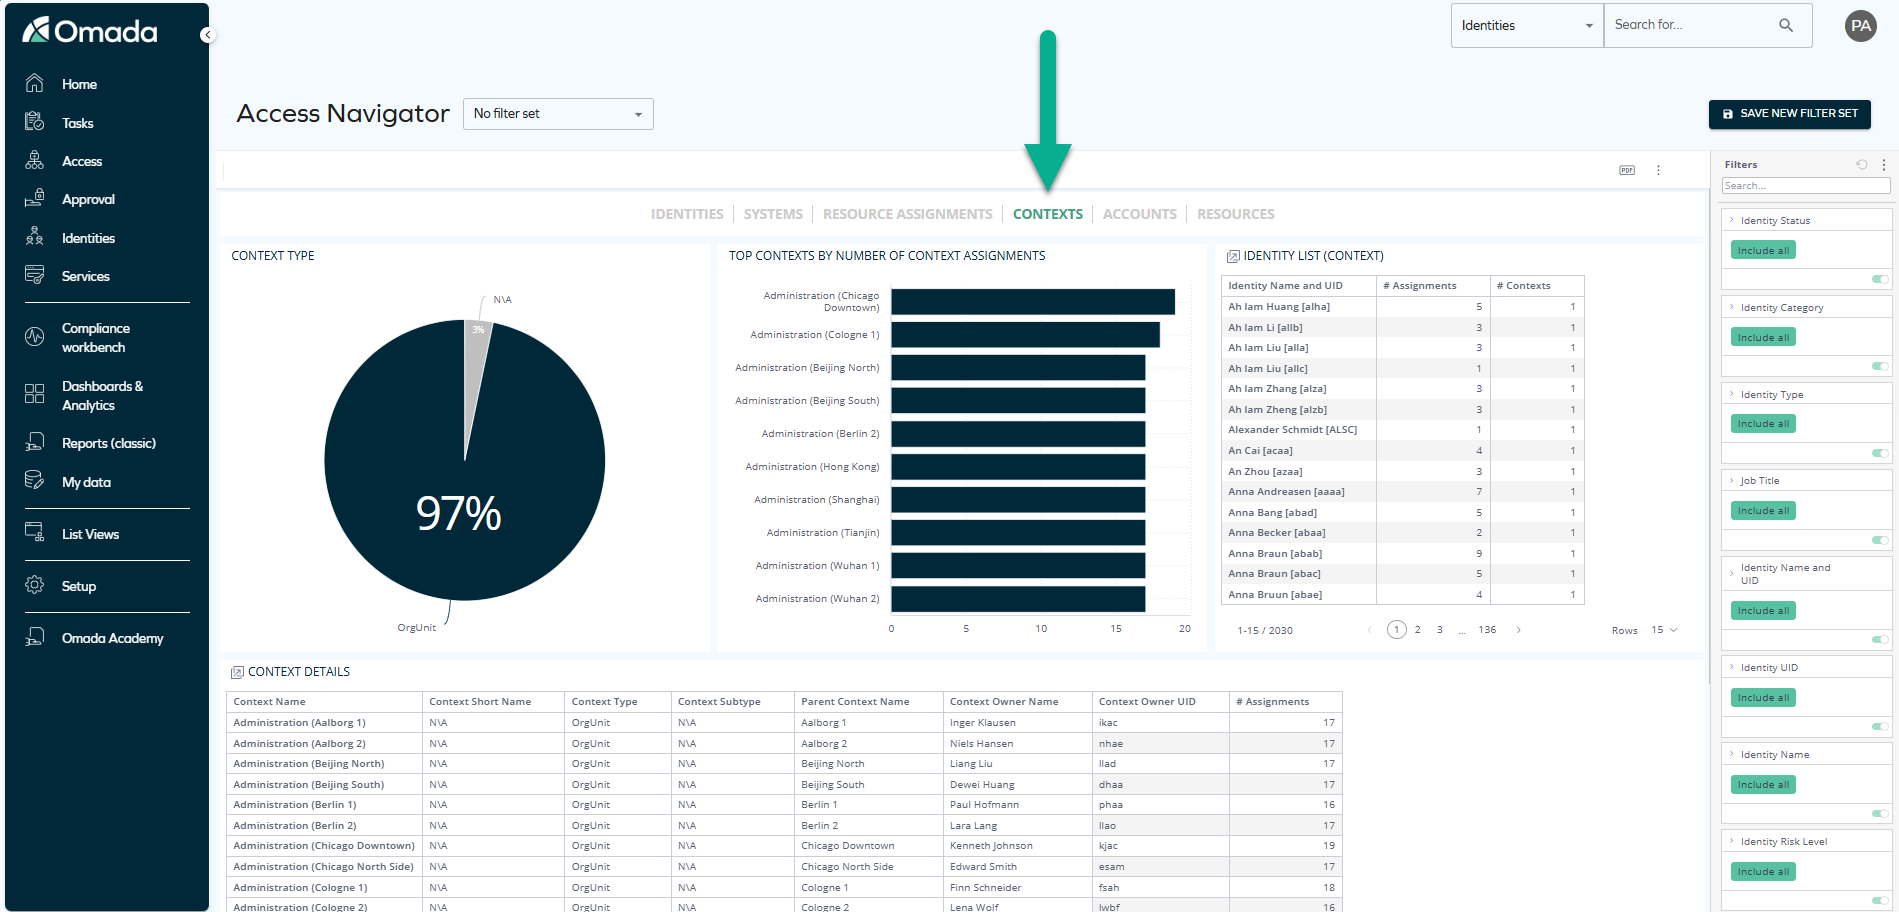
This tab shows information related to the contexts in which there are particular assignments.
It contains 4 widgets:
-
Context type – shows the percentage of context types (for example, OrgUnit) to which particular assignments belong.
-
Top contexts by number of context assignments – shows the statistics related to contexts to which context assignments belong.
-
Identity list (context) – a jumpable widget that shows a list of identities having a particular number of assignments in a particular number of contexts.
noteYou can jump from this widget to the Identity Details and to two more dashboards: Identity Change Log and Accounts on Date.
-
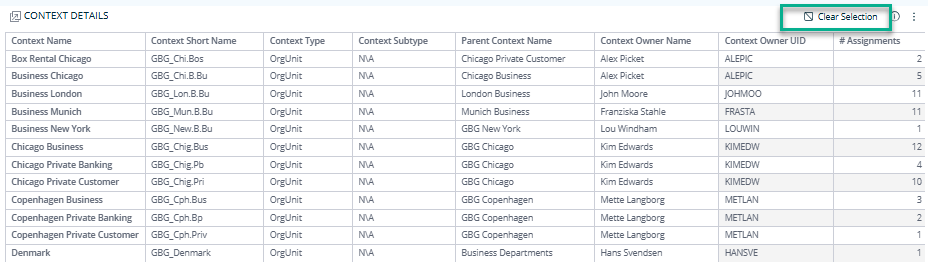
Context details - a jumpable widget that lists all the details related to contexts: context name, context short name, context type, context subtype, parent context name, context owner name, context owner UID, number of assignments.
noteYou can jump from this widget to the Context Details dashboard:

Accounts tab
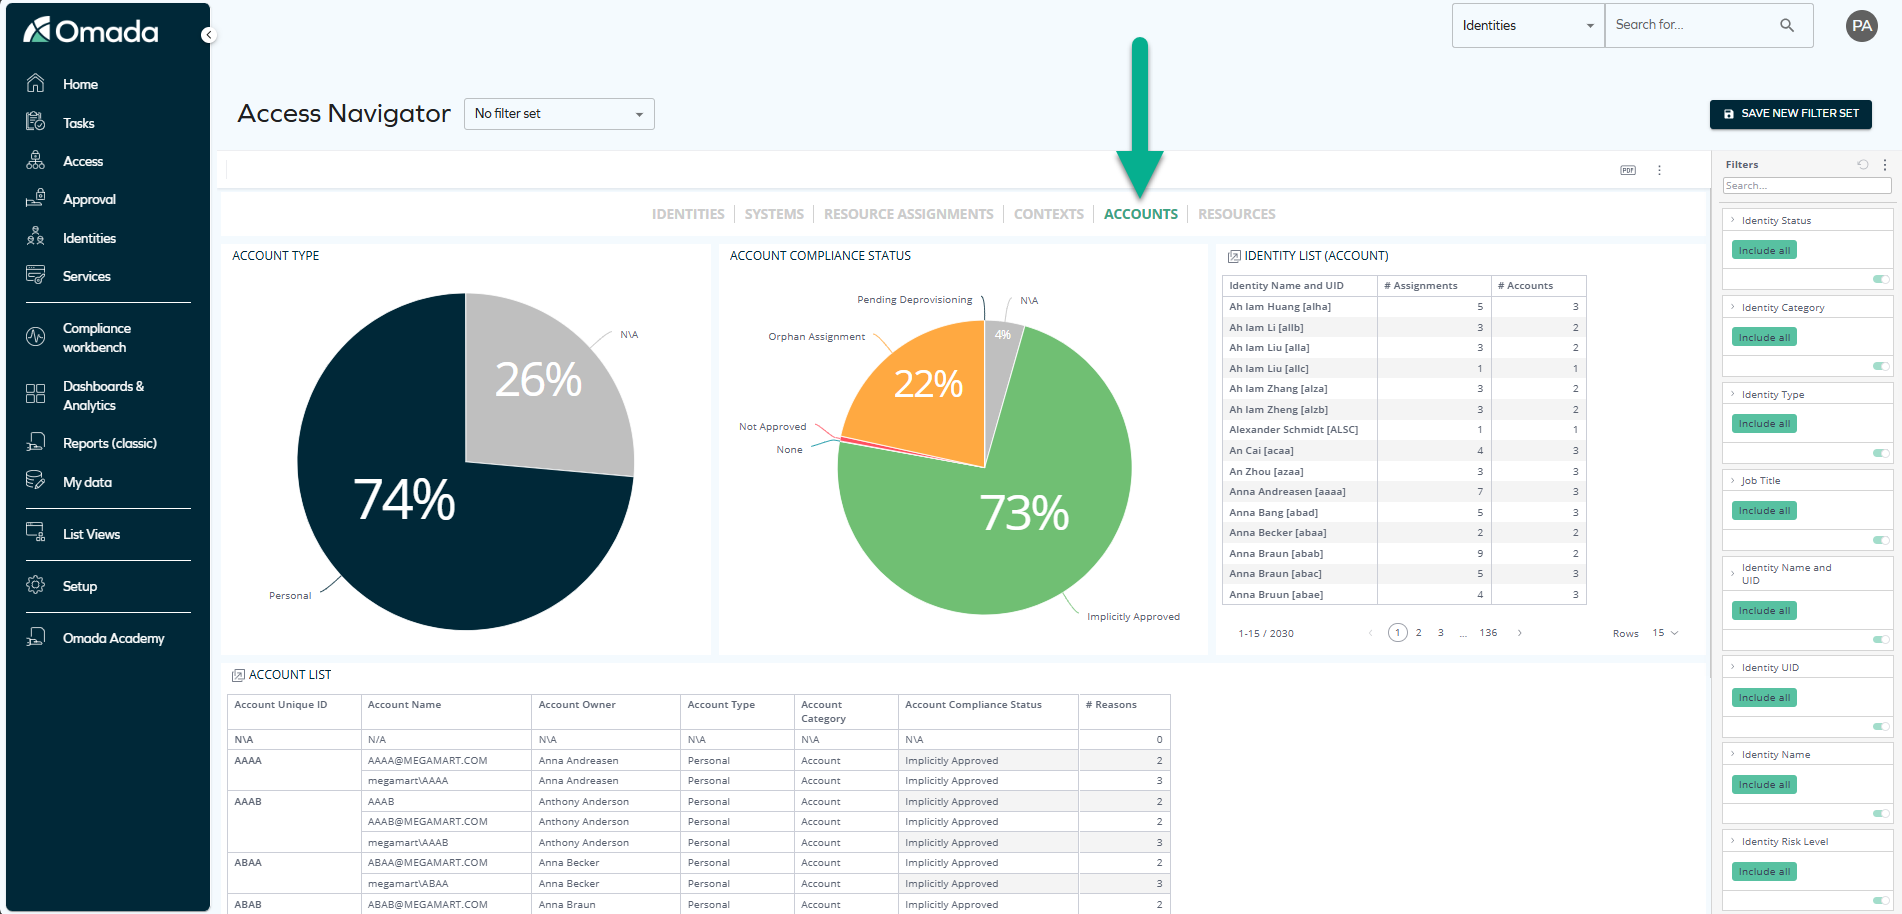
This tab shows information related to the accounts that have particular access.
It contains 4 widgets:
-
Account type – shows the percentage of account types (for example, personal accounts).
-
Account compliance status – shows the percentage of compliance of assignments made to particular accounts (for example, orphan assignments, pending deprovisioning, or not approved).
-
Identity list (account) – a jumpable widget that shows a list of identities that have a particular number of assignments and particular number of accounts.
noteYou can jump from this widget to the Identity Details and to two more dashboards: Identity Change Log and Accounts on Date.
-
Account list – a jumpable widget that lists all the details related to accounts: account Unique ID, account name, account owner, account type, account category, account compliance status, reasons.
noteYou can jump from this widget to a number of dashboards: Account Details, Account Log, Assignments in Period, Assignments Change Log, and Account Trend, where you can access even more details.
Resources tab
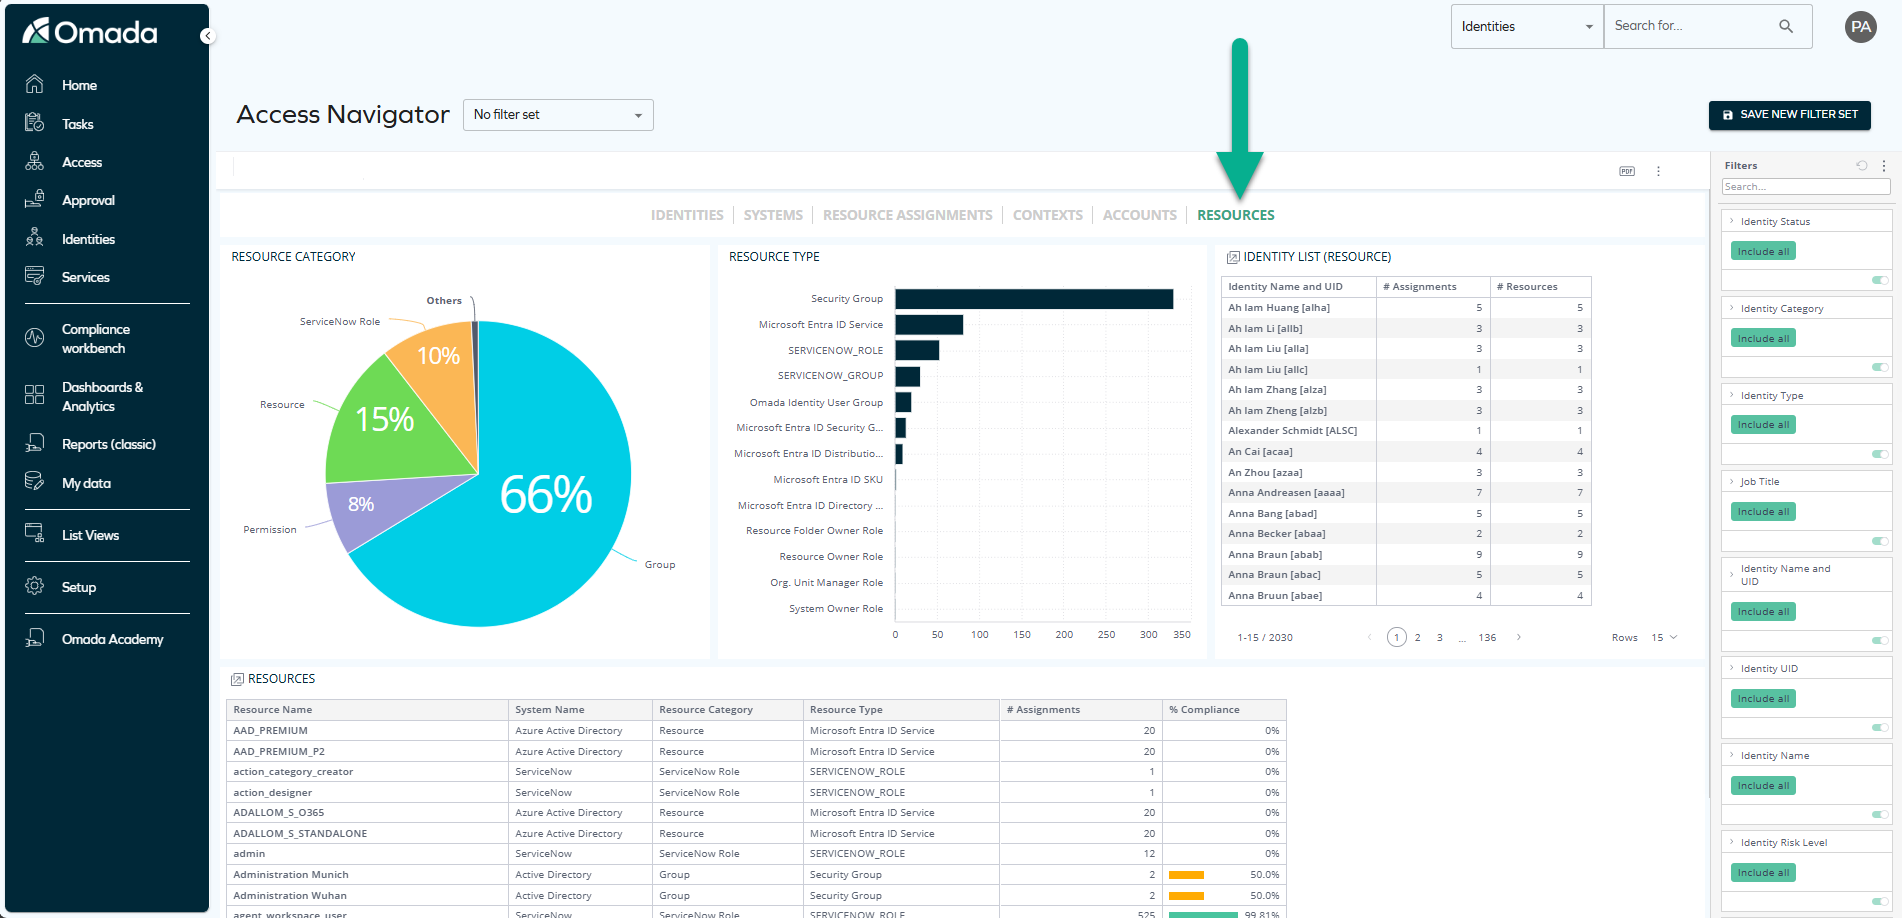
This tab shows information related to resources.
It contains 4 widgets:
-
Resource category – shows the percentage of resource categories.
-
Resource types – shows the numbers of particular resource types.
-
Identity list (resource) – a jumpable widget that shows a list of identities that have a particular number of assignments and particular number of resources.
noteYou can jump from this widget to the Identity Details and to two more dashboards: Identity Change Log and Accounts on Date.
-
Resources – a jumpable widget that lists all the details related to resources: resource name, system name, resource category, resource type, number of assignments, percentage of compliance.
noteYou can jump from this widget to a number of dashboards: Resource Details, Reason Details, Assignments in Period, Assignments change Log, and Resource Trend where you can access even more details.
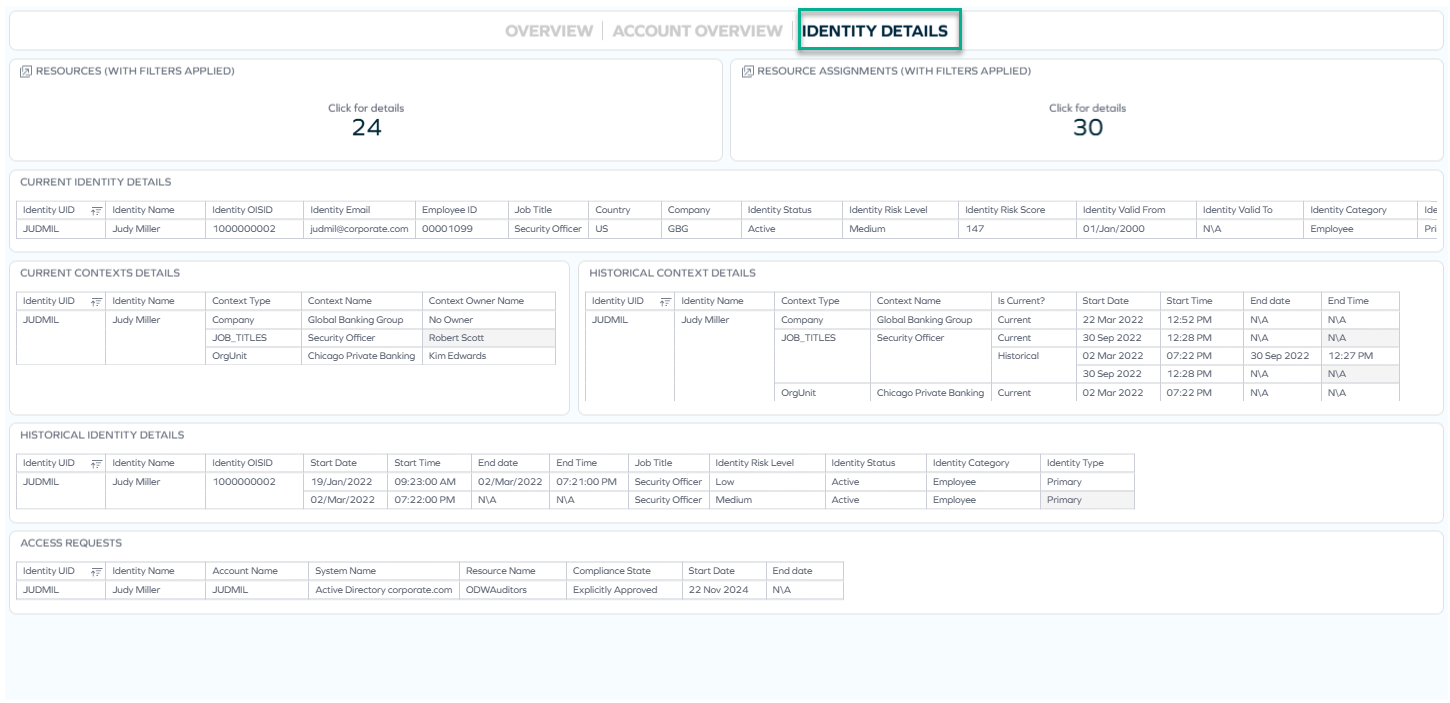
Identity Details - jump-to dashboard
Identity Details is a jump-to dashboard that can be accessed from the Identity list widget on any tab by right-clicking any item and selecting Jump to > Identity Details.
Identity Details was previously a separate Omada Identity Analytics dashboard. Currently, it is accessible as part of the Access Navigator dashboard.
On this dashboard, you can view a variety of charts and tables grouped into three tabs:
Overview
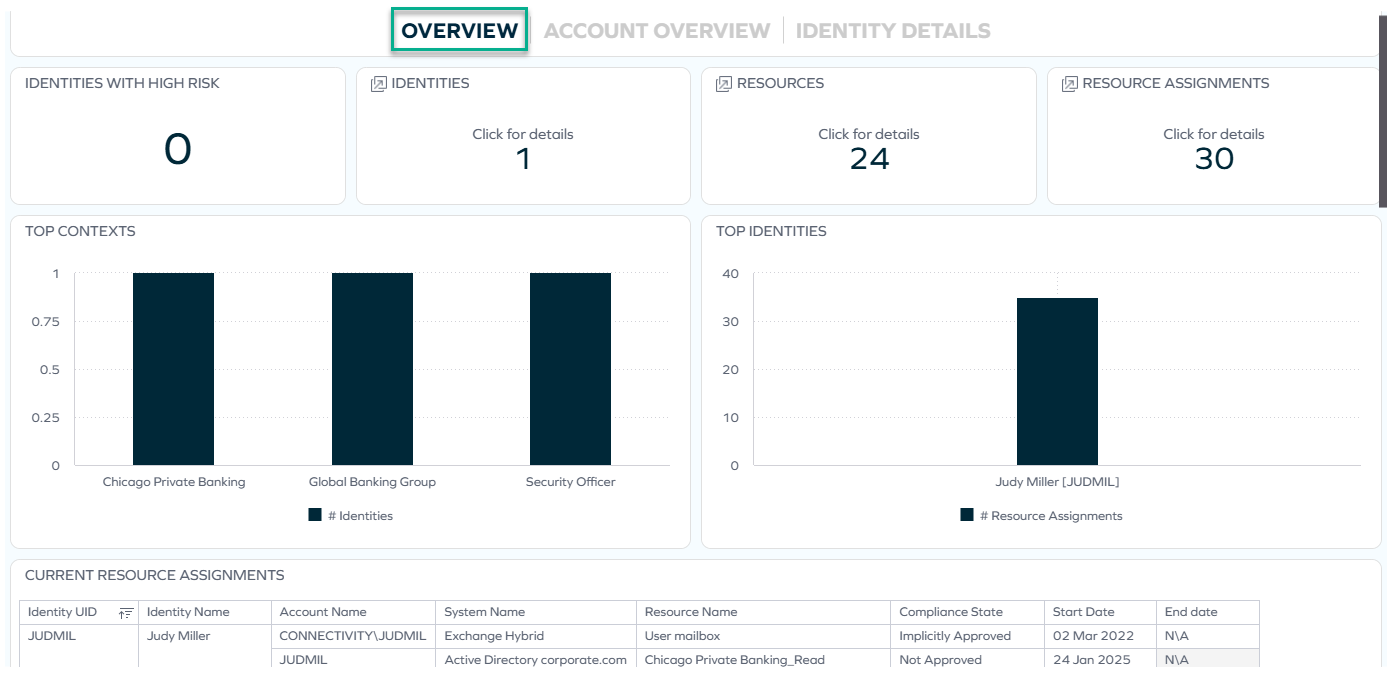
Account Overview
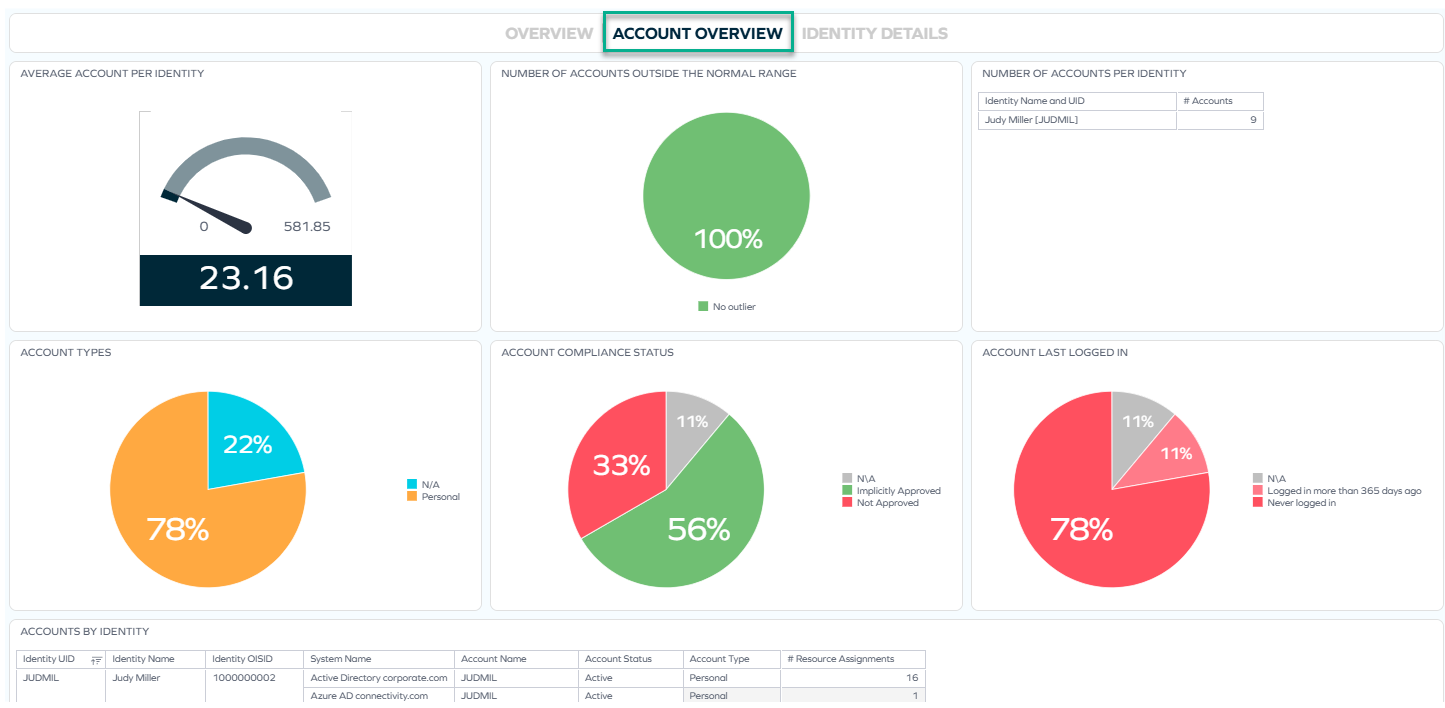
Identity Details
Some of the widgets displayed on these tabs are also jumpable, allowing you to narrow down to even more details on identities, resources, and resource assignments.
Filtering
The information displayed on each tab changes according to the filtering that you apply. For example, if you select any job title on the Identities tab, or any system on the Systems tab, the information on other tabs reflects the same filtering (until you change or clear it).
Filtering options
You can enable filtering:
-
by clicking any chosen item (on any widget or chart), for example, a particular job title
-
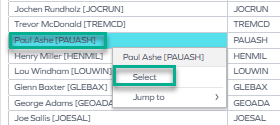
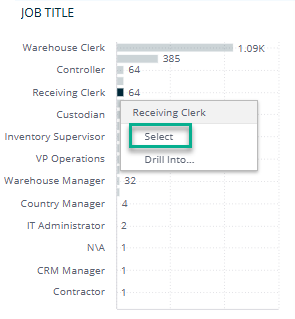
by right-clicking an item and clicking Select:
In the same way, you can select an item from a chart:
 tip
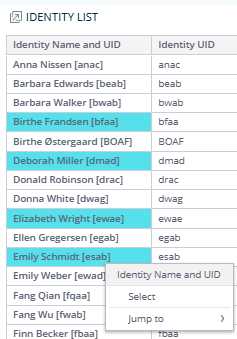
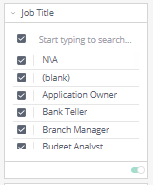
tipIf you want to select more than one item to filter by, press the Control key and select as many items as you need:
-
by selecting an item in the right pane:
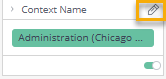
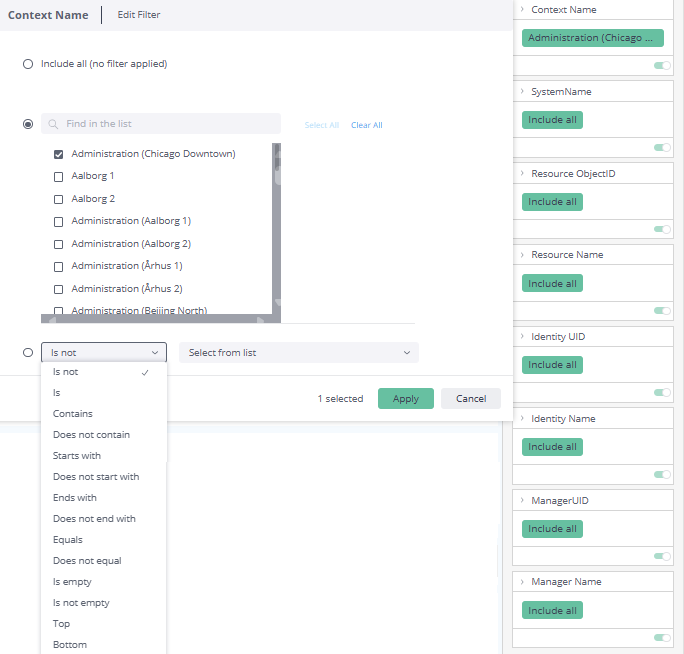
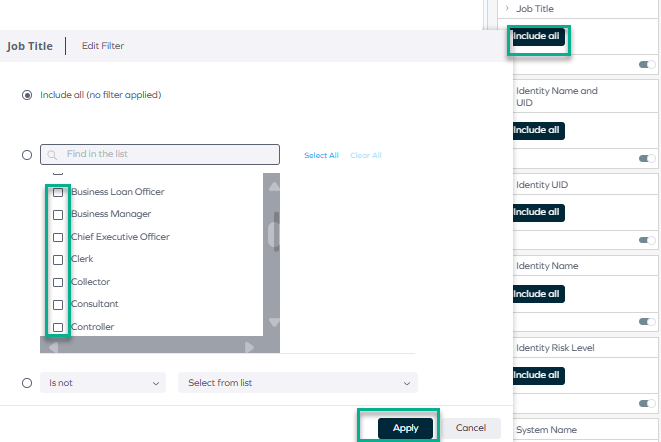
You can also edit filters by clicking the pencil icon, which appears when you hover over the top right corner of the rectangle:
Then, you can select from a variety of options such as Is not, Contains, or Is not empty:
You can also disable filtering in a number of ways, for example:
-
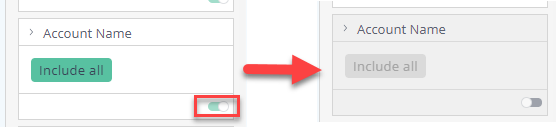
By disabling the toggle:
-
By selecting Clear selection, which appears in the top right corner of a widget when you hover over it:
-
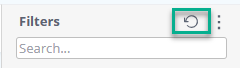
By resetting filtering in the right pane:
When your filtering is applied, the data immediately gets rearranged according to the filter, for example:
Downloading and exporting
To export (download) the content of any widget, open the three-dots menu next to it, select Download, and choose a format.
Before you download the content of a widget, read Omada Identity Analytics – Downloading and exporting for details on the available formats as well as their limitations.
Example: Investigating unexpected access
The Access Navigator dashboard can be used to investigate access patterns and follow them through to operational action. The example below demonstrates how to carry out a cross-tab analysis of a potentially unexpected access pattern and drill down to the relevant identities.
Step 1: Identifying an area of interest
-
Navigate to the Systems tab.
-
Review the data on the widget, paying special attention to Systems, Identity list (system), and System overview.
-
If you notice a system with a higher-than-expected number of identities or assignments, click the system name to apply a filter.
The dashboard immediately updates across all tabs to reflect the selected system.
Step 2: Reviewing affected identities
-
Switch to the Identities tab. If you don't apply any changes, the system filter will remain active.
-
Use the Identity list widget to review which identities currently have access to the selected system.
To view even more details, right-click an identity and select Jump to > Identity Details.
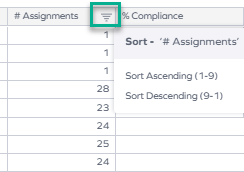
When reviewing large numbers of identities, you can also narrow down the data by:
-
Sorting by particular metrics (for instance, the number of assignments).
-
Applying additional filters (for example, by job title or identity type).
-
Step 3: Investigating identity-level details
In Step 2, you selected to jump to the Identity Details dashboard to review access data in depth.
When viewing the Identity Details dashboard, pay attention to:
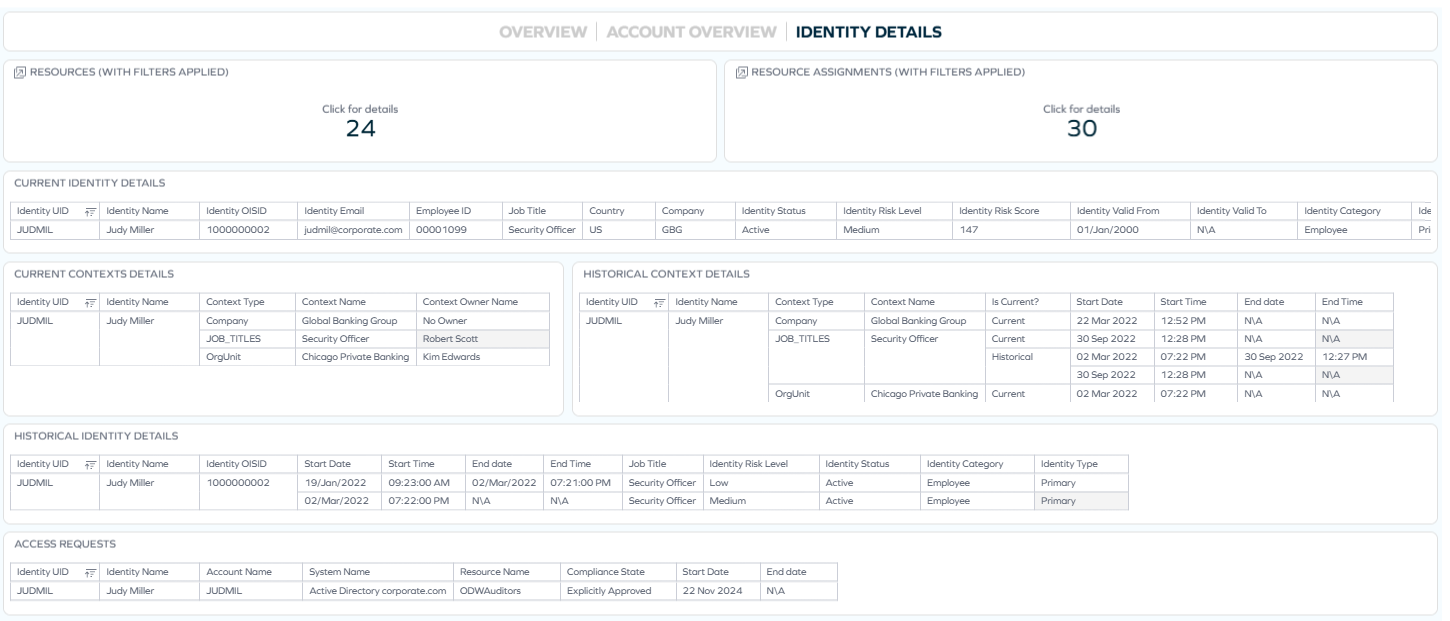
In some widgets, you can further narrow the time range using the date picker.
Step 4: Navigating to operational view
If you need to take action, use the link to navigate to the Identities list in Omada Identity (Enterprise Server).
For more guidance on navigating to the Enterprise Server view, go back to the Navigation section.
From there, you can perform a variety of actions, for example:
- Review access rights (see: Identities: Access rights tab)
- Remove access (see: Remove access)
- Trigger recalculations (see: Identity grid view)
Step 5: Exporting findings
If documentation or further analysis is required, return to the Access Navigator dashboard and use the Download option in the relevant widget to export the filtered data.
To learn which formats work best for your widgets, see: Downloading and exporting.
By combining filtering, jump-to dashboards, and cross-tab navigation, Access Navigator supports a structured investigation workflow: from high-level analytics to detailed review and operational follow-up.
Parity with legacy SSRS reports
Through this dashboard, as well as a number of other ones, you can access the data that was previously only accessible through the legacy SSRS reports (former Reports (classic) page in Omada Identity).
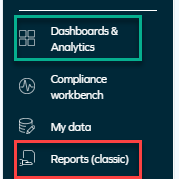
For a complete list of legacy reports and the current locations of equivalent widgets and dashboards, as well as an example of a business scenario, see the Legacy reports vs. Omada Identity Analytics Platform OIA section of Omada Identity Analytics.
Access to this dashboard
To learn which user groups have access to this dashboard, see Access to dashboards.