ServiceNow Relay
The ServiceNow Relay connectoris based on the generic REST connector. See the REST section for the full description of tabs, fields, and configuration options. The connector only relays provisioning tasks to the external provisioning system.
Out of the box the ServiceNow Relay connector can create Requests and Request items (RITM). As the connector is using ServiceNow Table API, it is possible to also configure custom task mappings and objects other than request objects. When the job is relayed to ServiceNow, the connector queries and determines the job status based on the Request state, as well as the task status based on the Request item state. Thanks to that capability, it is possible to recognize which Requests are completed, failed, pending, and partially completed.
Supported objects and operations
The ServiceNow Relay connector allows you to create and relay request and request item objects to ServiceNow, and indirectly manage access rights.
| Resource | Possible operations |
|---|---|
| Request | Create, read |
| Request item | Create, read |
Minimum required permissions
You need to have access to ServiceNow REST API. Depending on the client's configuration, you may also need access to an existing ServiceNow account with the user_admin role to manually manage sent requests.
Implementation notes
For information on how to build a developer ServiceNow instance, refer to the ServiceNow documentation.
Network requirements
The collector requires the port to the ServiceNow API endpoint to be open. The default port number for HTTPS is 443.
Prerequisites
For the ServiceNow Relay Connector to work correctly, you need to configure ServiceNow portal to authorize Omada Identity user to log in using OAuth credentials. ServiceNow supports several ways of enabling OAuth authentication against their web services. Follow the steps below to setup OAuth Password Credential authentication in ServiceNow and enable Omada Identity to access ServiceNow API endpoint.
The default Token URL takes the following form: https://[instance name].service-now.com/oauth_token.do
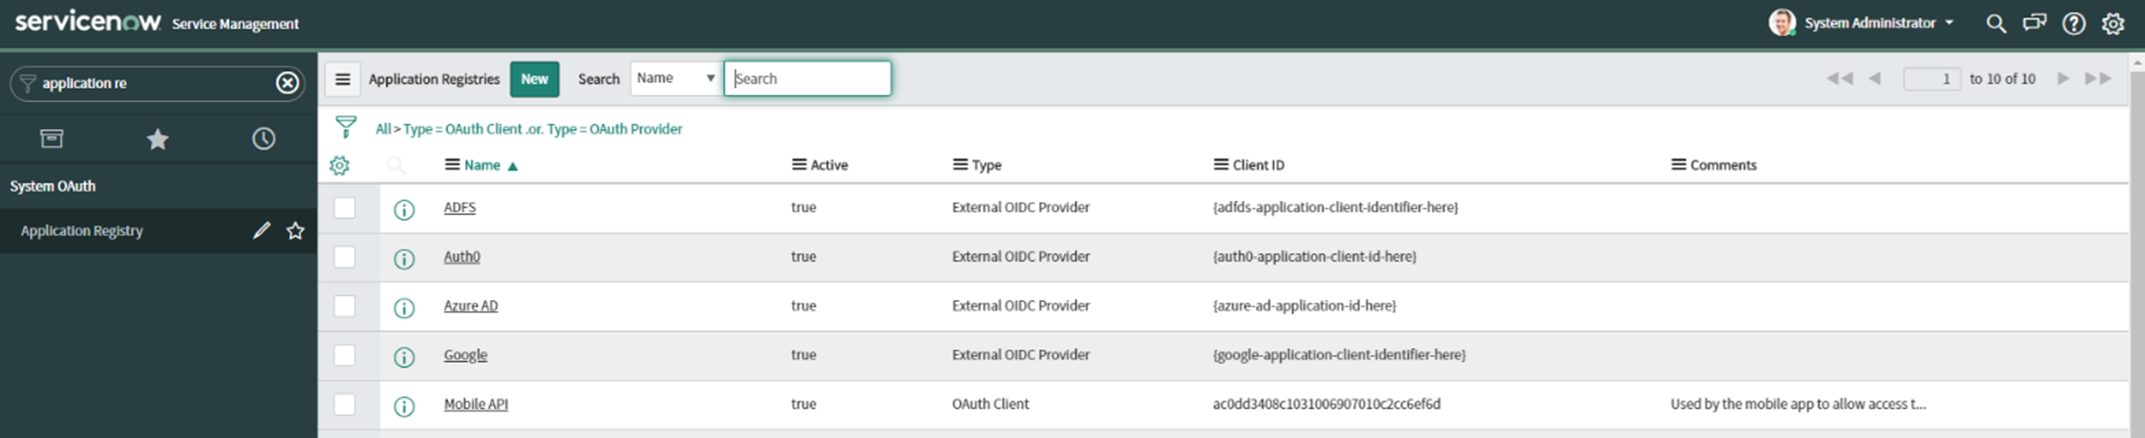
- Log in as a system administrator to the ServiceNow administration portal and go to the Application Registry page.
-
Create an OAuth API endpoint for external clients.
- Select the New button and select Create an OAuth API endpoint for external clients.
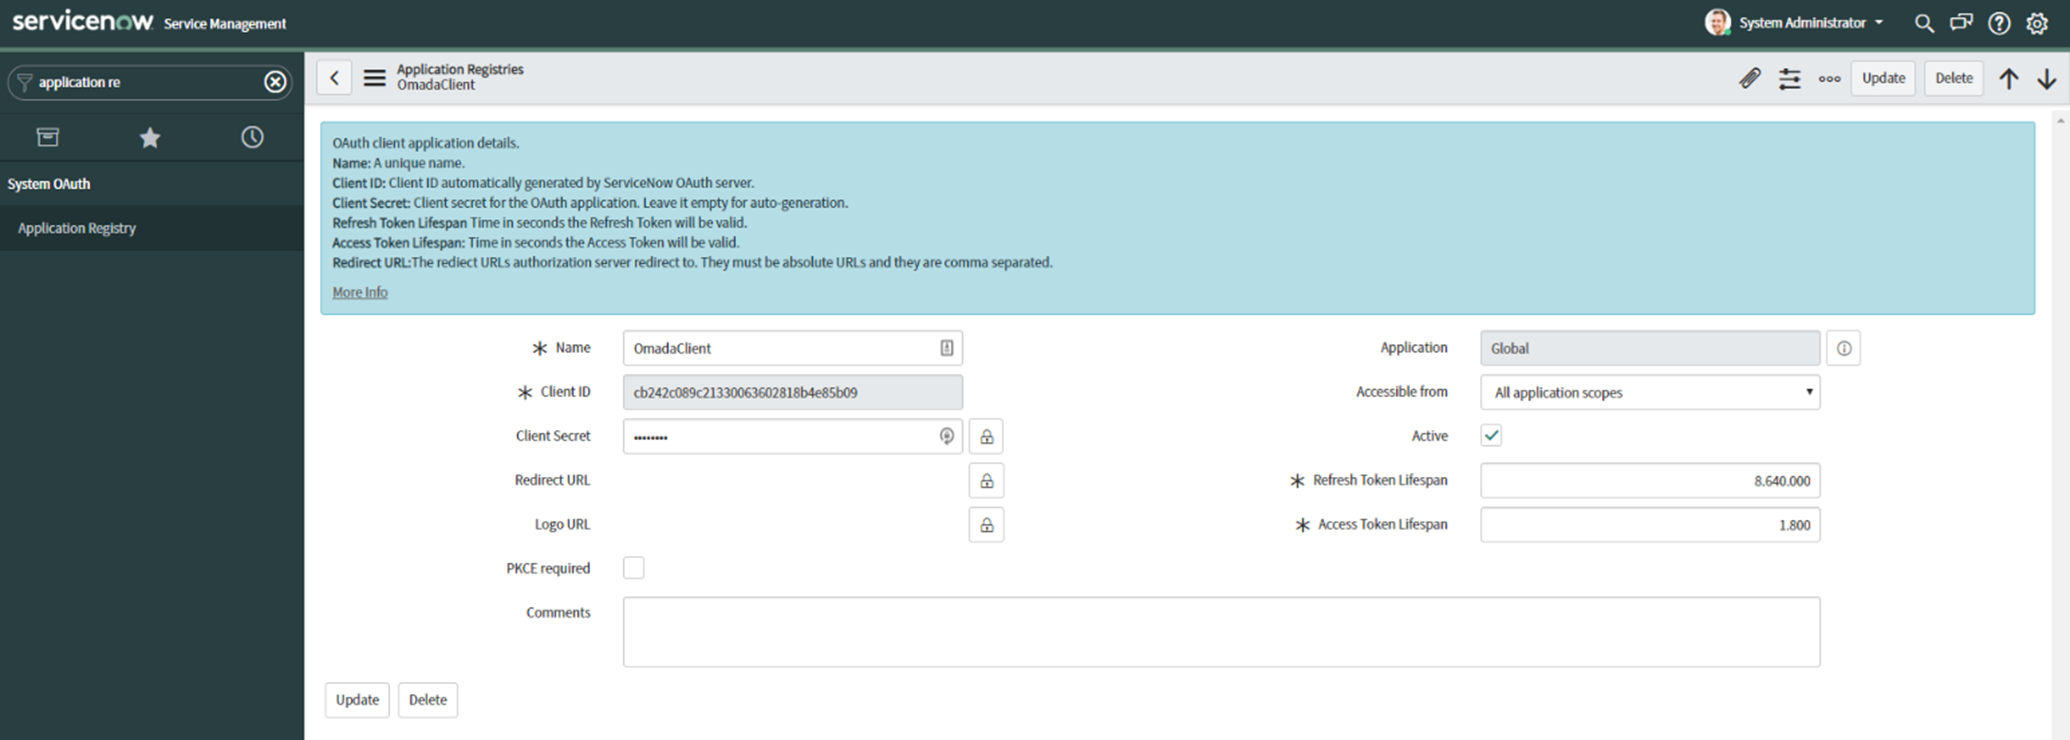
- Enter a unique name for the profile, e.g.,
OmadaClient. Click Submit. - Open the created object and make a note of the Client ID and Client Secret (The Client Secret can be read by clicking the lock next to the field).
-
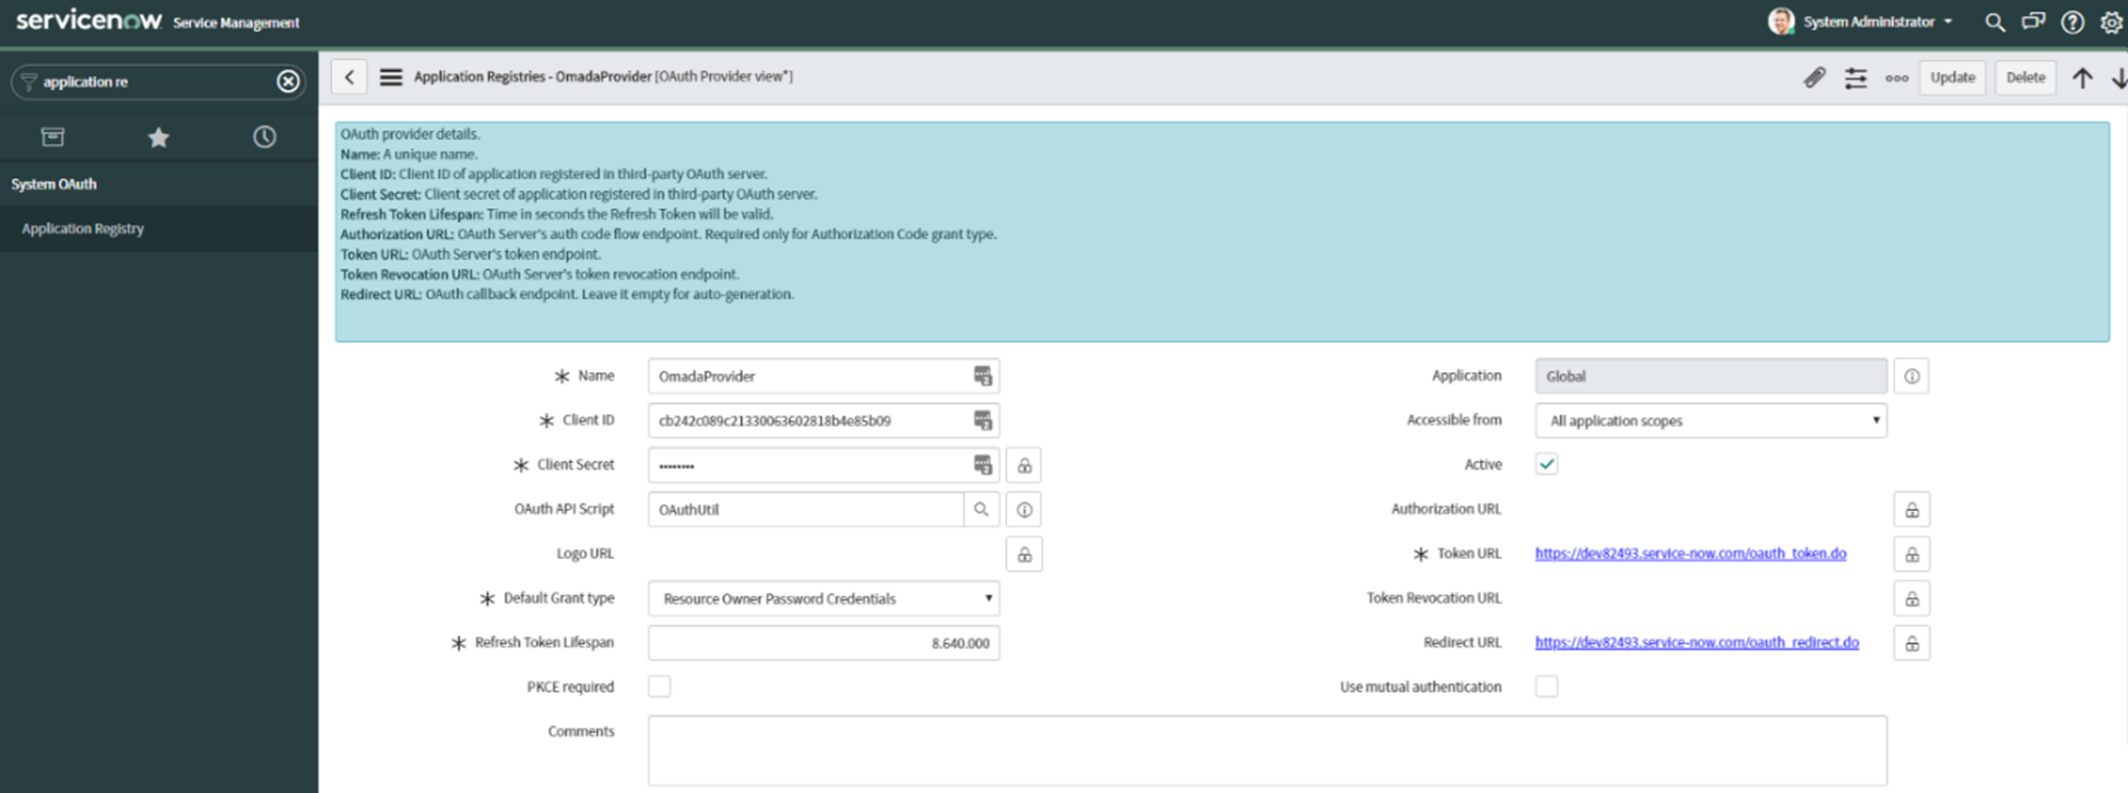
Create a third-party OAuth provider.
- From the list of Application Registries select the New button again and select Connect to a third-party OAuth Provider.
- Enter a unique name for the profile, e.g., OmadaProvider.
- Enter Client ID and Client secret values generated in the previous step.
- Set Grant type to Resource Owner Password Credentials.
- Specify the Token URL like this
https://[instancename].service-now.com/oauth_token.do.
📄️ Data provisioning
Connectivity package that allows onboarding servicenow-relay-connector in Omada Identity.