Google Workspace
This connectivity package provides support for governing and managing Google Workspace instances. It allows you to register and onboard any number of Google Workspace instances. You can load information about users, groups, group members, and relations between nested groups. The connector is based on the REST connector. See the REST section for the full description of tabs, fields, and configuration options.
Supported objects and operations
The Google Workspace collector enables the import of access rights data. Only full import is supported.
| System objects | Omada Identity Data Model | Operations |
|---|---|---|
| Users | - | Read |
| Groups | - | Read |
| Group members | - | Read |
| Parent/child relations between nested groups | - | Read |
Minimum required permissions
You should have access to Google Cloud Platform (GCP) and Google Workspace, including relevant permissions. You can create a new GCP account at https://console.cloud.google.com/freetrial.
Implementation notes
None.
Network requirements
None.
Prerequisites
Performing the initial configuration
Perform the following configuration steps to establish the correct connection with Omada Identity.
-
Assign members. Once you log into GCP with your account, in the left-hand side menu, select the menu item IAM & Admin --> IAM. Use the ADD button on top to add additional members and assign appropriate roles.
-
Set-up an Organization. From the IAM & Admin menu select the Identity & Organization menu item. Under Cloud Identity, select SIGN UP and follow the set-up guide:
- Create a Google Identity Account with your domain and click Done.
- Verify the domain ownership and click Done.
- Create Users and click Done.
-
Verify that your Organization is visible in the console. In the example below, the Organization is set to
Omada.net: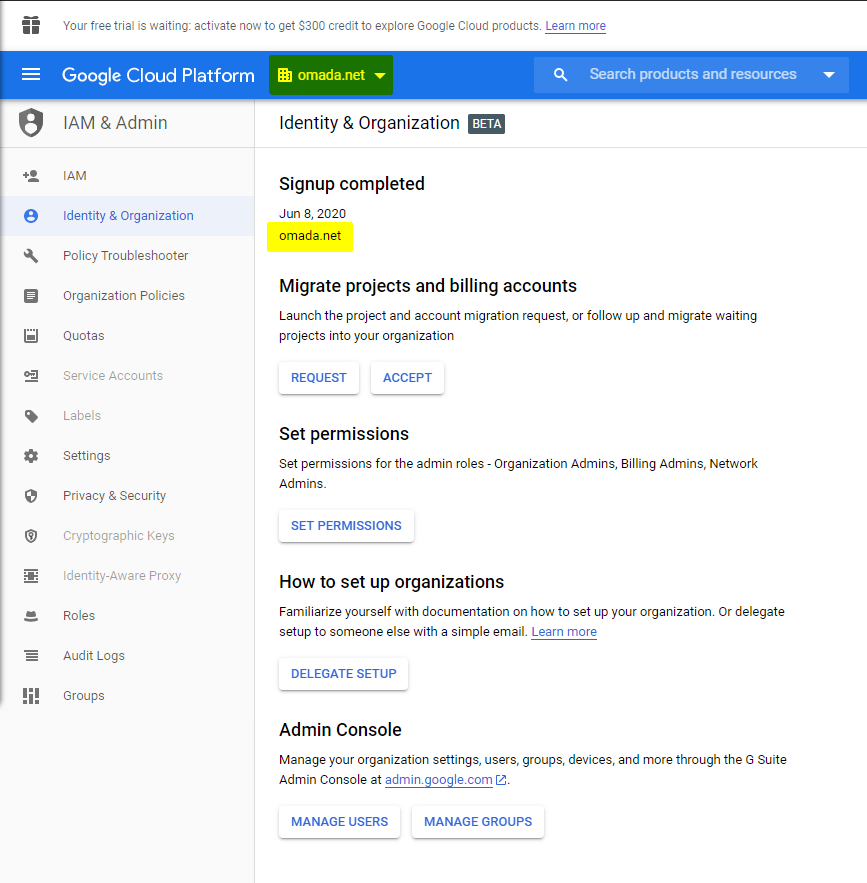
-
Create a project. Create a project that belongs to an organization.
-
Enable required APIs:
- Go to the API Console: https://console.developers.google.com
- Select the project created earlier.
- Click ENABLE APIS AND SERVICES.
- Search for and enable as a minimum as the three APIs below:
- Admin SDK
- Identity and Access Management (IAM) API
- Cloud Identity API
-
Create an App and configure the OAuth consent screen before setting up any service accounts.
- Provide a name and set the user type as Internal.
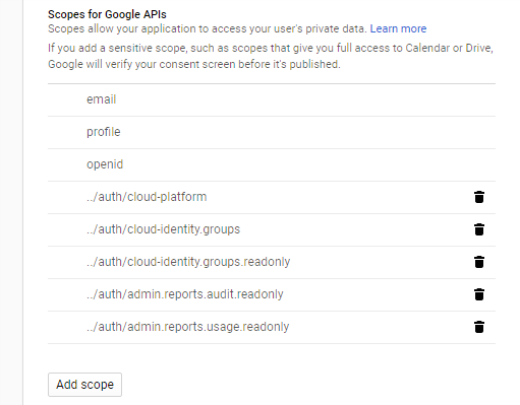
- Add relevant scopes for the APIs previously enabled, if they are not already listed.
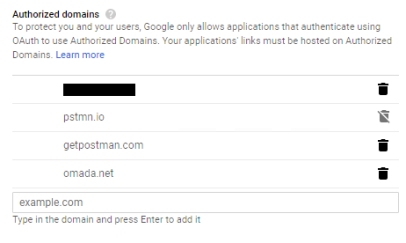
- Specify which domains are allowed to authenticate via OAuth:
-
Verify that the domain you want to integrate with is on the list of allowed domains:

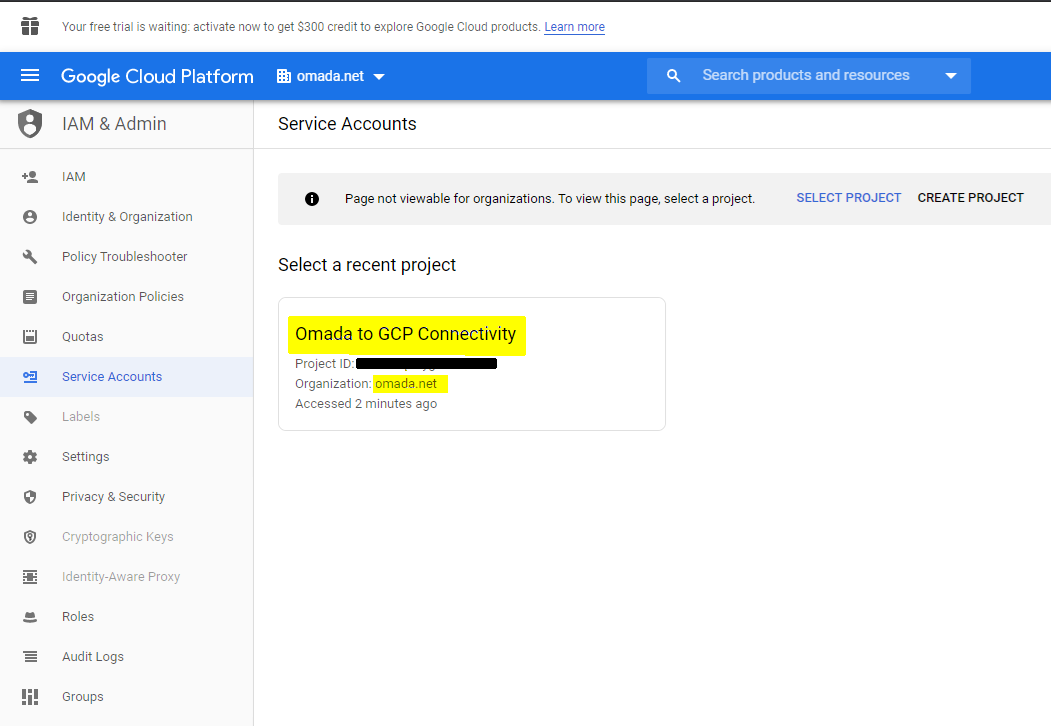
Set-up Service Accounts
To connect to Google Workspace, at least one Service Account is required. Select a project for the organization, you want to connect to.
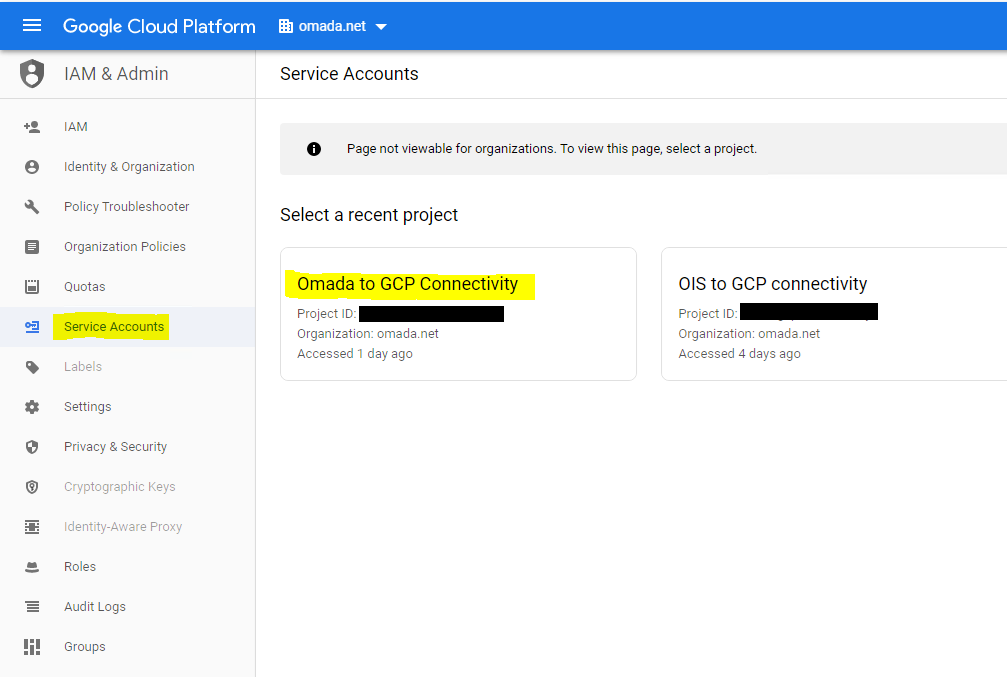
- Go to the admin console, make sure you are in the right project, select the Service
- Accounts menu.
- Click CREATE SERVICE ACCOUNT.
- Provide name, ID, and description. Click Create.
- Assign a correct role. Click Continue.
- The next step is optional and you can just skip it by clicking Done.
Assign Domain wide delegation to Service Account
To allow the service account to access Google Workspace (via the Admin API), you must enable Domain wide delegation to the service account you just created. For more details on how to set-up Domain wide delegation in the admin console, see the following article: https://support.google.com/a/answer/162106.
-
Find your new Service Account and click Edit on the context menu.
-
Check the Enable Google Workspace Domain-wide Delegation box.
-
Create a key by clicking ADD KEY and select Create new key.
-
Select JSON.
-
Click Create.
-
Click Close (you will need the file later for system onboarding in Omada Identity).
-
Click SAVE.
-
A new Client ID is generated for the Service Account.
-
Click View Client ID.
-
Copy the Client ID, as you will need this in later.
-
Go to the Admin Console, click the context menu in the upper right-hand corner, and select Security --> API Controls:
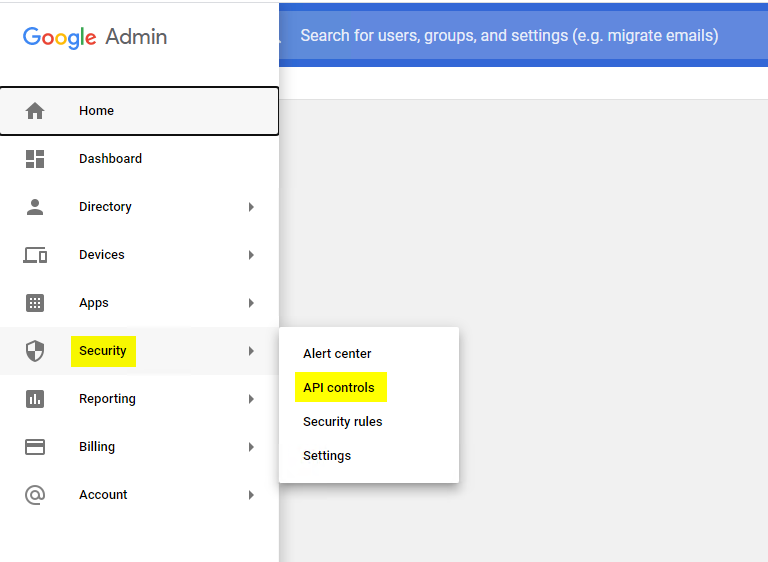
-
Click on MANAGE DOMAIN WIDE DELEGATION,
-
Select Add new to define the scopes for the previously created Client ID (Service Account),
-
Fill in the Client ID and the OAuth scopes (comma separated),
-
Click Authorize,
-
The Client ID and OAuth scopes are now added to the list.
-
The scopes which provides access to user, group, and role management are listed below. However, refer to the Google API reference for a complete list: https://developers.google.com/admin-sdk/directory
Creating a new Admin user
You need to create or assign a user as a Super Admin in Google Workspace, or you need to create a new Admin role and assign appropriate API privileges (corresponding to the scopes above). This user is used for impersonation as the service account, they cannot be an admin in Google Workspace. In consequence, even though you assign Domain Wide Delegation to the service account, and you define the client ID of the service account with appropriate scopes, you still need to specify an admin user in the call to the Admin SDK (subject = admin user).
-
Go to the Admin Console and select Users.
-
Click Add new user.
-
Fill out the required fields:
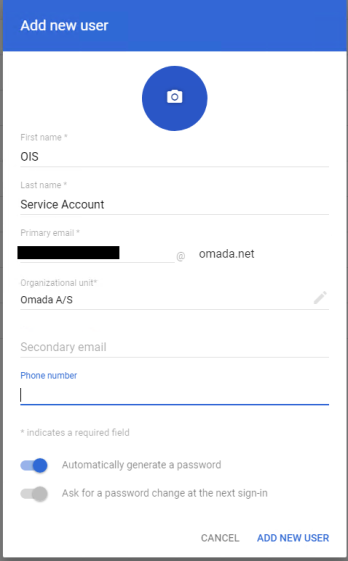
-
Click ADD NEW USER.
-
Click DONE.
-
Continue with the next step – assign the Admin Role.
Assigning the Admin role
-
Go to the Admin Console and select Admin roles.
-
Click the Super Admin role to edit.
-
Click Assign role.
-
Find and select the new Admin user created earlier.
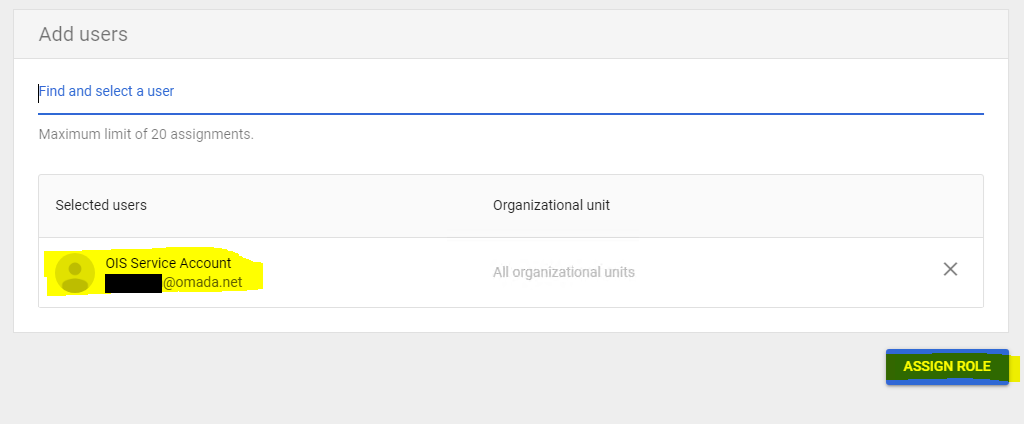
-
Click ASSIGN ROLE.
Now you are ready to perform System Onboarding in Omada Identity.