Configuration
Here you can find some configurations about the Access request process.
Optional/Hidden Reason field configuration
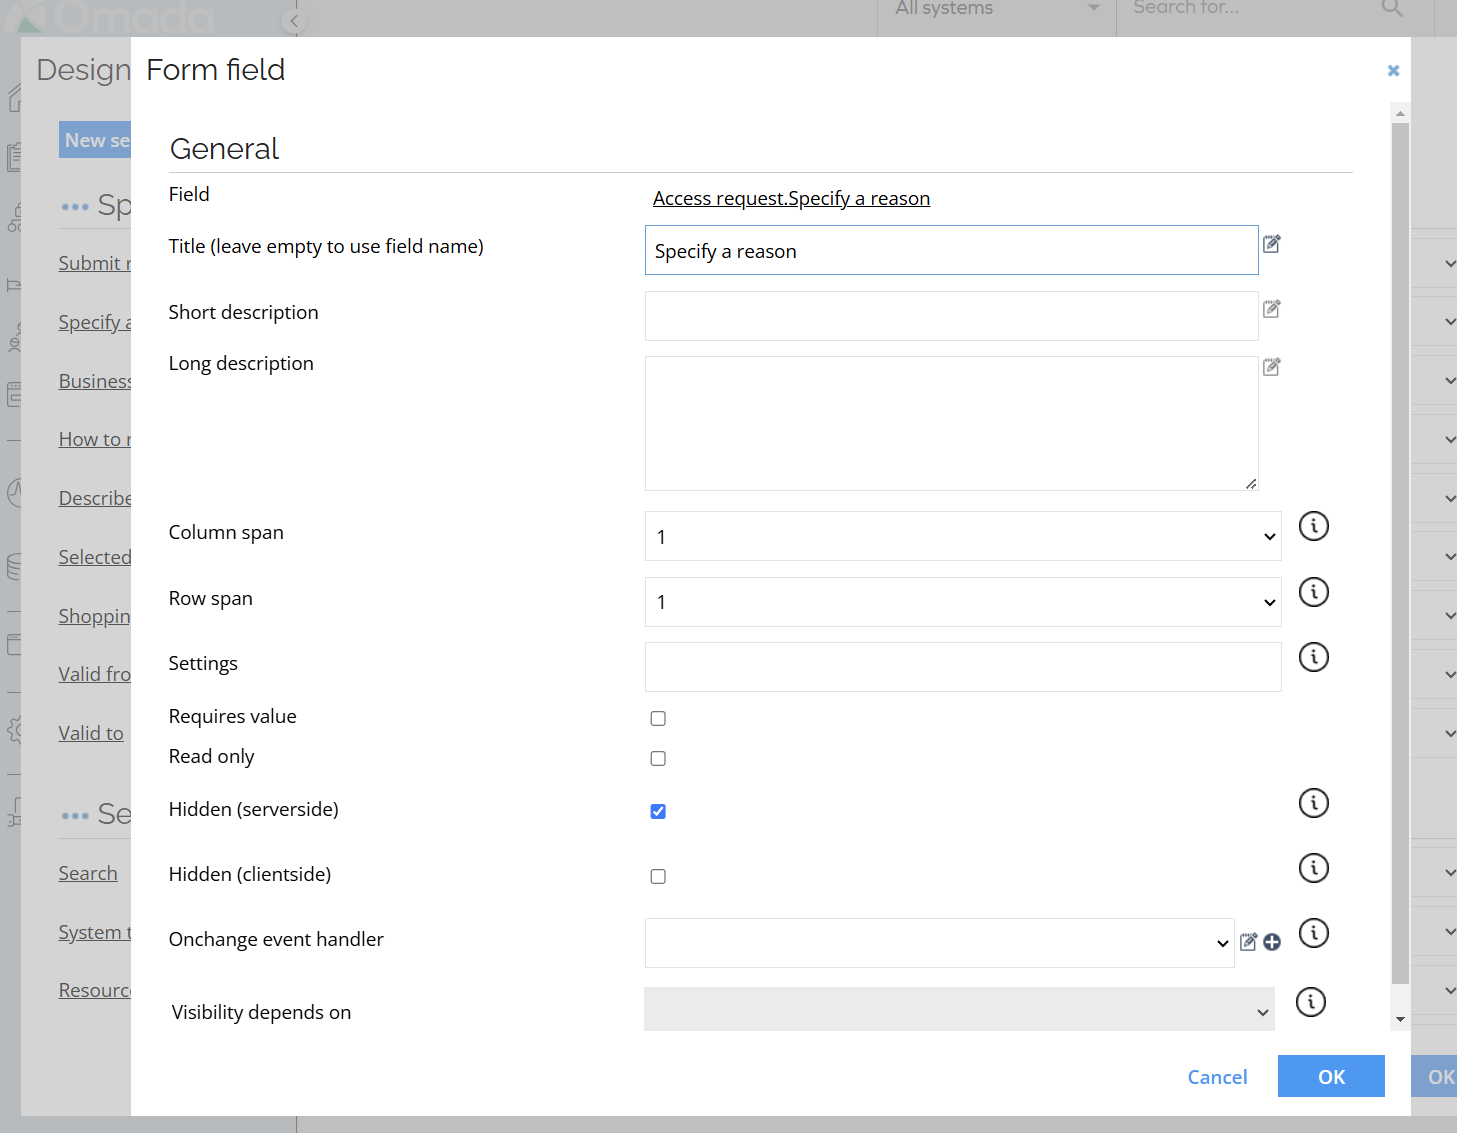
To hide the Reason field, go to Setup > Forms > Request access (Submit form) > Design Form > Specify a reason. Check the Hidden Server-side option to make the Reason field visible.
You can also set it to optional by setting Requires value to False.
Suggested filters
Suggested filters are quick tags that help you narrow down your resource search. The chips come in two types: System and Resources type, and each filter chip shows the type and name, for example: System: Omada Identity.
This option allows displaying suggested filters when using the search field in the access request process. A set of filters representing resource types and systems appears if you enter 3 letters or more:
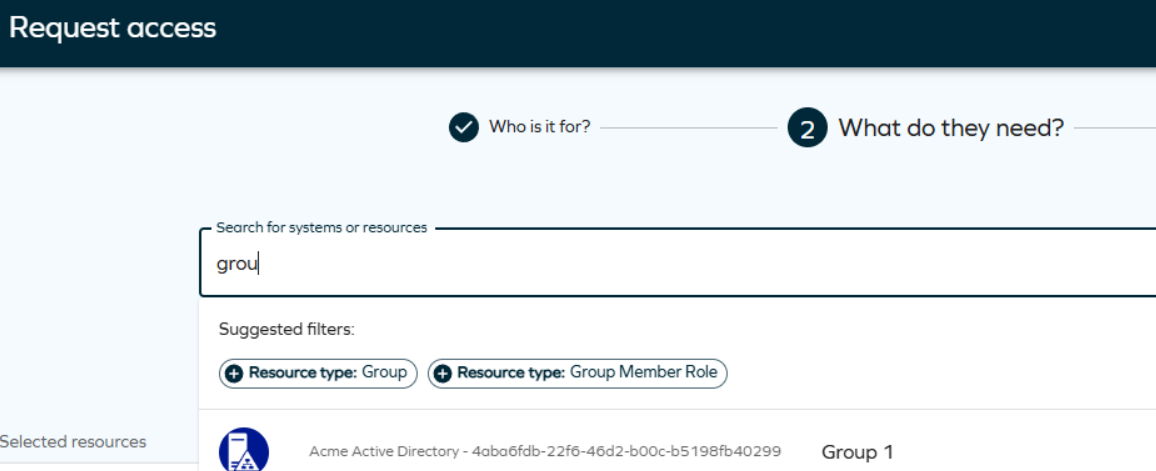
When you start typing in the search field:
- Filters related to your search appear in the Suggested filters section.
- You can click on a filter chip to apply it, and the resource list updates based on that filter.
- You can apply multiple filters of different types, but only one filter at a time.
- You can select two different system filters or two different resource type filters simultaneously.
Once the filter is used, it is added to the recent filters list:

To enable the suggested filters, set the Access Request: Enable filter suggestions for resource types and systems customer setting to true. See User Interface customer settings.
The number of filter chips is limited for better usability. If you select a filter of a certain type, other filters of the same type hide. They become visible again if you remove that filter from your search.
Enabling this functionality may negatively impact the resource search performance, especially in environments with large databases of resource types or systems.
Hiding text interpretation links
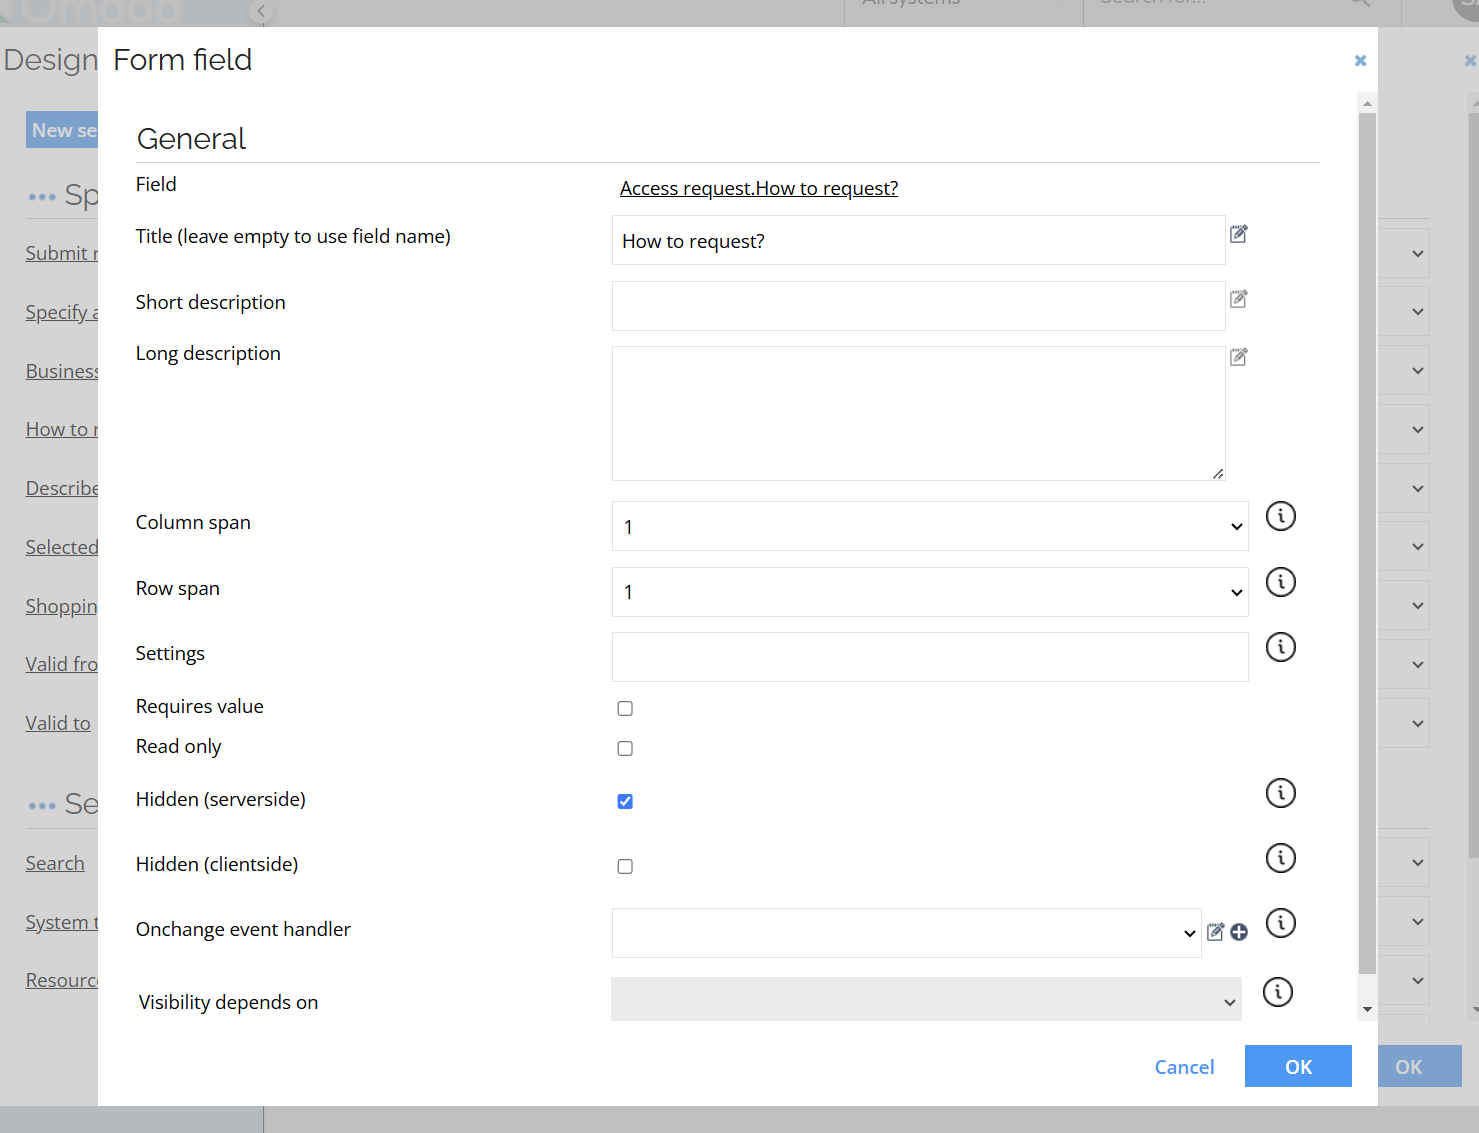
To hide Cannot find the correct access? link, go to Setup > Forms > Request access (Submit form) > Design Form > How to request and select Hidden Server-side. When checked, this text will not be visible, and the Written access request tab on the access page will be hidden.
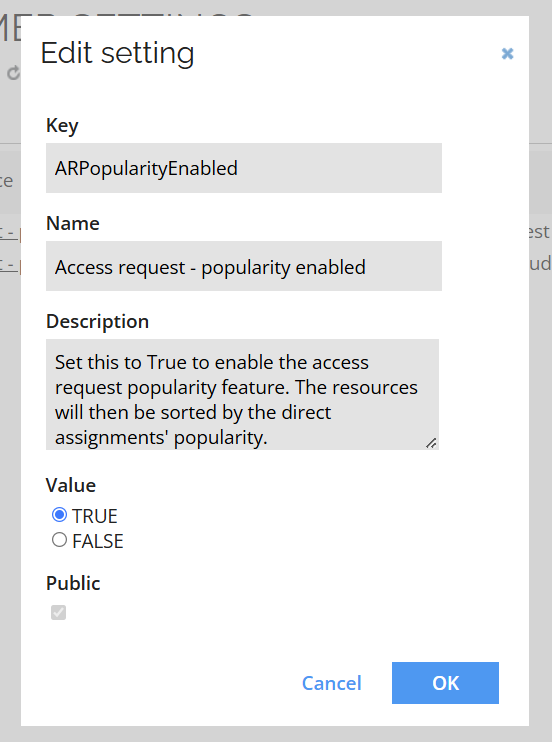
Managing popularity sorting settings
To enable the popularity sorting feature, go to Setup > Customer settings, look for the customer setting ARPPopularityEnabled, and set it to True. The resources will then be sorted by the direct assignments' popularity within the selected context.
Remove context field
It is possible to configure the system so that the context field is not available in the request.
To enable this, you need to set the business context field in the process template to Hidden (server side). To do so, follow these steps:
-
Log in to Omada Identity as a system administrator.
-
Go to Setup > Process templates > Request access.
-
Open the Process Template and select the first activity Request access. In the Attributes pane, open the form designer by clicking the form name Request access (ed2) -- Submit form.
-
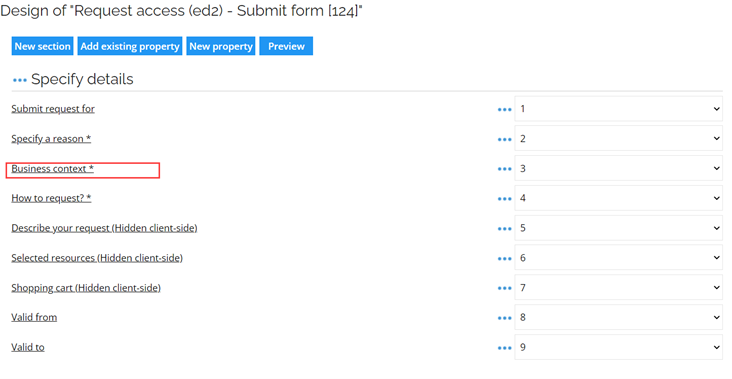
Click the Business context field.
-
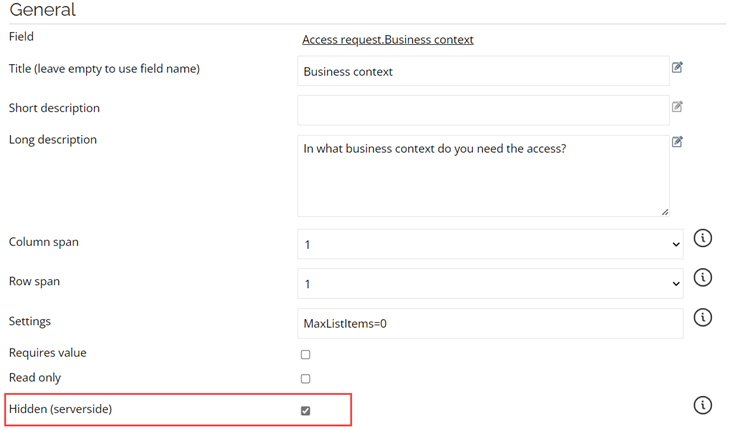
Set the field to Hidden (server-side) and save the form and the process template.
If you make the context not required in the Request access form, you also have to make context not required in the Interpret request form; otherwise, you will not be able to interpret the request, as the context will be missing.
Prevent self-service
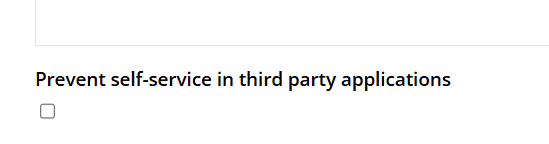
To restrict self-service capabilities, navigate to Setup > Resources > Advanced and check the Prevent self-service third party applications option. The property can be set on resource, resurce type and/or system.
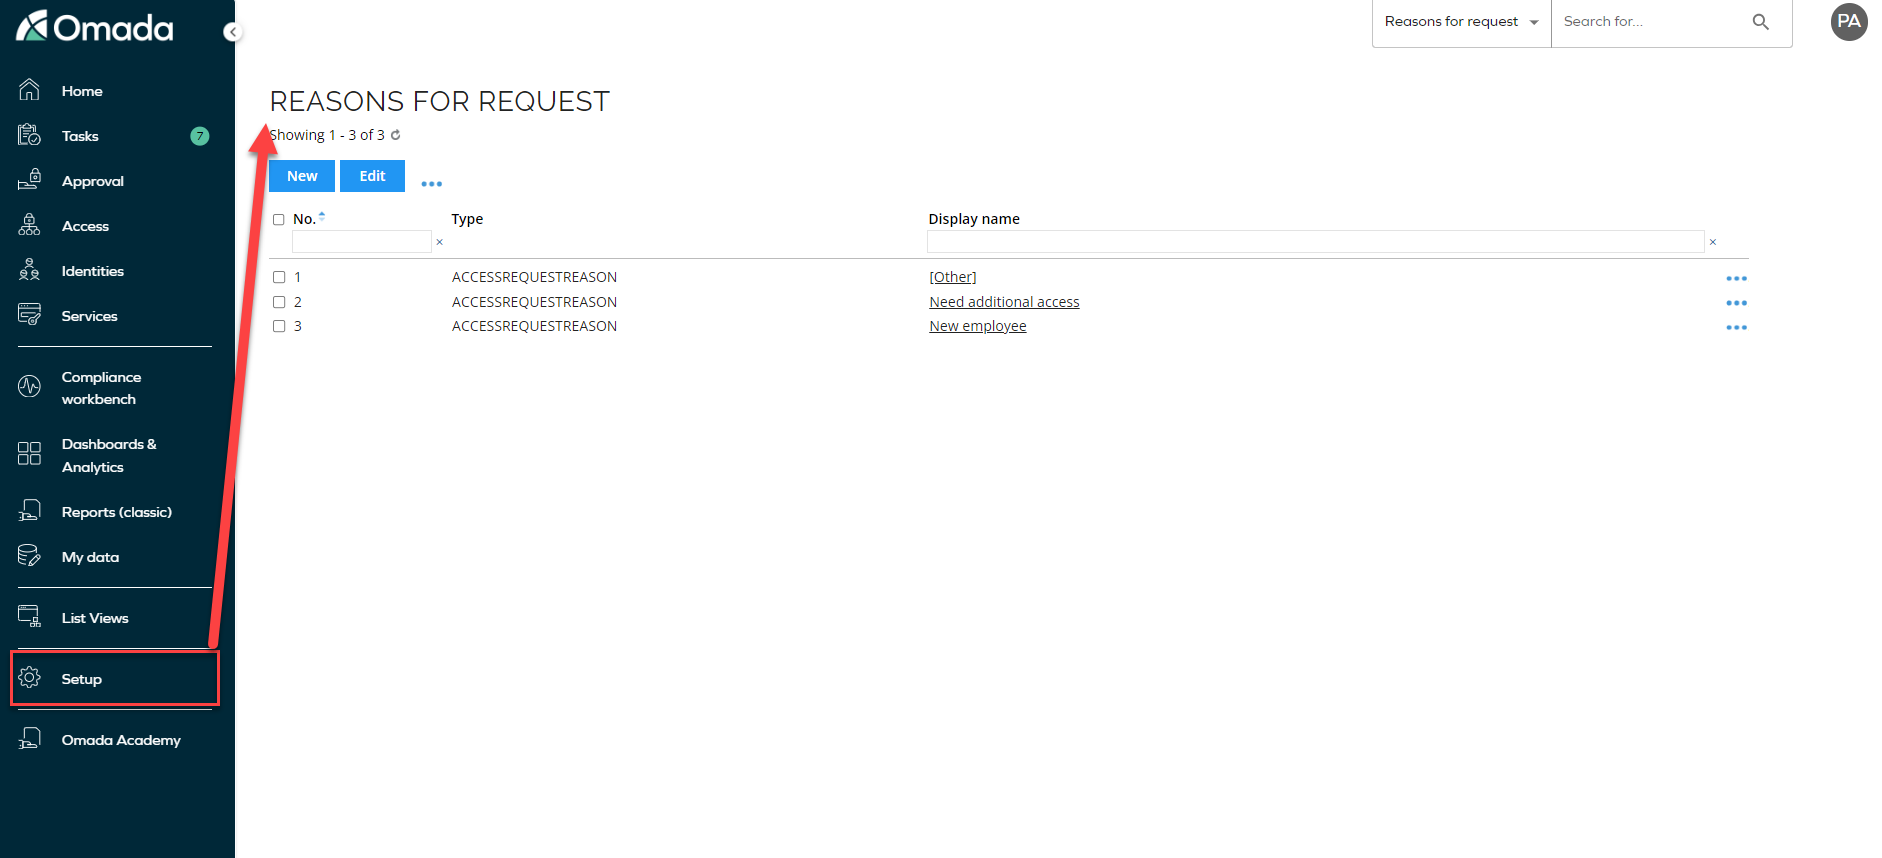
Change default values for the Reason field
To change the default values for the Reason field you need to go to Setup > Reason for request.
Edit contexts in Access Request
You can control which context types are shown and possible to select in the request process. To change this go to Setup > Properties and find the system name AR_CONTEXT, click Edit lookup view and set up the filters you want to appear in the Access request process. Edit the Data object type filter. Select the context types that you want to see and be able to select. This doesn't affect which contexts are used in the Eligibility Filter functionality.
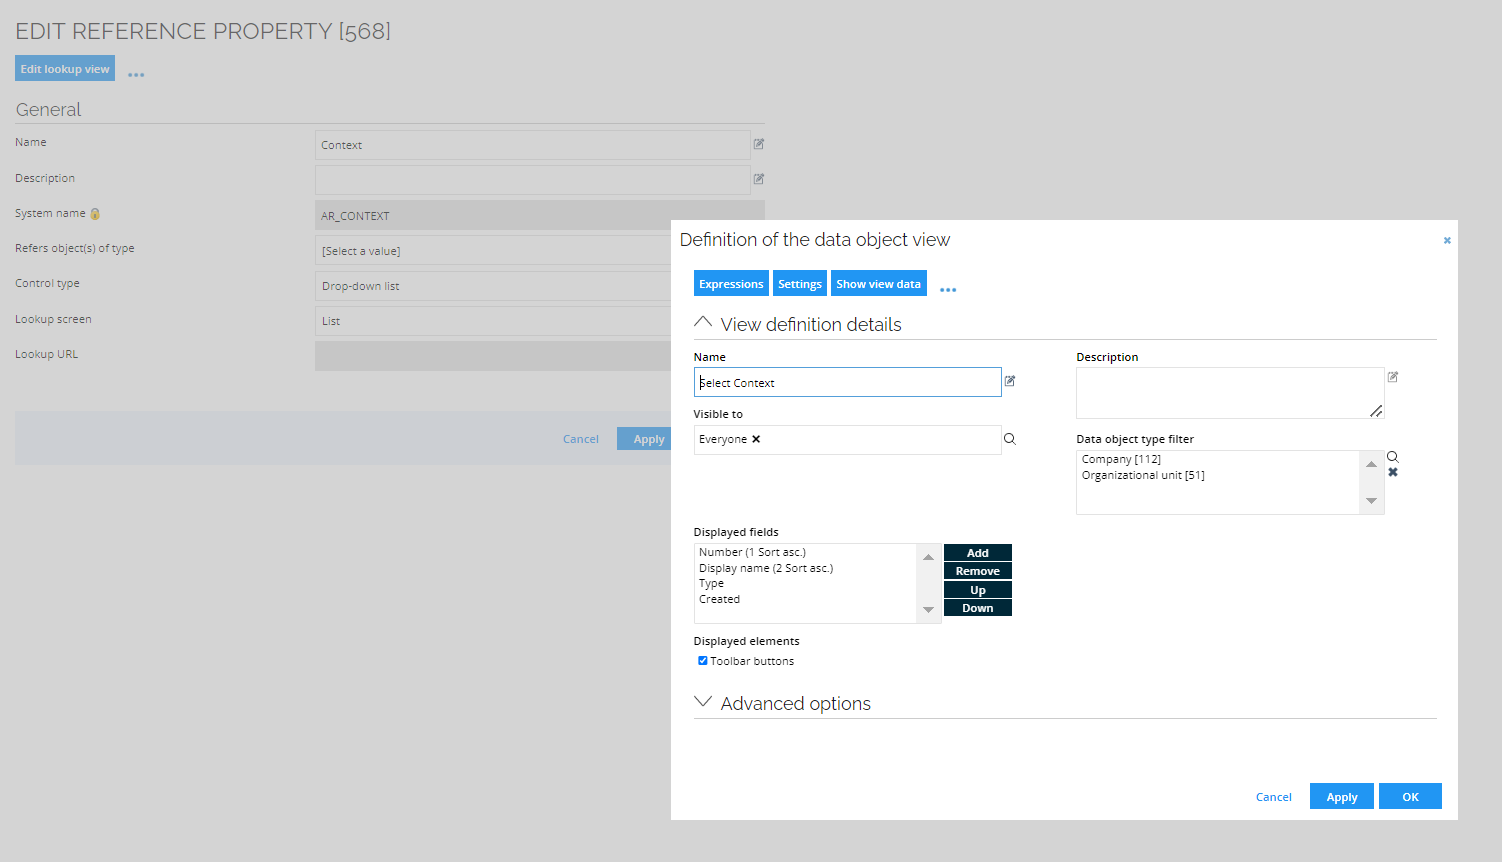
Now, when requesting access, you can only select the defined context types in the business context field.
Experience the approve access request process with Omada Identity Cloud interactive walkthrough. Learn how to perform a manager approval of access requested by one of your subordinates.
Changing or adding approvers to change the approval flow
To change or add who will act on behalf of identities in the approval process for requested access, you need to change the actors and their sequence in the approval process. To do it, follow these steps:
- Rename the values for the Approval property, and leave the level sequence as default (Level 1, Level 2, and so on).
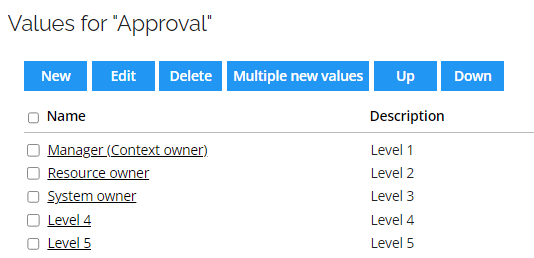
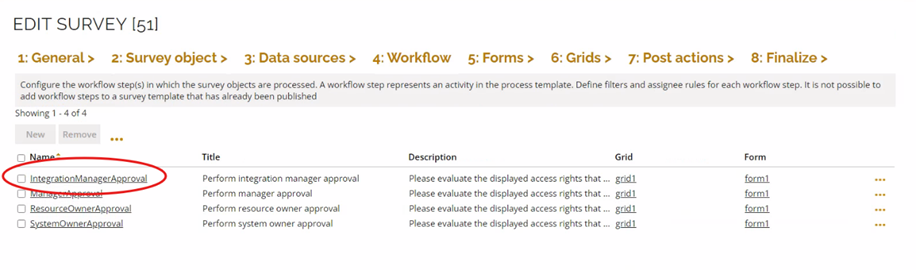
If you want to change Level 2 approver from Manager to a role used in your company (for example, Integration Manager), you need to rename Level 2 from Resource owner to Integration Manager, then rename Level 3 from System owner to Resource owner, and rename Level 4 from Level 4 to System owner.
- Update the sequence in the Workflow step of the Approval survey to include the newly added approval step.
Following the previous example, if you added the Integration Manager on Level 2, you need to add the following workflow step:
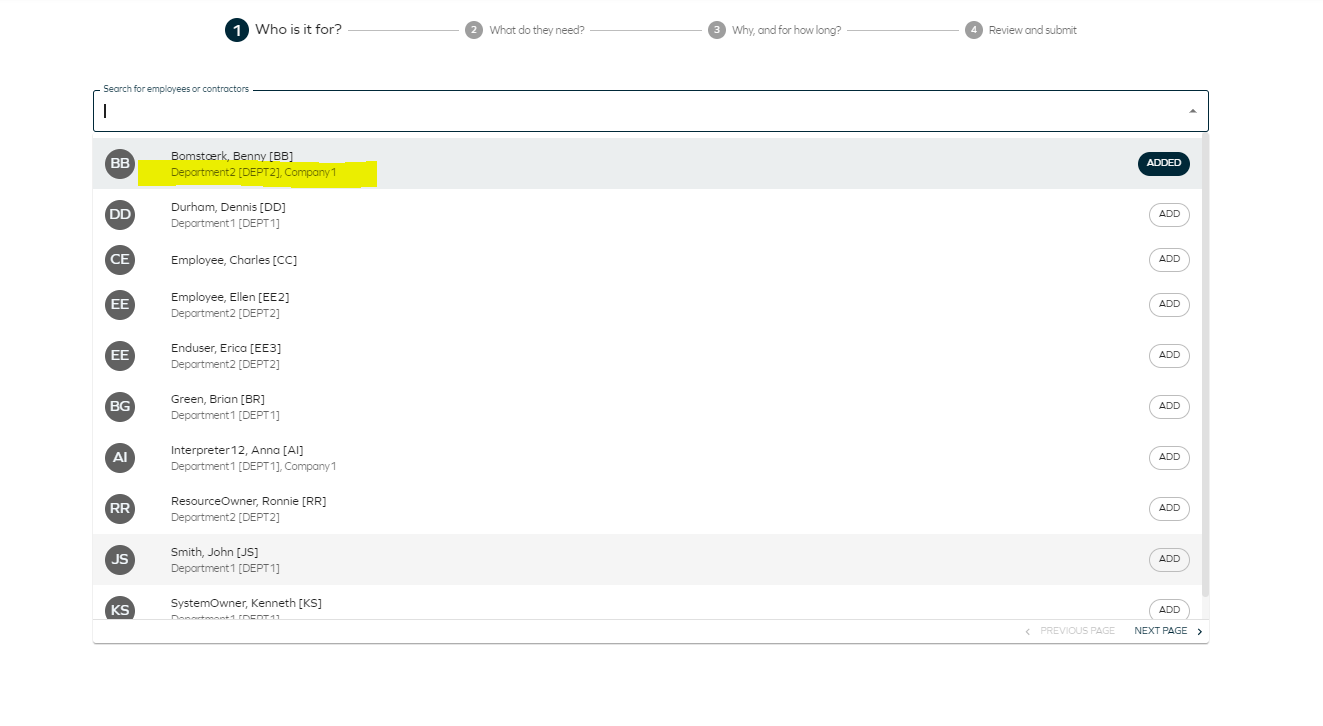
Request access on behalf
The access modifier on the identity selection field controls who can make requests on behalf of others. If you can see and select an identity in the first step, it means you can make a request for that user.
To allow more people to make requests on behalf of others, you need to adjust the access modifier. Follow these steps to change the access modifier.
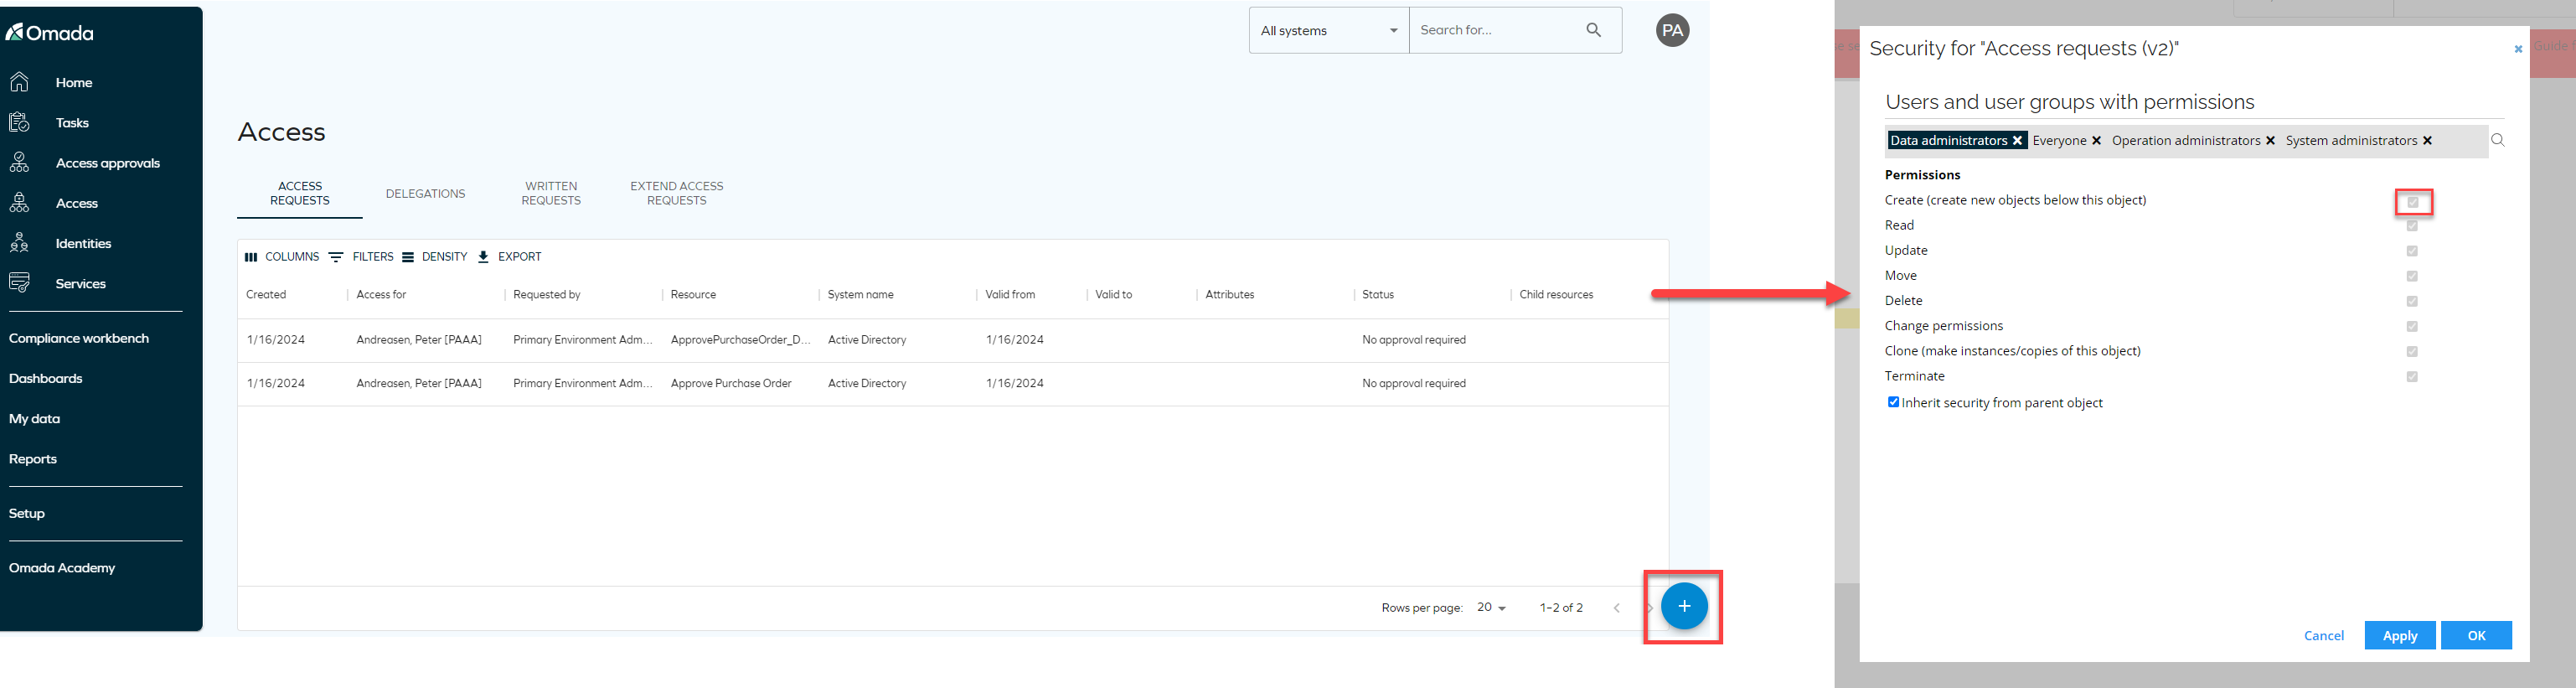
Request access button
The plus button to request access in the Access Request list view is hidden by default if you don't have the right permissions. You can change that in Setup > Tree structure. Select Access Request (v2) and check the permission Create (create new objects below this object).
SAP GRC risk analysis configuration
The configuration data for Risk Analysis in SAP GRC defines how the web service request payload is generated. The following section discusses configurable properties and their impact on the risk analysis process.
{
  "HitCount": 100,
  "SystemPropertyName": "SYSTEMID",
  "ReportType": [2, 3, 4],
  "ResourcePropertyName": "NAME",
  "webrequestconfigurations": [
    {
      "SystemUId": "4f0cf4d9-3efc-443d-9370-5164d3138fcf",
      "RiskAnalysisWithoutRequestWebReqConfig": "b8821e33-0b01-4029-b97d-6394a144f769"
    },
    {
      "SystemUId": "f05c44fa-7256-4b8b-8471-eaf598d9a99e",
      "RiskAnalysisWithoutRequestWebReqConfig": "809e8fc7-d88a-46ee-96ec-2409f719e4c9"
    }
  ]
}
This configuration allows different GRC instances to be assigned for different systems by specifying multiple webrequestconfigurations.
-
HitCount(int): Maximum number of results to return (default: 100). -
SystemPropertyName(string, required): System name of a value property on the system data object type to use as the connector. -
ReportType(array of int): Specifies report types for analysis (default: [2, 3, 4]). Possible values: [1, 2, 3, 4, 5, 6, 7, 8, 9, 10, 21, 22, 30, 31, 32, 33, 34, 35]- 1: Action Level
- 2: Permission Level
- 3: Critical Action
- 4: Critical Permission
- 5: Critical Role/Profile
- 6: Analytical Report
- 7: Mitigating Controls
- 8: Invalid Mitigating Controls
- 9: Alerts
- 10: Access Risk Assessment
- 21: SoD Reports
- 22: ERM Role
- 30: ROLE
- 31: USER
- 32: PROFILE
- 33: USERORG
- 34: ROLEORG
- 35: HROBJ
-
OrgRule(string, optional): Organizational rule to apply in the analysis (default: null). -
WebRequestConfigurations(array of objects): Defines configurations for different GRC instances/systems.SystemUId(string): Unique identifier for the system.RiskAnalysisWithoutRequestWebReqConfig(string): Configuration ID for risk analysis without a request.
Configuration
Perform the following action to integrate with the SAP GRC system using a SOAP web request. The primary purpose is to perform risk analysis using the grac_risk_analysis_wout_no_ws web service.
Key configuration fields:
- URL: The URL should point to the SAP web service endpoint for risk analysis. The accepted format:
http://[SAPSERVER]/sap/bc/srt/rfc/sap/grac_risk_analysis_wout_no_ws/100/grac_risk_analysis_wout_no_ws/grac_risk_analysis_wout_no_ws. Replace[SAPSERVER]with the actual SAP server hostname or IP. - Action: This specifies the SOAP action for the request. Example:
urn:sap-com:document:sap:soap:functions:mc-style:GRAC_RISK_ANALYSIS_WOUT_NO_WS:GracIdmRiskWoutNoServicesRequest - Request Type: Set to SOAP, as this is a SOAP-based integration.
- Content Type: Set to text/xml, as SOAP messages are formatted in XML.
- Accept: Set to text/xml (the response format should be XML).
- Timeout: The timeout value determines how long Omada Identity waits for a response before timing out.
Ensure that the SAP web service is active and accessible. If authentication is required, update the SOAP authentication type accordingly. Adjust security protocol settings if your SAP instance requires HTTPS or additional encryption.
In the EngineConfiguration.config XML file for RoPE, remove the comment. Esure that the SAPGRCPolicyCheckExtension is not commented out:
    <add type="Omada.RoPE.Controller.OISX.Extensions.SAPGRC.SAPGRCPolicyCheckExtension, Omada.RoPE.Controller.OISX"/>
    </extensions>
  </executor>
</engineConfiguration>
Composite roles
To allow correct risk analysis of composite roles in SAP, perform the following steps:
- Add the
SAPCompositeChildResourcesreference property to the Resource data object type. - Change export mappings so the nested single roles from the SAP system are stored as reference values in the property mentioned in step 1.
- Open the Omada Identity system from the Systems list and click Warehouse to portal mappings.
- Click New and select Resources.
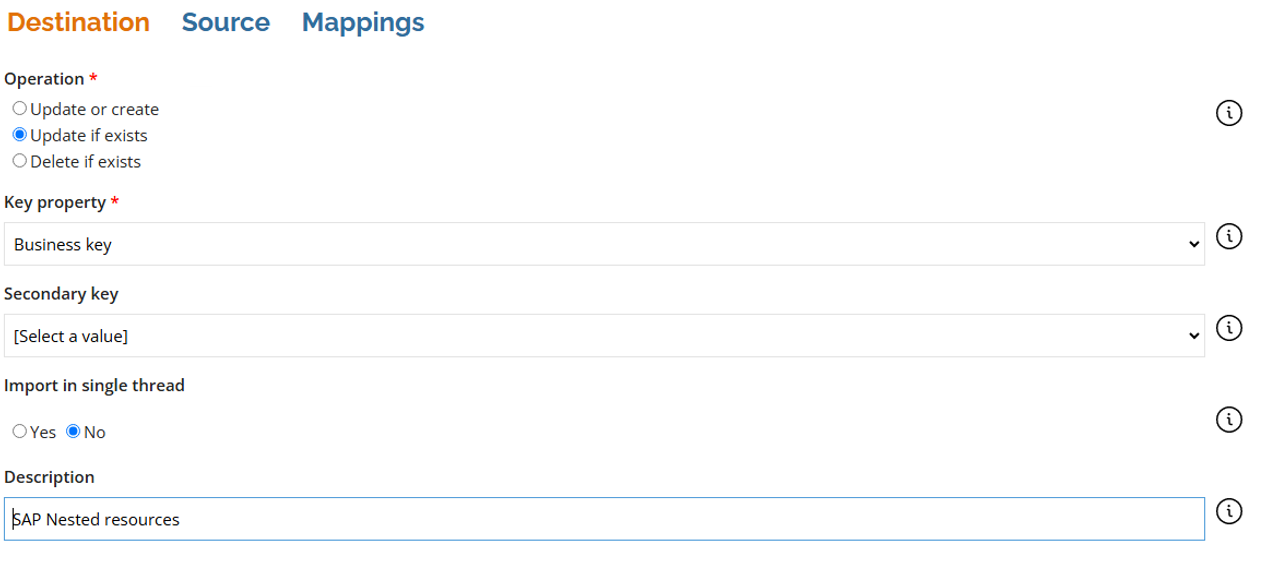
- Fill out the Destination tab with the following details:
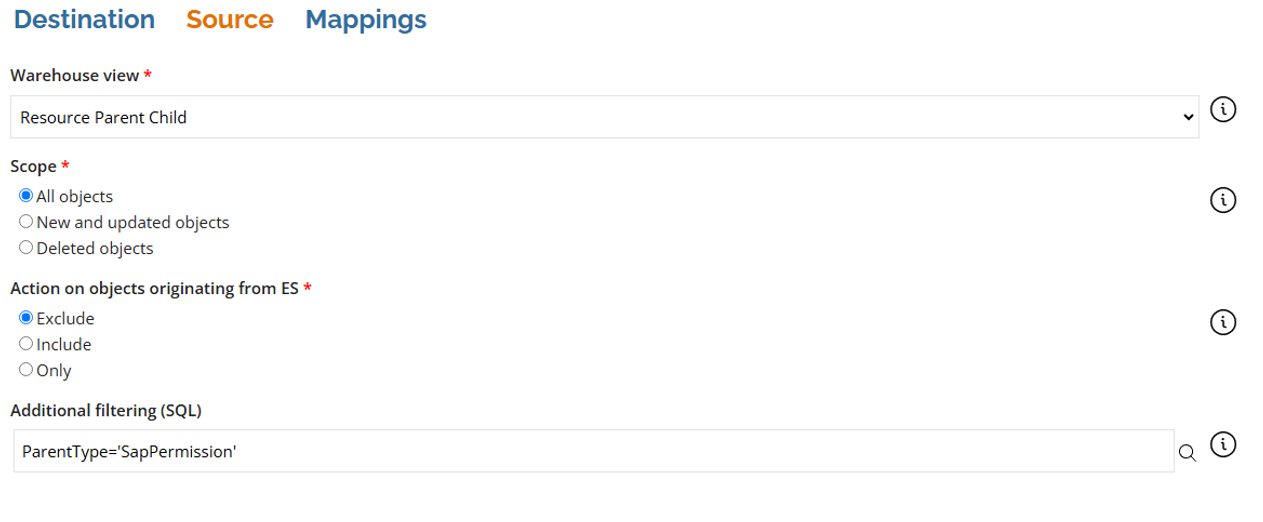
- Enter the following details in the Source tab:
- In the Mappings tab, create two mappings:
- Business key – Map – ParentComposedBusinessKey
- SAP nested resources – Map - ChildComposedBusinessKey
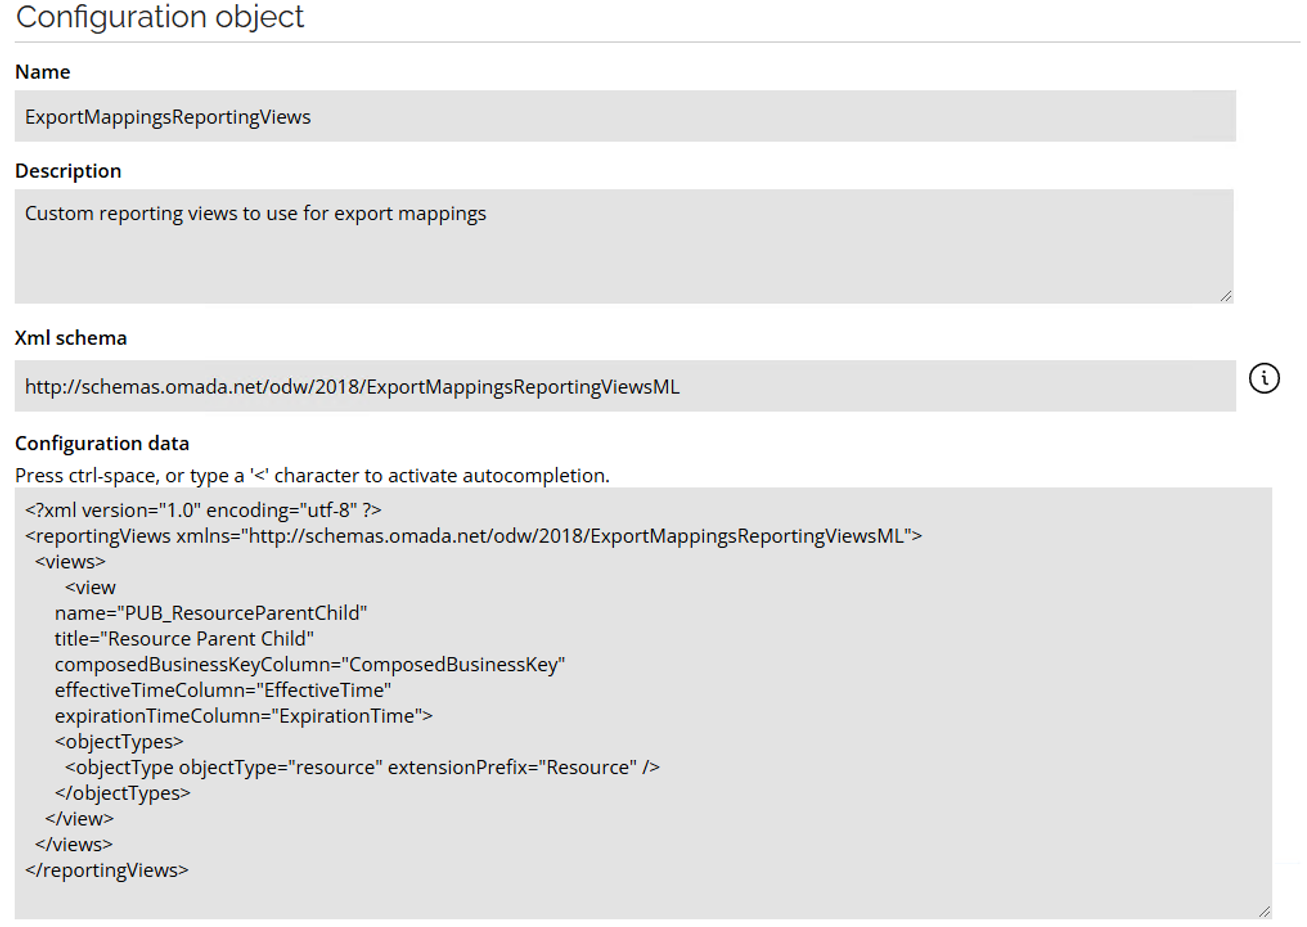
- Change
ExportMappingsReportingViewsconfiguration object to include the resource parent child view. Add the following to the<Views>node:
<view
      name="PUB_ResourceParentChild"
      title="Resource Parent Child"
      composedBusinessKeyColumn="ComposedBusinessKey"
      effectiveTimeColumn="EffectiveTime"
      expirationTimeColumn="ExpirationTime">
      <objectTypes>
        <objectType objectType="resource" extensionPrefix="Resource" />
      </objectTypes>
    </view>