Configure PingFederate with Open ID Connect on-prem
This page contains third-party references. We strive for our content to always be up-to-date, however, the content referring to external vendors may change independently of Omada. If you spot any inconsistency, please report it to our Helpdesk.
Follow these steps to configure PingFederate with Open ID Connect:
-
Log in to the PingFederate admin console.
-
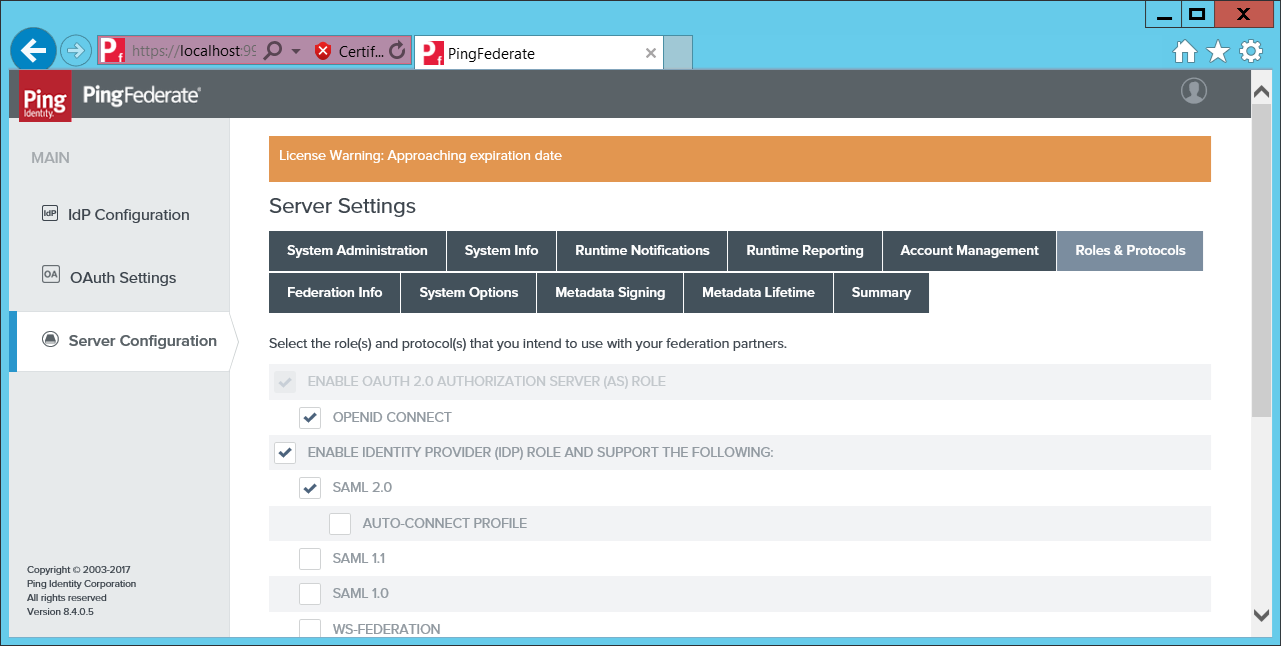
Go to Server Configuration > Server Settings > Roles & Protocols.
-
Enable OAuth 2.0 and OpenID CONNECT.
-
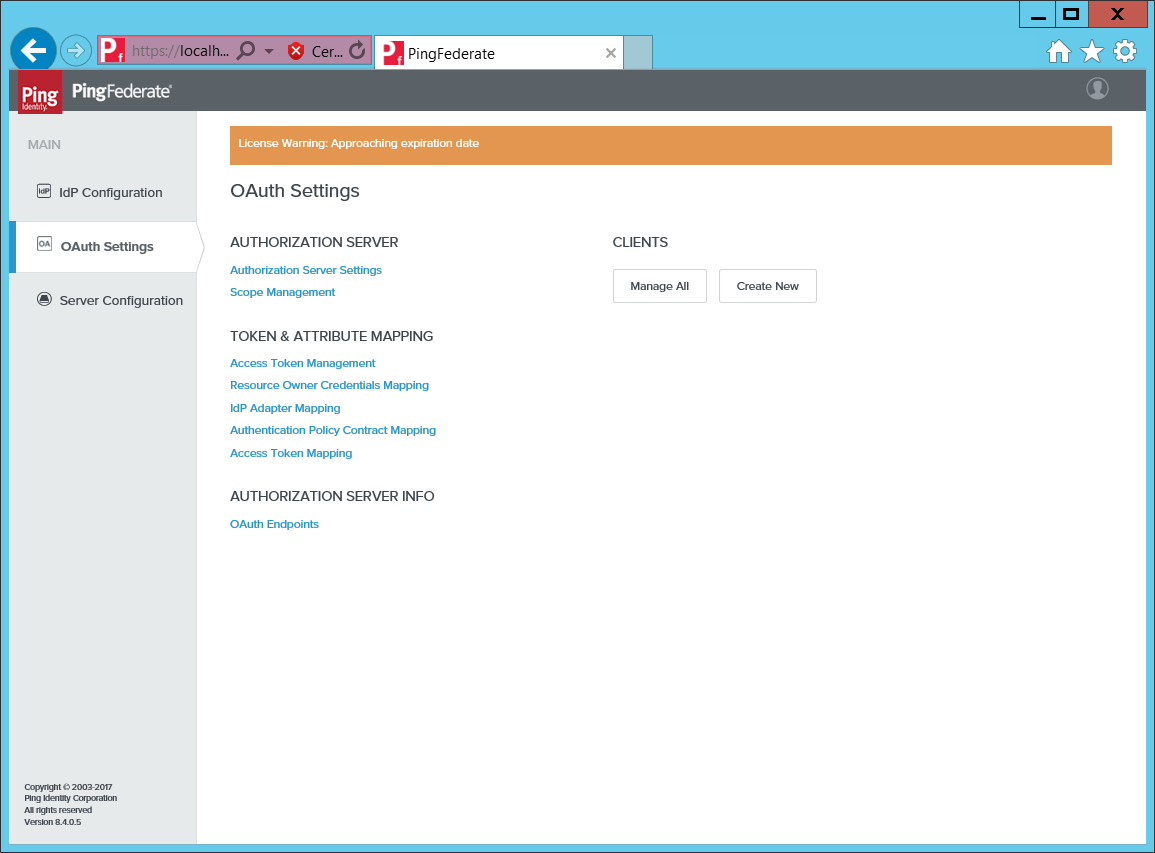
Select OAuth Settings, then click Create New.
-
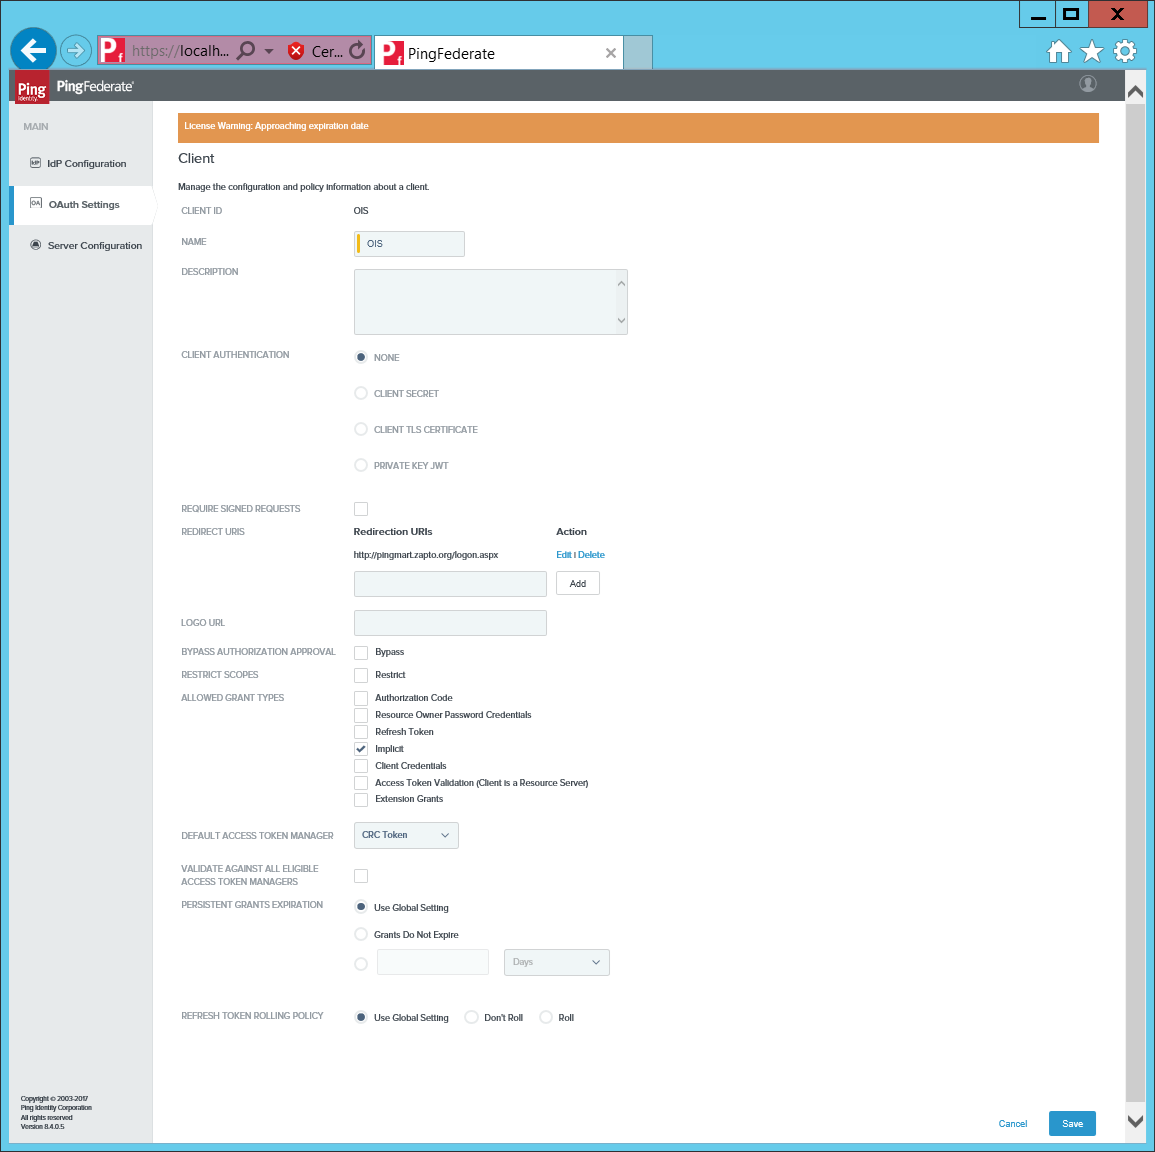
Type a name and the URL to logon.aspx (use lower case).
-
Select Implicit grant types, then click Save.
-
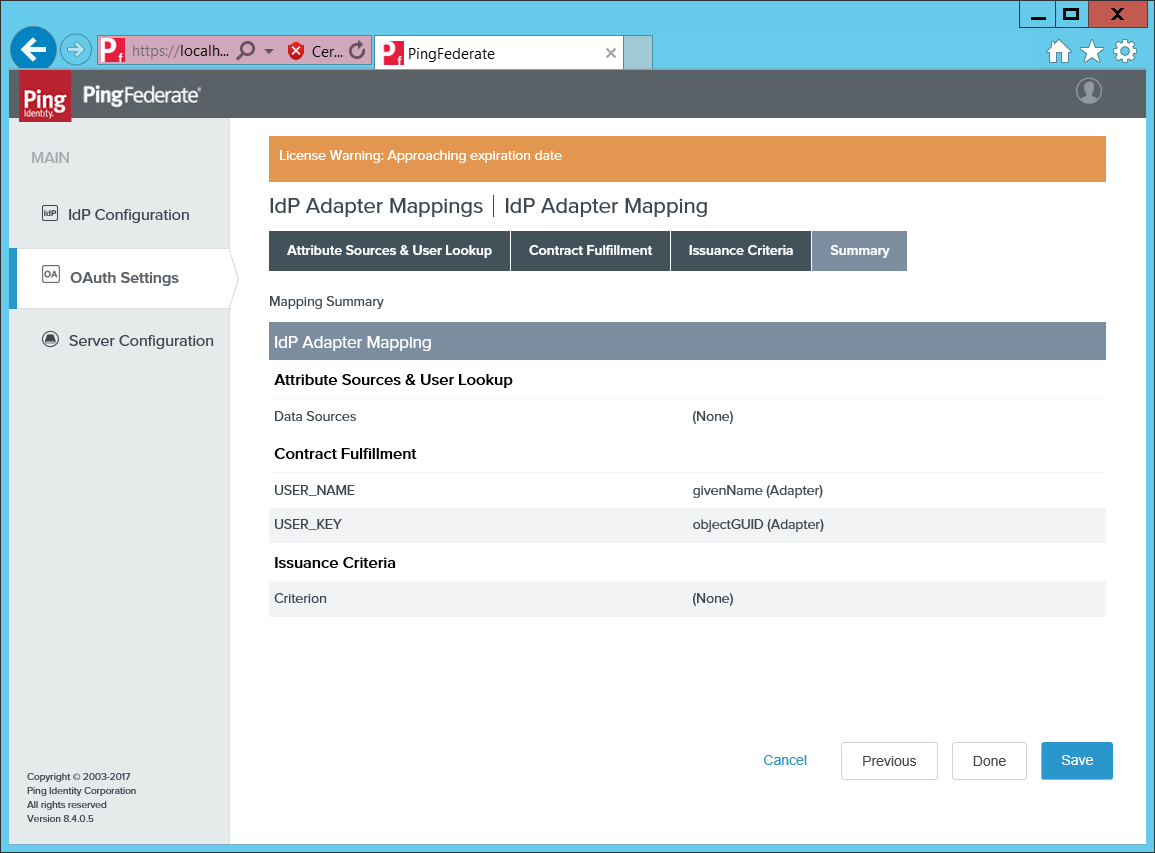
Go to OAuth Settings > IdP Adapter Mappings.
-
Map the
USER_KEYandUSER_NAMEto a meaningful value from the adapter. -
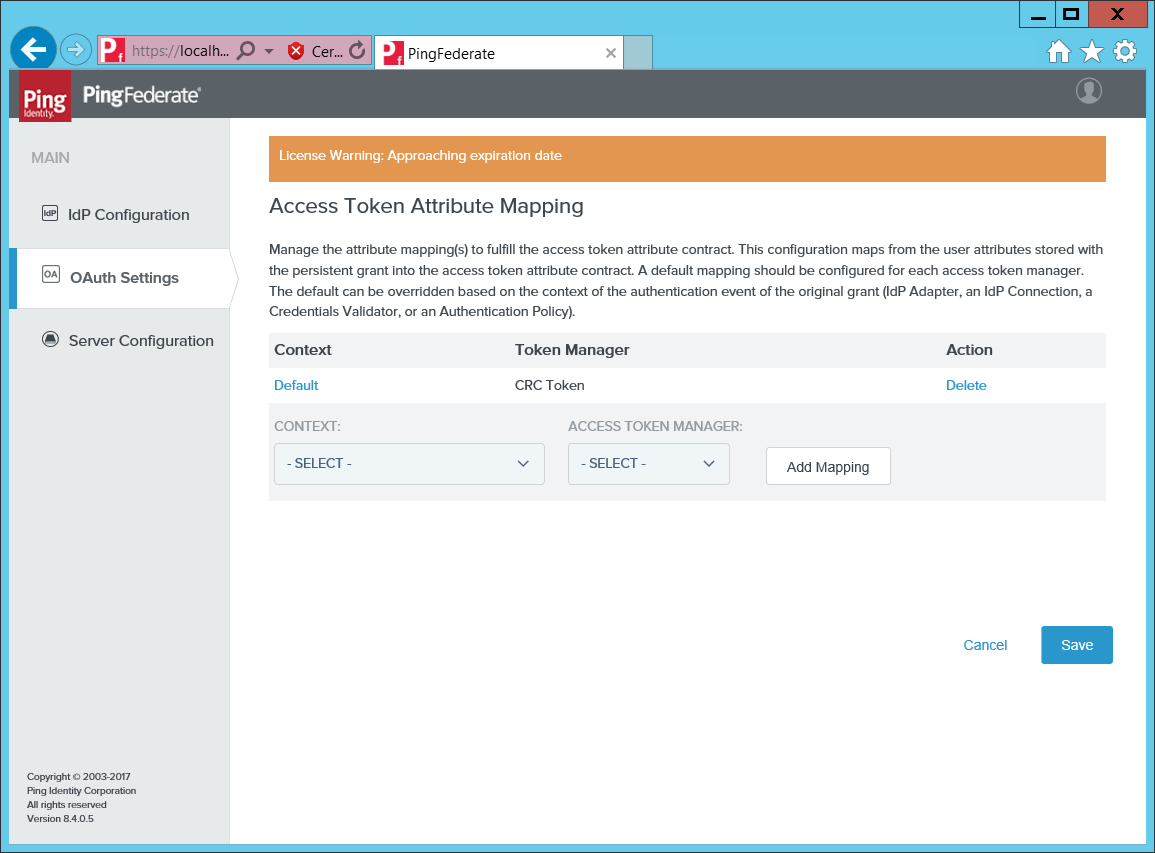
Open the Access Token Attribute Mapping.
-
Map the Default context to the CRC Token Manager.
-
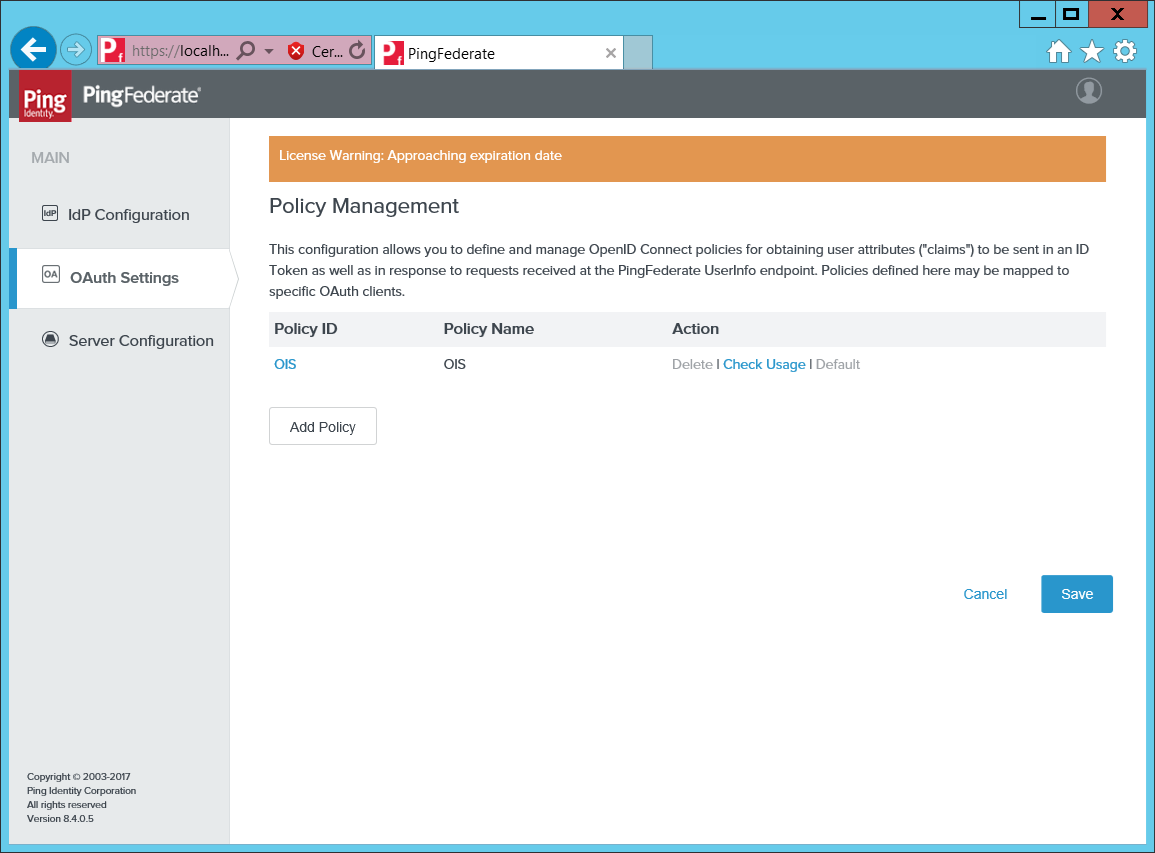
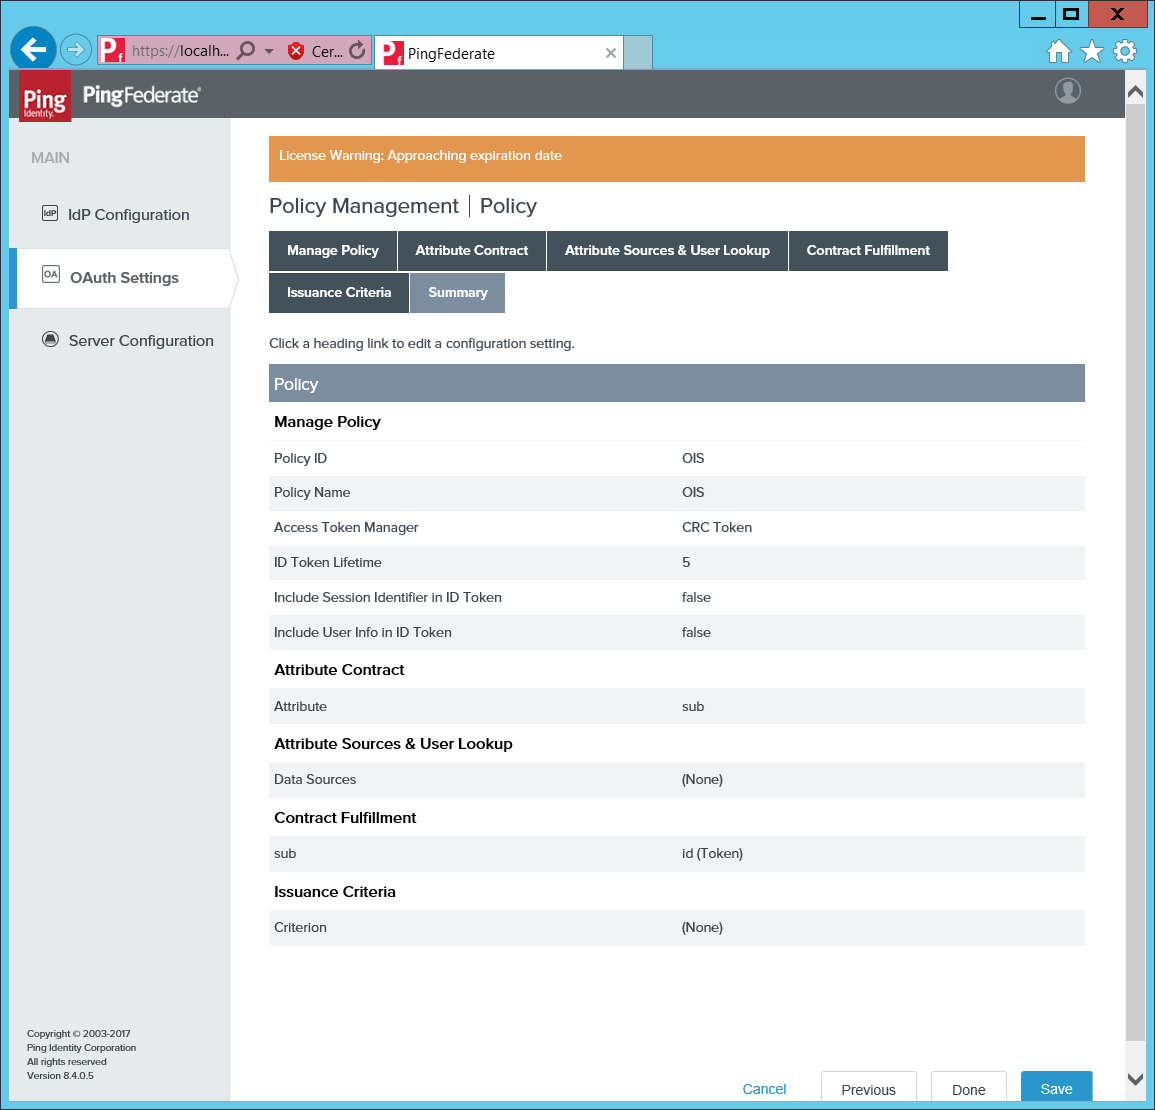
Next, open the Policy Management.
-
Add a policy Omada Identity mapping sub to id (Token).
-
Set the policy as Default, then create the Ping metadata endpoint from the URL to the PingFederate server and add
.well-known/openid-configurationat the end of the URL, for example: http://samlmart.zapto.org/.well-known/openid-configuration. -
Add the Client ID (Omada Identity) to
tblCustomerAuth.IdpIssueras well astblCustomerAuth.IdpAudienceand the Ping endpoint URL totblCustomerAuth.IdpEndPoint.