Configure Google with Open ID Connect on-prem
This page contains third-party references. We strive for our content to always be up-to-date, however, the content referring to external vendors may change independently of Omada. If you spot any inconsistency, please report it to our Helpdesk.
Follow these steps to configure Google with Open ID Connect:
-
Open the Google developer console on https://console.developers.google.com.
-
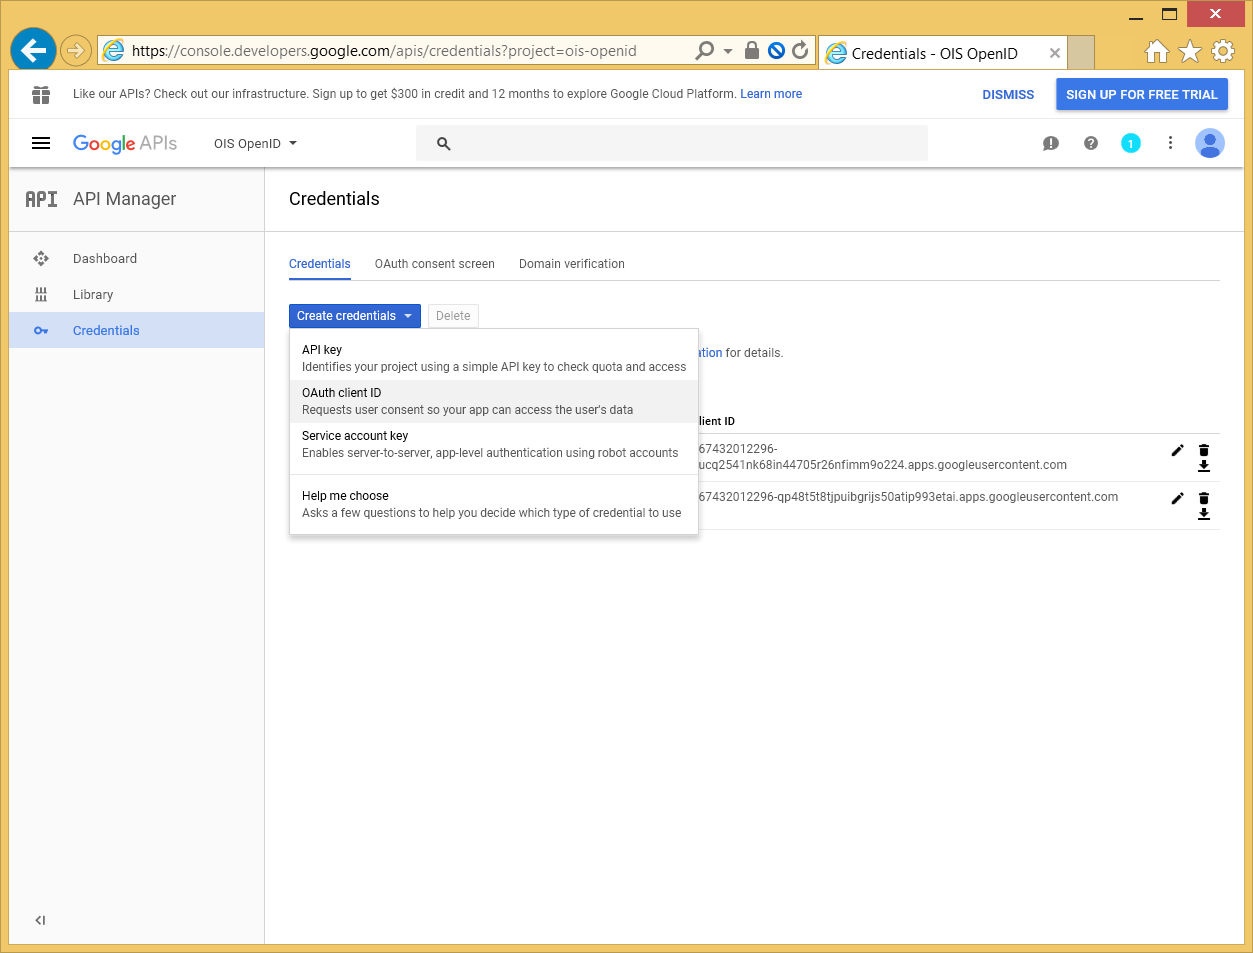
In the left-hand menu, select Credentials, and create a set of OAuth client id credentials.
-
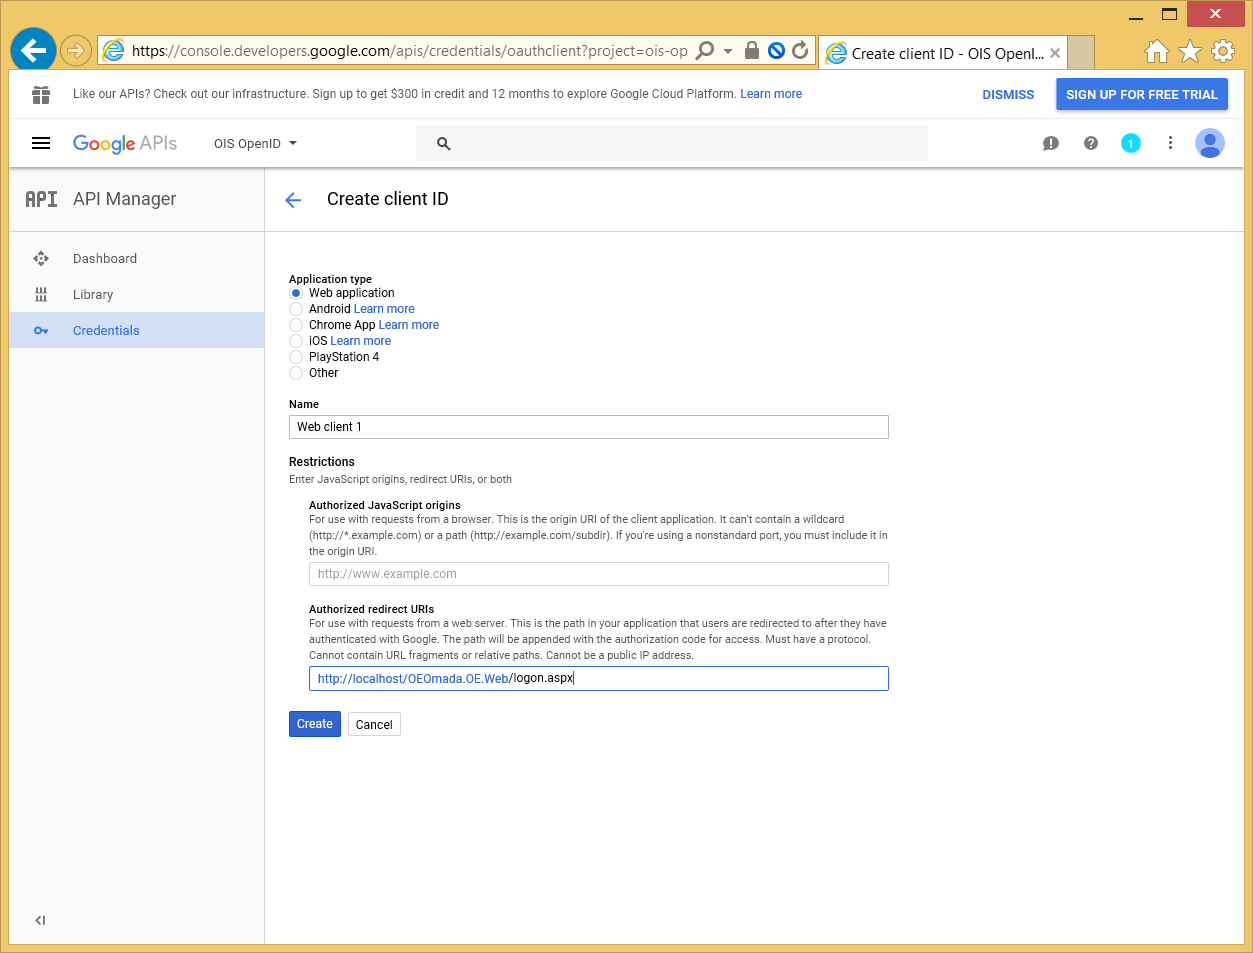
Select Web application, then type a name and the URL to the logon.aspx page in the Omada Identity Portal:
-
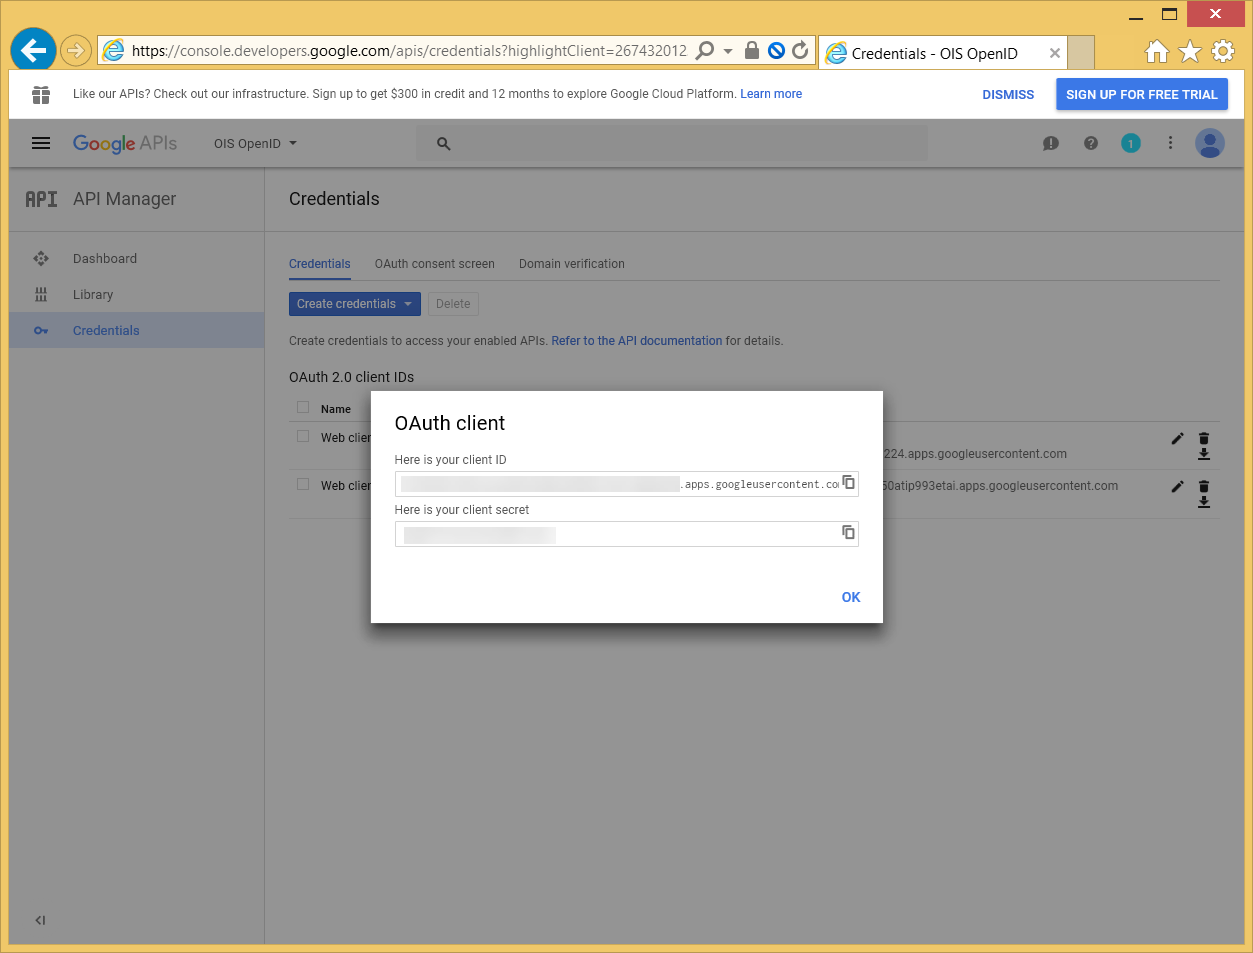
Copy the Client ID value into the IdpIssuer column in tblCustomerAuth in addition to the IdpAudience column.
-
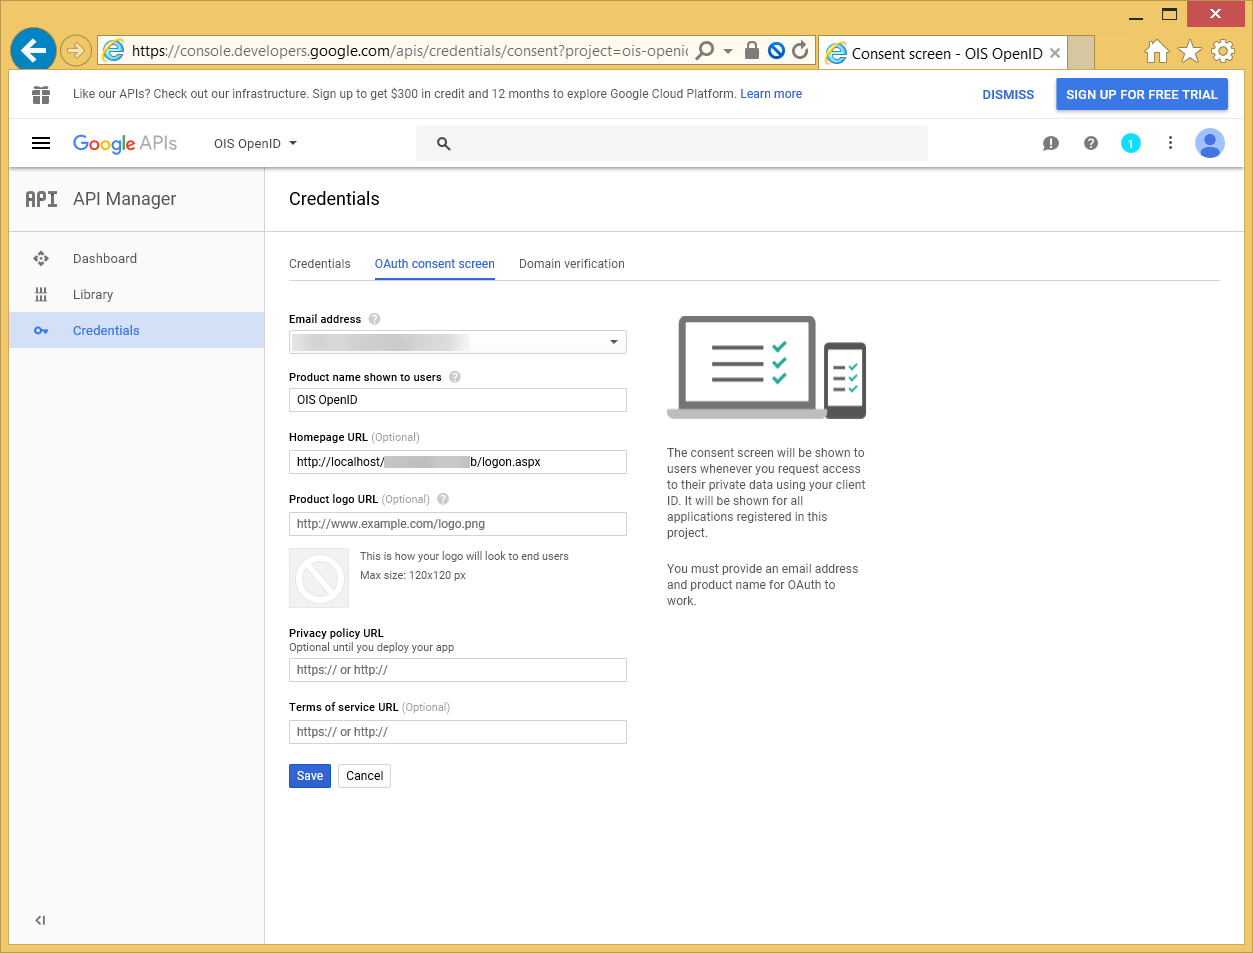
Configure the OAuth client with a product name and a homepage URL.
-
In the IdpEndPoint in tblCustomerAuth, paste or type https://accounts.google.com/.well-known/openid-configuration.
-
In the ResponseType column, in tblCustomerAuth table, set 0 (zero) as a value.
infoThe ResponseType column in the tblCustomerAuth table determines which
response_typevalue is sent in the OpenID Connect authorization request.-
0indicates theid_tokentype, facilitating Implicit Flow. For more information, refer to the OpenID documentation. -
1indicates thecodetype, enabling the highly secure Authorization Code Flow. For more information, refer to the OpenID documentation.
The flow used is determined by the
response_typevalue contained in the OpenID Connect Authorization Request.When the code response type is used, then, the Proof Key for Code Exchange (PKCE) is enabled. If PKCE is not supported, the code flow is disabled.
warningGoogle does not support the Authorization Code Flow with PKCE.
-