Configure PingFederate with Open ID Connect on-prem
This page contains third-party references. We strive for our content to always be up-to-date, however, the content referring to external vendors may change independently of Omada. If you spot any inconsistency, please report it to our Helpdesk.
To configure PingFederate with Open ID Connect:
-
Log in to the PingFederate admin console.
-
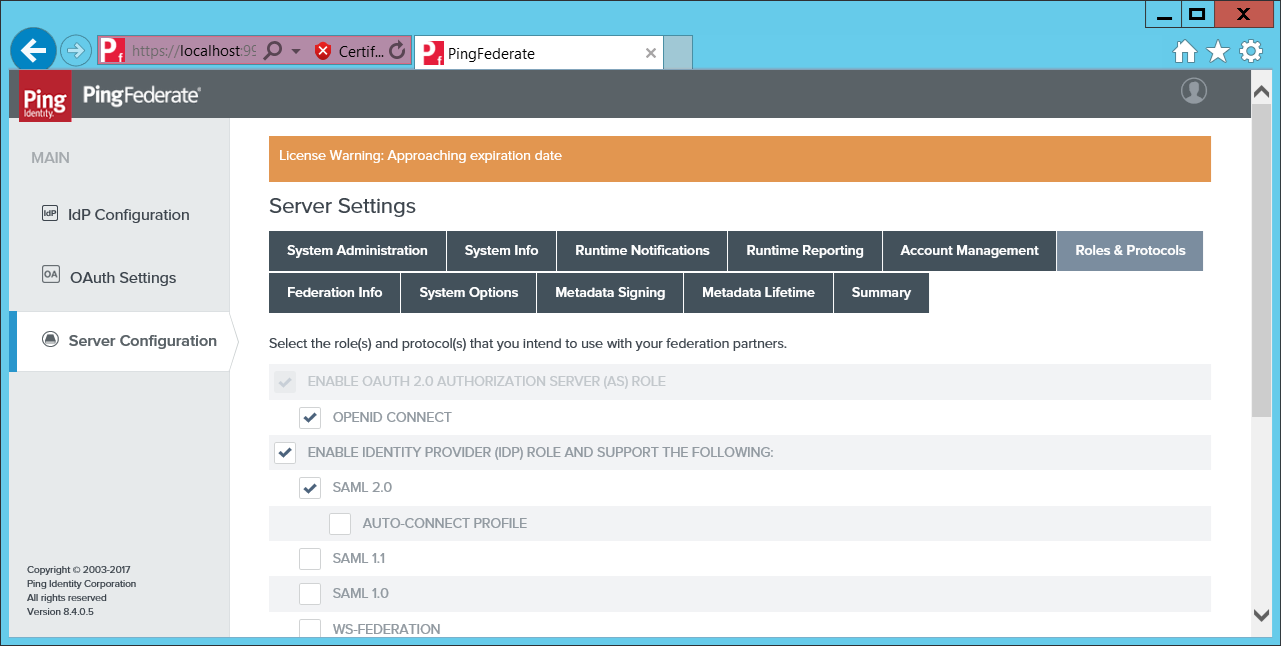
Go to Server Configuration > Server Settings > Roles & Protocols.
-
Enable OAuth 2.0 and OpenID CONNECT.
-
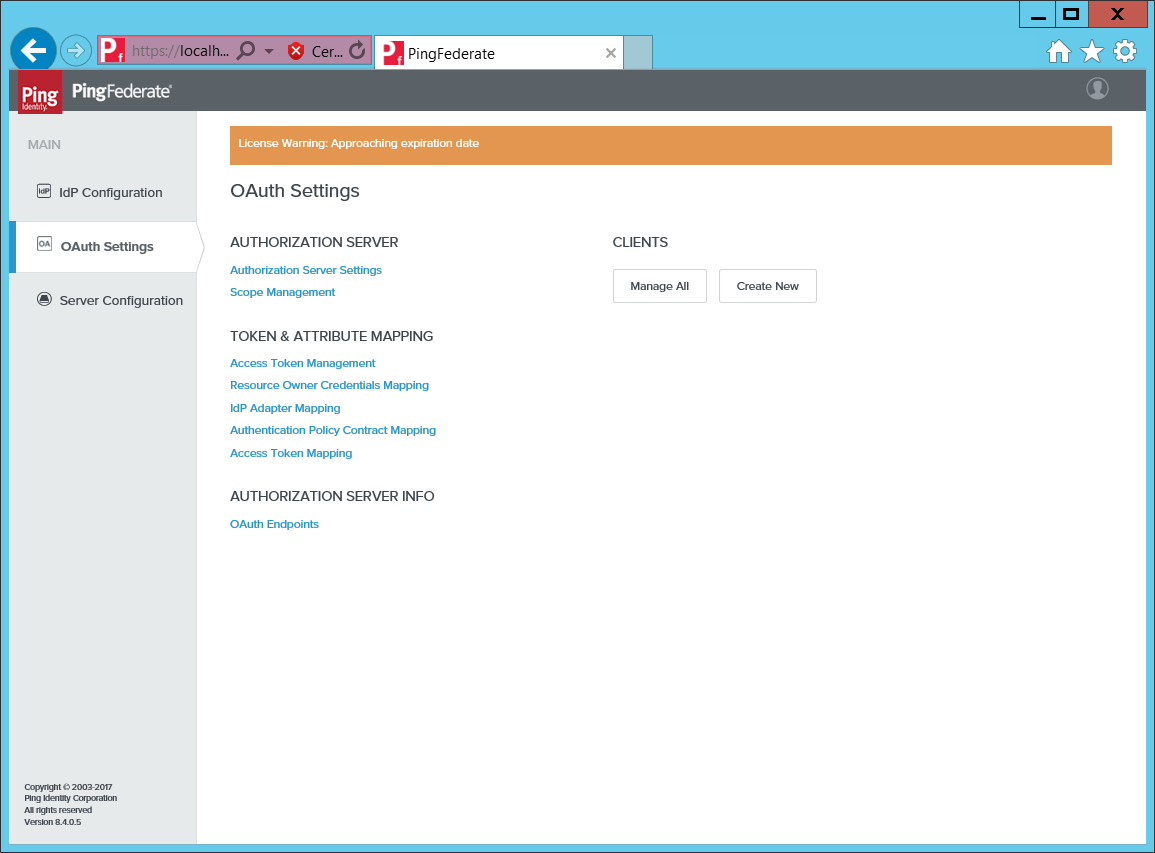
Select OAuth Settings, then click Create New.
-
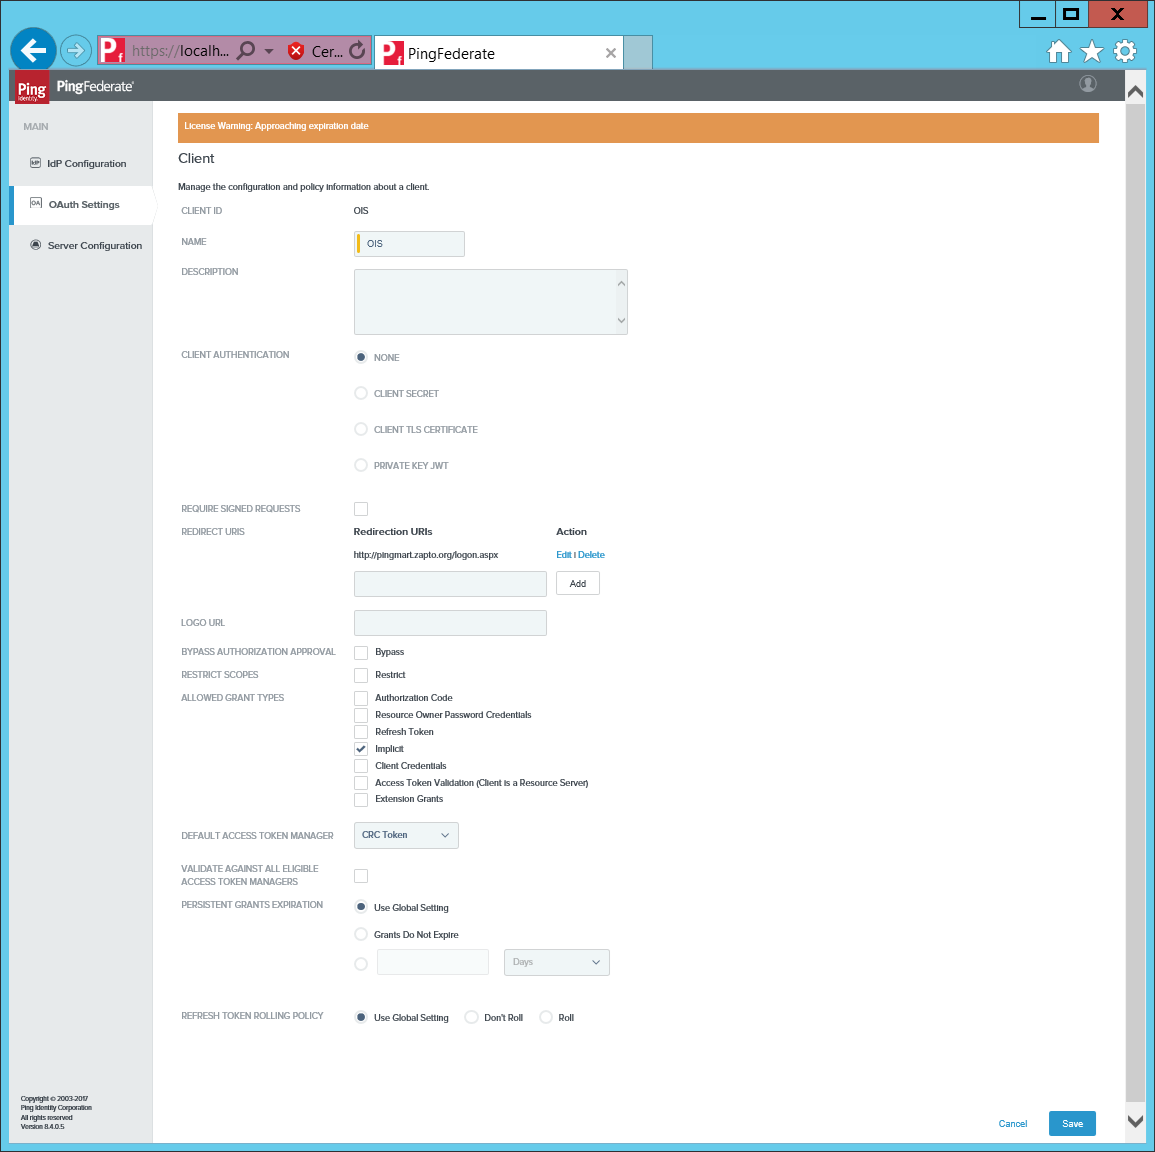
Type a name and the URL to logon.aspx (use lower case).
-
Select Implicit grant types, then click Save.
-
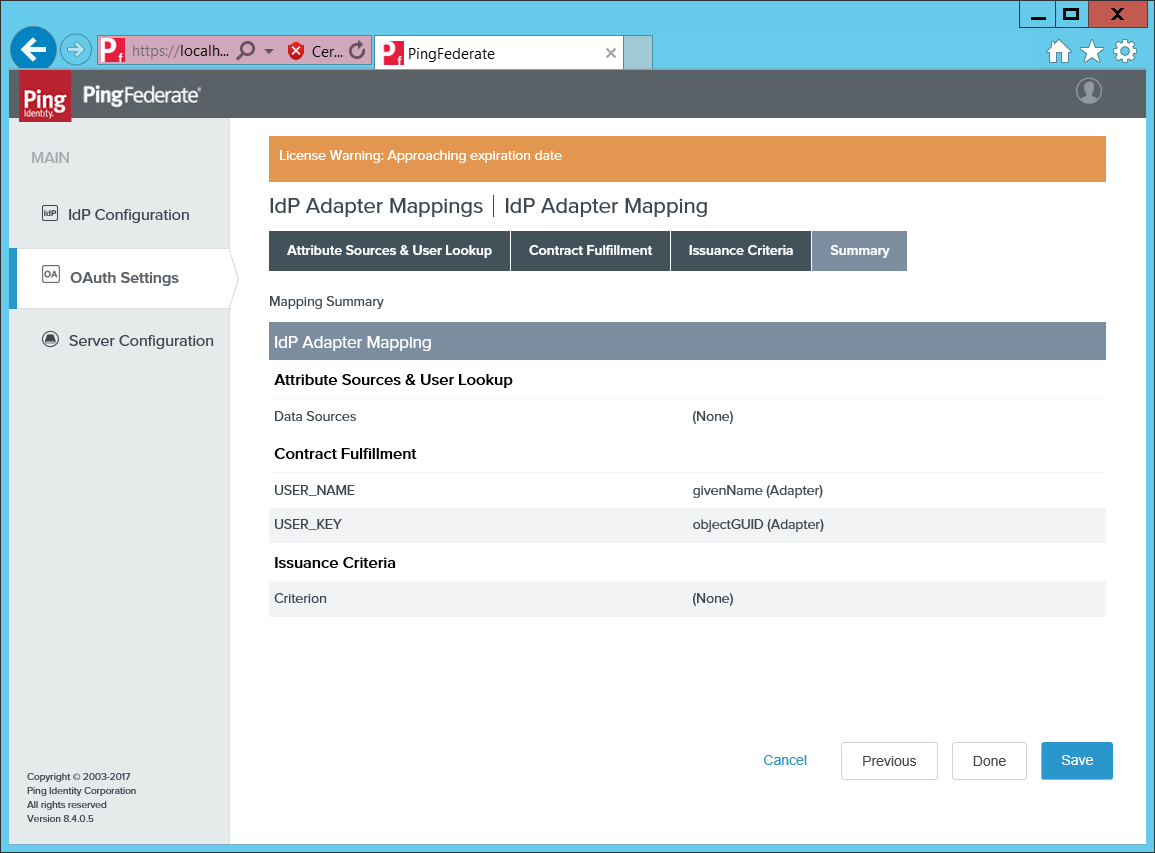
Go to OAuth Settings > IdP Adapter Mappings.
-
Map the
USER_KEYandUSER_NAMEto a meaningful value from the adapter. -
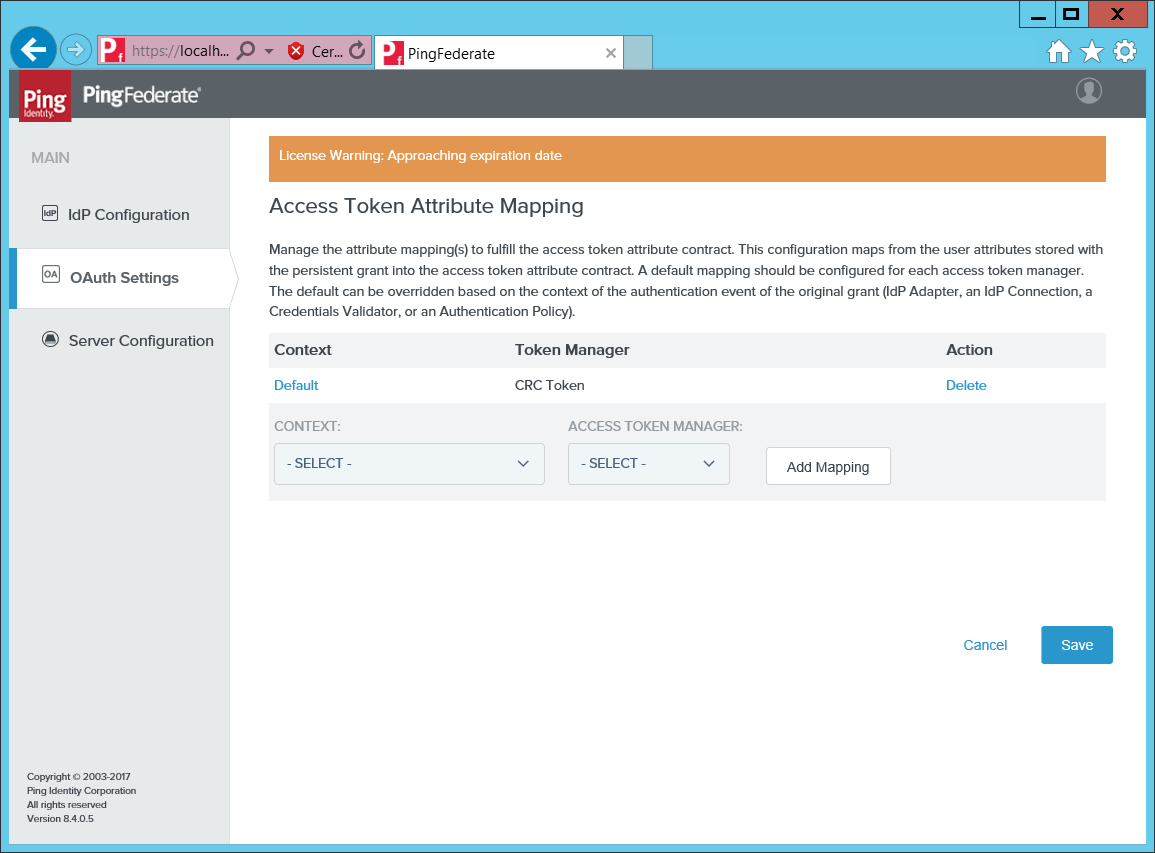
Open the Access Token Attribute Mapping.
-
Map the Default context to the CRC Token Manager.
-
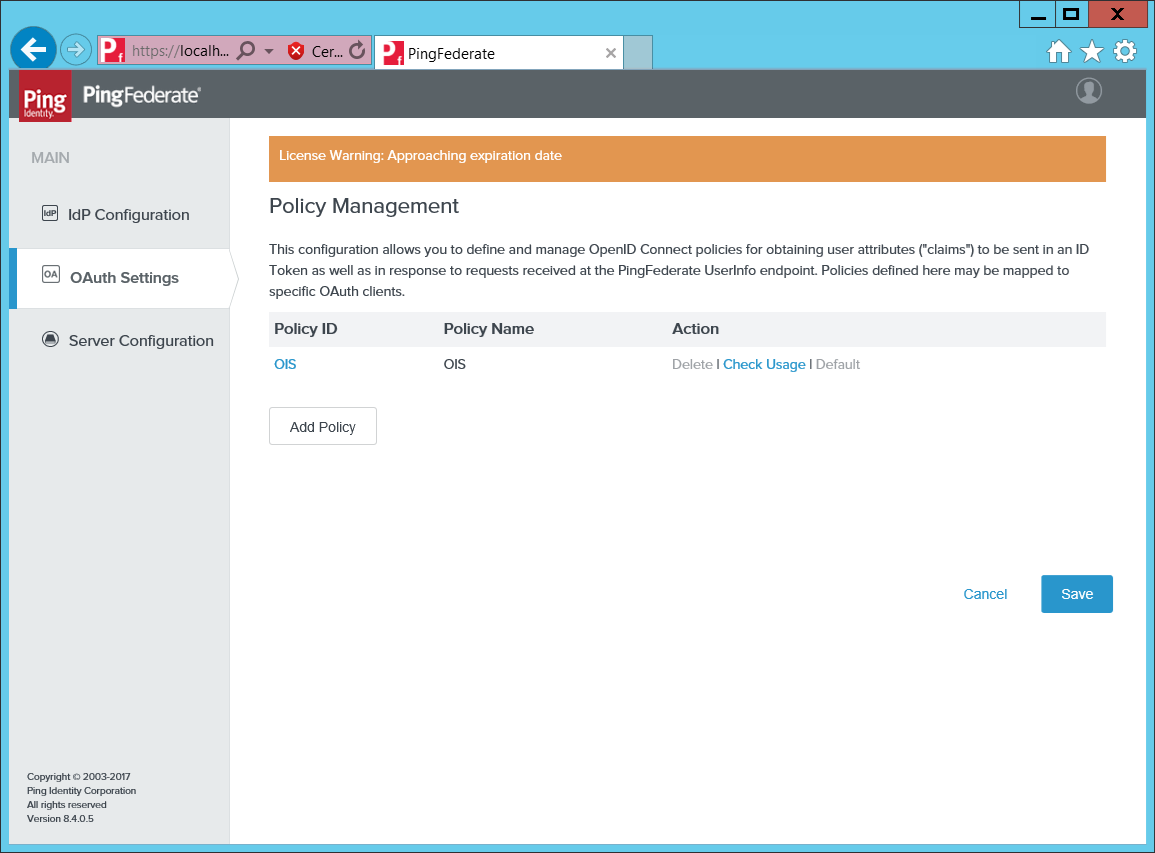
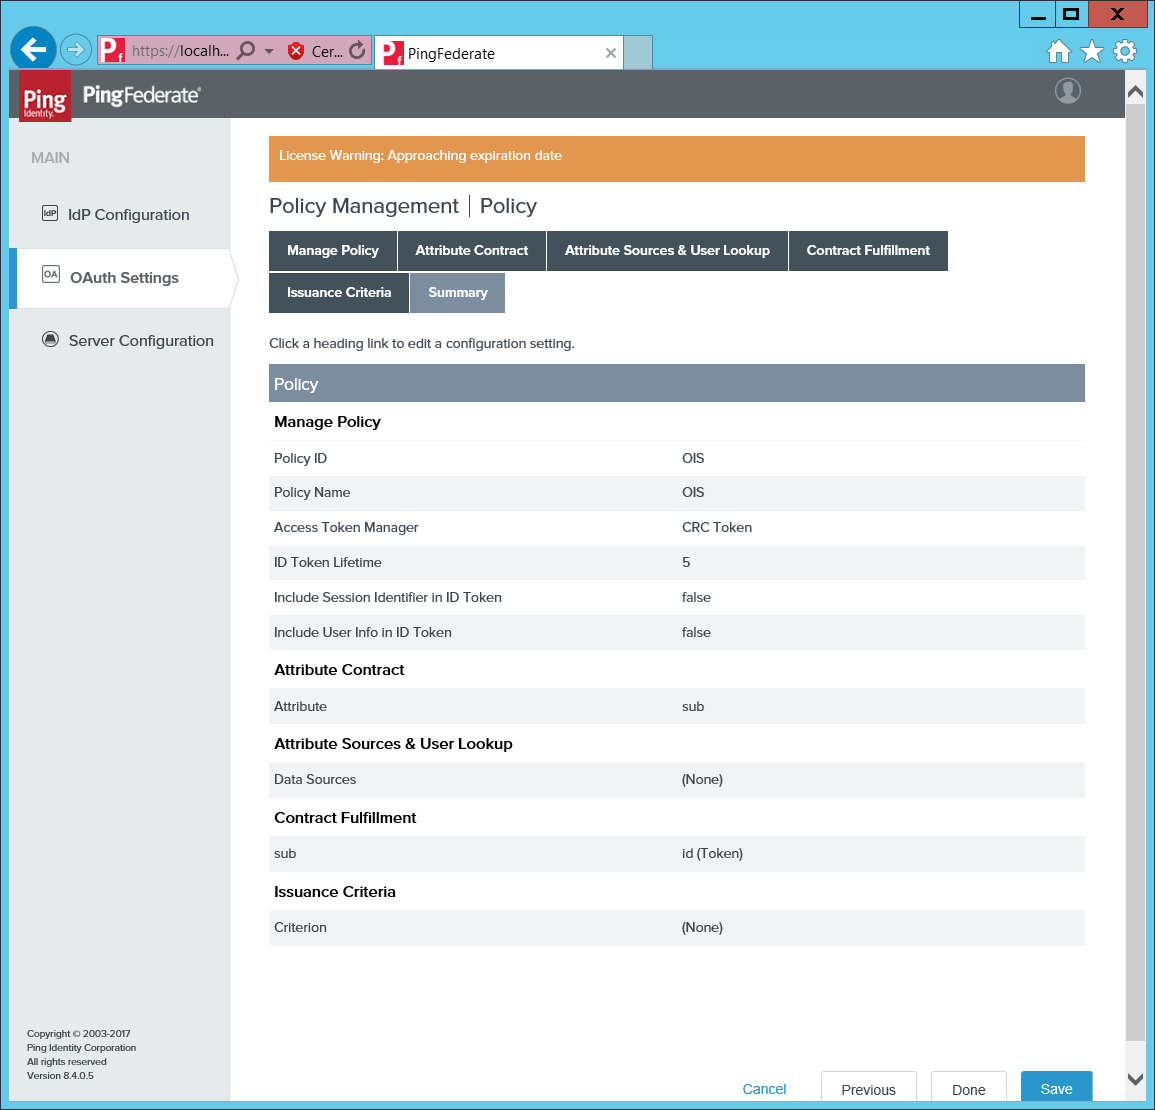
Next, open the Policy Management.
-
Add a policy Omada Identity mapping sub to id (Token).
-
Set the policy as Default, then create the Ping metadata endpoint from the URL to the PingFederate server and add
.well-known/openid-configurationat the end of the URL, for example: http://samlmart.zapto.org/.well-known/openid-configuration. -
Add the Client ID (Omada Identity) to
tblCustomerAuth.IdpIssueras well astblCustomerAuth.IdpAudienceand the Ping endpoint URL totblCustomerAuth.IdpEndPoint.