Configure OKTA with Open ID Connect
This page contains third-party references. We strive for our content to always be up-to-date, however, the content referring to external vendors may change independently of Omada. If you spot any inconsistency, please report it to our Helpdesk.
To configure OKTA with Open ID Connect:
-
Log in to the OKTA Administration page and select Applications.
-
As Omada is currently not in the pre-configured Okta listings, create a new Application.
-
In the Create a new app integration window:
-
select OIDC – OpenID Connect as a sign-in method,
-
select Single-Page Application as an application type.

-
-
Click Next.
-
In the New Web App Integration window, in the General settings section, provide information for the following, mandatory settings:
-
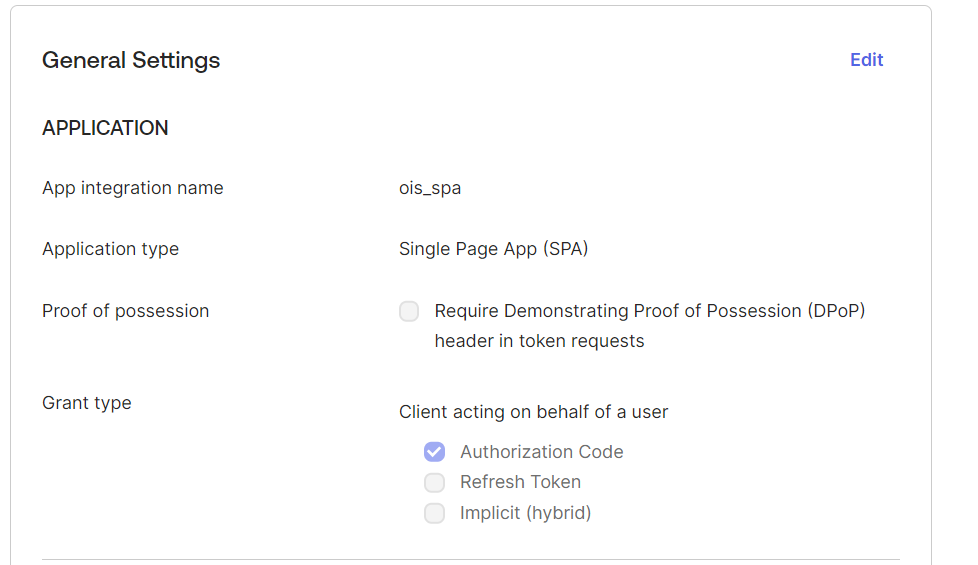
Provide the App integration name.
-
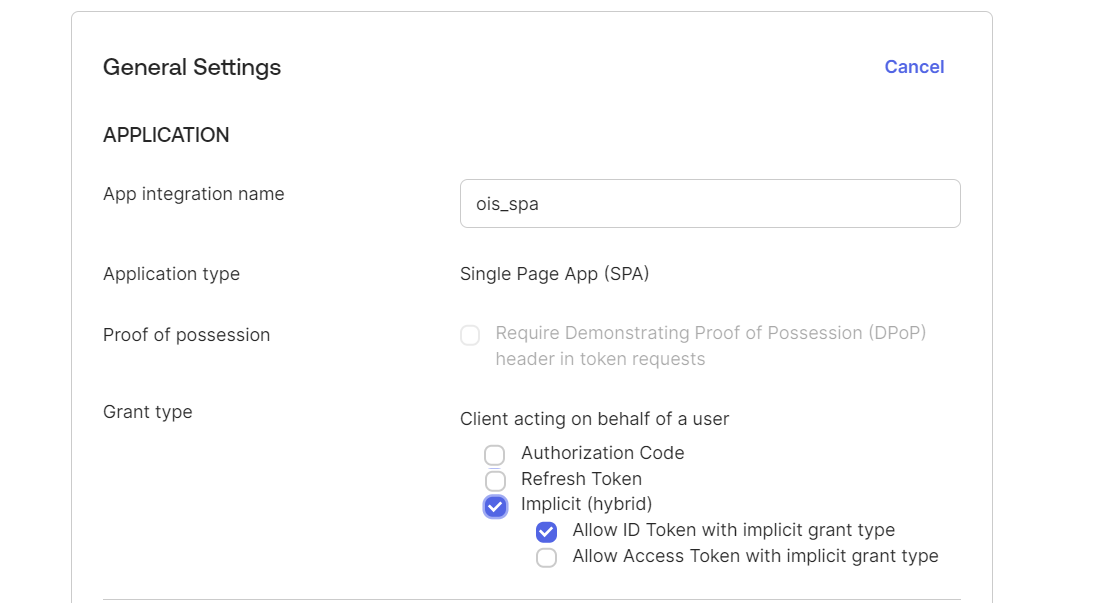
In the Grant type field, in the Client acting on behalf of a user setting, select the Authorization code checkbox.
 info
infoOmada recommends using the Authorization Code Flow for obtaining authorized access.
However, if you prefer to employ the Implicit Flow, select the Implicit (hybrid) and Allow ID token with implicit grant type option.
-
In the Sign-in redirect URIs field, specify the URL to the
logon.aspxpage in the Omada Identity Portal, for example,https://youromadasite.omada.cloud/logon.aspx.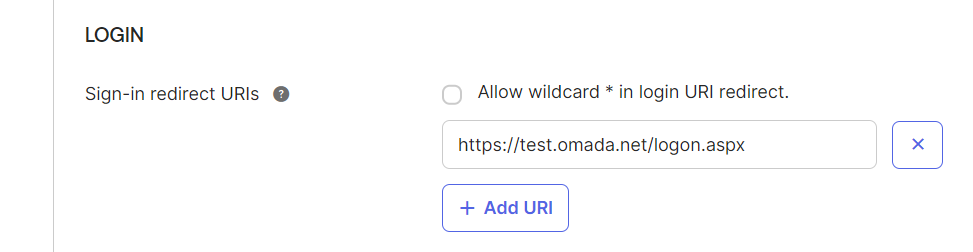
-
In the Sign-out redirect URIs, specify the URLs to the logoff page, for example,
https://youromadasite.omada.cloud/logoff.aspx?LANG=1000andhttps://youromadasite.omada.cloud/logoff?LANG=1001.
infoWhen configuring the Okta OpenID Connect Application, ensure that you include the
LANG=<Language ID>parameter in the Sign-out redirect URIs. This parameter should contain the ID for any language you anticipate users will use, for example:https://localhost/logoff.aspx?LANG=1000https://localhost/logoff.aspx?LANG=1001
noteIn the Assignments section, you can specify how you want to assign Omada to your users.
-
-
In the Login section, fill in the following information:
-
In the Login initiated by field, select the Either Okta or App option.
-
Configure the Application visibility options as needed for your environment.
-
In the Login flow field, select the Redirect to app to initiate login (OIDC Compliant) option.
-
Specify the Initiate login URI, for example,
https://youromadasite.demo.cloud/logon.aspx.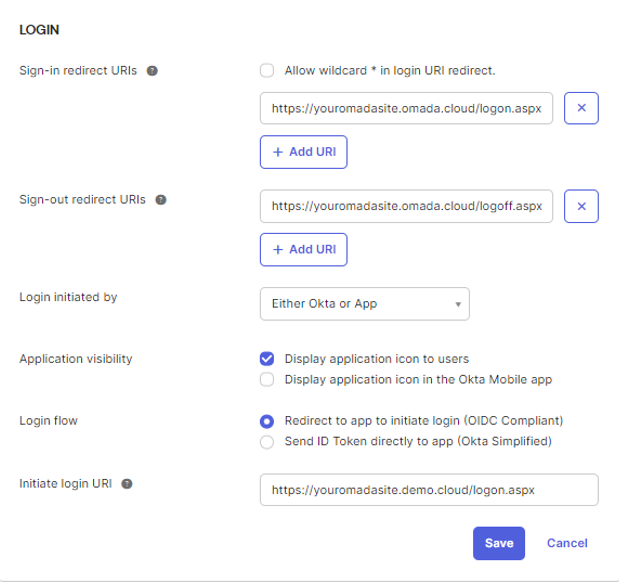
-
-
Click Save.
-
In the Proof Key for Code Exchange (PKCE) field, select the Require PKCE as additional verification option.

-
Next, save the OKTA generated information, such as Client Credentials and Client Secret information.
Omada Identity on-premises configuration on-prem
For the Omada Identity on-premises solution, configure the following setting:
-
In the ResponseType column, in tblCustomerAuth table, set 1 (one) as a value.
infoThe ResponseType column in the tblCustomerAuth table determines which
response_typevalue is sent in the OpenID Connect authorization request.-
0indicates theid_tokentype, facilitating Implicit Flow. For more information, refer to the OpenID documentation. -
1indicates thecodetype, enabling the highly secure Authorization Code Flow. For more information, refer to the OpenID documentation.
The flow used is determined by the
response_typevalue contained in the OpenID Connect Authorization Request.When the code response type is used, then, the Proof Key for Code Exchange (PKCE) is enabled. If PKCE is not supported, the code flow is disabled.
-
Omada Identity Cloud configuration Cloud
For the Omada Identity Cloud solution, configure the following settings:
-
Log in to the Omada portal, that is, https://portal.omada.cloud.
-
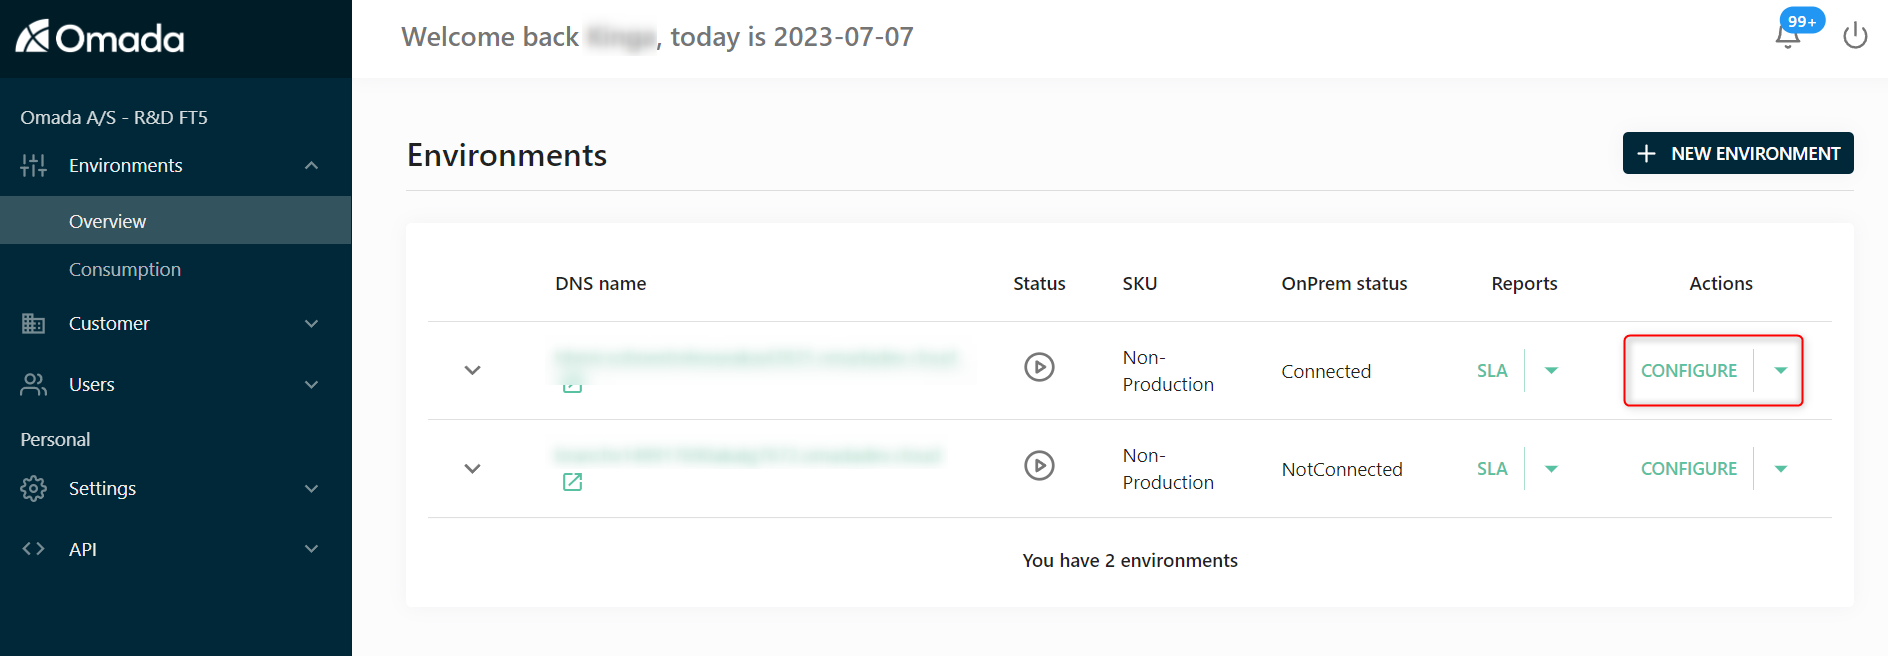
To configure the created environment, in the Actions column, select the Configure option.
-
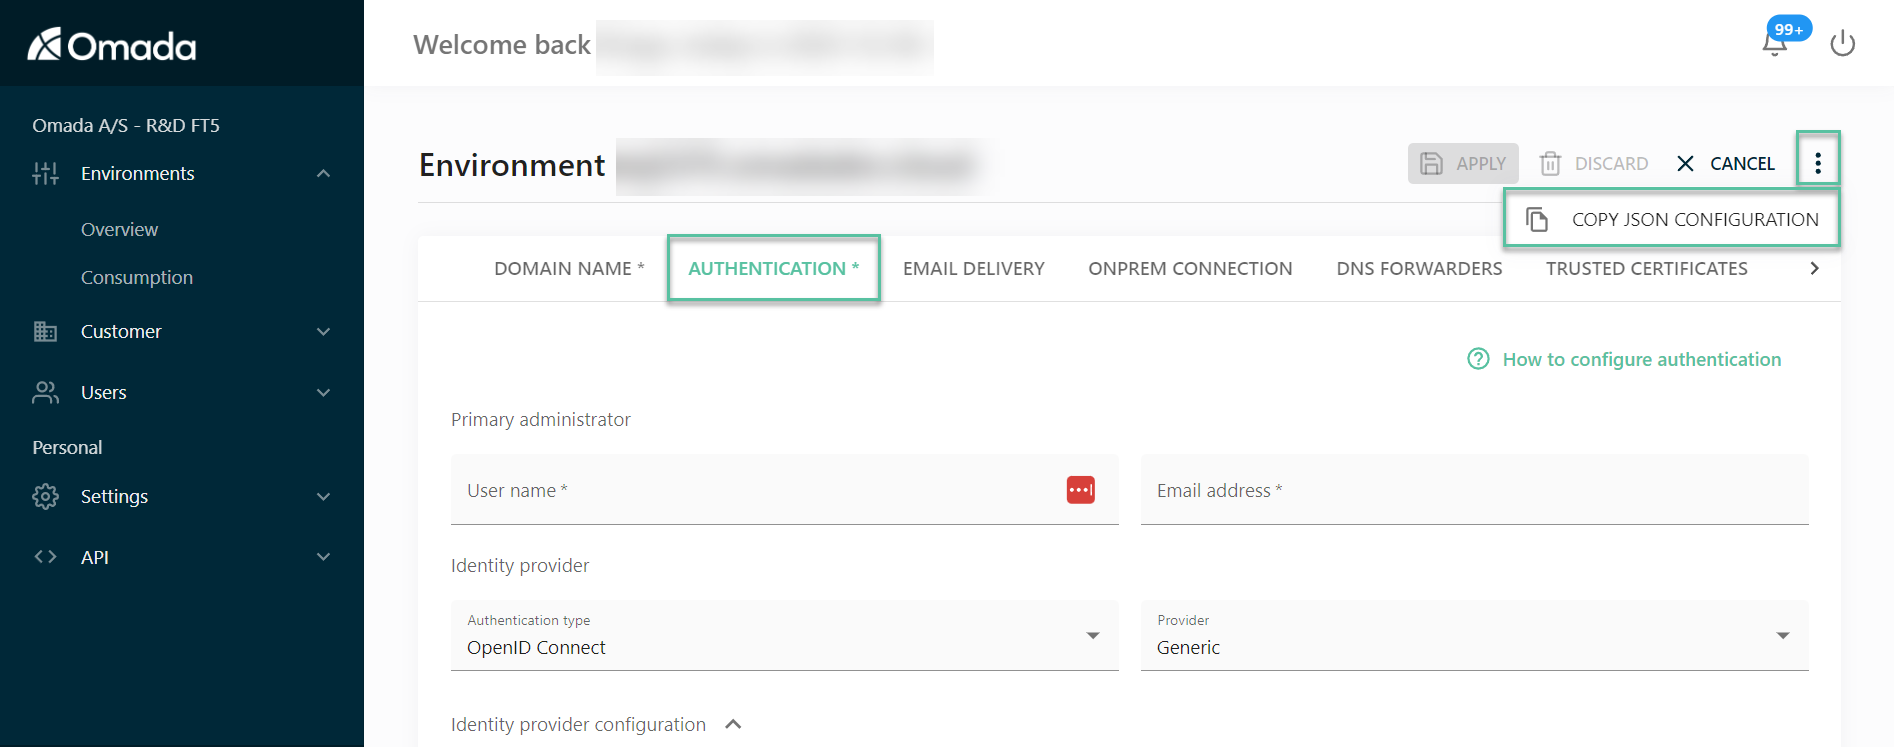
Click on the ellipse icon in the top right corner and click Copy JSON Configuration – this contains all of the Cloud settings including the Authentication tab.
-
Save the JSON for backup.
-
-
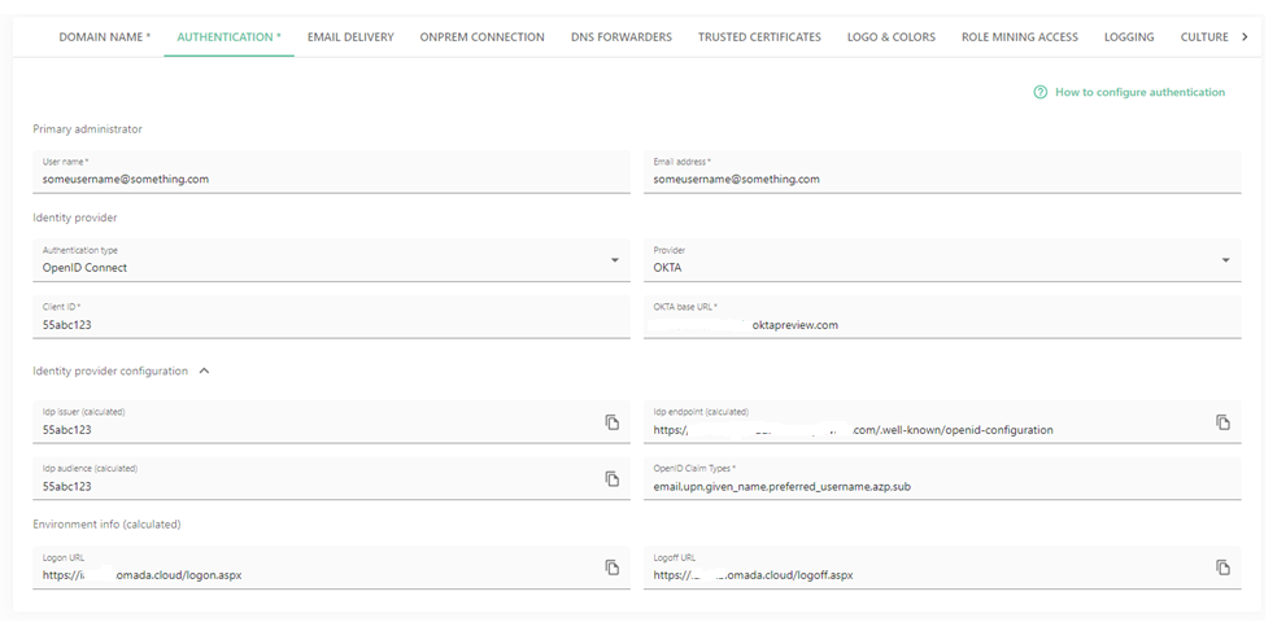
In the Authentication tab, fill in the following information:
-
Provide the User name.
- This will become the initial user of the solution. User name must match the logon for SSO.
-
Provide the Email address.
- This is the email address that Omada cloud will send the notifications to. It doesn't have to match the User Name.
-
In the Authentication type field, select the OpenID Connect.
-
Select Okta as a Provider.
-
In the Client ID field, provide the Client ID generated by Okta.
-
Provide the Okta Base URL, for example, something.oktapreview.com.
- This example uses an Okta test site for this URL.
-
In the OpenID Claim Types field, provide the following claim types:
- email,upn,given_name,preferred_username,azp,sub
-
Provide the Logoff URL, for example,
https://yourcloudname.omada.cloud/logoff.aspx.
 note
noteSome configuration options are auto generated by Omada and are labelled as such.
-
-
Click the Apply button to save your changes.