Configure OKTA with Open ID Connect
This page contains third-party references. We strive for our content to always be up-to-date, however, the content referring to external vendors may change independently of Omada. If you spot any inconsistency, please report it to our Helpdesk.
To configure OKTA with Open ID Connect:
-
Log in to the OKTA Administration page and select Applications.
-
As Omada is currently not in the pre-configured Okta listings, create a new Application.
-
In the Create a new app intergation window:
-
select OIDC – OpenID Connect as a sign-in method,
-
select Web Application as an application type.

-
-
Click Next.
-
In the New Web App Integration window, in the General settings section, provide information for the following, mandatory settings:
-
Provide the App integration name.
-
In the Grant type field, in the Client acting on behalf of a user setting, select the Implicit (hybrid) checkbox.
-
In the Sign-in redirect URIs field, specify the URL to the
logon.aspxpage in the Omada Identity Portal, for example,https://youromadasite.omada.cloud/logon.aspx. -
In the Sign-out redirect URIs, specify the URL to the logoff page, for example,
https://youromadasite.omada.cloud/logoff.aspx.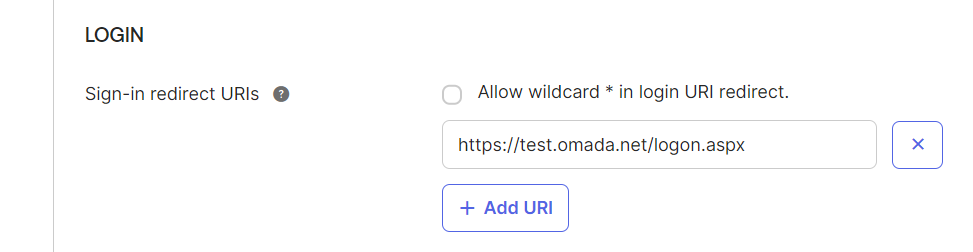
noteIn the Assignments section, you can specify how you want to assign Omada to your users.
-
-
In the Login section, fill in the following information:
-
In the Login initiated by field, select the Either Okta or App option.
-
Configure the Application visibility options as needed for your environment.
-
In the Login flow field, select the Redirect to app to initiate login (OIDC Compliant) option.
-
Specify the Initiate login URI, for example,
https://youromadasite.demo.cloud/logon.aspx.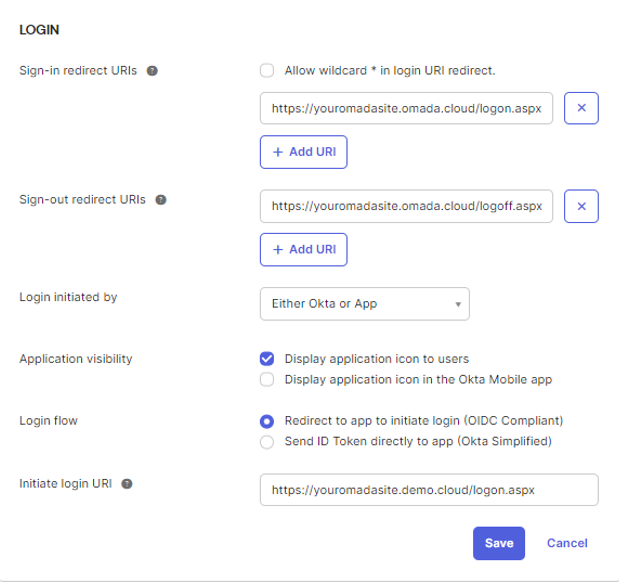
-
-
Click Save.
-
Next, save the OKTA generated information, such as Client Credentials and Client Secrets information.
Then, proceed to the next section to configure settings in Omada.
Omada configuration
-
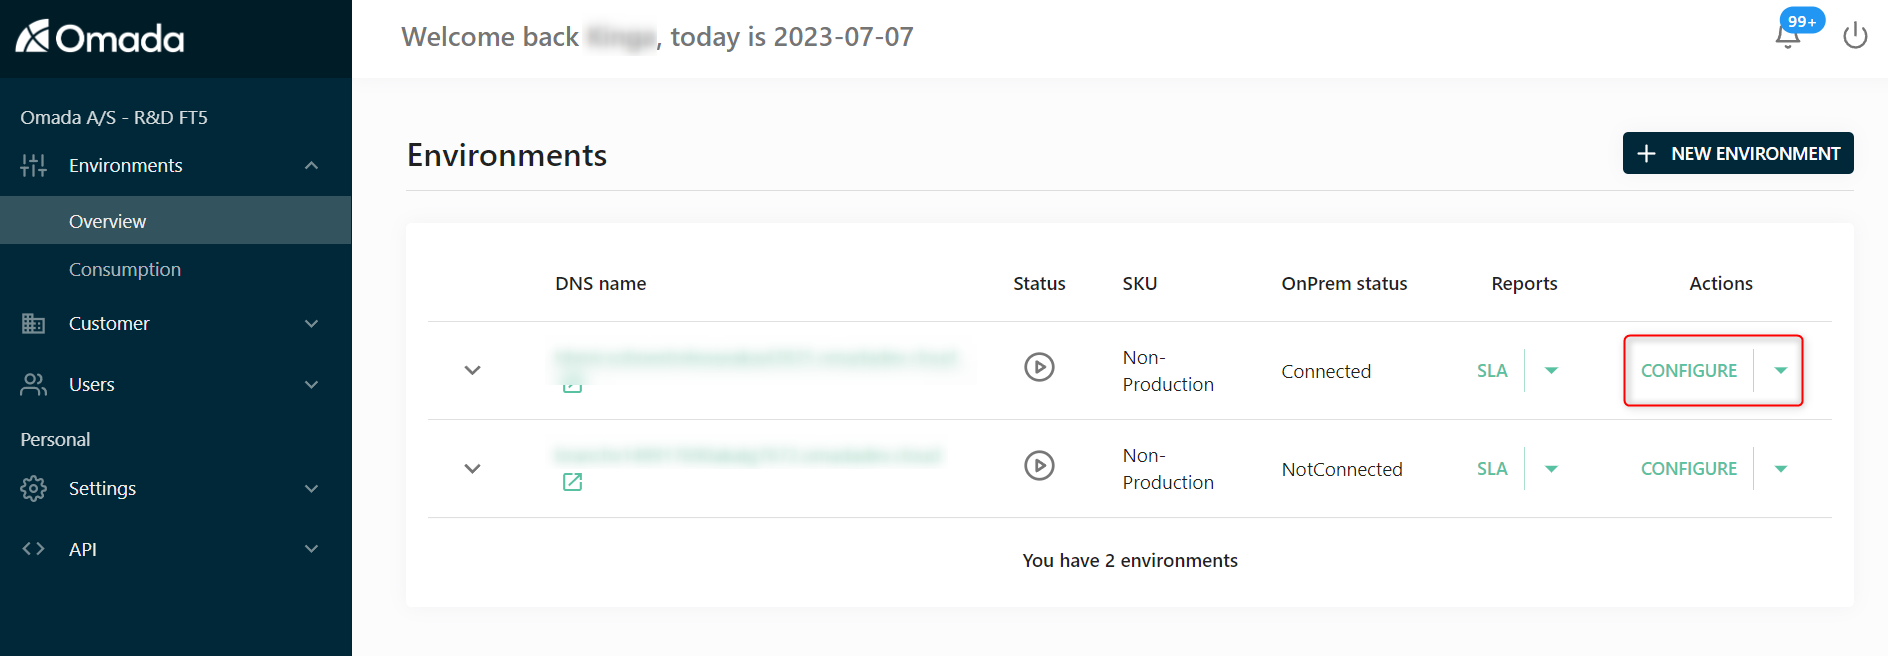
Log in to the Omada portal, that is, https://portal.omada.cloud.
-
To configure the created environment, in the Actions column, select the Configure option.
-
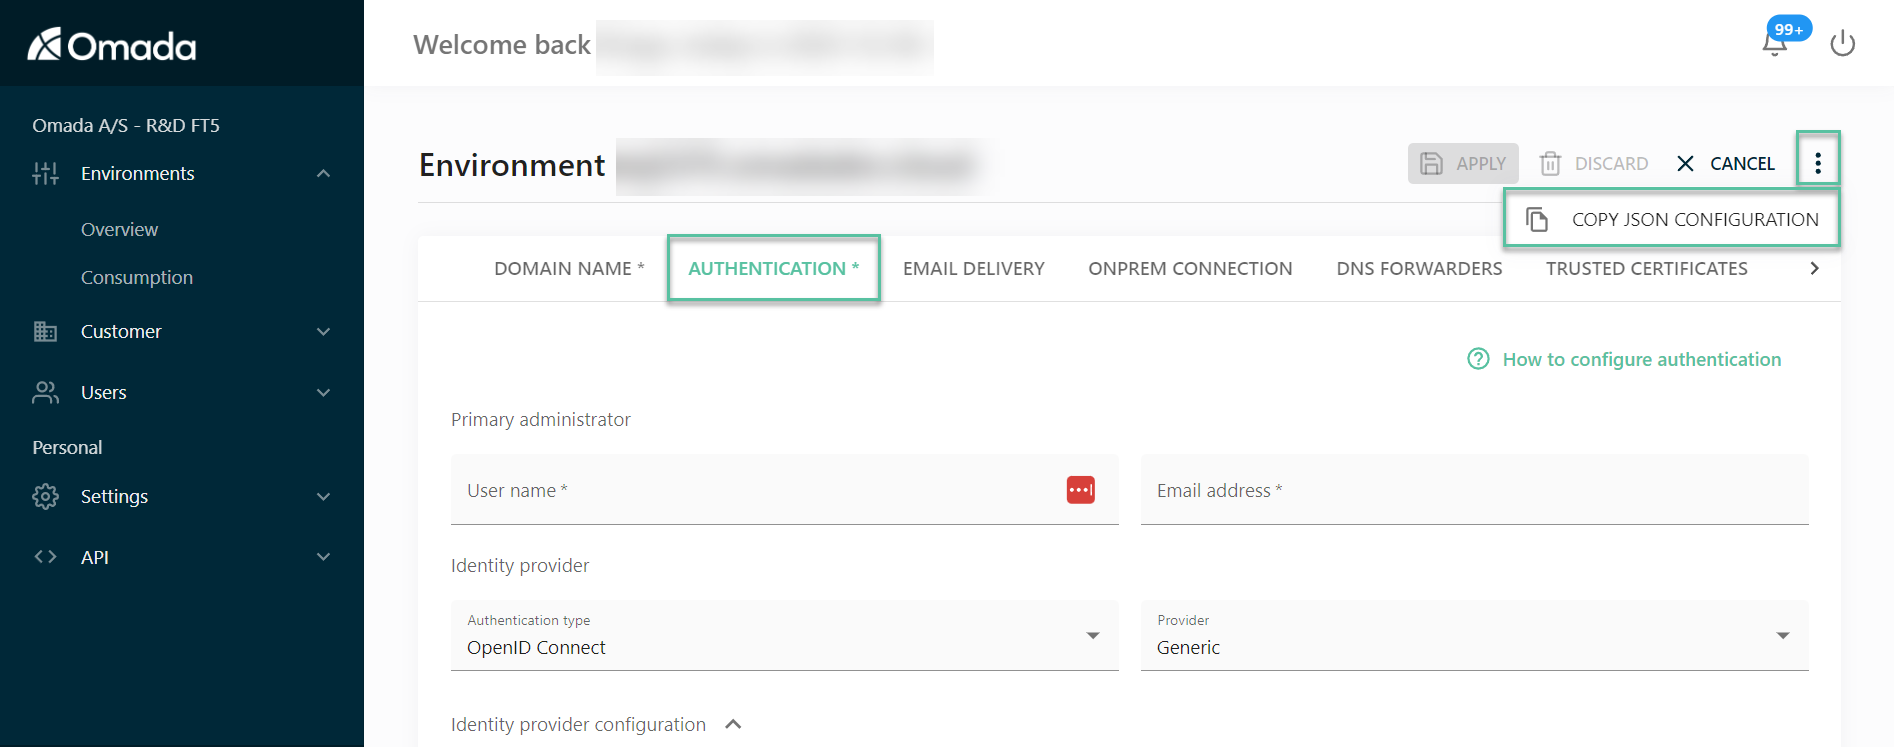
Click on the ellipse icon in the top right corner and click Copy JSON Configuration – this contains all of the Cloud settings including the Authentication tab.
-
Save the JSON for backup.
-
-
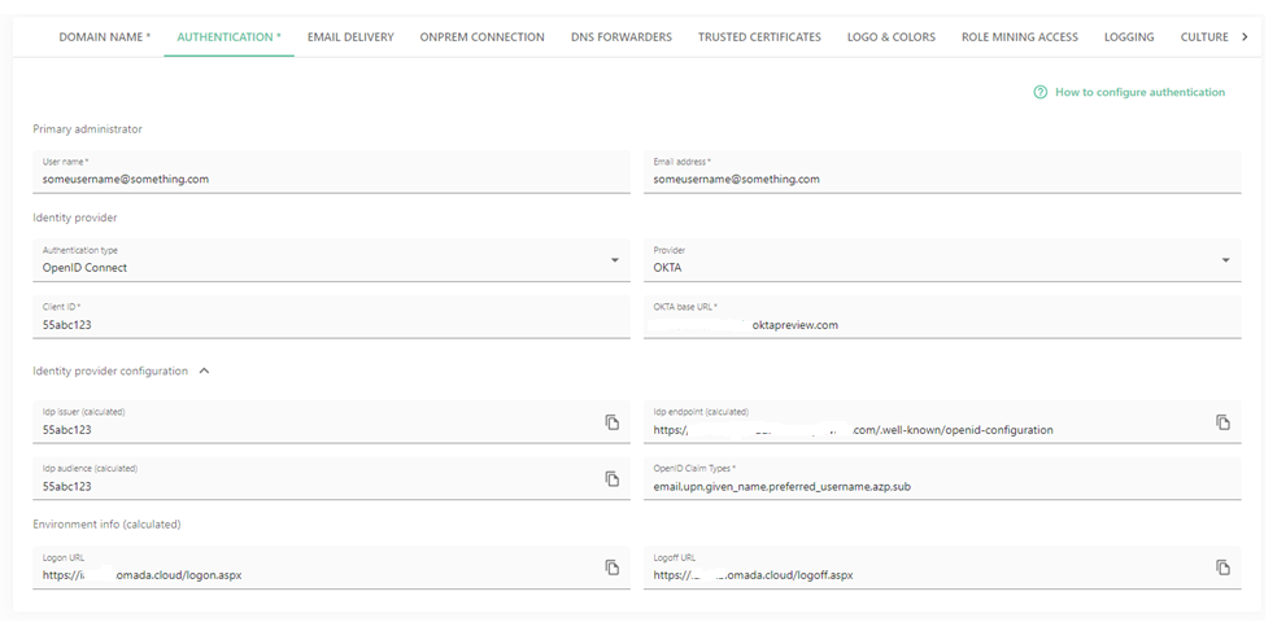
In the Authentication tab, fill in the following information:
-
Provide the User name.
- This will become the initial user of the solution. User name must match the logon for SSO.
-
Provide the Email address.
- This is the email address that Omada cloud will send the notifications to. It doesn't have to match the User Name.
-
In the Authentication type field, select the OpendID Connect.
-
Select Okta as a Provider.
-
In the Client ID field, provide the Client ID generated by Okta.
-
Provide the Okta Base URL, for example, something.oktapreview.com.
- This example uses an Okta test site for this URL.
-
In the OpenID Claim Types field, provide the following claim types:
- email,upn,given_name,preferred_username,azp,sub
-
Provide the Logoff URL, for example,
https://yourcloudname.omada.cloud/logoff.aspx.
 note
noteSome configuration options are auto generated by Omada and are labelled as such.
-
-
Click the Apply button to save your changes.