Password Filter
With the Omada Password Filter, a password change in Windows Active Directory or in Azure Active Directory can be synchronized to the user’s other accounts in systems managed by Omada Identity.
This means that a user can access other applications using the same password. In other words, this is not the same as Single Sign-On to other applications. It is a synchronization of the password.
The password is only synchronized for personal accounts (accounts of the default account type), which are the accounts intended to be used for daily work. Administrative accounts, privileged accounts and similar other account types are excluded from the password synchronization.
The password filter component uses the Password Filter technology in the Windows Domain controllers. A Password Filter enables synchronization of password changes to other systems.
For more information about the Password Filter technology, see the Microsoft documentation.
The Omada Password Filter component must be installed on all active domain controllers used by the system.
The domain name or the NetBIOS name of the domain must match the SystemID of the Active Directory system in Omada Identity or match the domain configured in the LDAP path attribute (derived from the DC components) of the onboarded Active Directory system.
Overview
System requirements
The component is only supported on Windows 2012 R2 and newer. If some domain controllers are not yet Windows 2012 R2, then password changes originating from those old controllers will not be propagated.
Integration with Azure AD
When the on-premises Active Directory is connected to Azure Active Directory with Azure AD Connect, then password changes can be synchronized from Azure AD using the Password Writeback feature. In such cases, password changes from Azure AD can also be propagated to the user’s other personal accounts, just like when password changes from an on-premise Active Directory.
Integration with other password reset components
Other password reset components or products that write the new password to Active Directory will also trigger the Omada Password Filter and the following password change in connected systems.
Access-management of PasswordFilterWebService
The PasswordFilterWebService security is managed in the AuthorizationRoles under Users & Security. You can grant users/groups a built-in Password filter role or grant access to the individual methods on the web service by adding them to an existing or new authorization role.
Audit calls to PasswordFilterWebService
Successful calls to the PasswordFilterWebService are audited as information entries in the logging set up in the portal. Attempted calls rejected due to lack of permission will be logged as error entries.
Password reset and Omada Identity Provisioning Service (OPS)
The Password reset function must be enabled in the General Settings of the connected system for which you want to update the password when changed in Active Directory or Azure AD.
The related OPS connector must have the ability to set a new password.
Do not enable Password Reset in AD and Azure AD
The Omada Identity password reset setting does not need be enabled for neither Active Directory system nor Azure Active Directory, because password change requests will come from those systems, and they already have the new password set.
Only enable the Password reset function for other connected systems, not for Active Directory and Azure Active Directory.
Password policies
The password policies must be aligned between the active directories on the one side (AD and Azure AD) and the target systems on the other side.
If password policies are not aligned, there is a risk that the password propagation by the Omada Password Filter feature will not succeed. If the password policy is met when changing a password in AD, and the password policy for the target system is not met then the password is not written to the target system. The failure is not signaled to the end user, but an error message is written to the Windows Event Log.
The following setting must be enabled on any domain controller that the Omada Password Filter is installed on: Password must meet complexity requirements.
Install the Omada Password Filter
Installation process using Basic authentication
This installation process uses basic authentication for communication between Omada Password Filter and Enterprise Server.
If you have manually created the RequireSSL value under the Computer\HKEY_LOCAL_ MACHINE\SOFTWARE\Omada\Omada Password Filter registry key, make sure it is removed before running the installer.
To do so, follow these steps:
-
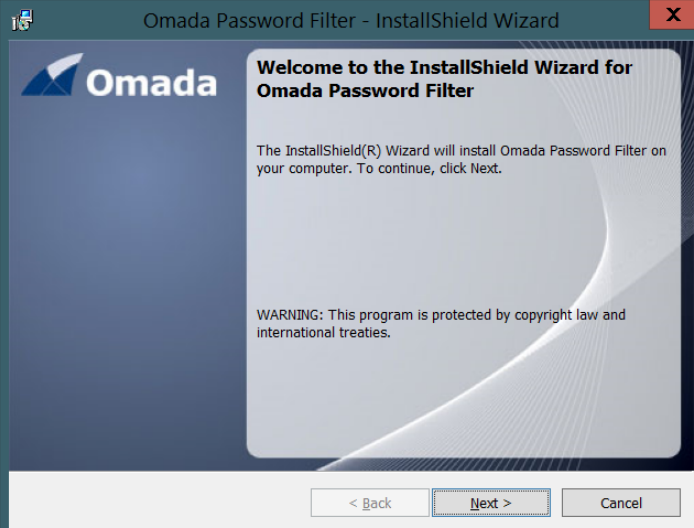
On each domain controller, run the
Omada Password Filter.exe:
-
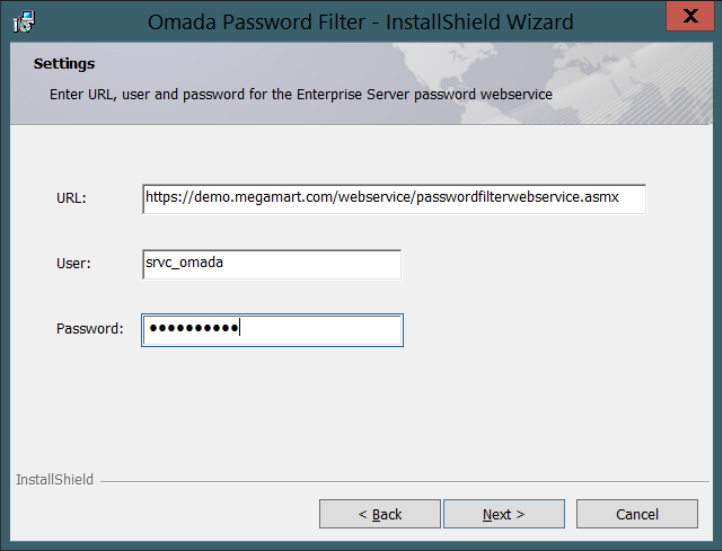
Enter the complete URL to the password filter
passwordfilterwebserviceendpoint. The URL is:https://<host>/webservice/passwordfilterwebservice.asmx
Here, replace
<host>with the hostname of the Omada Identity application server that is reachable from the domain controller. The URL must begin with https, and the Omada Identity application server must have a valid certificate configured to enable HTTPS. -
Create a service account for the password filter web service or use an existing one. The service account must be a member of a group with a Password filter role.
-
Enter the username and password for the service account in the installer. Click Next.

-
Click Install to continue. After the installation completes, reboot the server.
Installation process using Azure Active Directory OAuth
This installation process uses OAuth client credentials flow against Azure Active Directory for communication between password filter and Enterprise Server.
Providers other than Azure Active Directory are not supported.
If you have manually created the RequireSSL value under the Computer\HKEY_LOCAL_ MACHINE\SOFTWARE\Omada\Omada Password Filter registry key, make sure it is removed before running the installer.
-
Register an application in Azure Active Directory. Refer to the Configure Azure AD with Open ID document for more information.
- The application does not require any specific permissions. However, it is necessary to define the scope for the application as described in the guide in format
app://{application id URI}. - Take note of the following settings:
- Tenant Id
- Application Id URI
- Client secret
- The application does not require any specific permissions. However, it is necessary to define the scope for the application as described in the guide in format
-
Configure Enterprise server for Open ID.
-
Create a service account in Enterprise Server for the application registered in Azure AD. The account must be a member of a group with a Password filter role.
-
On each domain controller, run the
Omada Password Filter.exe:
-
Enter the complete URL to the password filter
passwordfilterwebserviceendpoint. The URL is:https://<host>/webservice/passwordfilterwebservice.asmx
Here, replace
<host>with the hostname of the Omada Identity application server that is reachable from the domain controller. The URL must begin with https, and the Omada Identity application server must have a valid certificate configured to enable HTTPS. -
In the Username and Password fields, enter the Application Id URI and Client secret of the registered Azure AD application.
-
Complete the installation process.
-
Go to the Windows registry key: Computer\HKEY_LOCAL_MACHINE\SOFTWARE\Omada\Omada Password Filter and edit the following values:
- AuthType – 1
- OAuthScope –
api://{application id URI}/.default - OAuthTenant – Azure AD tenant Id
Omada recommends updating the registry settings on each domain controller to enable strong encryption with TLS 1.2 protocol.
This can be done by configuring .NET Framework to use TLS 1.2 by default, with the registry keys:
[HKEY_LOCAL_MACHINE\SOFTWARE\Microsoft\.NETFramework\<VERSION>]
"SchUseStrongCrypto"=dword:00000001
[HKEY_LOCAL_MACHINE\SOFTWARE\Wow6432Node\Microsoft\.NETFramework\<VERSION>]
"SchUseStrongCrypto"=dword:00000001
For more information of setting strong encryption, please refer to the Microsoft documentation.
Password encryption
You can add an extra level of security on top of TLS by encrypting the passwords while it is transferred between the domain controller and the Omada Identity server by using a shared secret.
To do so:
- On each domain controller, go to the Windows registry key: Computer\HKEY_LOCAL_MACHINE\SOFTWARE\Omada\Omada Password Filter and edit the EncryptionKey value. This is the key that will be used to encrypt the passwords sent to Enterprise web service. The same key value must be provided in the next step in Enterprise Server.
- In Enterprise Server provide the same key from the previous step as PasswordFilterEncryptionKey. You can do this in two ways:
- Windows registry - add new string value PasswordFilterEncryptionKey under Computer\HKEY_LOCAL_MACHINE\SOFTWARE\Omada\Omada Enterprise\14.0
- Web.config – add new element under
<appSettings>named PasswordFilterEncryptionKey
Update Omada Password Filter credentials
The username and password, or application id URI and client secret, respectively, provided during the installation, are stored inside Windows Credential Store. You can modify them in two ways:
-
Rerun the installer using the following command providing values for
OMADA_USERandOMADA_PASSWORDparameters:Setup.exe /s /v"/qn" /v"OMADA_USER=xxx" /v"OMADA_PASSWORD=xxx" /v"CHANGE_
CREDENTIALS=true" -
Change the credentials in the Windows Credential Store using the
cmdkeycommand.
-
You need to execute this command as a system user, which can be achieved using the
PsExectool. To do so, run the following command providing the values for/userand/passparameters:PsExec.exe -s cmdkey /generic:OmadaPasswordFilter /user:xxx /pass:xxx
For more details on the cmdkey, please refer to Microsoft documentation.
You can also find more information on the PsExec tool here.
To uninstall the Omada Password Filter, go to the Windows Add/Remove programs and features and uninstall the Password Filter.
It is likely that the Password Filter dll files are locked. If this is the case, the uninstaller will ask you to reboot the server after the uninstall is complete.