Configure Google with Open ID Connect
This page contains third-party references. We strive for our content to always be up-to-date, however, the content referring to external vendors may change independently of Omada. If you spot any inconsistency, please report it to our Helpdesk.
To configure Google with Open ID Connect:
-
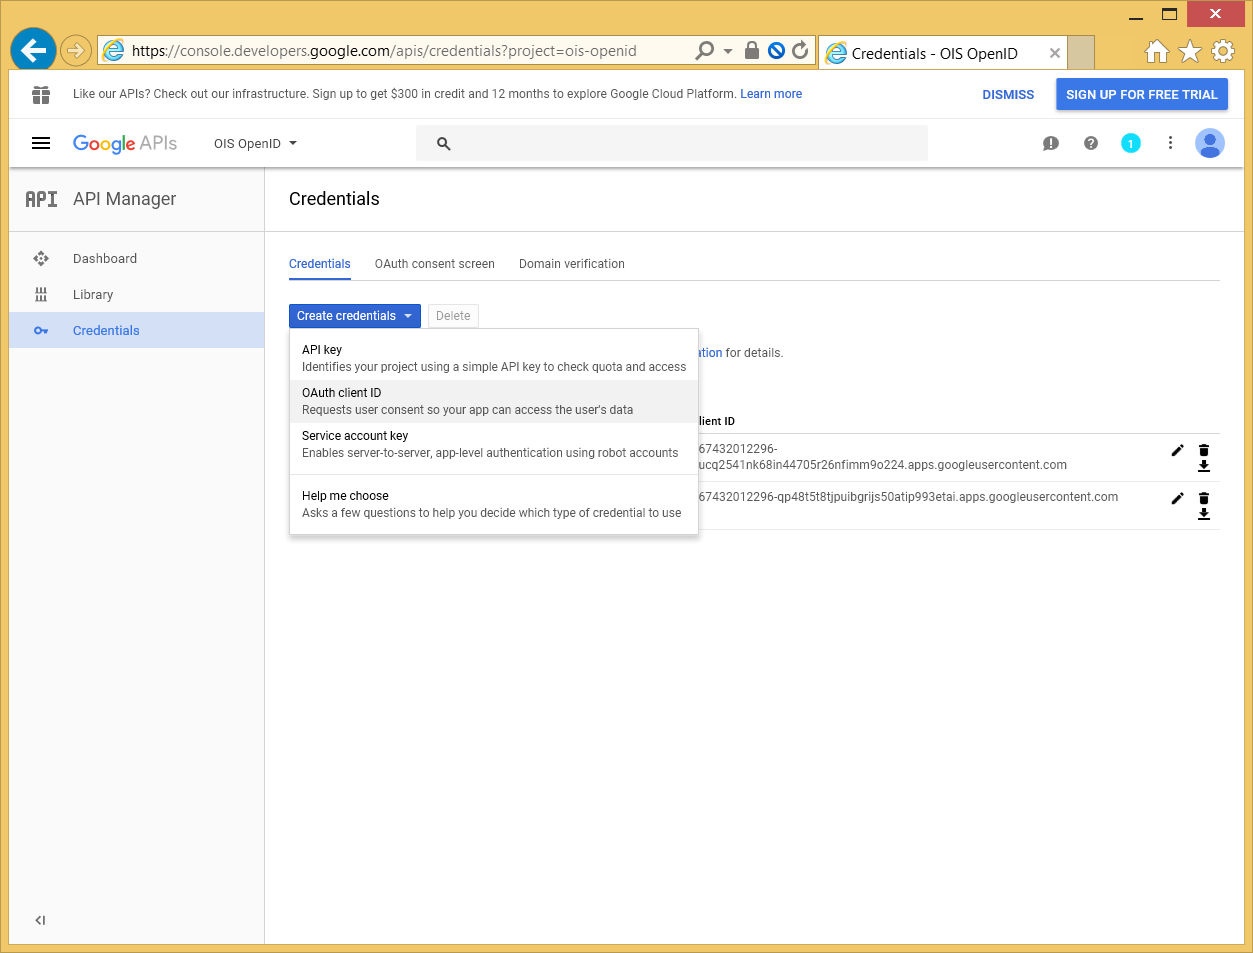
Open the Google developer console on https://console.developers.google.com.
-
In the left-hand menu, select Credentials, and create a set of OAuth client id credentials.
-
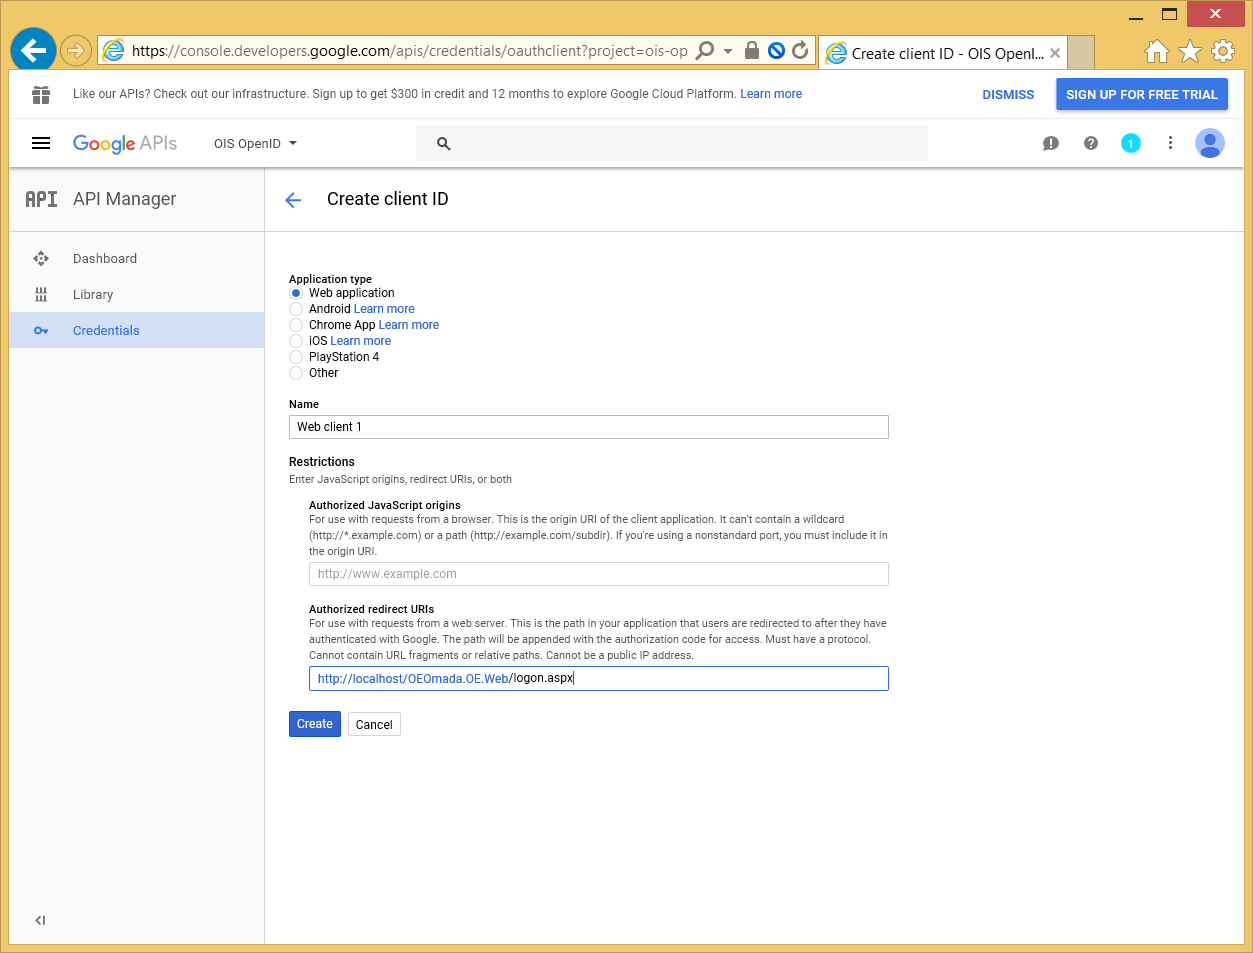
Select Web application, then type a name and the URL to the logon.aspx page in the Omada Identity Portal:
-
Save the changes.
-
Save the automatically generated information by Google, such as Client ID and Client Secret.
Omada configuration
-
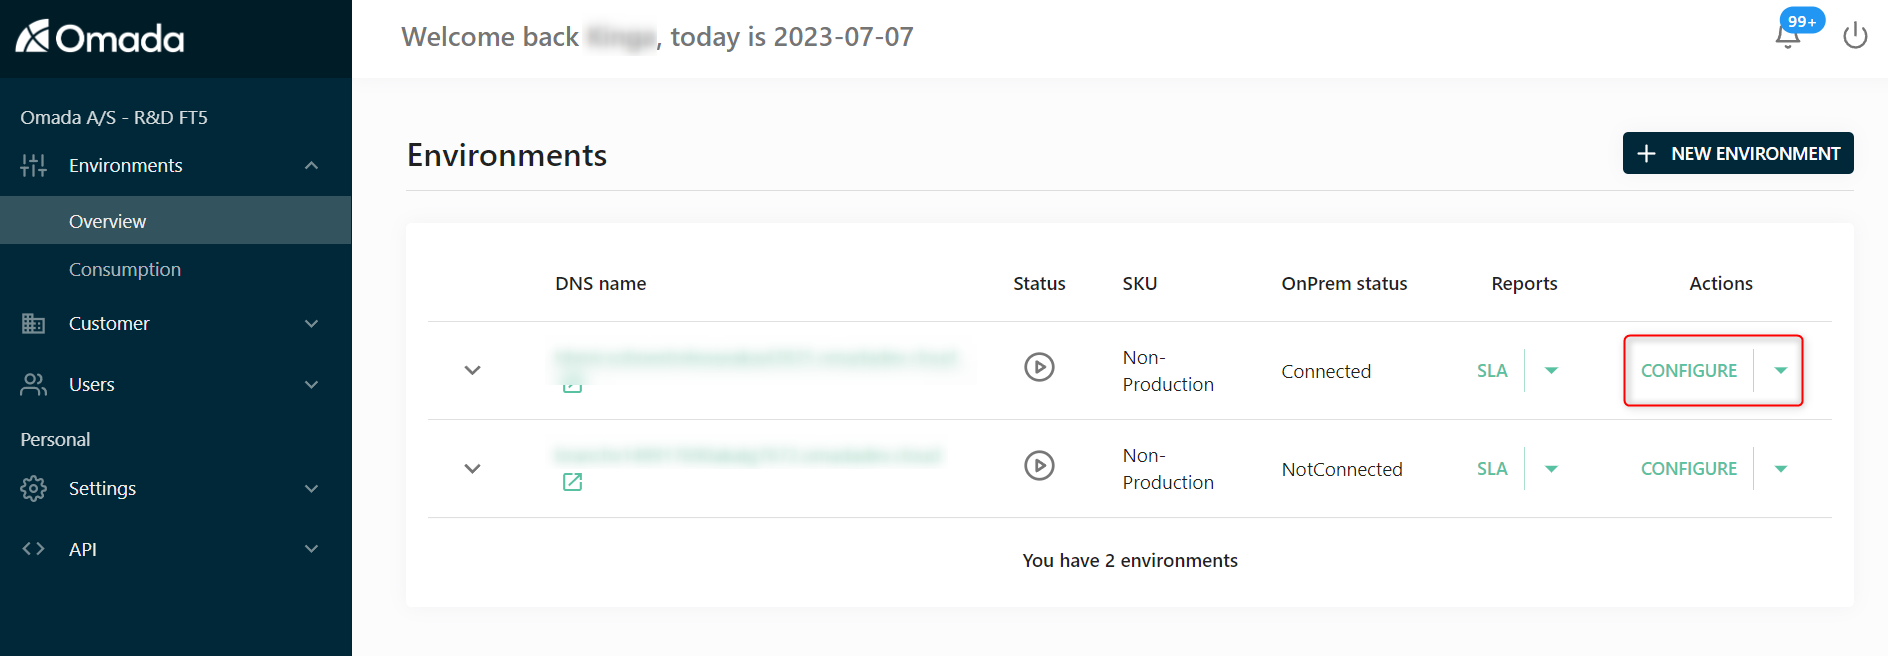
Log in to the Omada portal, that is, https://portal.omada.cloud.
-
To configure the created environment, in the Actions column, select the Configure option.
-
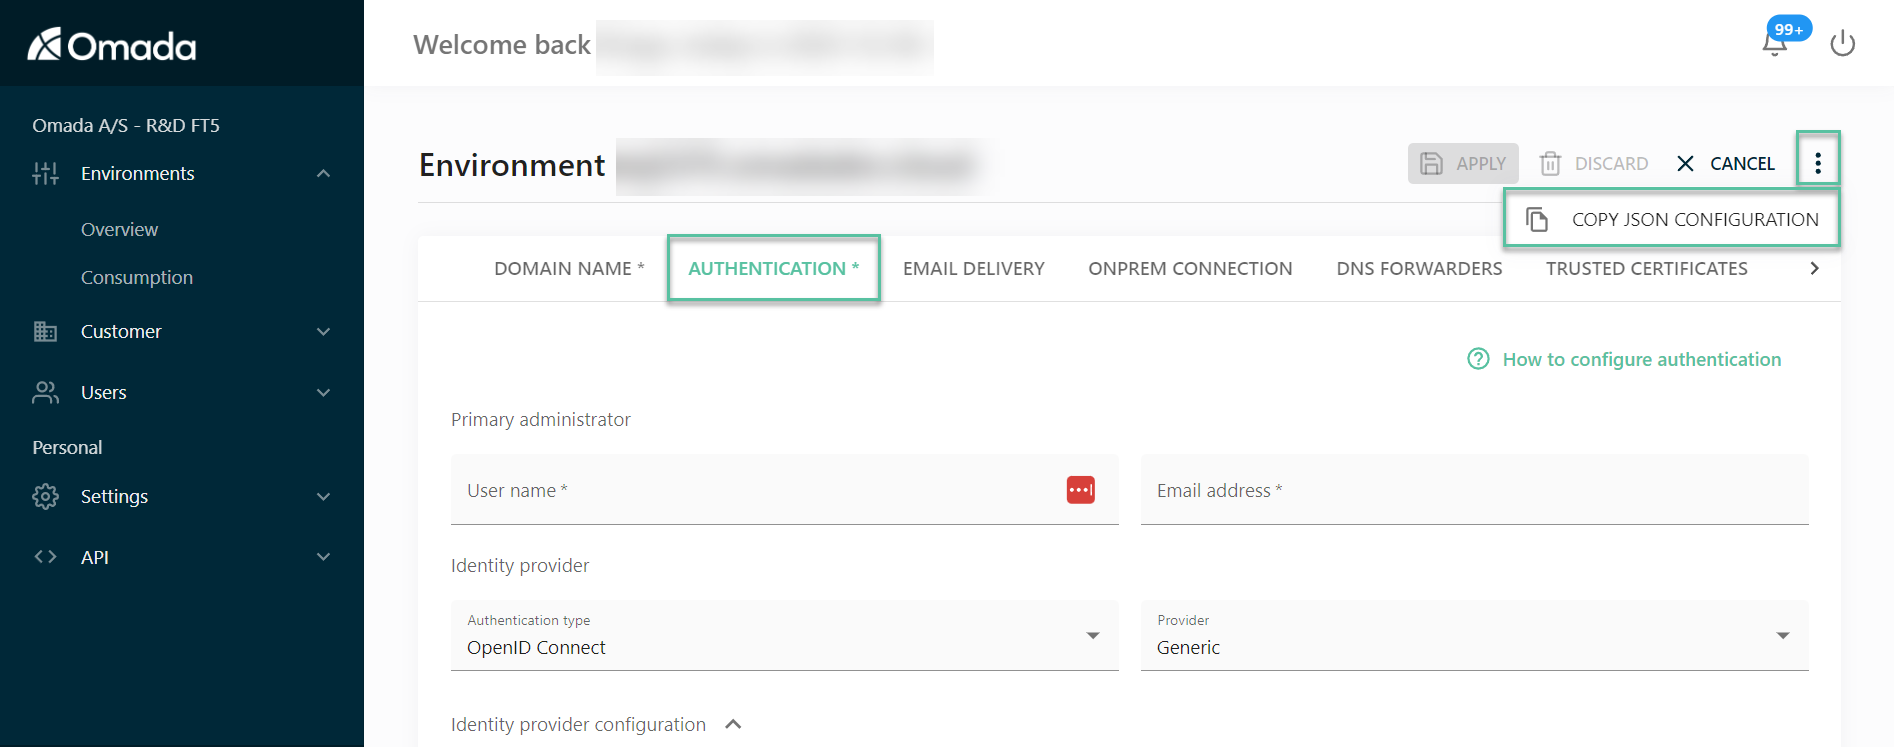
Click on the ellipse icon in the top right corner and click Copy JSON Configuration – this contains all of the Cloud settings including the Authentication tab.
-
Save the JSON for backup.
-
-
In the Authentication tab, fill in the following information:
-
Provide the User name.
- This will become the initial user of the solution. User name must match the logon for SSO.
-
Provide the Email address.
- This is the email address that Omada cloud will send the notifications to. It doesn't have to match the User Name.
-
In the Authentication type field, select the OpenID Connect.
-
Select Google as a Provider.
-
In the Client ID field, provide the Client ID generated by Google.
-
In the OpenID Claim Types field, provide the following claim types:
email,upn,given_name,preferred_username,azp,sub -
In the IdpIssuer field, provide the Client ID generated by Google.
-
In the IdpAudience field, provide the Client ID generated by Google.
-
Provide the Login URL, for example,
https://yourcloudname.omada.cloud/login.aspx. -
Provide the Logoff URL, for example,
https://yourcloudname.omada.cloud/logoff.aspx.
noteSome configuration options are auto generated by Omada and are labelled as such.
-
-
Click the Apply button to save your changes.