Translations
You can customize translations in Omada Identity by modifying the built-in strings. This can be done through the Cloud Management Portal and the Omada Identity Portal.
Cloud Management portal
-
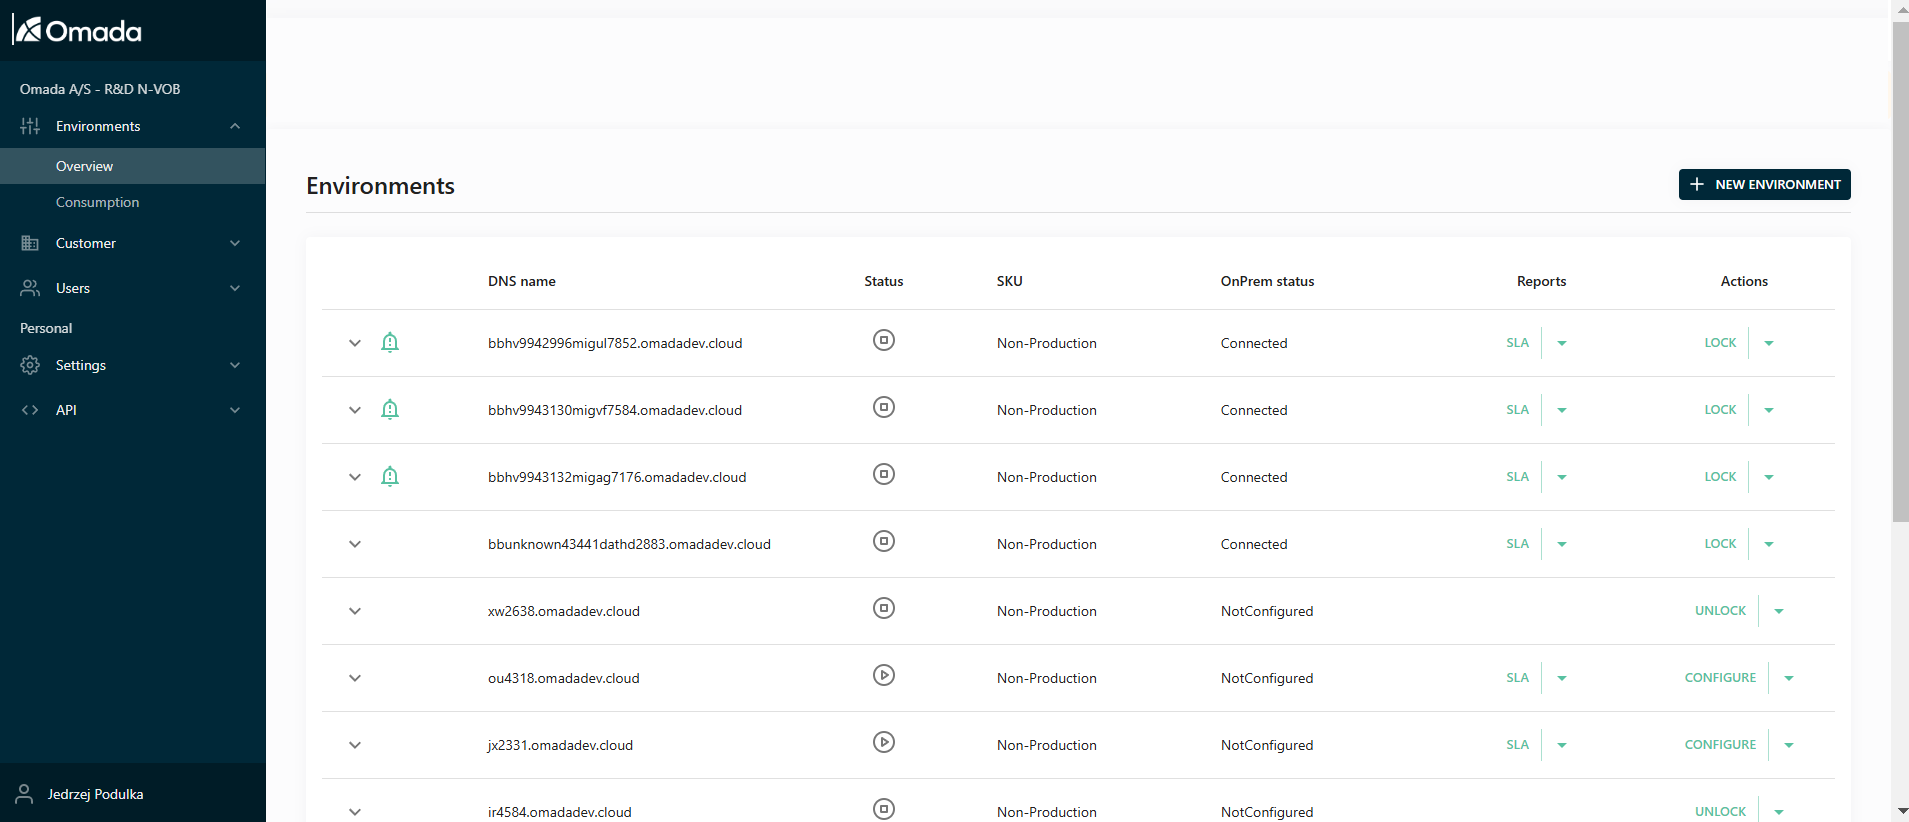
Access Cloud Management portal where you manage your cloud environment. If you need more information, you can find it here Cloud Management portal.
-
Select the environment where you want to customize translations.
-
Navigate to the Culture tab within the selected environment. This tab contains the translation settings.

-
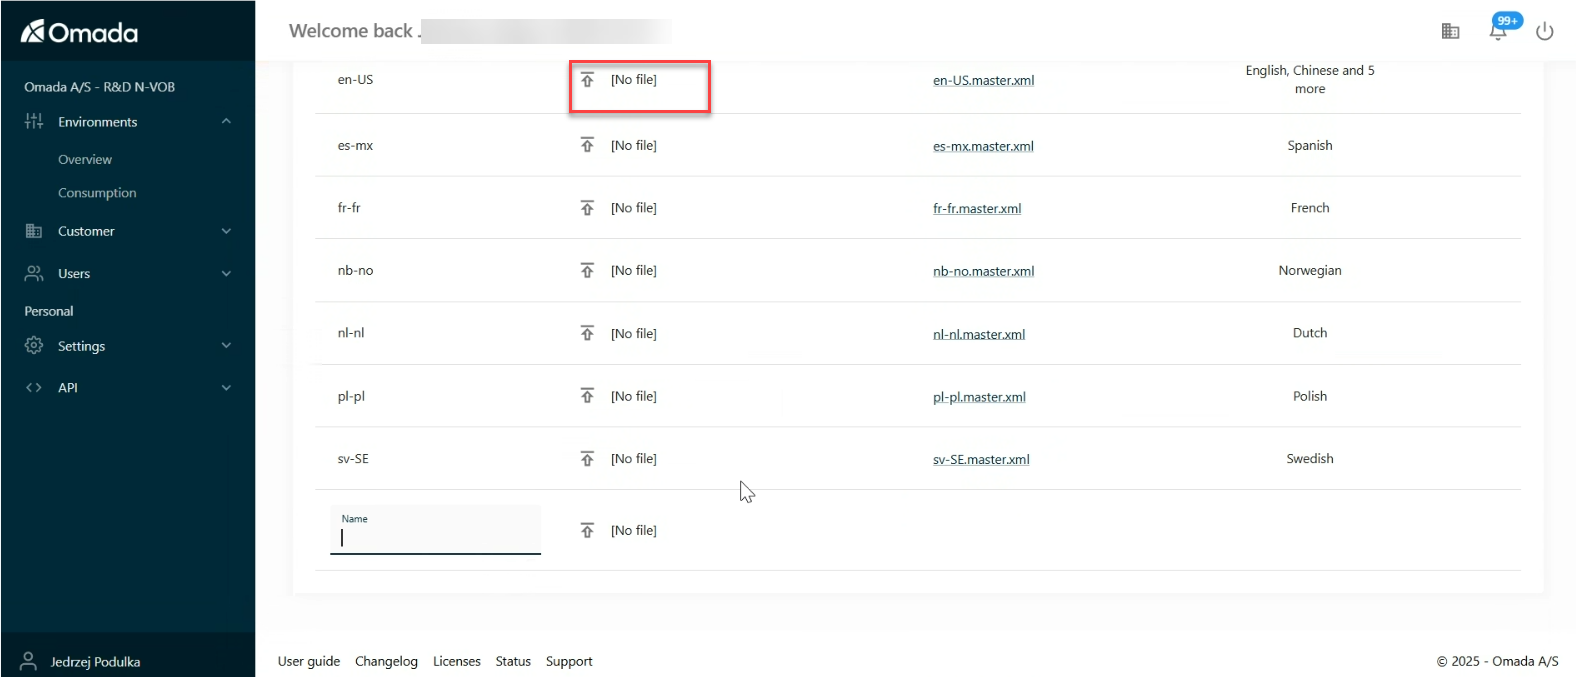
Download the XML file that contains the strings you want to customize.
Within the file, translate the strings in the <translated> tags. Do not change anything else.
-
Upload the edited XML File. Once you have made your changes, upload the edited XML file back to the portal by clicking on the upload arrow.
Omada Identity portal
-
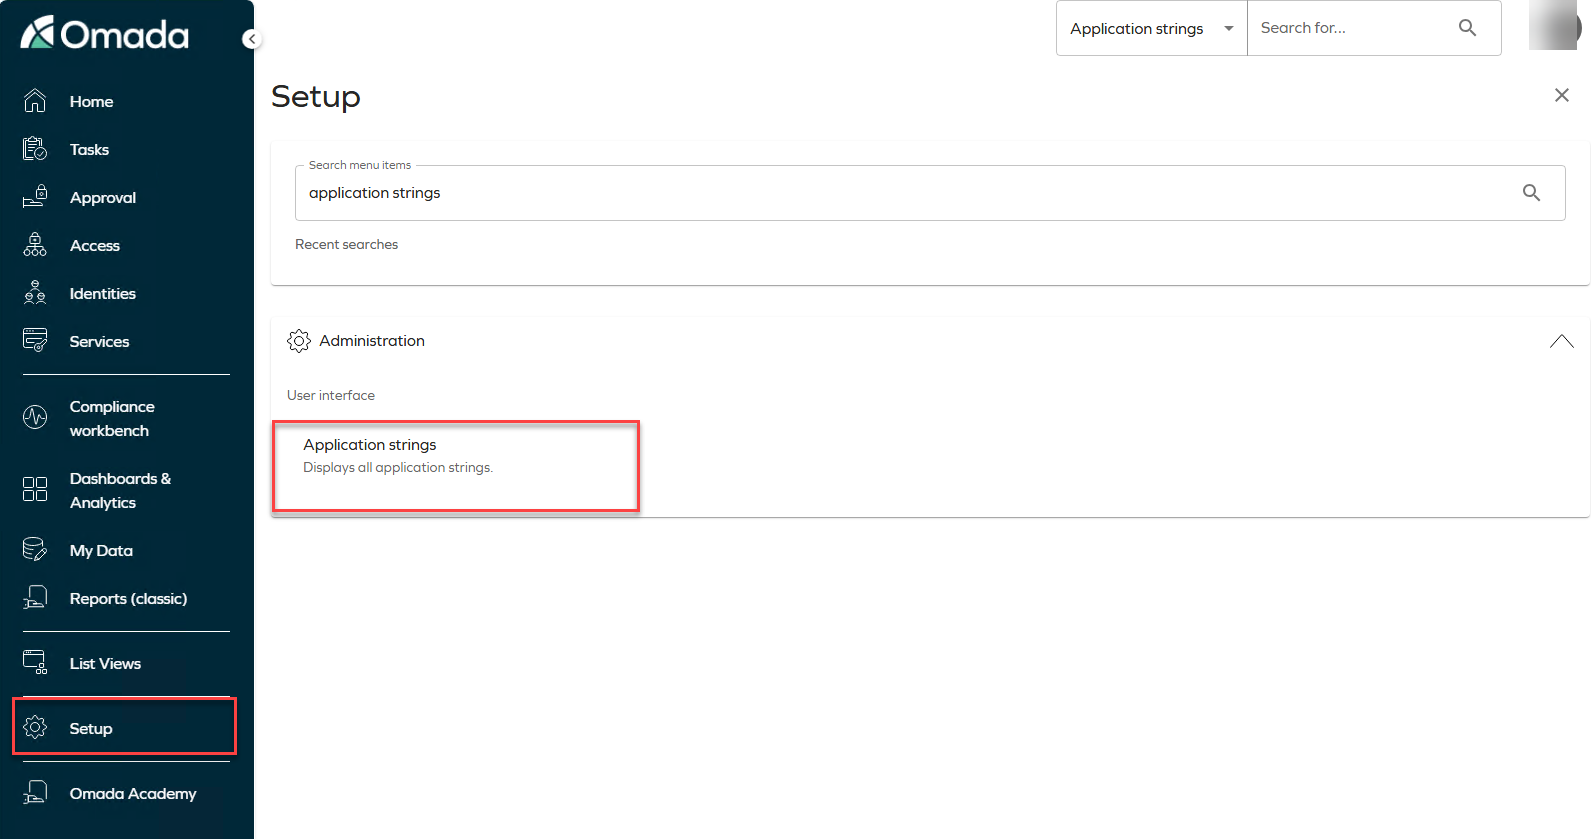
In the Omada Identity Portal, navigate to the Setup section and then to Application Strings.
-
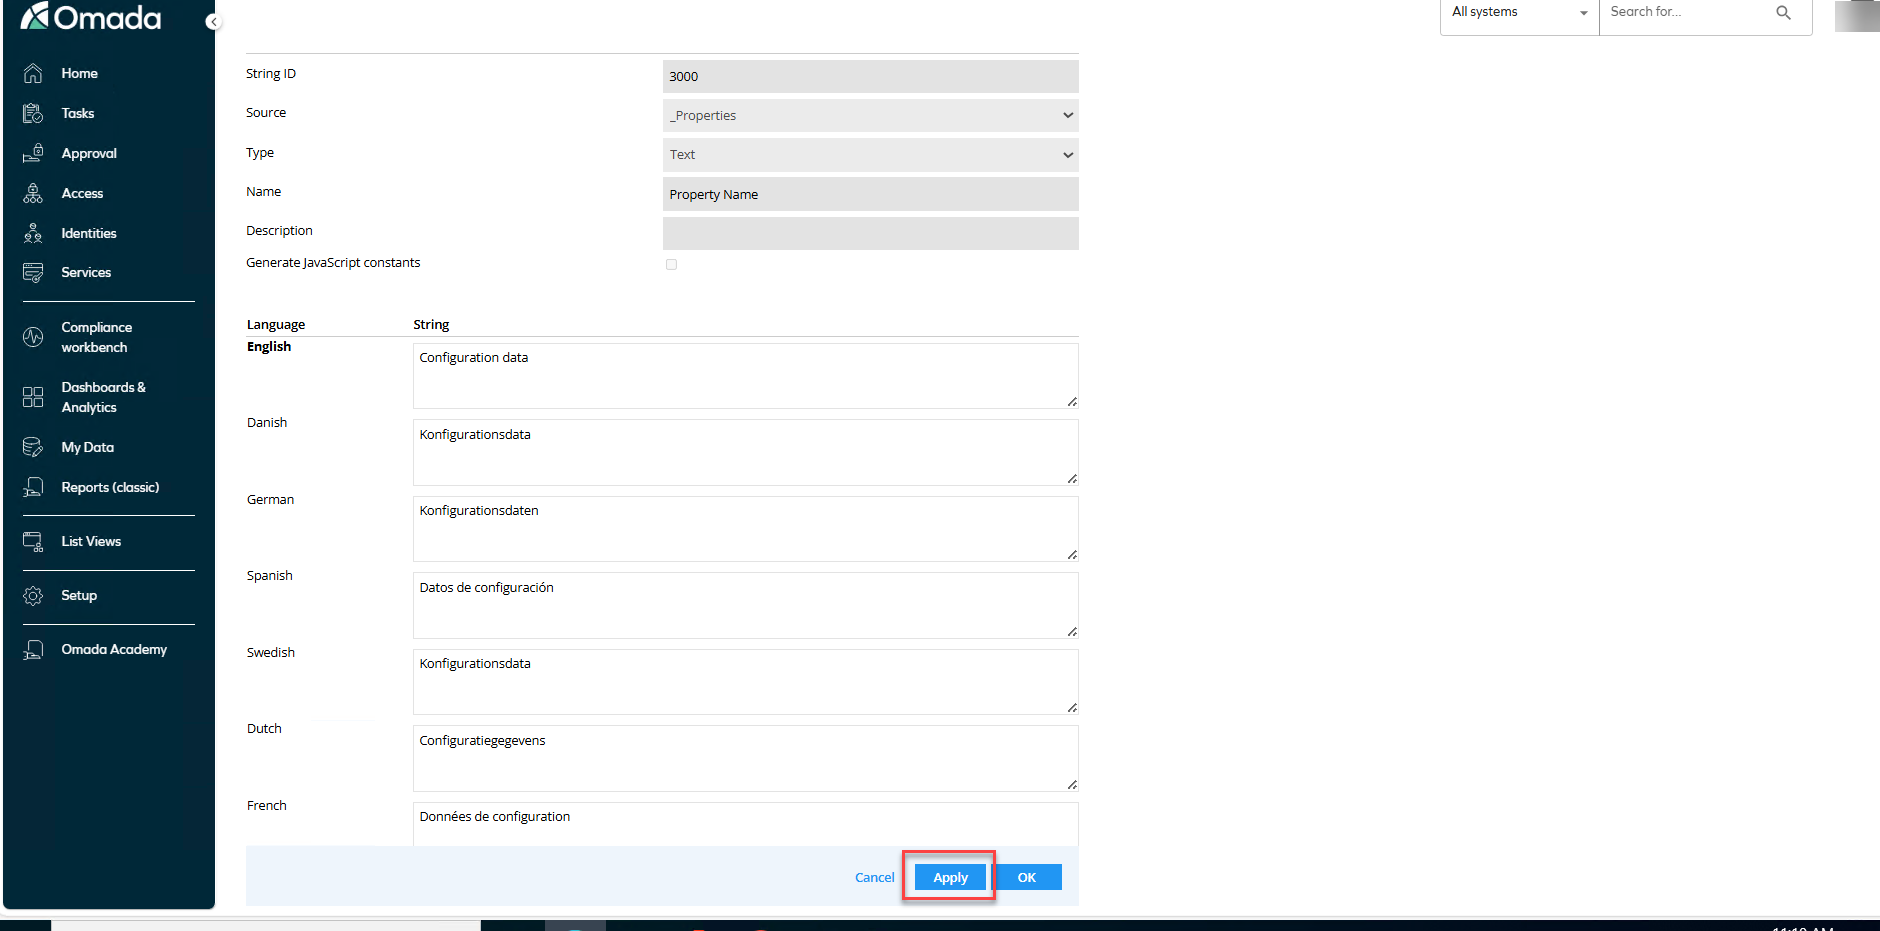
Click on the specific application string you want to customize. This will open a detailed view where you can make your changes.
-
After making your changes, click Apply to save and implement them.
-
Click on Revert to defaults > Revert all to defaults to see all the changes implemented.

ImportantThe Revert to defaults action only affects translations stored in the database. Translations originating from translation files are not modified.
The revert operation restores values from the master translation files only. If a translation is overridden by a custom translation file, that override is not reverted. Because custom translation files take precedence over master translation files, reverting the master translation may have no visible effect on the displayed value.
Revert all to defaults no longer attempts to revert Data Object Type (DOT) multilingual property values to their default values. To modify DOT multilingual property values, use the Mass Edit option.