Install Enterprise Server
Enterprise Server Installation
This section describes a single-tier installation of Enterprise Server.
If you upgrade to a new patch release, you are not prompted for any details. To add new features, run the installer a second time after the upgrade.
Install Enterprise Server
Before you begin the installation process, make sure that you have installed Microsoft .NET Framework 4.8.
-
Double-click the Omada Identity Suite (OIS) installer file, OIS Enterprise Server.exe, to launch the installation wizard. Once the Preparing to install screen is replaced by the Welcome page of the installation wizard, click Next.
-
Click Next to install the software to the default destination folder, which is C:\Program Files\Omada Identity Suite\Enterprise Server 15. Alternatively, click Change to specify a different folder.
-
Specify the user under which the application pool and services are going to run (for Service Account only), then click Next.
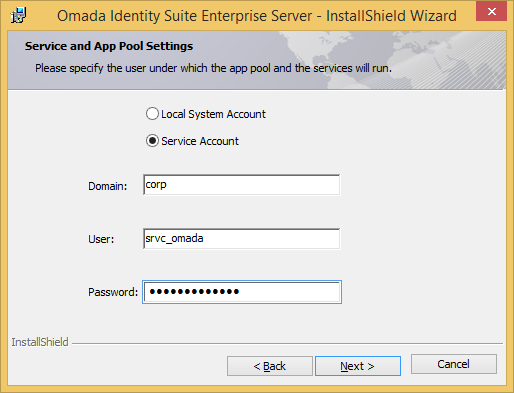
-
Select the software you would like to install, then click Next.
-
Click Install. The program features that you selected are now installed. Click Next when the process completes. Click Finish to complete the installation.
Command line installation
You can run a silent installation from the command prompt. The following example installs all features to the default installation path, using a named user as the account that is going to run the Omada services.
OIS Enterprise Server.exe /v\"INSTALLDIR=\"C:\Program Files\Omada Identity Suite\Enterprise Server 15\" SERVICETYPE=\"2\" SERVICEDOMAIN=\"test\" SERVICEUSER=\"testservice\" SERVICEPASSWORD=\"xxxx\" /qn\" /s
Use SERVICETYPE="1" to use the Local System Account as the account that is going to run the Omada services. You can change to another user later if you need to.
You can specify which features to install by adding an ADDLOCAL parameter with a comma-separated list of the features to install. The following features are available:
- Omada_Enterprise
- PasswordReset
The following example shows how to install Omada_Enterprise and Tools.
OIS Enterprise Server.exe /v\"INSTALLDIR=\"C:\Program Files\Omada Identity Suite\Enterprise Server 15\" ADDLOCAL=\"Omada_Enterprise,Tools\" SERVICETYPE=\"2\" SERVICEDOMAIN=\"test\" SERVICEUSER=\"testservice\" SERVICEPASSWORD=\"xxxx\" /qn\" /s
You can test the parameters by running the command without /qn and /s. This opens the installation wizard with the specified parameters inserted, enabling you to confirm the settings.
Installing different versions of the Enterprise Server
If you need to run different versions of Enterprise Server, you should manually install the software in a distinct folder. Go to Start > Run and enter:
msiexec /a "OIS Enterprise Server.exe"
This command is necessary because you can only have one Timer Service running. It should work for all databases.
This is only necessary for installations within the same minor versions of Enterprise Server. For this release, that means 15.0.x versions.
When you configure each website with different ports (or different IP addresses), each website can then run independently. The IISRESET command affects all websites.
Create a database
Because Enterprise Server requires an empty database, you must create a database in SQL Server. For detailed instructions on how to create a database, see Install IIS and create a database.
- In SQL Server Management Studio, create a new database and give it a name, for example, Omada Identity.
- Make sure that the service account running the Enterprise Server is assigned the db_owner role for the database.
- If the user who is accessing the Enterprise Server database is not allowed to have the db_owner role because of company or SQL Server policy:
- Install the db_omada role on the SQL Server using the script db_omada.sql.
- Grant the user who is accessing the Enterprise Server database the following roles: db_omada, db_datareader, and db_datawriter.
While creating the Enterprise Server (ES) database, make sure that you have both read_committed_snapshot and allow_snapshot_isolation settings enabled in the ES database before you use the Omada Identity software. These settings are required for proper operation of the ES.
Database connection
When you install Enterprise Server using OIS Enterprise Server.exe, the installer does not prompt you to enter the database connection settings.
After the installation is complete, configure the database connection string manually in Web.config:
-
Add or update the
ConnStrapplication setting in the Enterprise ServerWeb.configfile. The file is located at<Installation directory>\Omada Identity Suite\Enterprise Server\Web.config.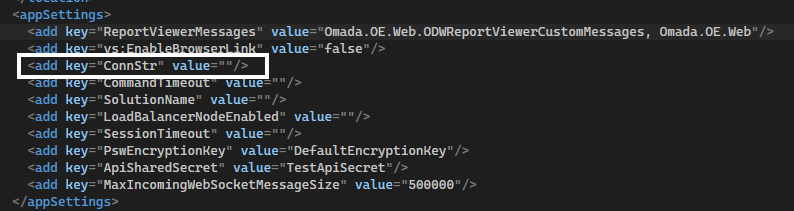
Before running the installer, you must first create an empty SQL Server database with the required permissions and snapshot isolation settings enabled.
Omada recommends backing up the Enterprise Server database at least once a day, and preferably more frequently.
You can automate database backups by configuring a SQL Server Agent job.
Set-up the Web Application in IIS
Now that you have installed Enterprise Server, you must create and configure the Omada Identity web application.
Edit IIS Settings
-
In Windows, click Start -> Administrative Tools to open Internet Information Services (IIS) Manager, then expand the menu in the navigation pane on the left.
-
Right-click Sites and select Add Website.
-
In the Add Website dialog box, type OIS as the Site name and C:\Program Files\Omada Identity Suite\Enterprise Server\website as the Physical path, then click OK.
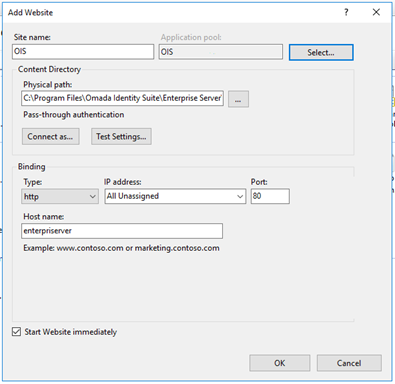
-
An associated application pool is automatically created. Click Application Pools. OIS now appears on the list.
-
Right-click the OIS application pool and select Advanced Settings.
-
In the Advanced Settings dialog box, specify the settings as shown in the image below.
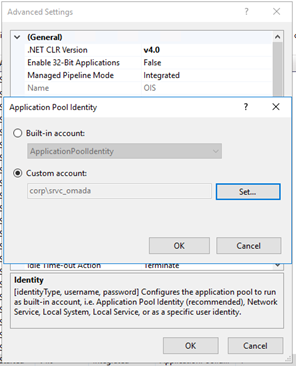
-
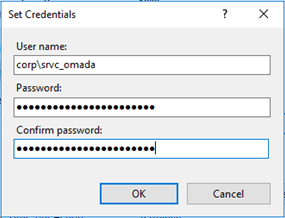
In the Application Pool Identity dialog box, select Custom account and click Set.... In the Set Credentials dialog box, enter the service user name and password. After confirming the password, click OK.
-
The service user name is now displayed in the Identity field. Click OK.
Edit Default Document settings
-
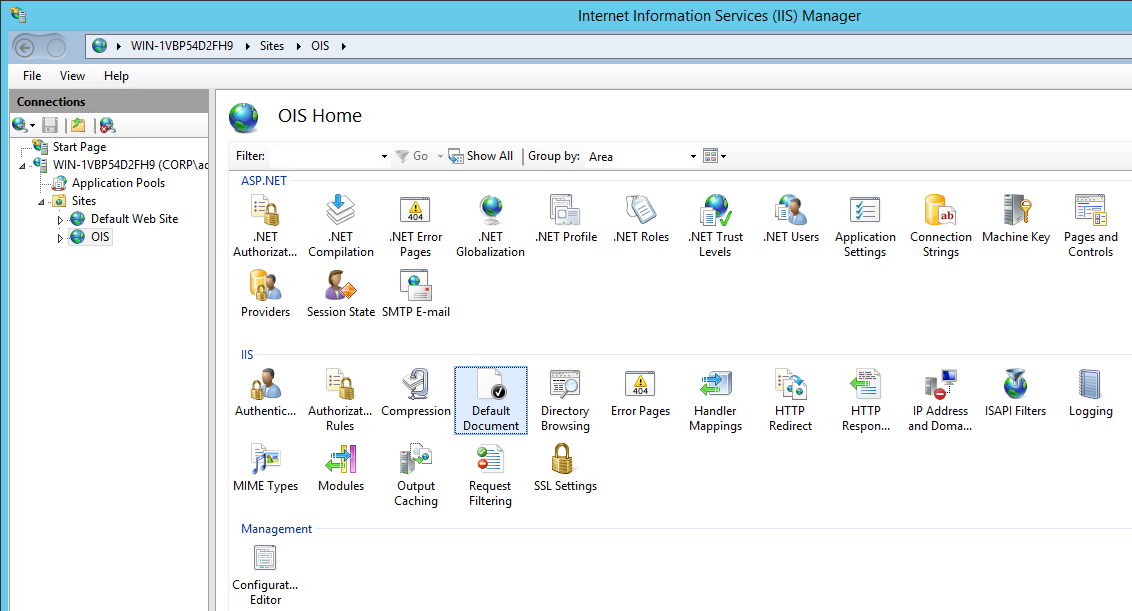
Next, you must edit the Default Document settings and the Authentication settings for the OIS site. Start by double-clicking Default Document in the IIS section.
-
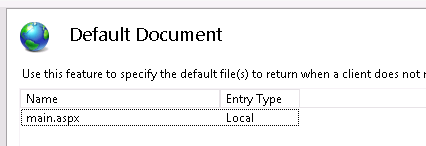
On the Default Document page, right-click and select Add, and add main.aspx as a default document. Remove the other entries.
-
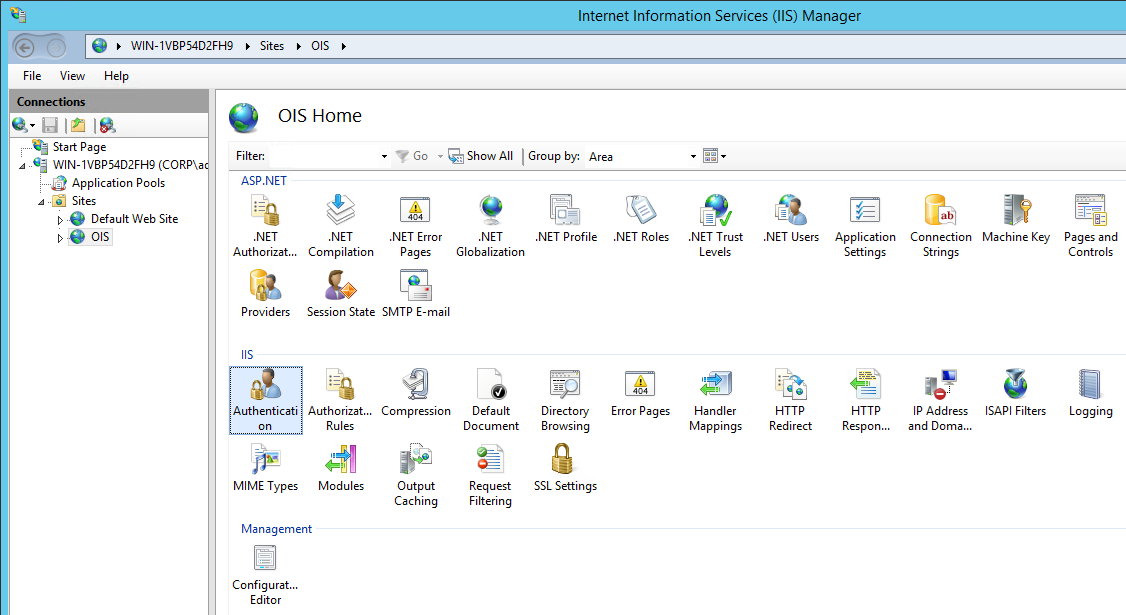
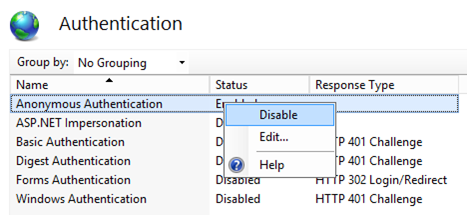
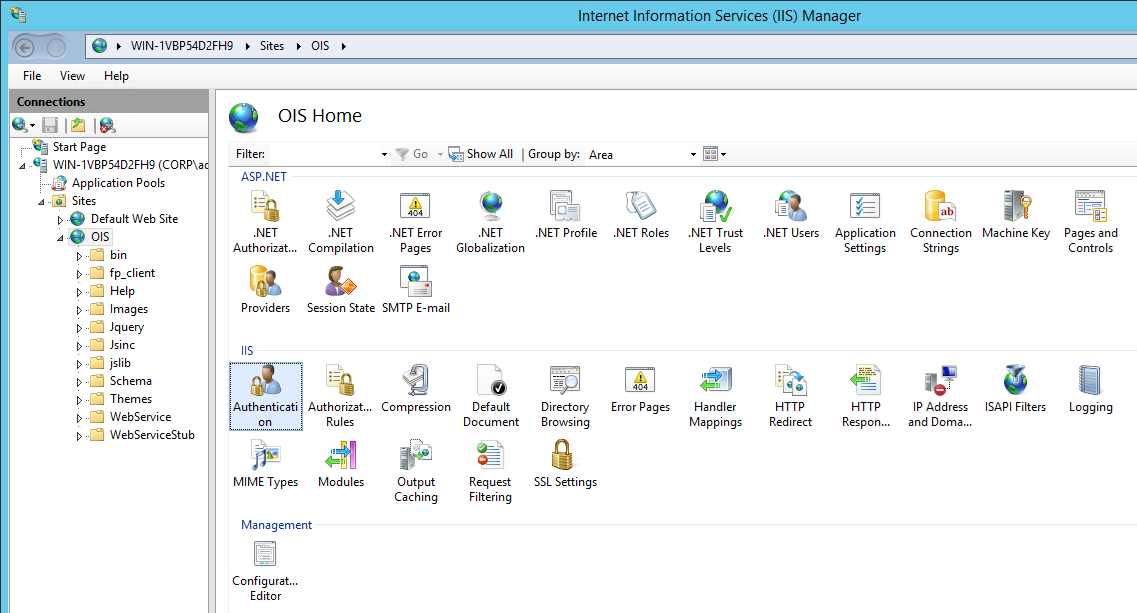
Return to the OIS Home page and double-click Authentication in the IIS section.
-
Right-click Anonymous Authentication and select Disable.
-
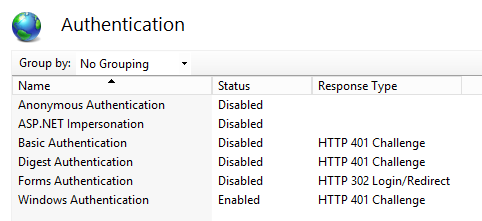
Right-click Windows Authentication and select Enable. The Authentication page should look like this:
-
In the IIS section, right-click and select Basic Settings, then in the Edit Site dialog box, click Select to use OIS as the application pool and click Test Settings.

-
Click OK to save your settings.
Authenticate Users
If you want the portal to authenticate users with user name and password, you can disable Integrated Windows Authentication. The following steps describe how to do this.
-
Open the Internet Information Services (IIS) Manager, go to Home, and double-click Authentication.
-
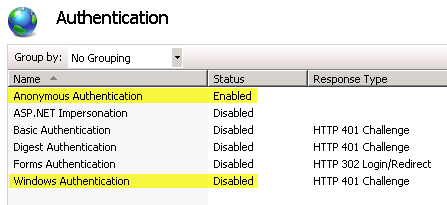
Enable Anonymous Authentication and disable Windows Authentication.
Log on to the application
By default, only one user named Administrator, with an empty password, is available for you to log in with.
The user table in Omada Identity also contains three other artificial users that are used by the system only.
- ACTUSER is used in filter expressions to express a variable being replaced with the active user during the evaluation.
- SYSTEM is the user who executes the code when it is not running in the context of an interactive user in a web browser. For example, the Timer Service and the Role and Policy Engine (RoPE) are running in the context of the system user. Also, CodeMethods can be configured to run as the system user.
- NONE is used as the assignee on activities that do not have any other assignee yet.
There are two different approaches to how you can log on as an administrator to the application. They are described in the following sections.
Use anonymous authentication
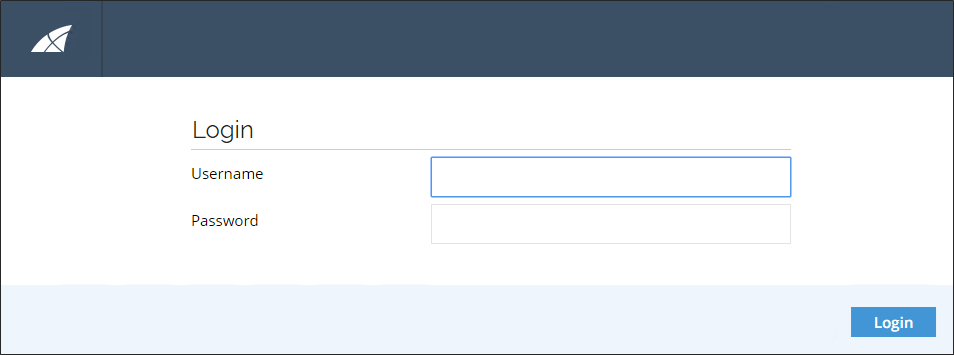
If you have enabled anonymous authentication, perform the following steps to log on with a user name and password:
-
Open your web browser, and connect to the web server, for example,
http://localhost/OmadaEnterprise/main.aspx. -
Enter Administrator as the user name. Do not enter a password.
Use integrated Windows authentication
To log on with Integrated Windows authentication, log on to the web server (console or Remote Desktop) with the Administrator user.
- Open your web browser on the web tier and connect to the local web server.
To avoid using the Administrator user, you can log in to the application using anonymous authentication and manually create accounts in Enterprise Server for a few relevant users before enabling Windows Authentication.
License keys
You must install a license key for each installation. The key is stored in the database, and you normally just need to install it once for each database. However, if the license conditions change, new license key installations might be necessary.
Request a license key
To request a license key, contact your account manager or the Omada sales department at sales@omada.net. You must submit the following information to obtain a key:
- Company name
- Address (multiple if applicable)
- Contact person
- License key type (normal, demo, or trial)
- Number of users
- Number of process templates
- Number of identities
License key types
There are three different types of license keys that you can request for Omada Identity.
| License key type | Description |
|---|---|
| Normal | A normal license key enables you to use the system without any time limits. You must upgrade this license key each time you install a new version of Omada Identity. |
| Demo | A demo license key is meant for Omada partners so that partners can demonstrate Omada Identity for a third-party company or individual. Demo license keys have a time limit, so you must update this type of license key after the license has expired. |
| Trial | A trial license key is meant for potential customers and partners who request a demonstration of how the system works. The trial license key has a time limit and will expire. |
Updating the Enterprise Server license does not automatically update the Omada Identity Data Warehouse (ODW) license. When you update the Enterprise Server license, you must also update the ODW license separately. For more information, see Update the ODW license.
Install or update a license key
-
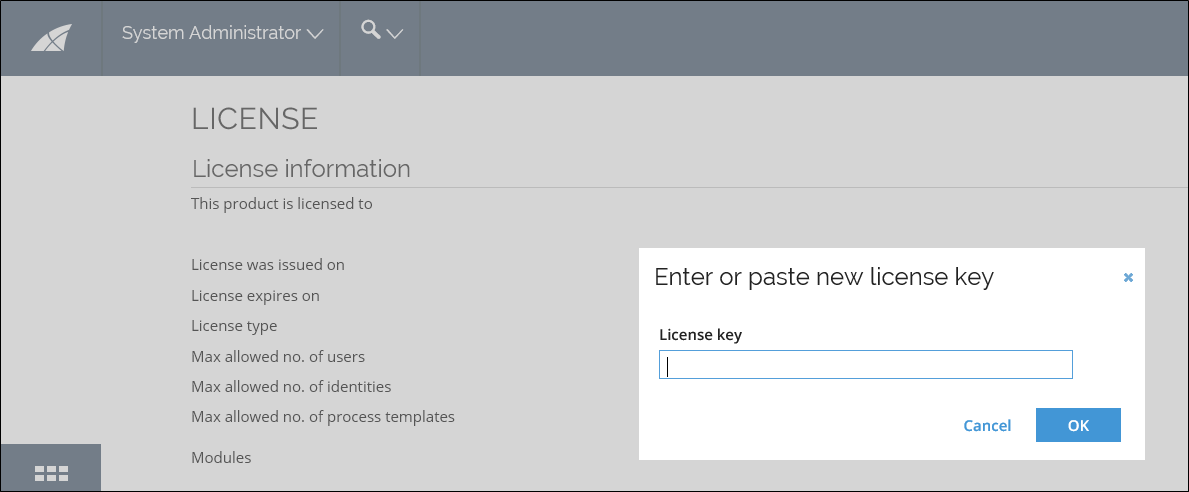
Log in to the Omada Identity Portal.
-
Follow the instructions at the top of the screen to enter a license key.
-
Paste your new license key into the field and click OK. Your license is now updated.
Only Platform administrators can update the Omada Identity license keys.
The Omada Identity application programming interface (API) documentation contains information about the built-in collection of code methods, public JavaScript methods, and other API-related content provided by Omada developers.
You can access the documentation in either of the following formats:
- Online HTML format.
- Compiled HTML Help format (
.chmfile).
The .chm file is available at the following default location:
C:\Program Files\Omada Identity Suite\Enterprise Server\documentation\OIS-X 15 documentation.chm
You must run the .chm file locally on your computer. Windows may prevent you from opening it if you try to run it from another location.
Service User Rights
Logging on as a Service
You must give the service account(s) used for the Omada Identity Services the right to Log on as a service in Local Policies.
Database owner
The service account(s) used for the Omada Identity Services must have the db_owner role in the Enterprise Server database.
If the user who is accessing the Omada Identity Enterprise Server database is not allowed to have the db_owner role because of company or SQL Server policy, do the following:
- Install the db_omada role on the SQL Server using the script db_omada.sql.
- Grant the user who is accessing the Enterprise Server database the following roles: db_omada, db_datareader, and db_datawriter.
Access to the MSDB database
The service account(s) used for the Omada Identity Services must have the following role memberships for the MSDB database:
- db_datareader
- db_ssisadmin
If SQL Server Agent is used, the following role is also required:
- SQLAgentOperatorRole
Set read Access to Perflib Registry Key
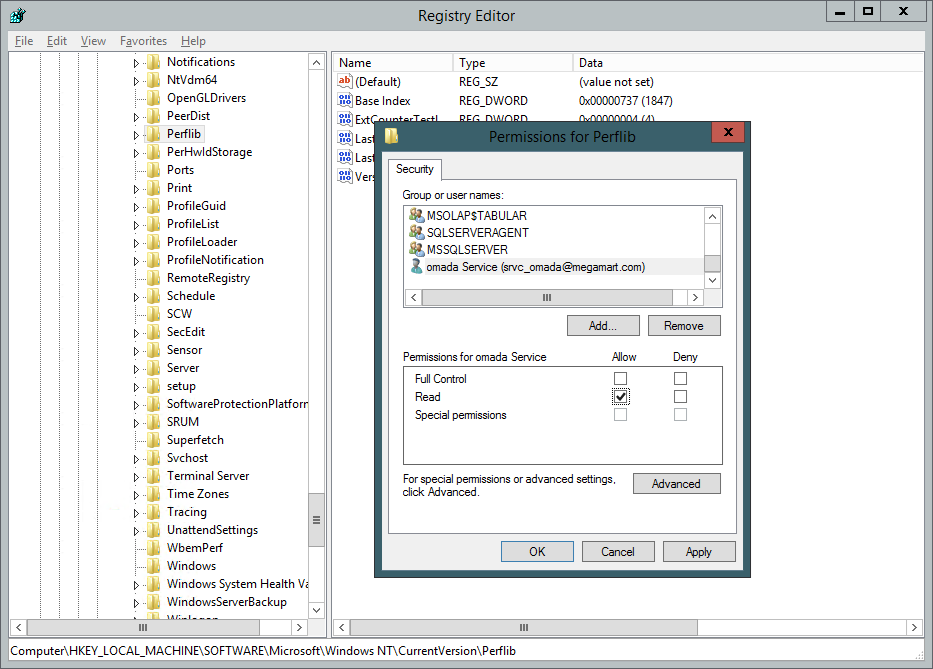
The service account(s) used for running the Omada Identity Services and the IIS application pool must have Read Access to the following registry key:
HKLM\SOFTWARE\Microsoft\Windows NT\CurrentVersion\Perflib
This access is required for the performance counters to run. You set it in the permissions for the registry key in the Registry Editor.
-
Right-click the registry key, and select Permissions....
-
Click Add... and search for the service account.
-
Select Read in the Permissions section and click Apply.
Full-text search catalogs and indexes are created inline in dbcr.sql during initial installation, eliminating the need for manual Configuration utility steps.