On-premises activation
Prerequisites
Make sure you have registered and installed the latest version of:
-
Omada.Connectivity.StandardCollectorsconnectivity package, -
Omada.Connectivity.StandardConnectorsconnectivity package, -
Omada.Connectivity.OData.OmadaIdentityconnectivity package.
See Connectivity for more details on how to register and install the packages.
Enabling Governance for Omada Identity
Before you start
-
Enable OData for Users and UserGroups.
-
Disable custom events.
Disable or delete existing custom code methods creating, updating, or deleting user objects. Code methods in the packaged solution are disabled automatically, but custom code methods or custom invocations of code methods require to be disabled manually.
noteIf the Code Methods or Application Events remain active it doesn't cause inconsistencies in the database. It may, though lead to a presence of unapproved users and user group memberships. They are eventually handled in the reconciliation cycles.
-
Adjust user and user group handling through customization or enhancements.
infoWhen enabling the Governance for Omada Identity, ensure to include the Omada Provisioning Service and Omada Data Warehouse service accounts in the Provisioning Users group. This grants them access for querying, provisioning, and deprovisioning users and user group memberships.
For more information on this user group, refer to the Users and user group section in the Security documentation.
-
Have a naming convention:
- By default, the name for personal account type is set to
Personal. - By deafult, the account naming format for the Omada system accounts is set to
[EMAIL].
-
Have the account rules configured:
-
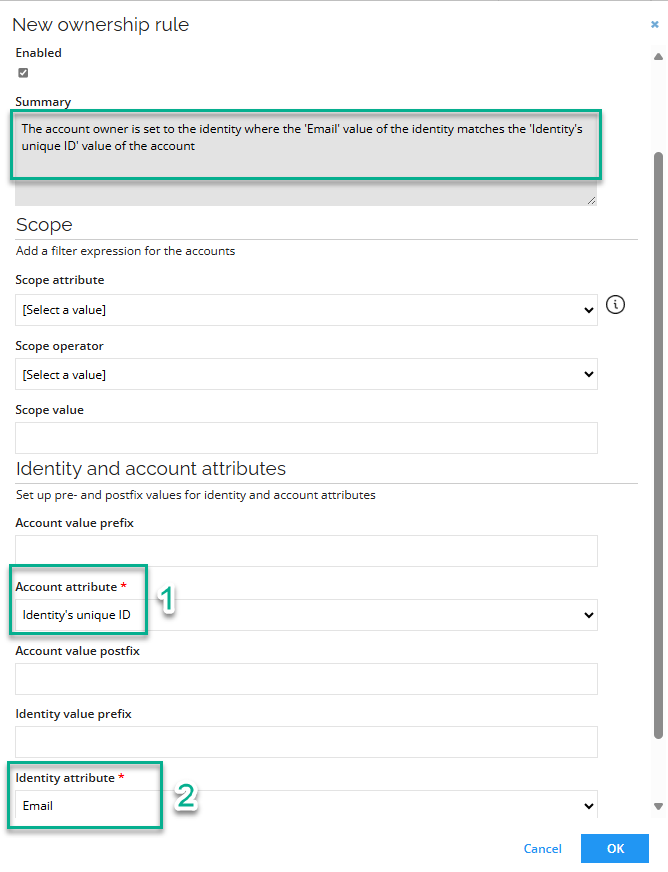
Determine the Ownership rule (default: The account owner is set to the identity where the 'Identity's unique ID' value of the identity matches the 'Account UID' value of the account).
infoWhile by default, the account name format is set to
[EMAIL], also by default, the Omada Identity system matches the account's UID to the IdentityID.If you do not use the email address as the IdentityID (but, for example, employee numbers from the HR system), you can change the ownership rule:
-
Go to Systems > Omada Identity > Account rules > New.
-
Set the Account attribute to Identity's unique ID.
-
Set the Identity attribute to Email. After that, the Summary will be updated automatically.
-
-
Determine the Classification rule (default: If an account with the account attribute 'Identity join reason' equals 'IdentityID Match', the account type is set to 'Personal').
-
-
Have the approval workflow configured, including:
- The required level of access approval for Omada Identity user groups. By default it is set to System owner.
- The appropriate approvers. By default they are not configured.
-
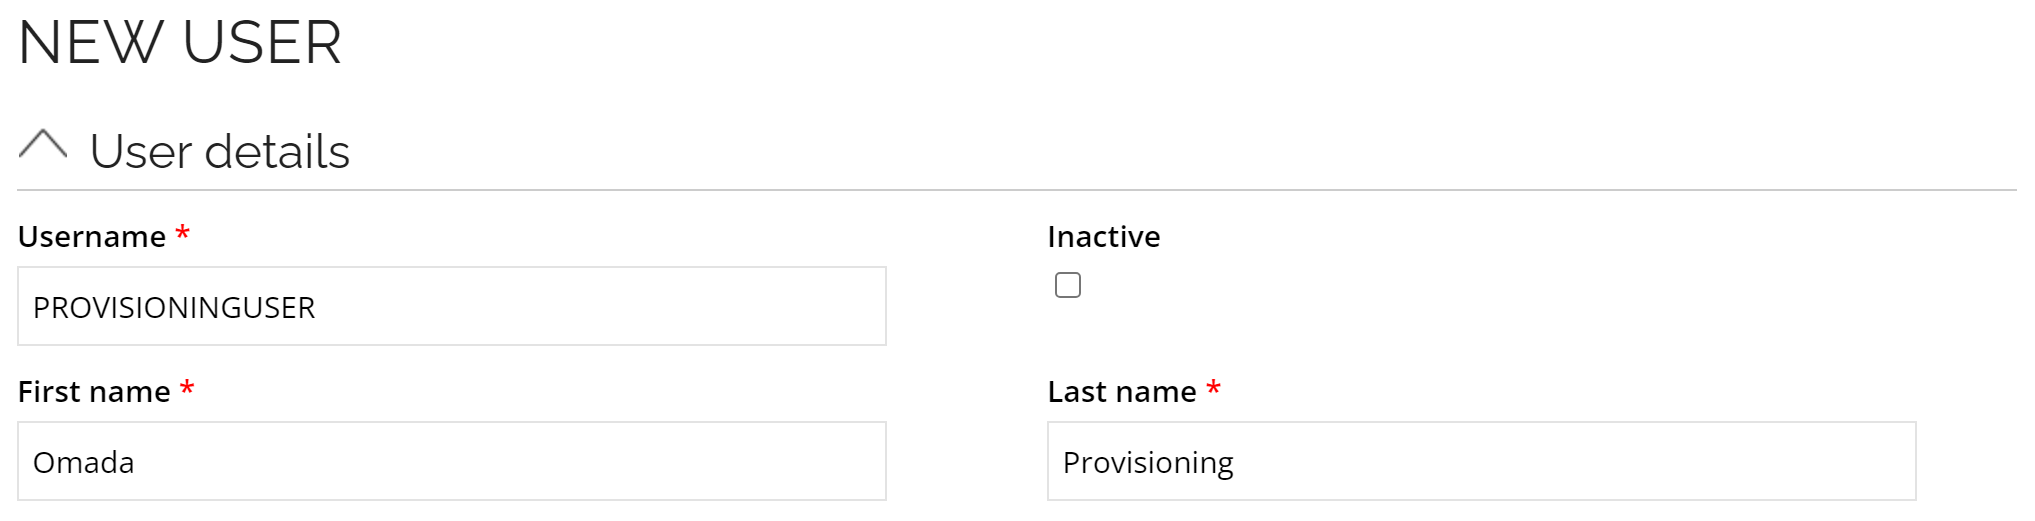
Create a new user for provisioning.
When configuring Governance for Omada Identity, you must create a new user for provisioning and reading user and user group data. You can also use the already existing user, but they must be a member of the Provisioning users user group.
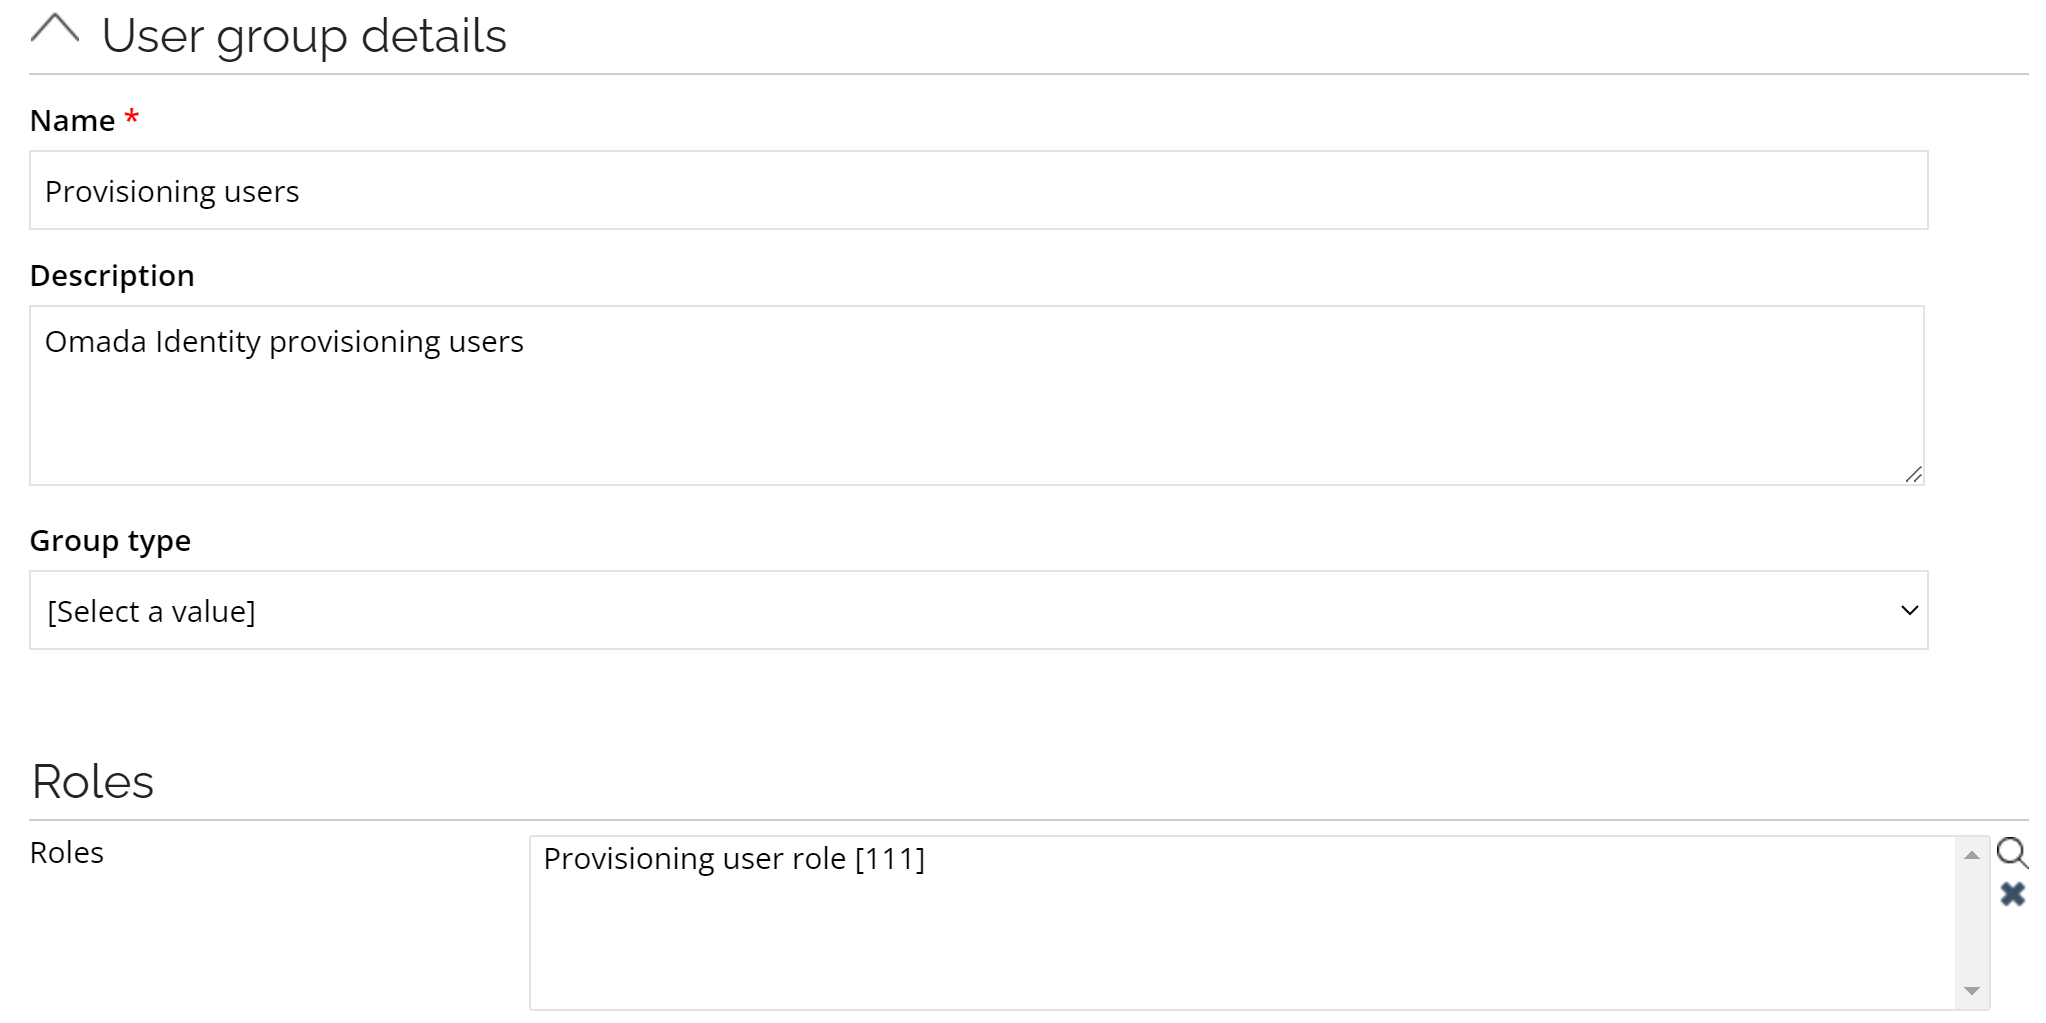
In the system, there should be a user group named Provisioning users.
Create a new user.
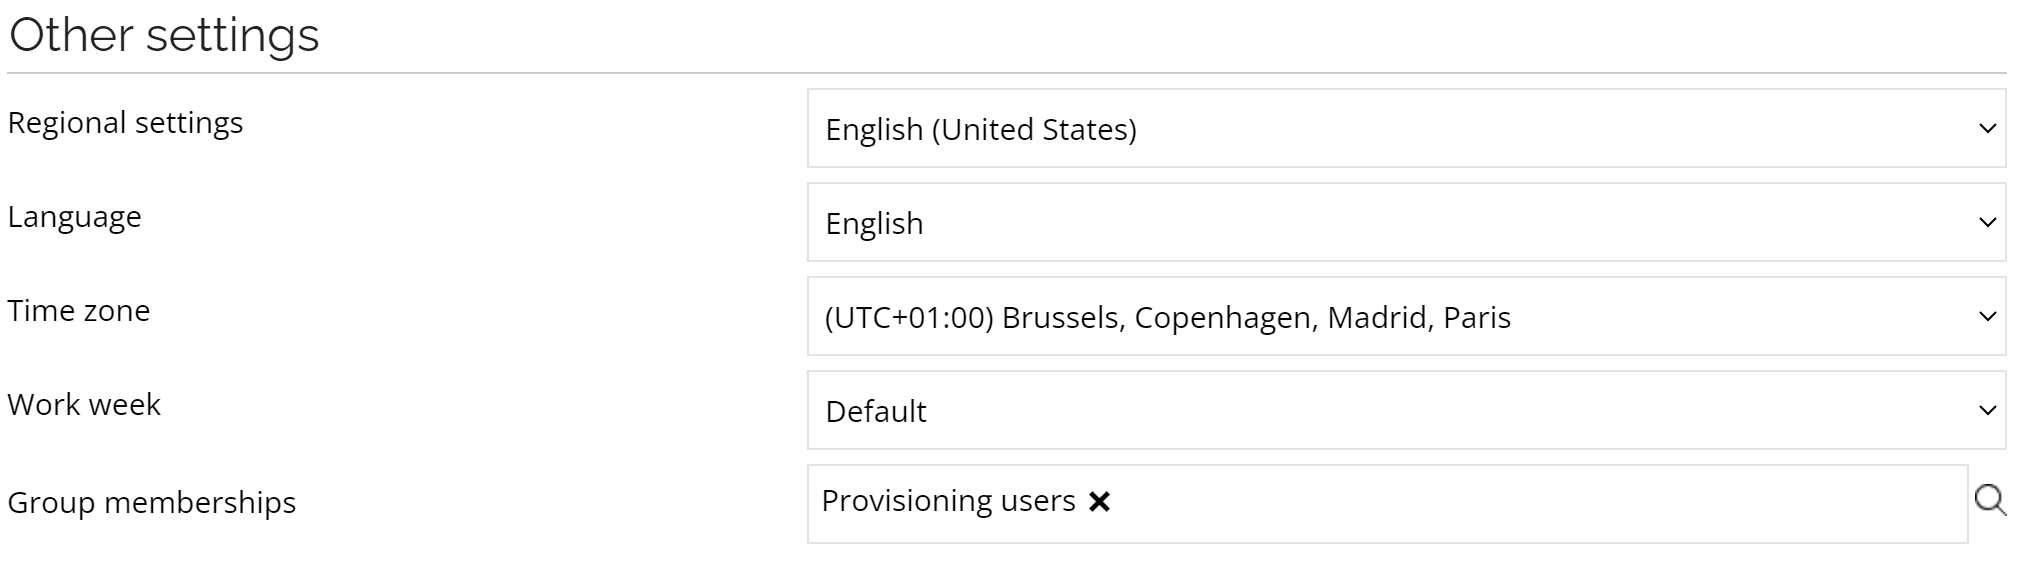
Then, add the newly created user as a member of the Provisioning users user group.
Procedure
-
Go to Setup > Installed Packages and install the Governance for Omada Identity changeset.
-
Go to All systems and select the Omada Identity system.
-
Optionally, update the the account name format.
noteIf the the name format for the personal account type is not set to
[EMAIL](but, for example, to[IDENTITYID]), go to Setup > Resources and select the OIACCOUNT resource and update the property account name format. -
Optionally, go to Resource folders and configure approvals in the Omada Identity resource folder:
- Configure an appropriate approval level of access for Omada Identity user groups. By default, it is set to system owner approval.
- Validate the approval configuration.
-
Go to Connection details and configure the following:
- Authentication type with associated settings and required credentials.
- Base URL to the OData endpoint of the Enterprise Server, for example
http://enterpriseserver/OData/DataObjects.
-
Go to Data Import and select Start data import action. Then click OK.
noteRunning the import prevents creating provisioning tasks for existing users and group memberships.
-
Go to Provisioning > Enable provisioning, select or type the following options, and click OK:
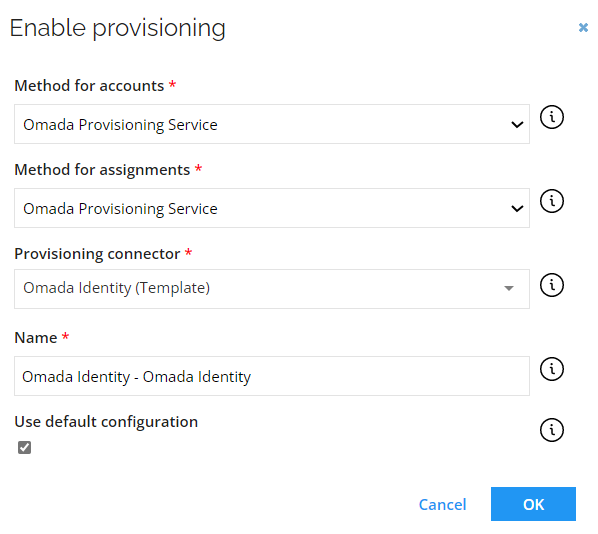
When a pop-up appears, confirm enabling the default configuration by clicking OK.
-
Make sure that the name for the personal account type is set to
Personal, like in the screenshot: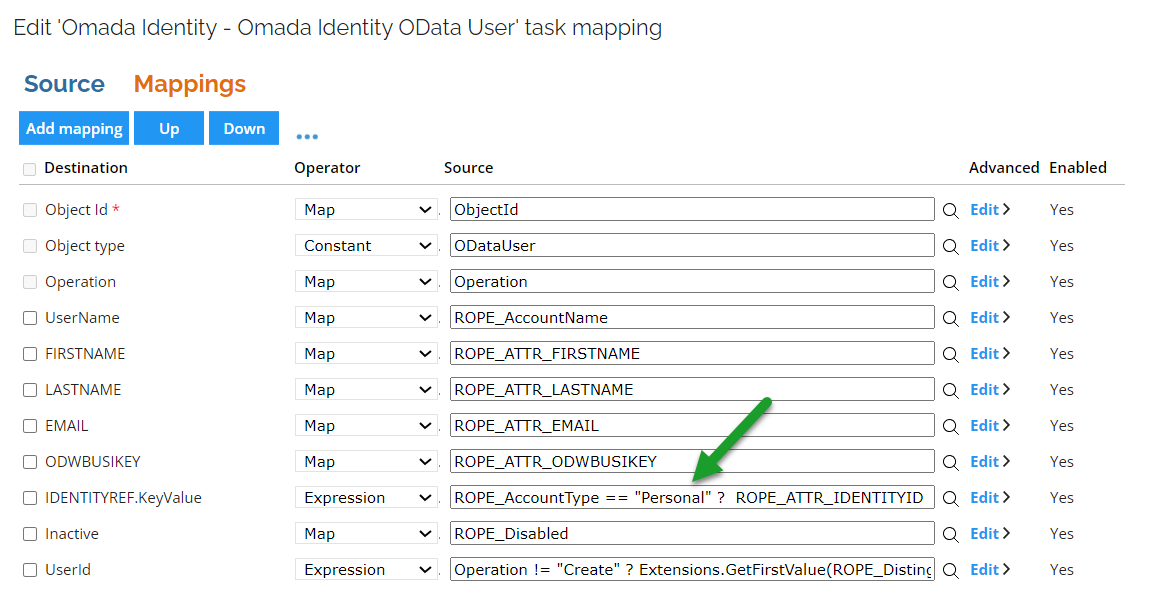
You can check it by clicking Task mappings > ODataUser > Mappings.
If the name for the personal account type is not set to
Personal, do the following:-
Select ODataUser and click Edit.
-
Select the Mappings tab.
-
Select the
IDENTITYREF.KeyValuedestination and replace thePersonalstring, in the source string, with a new name for the personal account type. It is required for the new source to have the following pattern:ROPE_AccountType == "<new_account_type_name>"?
ROPE_ATTR_IDENTITYID : null
-
-
Go to Connector settings and configure the following:
- Configure the base address with the URL to the Enterprise Server.
- Select the Authentication type and configure related settings.
- For any custom mappings of user properties from the identity that were implemented with copy rule on the code method for the user creation, map those attributes on the RoPE account object and in the task mappings.
- Set the status for the Task mappings and Data model settings to OK using the Edit status button on the right side.
- Commit the settings.
-
Go to Advanced settings. In the General tab, configure the following:
- Increase the
Concurrent connectionsnumber to at least 5. - Select the Review jobs flag.
- Confirm by clicking OK.

- Increase the
-
Configure the Custom service desk settings.
The service desk agents configured in the SERVICEDESKAGENTS on the OrgUnit object type are migrated automatically by the built-in update action.
If Context Type, other than OrgUnit, has a service definition but doesn't have self-management configuration for the object type set in the context type, then it must be configured by following instructions in the Add self-management configuration to additional data object types section.
-
Go to Connector settings and configure the following:
- Authentication type with associated settings and required credentials
- Base URL to the Enterprise Server, for example
http://enterpriseserver - Confirm by clicking OK.
Optional steps of configuring Governance for Omada Identity
Procedure
-
Create the following technical identities:
- Service accounts in the Enterprise Server.
- System administrator user, or disable it.
- Other non-personal administrator and service accounts required.
-
Create or enable the administrative account type for the Omada Identity system.
-
Configure the approval workflow for administrative resources.
Use the administrative Omada Identity resources for primary identities with an administrative account only.
-
Make sure orphan accounts and unapproved user group memberships are properly handled:
- Calculate the Unresolved Identity
cautionMany orphan assignments may result in a prolonged time of the Unresolved Identity calculations.
- Initiate the Account Ownership review survey, scoped for the Omada Identity system, to validate the system compliance.
noteAssign the orphan accounts to an identity.
- Service accounts are usually assigned to a technical identity.
- Administrator accounts are usually assigned to an identity through administrator account type.
-
Repeat system import.
-
In the Compliance dashboard validate that there are no orphan accounts and unapproved assignments.
cautionIf the system remains uncompliant, create appropriate assignment policies and access requests to achieve desired state.
-
For the Omada Identity Account and Omada Identity User Group resource types enable the Exclusively managed field. This enables that not approved user group assignments are deprovisioned by the system when manually assigned.
-
In the Omada Identity resource folder configure the desired approval level for accessing Omada Identity user groups.
Governance for Omada Identity interdependencies
As users are imported into the warehouse as accounts, and user group memberships are imported as permission assignments upon installation of the feature package, the event-driven logic becomes disabled. Consequently, the provisioning of users (accounts) and user group membership (permissions) are entirely managed by OPS. This shift has several implications when enabling the Governance for Omada Identity, such as:
Code methods impacted by the feature
CreateContractorIdentity2- no longer adds user to the contractor user groupCreateEmployeeUser2- no longer adds user to the employee user group
Code methods made obsolete
All automated operations performed by these code methods will be managed by the Governance for Omada Identity through provisioning tasks. Consequently, these code methods will no longer be accessible for use in any new functionality, even if Omada Identity Governance is not yet enabled. Furthermore, they will be phased out in future versions of the product. However, despite their unavailability for new functionalities, they will continue to function as expected for existing ones. Following the activation of the Governance for Omada Identity, they will become redundant, prompting their classification as obsolete.
Identity.CreateIdentityUserIdentity.UpdateIdentityUserMain.CreateIdentityUserMain.CreateIdentityUserExMain.UpdateIdentityUser
If you enabled Governance for Omada Identity, go through your custom event definitions and code method calls from processes that could use the obsolete code methods, and disable or replace them. When they are not disabled or replaced, and Governance is enabled, errors appear in the Event Log.
Application events made obsolete
IdentityUserSynchronizer- Sync from Identity to user of FirstName, LastName, JobTitle, Email, IdentityStatus(interpreted into Inactive flag), ODWBusinessKeyGroupMembershipHandler- Adding and removing users to user groups when they're being added or removed as owner of identities, orgunits, resources, systems, resource folders, constraints and contexts. Similarly, adding or removing users to the service desk group.
The RoPE extension SelfManagementExtension no longer adds or removes users from user groups.