Event definitions
Events are key components that initiate a series of actions based on triggers. These triggers can range from creating, updating and deleting data objects to process transitions, activity reassignments and specific times.
Potential actions include sending notifications, updating or copying data, and executing code methods that enable the realization of business logic.
Imagine a scenario in which an identity is to be deactivated when the validity date is reached and the manager is to receive a notification about this. This is an example of a timer-triggered event affecting identity data objects whose valid to date has expired. The event automatically updates the status of the affected identities to Terminated and sends notifications to the relevant stakeholders. Importantly, this event is universal across the system and applies to any eligible change, rather than being limited to a specific process.
When designing events, it is essential to:
-
consider the impact on performance. The amount of verified and changed data must be kept to a minimum.
-
be mindful of the potential for any action to trigger further events. Avoid triggering event cascades and make sure that you do not trigger endless event loops.
Configuration
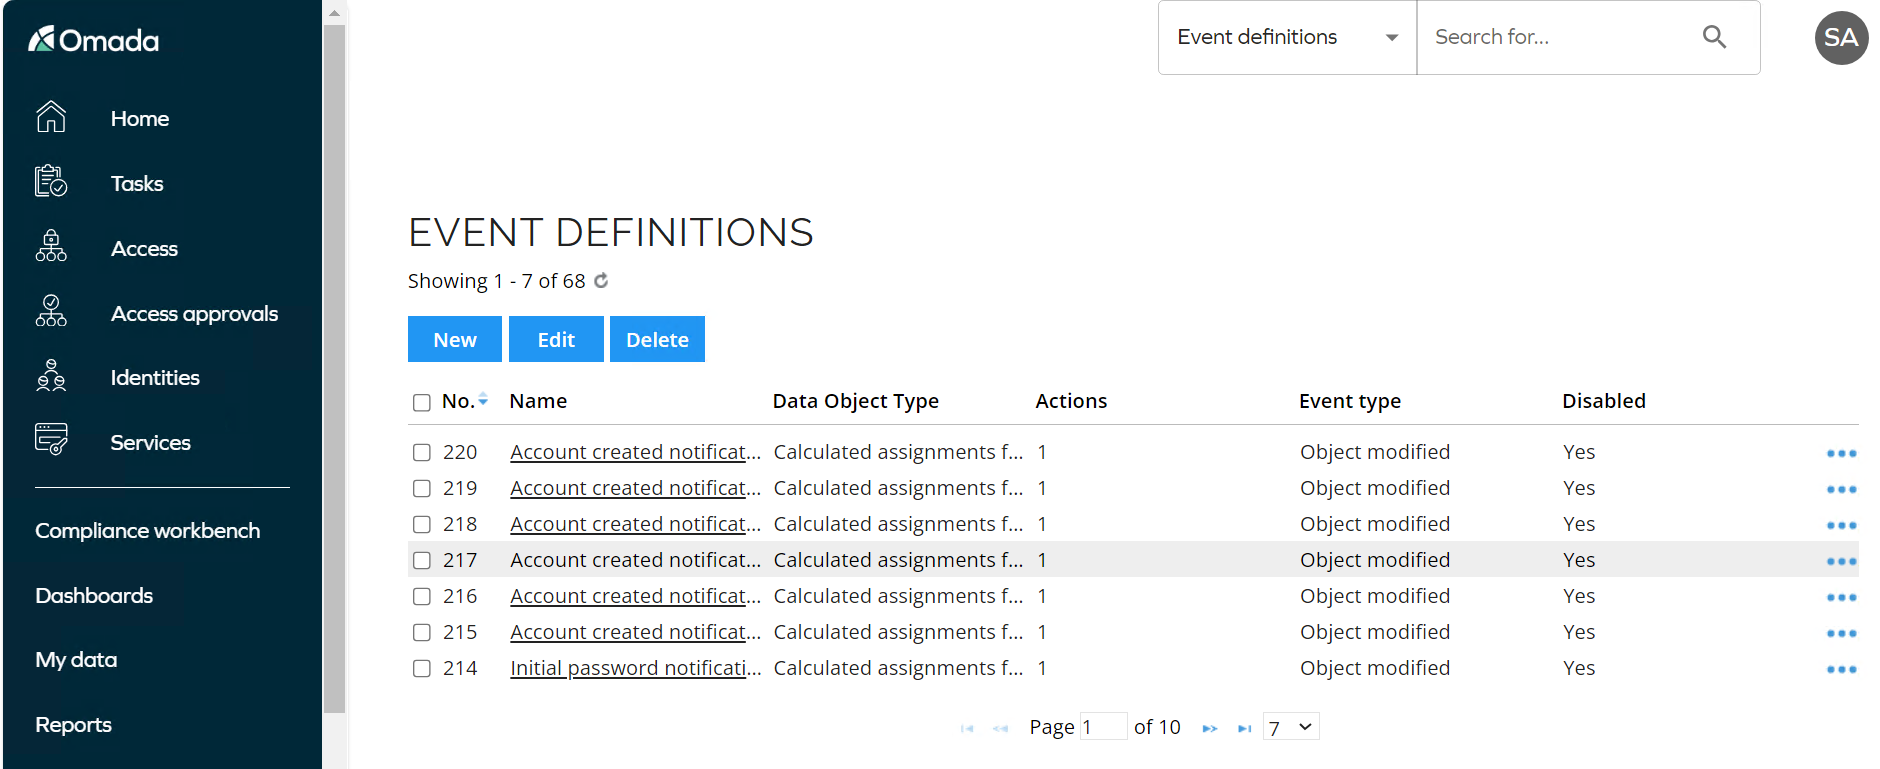
System events are managed exclusively in Setup > Administration > Process configuration > Event definitions.
There are special Transition events that offer the same options as normal events, but are configured in the respective processes in which they are used. They remain specific to their respective processes and are not displayed in the system overview.
By default, events are executed by the user who triggered the change. This means that this user must also have the necessary authorization to apply the triggered actions. Timer-based events are executed by the timer service account.
Create new event
Follow these steps to create a new event definition:
-
Go to Setup > Administration > Process configuration > Event definitions.
-
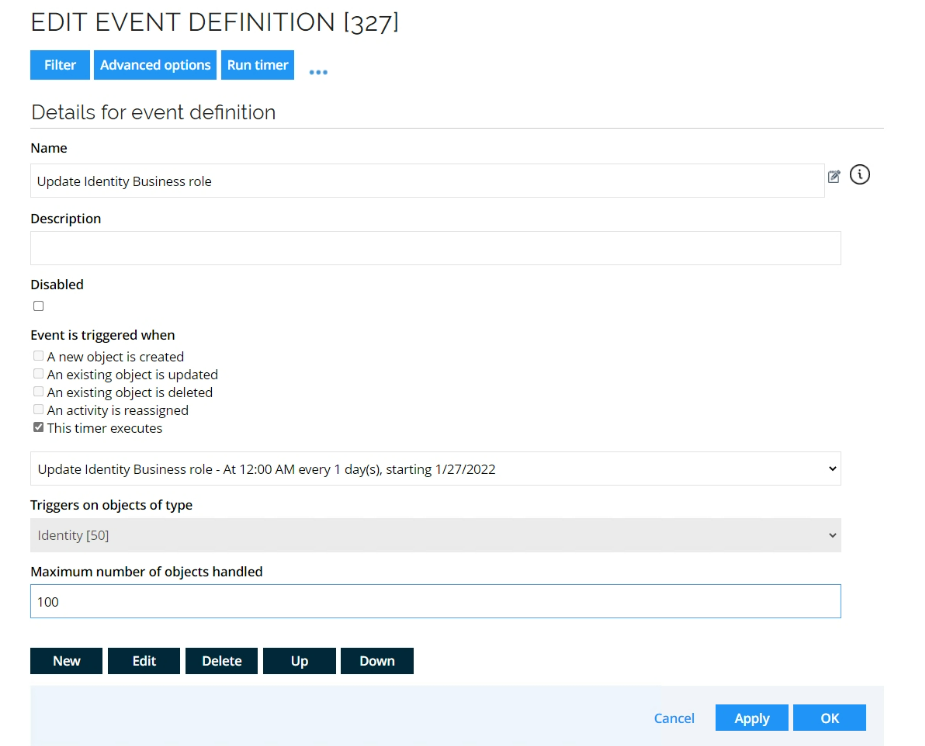
Click New and provide a name of the event definition and optionally, a description.
-
In the Disabled option, you can choose whether to disable the event.
tipEvent definitions vary based on the trigger that sets them in motion, rather than the actions they carry out. While multiple events may share the same actions, their triggers can differ. Therefore, naming each event according to its trigger aids in understanding when and why each event occurs.
-
-
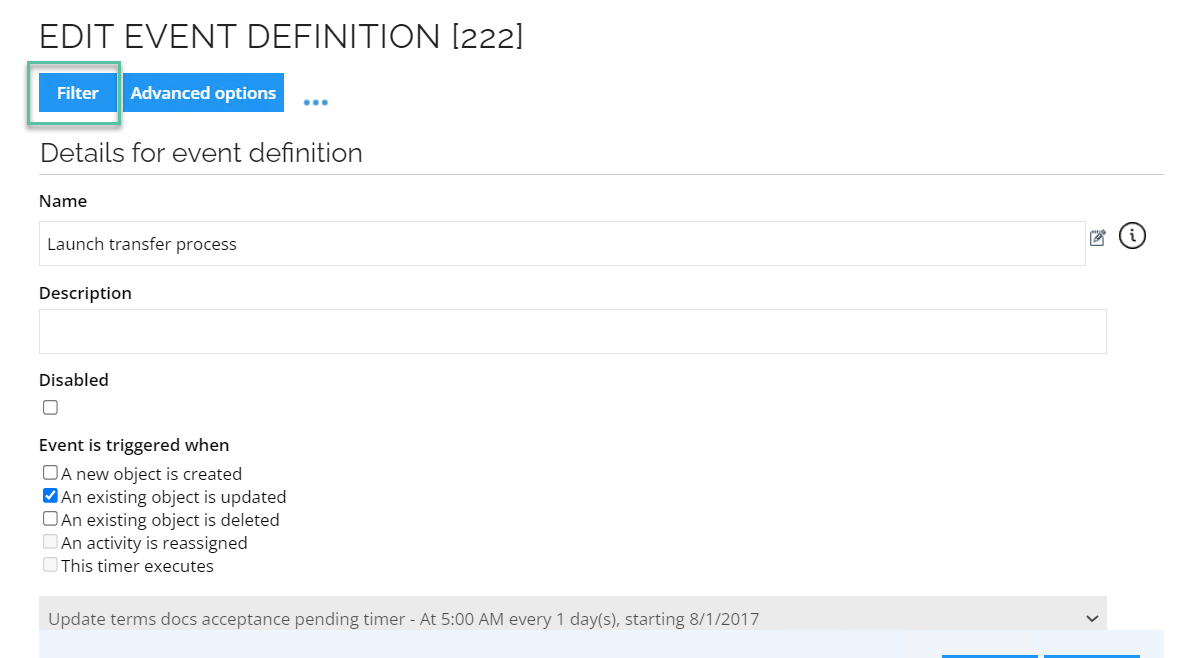
In the Event is triggered when option, select when the event will be triggered.
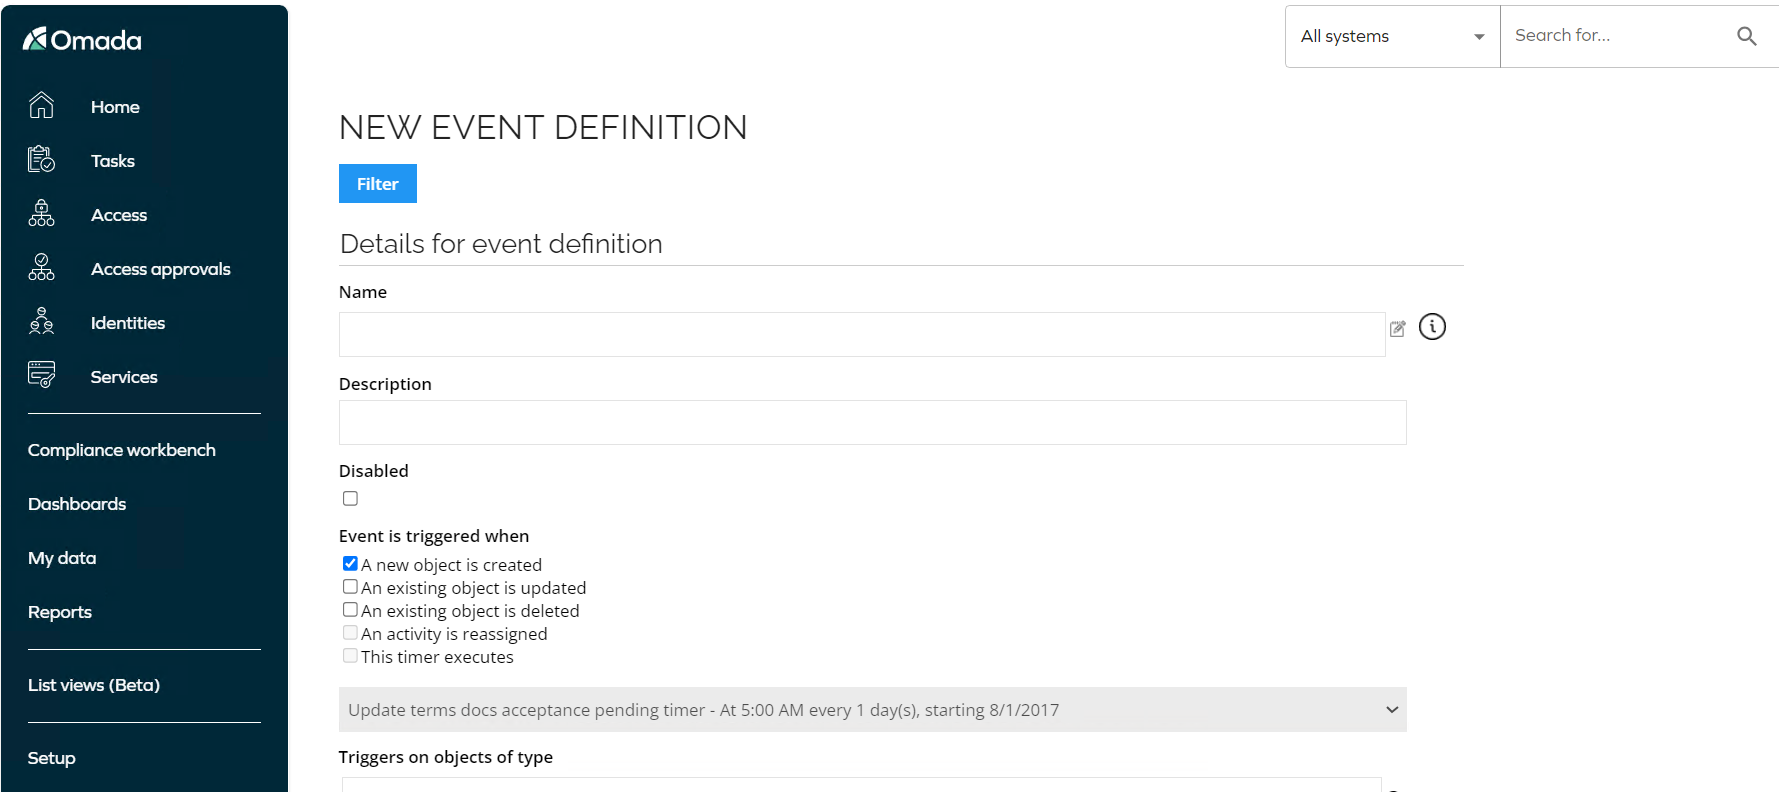
The available options depend on the selected trigger:
-
A new object is created, for example, when a new identity is created in Omada Identity.
-
An existing object is updated, for example, if an existing identity is assigned to a different OU. Here, you can set some additional settings in the Advanced options. You can define changes to which properties you want the event to trigger on.
For more detailed instruction, refer to the Advanced configuration options section below.
-
An existing object is deleted, for example, if an existing identity is deleted.
warningDo not delete data in production environments. Deleting a data object also removes its references, potentially causing inconsistencies in your data and configuration. Instead, use a status property.
-
An activity is reassigned, for example, when the task assignment is transferred from one user or user group to another.
-
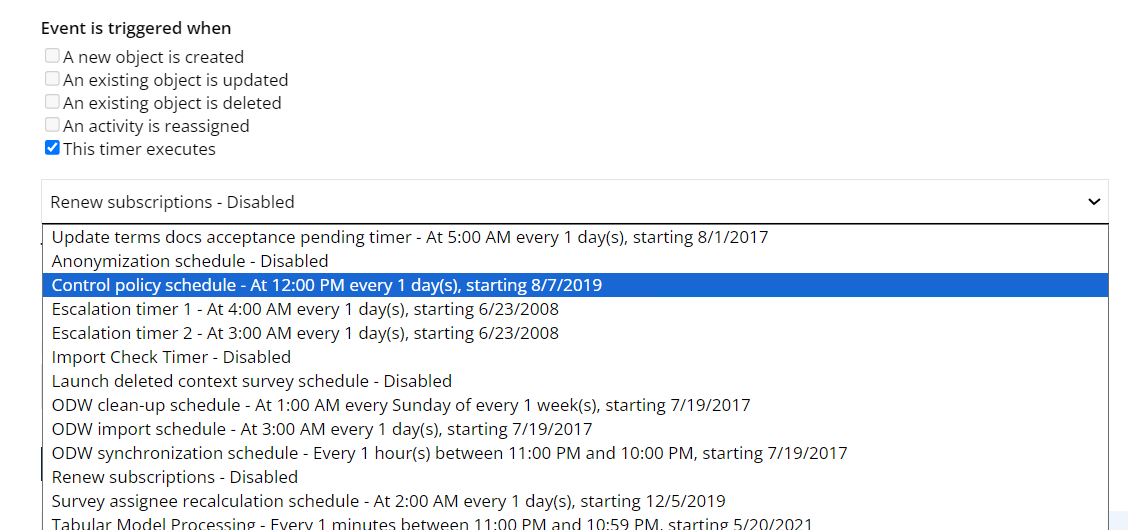
The timer executes, for example, send a reminder if a task has not been completed after X days. It requires selecting a previously created timer. For more information, refer to the Run event definition with timer section.
Event definition behavior during test run of changesetsWhen a changeset is imported in test mode, all actions within the changeset are executed as they would be during a standard import. This includes the evaluation and triggering of event definitions, such as those configured to run on resource creation.
The only functional difference between a test execution and a standard import is that, once processing is complete, the transaction is rolled back instead of being committed.
As a result:
-
Event definitions are triggered during a test run if their conditions are met (for example, on resource creation).
-
Any actions initiated by these event definitions (such as executing code methods) are also performed.
-
No changes are persisted, as the entire transaction is rolled back at the end of the execution.
This behavior is expected and consistent with the system’s design for processing changesets in test mode.
-
-
-
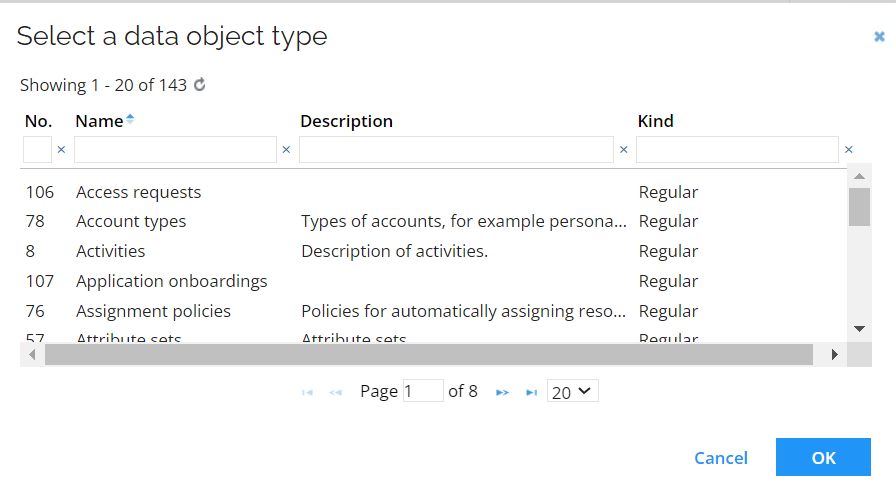
Next, choose which data object types you want to trigger the event on:
-
Once the event definition has been saved with a defined data object type, you can configure Filters and Advanced options, located just below the header. For more details, refer to the Set up filter expressions for event definitions and Advanced configuration options section.
-
Click the New button and select the actions you want to follow the event in the Select an action to be created window.
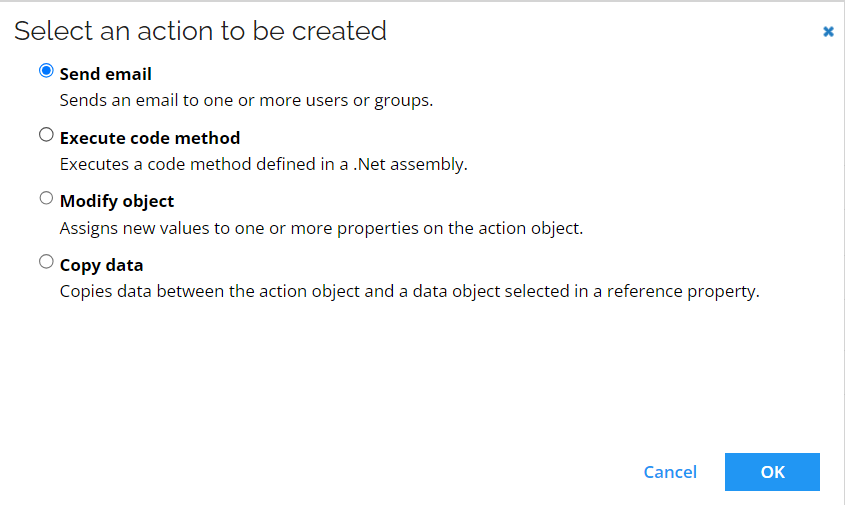
The available actions are:
-
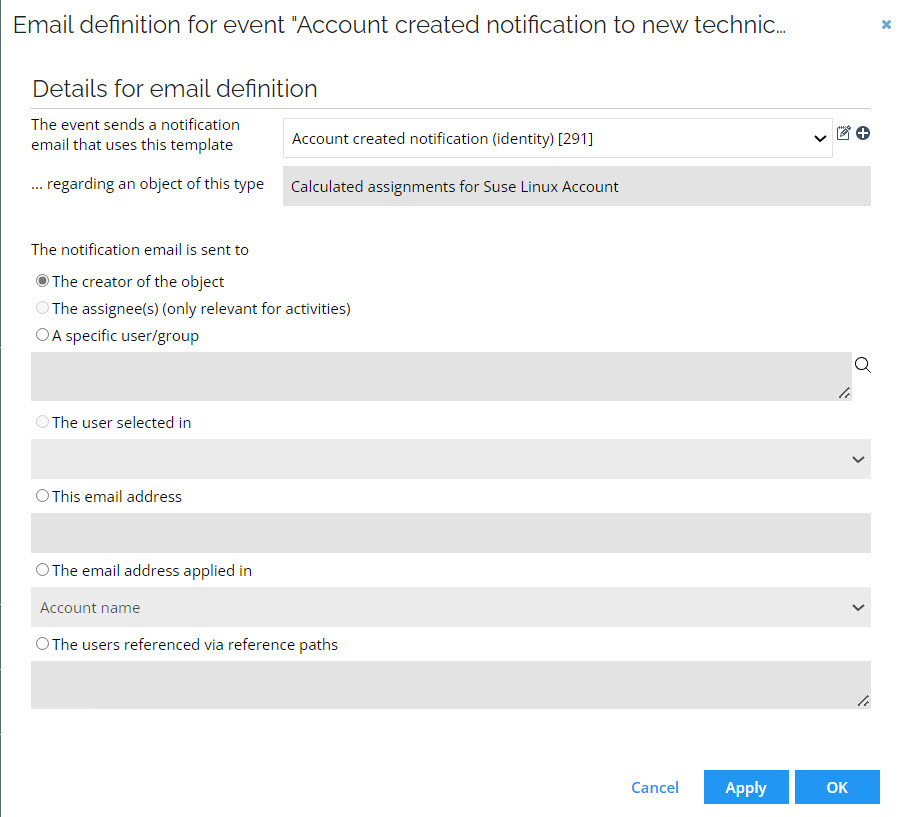
Send email. Fill in the following details for email definition:
-
In The event sends a notification email that uses this template field, select the predefined template that you want the email to be based on.
-
In the regarding an object of this type field, you can see the type of object within the system. The content of the email and the details included in the template will be relevant to this particular type of object.
-
In The notification email is sent to field, specify the receiver of the email.
-
-
Execute code method
- For more information, refer to the Add a code method to an event definition section in the Code methods documentation.
-
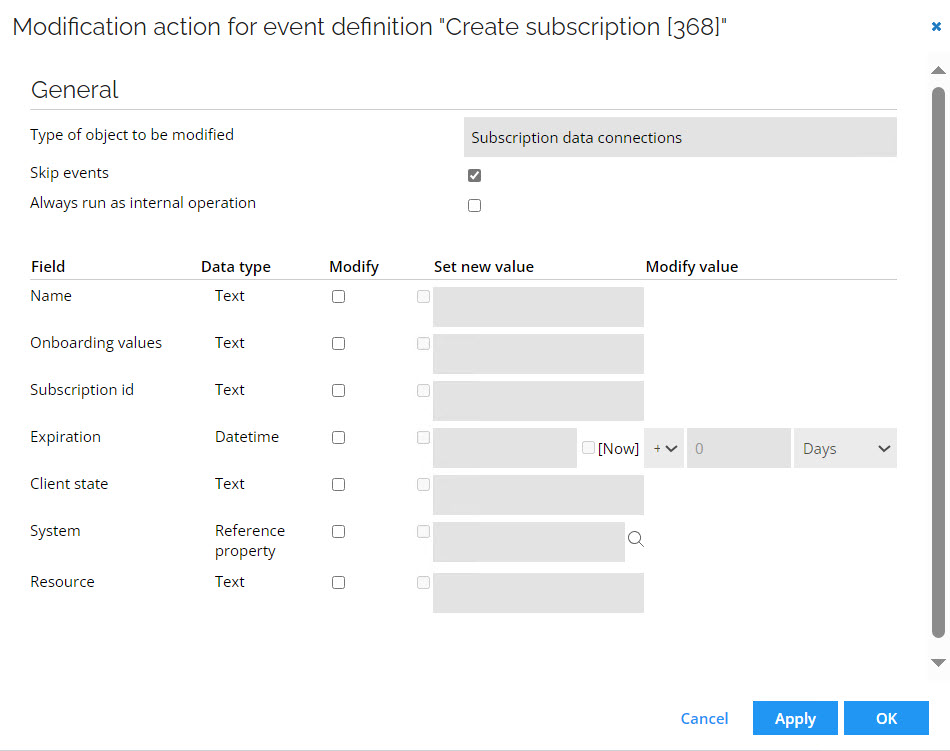
Modify object. Fill in the following details to assign new values to the properties on the action object:
-
Use the Skip events option to decide whether this modification can trigger additional events.
-
In the Always run as internal operation option, decide whether this event should be executed as an internal operation, regardless of the source of the change.
-
In the modification table, specify the properties you want to edit by selecting the Modify checkbox and set new values.
-
-
Copy data
- For more information, refer to the Adding a copy action to an event definition section in the Code methods documentation.
You can add several actions that will be executed in the selected order.
-
-
Save your changes by clicking the OK button.
Set up filter expressions for event definitions
To reduce the amount of data to be analyzed, you should use filter expressions. It is important to be precise and avoid inadvertently triggering endless loops or chain reactions.
To configure filter expressions, follow these steps:
-
Open the relevant event definition and click the Filter button.
-
In the Data Object Filter dialog box, you can see the data objects types on which your filter is applied. Click the Filter expressions button.

All filter expressions that are applied altogether are listed in the Filter Expressions dialogue box.
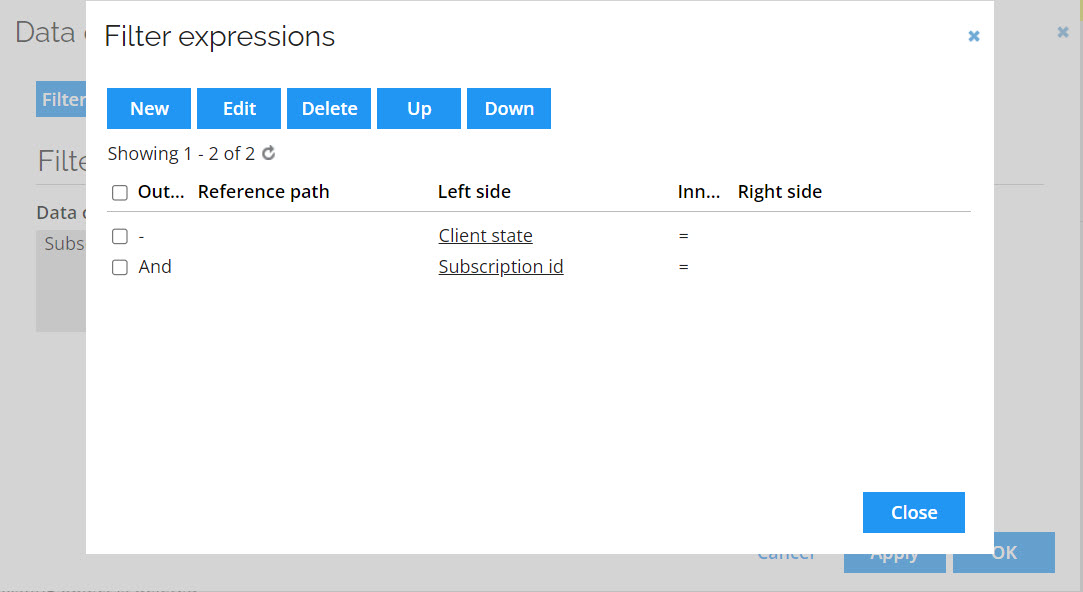
-
You can edit filter expressions or add a new one by clicking New.
-
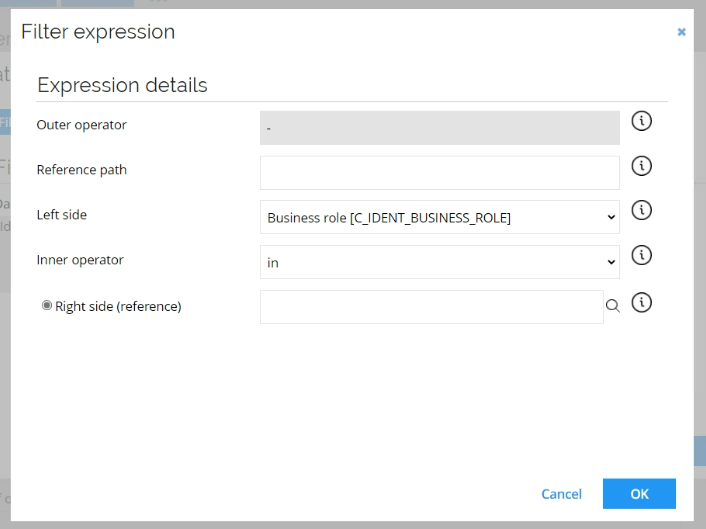
Fill in the following expression details:
-
The reference path is optional. It allows you to navigate to a parent or child data object using reference properties. For more information, refer to the Reference paths documentation.
infoCurrently, reference paths in event definition are only allowed for:
- timer events for a regular data object type
- non-timer events for shadow resource assignment object type
warningThe combination of "reference path" and "right side (property)" is not supported.
-
In Left side, you can select against which property on the data object the filtering will be applied. For example, ID, Description, and Business key.
-
The Inner operator defines the comparison between the left and the right side. Click the i icon to see the operator's description.
-
The options in the Right Side depend on the property selected in the Left Side. You can select either a property, a reference, or enter a value. Click the i icon next to it for more details.
warningIn event definition filter expressions, we do not support the Like operator and property on the left and right side of an expression.
-
-
When you finished setting up the filter expressions and the event definition in general, click Apply and then OK to close the event definition.
Advanced configuration options
Depending on the event trigger selected, the following advanced configuration options are available:
-
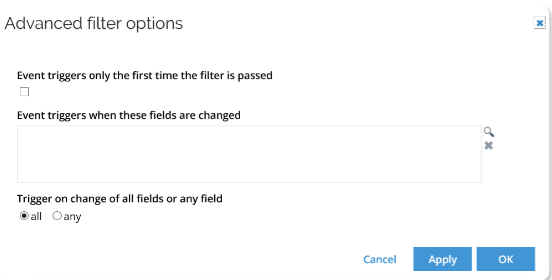
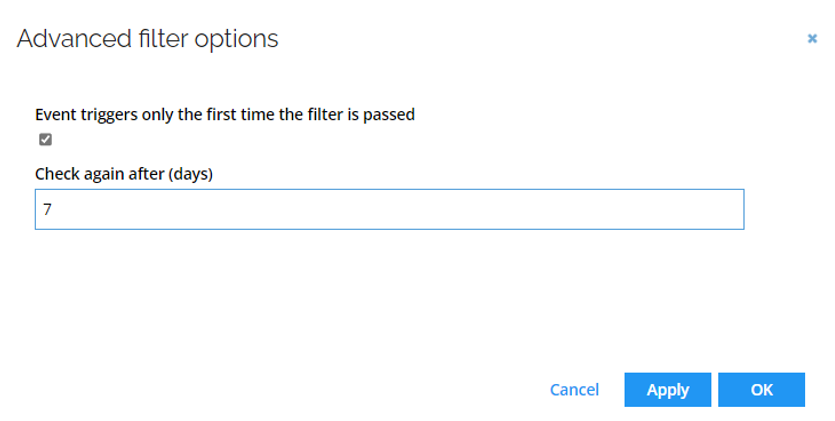
Event triggers only the first time the filter is passed
-
The setting can be set through Advanced options button and is only available if the event type is either:
-
This timer executesor -
An existing object is updatedand if the object is of type CRA or survey (both shadow object types).
-
-
If the event trigger is changed on the parent web page, the setting will be cleared when saving the event definition.
noteIf you update the event definition, the count is not reset on already triggered objects, that is, the event definition will not trigger again for the same objects.
However, when a process activity completes, the event can potentially trigger again for escalation to work if the activity is activated again.
-
For timer based events, it is possible to let the event be triggered repeatedly for the same object. The time between each invocation is configured in the field Check again after (days)".
-
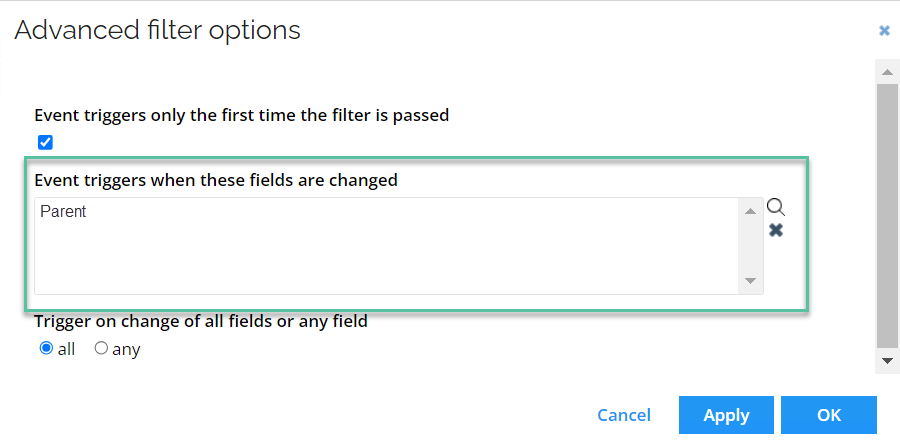
For ObjectModified events, you can specify which changes should trigger the event by selecting the relevant fields in the Events trigger when these fields are changed field. For example, you might configure the event to trigger only when the Onboarding values property is updated:
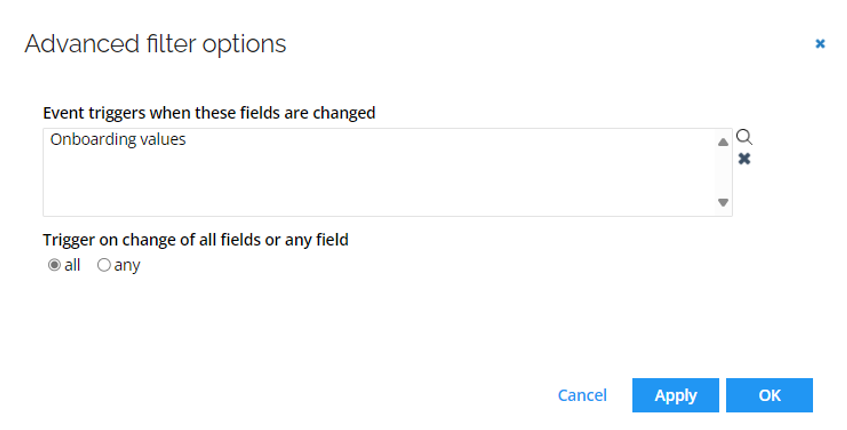
If multiple fields are selected, the Trigger on change of all fields or any field option determines how the event is triggered. You can choose to have the event fire only when all selected fields change, or when at least one of the selected fields changes.
-
-
Event triggers when these fields are changed
-
The setting can be set through the Advanced options button and is only available if the event type is
An existing object is updated. -
Select the properties that can trigger the event definition of data objects:
-
Under Trigger on change of all fields or any field, select all if all previously selected properties must change at once in order for the event definition to be triggered, otherwise select any.
-
-
Maximum number of objects handled
- The setting is only available if the event type is
This timer executes. - To avoid problems with large datasets, enter the maximum number of objects to be processed in a single run.
- The setting is only available if the event type is
Run event definition with timer
To test an event definition, the associated timer can be executed directly.
Keep in mind the following:
- all event definitions associated with the selected timer are executed
- the timer runs with your authorizations.
Follow these steps to run an event definition ad hoc with a timer:
-
Go to the Event definitions view.
-
Select the required event definition.
-
In the Event is triggered when, clear the default checkbox and select This timer executes.
-
In the timer dropdown, select a previously created timer.
 info
infoFor information on how to create timers, refer to the Timer Service section in the documentation.
-
Confirm the changes and click Apply to save the event definition.
-
Click the Run timer button.