Event definitions
Event definitions allow you to automate actions based on timers, survey steps, or the creation or the update of an object.
The Events definitions view is available under:
- Setup > Administration > Data management in the legacy UI.
- Setup > Administration > Process configuration in the new UI.
Configuring event definitions on object changes
Follow these steps to configure an event definition on object changes:
-
Go to Setup > Administration > Data Management > Event definitions to start creating a new event definition.
You must create and set up an event definition to move data objects below their parent in the tree structure.
-
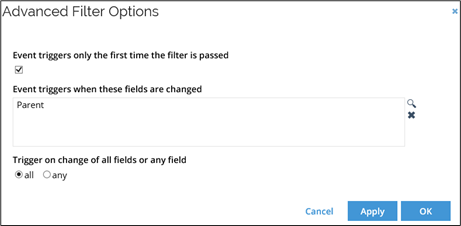
In the Advanced Filter Options section:
-
The Event triggers only the first time the filter is passed setting is only available if the event type is either
TimerExecutedorObjectModifiedAND if the object is of type CRA or survey (shadow objects with, for example, no event type combinations)
-
If the event trigger is changed, the setting will be cleared when saving the event definition if unavailable.
noteIf you update the event definition, the count is not reset on already triggered objects, that is, the event definition will not trigger again for the same objects. However, there is an exception - when the process activity completes, Omada resets the count for escalation to work if the activity is activated again.
-
Select that the event should trigger when the Parent property on data objects of the particular type changes.
-
-
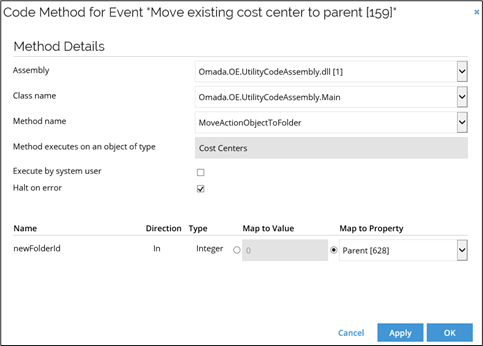
In the bottom of the view, click New and choose Execute code method in the Select an action to be created dialog box.

-
Add a code method to move the data object to the position stated in the Parent property. The code method to use for this action is located in the class name Omada.OE.UtilityCodeAssembly and is called MoveActionObjectToFolder.
When a changeset is imported in test mode, all actions within the changeset are executed as they would be during a standard import. This includes the evaluation and triggering of event definitions, such as those configured to run on resource creation.
The only functional difference between a test execution and a standard import is that, once processing is complete, the transaction is rolled back instead of being committed.
As a result:
-
Event definitions are triggered during a test run if their conditions are met (for example, on resource creation).
-
Any actions initiated by these event definitions (such as executing code methods) are also performed.
-
No changes are persisted, as the entire transaction is rolled back at the end of the execution.
This behavior is expected and consistent with the system’s design for processing changesets in test mode.
Add filter expressions to event definitions
After configuring a code method, you should define filter expressions. To do so, follow these steps:
-
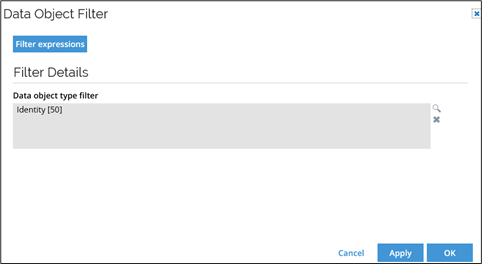
Open the relevant event definition and click the Filter button.
-
In the Data Object Filter dialog box, choose the data objects types on which your filter should apply. Click the lookup icon and select the data object types, then click the Filter expressions button.
The Filter Expressions dialog box lists all existing operators in the filter. You can edit filter expressions or add a new one by clicking New.
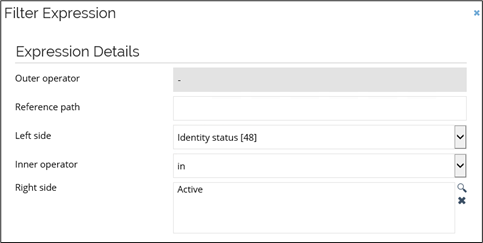
The first filter expression that you add never has an outer operator, so you cannot specify this setting for this particular filter expression. You only need to set an outer operator when there is a previous expression to the one with which you are working.
infoCurrently, reference paths in event definition are only allowed for:
- timer events for a regular data object type
- non-timer events for shadow resource assignment object type
The values of the filter depend on the properties selected in Left side. Inner operators are found between properties on the left side and properties on the right side.
warningIn event definition filter expressions, we do not support the Like operator and property on the left and right side of an expression.
-
When you are done setting up the filter expressions and the event definition in general, click Apply and then OK to close the event definition.
Configuring an event definition with timer
Follow these steps to configure an event definition with timer:
-
Go to your Event definitions view.
-
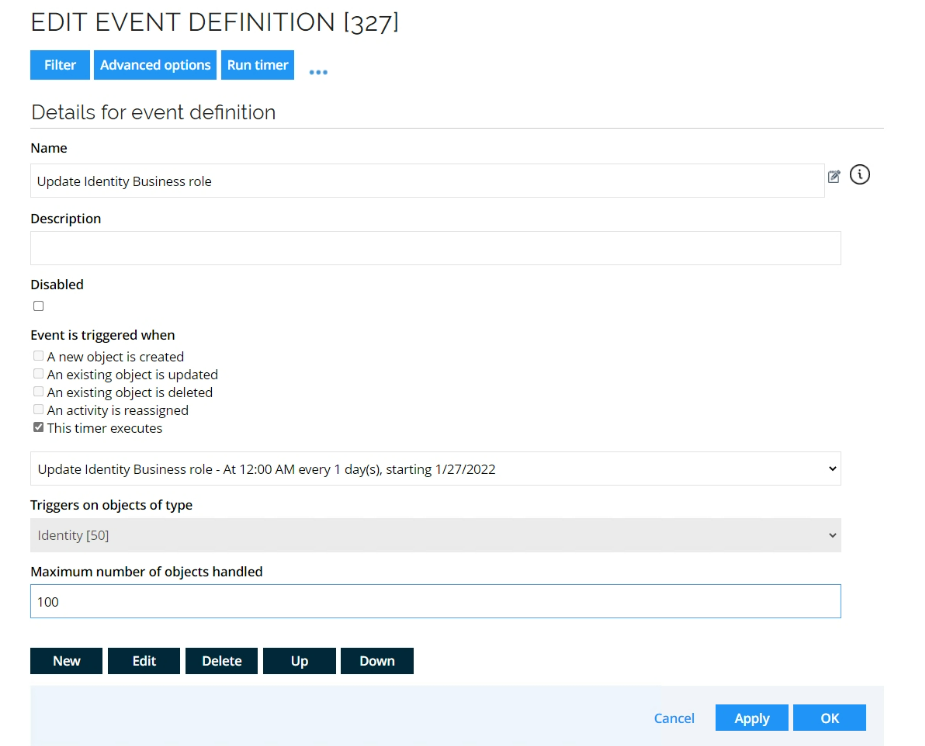
Click New and create an event definition to update the identities business role:
-
In Event is triggered when, clear the default checkbox and select This timer executes.
-
In the timer dropdown, select a previously created timer.
-
In Triggers on objects of type, select the Identity object.
-
To prevent issues on large data sets, enter a value in Maximum number of objects handled.
-
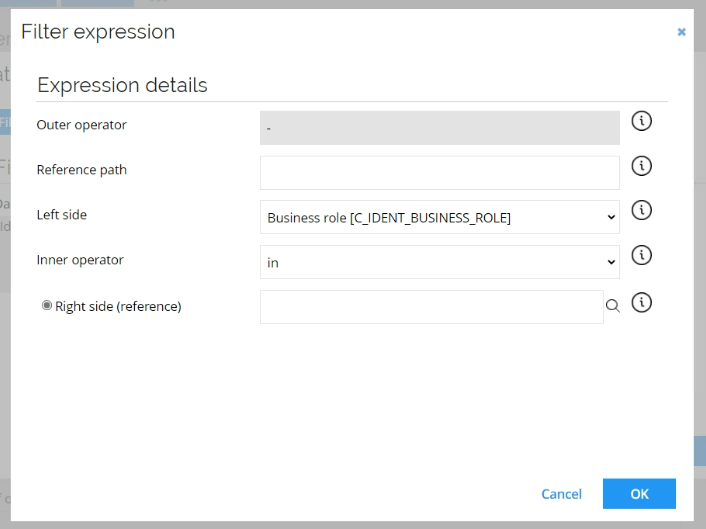
Then, click on Filters to open the Filters expressions dialog, and click New.
-
Select Business role in Left side, and leave the rest empty, to apply the event definition to all identities where the business role is empty:
-
Click New again to add another filter to limit the event definition to identities with the job title Department manager:

-
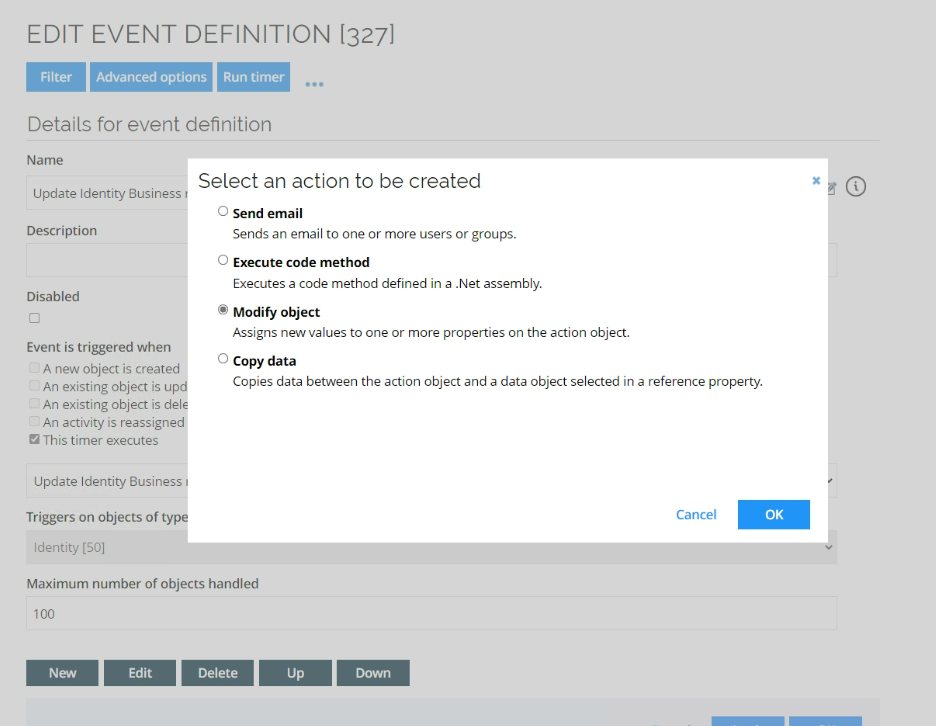
Back on the Event definitions, click New at the bottom of the view to select the action to follow the event:
-
Select Modify object and then in the dialog check the business role and choose the value Department manager:
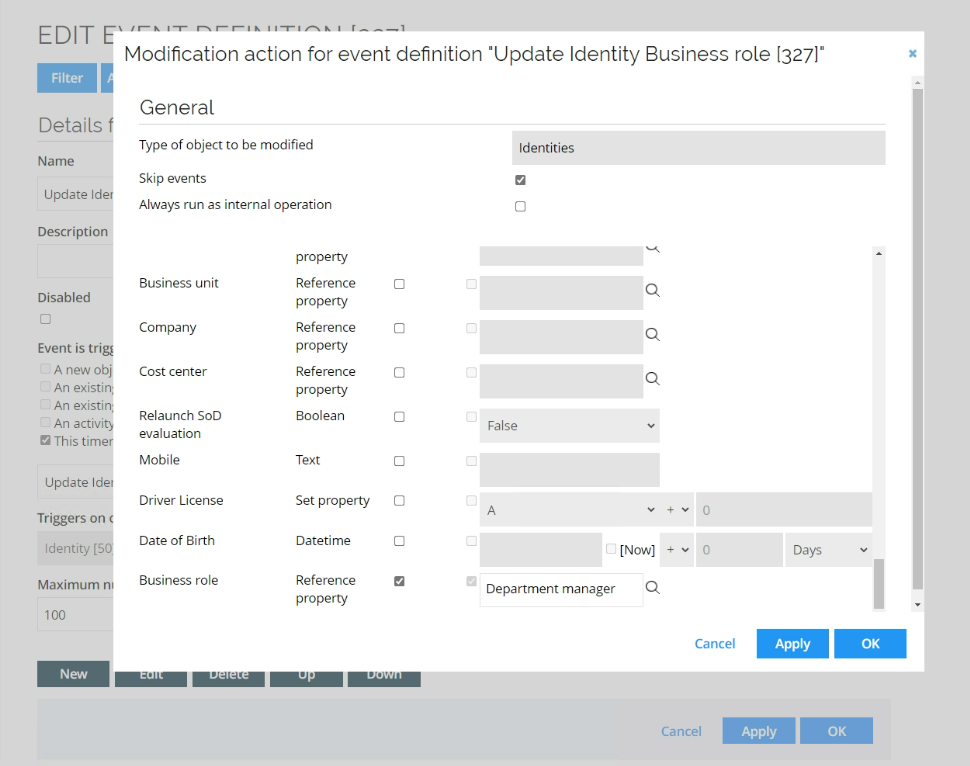
-
Confirm and click OK to save the event definition.
Now, you can test the event:
- Go to the Timers view.
- Run the timer involved in the event definition.
- Open the Identities view.
- See that the identities which had the Business role empty now have the value Department manager.
You may have to make the Business role column visible in the Identities view to see the results.