Gmail service account SMTP OAuth to send emails
This page contains third-party references. We strive for our content to always be up-to-date, however, the content referring to external vendors may change independently of Omada. If you spot any inconsistency, please report it to our Helpdesk.
To send emails through with Google Workspace SMTP, you need to create a Service Account and Service Account Key with your Google Workspace admin account, and select an auth scope.
Remember to enable Gmail in your Google Workspace account and use smtp.gmail.com DNS and port 587. For more information on how to activate Gmail, refer to the Google Workspace documentation.
Follow these steps of the Google guidelines:
-
Go to
https://console.cloud.google.com/. -
Create or select a project.
-
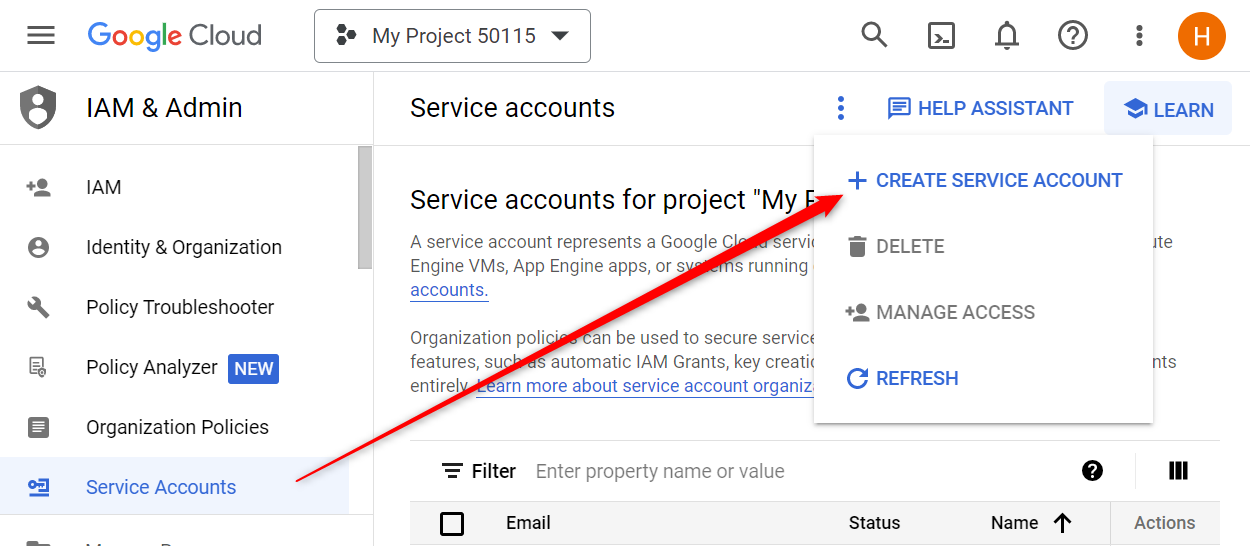
Click Create service account in the project.
-
Click on the service account created.
-
To obtain the credentials needed, go to the Keys tab and click Add key.
-
In the pop-up window, select the JSON type, and click Create. A JSON file is created, which will look this this:
{
  "type": "service_account",
  "project_id": "crafty-plateau-1766",
  "private_key_id": "0b98f4d50ff66eddb3c08d1ea411a39b14t4b7c0",
  "private_key": "-----BEGIN PRIVATE KEY-----\nMPPEvgIFGFGFDBgkqhkiG9w0BAQEFEASCBKgwuySkAgEAO5XbT[.......]mUE5bj/QMEqnGmb4/G\n4O/VPJD5RpNAFRrhyRjaiLw0\n-----END PRIVATE KEY-----\n",
  "client_email": "test-952@crafty-plateau-1766.iam.gserviceaccount.com",
  "client_id": "179970794339311404159",
  "auth_uri": "https://accounts.google.com/o/oauth2/auth",
  "token_uri": "https://oauth2.googleapis.com/token",
  "auth_provider_x509_cert_url": "https://www.googleapis.com/oauth2/v1/certs",
  "client_x509_cert_url": "https://www.googleapis.com/robot/v1/metadata/x509/test-952%40crafty-plateau-376609.iam.gserviceaccount.com"
} -
Go to the Advanced settings of the Service account, and copy the Client ID.
-
Next, go to
https://admin.google.comto set up the scopes:-
Go to Security > Access and data control > and click API controls.
-
Click Manage Domain Wide Delegation.
-
Click Add new and copy the Client ID and choose the
https://mail.google.com/scope: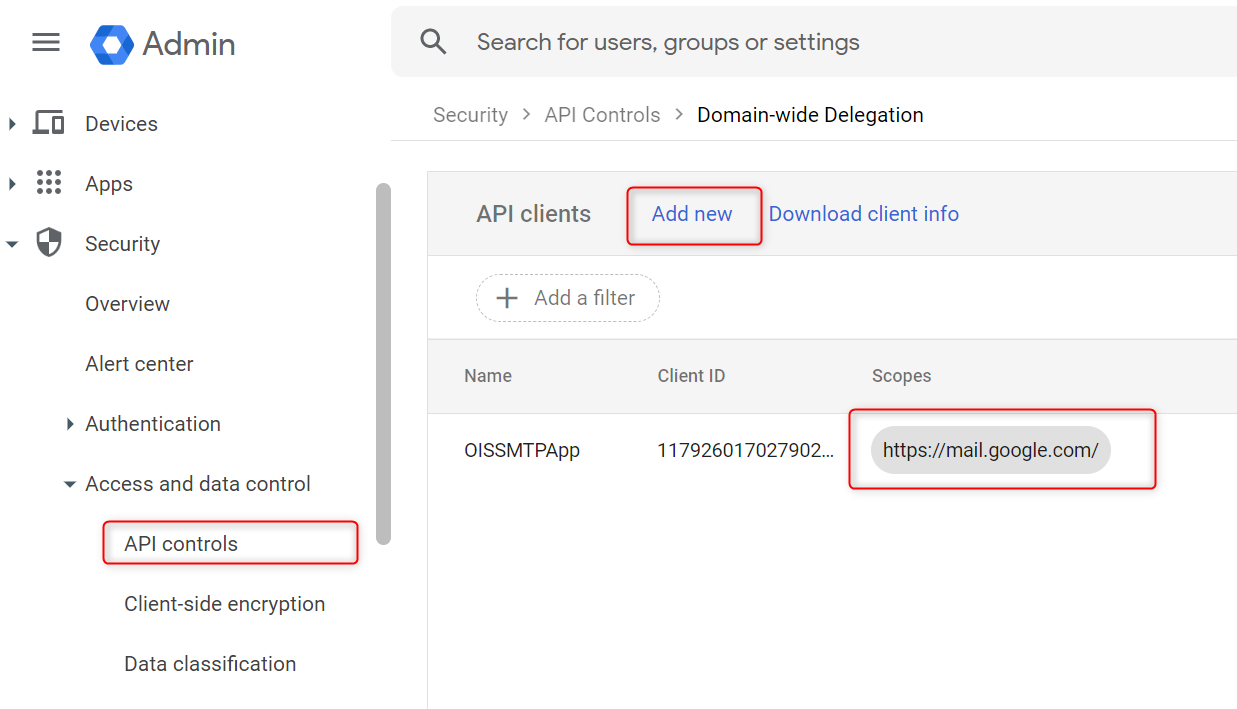
infoThe
<https://mail.google.com>scope is required for SMTP, as explained in Google's documentation. -
-
Finally, equipped with the JSON file and the scope:
- For Omada Identity Cloud solution
- For Omada Identity On-premises solution
- Go to Cloud Management Portal.
- Open the required environment.
- Go to the Email delivery tab.
- Select Google Workspace SMTP to fill in the necessary details:
- For network host, use the smtp.gmail.com and the 587 port.
clientIdis the client_id of the service account, available in the JSON file or in the Google console.userNameis the service desk email address with access to Gmail that the service will use to send the mails.- The sender email address in OIS needs is the email address for a user with access to Gmail.
keyIdis the private_key_id from the JSON file created and downloaded from the Google console.privateKeyis the service account private_key created and downloaded in the JSON format from the Google console, encrypted through StringEncrypter.scopes- add thehttps://mail.google.comscope.
-
Go to Enterprise Server and Setup > System settings > Configuration objects.
-
Open the configuration object
notificationSettings. -
Add the
googleServiceAccountsection and fill the properties:
<notificationSettings xmlns:xsd="http://www.w3.org/2001/XMLSchema" xmlns:xsi="http://www.w3.org/2001/XMLSchema-instance" xmlns="http://schemas.omada.net/ois/2022/NotificationSettingsML">
      <smtp>
        <network host="smtp.gmail.com" port="587" secureSocketOptions="Auto">
          <googleServiceAccount
                    clientId="<client_id of the service account, available in the JSON file or in the Google console.>"
                    userName="<The service desk email address with access to Gmail that the service will use to send the mails.>"
                    keyId ="<The private_key_id from the JSON file created and downloaded from the Google console.>"
            privateKey="<The service account private_key created and downloaded in the JSON format from the Google console, encrypted through StringEncrypter.>"
                    scopes = "https://mail.google.com"
                  />
        </network>
      </smtp>
    </notificationSettings>
Use StringEncrypter to encrypt the privateKey.
Once this is done, when you send a notification email through Omada Identity (password reset failure/success, employer/contractor onboarded...), the emails will be sent from the Google user account name indicated in userName.
For more information about the Google Service Account configuration, see: