Post action
In the Post actions step, you define the post actions to execute in the survey. Here, you can also define survey settings.
You can create a new post action, as well as edit and remove post actions. From the ellipsis menu, you can access the option to edit post action Parameters.
-
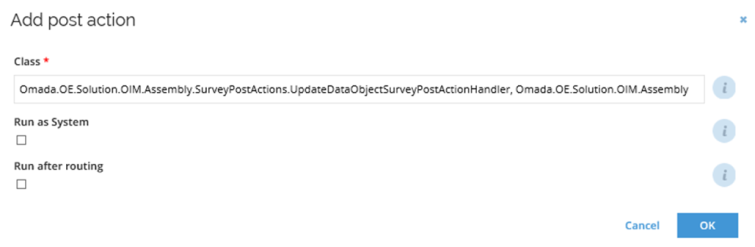
Click the New icon and define values for all the required fields to add a post action.
-
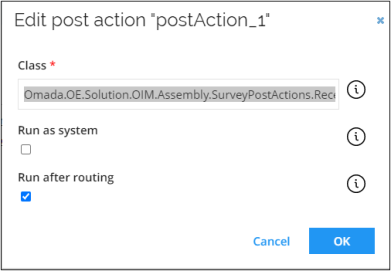
Enter the .NET class of the post action in the Class field.
-
Select Run as System if the post action should be executed as the system user.
infoConfiguring the Post Action to execute as the system user effectively overrides the security restrictions as the system user has elevated privileges. A drawback of this approach is that changes performed by the Code Method appears as if they were made by the system user, and not by the user who submitted the survey response.
-
Select Run after routing if the post action should be run when the survey object is routed from one workflow step to another (rather than being run only when the final state is reached).
-
Click OK to save the changes.
-
To edit a post action, select it, then click the ellipsis menu next to the Survey Settings button and choose Edit.
-
To remove a post action, select it, then click the Remove button.
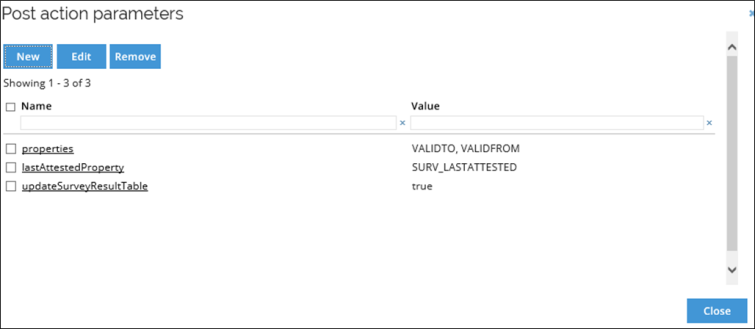
Post action parameters
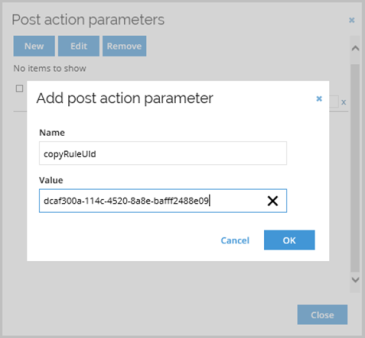
When you have saved the post action, you can add and edit parameters for the post action. To do this:
-
Click the ellipsis menu and select Parameters. A popup window will open.
-
Type in the name of the new parameter.
-
Select whether the parameter should have a hardcoded constant value or should be editable by the user as a survey setting when launching the survey. If you have selected the survey setting option, choose the setting from the drop-down menu.
-
Enter the parameter value. The value field can be a comma-separated list of values.
-
Click OK to save the changes.
-
To edit a parameter, select it, then click Edit button.
-
To remove a parameter, select it, then click the Remove button.
Parameter values in the Add/Edit post action parameter dialogbox may be mapped to survey settings. For an example of how this is done, see Mapping a post action parameter to a survey setting – example.
Create a survey setting
Follow these steps to create a new survey setting:
- Click the Survey Settings button to open the Survey Settings window.
- Click the New icon to open the Add survey setting window.
- Give the survey setting a name.
- Give the survey setting a title. This is what will be displayed in the survey initiation activity.
- Select the data type from the following:
- String
- Reference
- DateTime
- Boolean
- Integer
- In the Property field, click the magnifying glass to open the select property dialog. Select a property. Only properties of valid types are shown.
- Select the Requires value checkbox if the setting must contain a value.
- Select the Show in UI checkbox if the setting should be visible in the user interface.
- Click OK to save the changes.
Survey template in Recertification
If you want to use this feature in custom survey templates two conditions must be fulfilled:
-
PostAction needs to be defined that is implemented by class:
Omada.OE.Solution.OIM.Assembly.SurveyPostActions.RecertificationPostAction, Omada.OE.Solution.OIM.Assembly.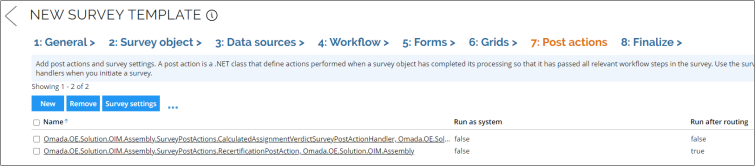
-
Resource assignment must be added as property in the 2: Survey object step. Based on this, the Identity and Request for Recertification KPIs are calculated.
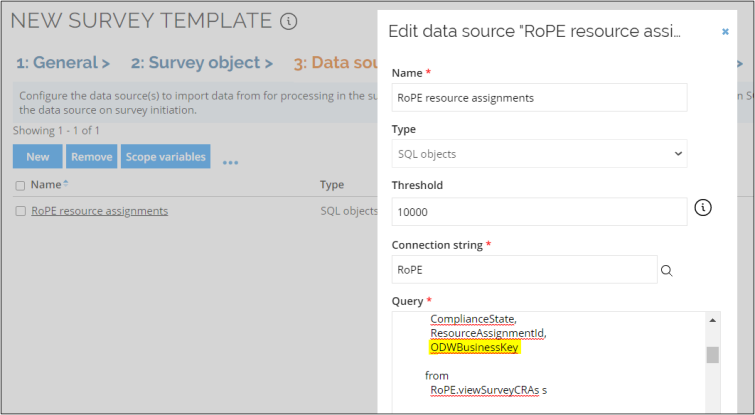
 info
infoFor this property to be filled, a proper sql query must be applied in the Data sources step. For example, one in the Access review for managers:

And available in source view, in the example in the RoPE.viewSurveyCRAs: