Process designer
The Process designer allows you to draw up your business process in a visual editor and modify and configure it as you go along.
The Process designer view consists of:
- The process sheet, where you can design your process,
- The left pane providing components for configuring the process,
- A toolbar with buttons to zoom in and out, save and close.
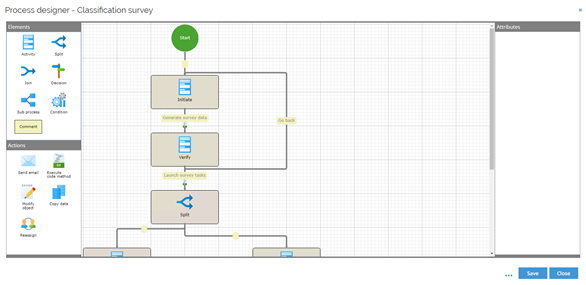
You can draw the business process by dragging and dropping the elements from the left pane to the process sheet and arranging them and connecting them through transitions. Swim lanes and labels provide a better overview. You can add actions to the transitions, defining what should happen when the process passes from one control element to the next.
Design a process in the Process designer
Follow these steps to design a process:
-
Once your process template is defined in Process templates view, click Designer.
-
Click the Activity element on the Elements tab of the left pane and drag it to the correct position on the process sheet.
- You can add swim lanes and labels to the blank process sheet. Swim lanes and labels will provide a better overview of your process.
-
Click the activity and name or rename it in the right-hand side panel. Repeat steps 1 and 2 until you have added the activities you need.
-
If your business process contains parallel activities, add a Split and a Join element to start the parallel run and to send it again.
-
If your business process calls for a decision on whether it should continue to the one or the other activity, add a Decision element.
-
If another process has to be completed as part of the main process, add a Sub-process element to the business process.
-
If you want to specify that the execution of one action should wait for the completion of another action, you should insert a Condition element between the transitions.
-
When you have added the elements you need - or some of them, and repositioned them, if necessary, you will have to add transitions between them.
-
Click the border of the Start element and drag the transition to the border of the first activity in the process flow.
-
Add transitions between the remaining elements of the process flow.
- To add a transition, click the border of an element (center) and drag the transition to the border of the next element in the process flow.
-
Right-click the transitions to add a name to each transition. The transition name will be displayed as a button on the form for the preceding activity when you run your process.
-
Add actions to the transitions, if relevant, to define what should happen when the process passes from one element to the next.