SSIS Packages
This section provides detailed information on configuration and use of the SSIS Packages for Omada Identity Data Warehouse.
The Omada ODW Run package runs all the ODW SSIS packages. There are different ways of starting the Omada ODW Run package, depending on your organization’s needs.
Please bear in mind that Omada recommends installing and running DTEXEC utility in the 64-bit version. Using DTEXEC utility in the 32-bit version may result in ODW memory issues.
User rights
Default language in the SQL server
The user running the ODW packages must have the default language for its SQL server login set to English (US).
Database roles
The user running the ODW Packages must have the following role memberships in SQL Server:
- The db_owner role in the Omada databases.
- The db_ssisadmin, db_datareader, and public roles in the
msdbdatabase.
Temporary storage location
Omada highly recommends that the temporary storage folders for the user running the imports are not placed on the system drive.
You should not locate dynamic data, including data in the temp folder, on the system drive but rather on a data drive. This is because:
- The system drive cannot be extended without taking the server down, but other drives can.
- If the system drive is full, the server stops running, but if another drive is full, the server itself can continue to run. Only processes that use the drive that is full are affected.
Change temporary storage location: admin user
- In Windows, go to Control Panel -> System and Security -> System.
- Click Advanced system settings -> Environment Variables....
- In the User variables list, select the TEMP variable and click Edit....
- In the Edit User Variable dialog, type the new location in the Variable value field.
- Click OK. Repeat this process for the TMP variable.
Change temporary storage location: Non-admin user
- In Windows, go to Control Panel -> User Accounts, then click Change my environment variables.
- In the Environment Variables dialog box, select the TEMP variable and click Edit....
- In the Edit User Variable dialog box, type the new location in the Variable value field.
- Click OK. Repeat this process for the TMP variable.
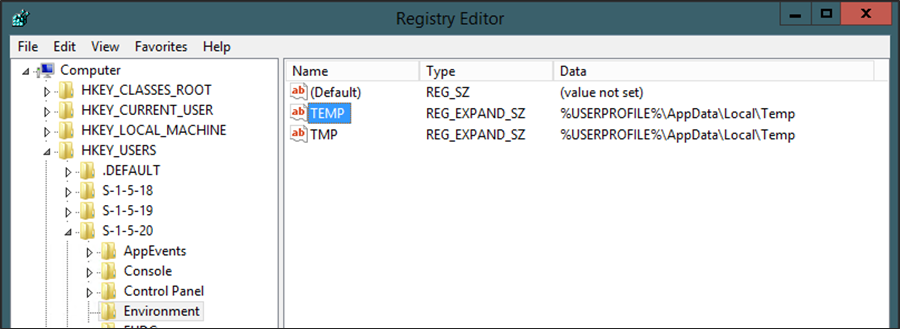
Change temporary storage location: System user
-
For a system user, that is, a user who cannot log in to the computer, you must change the location in the Windows Registry editor. Find this user in Computer -> HKEY_USERS.
The example below uses Local Services 5-1-5-20.
-
Expand this folder, and select the Environment folder, then locate the TEMP key to open the Edit string dialog box.
-
In the Value data field, type the new location for the key.
-
Click OK. Repeat this procedure for the TMP key.
Run ODW packages from SSMS
You can run the ODW package manually from the SQL Server Management Studio (SSMS). Omada recommends that you run non-scheduled packages from Command Prompt to reduce the processing time.
-
In SSMS, connect to Integration Services and locate the ODW Packages in Stored Packages -> MSDB -> Omada -> ODW.
-
Right-click the Omada ODW Run package and click Run Package.
-
Go to the Command Line tab and type OmadaEncryptionKey when you are asked to provide a password.
-
To set the Profile ID and its value, do one of the following:
In Command Line, choose Edit the command line manually, then type, for example,
/SET \package.variables[ProfileID].Value;"7b7c852d-1896-40d5-b478-992ae014627c”.Alternatively, go to the Set Values tab and type
\package.variables[ProfileID].Value in the Property Path column and 7b7c852d-1896-40d5-b478-992ae014627cin the Value column. -
If you chose the Set Values tab option, make sure that you have chosen the option Restore the original options.
-
Click Execute. You are asked to type in the password twice. Once again, type OmadaEncryptionKey.
-
When the package has finished, click Close in both windows.
Run ODW packages in Command Prompt
Omada recommends that you use import profiles when you run ODW Packages manually.
-
In SSMS, connect to Integration Services and locate the ODW Packages in Stored Packages -> MSDB -> Omada -> ODW.
-
Right-click the Omada ODW Run package and click Run Package.
-
Go to the Command Line tab. Choose the option Edit the command line manually.
-
Type the password OmadaEncryptionKey after
[\DECRYPT]. -
Type the ID of the relevant import profile in the ProfileID parameter.
-
Optionally, to log events to a log file, specify a file name and path, for example,
/REPORTING V>"C:\Program Files\Omada Identity Suite\Import Logs\dtlog.txt".The command above creates a log file with the file name dtlog.txt in a folder called Import Logs. Log files are overwritten unless you specify a unique name each time you run an import.
Specify
/REPORTING V(Verbose) orE(Errors only). If you do not specify a file name, events are logged to the command prompt window.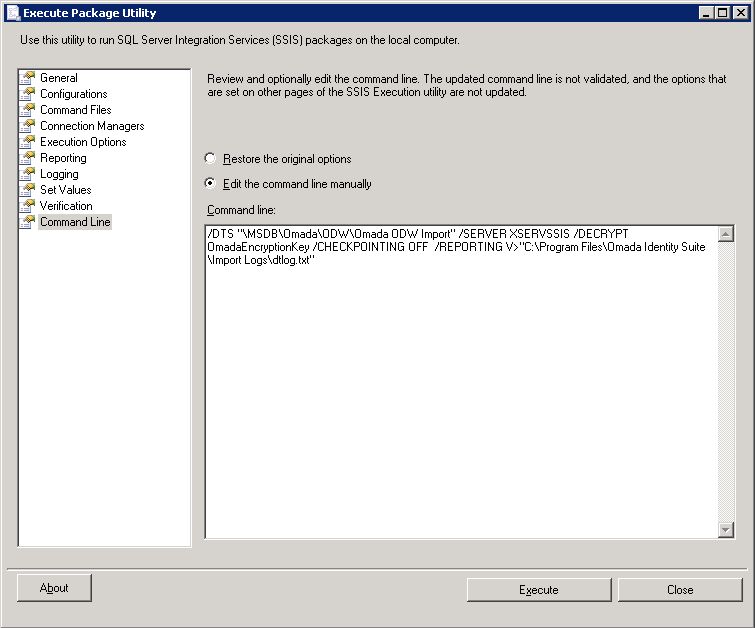
-
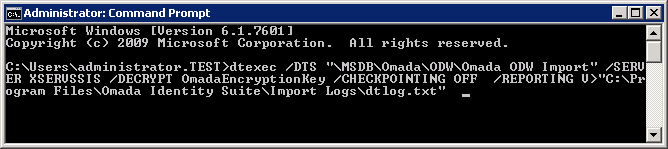
Copy the command line.
-
Open Command prompt. Type dtexec and paste the command line. Press Enter to run the ODW package.
Run ODW packages with SQL Server Agents Jobs
You can configure and schedule jobs in SQL Server Agent to run ODW SSIS packages. This allows you to run import profiles at the most convenient time, for example at nighttime, and define additional actions to take before or after the ODW Run package is run.
If you run import profiles as an SQL Server Agent Job, Omada highly recommends that you use a proxy account for the SQL Server Agent. Use proxy accounts to allow the SQL Server Agent to run in the security context of a specific user.
To set up a SQL Server Agent job for the import profile, follow the steps described in the following sections.
Set up a proxy user
-
If you do not already have an appropriate service account to use as your proxy account, create one. Note that the language for the user running the ODW Run package must be set to US English.
-
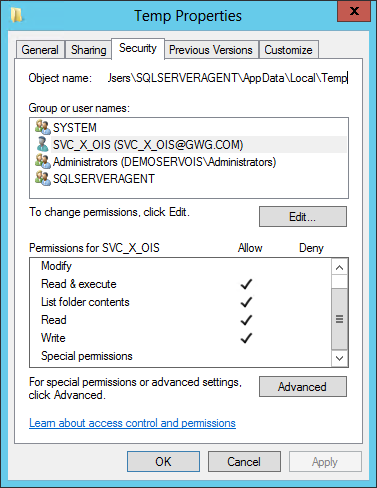
The proxy account needs Write access to the temp folder for the SQL Server Agent.
-
In the Services list, locate the Log On As user account thatis used by the SQL Server Agent.

-
Go to the user's Temp folder in Windows File Explorer.
-
Click Allow to assign the Write permission to the folder for the proxy account.
-
-
Connect to the Database Engine in SQL Server Management Studio and find Security in the Object Explorer.
-
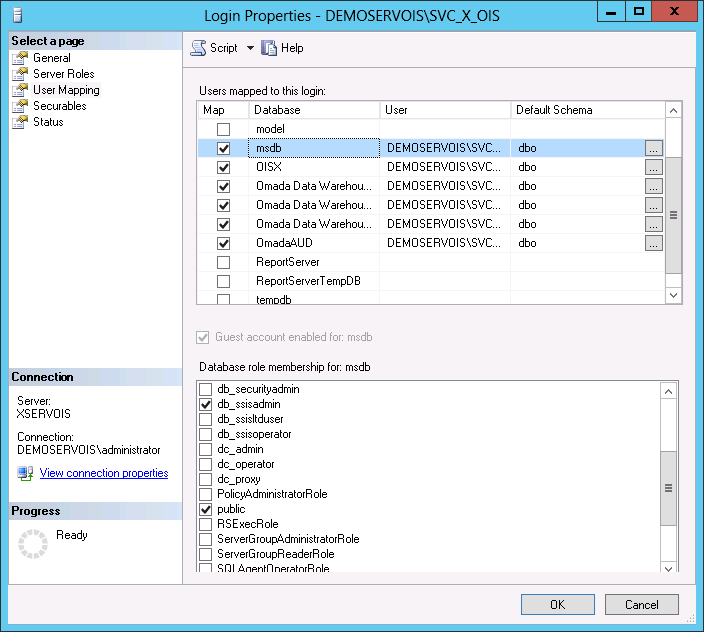
Create a login by right-clicking Logins and selecting New Login....
-
In the User Mapping tab, give the login the following role memberships:
-
db_owner role in the Omada databases
-
db_ssisadmin, db_datareader, and public roles in the msdb database
-
-
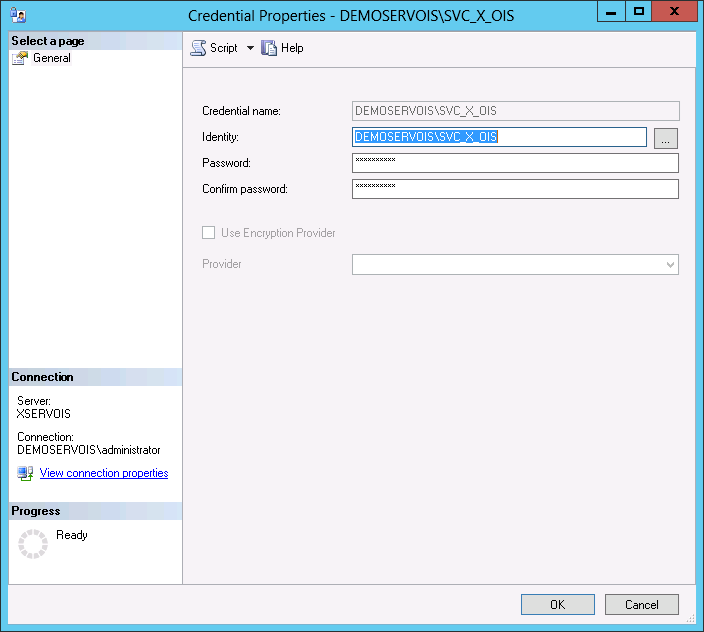
Create Credentials for the login by right-clicking Credentials and selecting New Credential....
-
Find SQL Server Agent in the Object Explorer.
-
Create a Proxy Account by right-clicking Proxies and selecting New Proxy....
-
In the General tab, select the SQL Server Integration Services Package Subsystem.

-
In the Principals tab, add the login to the Proxy account principals.

-
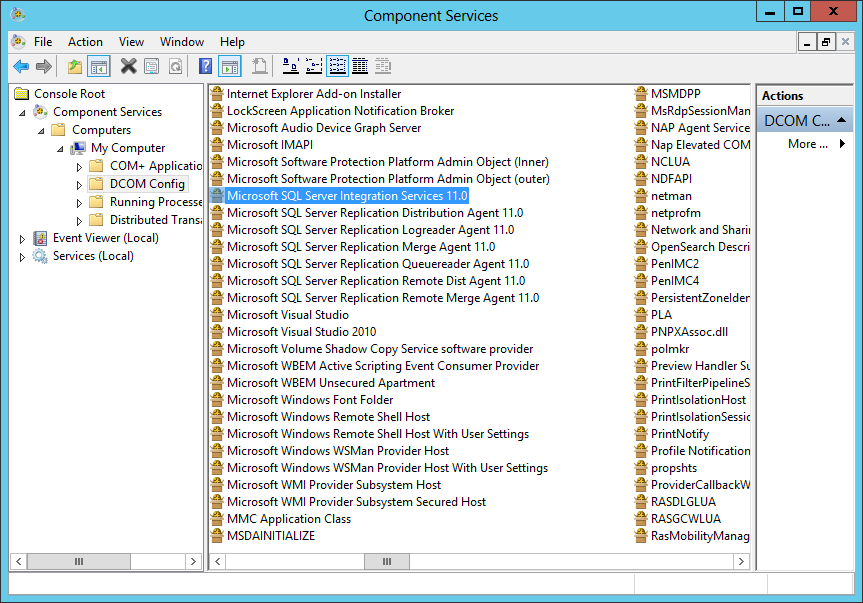
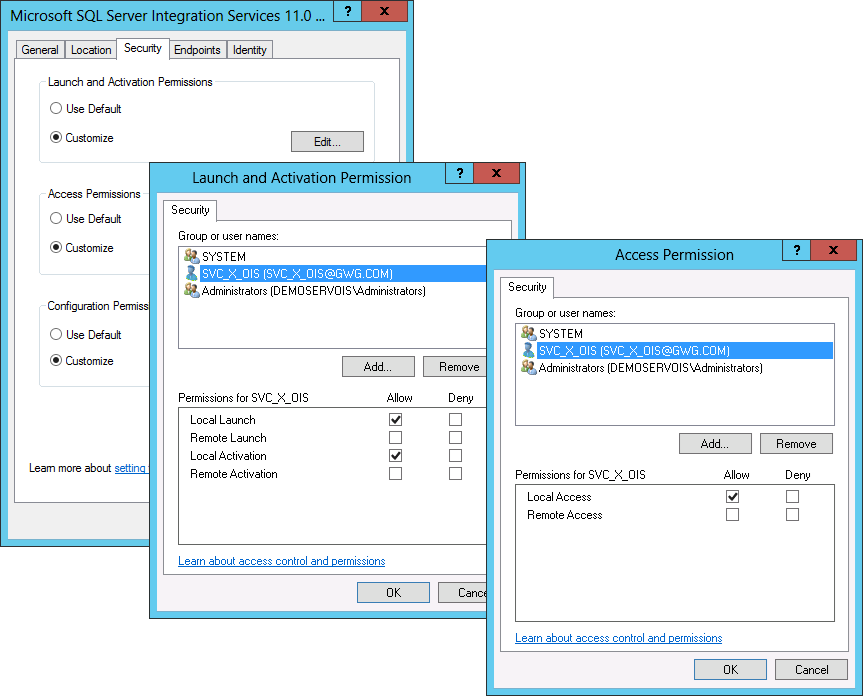
Allow SSIS DCOM access for the Proxy account in Administrative tools -> Component Services. Restart the SQL Server Integration Services in Administrative tools -> Services.
Configure the import profile job
You are now ready to set up the import profile job in SQL Server Management Studio.
- Connect to the Database Engine and find SQL Server Agent in the Object Explorer.
- Right-click Jobs and select New Job....
- Give the new job a name and description and select an owner.
Create a job for running the ODW run package
The steps define what should occur during the job. The options range from ActiveX scripts and PowerShell to SSAS commands and queries. For ODW import profiles, the most relevant types are SSIS Packages and Transact-SQL scripts.
-
In the Steps tab, click New....
-
In the General tab, add a name, and select SQL Server Integration Services Package in the drop-down list Type.
-
Select the Proxy account in the drop-down list Run as.
-
Set Package source to SQL Server and enter the SSIS Server name in the Server field.
-
In the Advanced tab, set success and failure for the action that you want to be performed. These are the available options:
-
Go to the next step
-
Quit the job reporting success
-
Quit the job reporting failure
-
Go to step:
[x]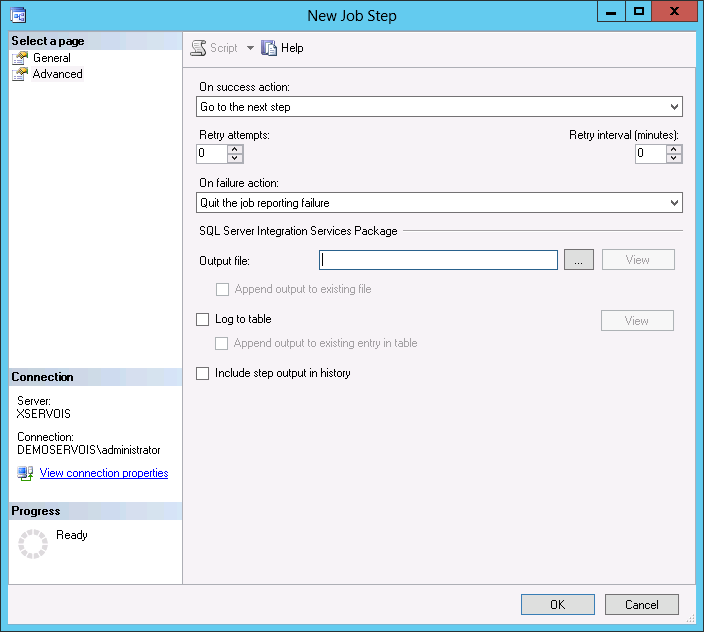
-
-
Configure any additional steps using the same approach.
-
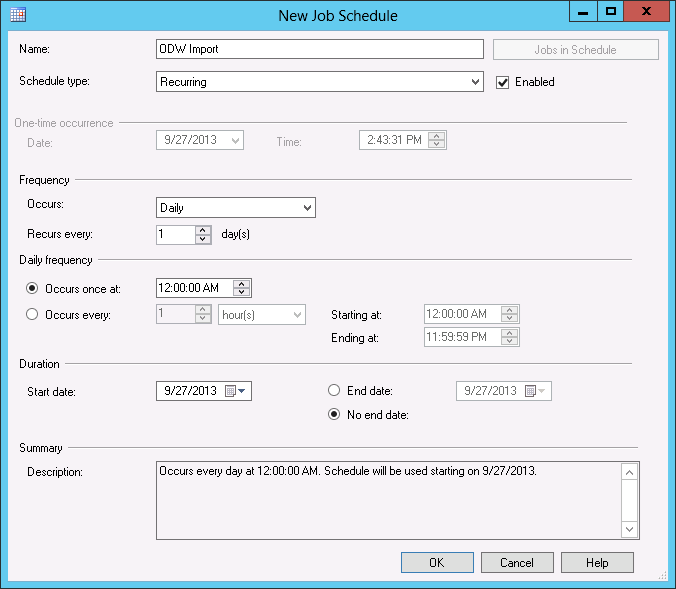
Configure the Schedules tab
In the Schedules tab, you can define a new schedule for the job or reuse an existing schedule.
Configure the Notifications tab
-
In the Notifications tab, you can set up rules for how and when to send notifications based on the outcome of the job. In the example below, an email is sent to the ODW Admin group both on success and on failure, and in the event of a failure, logs are sent to the Windows Application.
-
If you select Write to the Windows Application event log, users without permissions to the database can view events in the Windows Application event log.
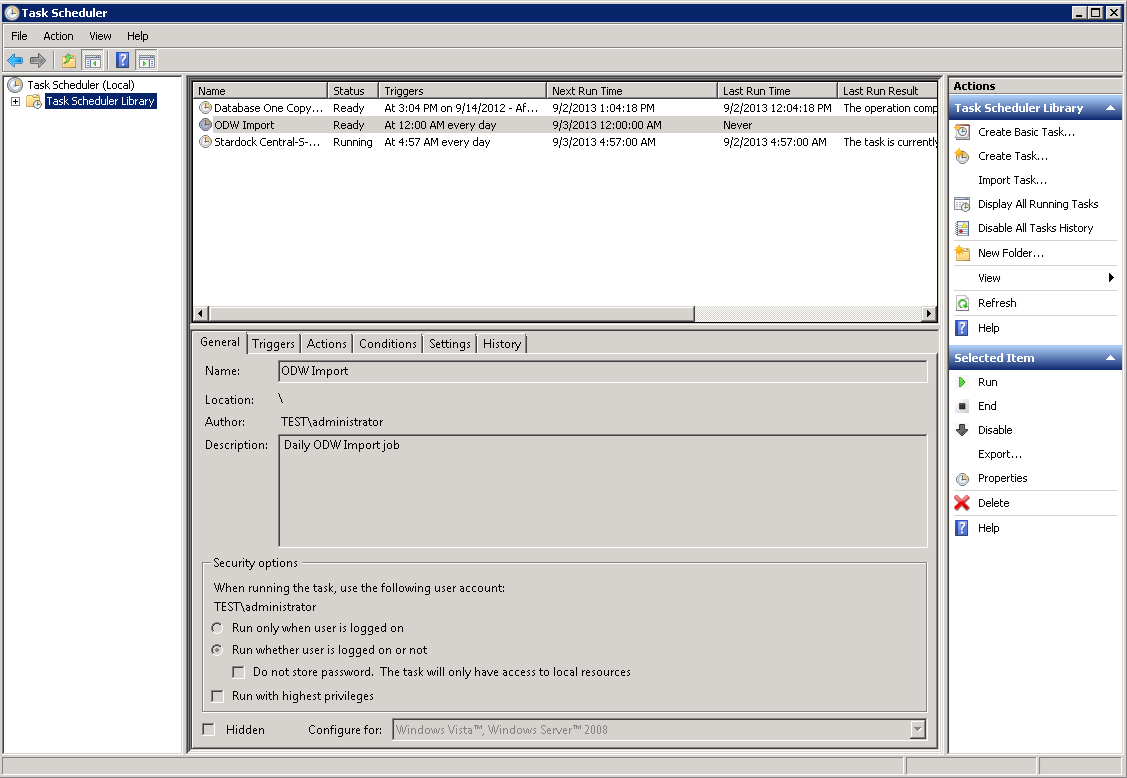
Run ODW packages with a batch file
You can run ODW Import profiles with a batch file (.bat or .cmd). This is a basic text file that contains any number of commands that are run line-by-line by the Command Prompt (cmd.exe). You can include any command that is relevant for the ODW Import profile.
You can schedule the script to run at a particular time by creating a task in the Windows Task Scheduler.