Omada Identity Role and Policy Engine
The user that installs Omada Identity RoPE must have the following rights and database roles.
| Where | Description |
|---|---|
| Local group settings | In Local Group settings, the user must be a member of a group that has rights to install software on the system. This is usually Local Administrators. |
| SQL server roles | To create the database during the installation process, the user must have the server role dbcreator. |
Creating the RoPE database
Omada recommends that you do not create the RoPE database yourself but wait until it is created and set up automatically during the installation process. If you do this, the installation process also configures the database to enable the snapshot setting. This setting is required for RoPE to run properly.
If you decide to create the RoPE database manually before you install the Omada Identity components, you must make sure to set the isolation level to a read-committed snapshot in the RoPE database before you use the Omada Identity software. If you do not enable this setting, RoPE cannot process identities correctly.
Multiple instances of RoPE
You can have multiple service instances of the Role and Policy Engine running on the same server. In order to increase the calculation speed, you can configure each instance to queue identities each cycle in parallel to other RoPE instances.
In order to install more than one RoPE service, you need to run the following command from a command prompt:
%windir%\Microsoft.NET\Framework\v4.0.30319\installutil /i /ServiceIdx=<index>
"C:\Program Files\Omada Identity Suite\Role and Policy Engine\Service\Omada.RoPE.EngineExecutor.exe"
Each installed service must have a unique service index (per server). The ServiceIdx parameter must specify an integer value. The default installed RoPE service has the service index: 0.
All installed services can use the same binaries and configuration files. If you want some services to run with different configuration options (for example, the batch size) you can make a copy of the directory, edit the configuration files, and install the services from there.
To make sure you are queuing the identities in multiple instances, make sure that the queueModifiedEachCycle setting in the Engine Configuration file of each RoPE instance is set to True.
Install the RoPE Service
Here you can find description on how to install the Role and Policy Engine Service.
Install RoPE
-
Double-click the OIS Role and Policy Engine.exe file to launch the Omada Identity Role and Policy Engine installation wizard. Click Next.
-
Select the destination folder. By default, this is C:\Program Files\Omada Identity Suite\Role and Policy Engine. If you want to change the destination folder, click Change... and browse to the desired location.
-
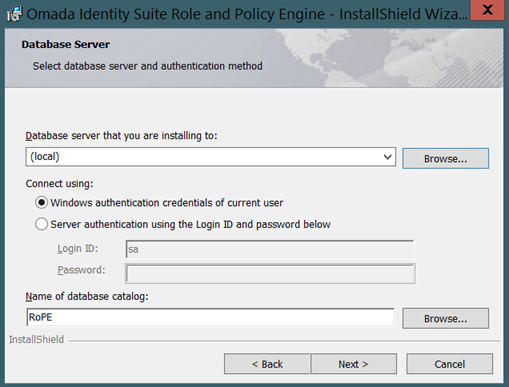
Enter the name of the database server that you are installing the database on and select an authentication method.
-
Specify the name of the database. You can also just use the default name that is shown. Click Next.
-
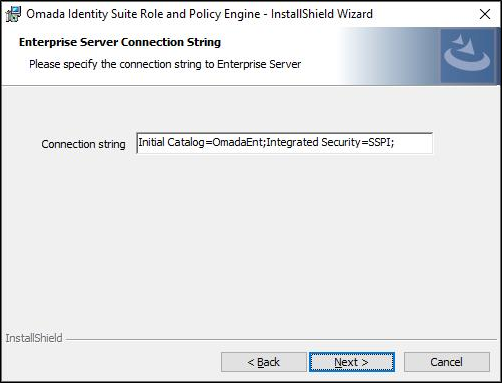
Enter the connection string to the Omada Identity Enterprise Server database.
-
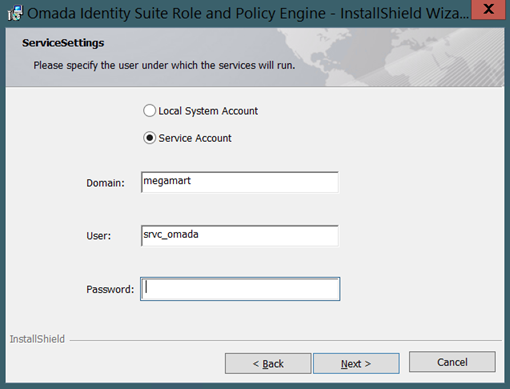
Specify the user under which the service is to run for Service Account only, then click Next.
-
Click Install. Click Back to make any changes.
-
The program features that you selected have now been installed. Click Finish to complete the installation.
Start the RoPE service
-
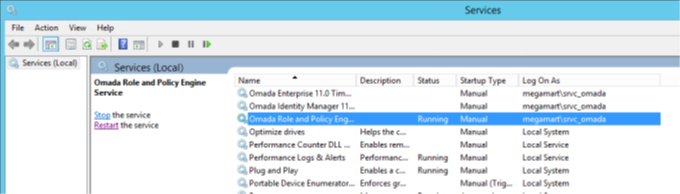
The default startup type of the Omada Role and Policy Engine Service is Manual, so you must manually start the service. Go to Administrative Tool -> Services and locate Omada Role and Policy Engine Service.
-
Right-click the service and select Run. This enables the service until you restart or turn off the machine that it is run on.
noteIf you have installed multiple RoPE service instances, there is an entry for each of them in the Services list. You must start each separately.
-
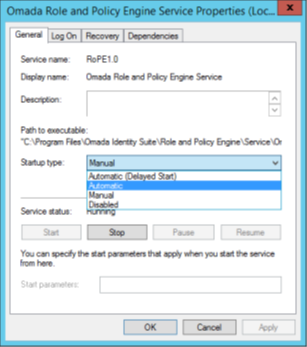
To change the startup type for the service, right-click the service and select Properties.
-
Under the General tab, click Startup type, for example, change from Manual to Automatic as shown below. Click OK to save the changes.
You must give the service account used for the Omada Role and Policy Service rights to Log on as a service in Local Policies and the db_owner role in the RoPE database.
Upgrade the RoPE service
There are several things you should do before you install a new version of RoPE, to upgrade from the previous version.
You can find the details of the upgrade process in the Upgrade guide.