Context assignments
The relationship between an identity and a context is called a context assignment. An identity has a context assignment to a context - either a direct context assignment or a membership-based context assignment.
Becoming a member of a context
There are a number of steps to go through in order to become a member of a context.
End-users can request to join a context, also known as joining a project. To do this, you must go to Services > Join a project. If you are not using projects as a context type, you can rename the process to something more relevant than "Join a project".
Users must specify a reason for why they want to be a member of the context by typing a description of this in the Reason for request field.
The context owner must approve the end user's request for membership.
Membership-based context assignments
You can specify a membership property for contexts that create contexts assignments based on a reference between an identity and a context.
The identity data object has a reference property named OUREF which refers org. unit objects. In the context type definition Org. units, it is specified that this property refers the identity's membership to an org. unit.
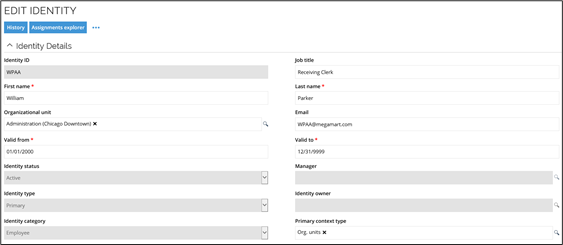
In the example below, the identity, William Parker, is a member of the Administration (Chicago Downtown) organizational unit and the Primary context type is Org. Units, as illustrated below.
William Parker belongs to this context via a membership-based context assignment.
The benefit of handling context via membership-based context assignment is that it limits the work required to maintain context assignments.
Direct context assignments
You create direct context assignments through the Request Membership process if you have context owner rights when you edit the context object. Identities are also added to a context when a context owner requests access on their behalf in the request access process.
Note that in the default security setup, context owners can create scontext assignments, but not delete them.
Expire direct assignments
If an identity is terminated, the identity's direct assignments (or Resource Assignment objects) are also terminated, for example, if the owner of the identity is at some point re-hired to a company, this feature can prevent an identity from re-gaining permissions that they had before the termination of the identity.
The termination of the assignments is ensured by a time-based, daily event definition that checks if there are identities with active direct resource assignments, whereby the Valid To date (or validity) of the identity was reached more than 'x' (this is configurable) number of days.
This ensures that if the identity is re-hired after x+1 day, then the direct assignments do not become active again and must be re-requested.
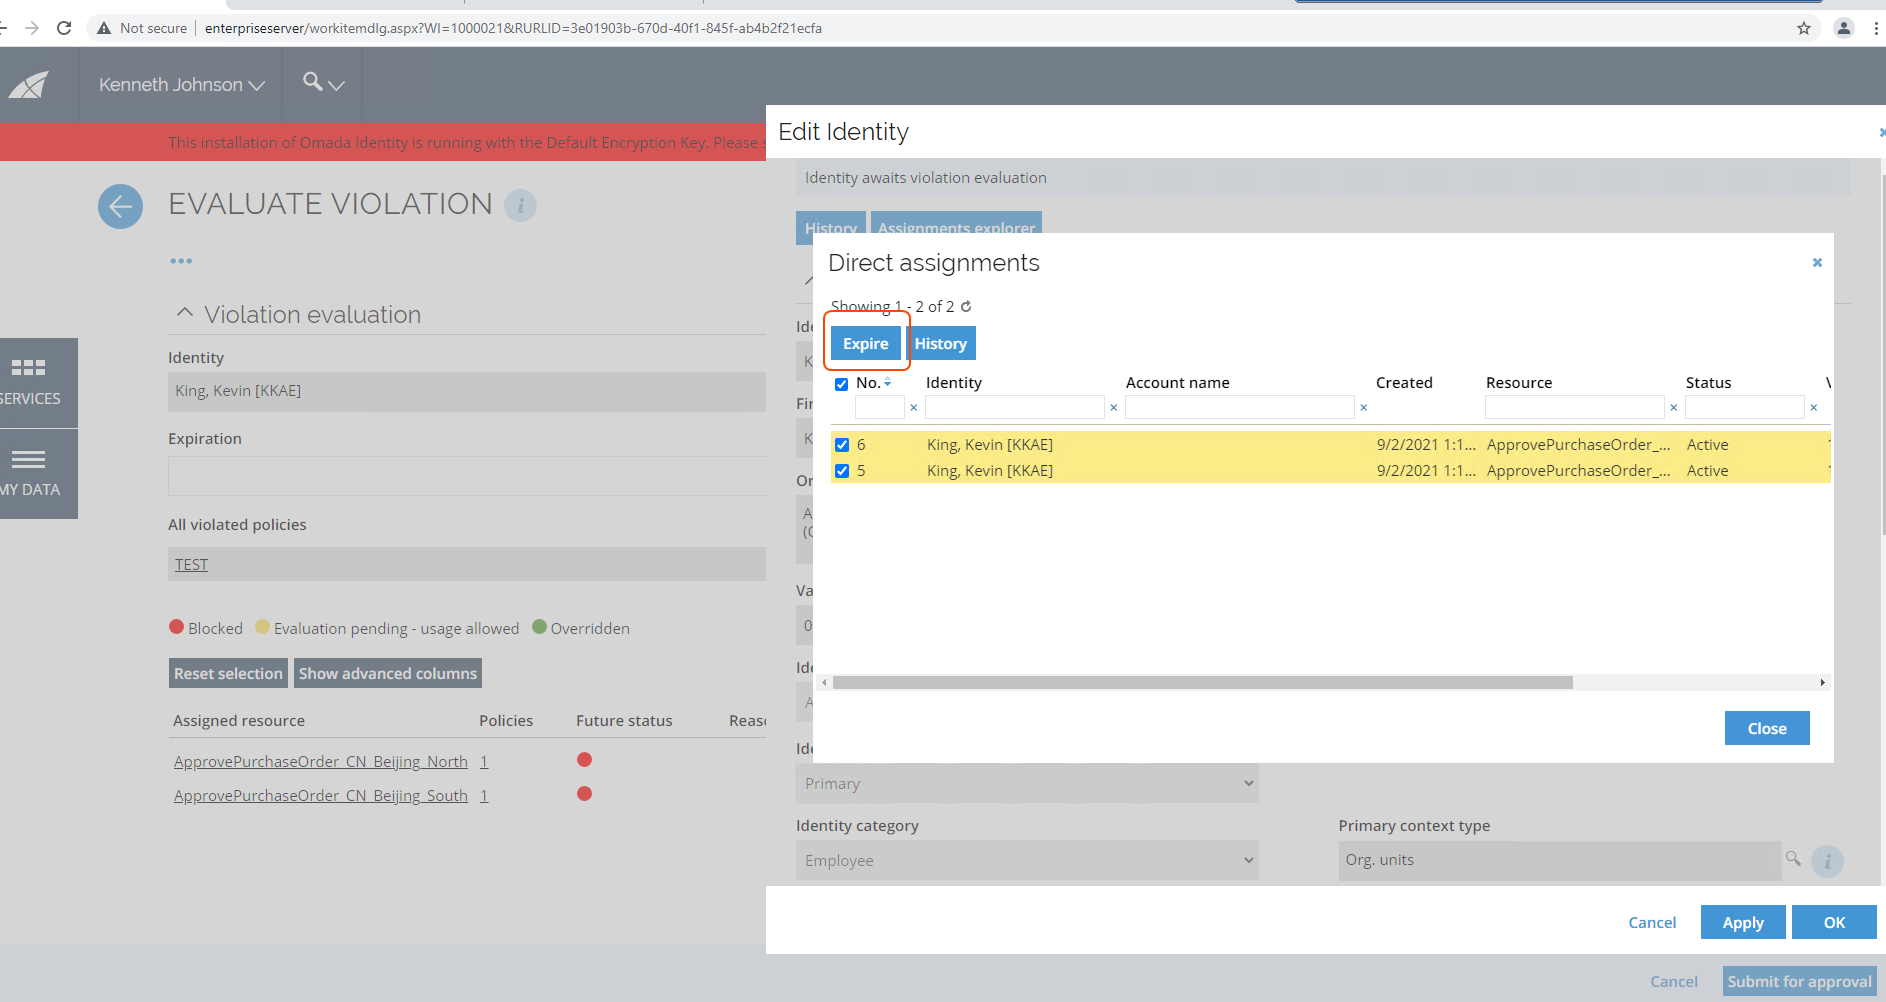
Expire direct assignments from Evaluate violation task
It is possible to expire direct assignments also from the Evaluate violation task. An Expire button will be available when viewing an identity, triggering a dialog box with the identity's correct assignments. This button allows you to expire any direct assignment visible from the Identity view. This is because the customer setting EnableRAExpirAction is by default set to true, but it is possible to change it by setting the customer setting to false so it will not be visible anymore. The following roles have access to the Expire button:
-
Managers of the evaluated identity.
-
System administrators.
-
Service desk agents for the organization unit that the identity belongs to.
-
System owner (can only expire resources from their system).
-
Resource owner (can only expire the resource they own).
Configuring a time interval for terminated identities
To configure the time interval used to find identities that are terminated:
-
Go to Setup > Administration > Data Management... > Event definitions.
-
In the Event Definitions view, on the list with the event definitions, find and select the Make resource assignments obsolete for obsolete identities event definition and then click Edit.
-
In the Edit Event Definition view for the relevant event definition, click Filter.
-
In the Data object filter dialog box, click Filter expressions.
-
In the Filter expressions dialog box, select the value that you want to edit, and then click Edit.
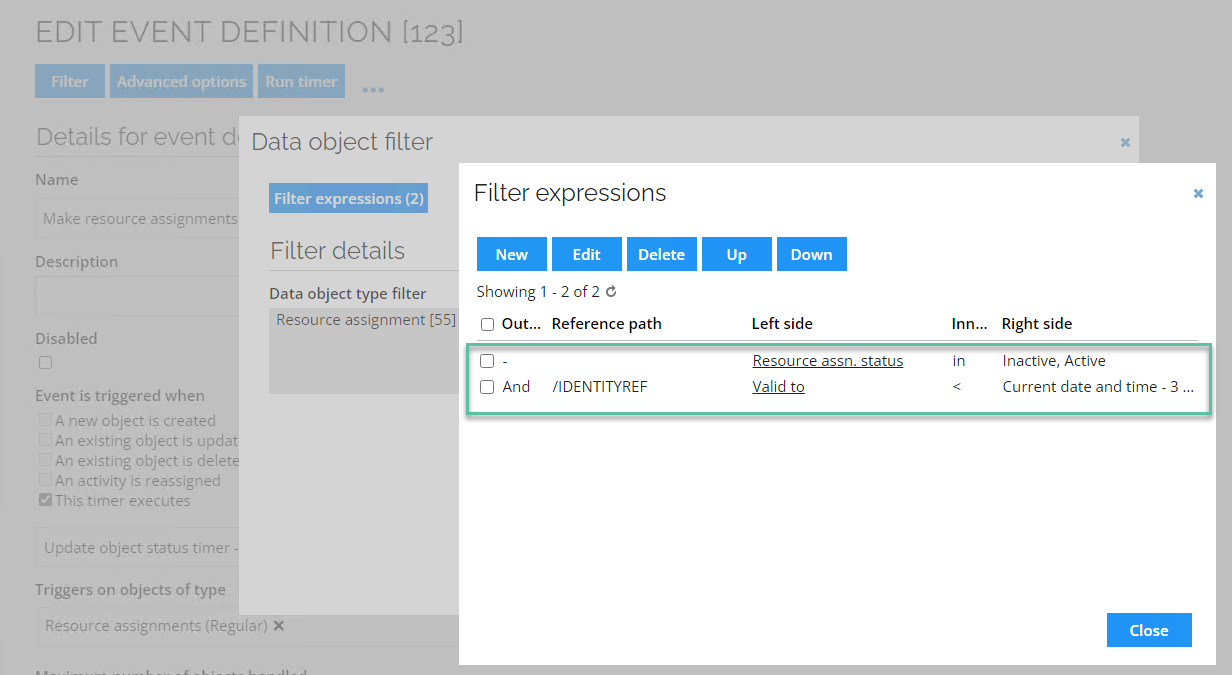
-
In the Filter expressions dialog box, edit the relevant value and when you are finished, click OK.
-
Click Close.
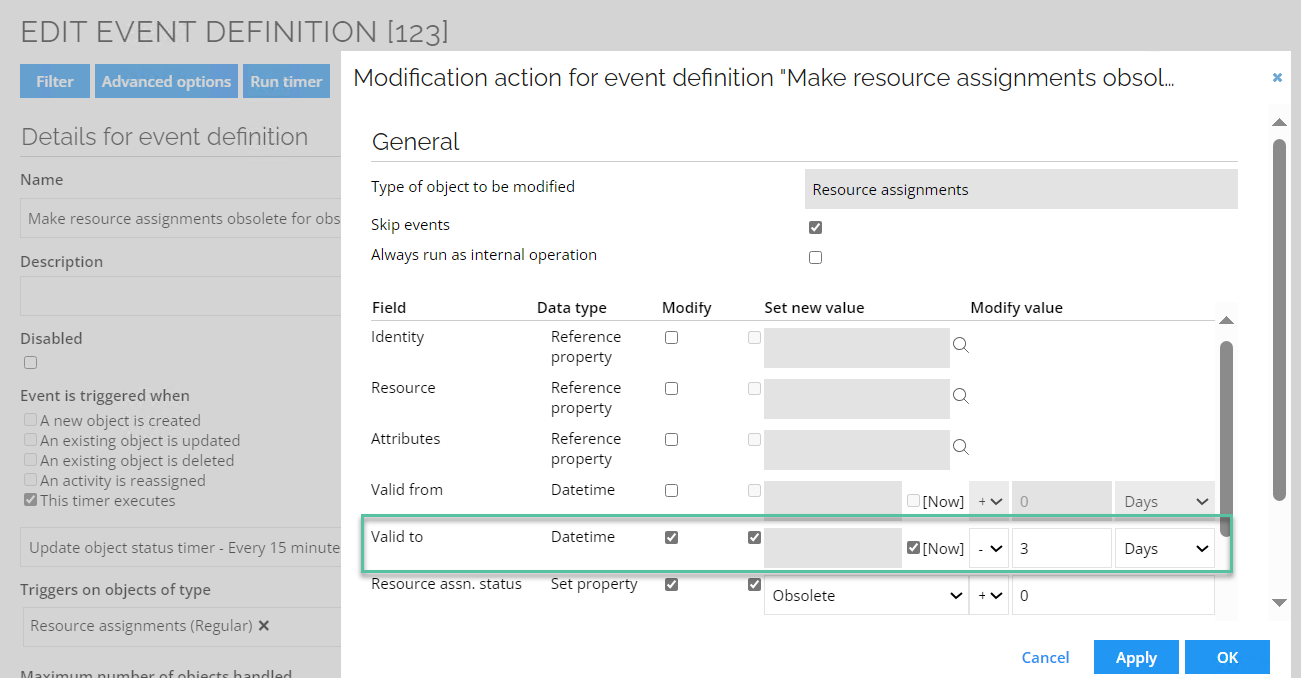
The value set on the resource assignment Valid To field should match the value set in the filter expression. To do so, follow these steps:
-
When editing the relevant event definition, at the bottom of the view, select the action type and then click Edit.
-
In the Modification action dialog box, in the Valid to field, enter the value so it matches with the value for the filter expression.
-
When you are finished, click OK.