Create assignment policy
The following is an example of an assignment policy. Your assignment policy may require more or fewer steps to be sufficient for your organization's needs.
Experience the creation of an assignment policy with Omada Identity Cloud interactive walkthrough. Learn how to create a policy that assigns all internal employees a user mailbox.
Follow these steps to create an assignment policy:
-
As a user with administrative access, go to Setup > Master Data > Policies... > Assignment Policies, then click New in the top-left corner.
-
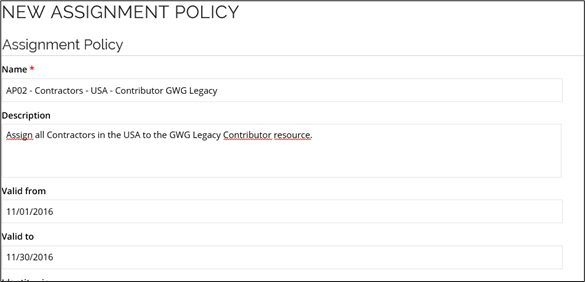
On the page for the New Assignment policy, type the relevant information required for the Name, Description, Valid from and Valid to settings.
-
Only the Name setting is mandatory, but if you have many assignment policies in your system, it may be a good idea to include a description of the assignment policy.
-
-
If the identities that the policy should apply for are to be scoped on a view, select the view in the Identity view field. This shows all views of the type Policy Scope. These views are filtered on the identity data object type. Click on the lookup icon to open the dialog where you can select the views. In the dialog it is also possible to create a new Policy Scope view.

-
If you want to inspect all the identities included in a Policy Scope view, click the selected Identity View. The Definition of the data object view will open. Then, you can click the Show view data button to preview the data in the view.
- In the Definition of the data object view for Assignment policies, and also for Constraints, you can click the "..." menu and use the Other policies using this view menu item to show a list of all assignment policies (or constraints) that are configured with the same scoping view.
-
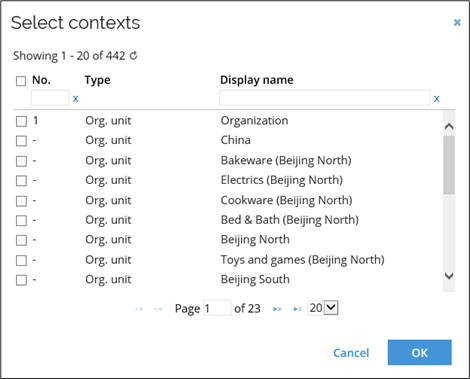
If the identities for which the policy should apply should be scoped based on their context memberships, select the relevant contexts in the Contexts field. Click the lookup icon to open the Select Context(s) dialog box.
 note
noteThe context memberships of an identity include all ancestor contexts to those the identity is a direct member of. If an Assignment Policy is scoped on contexts of different context types, the policy only applies to the identities that are in at least one context of each type. For example, a policy scoped on Department: Finance, IT and Job title: Controller, Developer will apply to anyone who is either working in Finance or IT and has the job title of a Controller or Developer.
-
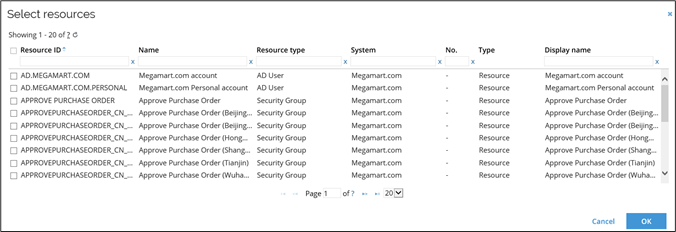
In the Resources field, add all the resources to assign to the identities that are part of the assignment policy. Click the lookup icon to open the Select resources dialog box.
-
In the Account types field select account types that the specified resources are allowed to be assigned for. If a resource is of the type Role, the applicable account types of child resources must also be selected in the policy.
noteWe recommend that only one type of account is used per assignment policy.
If you have an AP with resources using different account types, but no type is specified, we recommend splitting the assignment policies to separate into different account types.
-
Select the checkbox Only apply policy to identities who are direct members of the scoped business contexts if you want the policy to only be applied to identities that have a direct membership of the selected business context(s) (or an indirect membership if it is via an Employment object - or another type of a "personal" business context).
-
Click OK on the New Assignment policy page to save your new policy and close this page.
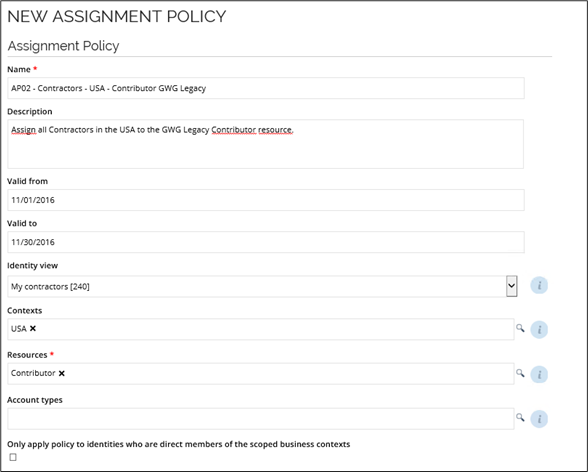
The policy above creates calculated resource assignments for all identities of the category contractor that belong to the USA organizational unit and any organizational units below to the Contributor.
You can also use data exchange to import assignment policies. To do it:
-
Create the data exchange for an assignment policy with the option to upload via a CSV file.
-
Fill in all the needed fields and properties in the file. In the Identity view field, enter the
FormDataUid.To find the
FormDataUidin the Identities view, press Ctrl and right click on any blank space. Then, select Debug information. TheFormDataUidcontains 32 digits with 4 dashes (xxxxxxxx-xxxx-xxxx-xxxx-xxxxxxxxxxxx). -
Run the created data exchange.
As a result, the assignment policy is created, and the Identity view is recognized in the policy.
You can also import assignment policies with contexts using data exchange. To do it, however, you need to define a single data object type for the context property, and then remove it again after the data exchange. If you work with multiple context types, you need to do one data exchange per context type where the context property reflects the data object type/context type.