Azure SQL databases
To use external databases from Azure SQL for your on-prem installation, follow these steps:
-
Create Azure SQL databases.
These are the databases that you need to create in Azure SQL with the
Danish_Norwegian_CI_AScollation.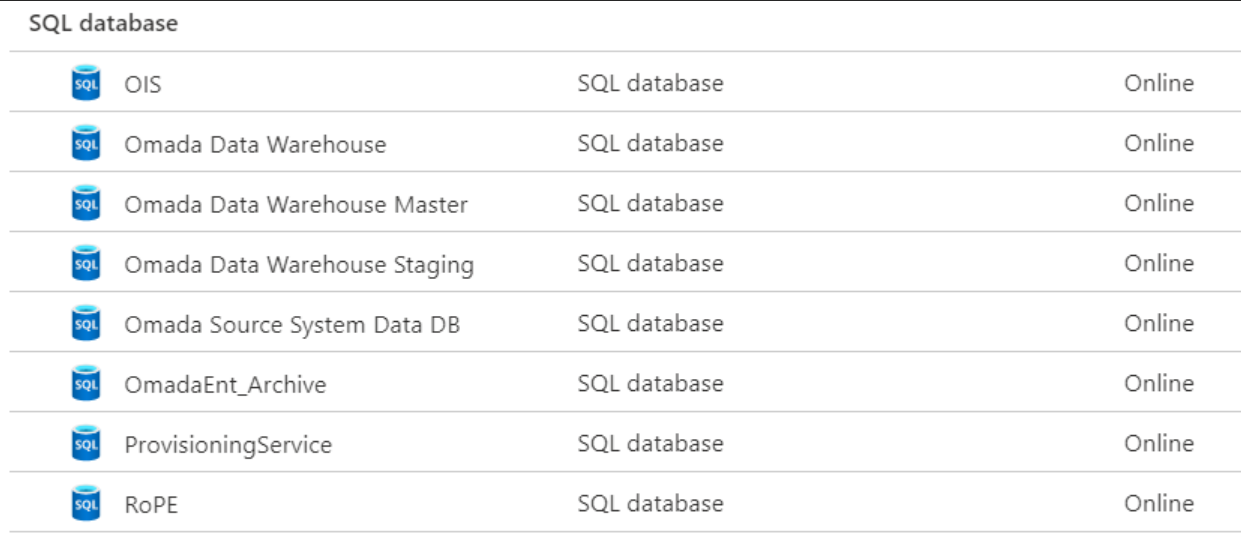
-
Update the MSSQL node in the configuration file.
Then, you must modify the following settings in the MSSQL node of the configuration file:
Settings Value description Server Add the address of the server, available on the Microsoft Azure portal. Administrator Add the administrator name established when creating the Azure server. AdministratorPassword Add the administrator password established when creating the Azure server. IntegratedSecurity Must be switched to False. Example<?xml version="1,0" encoding="utf-8"?>
<Configuration>
<Version Type="LocalCopy">
<MSSQL>
<Version>2016</Version>
<VersionNo>13</VersionNo>
<Server>[SERVER_ADDRESS]</Server>
<SSIS>localhost</SSIS>
<Administrator>[USER_NAME]</Administrator>
<AdministratorPassword>[USER_PASSWORD]</AdministratorPassword>
<IntegratedSecurity Enabled="false">
</IntegratedSecurity>
<RsHttps>false</RsHttps>
<RsOnAppServer>true</RsOnAppServer>
<SSRSPath>C:\Program Files\Microsoft SQL Server\MSRS13.MSSQLSERVER\Reporting Services</SSRSPath>
<SSASServer>.</SSASServer>
<SSASCatalog>OIS</SSASCatalog>
</MSSQL>
... -
Update ES, OPS, DW, RoPE nodes in the configuration file
Then, for each ES, OPS, DW, RoPE nodes of the configuration file, you must modify the following settings:
Setting Value description DBUser Add the database user name created with your Azure SQL server. DBPassword Add the database password created with your Azure SQL server. Example<OPS Enabled="true">
<Version>12.0.271</Version>
<DropFolder>\\ovms09\drop\OPS\Dev\Next Release\OPS.Dev.Next</DropFolder>
<Name>Omada Provisioning Service</Name>
<Exe>Omada Provisioning Service.exe</Exe>
<DBName>ProvisioningService</DBName>
<DBUser>[Database_Name]</DBUser>
<DBPassword>[Database_Password]</DBPassword>