Postrequisites
Deprecation
As we've updated the version number and removed deprecated code, custom libraries must be recompiled using the latest Omada libraries. Once you have upgraded Omada, you must redeploy your custom files.
Refer to the deprecation calendar for the list of deprecated and removed features in Omada Identity.
Deprecated components
After installing the software, run the SystemInfo.sql script in the ES database.
This script is located in the Omada Identity installation folder at C:\ProgramFiles\Omada Identity Suite\Enterprise Server\Sql scripts.
This script creates a stored procedure (spSystemDiagnostics) that produces information about the Omada Identity system that is usable for diagnostics and bug investigation. The stored procedure should be executed with text output.
The script can, for example, detect the use of deprecated components that require special attention when upgrading, including:
- Use of deprecated access modifiers.
- Use of deprecated code methods.
- Other issues that should be handled if reported (for example, issues related to data objects with mandatory fields that have empty values).
Deployment of reports
After any upgrade, you need to redeploy all the standard reports.
Republish old surveys
This step may be optional if you are upgrading from the latest version.
Some of the surveys defined in the previous versions of the Omada Identity can display multiple statements SQL errors on question generation after this update. To mitigate the issue, Omada recommends republishing the Access Review for Managers, the Access Review for Resource Owners, and the Account Ownership Review surveys. To do so, follow these steps:
-
Rename the system name of the existing survey template, for example, change it to
RoPE_ResourceAssignmentSurvey_legacy. -
Republish the
CalcResourceAssignmentSurvey_Manager.xmlsurvey located in C:\Program Files\Omada Identity Suite\Enterprise Server\Survey templates. -
Ensure that references such as Survey schedules, Compliance workbench, and the Services menu reflects the correct survey template.
Repeat the steps for other mentioned surveys.
Import Review Joined Identities survey template
This step may be optional if you are upgrading from the latest version.
Delete the Review Joined Identities survey template and import it from the template file. If the template was modified manually the changes will have to be reapplied.
Alternatively, the fix can be manually applied in the survey template. The following steps need to be done:
-
Navigate to Survey Templates view in Setup and open Review Joined Identities template.
-
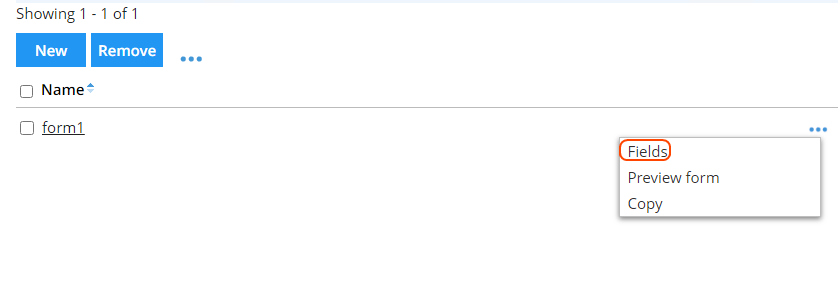
Select Forms tab. From the form1 ellipsis menu, click Fields.
-
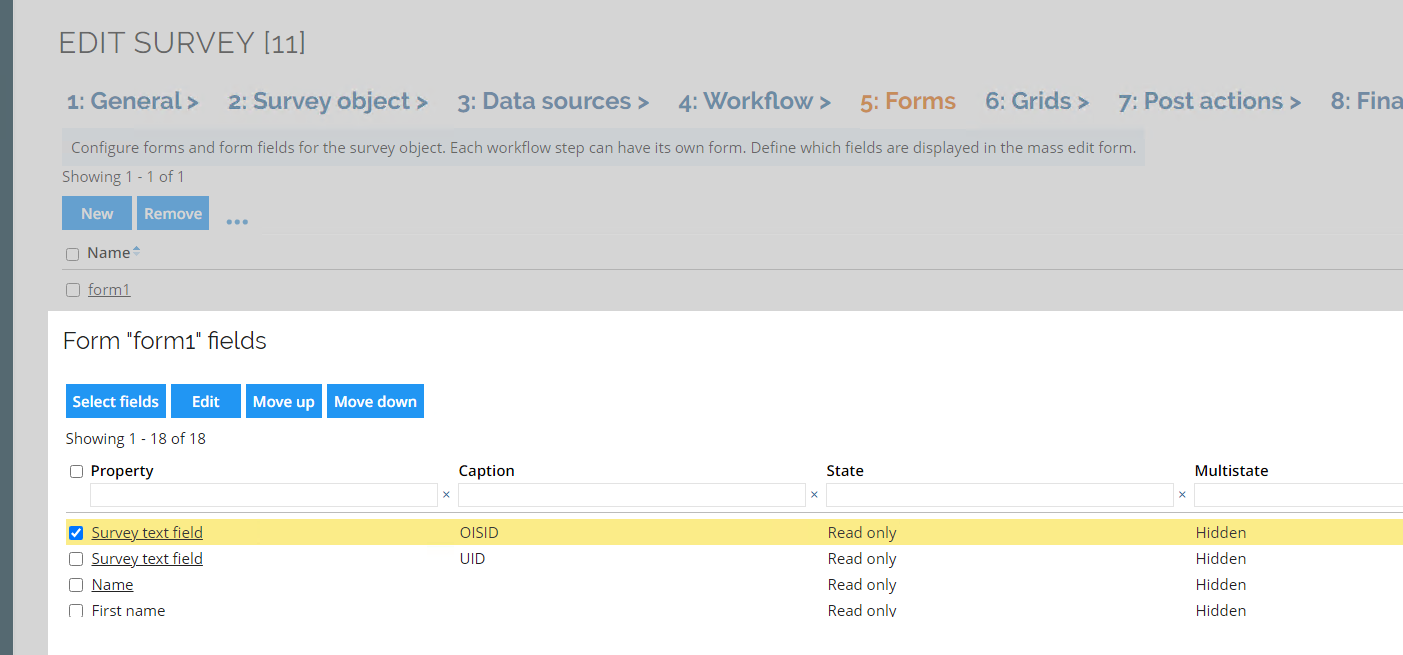
Click Select fields button to open fields list editor.
-
Deselect OISID field and select SURVFLD_TEXT8. Click OK.
-
Scroll down to the last field (Survey text field) and edit it.
-
Fill Caption text field with "OISID" and click OK.
-
Check the field in a list and click Move up button until the field is moved to the top.
-
Close the form1 form fields editor and click OK to apply changes to survey template.
Multivalued source fields
This step may be optional if you are upgrading from the latest version.
If any of the source fields in the mapping has values that can be accounted as Multivalued, all of the mappings related to this field should have the Multivalued checkbox marked prior to initializing next import.
The affected, default mappings are:
-
In the CyberArk, the
rightsfield used in Resource assignment queries. -
In the Exchange Online and Hybrid, the
ADDITIONAL_EMAILfield used in the User Mailbox and Shared Mailbox queries.
Change the Action on objects originating from ES option for Context manager - Organizational Units
This step may be optional if you are upgrading from the latest version.
The Action on objects originating from ES option for Context manager - Organizational Units was set to Include.
Post-installation activities
The installation of Omada Identity currently requires outdated components. This section outlines the optional actions to address this issue.
Removing SQL Native client 2012 dependency
Required software:
-
Latest version of the Microsoft Visual C++ Redistributable
-
Latest OLEDB Drivers
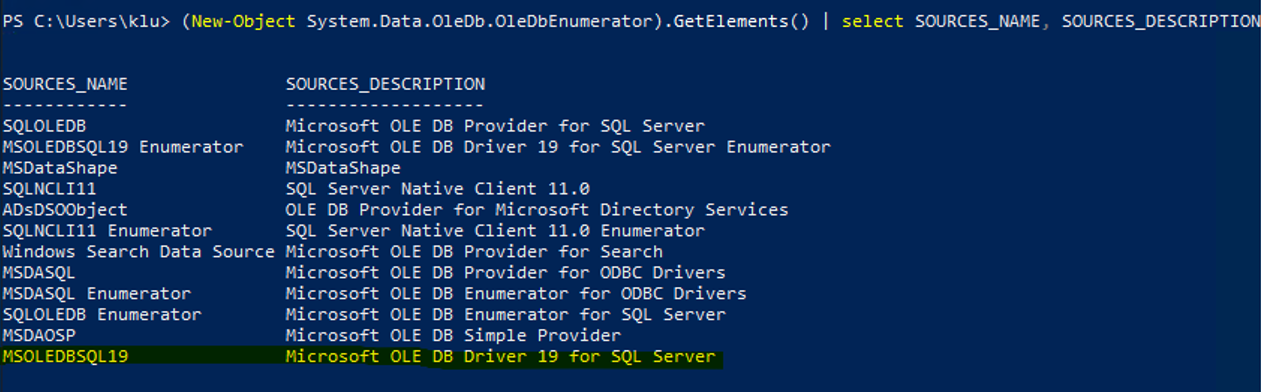
To ensure compatibility with the new SQL Connection Provider name, verify the new Providers by running the following command via PowerShell:
(New-Object System.Data.OleDb.OleDbEnumerator).GetElements() | Select SOURCES_NAME, SOURCES_DESCRIPTION
Example output (with the interesting part highlighted):
Configure the new provider
Follow these steps to configure the new provider:
-
Update the OLEDB Provider in the ODW Connections String configuration file located at C:\Program Files\Omada Identity Suite\Datawarehouse\Common\Omada ODW ConnectionString.dtsConfig:
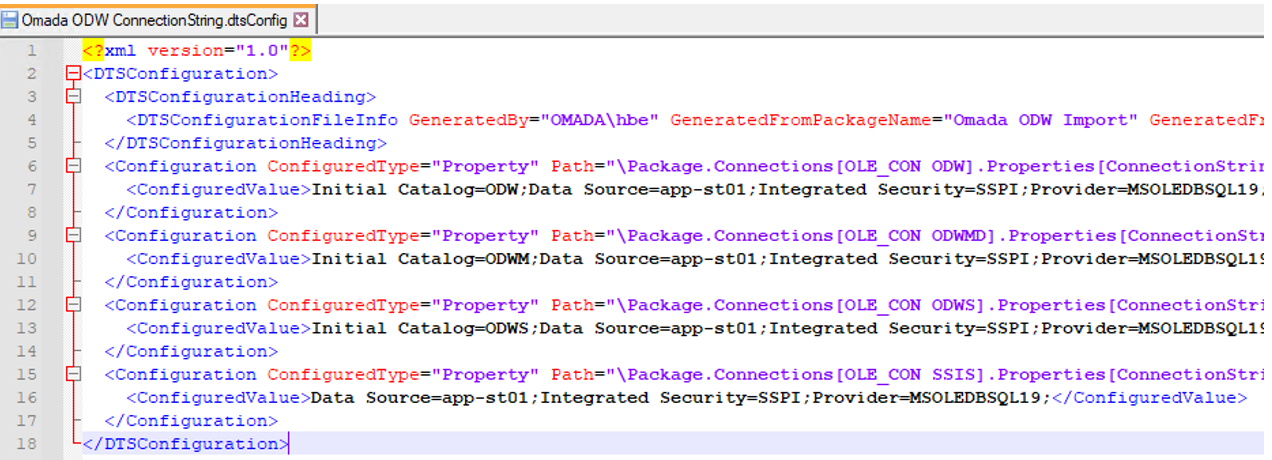
Make sure to change the provider to match the one listed in the previous step.
-
Update the Data Connections in the Omada Identity. Modify the following data connections:

Make sure to change the provider to match the one listed in the previous step.
Microsoft Report Viewer
To use the Report Viewer 2015 instead of 2012 version, follow these steps:
Required software:
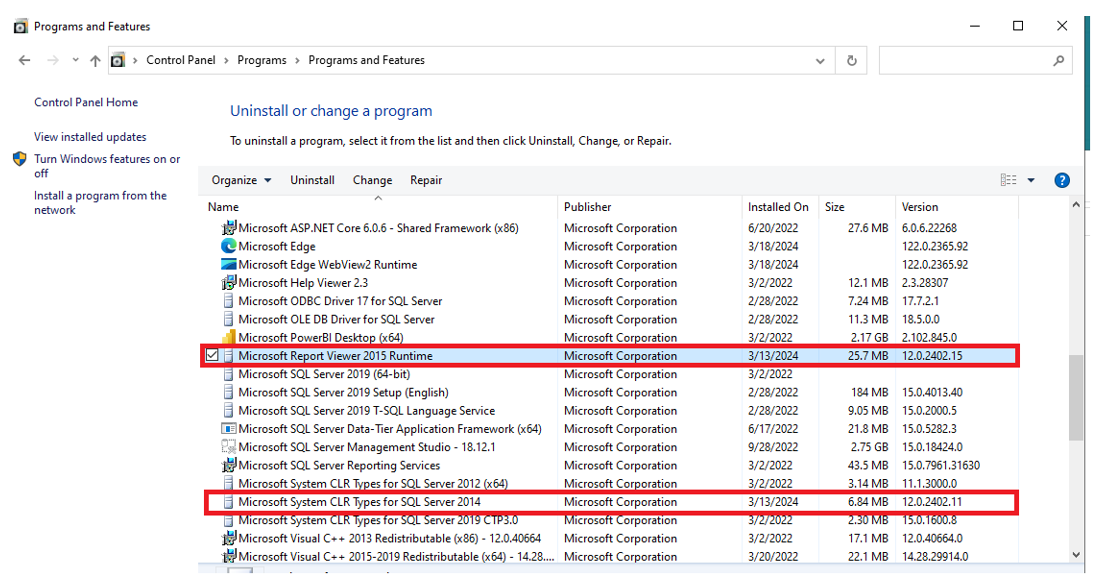
- Microsoft System CLR Types for SQL Server 2016
- Report Viewer 2015
Installation verification can be performed as follows:
Configuration files update:
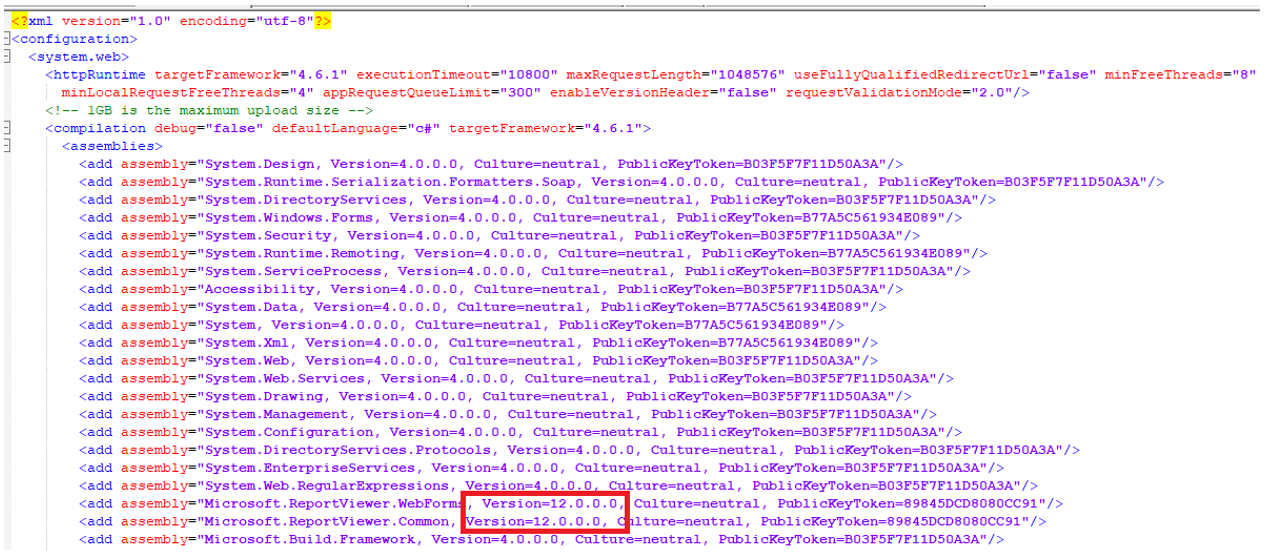
Additional modifications are required in C:\Program Files\Omada Identity Suite\Enterprise Server\website\Web.config:
-
Update the reference to the correct ReportViewer Assembly. Change [Version=11.0.0.0] to [Version=12.0.0.0].
-
In the Assembly Bindings section, add the following new dependent Assembly:
<dependentAssembly><assemblyIdentity name="Microsoft.ReportViewer.WebForms" publicKeyToken="89845dcd8080cc91" culture="neutral"/><bindingRedirect oldVersion="0.0.0.0-12.0.0.0" newVersion="12.0.0.0"/></dependentAssembly>