Resource Management (BA01)
Entitlement Management is called Resource Management within the Omada Identity terminology.
Log in to the portal as System Administrator. Go to the Setup. Here, you will find that Omada Identity have three built-in administrator roles:
- Operation administrators
- Data administrators
- System administrators – System Administrator is assigned to all the three roles
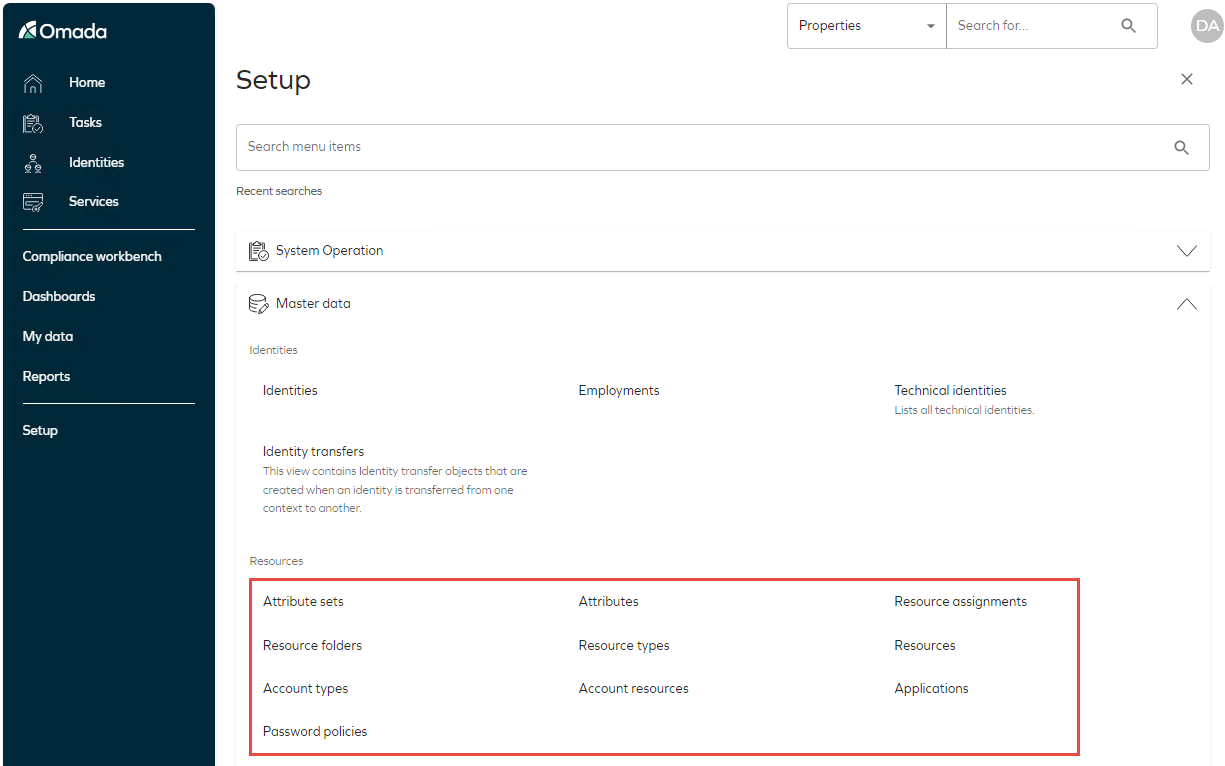
Under Master Data, there is a submenu called Resources. Here, data administrators can maintain Resources, Resource Types, Account Types, Provisioning Attributes, and Logical Applications.
Classification Feature (GOV04)
You can add classification tags and classification tag categories (a group of classification tags) to certain data object types to help your organization to comply to data security regulations, such as the upcoming EU GDPR, and to show accountability in relation to EU GDPR.
You can add classification tag categories and classification tags for the following data object types:
- Systems
- Contexts
- Resources
- Resource Folders
- Identities
When you add classifications for these types of data object types, you provide your organization with the ability to establish a risk management strategy, including relevant risk controls.
Creating classification tags and categories (GOV04.01)
To get started with classification, your organization must create its own classification tags and classification categories to Omada Identity.
Omada Identity comes with some predefined classification tags and classification tag categories, but only a few to get you started. This is because the type of classification that you need to set may be different depending on the type of business or national context in which your organization operates. In other words, what you must comply with in one country or type of organization may not be the same in a different country or type of organization.
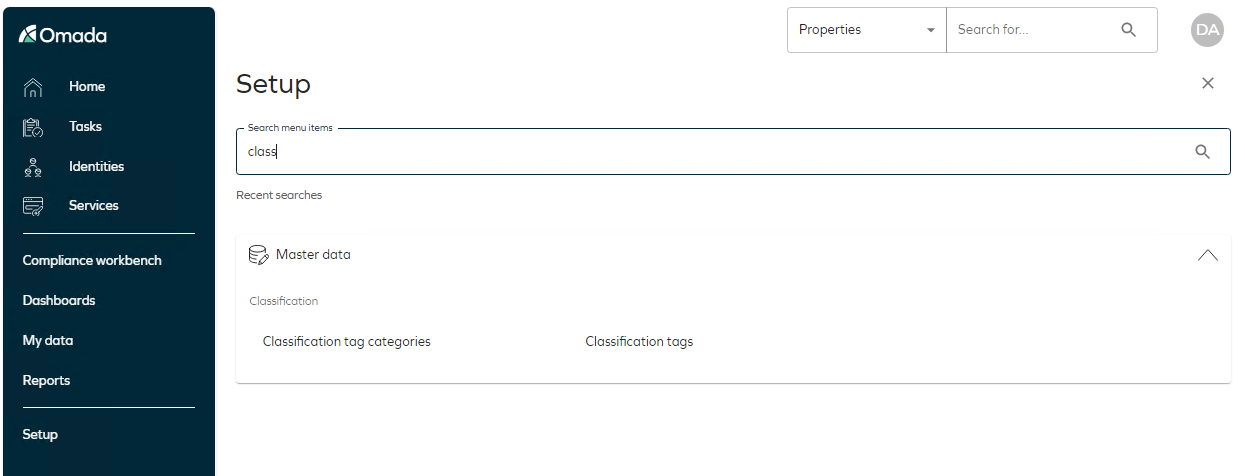
Find the Classification tag categories view in Setup > Master Data > Classification > Classification tag categories.
A classification tag category is a group of classification tags. For example, you could create a classification category named Very sensitive information.
When you have created one or more classification tag categories, you should then create classification tags to allow your organization to divide the data into even more levels.
In the context of the classification category EU General Data Protection Regulation, you then add classification tags for Personal data, Personal sensitive data, High risk data, Medium risk data and Low risk data. The classification tags allow you to further divide data into different levels of security.
Find the Classification tags view in Setup > Master Data > Classification > Classification tag categories.
You can add or edit classification tags and classification categories but remember that you should only change existing classification tagging if you really need to.
The demo system contains some Classification tags that are not standard in the product.
Adding classification through surveys (GOV04.02)
When you have set up the classification tag categories and classification tags that you require for your organization, the next step is to tag the data object types.
The primary way in which to work with classification is to run surveys. To do so, follow these steps:
-
Login as the System administrator.
-
From the Services, you can select any one of the below surveys:
-
Classification survey
-
Resource classification survey
-
System classification survey

-
-
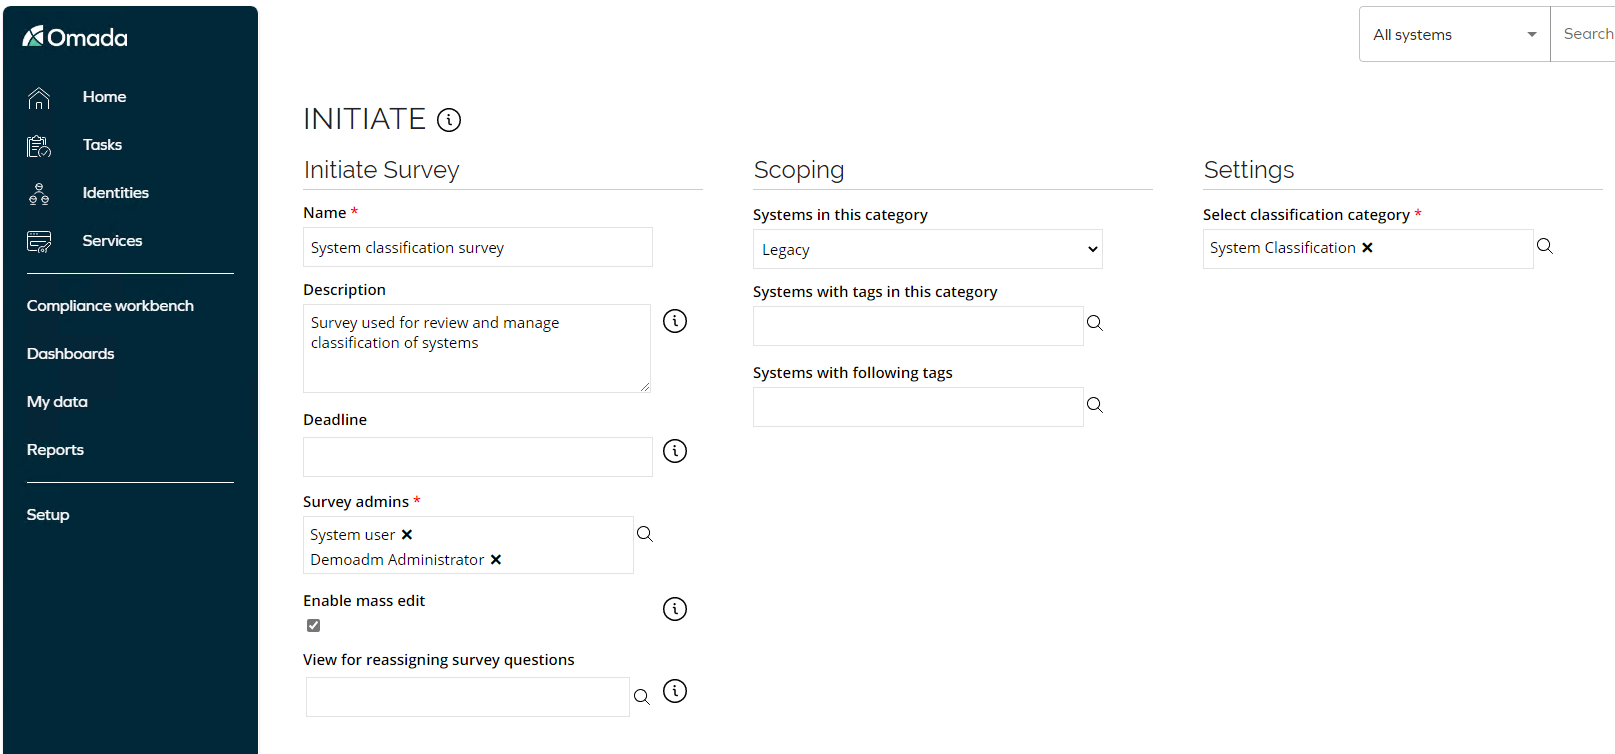
Select the System classification survey.
-
Next, define the scope of your classification survey, including the classification tags that should be available for this survey. This is like when you initiate any other type of survey in Omada Identity.
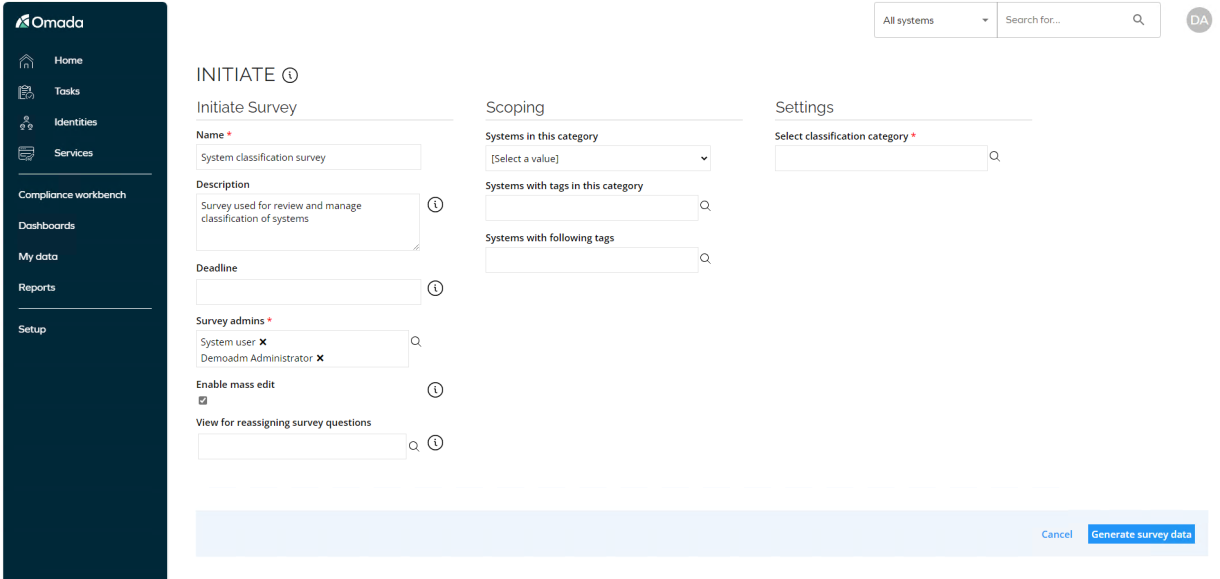
-
When you have specified the scope of and settings for the survey, generate the survey data.
-
You are presented with a preview before the survey is launched, here you as the survey admin can verify if the survey is as expected before launching it.
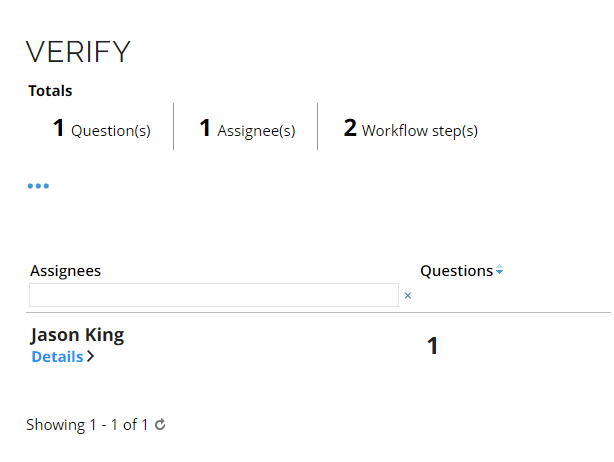
-
After verification, launch the survey tasks – The survey is sent to the owner(s) of the data objects.
-
Log in as Jason King, where there will be a task assigned. Click to open the task.
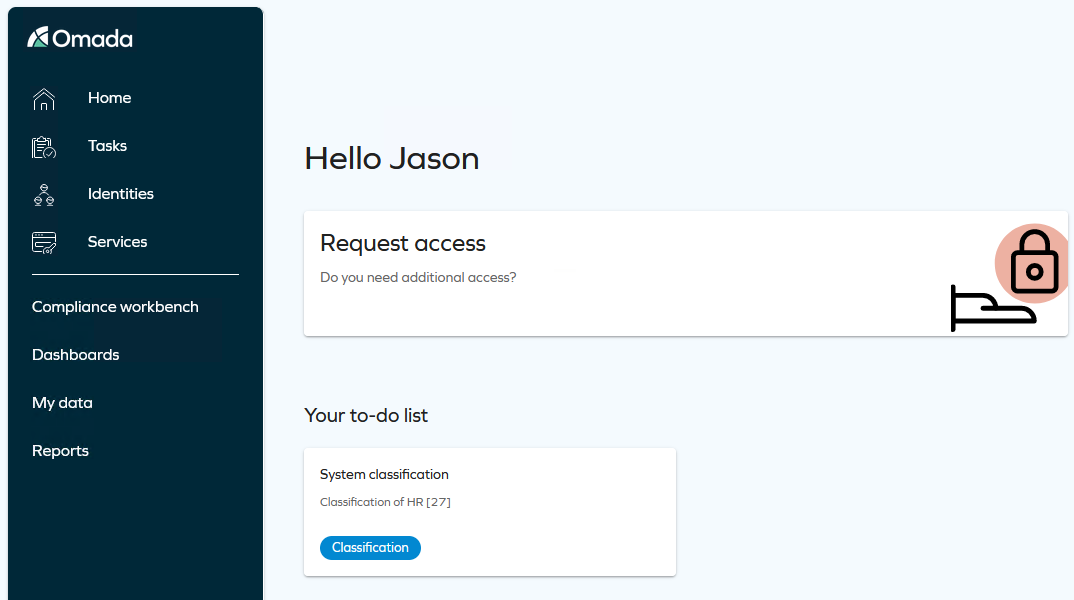
-
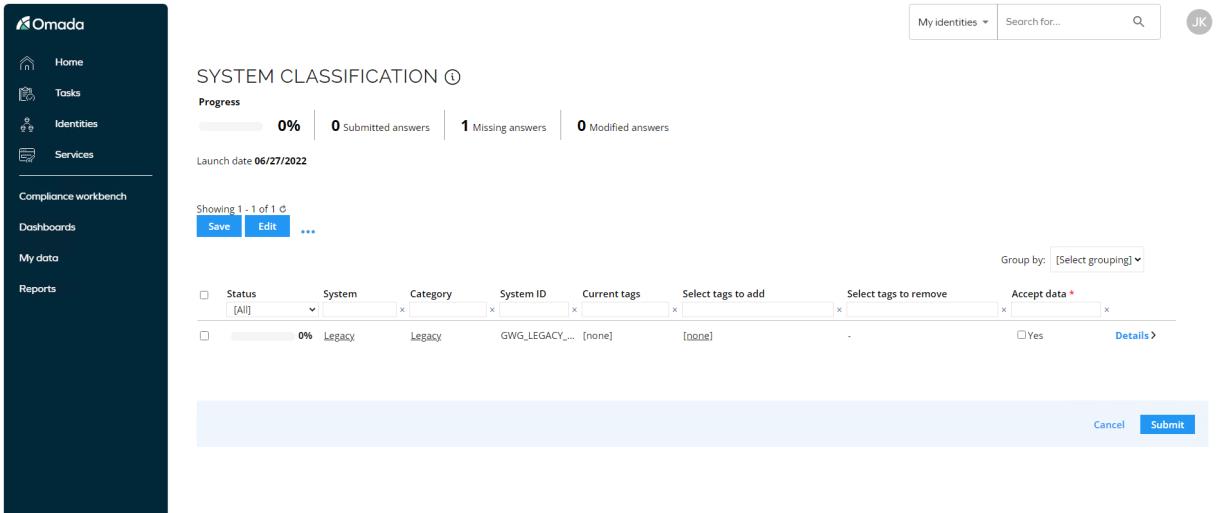
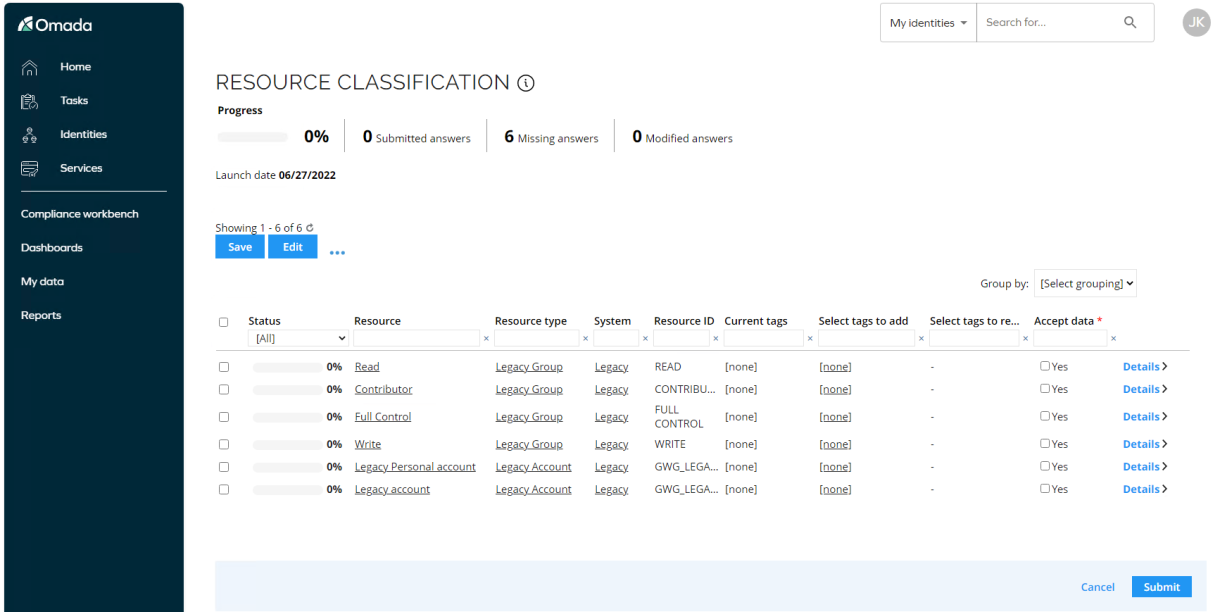
The System owner Jason King is asked to provide classification tag(s). Like other types of surveys, the data admin must now decide on each item that is part of the survey. In this case, there are three selections that you can or must do:
- Select tags to add
- Select tags to remove
- Accept data (mandatory)
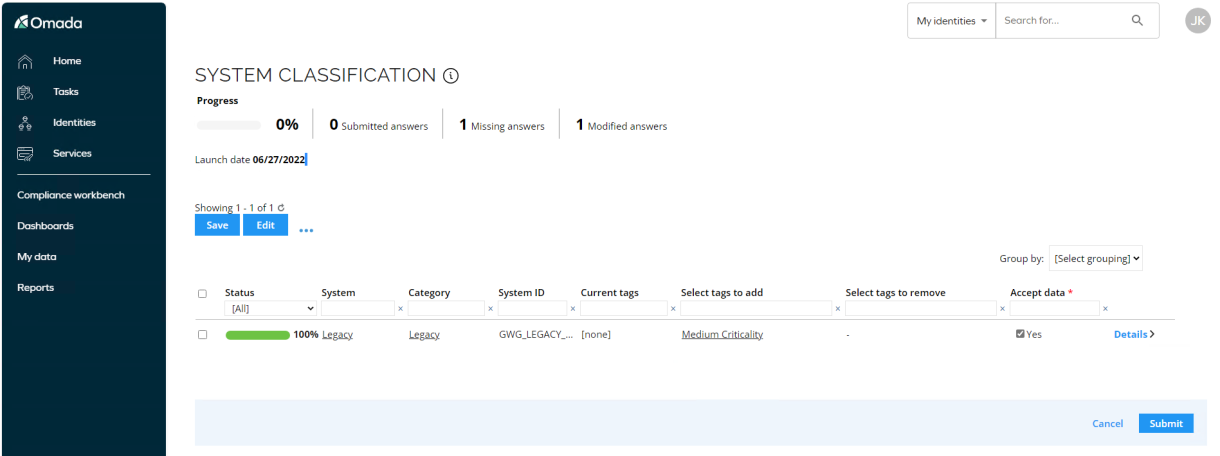
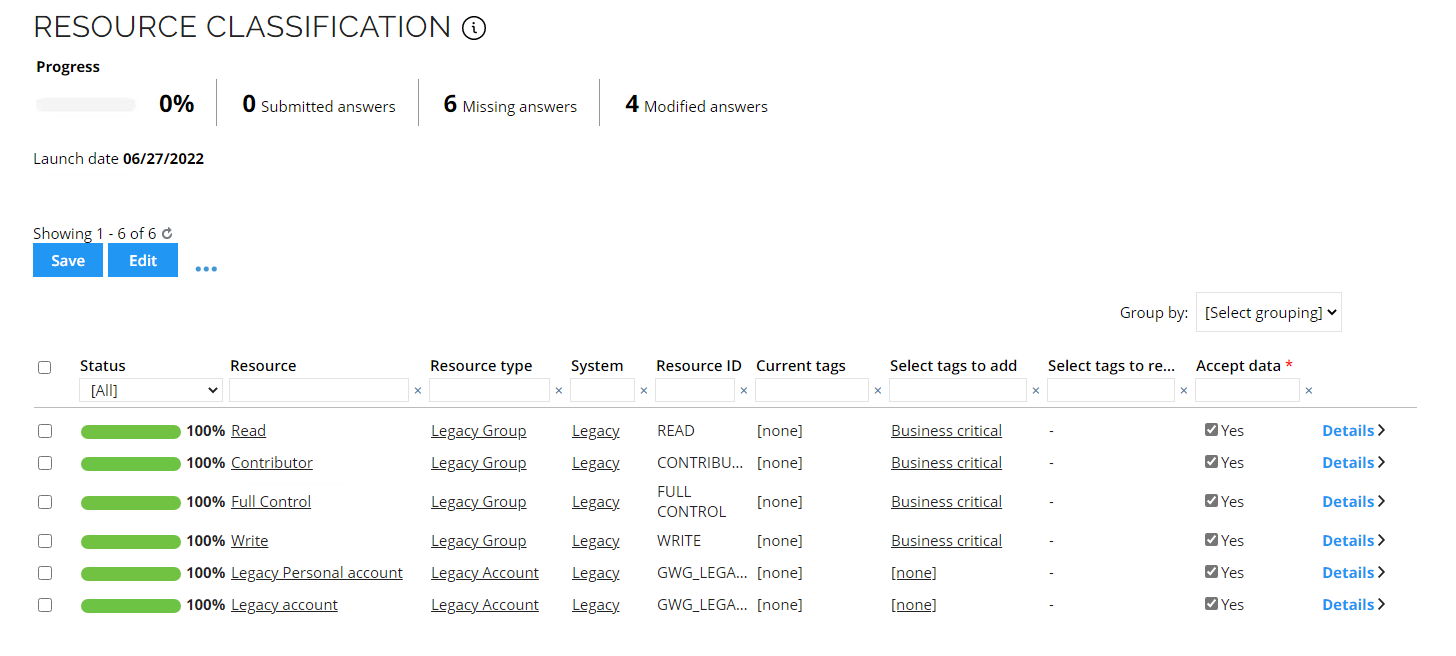
Click the tag(s) in the Select tags to add/Select tags to remove columns to change the current classification. If you have not previously set any classification tags, the column shows
[none].When you are ready, select the Yes checkbox in the Accept data column for each item.
-
When you have selected the checkbox for each item in the survey, click Submit to complete the classification survey.
-
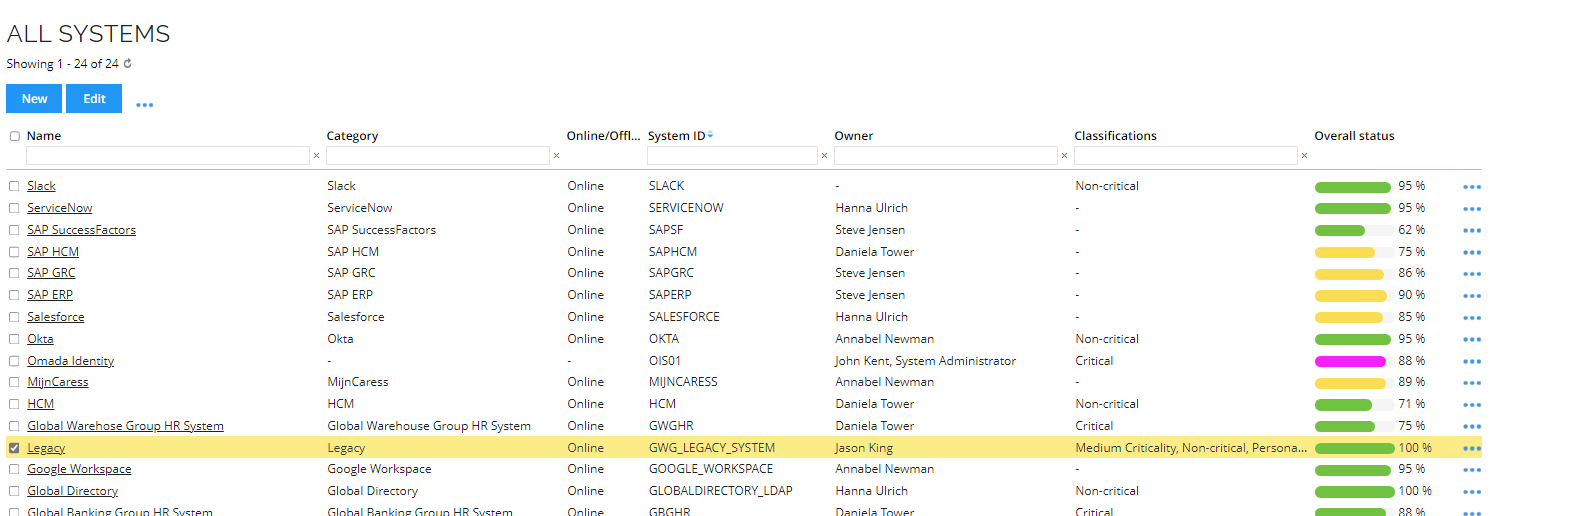
Log in to the portal as the system administrator. Go to Setup > All Systems. Here, you can see the classification(s) is assigned to the system.
-
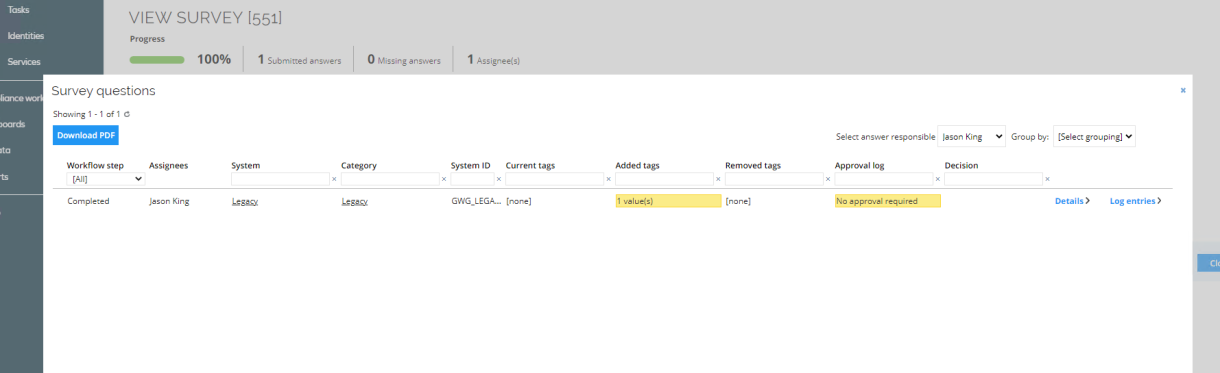
Go to My Data > My Surveys to see the survey is completed.

-
Click on the survey to see the details.
Resource classification
-
Log in as the system administrator.
-
From All Services, you can select any one of the below surveys:

-
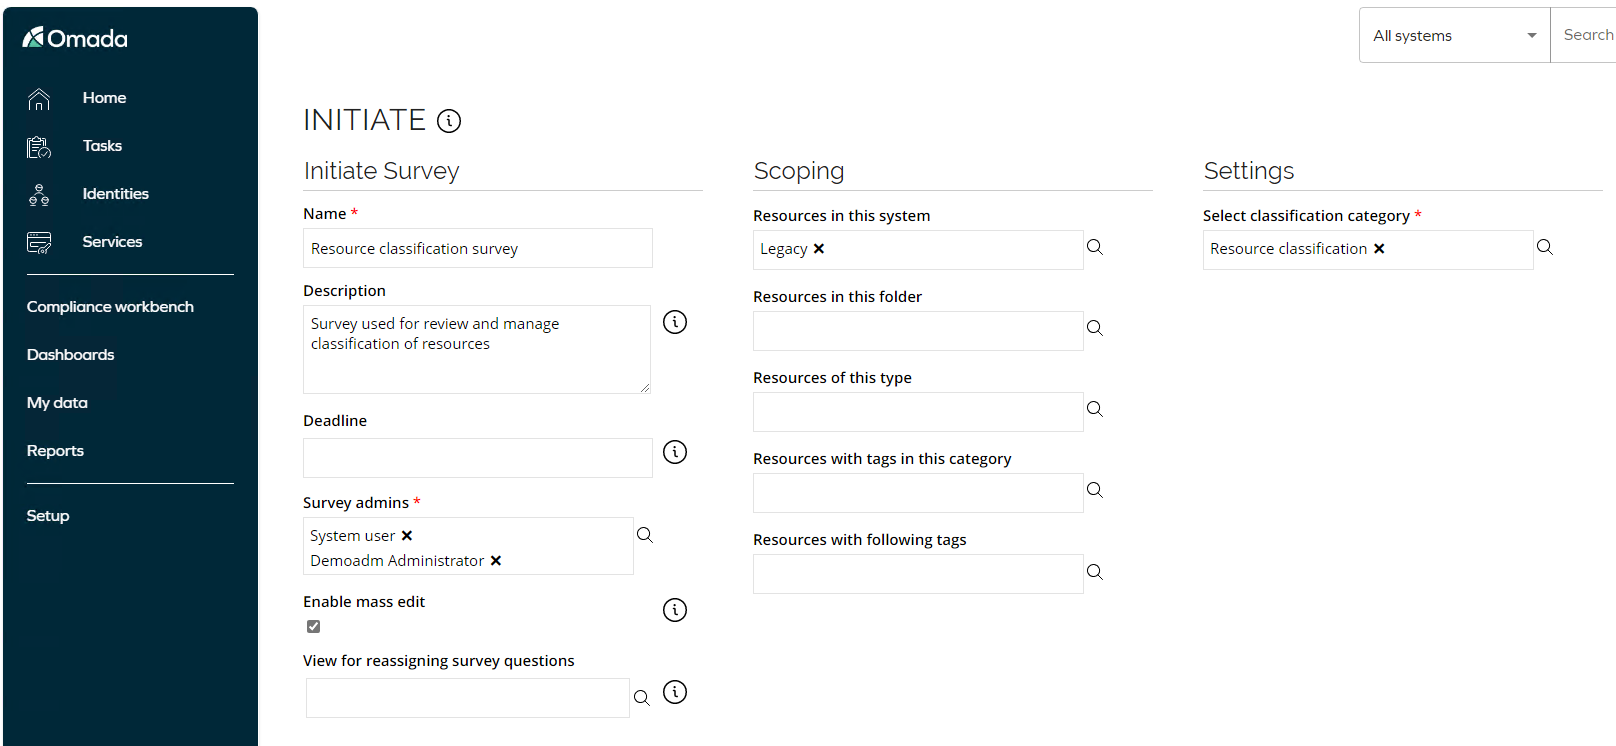
Select the Resource classification survey.
-
Next, define the scope of your classification survey, including the classification tags that should be available for this survey. This is like when you initiate any other type of survey in Omada Identity.
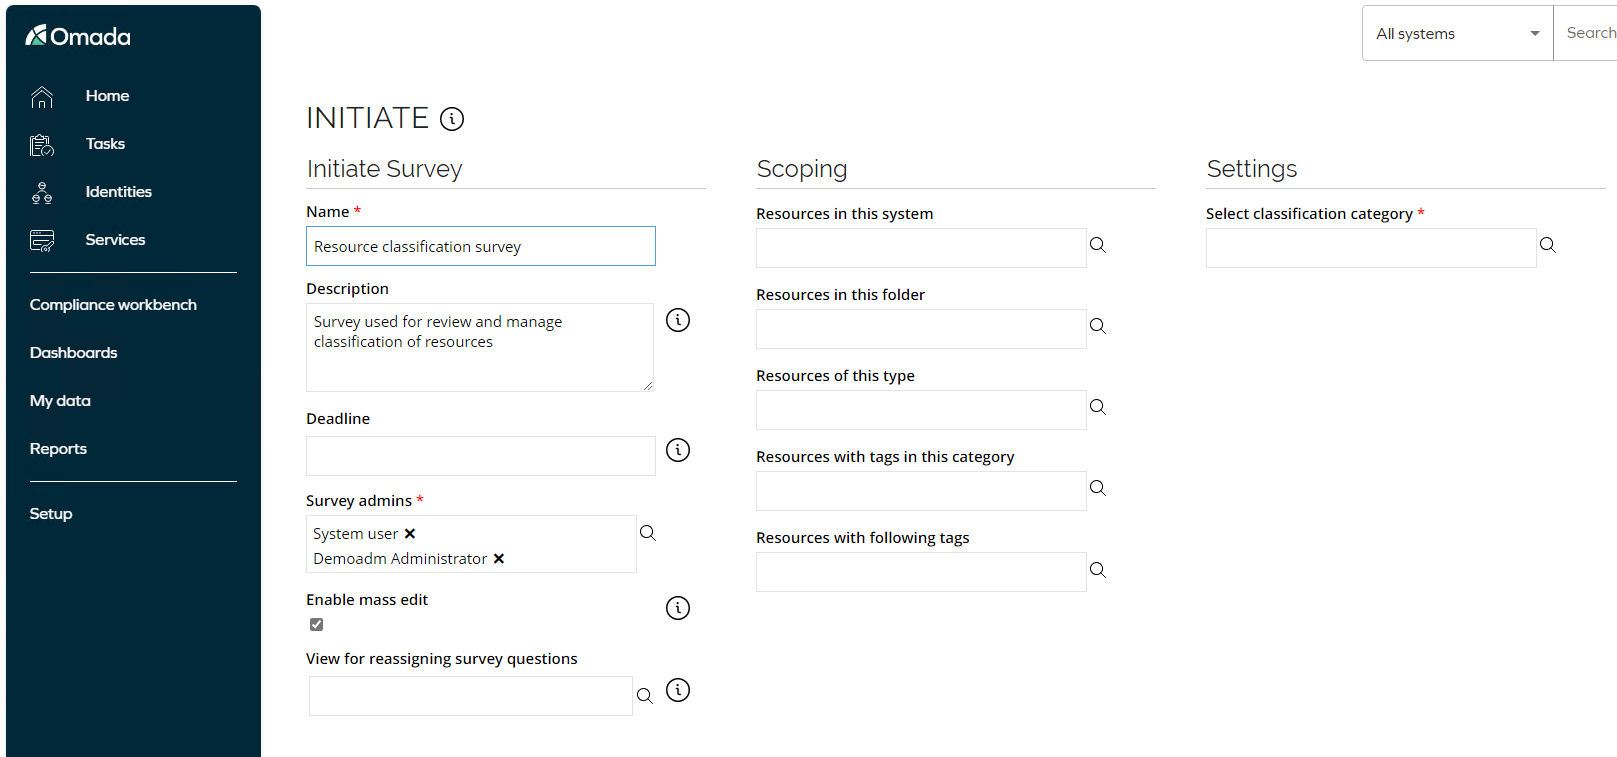
-
When you have specified the scope of and settings for the survey, generate the survey data.
-
You are presented with a preview before the survey is launched. Here, as the survey admin, you can verify if the survey is as expected before launching it.
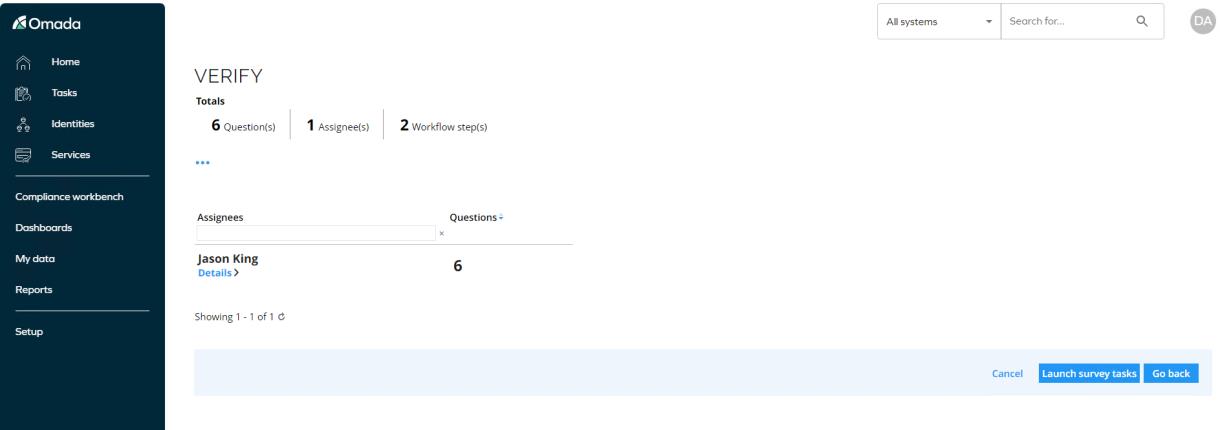
-
After verification, launch The survey is sent to the owner(s) of the data objects survey task.
-
Log in as Jason King, where there will be a task assigned. Click to open the task.
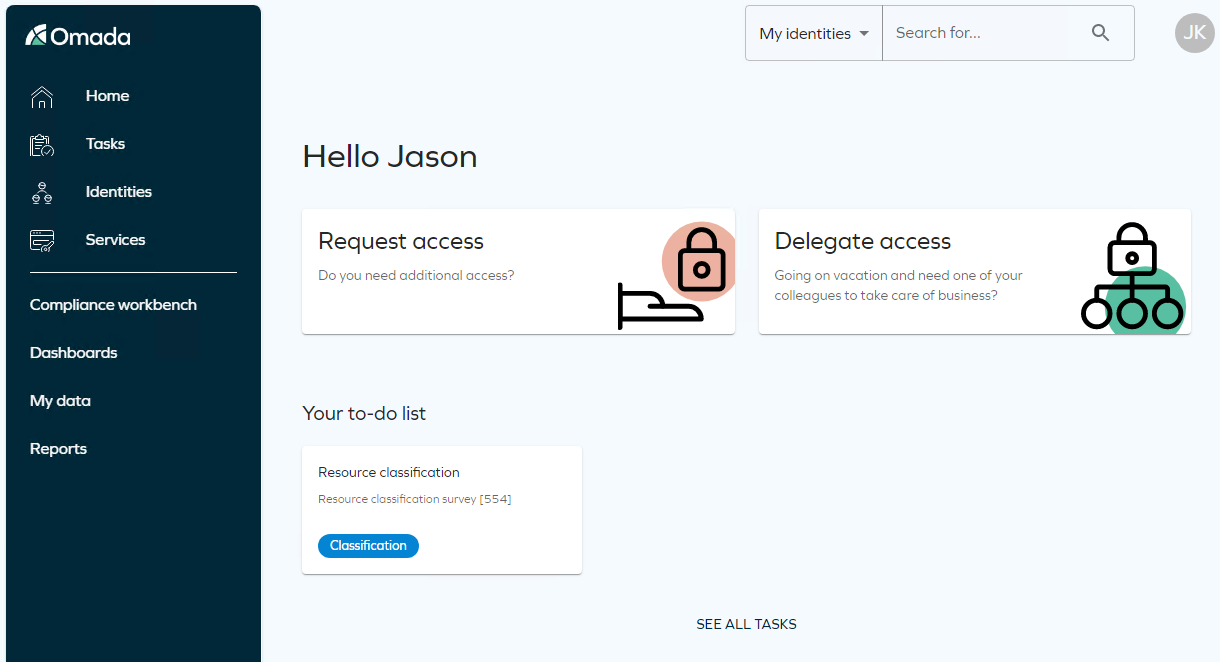
-
The System owner Jason King is asked to provide classification tag(s).
-
Like other types of surveys, the data admin must now decide on each item that is part of the survey. In this case, there are three selections that you can or must do:
- Select tags to add
- Select tags to remove
- Accept data (mandatory)
-
Click the tag(s) in the Select tags to add, Select tags to remove columns to change the current classification. If you have not previously set any classification tags, the column shows
[none]. -
When you are ready, select the Yes checkbox in the Accept data column for each item.
-
When you have selected the checkbox for each item in the survey, click Submit to complete the classification survey.
-
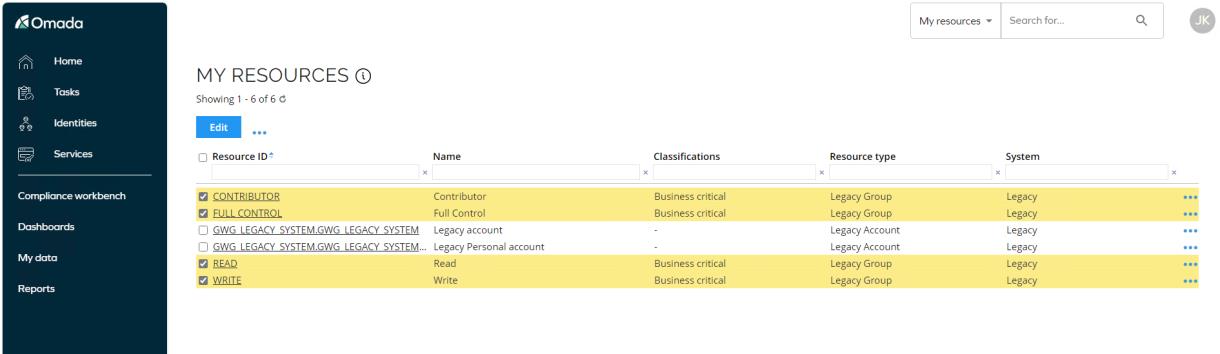
Go to My Data > My Resources. Here, you can see the classification(s) is assigned to the resources.
-
Log in to the portal as the System administrator. Go to My Data > My Surveys to see the survey is completed.
-
Open the survey to see the details.
Using Classification Feature to Manage Risk Levels
Further to the classification tag functionality, you can also use classification tags functionality to manage the Risk Level calculation of resources and identities.
Adding risk levels to your setup allows you to be able to see the risk level of all resources and identities and use the risk levels in access approval requests. This assist the approver in assessing whether the access right should be granted or not.
When you want to use the classification tags for risk score calculations, you must use tags from classification tag categories, which have been enabled for risk calculations. As a standard, Omada Identity delivers 3 classification tag categories, which are used for risk calculations:
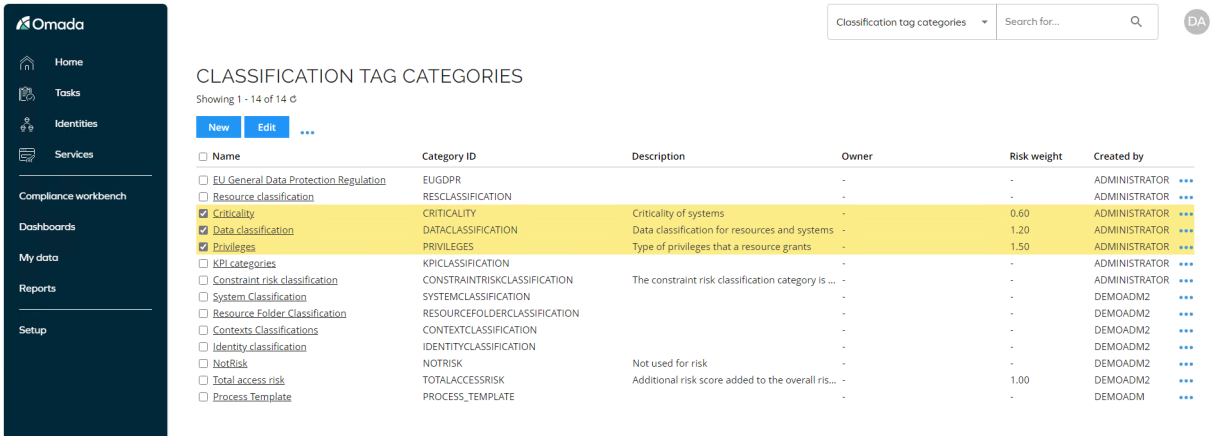
When a classification tag category is risk enabled, it is mandatory to update a risk weight for the category:
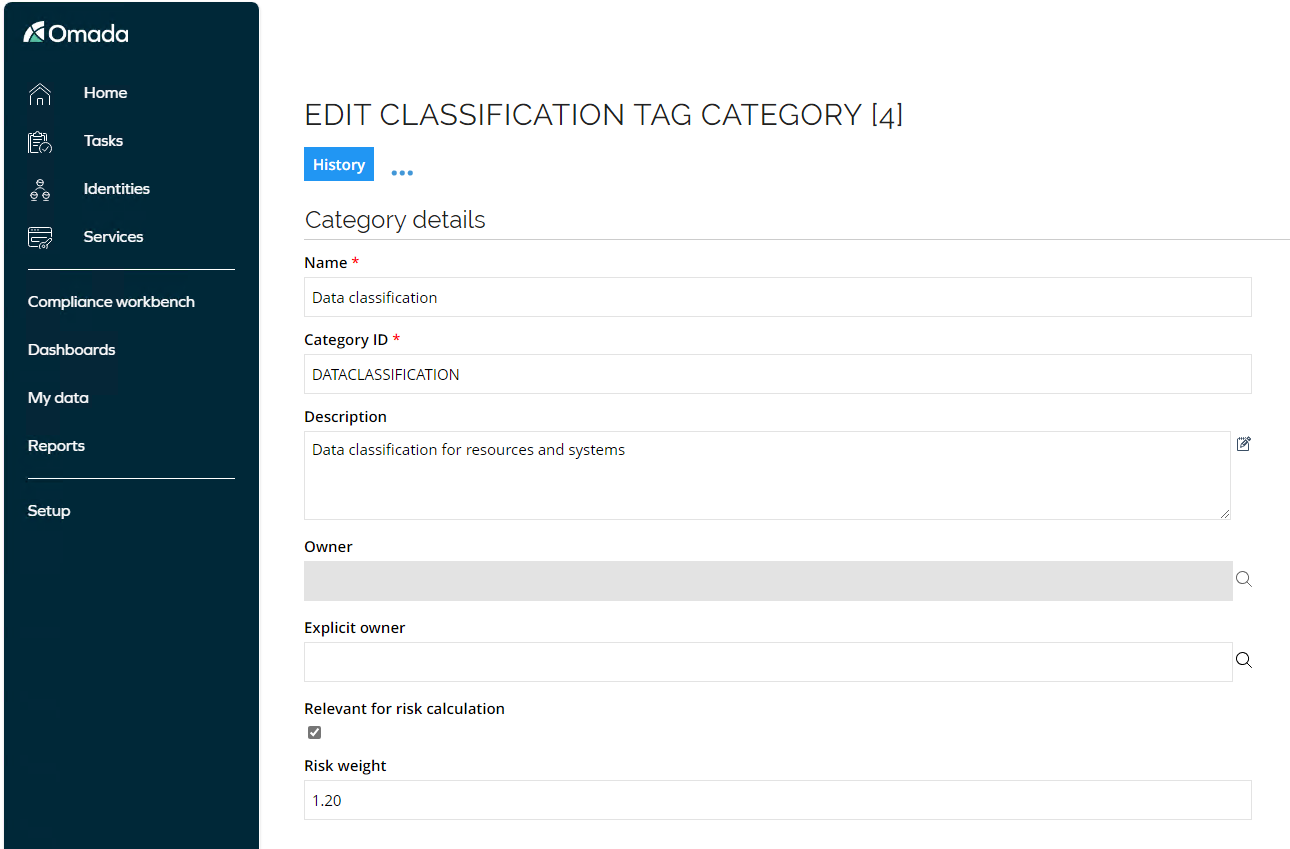
If you need to differentiate the importance of the different categories of risk classifications, you can set the risk weight accordingly. Otherwise it is recommended to leave the risk weight at 1.00.
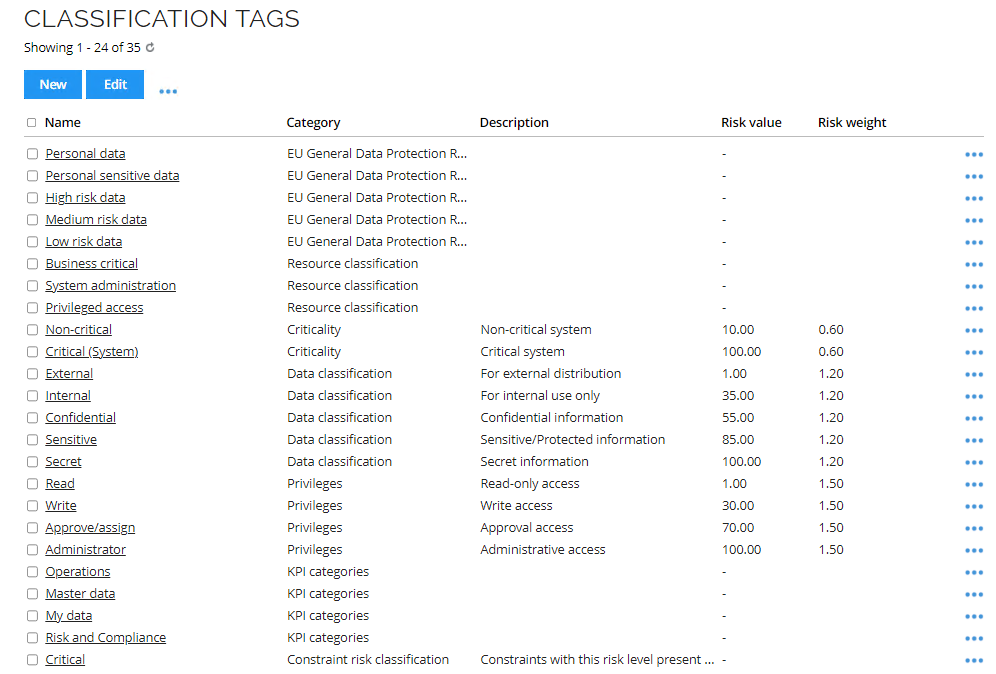
Classification tags are then used to create the different ‘risk values’ within each risk category. Omada Identity comes predefined with several risk-related classification tags:
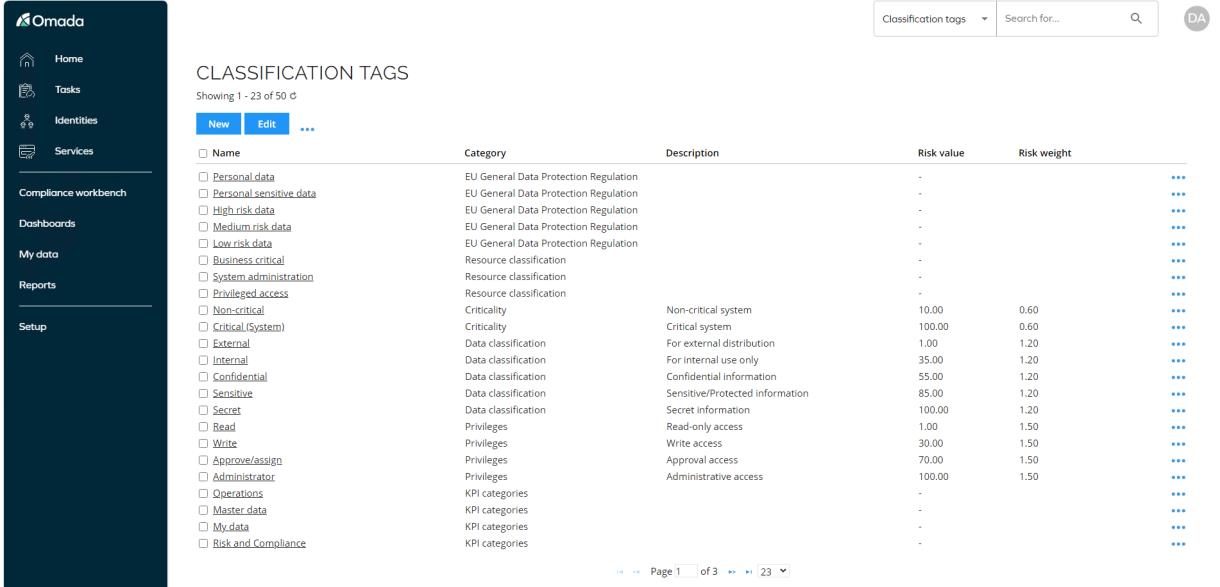
In the standard setup, Criticality is intended to be used to risk score a system, whereas Privileges and ‘Data classification’ are intended to risk score resources.
You can apply these classification tags to systems and resources, and RoPE will instantly start re-calculating the new risk scores if any risk scores, weights, classification tags etc. are changed, added, or removed. Please note that these calculations can take some time, as even smaller changes, like changing the risk weight of a classification tag category, can result in almost all identities to be recalculated.
Risk calculations have been enabled in the demo system and will appear as risk levels in views and access request approvals. It is not necessary to make any preparations in the system to demo the risk feature; the existing resources have been assigned with risk classification tags and the risk levels are calculated.
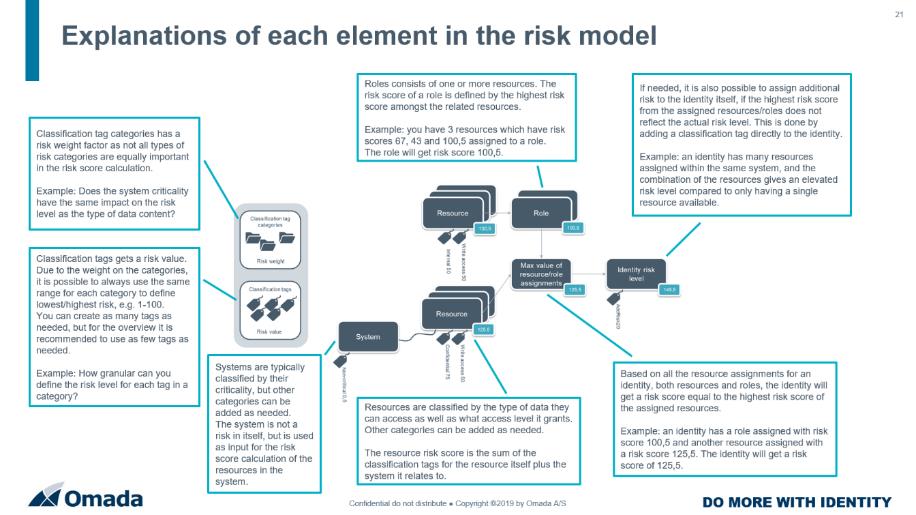
The levels are used to make it simpler for users to understand the risk score, rather than just showing the risk score as a number. The model is created as follows:
Risk score Level
- 0-99 - Low
- 100-199 - Medium
- 200-999 - High
If you need to change these levels, they can be changed under Setup > Administration > More… > Configuration Objects > Risk Level Thresholds.
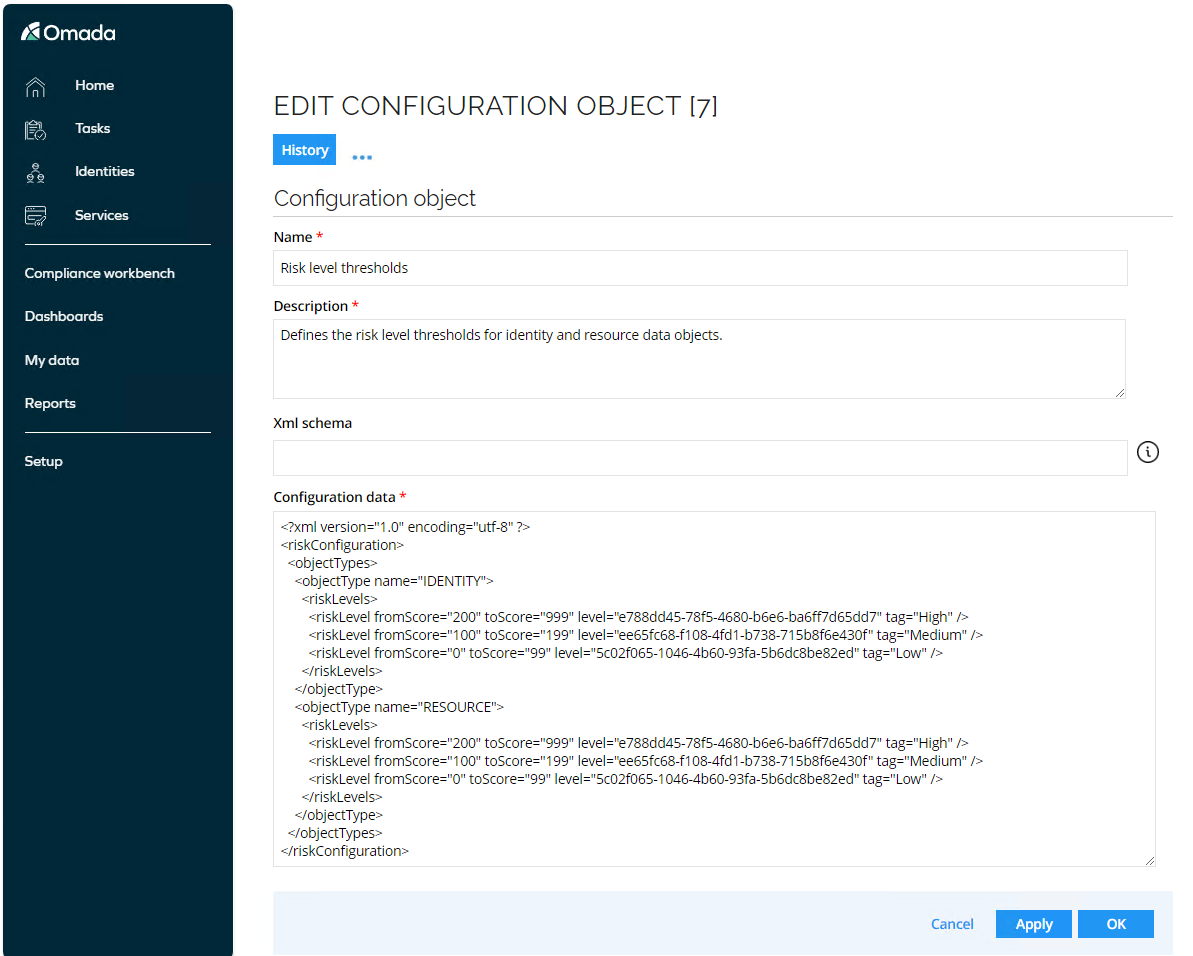
Notice that it is possible to configure different risk levels for resources and identities. This is mainly relevant if you score not only resources, but also want to add risk scores directly to an identity (or a context the identity is related to).
If risk classification tags are added to an identity, the risk score is added to the identity’s risk score calculated from the assigned resources.
You can find more information about the risk calculation method in the Advanced Risk Score Model presentation available on the Omada HUB.