Translations
You can customize translations in Omada Identity by modifying the built-in strings. This can be done through the Cloud Management Portal and the Omada Identity Portal.
Cloud Management portal
-
Access Cloud Management portal where you manage your cloud environment. If you need more information, you can find it here Cloud Management portal.
-
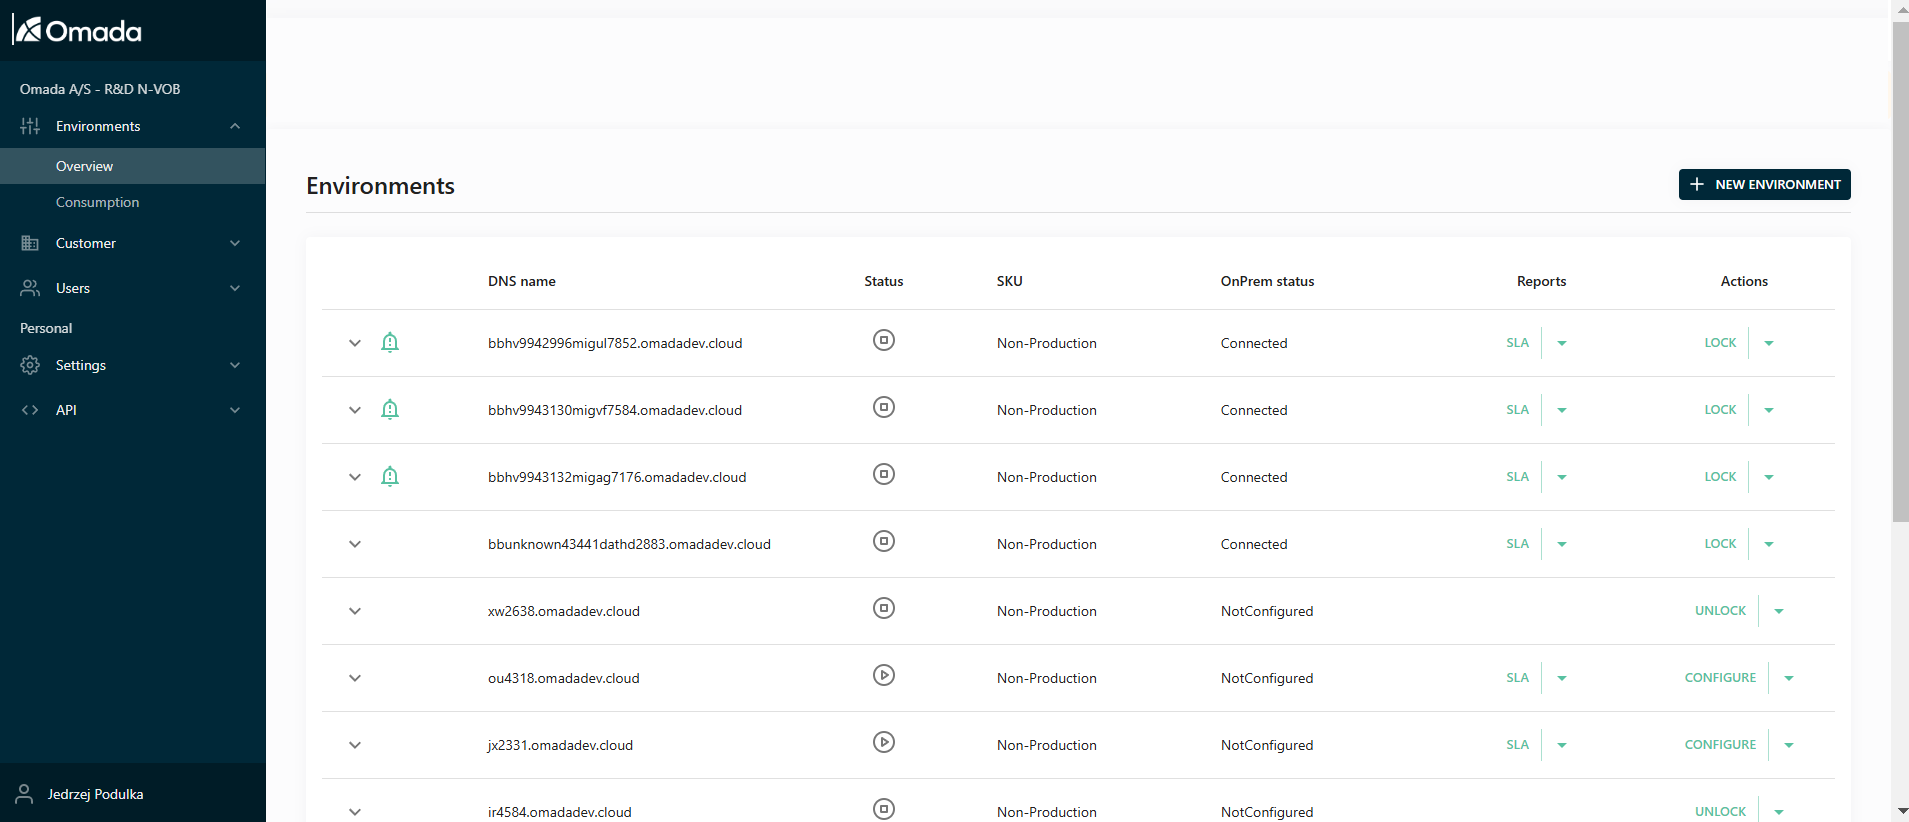
Select the environment where you want to customize translations.
-
Navigate to the Culture tab within the selected environment. This tab contains the translation settings.

-
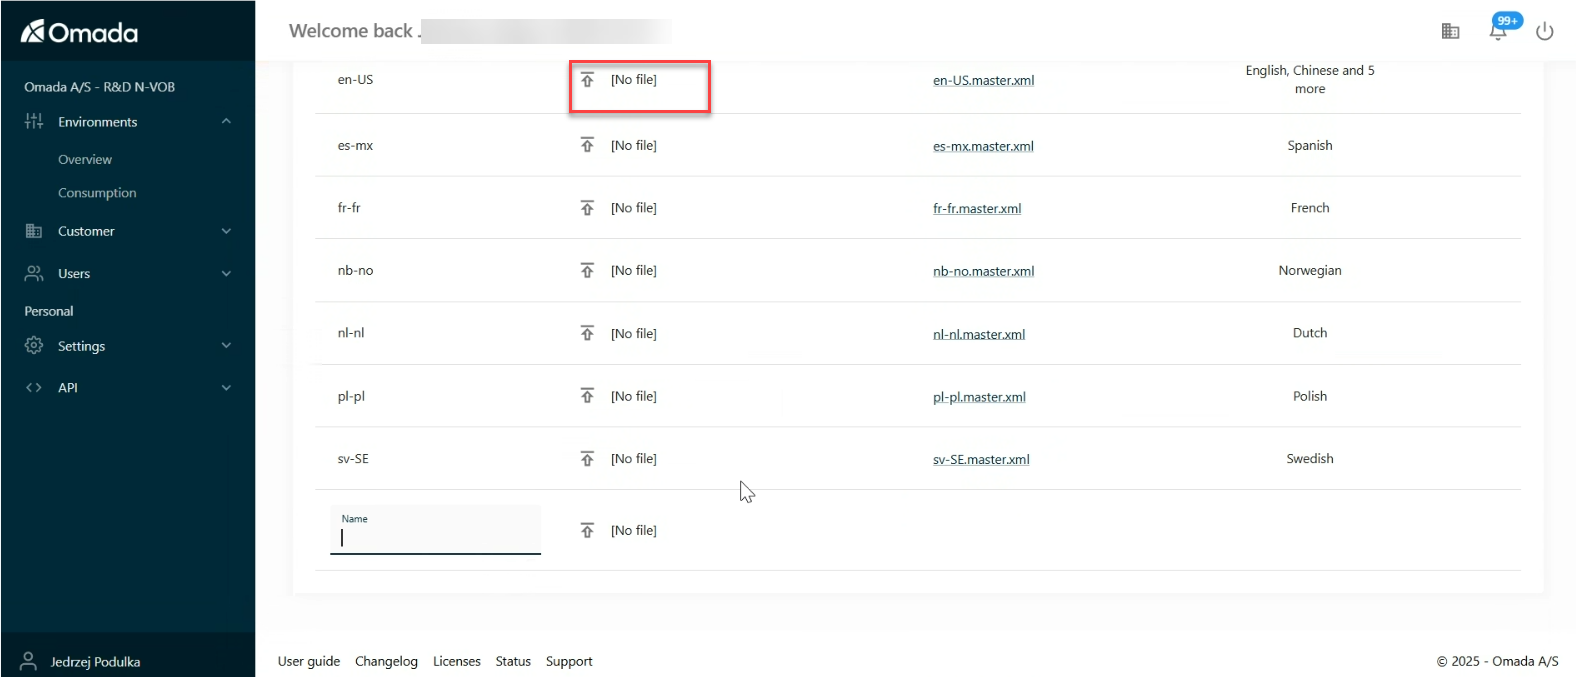
Download the XML file that contains the strings you want to customize.
Within the file, translate the strings in the <translated> tags. Do not change anything else.
-
Upload the edited XML File. Once you have made your changes, upload the edited XML file back to the portal by clicking on the upload arrow.
Omada Identity portal
-
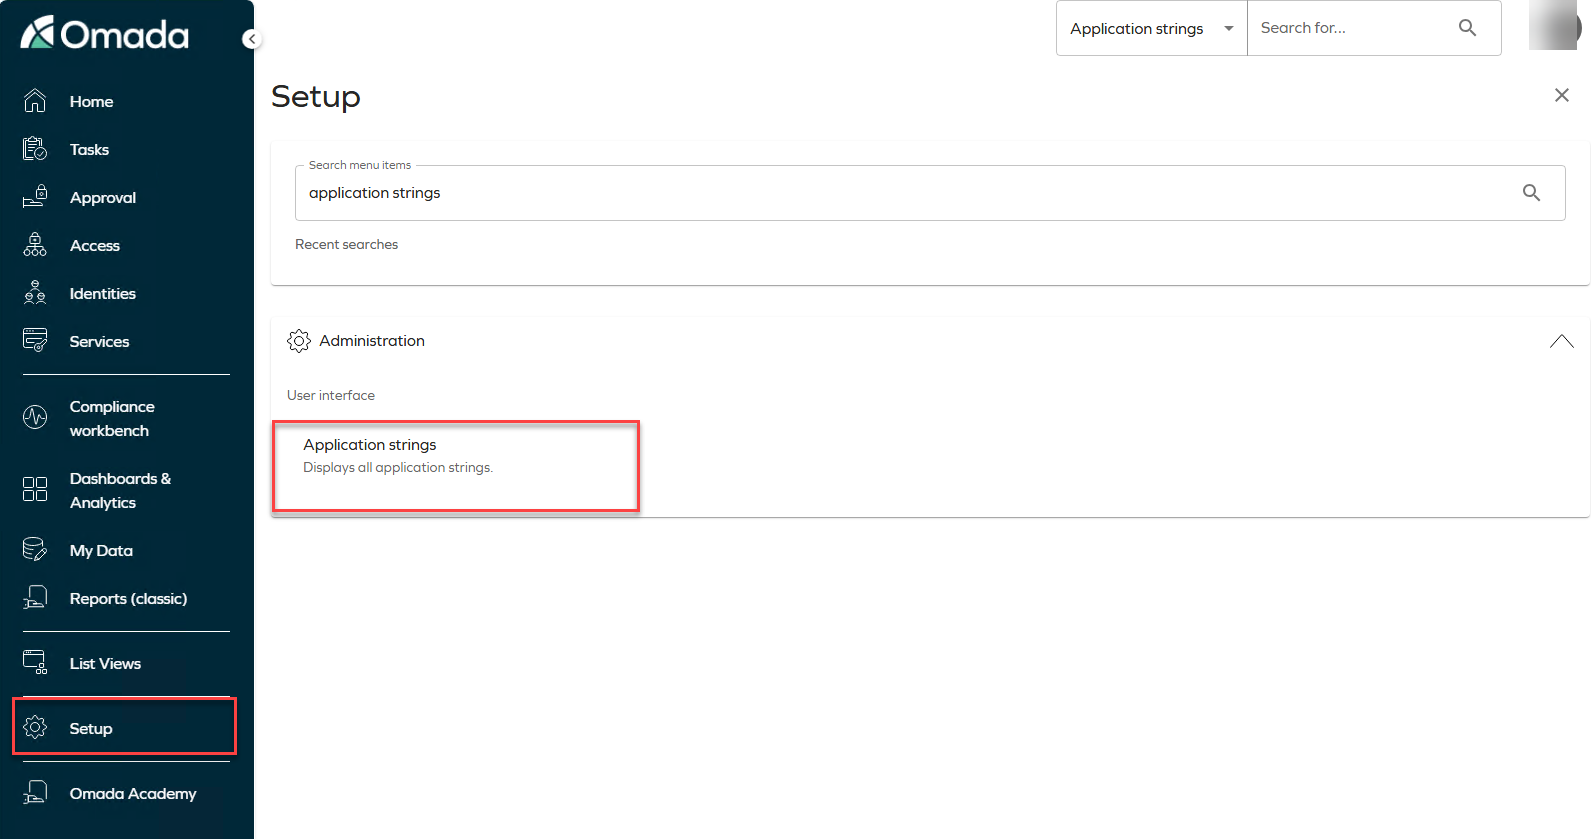
In the Omada Identity Portal, navigate to the Setup section and then to Application Strings.
-
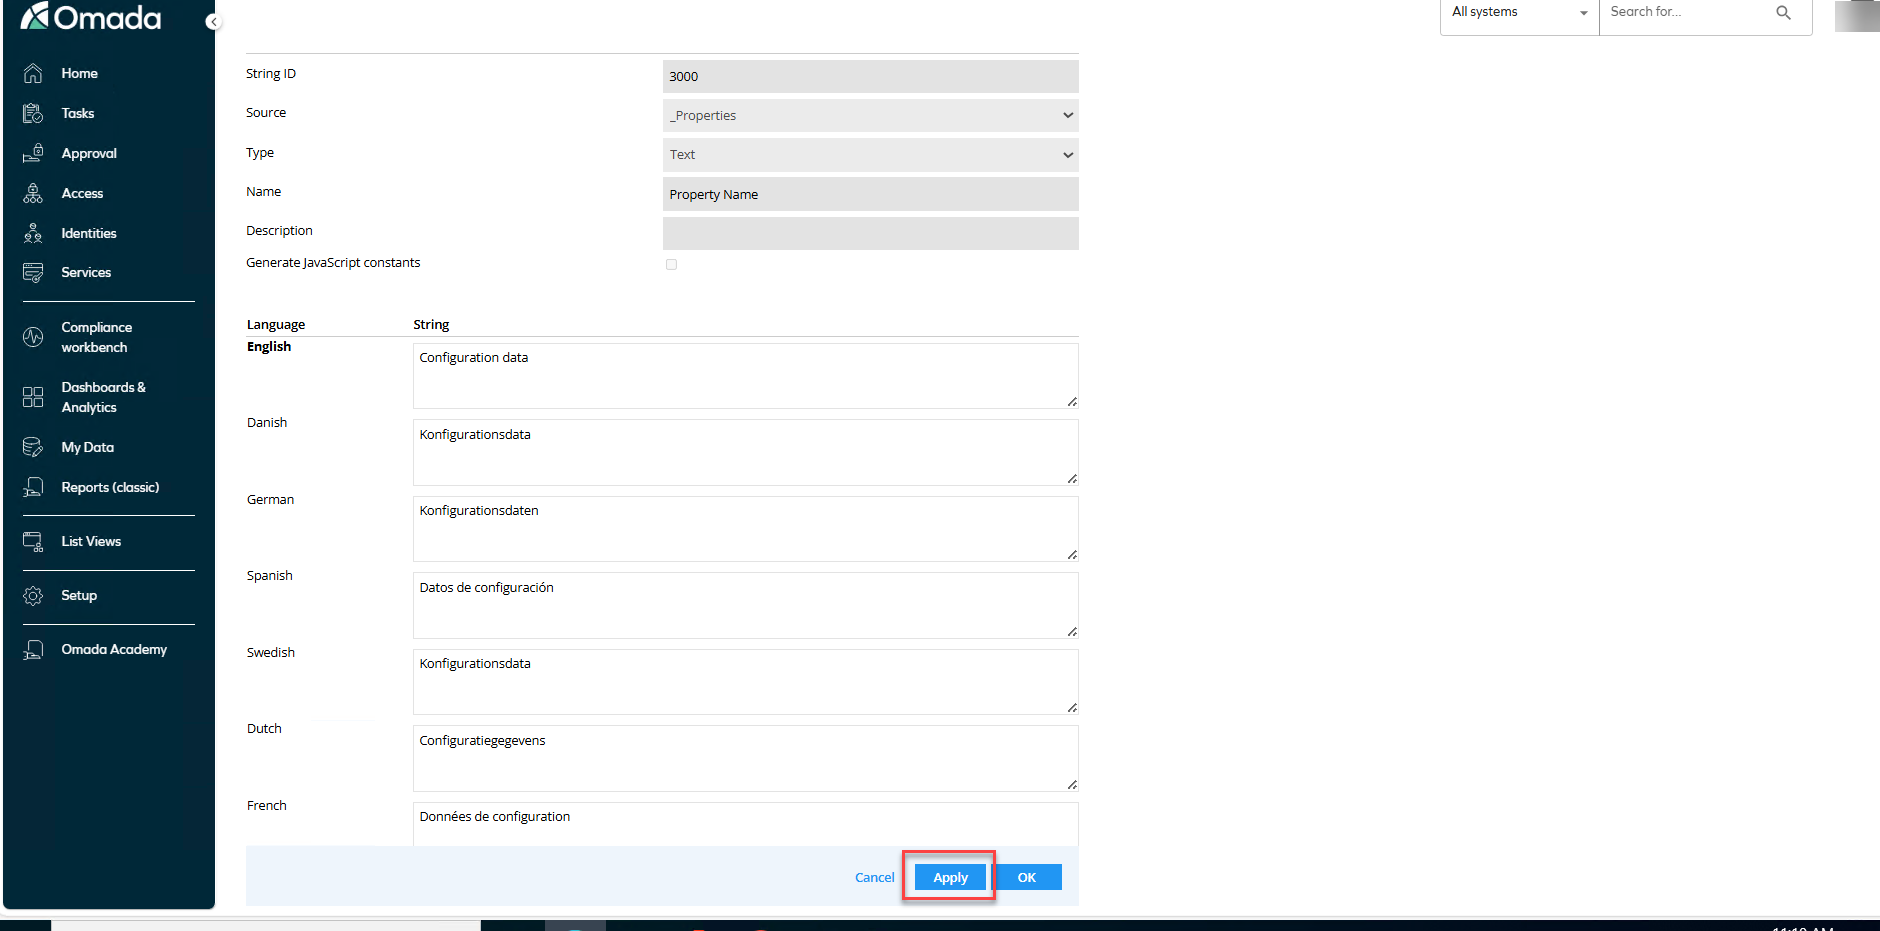
Click on the specific application string you want to customize. This will open a detailed view where you can make your changes.
-
After making your changes, click Apply to save and implement them.
-
Click on Revert to defaults > Revert all to defaults to see all the changes implemented.
