Step 1 - Creating application
First step includes creating an application: the logical application and associated objects are created as master data. To do so, follow these steps:
-
Log in as the System Administrator of the application.
- If another role is used for application onboarding, for example, data administrator, make sure that the role has the Create and Update permissions for Data Object Types.
-
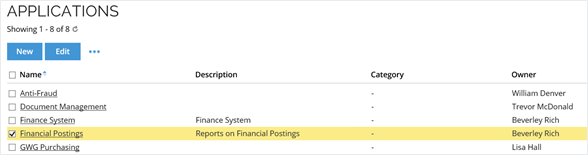
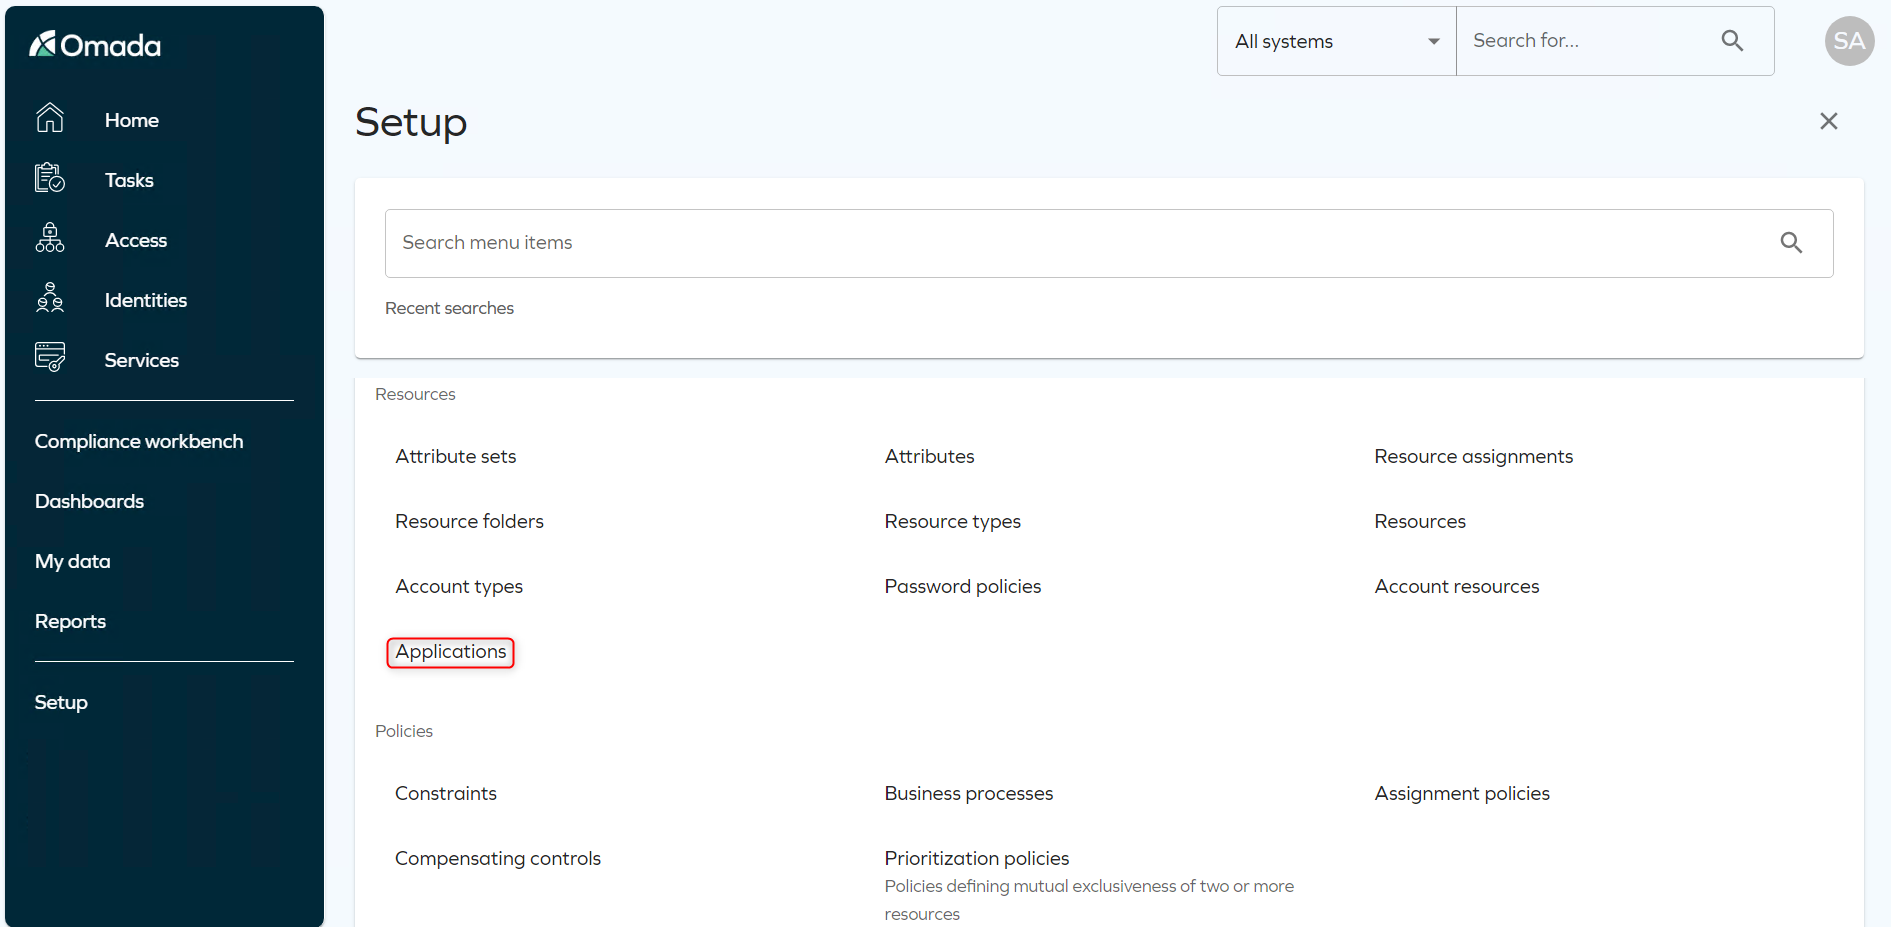
Go to Setup > Master data > Resources > Applications.
-
Ensure that the application you are about to create does not exist yet and click New to start the creation process.
-
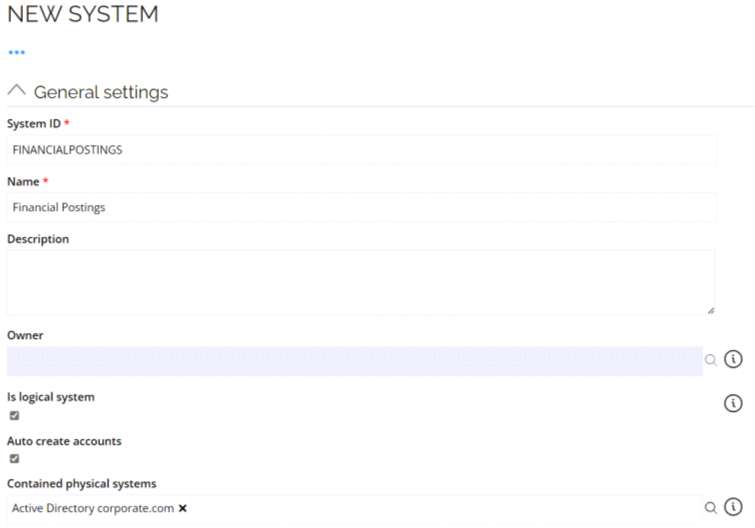
Set the System ID of the application to
<APPNAME>, for example, for an application named Financial Postings, the system ID will beFINANCIALPOSTINGS. -
Set the Name of the system to the business-friendly name of the application, in this example Financial Postings. Fill out Description with a short meaningful description of the business purpose of the system.
-
Define the IT system owner in the IT Owner field.
-
In most cases, self-management is enabled in Omada Identity. If so, the business owner (owner field) should be set through a self-management assignment either by setting a manual owner, or by requesting access to the System owner role in the Access Request process.
-
Tick Is logical system and Auto create accounts unless you are creating a trusted system. Use the following table to decidewhich of these two options to choose:
Auto create accounts Trust + Abstraction to real accounts – good if multiple systems are used + Allows the use of accounts of another system - You need Account resources in the logical system + Useful if you want to recertify logical CRAs with the real account name - The Account name will be artificial -
Click the magnifying glass on the right side of the Contained physical systems field and select the correct system from the list, that is, Active Directory. The resulting system settings will look like this:
-
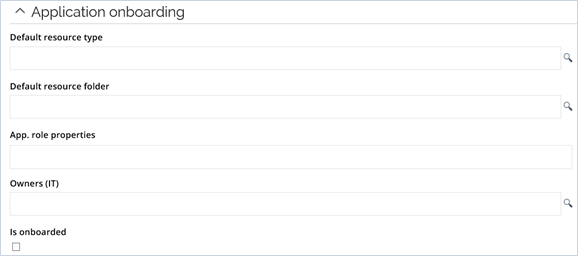
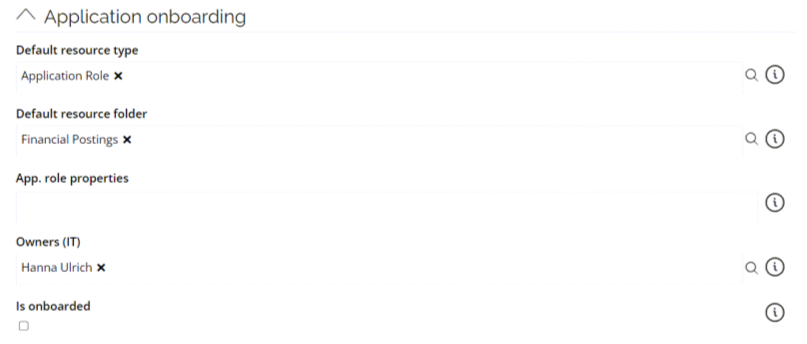
If you are using the Application onboarding process to create application roles, scroll down and open the Application onboarding tab. Select the magnifying glass on the right side of the Default resource type field to open a popup window of a list of resource types.
-
Select the Application Role resource type or click New to create a new resource type. If you create a new resource type, select Role in Resource Category. Click OK to save the resource type.
-
Next, set a folder for the application to store its data. Click the magnifying glass next to the Default resource folder field to open a pop-up window of a list with resource folders. Select the Resource folder that is relevant for the application - based on the level of approval needed.
-
You can also create a new folder for each application. Click New to create a new resource folder. Set the Name to
<App Name>and the FolderID to<APPNAME>.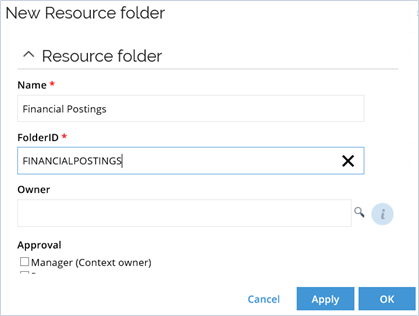
-
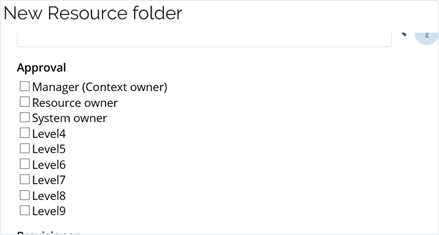
In the same window, scroll down to Approval. Here is where you select the approval levels necessary for giving access rights to this application. If you leave it blank, there will be no approval on this application, which means that if an identity uses self-service to request access to this resource, they will be given access without any further processing. Click OK to save the resource folder.
-
Select the resource folder just created from the list by clicking it and clicking OK.
-
Set the Owners (IT) by writing their name or searching for it by using the magnifying glass next to the field.
-
The IT Owner must be an Omada Identity System Owner. If this is not possible, the security on the process target needs to be changed accordingly.
-
In Advanced, select classification tags that apply to the application and are verified by the application owner.
-
The resulting settings will look like this:
-
Click OK in the New System window and the application is now ready under Applications.